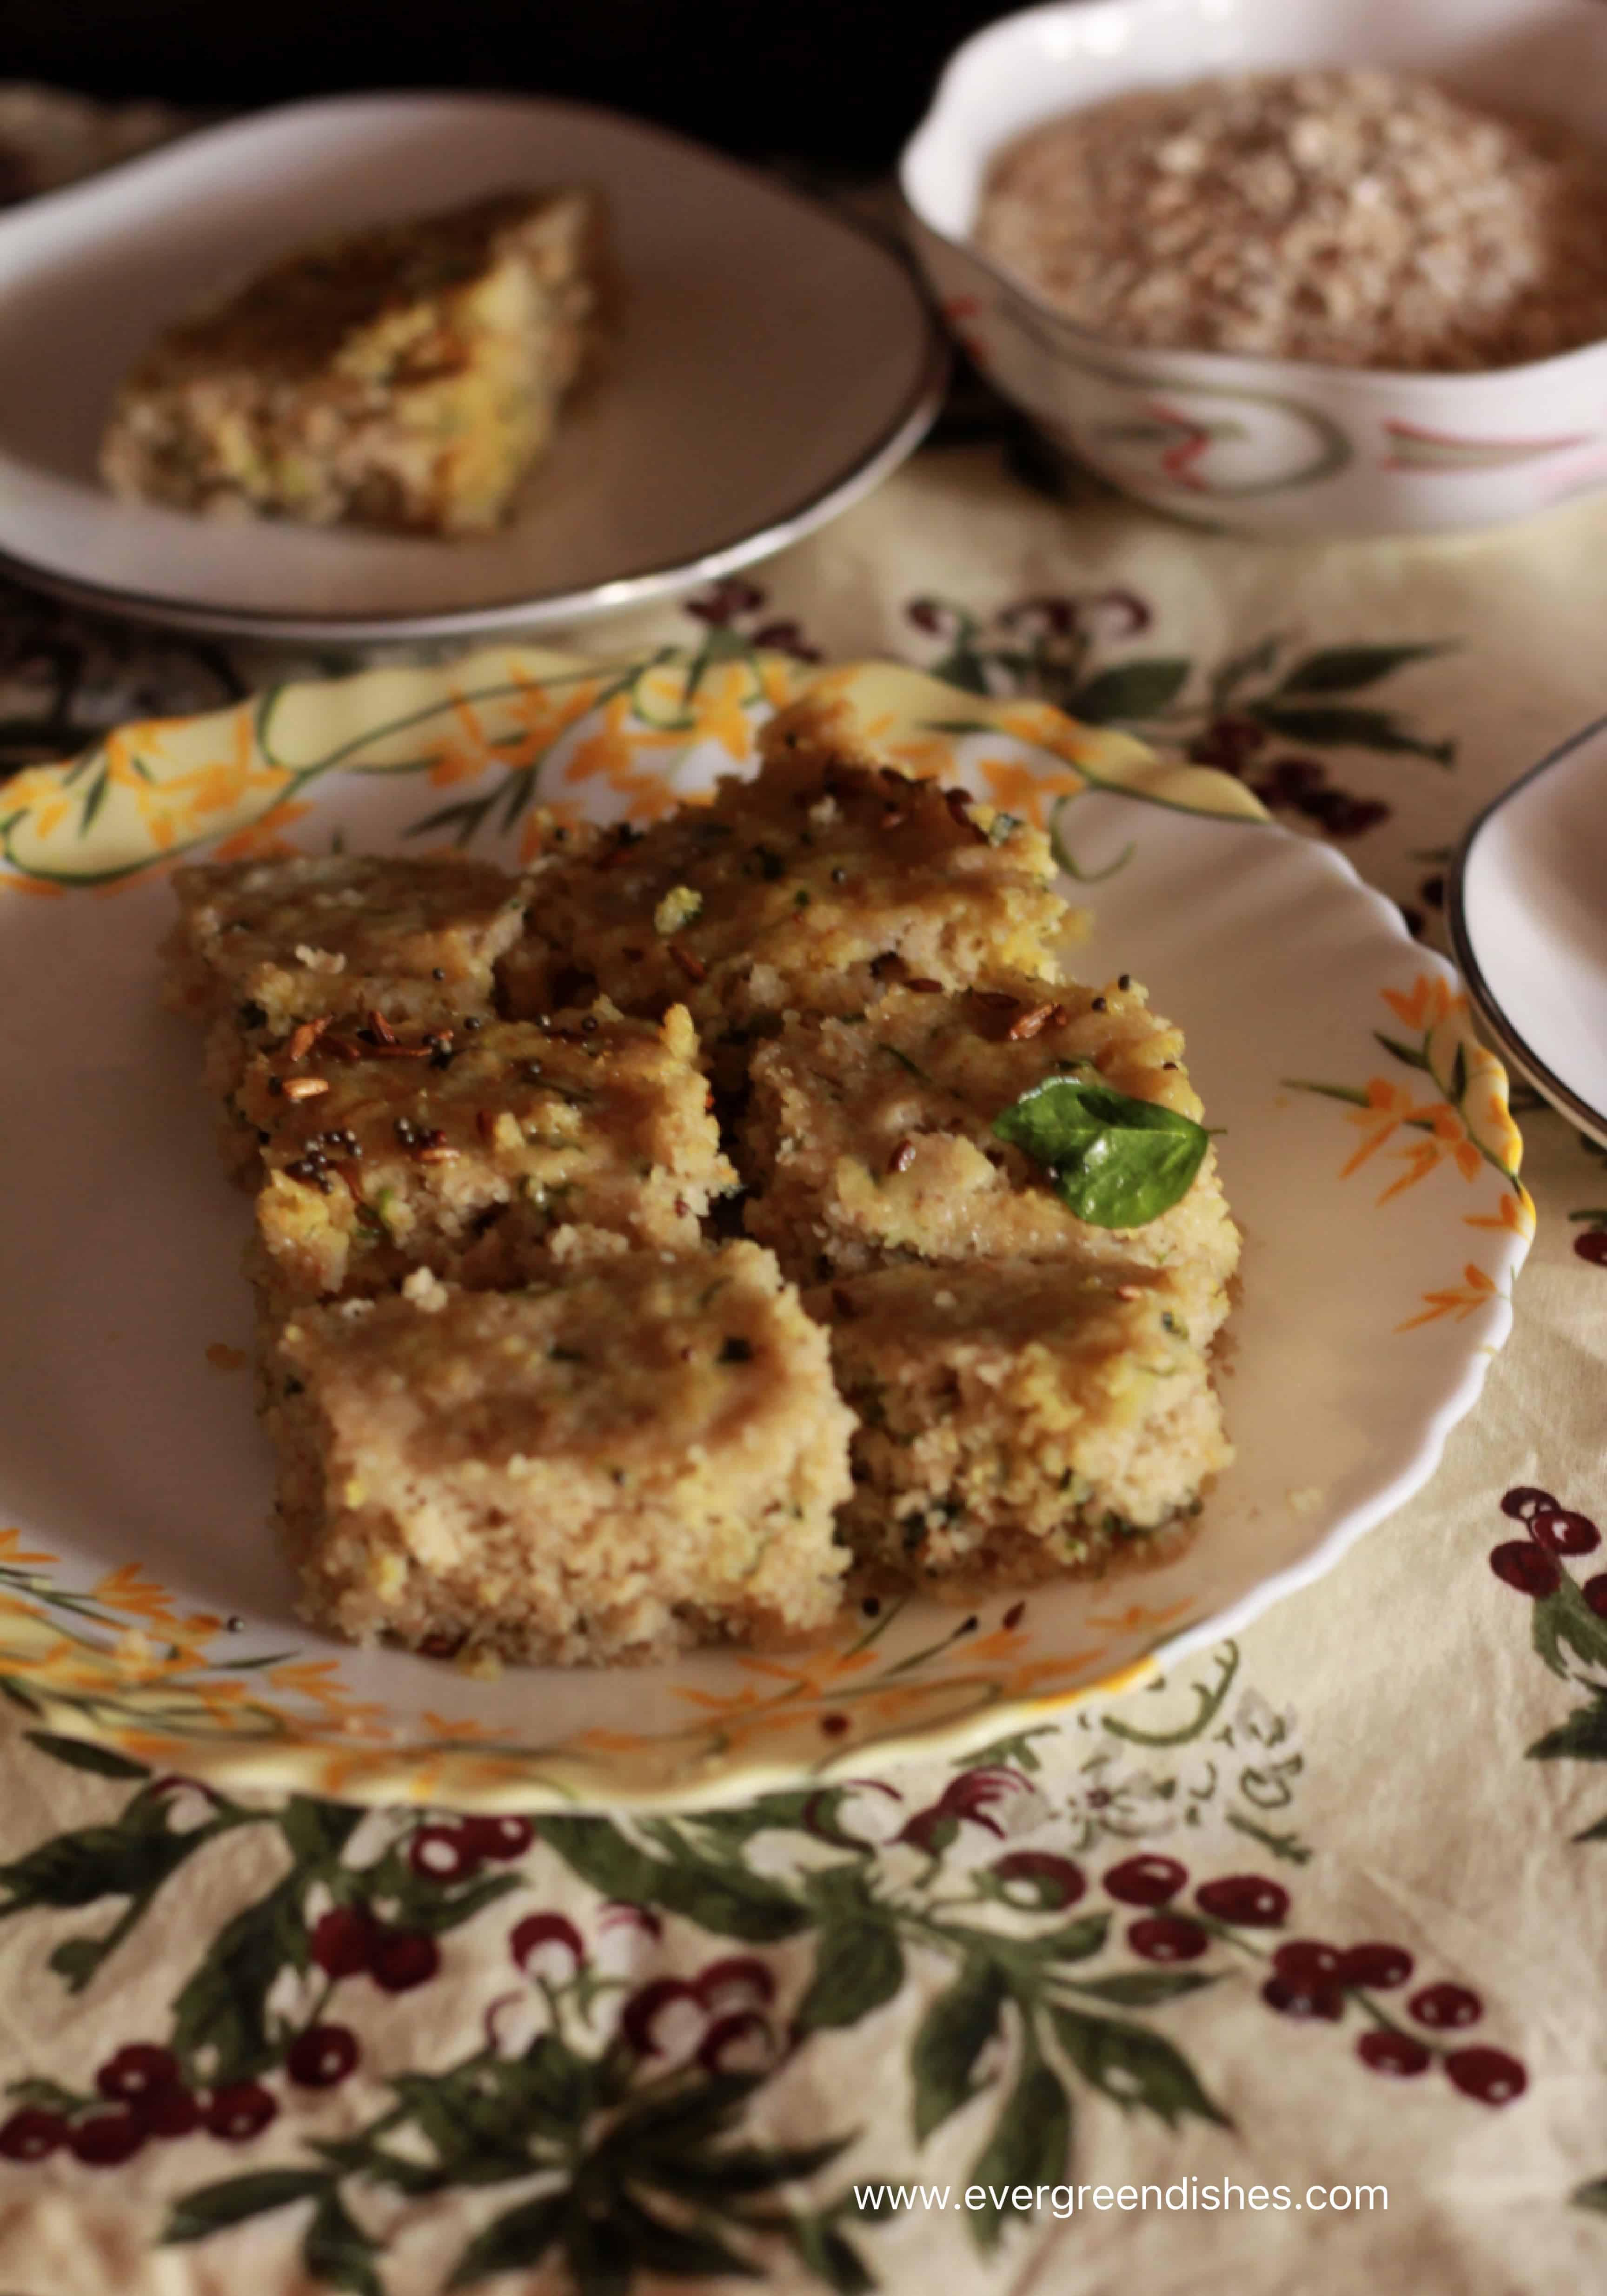
Oats Dhokla is a healthy twist to the usual one. Powdered oats, semolina and yoghurt are used to make this snack. This is an instant version, needs no soaking or fermentation. It can be prepared within an hour.
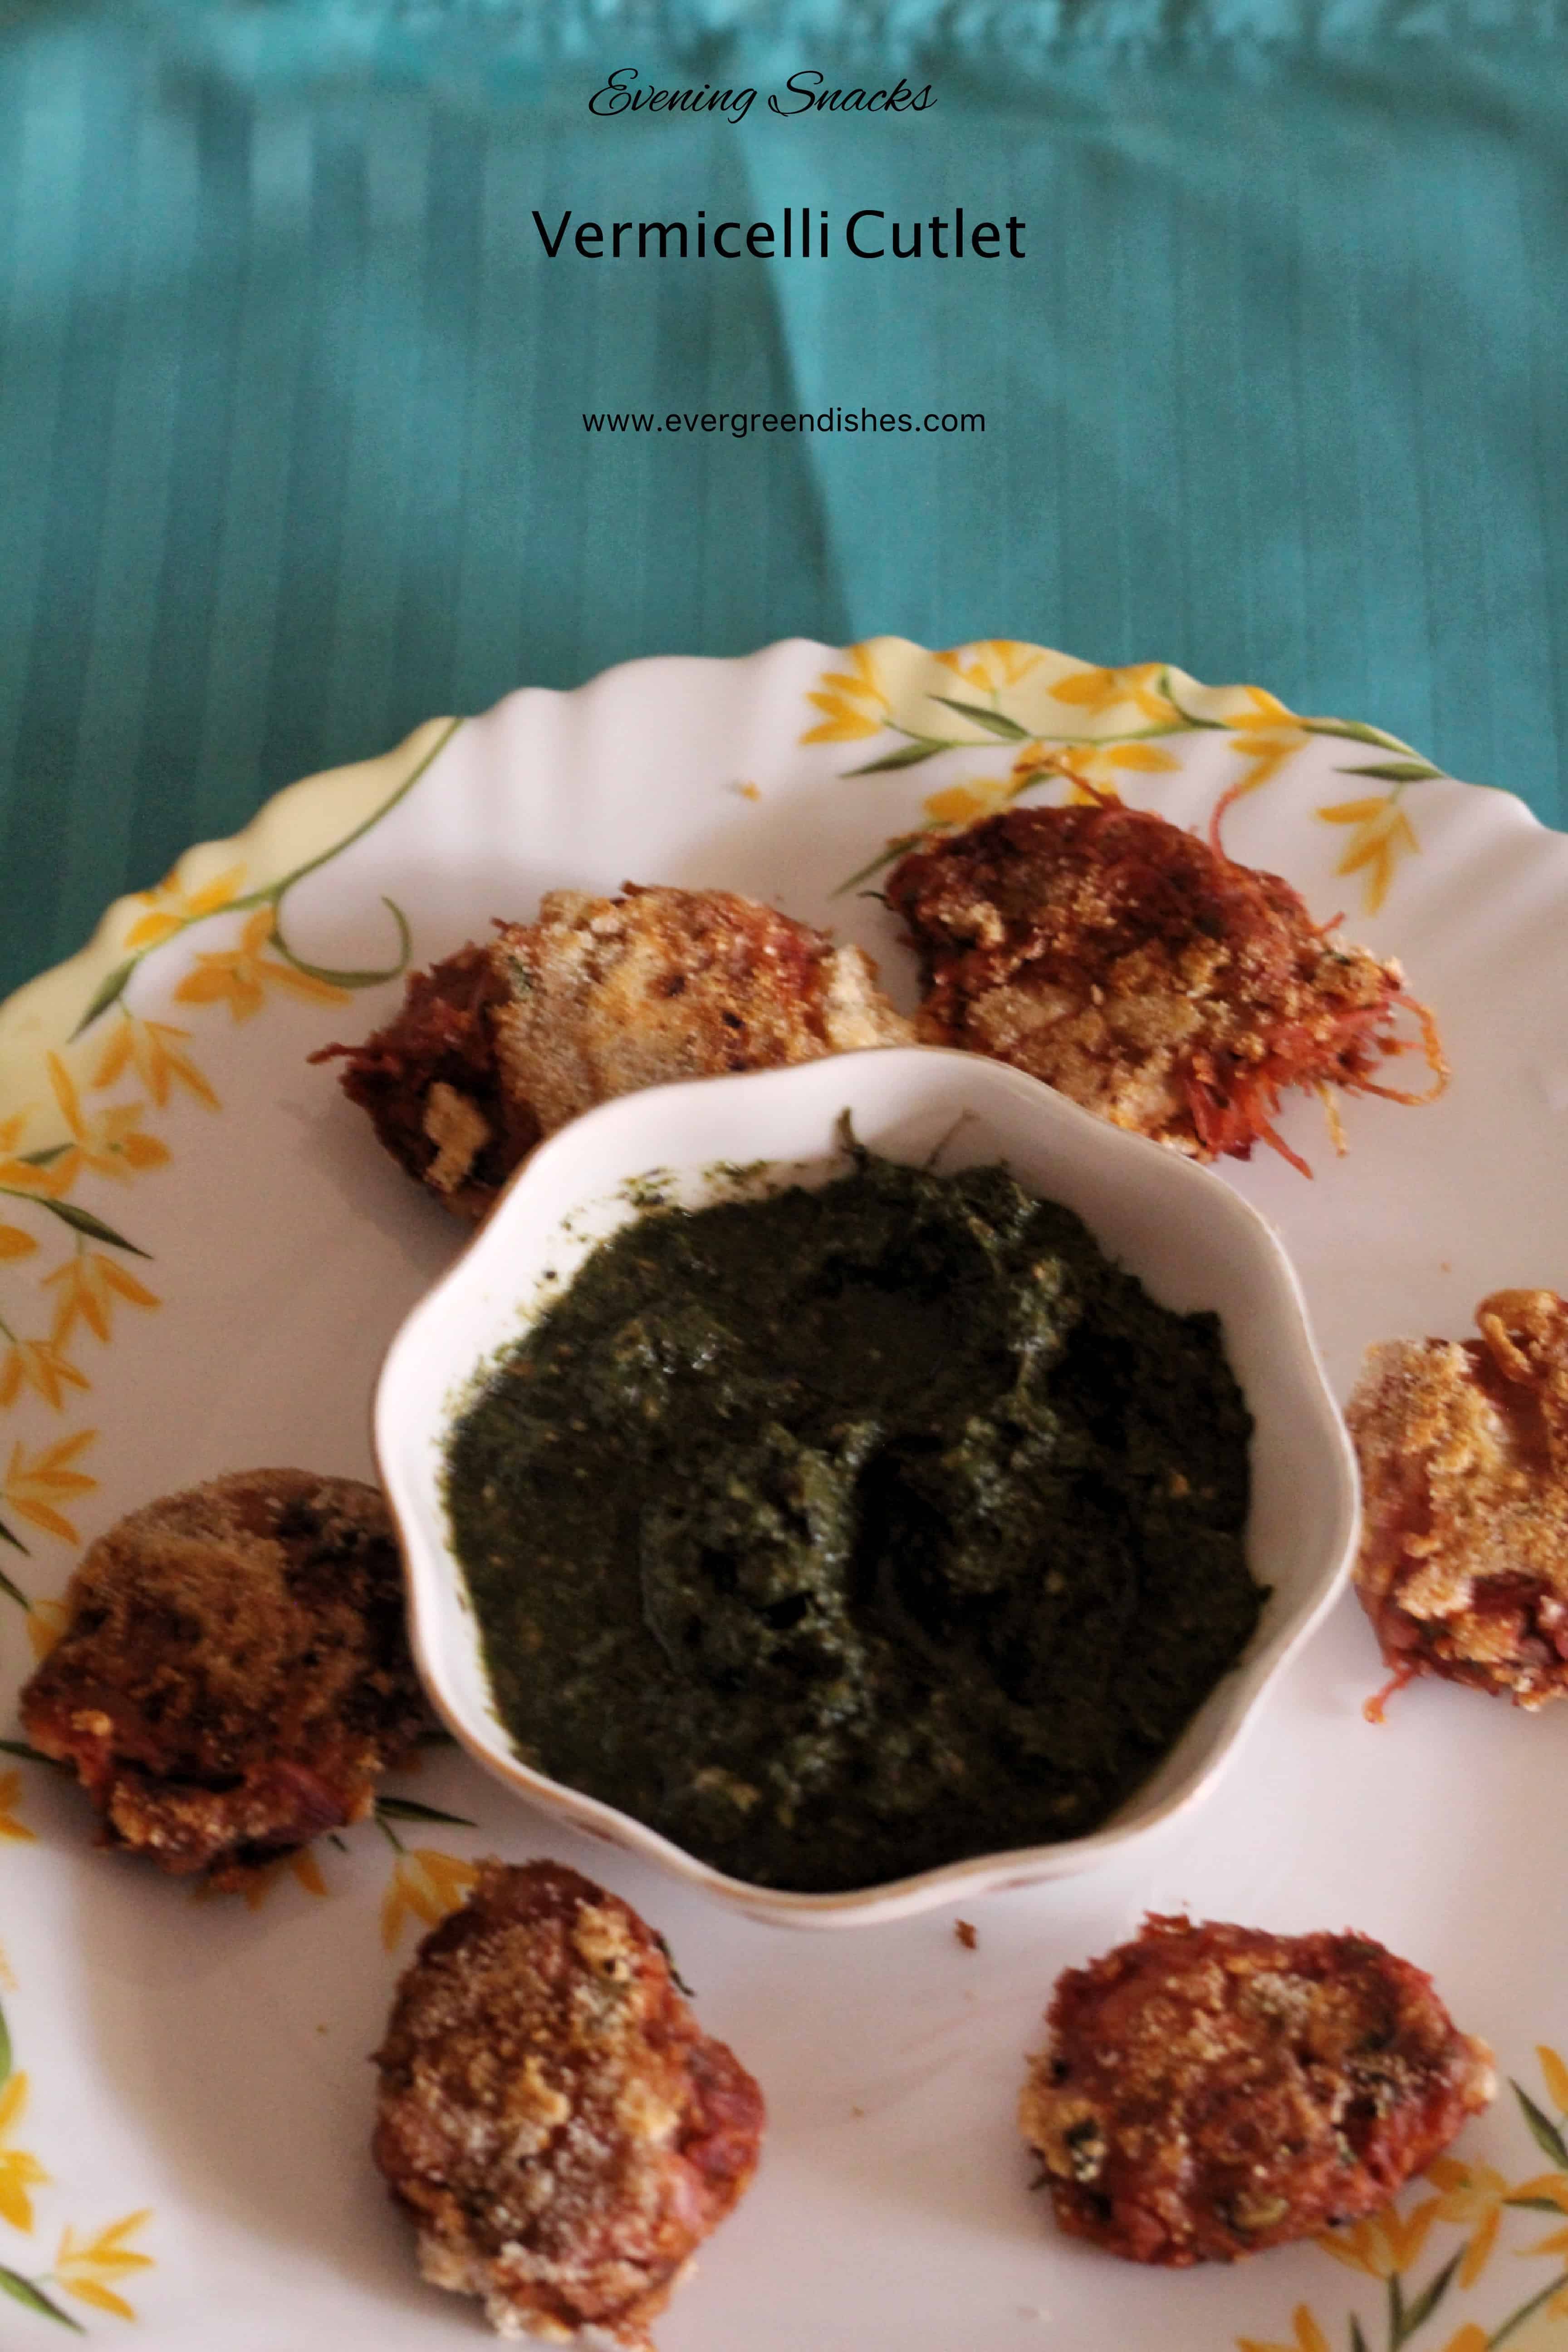
Vegetable and Vermicelli cutlets is tasty, different and a filling snack for the evening. It has the goodness of vegetables and vermicelli, a fusion dish.
A few days back I made these cutlets and they were yumm. The neighbours son loved these and asked his mom to make them. Vermicelli is one of the essentials in a South Indian kitchen. All kinds of dishes are made using it from upma to idli and cutlets. (more…)
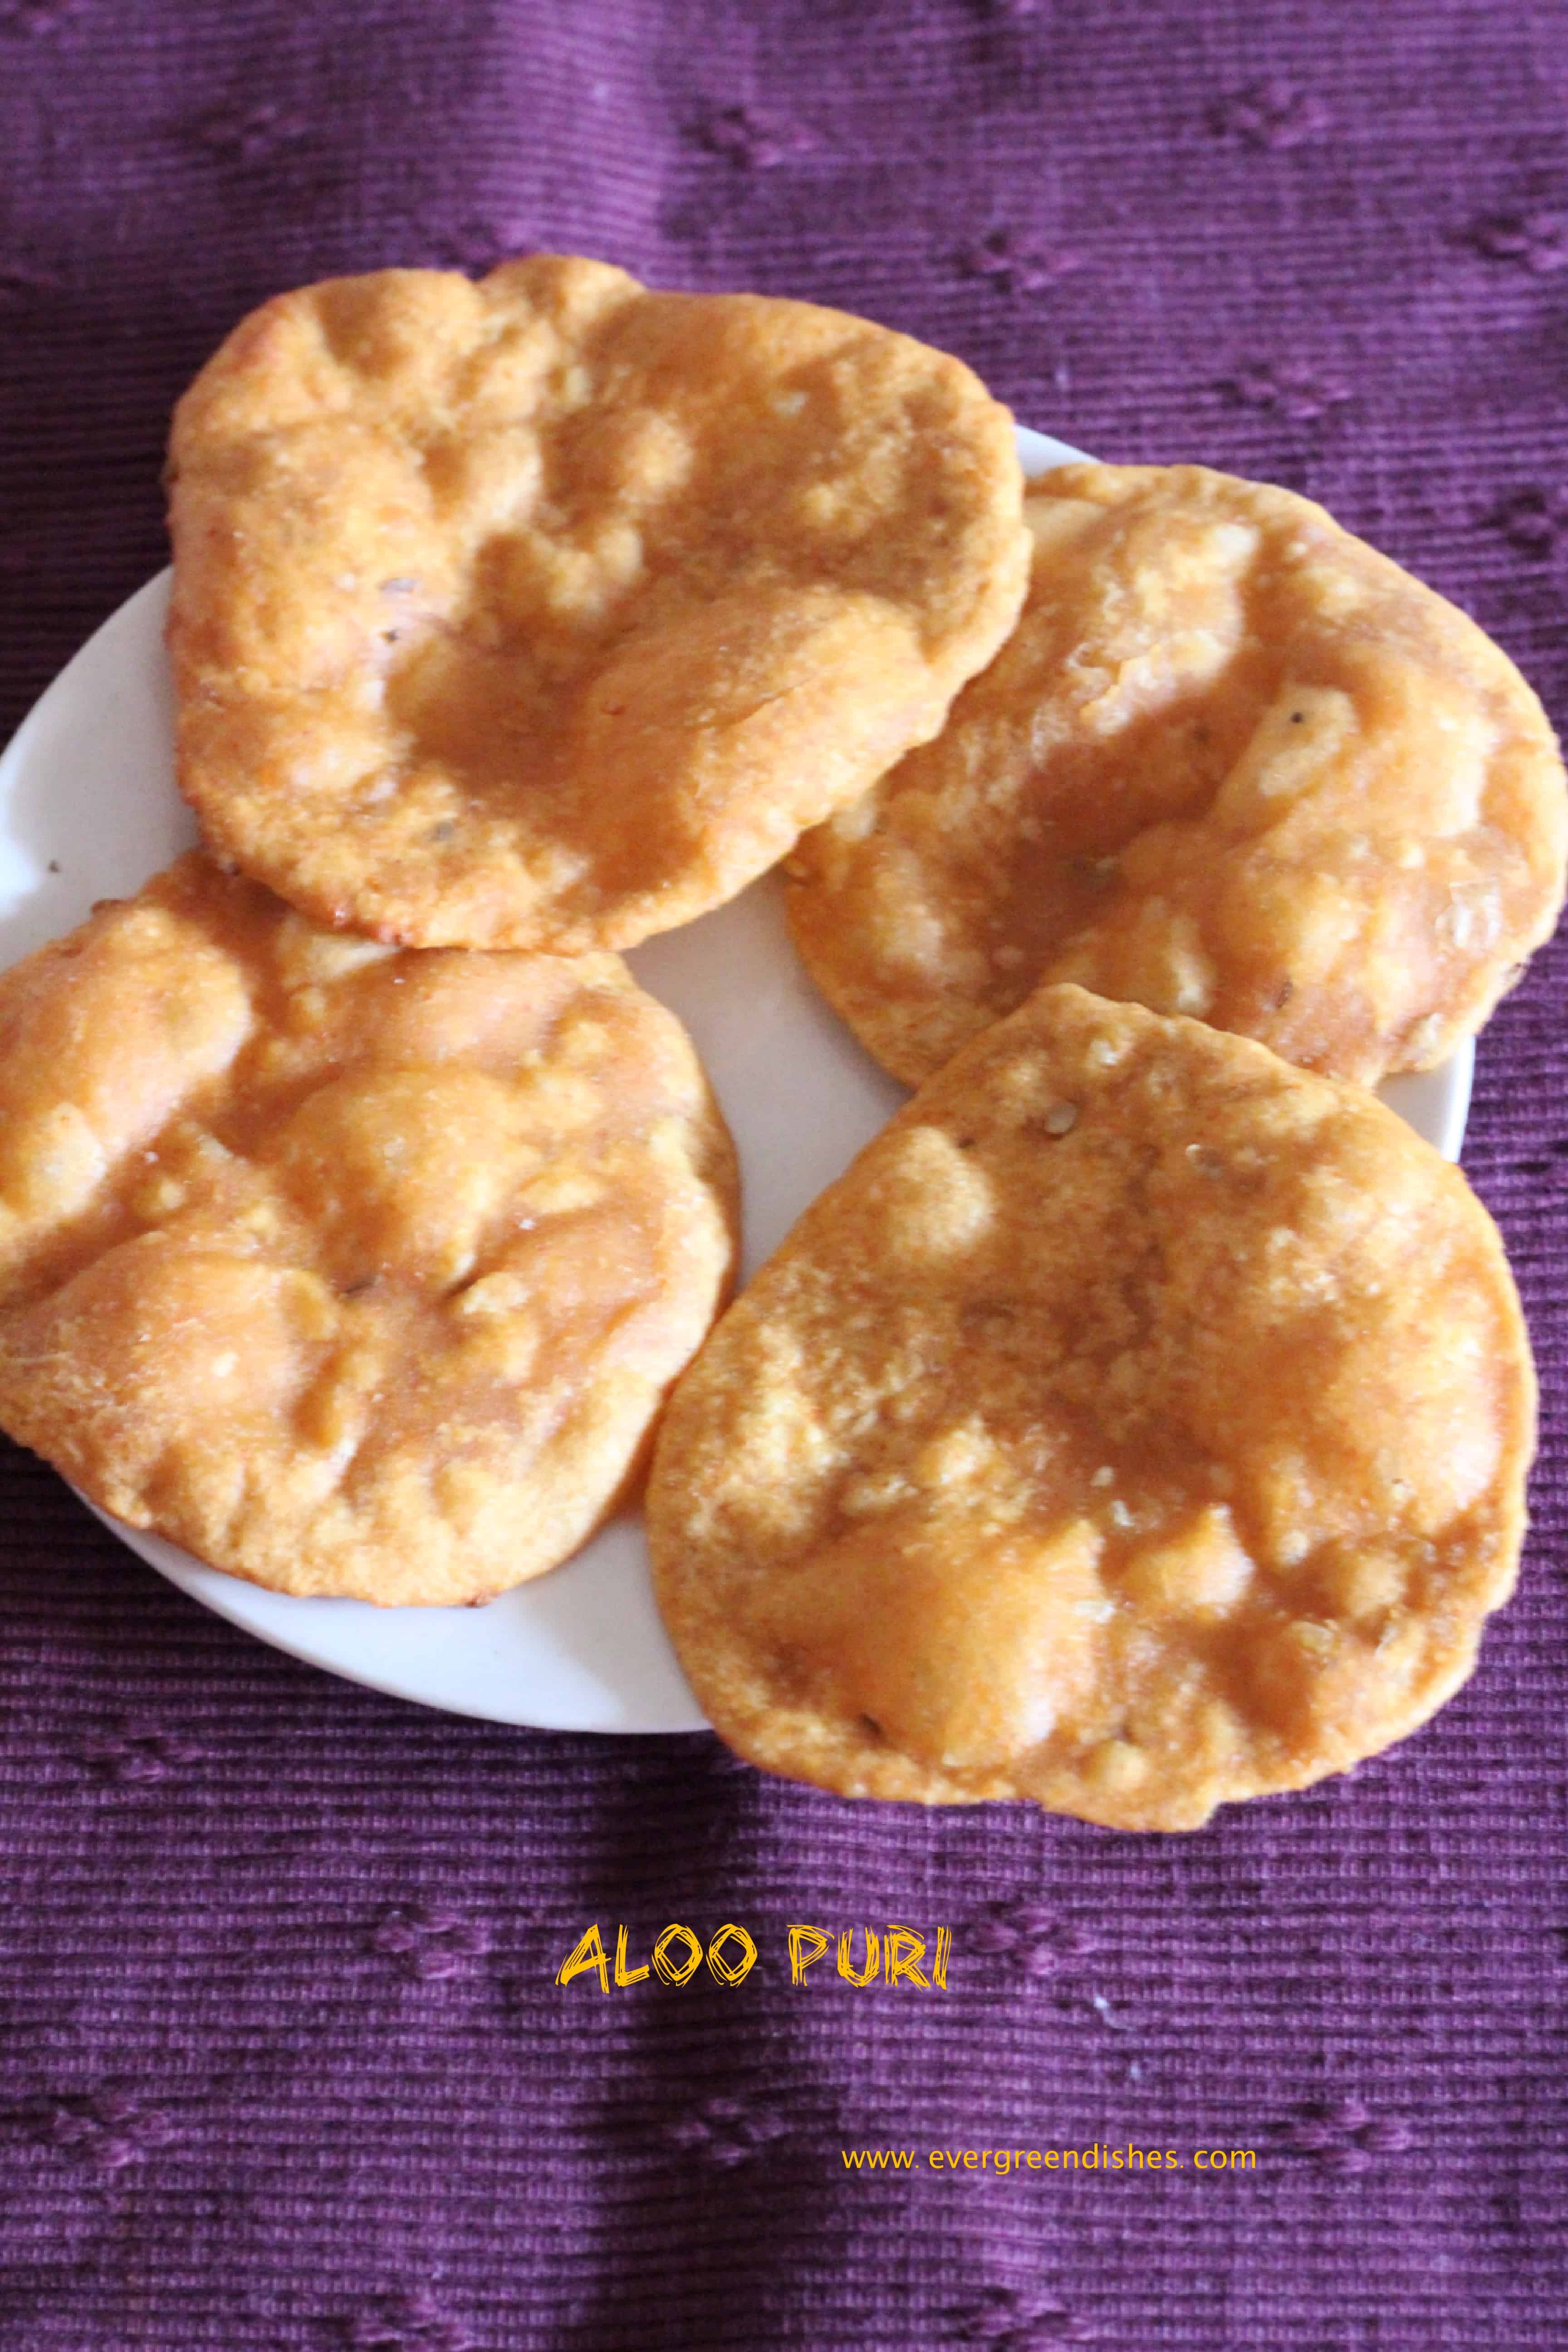
Aloo puri is tasty, deep fried flatbread that can be made easily. A little prior preparation and tasty breakfast is ready. Potato, mixed with a few other spices and deep fried to puri makes a delectable snack. It needs no accompaniment as such though pickle tastes good.
Children love puri and this aloo puri is one of the favourites. It is ideal to carry as travel food. No elaborate dishes are needed to be packed.
Ingredients:
2 cups wheat flour
2 boiled potatoes
salt to taste
2 teaspoon chilly powder
1 teaspoon carom seed
water for kneading
oil for frying
Method :
To make the dough:
Take the flour in a wide bowl. Mash the potatoes and put it. Add salt, ajwain and chilly powder. Mix to a crumbly texture. Add little water and make a firm dough.
To make the puris :
Take a small ball of the dough and roll it into a circle of four inches diameter. Heat the oil in a pan. Once the oil is heated, slowly add the puri and fry on moderate it. Turn it to the other side with the ladle, remove on a tissue paper. Serve hot.
Evergreendishesdev
Aloo Puri
Aloo Puri is a delectable, deep fried flatbread. It is ideal for breakfast, serve it with pickle, it tastes delicious.
2 cups wheat flour 2 boiled potatoes salt to taste2 teaspoon chilly powder 1 teaspoon ajwainwater for kneadingoil for fryingMethod :To make the dough:Take the flour in a wide bowl. Mash the potatoes and put it. Add salt, ajwain and chilly powder. Mix to a crumbly texture. Add little water and make a firm dough.To make the puris :Take a small ball of the dough and roll it into a circle of four inches diameter. Heat the oil in a pan. Once the oil is heated, slowly add the puri and fry on moderate it. Turn it to the other side with the ladle, remove on a tissue paper. Serve hot.WP Recipe Maker #6662remove– 2 cup wheat flour– 2 boiled potato– chilli powder– salt
To make the dough
Take the flour in a wide bowl.
Mash the potato, put it along with the flour. Add salt, carom seed and chilli powder.
Mix it to a crumbly mixture.
Add little water and mix to a stiff dough.
Keep it aside for five minutes.
To make the aloo puris
Take a small ball of the dough and roll it into a circle of four inch diameter.
Heat oil in a pan, once the oil is heated slowly add the puri and fry on moderate heat.
Flip it to the other side with the ladle, once it is done, remove on a tissue paper.
Serve with any pickle.
Pin it for later:
aloo puri
If you ever make this dish, take a picture and share with me @foodiejayashree on Instagram
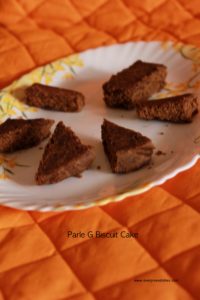
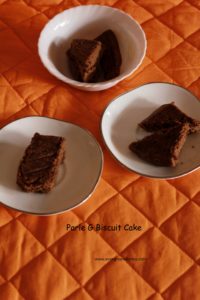
Parle G biscuit cake is easy to make, soft and different from the usual one. It makes a good tea time snack.
Cakes are an all time hit at home, though I am less a baker. It’s my daughter who provokes me to bake each time, with holidays, she is all set to bake if I agree to help her. Today I have a simple cake which is easy to make, soft and different. Our good old Parle G biscuit is the primary ingredient here. Check the recipe below:
Ingredients: Measurement used: 1 cup=150ml
35 Parle G biscuits
4 teaspoon castor sugar
2 teaspoon baking powder
2 teaspoon cocoa powder
1 cup milk
Method:
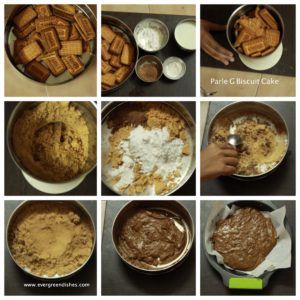
Grind the biscuits to a powder.
Add sugar, baking powder and cocoa powder to it. Mix them well.
Add milk to it and mix again.
Grease a cake tin or put a baking paper to it.
Pour the batter into it, microwave for five minutes.
Insert a tooth pick to check if it’s done, if it comes clean, it’s done.
Let stand for ten minutes.
Parle G biscuit cake is ready to eat.
making of parle g biscuit cake
From the left to the right in the collage you will find
Add sugar, baking powder and cocoa powder to it. Mix them well.
Add milk to it and mix again.
Grease a cake tin or put a baking paper to it.
Pour the batter into it and microwave for five minutes
Insert a tooth pock to check if it’s done, if the tooth pick comes clean, it’s done.
Let stand for ten minutes.
Parle G biscuit cake is ready to serve.
parle g biscuit cake
Did you like the recipe? Do let me know, will be glad to hear from you. If you recreate, do take a picture and tag @evergreendishes on Twitter and Facebook and @foodiejayashree on Instagram, shall be glad to see and share further.
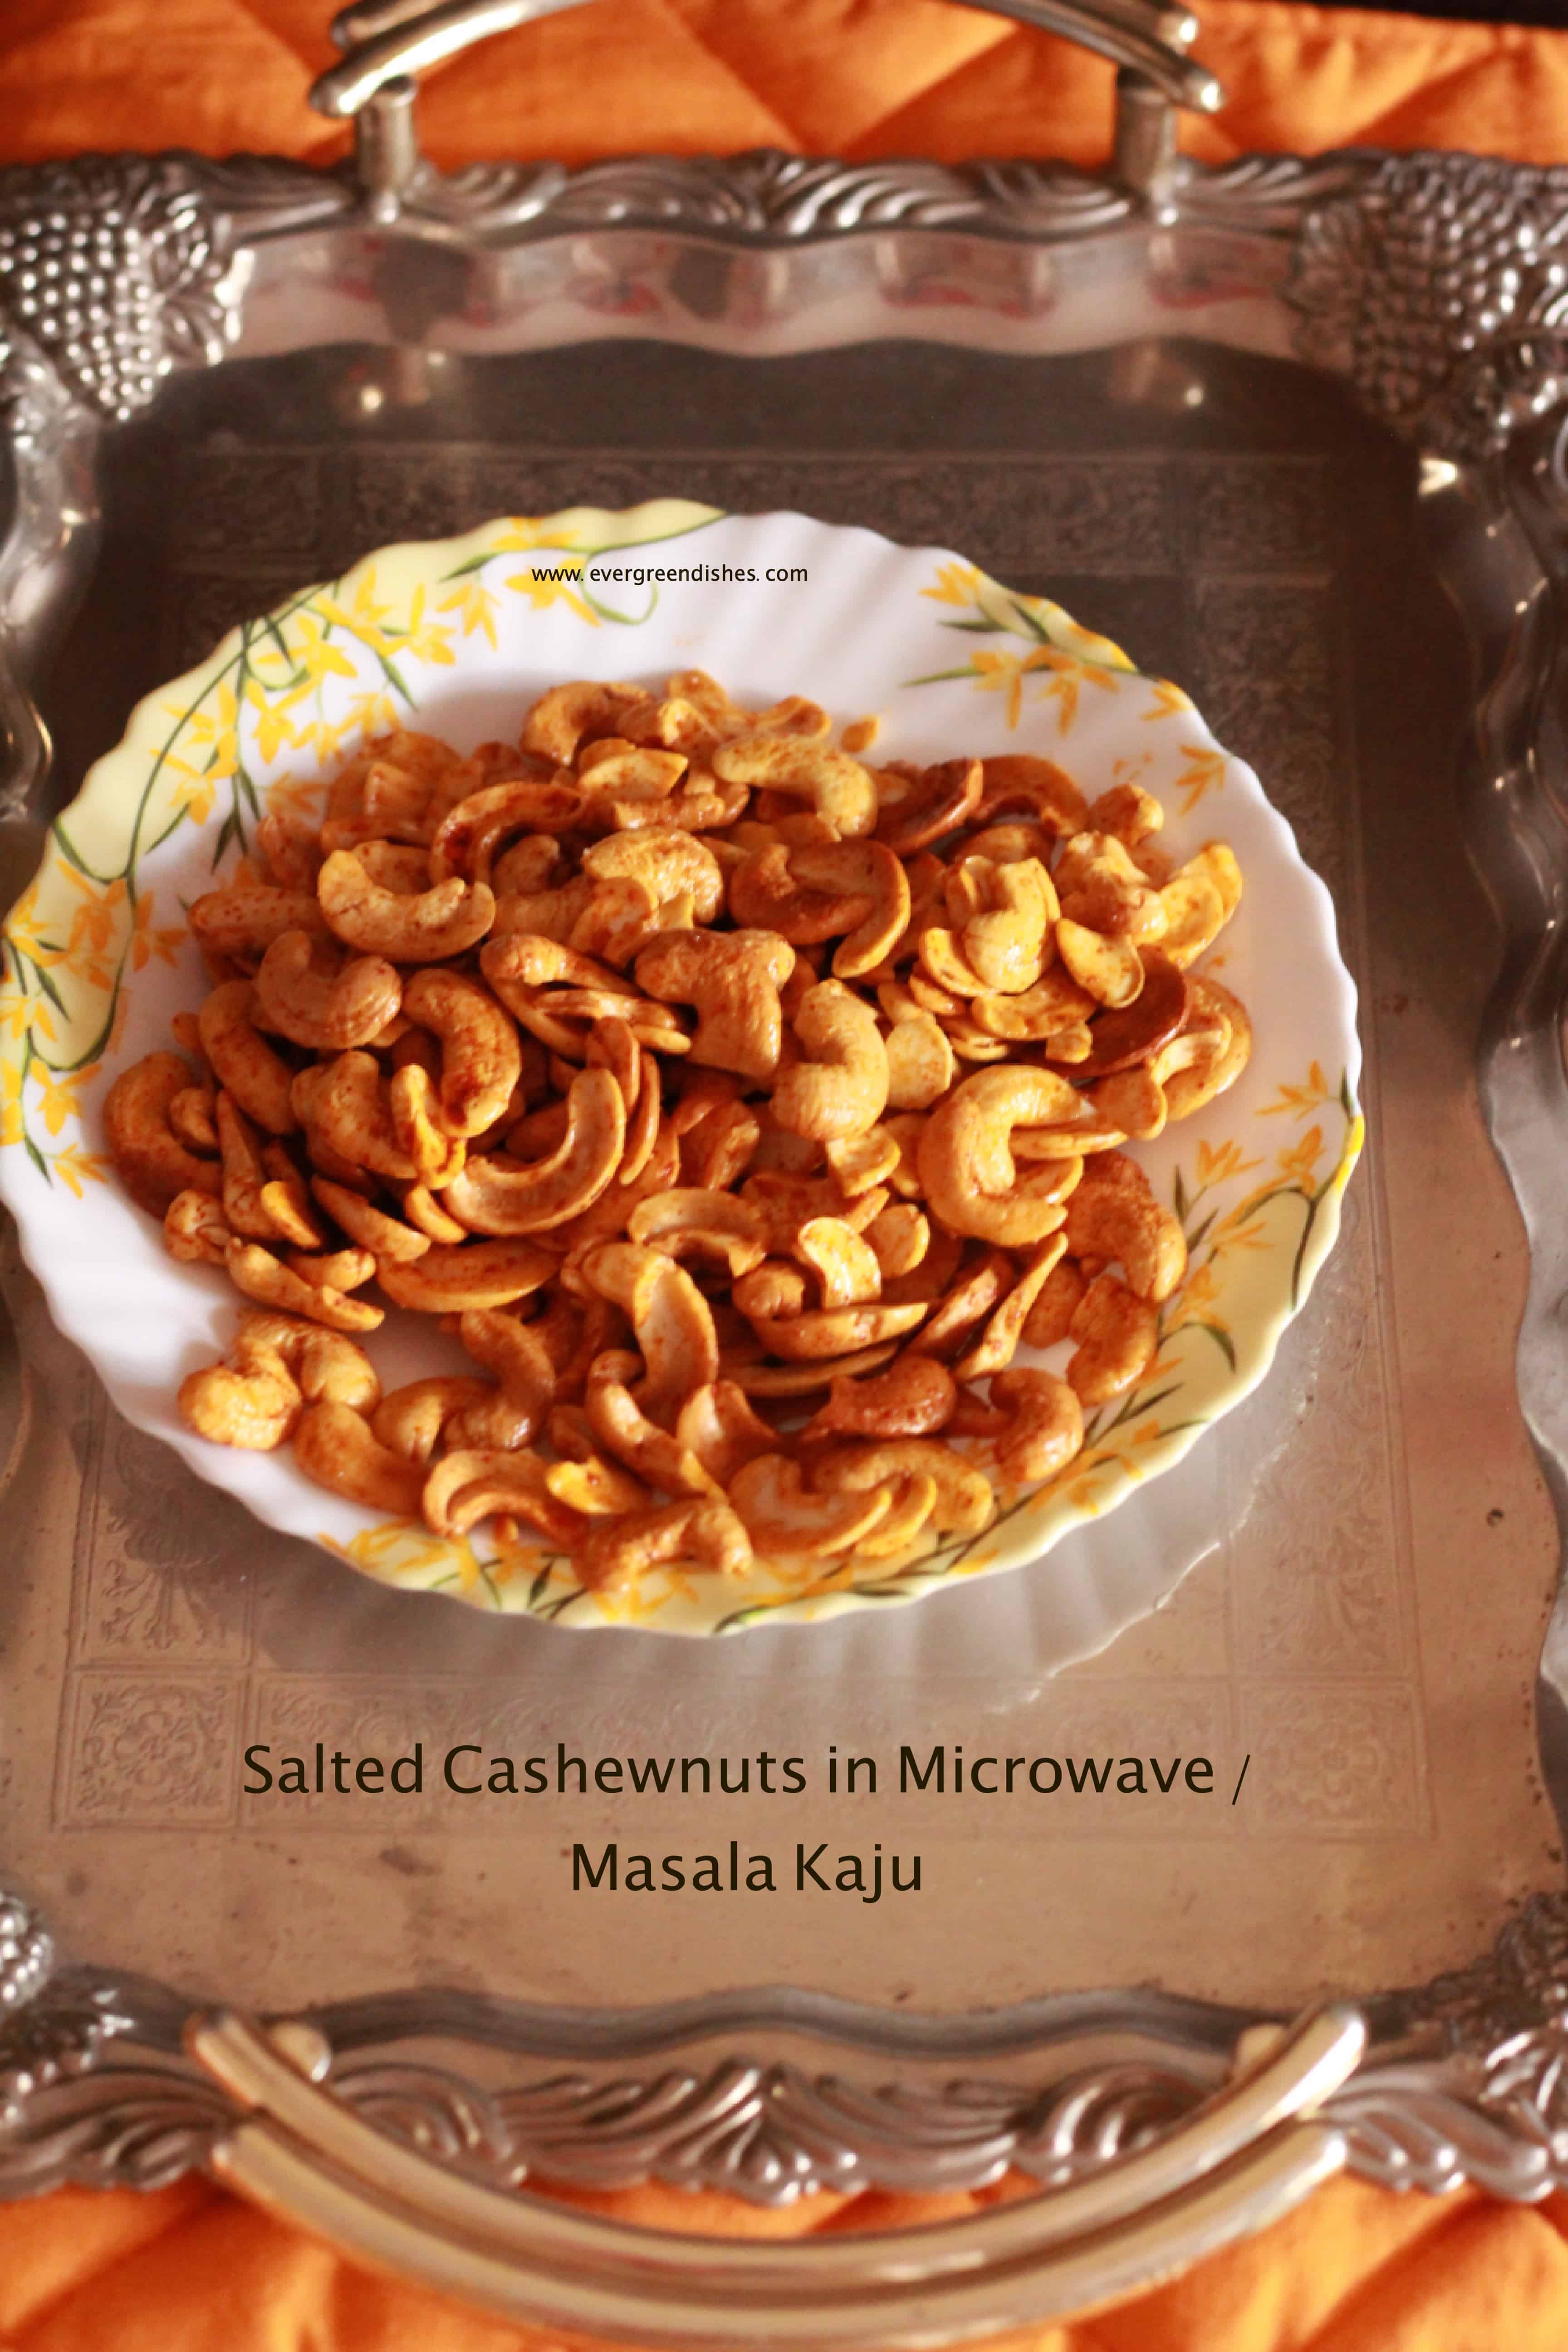
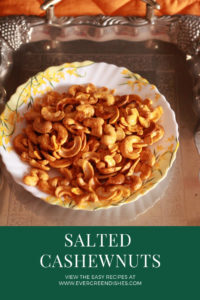
Salted cashew nuts / Masala Kaju as we Indians commonly name it, make a great appetiser. It is ideal to binge during mid-day or serve as a snack to guests with tea. These are made in microwave and are ready in fifteen minutes.
Microwave oven is ideal to toss the nuts, they are evenly made, lesser time is needed, little oil is used. Most of all I find it a good experience in using it.
Recently, I tried making stuffed tomato and it came out good. Other microwave recipes that I have on blog is Stuffed Capsicum
Let’s get making Salted Cashew nuts in Microwave / Masala Kaju
Ingredients:
1 cup cashew nut (Measurement : 1 cup = 250 ml)
1 teaspoon ghee
1/2 teaspoon chilli powder
1/4 teaspoon chaat masala
salt to taste
Method:
Take a microwave safe bowl, a flat bowl is preferred as it helps in even heating. Put the cashew nuts in it and microwave on medium power for 5 minutes. Check and if it needs to be roasted, reduce the temperature and keep again for 3 minutes. Initially, I kept at 600 power and then at 300 power.
Once, they are golden in colour, remove in a plate, add ghee and put the roasted cashew, microwave for 30 seconds, add salt, chilli powder and chaat masala, mix and again microwave for 30 seconds. Salted Cashew nuts aka Masala Kaju is ready to serve !
Different options :
use only salt
use salt and pepper
use salt, cumin powder, chilly powder and chaat masala
To make Salted Cashew nuts / Masala Kaju in Pan:
Ingredients:
1 cup cashew nuts
3 tablespoon ghee
1 teaspoon chilly powder
1/2 teaspoon chaat masala
a few curry leaves
a pinch of asafoetida
salt to taste
Method:
Take ghee in a pan, fry the curry leaves until crisp and put them aside.
In the same ghee, roast the cashew nuts until golden in colour. Put them in a plate.
In a bowl, mix the roasted cashew along with curry leaves and all spice powders.
Isn’t this an easy one? If you ever try this recipe, take a picture and tag me @foodiejayashree on Instagram
I love using Catch spice powders, they come in handy sprinklers and are good in taste.
Evergreendishesdev
Salted Cashew Nut in Microwave / Masala Kaju
Salted cashew nut make a good snack to binge in the evenings. They are roasted in the microwave and can be made quickly.
Take a flat microwave safe bowl, put the cashew nuts in it. Spread them evenly and microwave on medium power for five minutes. Check, toss, reduce the temperature and microwave for three more minutes. I put them at 600 power for five minutes, checking every minute and again put at 300 power for 3 minutes.
Once they are golden in colour, remove in a plate, add ghee, put the cashew nuts and switch on the power for 30 seconds. Sprinkle salt, chilly powder and chaat masala, mix and heat it for 30 seconds again.
Notes
Use microwave safe glass bowls for cooking.
Time may vary for each model, check when they are done, you get a good aroma and they are golden in colour.
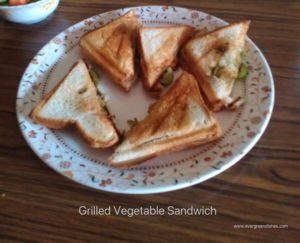
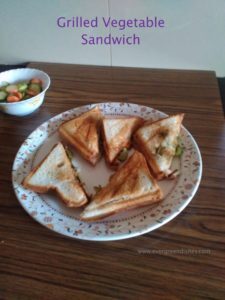
Grilled Vegetable Sandwich is tasty and filling. It can be packed in lunch box or served for breakfast. It makes a good choice with a cup of hot tea for evening snack.Sandwich are ideal for breakfast, evening snack or to pack in a lunch box.
We often have sandwich for dinner along with soup. Thus, a different filling is what I create. The Open Sandwich is the favourite at home. In the mornings I usually prefer to make a No Cook Sandwich as I usually have another dish ready. Today, I have Grilled Vegetable Sandwich.
grilled vegetable sandwich
Grilled Vegetable Sandwich Recipe
Ingredients:
8 slices bread
2 tablespoon butter
a little salt
1/4 teaspoon pepper powder
1/2 cup mint chutney (check tips below)
2 cucumber
1 onion
1 tomato
1 capsicum
chaat masala
cheese
Method:
Cut the cucumber and tomato into thin circles.
Cut the onion and capsicum finely.
Mix the butter with salt and pepper powder
Take four slices of bread, apply some butter over it.
Now generously put green chutney on two slices.
Keep a few cucumber pieces along with tomato.
Put some onion and capsicum pieces over it.
Sprinkle some chaat masala and put some cheese over it.
Keep the other two slices of bread (smeared only with buttter) over it.
Grill it in the toaster.
Once it is done, remove and serve hot.
Repeat for the other four slices.
Take a tip:
To make the mint chutney, I used fresh cooconut, mint leaves and green chilly. Saute the green chilly and mint leaves in a little oil. Then grind along with coconut and salt by adding little water. This chutney pairs well with chapati also.
Cheese may be avoided.
grilled vegetable sandwich
Evergreendishesdev
Grilled Vegetable Sandwich
Grilled Vegetable Sandwich is a quick and fuss free breakfast or evening snack. You can even pack it in the lunch box.
Cut the cucumber and tomato into thin circles. Cut the onion and capsicum finely.
Mix the butter with salt and pepper.
Take four slices of bread, apply some cheese over it.
Now, generously put green chutney over it.
Keep a few slices of cucumber and tomato.
Put some onion and capsicum pieces over it.
sprinkle some chat masal and put some grated cheese over it.
Cover them with the other two slices that were smeared with butter.
Grill it in the toaster.
Once it is done, remove and serve hot.
Notes
To make the green chutney, I have used mint leaves, fresh coconut, green chilly and salt. Roast the mint leaves and green chilly in little oil. Grind them along with coconut and salt by adding little water.
Avoid cheese if you are calorie conscious.
Grilled vegetable sandwich is tasty, filling and easy to prepare. It is ideal to serve for breakfast.
I am sending this post to Sandwich theme at Healthy Wellthy Cuisine. Here are more sandwich recipe from my team mates.
If you have liked this post, do share it further and leave a comment. Follow us on Facebook, Twitter, Pinterest and Instagram.If you ever make this recipe, take a picture and share it by tagging @foodiejayashree on Instagram or @evergreendishes on Facebook. I will be glad to see and share your creation further.
Check out my e-books on Amazon. Do not miss any post. Subscribe to get all updates and an e-book for free !
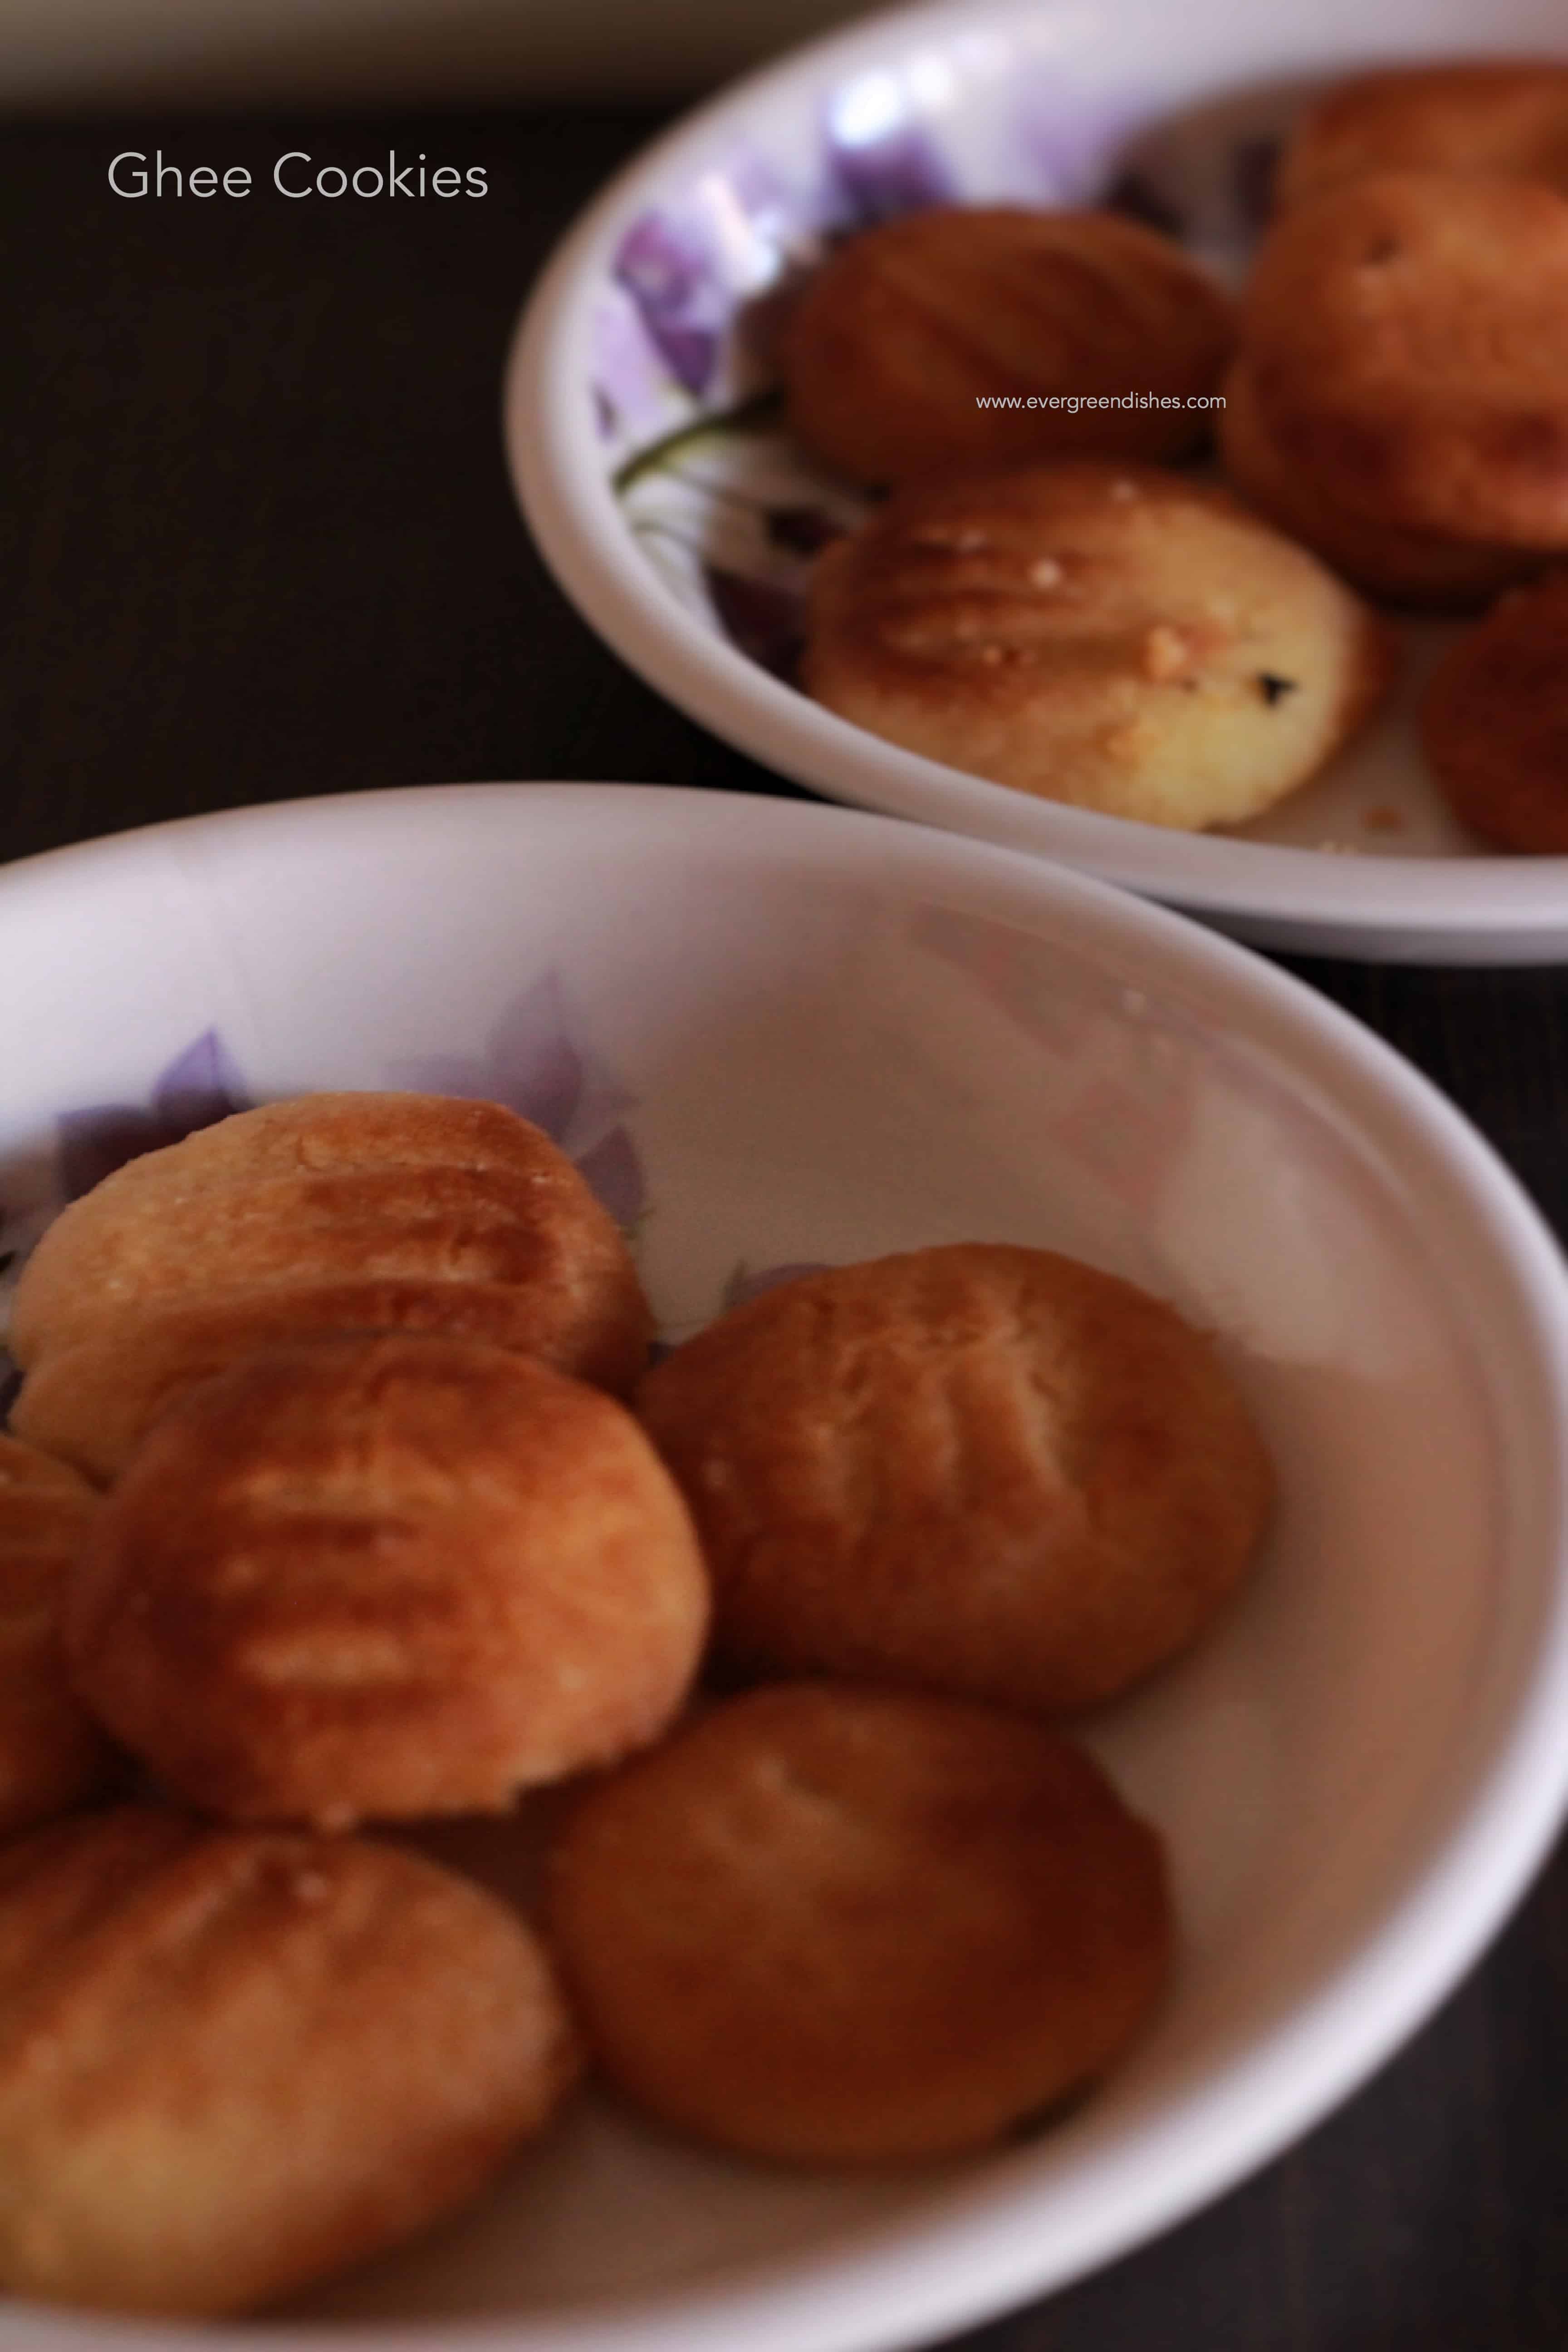
Three ingredient cookies | Ghee Cookies These cookies are crispy, tasty and melt in the mouth. All ingredients are easily available at home.
Ghee cookies are crispy, yummy, easy to make. They are loved by all and ideal to store as snacks for kids. It is eggless and no baking powder is used. (more…)
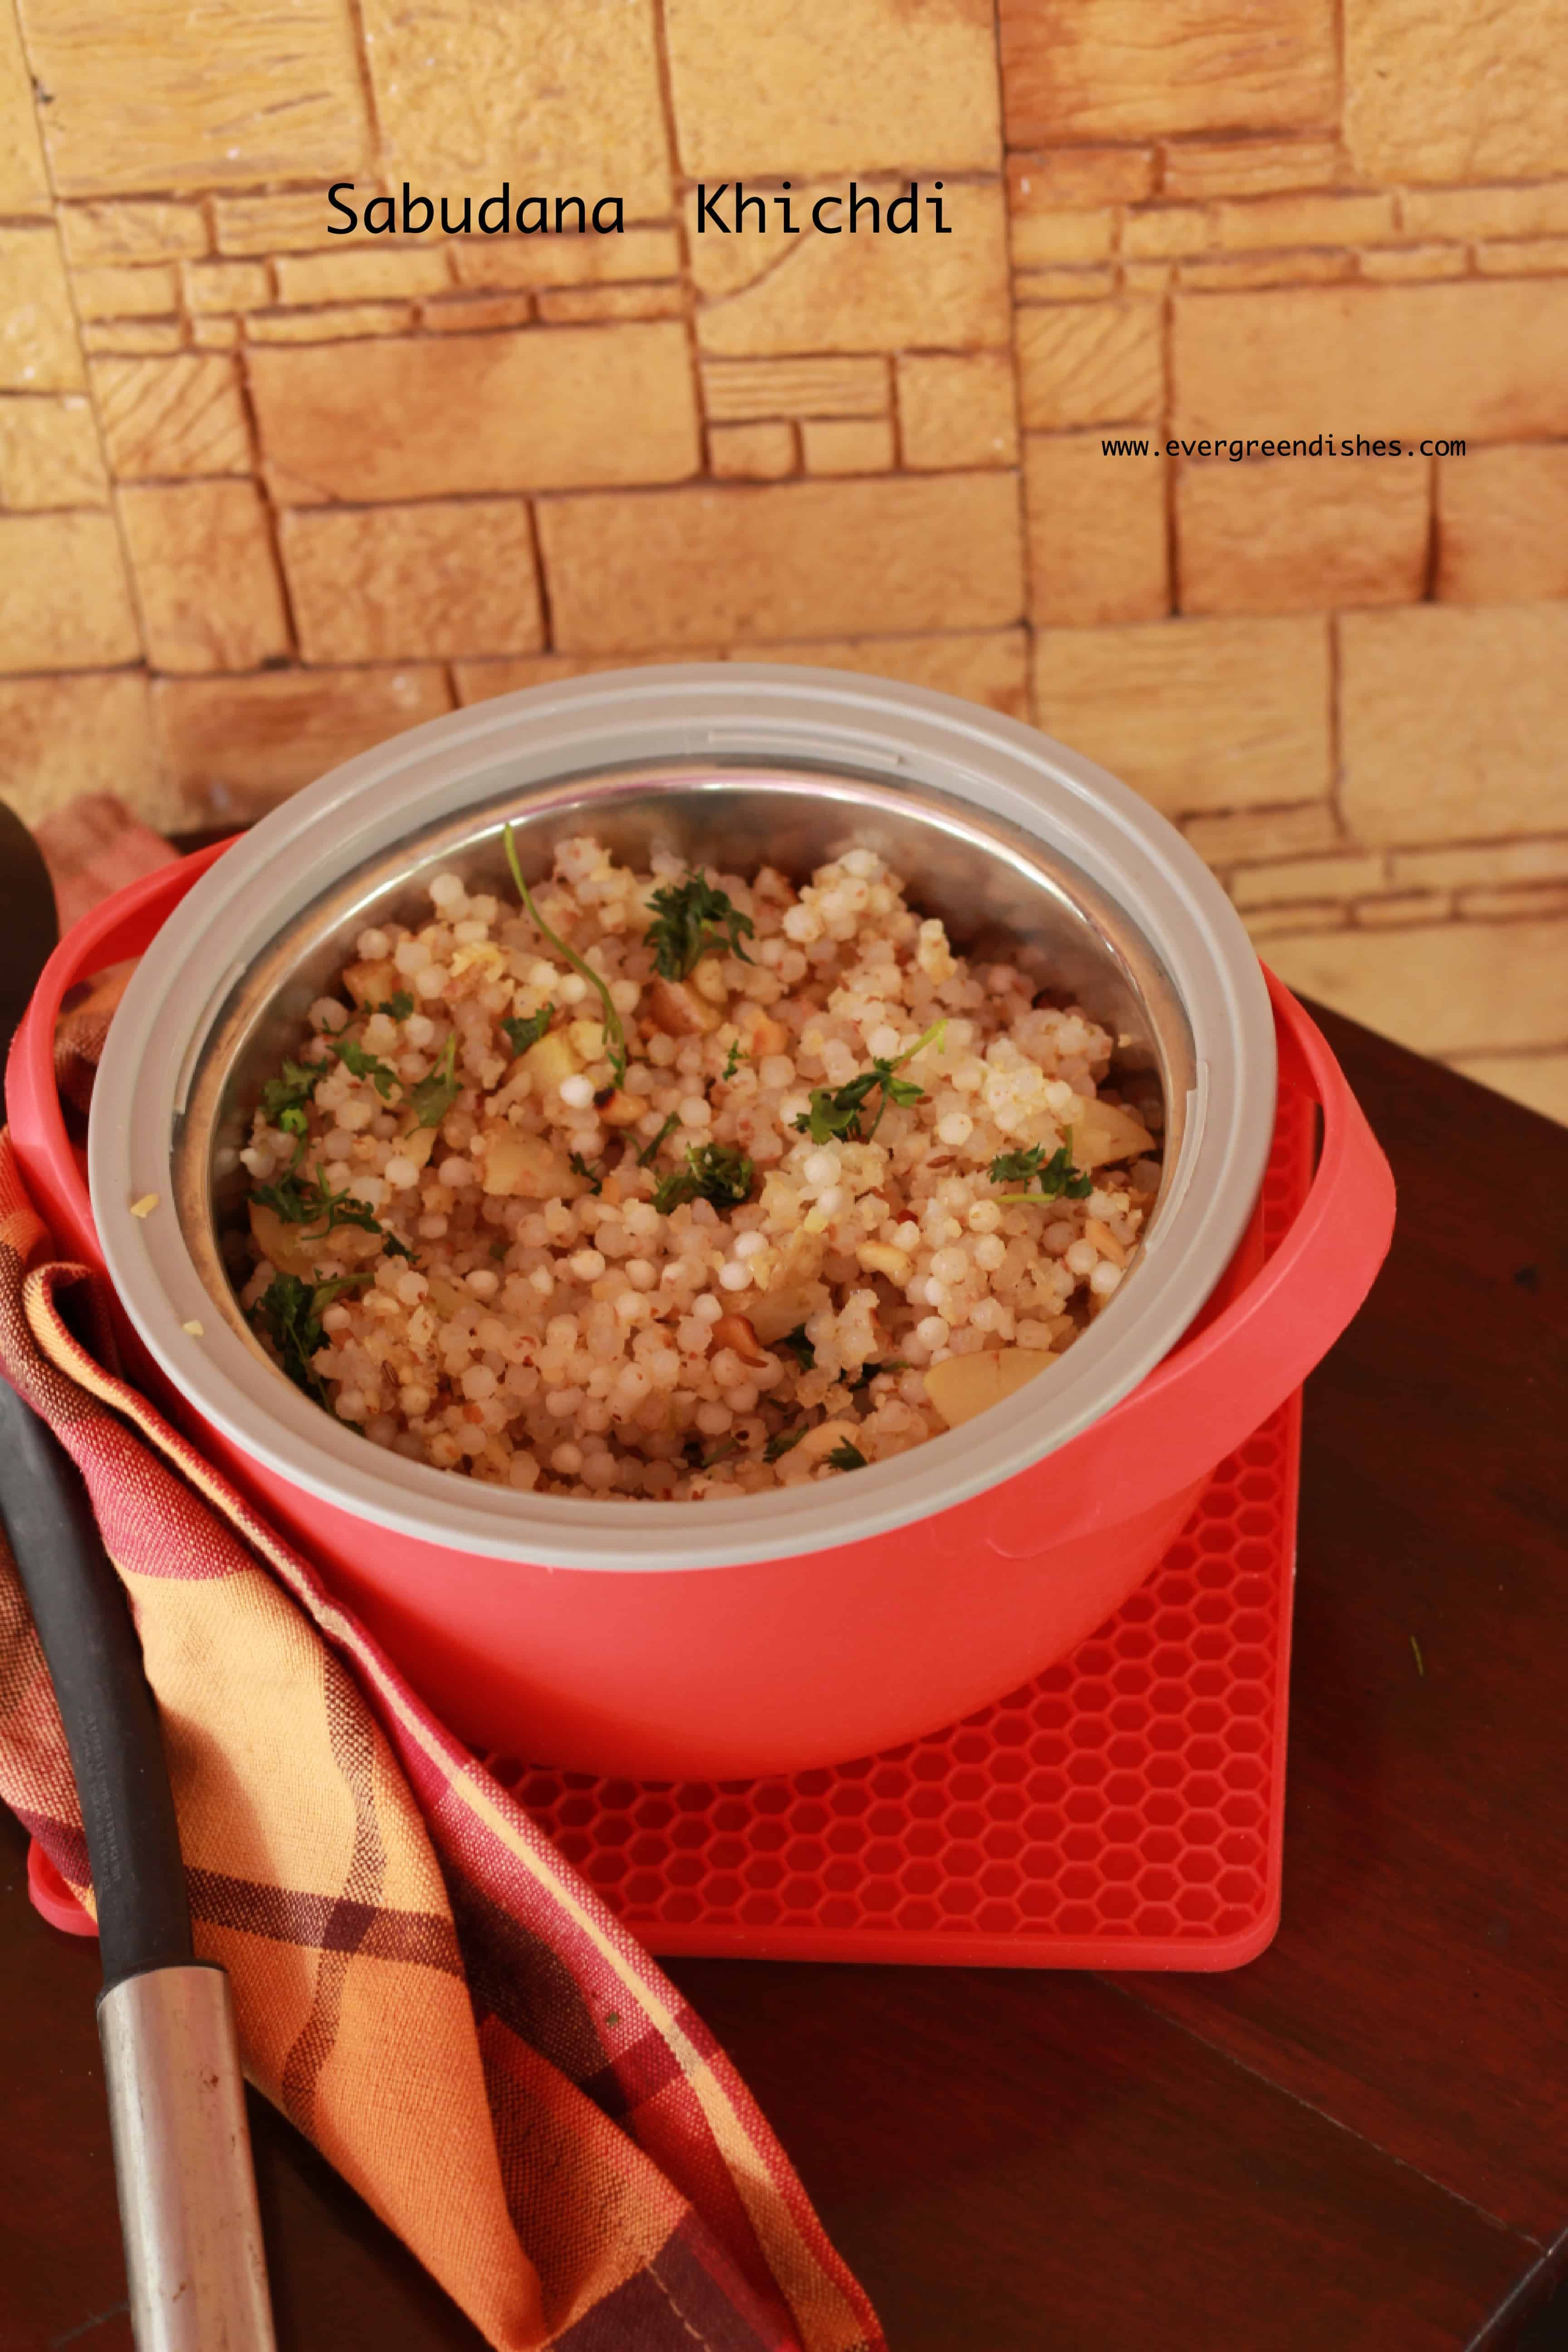
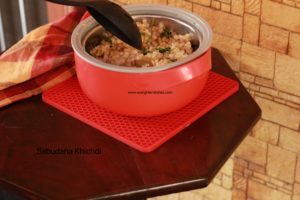
Sabudana Khichdi is made from soaked tapoica pearls and tossed in spices, is a favourite of one and all. It is usually made during fasting days. It is tasty and makes a good evening snack. We all love this to the core. It is commonly used as a fasting food during Ekadasi and Navratri.
Sabudana khichdi, reminds me of so many tales. My mother makes the best kind, it’s so tasty. I make sabudana khichdi quite often, it’s one of the favourite of my children, but somehow never made to the blog, happy I am posting it today.
About the event :
The Shhhh Secretly Cooking Challenge group have now reached the heart of the country, a foodies delight, splendid state of Madhya Pradesh. The cuisine of the state is influenced by neighbouring countries and has a love for street food. Thus, a wide range of delectable dishes are famous here from Malpua to Seekh Kabab. I was paired with Sasmita of www.firsttimercook.com She is a good cook and a consistent blogger. I had given milk powder and cashewnut as the secret ingredient, and Sasmita prepared Mawa Baati. Cumin and peanut were the secret ingredients given to me and I have prepared my favourite Sabudana Khichdi.
We love sabudana khichdi at home, but somehow, this dish had not made to the blog. Now, I got a chance to put it here. But, I had put sabudana wada before, it is made in appe pan.
sabudana khichdi
Tips to make a good khichdi:
Making a good khichdi is an art destined to a few. It is tricky and one gets to know it the hard way. Always use good quality sabudana. I prefer using Varalakshmi brand, it is good and gives me good results each time. Secondly, soaking is done with a little quantity of water, for ten minutes. After ten minutes, discard the water and keep it aside for four to five hours.. Thirdly, sabudana khichdi needs a little more quantity of oil than other dishes we prepare.
Steps in making sabudana khichdi:
Preparing sabudana khichdi, needs a little planning as it needs to be soaked for a few hours.
soaking
roasting of groundnuts
grinding
cooking of sabudana
Read the method given below for proper soaking of sabudana.
Ingredients:
1/2 kilogram sabudana
2 potato
4 tablespoon roasted peanut powder
8 green chilly (use less if spicy)
1 +1 teaspoon cumin
2 tablespoon ghee
2 tablespoon oil
salt to taste
1 lemon
Method:
Clean the sago pearls, wash them in running water, discard the water to remove all the starch. Put some water, a little above the sago pearls, keep it aside for ten minutes. Then discard the water again (keeping very little) and keep it aside closed for four to six hours. The pearls bloom and are tender when you hold between fingers.
Roast the peanuts and make a coarse powder.
Grind green chilly and a spoon of cumin in the small jar.
Cut the potato into small thin pieces. Put them in water to avoid discolouration.
Take oil and ghee in a thick pan, add cumin, as it splutters, rinse the potato slices and put it. Let cook for sometime.
In the meantime, add salt, green chilly paste and lime juice to the soaked sabudana. Mix it.
Once the potatoes are cooked and slightly crunchy, add the mixed sabudana to it. Give a stir, let cook on a low flame for sometime.
Garnish with fresh coriander. Fresh grated coconut may be used.
Take a tip:
Tapioca pearls or sabudana used are not the small, shiny tiny ones. These are white small balls.
Green chilly, adjust as per your need. It also depends on the spice level of the green chilli.
Washing the sabudana, adding water, keeping aside for ten minutes, then discard the water and soaking it with very little water is an important step here.
The measurements given here are for 1/2 kilogram of dry sabudana. Thus the quantity of prepared dish, it yields is more. Decrease the quantity proportionately as per your need.
Evergreendishesdev
Sabudana Khichdi
Sabudana khichdi is delicious snack prepared with tapoica pearls, spices are added to it and served usually during fasting days.
Clean the sago pearls, wash them in running water, discard the water to remove the starch. Put some water, a little above the sago pearls, keep it aside for ten minutes. Then discard the water (keeping very little) and keep it aside closed for four to six hours. The pearls bloom and are tender to hold between fingers.
Roast the peanuts and grind to a coarse powder
Grind green chilly and a spoon of cumin in the small jar.
Cut the potato into small thin pieces. Put them in water to avoid discolouration.
Take oil and ghee in a thick pan, add cumin, as it splutters, rinse the potato slices and put it. Let cook for sometime.
In the meantime, add salt, green chilly paste and lime juice to the soaked sabudana. Mix it.
Once the potatoes are cooked and slightly crunchy, add the mixed sabudana to it. Give a stir, let cook on a low flame for sometime.
Garnish with fresh coriander. Fresh grated coconut may be used.
Notes
Tapioca pearls or sabudana used are not the small, shiny tiny ones. These are white small balls.
Green chilly, adjust as per your need.
It is essential for the sabudana to be soaked and ready before cooking. Washing the sabudana, adding water, keeping aside for ten minutes, then discard the water and soaking it with very little water is an important step here.
The measurements given here are for 1/2 kilogram of dry sabudana. Thus the quantity of prepared dish, it yields is more. Decrease the quantity proportionately as per your need.
If you ever recreate this dish, do take a photo and tag @foodiejayashree on Instagram. Subscribe to get a book of handy hints for free and all updates in your inbox. Be the first one to be notified.
Jowar dosa | healthy recipe | south indian cooking || breakfast recipe
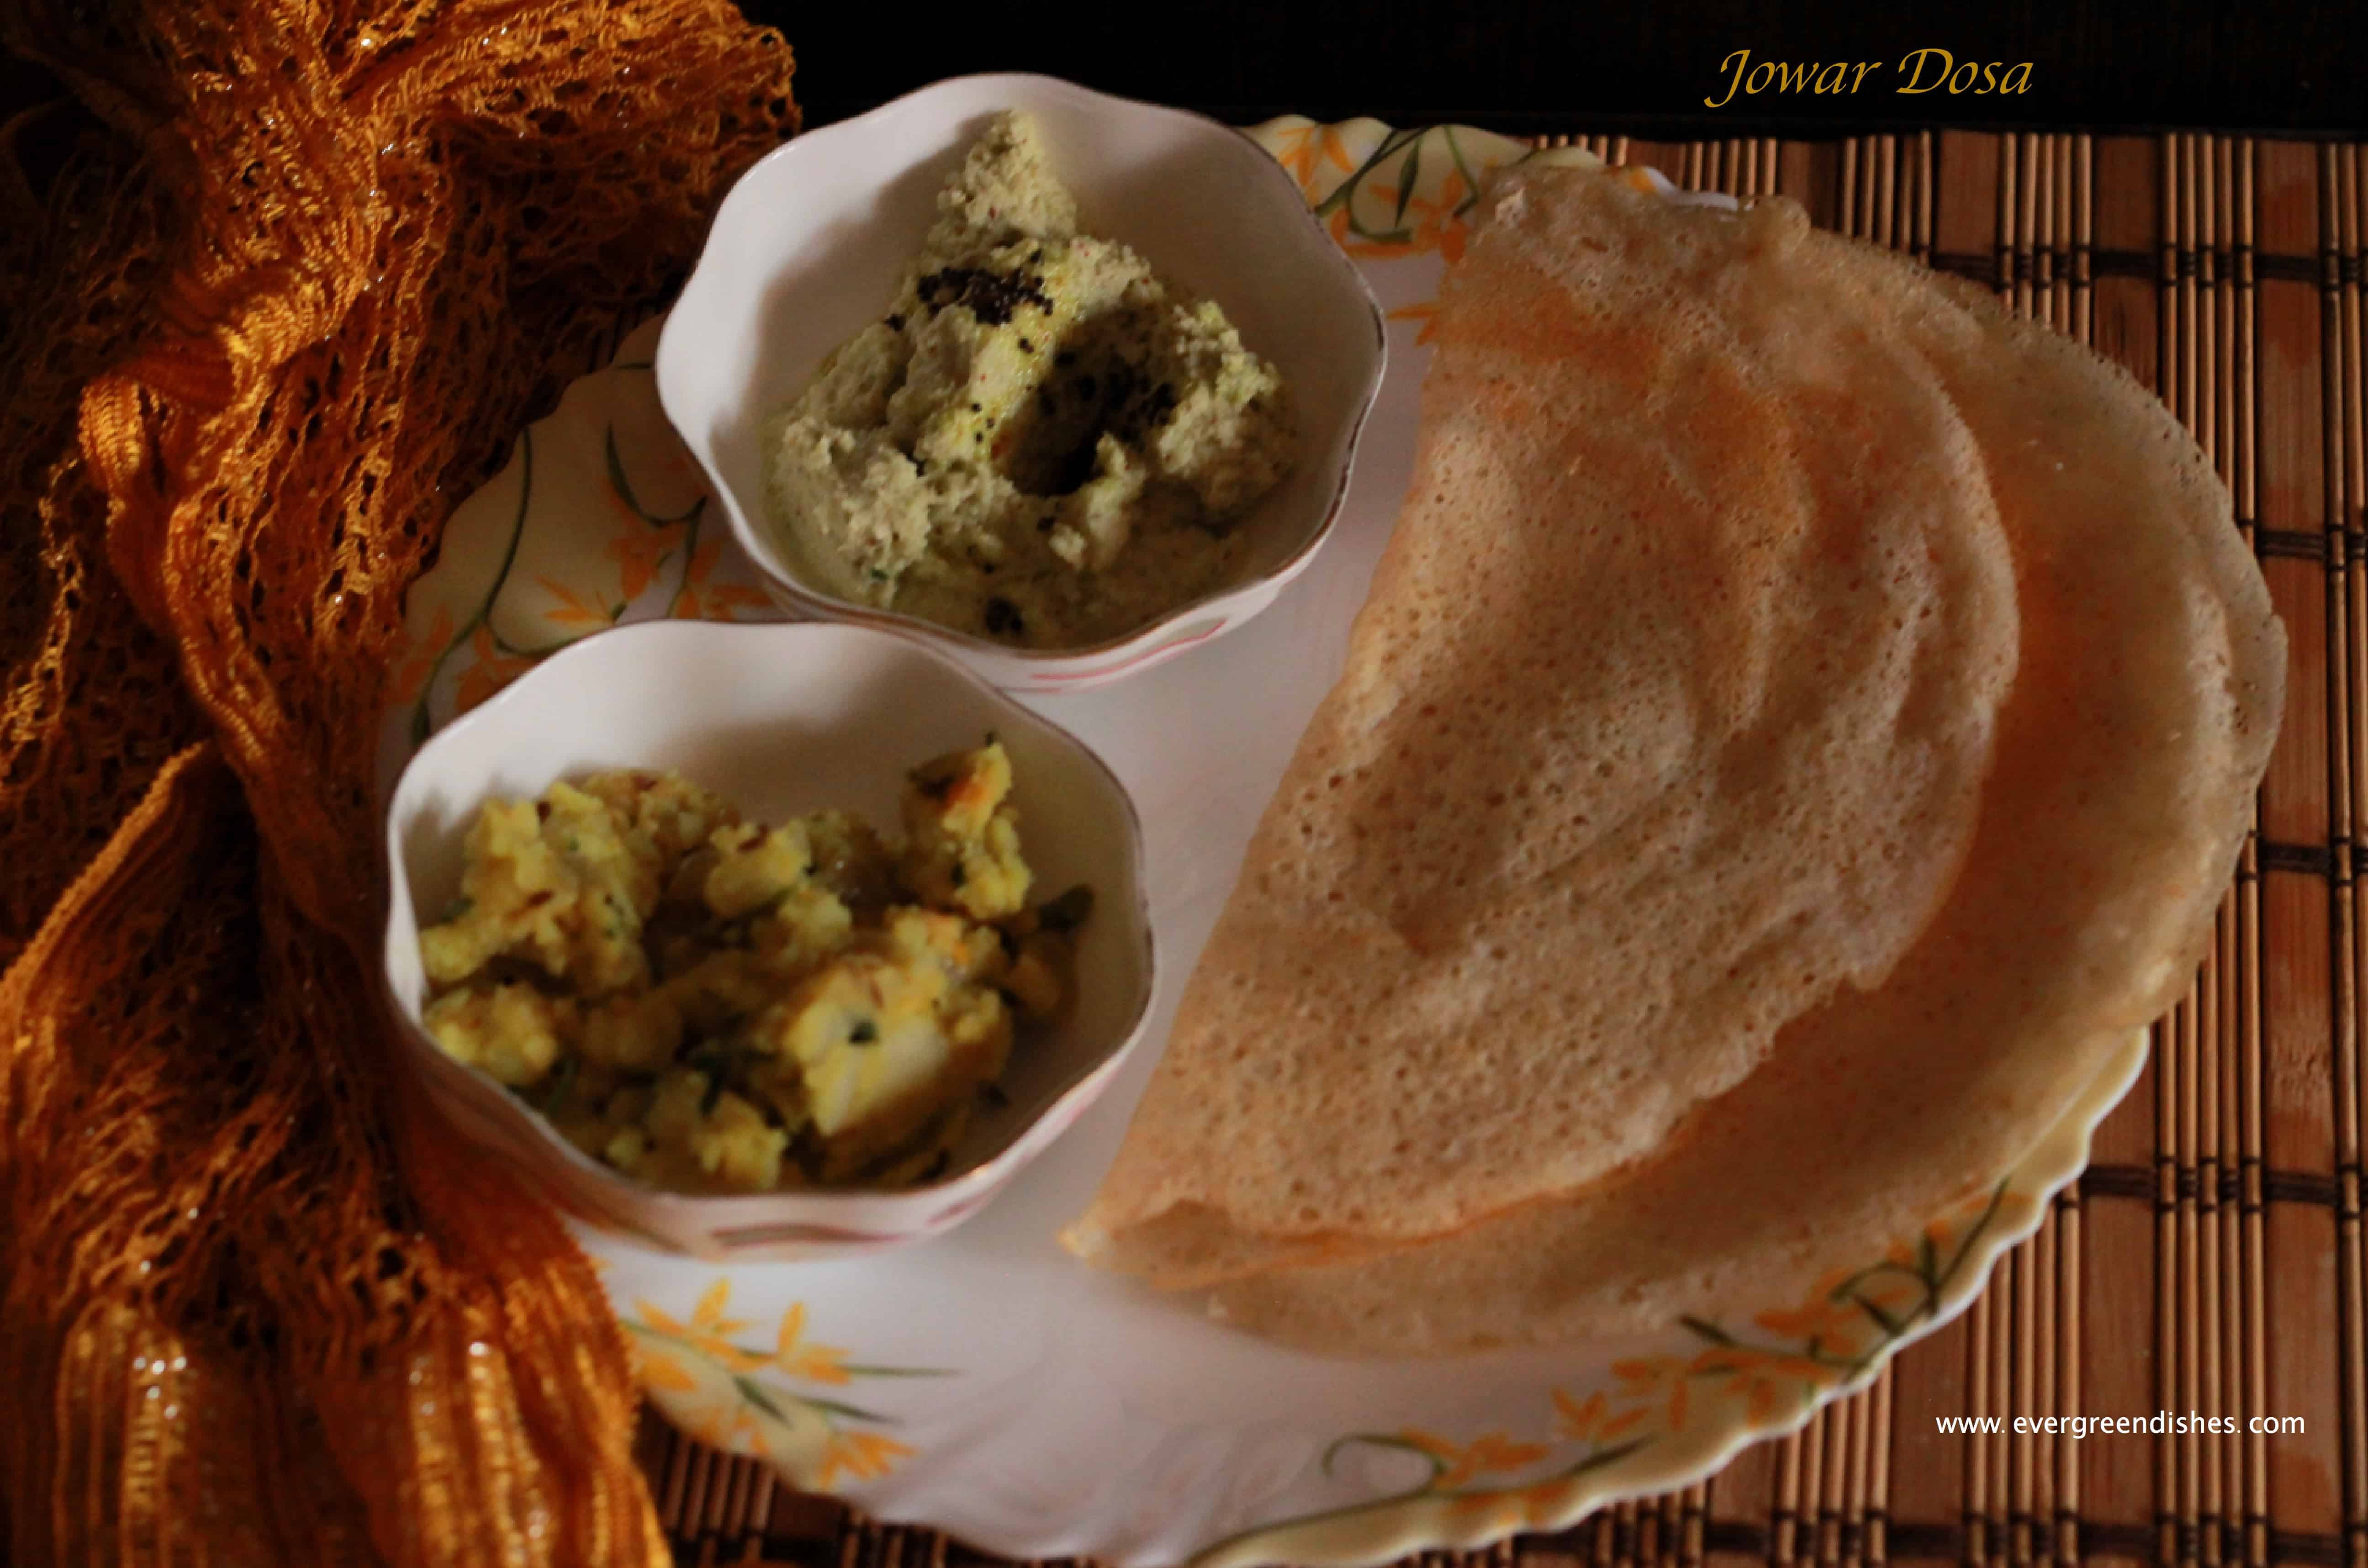
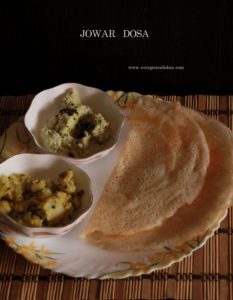
Jowar dosa is a healthy twist to the usual one. It is tasty and can be made both crispy and soft. Serve it with chutney and potato sabzi for a good breakfast. Jowar is the Indian name for Sorghum. It is also known as Indian millet, Great millet, Durra and milo. In India, the other names by which it is known are jola, chholam or jonna.
Dosa is one of the favourites of South Indian. A dosa batter in the refrigerator really saves our day ! It is on the weekly menu, and not to mention the many variety that they prepare. Rice is one of the essential ingredients in it, but now different versions are being made. We are more conscious of what we consume, thus dosa with millets has made their way in most kitchens.
Jowar dosa is a healthy twist to the regular one and I am loving it. The taste is not similar but I can vouch that there is not much difference too. Infact, we are loving this variety of millets dosa. It is ideal for breakfast, evening snack or dinner. It is vegan and glutenfree.
What are millets?
Millets are coarse grains and a repository of high fibre, protein, mineral and vitamins. They are widely grown as cereal crops for fodder and human food. Some millets are fox tail, sorghum, pearl millet, little millet, proso millet and barnyard millet.
Can one make the same quantity of batter as the regular dosa?
I prefer not to make as the taste varies once the batter gets sour. The regular dosa tastes good.It is better to make these in lesser quantity as for a single use.
Here whole grains of jowar are used, they need to be soaked for a longer time. It is advisable to soak before you go to bed at night, but the urad dal, soak it for two hours only. Grind them to a batter and allow to ferment. Thus, pre-planning is essential.
Make a small quantity and preferably finish the batter on the same day. If it remains, finish it the next day, I am doubtful how good it tastes as the usual dosa batter that we use.
Since millet is used here, unlike the regular dosa, these need to be cooked on both sides.
Jowar Dosa
Ingredients:
(Measurement used 1 cup = 150 ml)
1 cup jowar
1 cup rice
1 cup urad dal
1 teaspoon fenugreek
water for soaking
salt
oil for roasting
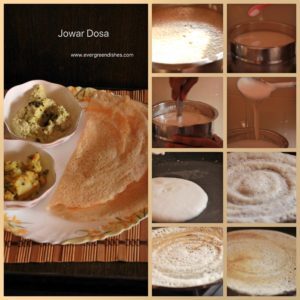
Method:
Wash and soak the jowar in water for six to eight hours.
Soak rice separately with methi in it.
Soak urad dal for two hours.
Grind the jowar at first, add rice to it later and let them blend.
After sometime, put urad dal to it. Put some water to the batter if needed. I preferably use the soaked water.
Grind all of them to a smooth batter.
Remove the batter in a wide bowl.
Allow it to ferment for seven to eight hours.
Add salt to the batter, mix it.
Take some batter in another bowl.
Heat a skillet.
Take a spoonful of batter, pour it on the skillet and spread it inside out. A thin crepe can be made.
Drizzle oil, once it roasted, turn it to the other side.
Serve hot with chutney. Potato sabzi too tastes good.
making of jowar dosa
Pin it for later:
Jowar dosa
Evergreendishesdev
Jowar Dosa
Jowar dosa is tasty and healthy twist to the usual dosa. It can be served for breakfast, lunch, evening snack or dinner.
While grinding, at first, put only the jowar in the machine. After sometime, put rice. Add some water. Then later, add urad dal. Grind all of them together to a smooth batter.
Remove the batter in a big bowl, allow to ferment for six to eight hours.
Add salt to it.
Mix the batter and take some in a small bowl. Heat a skillet, pour a ladle full of batter and spread it inside out to a thin crepe. Drizzle some oil.
Allow to cook. Flip it to the other side. After two minutes, remove and serve.
Notes
Make a small quantity of batter and finish it within a day or two.
This post is part of the theme #TimeForDoasatHW at Healthy Wellthy Cuisines group. Here are the other dosa varieties by co-bloggers
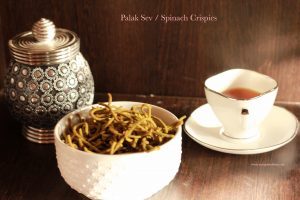
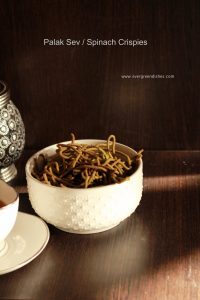
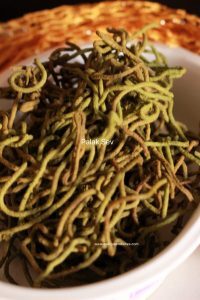
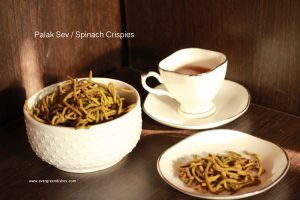
Palak Sev is a crunchy and flavoursome dry snack usually prepared during Diwali. It makes a good snack to serve along with other sweets.
Diwali is round the corner and so much of enthusiasm all around. It’s the festival we look forward to celebrate and enjoy. Many sweets and snacks are prepared and children are happy enjoying the vacation.
Today, I bring to you Palak Sev or Spinach Crispies. It’s crunchy and flavoursome, makes a good snack with tea.
Palak Sev
Let’s get to the recipe without much ado
Ingredients: Measurement: 1 cup =200 ml
1 cluster spinach
1cup gram flour
2 teaspoon rice flour
salt
2 teaspoon hot oil
5 green chilly
1 inch ginger
1 teaspoon cumin
water
oil for frying
Method:
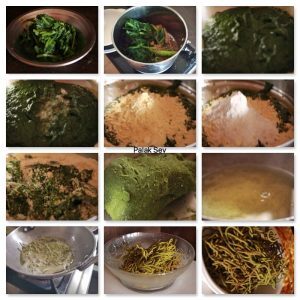
Remove the stalk of spinach leaves.
Cut and blanch it.
When cool, grind it to a paste with chilly, ginger and cumin. Do not add water.
Remove the paste in a bowl.
Add salt to it. Mix. Heat oil in a pan.
Put rice flour and gram flour to it. Add two tea spoon of hot oil to it. Mix and knead to a dough. Use only as much gram flour as required.
Take a sev maker, smear some oil to it. Take some dough and make it to a cylindrical shape. Put it inside, close and once the oil is hot, press it directly in the oil. Ensure the oil is on low flame while pressing the sev.
Fry on medium high, use a long handled perforated ladle to toss and remove it.
Remove on a tissue paper. Repeat with the rest of the dough.
Once cool, put in a container and keep it.
Take a tip: Green chilly used were not spicy, hence used 5.
Palak Sev
Making of Palak Sev
Palak Sev
Evergreendishesdev
Palak Sev / Spinach Crispies
5 from 4 votes
Palak sev is a tasty snack to binge with tea or as an accompaniment with any meal.
Remove the stalk of spinach leaves. Cut and blanch it. When cool, grind it to a paste with chilly, ginger and cumin. Do not add water.
Remove the paste in a bowl.
Add salt to it. Mix. Put rice flour and gram flour to it and knead to a dough. Use only as much gram flour as required. Heat oil in a pan, add two teaspoon of hot oil to the dough.
Take a sev maker, smear some oil to it. Take some dough and make it to a cylindrical shape. Put it inside, close and once the oil is hot, press it directly in the oil. Ensure the oil is on low flame while pressing the sev.
Fry on medium high, use a long handled perforated ladle to toss and remove it.
Remove on a tissue paper. Repeat with the rest of the dough. Once cool, put in a container and keep it. Stays good for more than a week.