Chinese dishes have gained immense popularity in our country in the past few years. Though, not exactly the same version, the major ingredients are included with a slight touch of our spices, thus it was the beginning of Indo- Chinese cuisine in our country. From starters to lunch ideas, they have a huge variety of delicacies which have become the buzz word in our society today. The immediate dish that occurs one’s mind is noodles. Today, I present to you their exclusive Hakka noodles along with a starter,alu 65 for our blog hop .This day marks the blogversary of my website also. Thankyou to one and all for the support. It has really been a wonderful journey here.
Strawberry are luscious red berries with a sweet taste. The bright red colour is just irresesitible. It is called as the queen of fruits. Although, grow in cold climate, today it is available in all places. Thanks to the super markets which bring these fruits. With summer approaching soon,giving children a glass of strawberry milkshake is good for health and quite easy !
I love this month, pleasant climate, many celebrations and holidays. It’s that time of the year where we bake goodies and make new resolutions. We look forward to new beginnings again. As usual, my favourite recipe for you with seasons greetings to all of you. May the year ahead be filled with immense joy and happiness. (more…)
(Disclosure : As an Amazon Associate, I will get a small commission for qualifying purchases without no addition cost to you.)
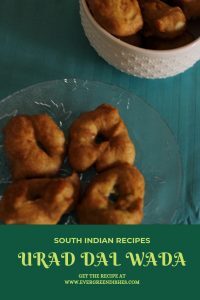
urad dal wada | uddina wade | wada recipe | uddina vade| south indian recipes |
Urad dal wada are tasty and loved by all. It is usually served along with idli in restaurants. It is one of the essentials of South Indian breakfast.
Urad dal is soaked and then made into a thick batter, seasoned with spices and then deep fried in oil. Shaped like doughnuts, these have always been my favourite. With or without chutney, I love these fried dumplings. Today, a sneak and peek at this one.
This is vegan and gluten free snack, ideal for breakfast along with idly or as an accompaniment with any meal. It is tasty and one cannot resist having a couple of them. It is usually served with coconut chutney but one can dunk them in sambar or thick curd, it tastes awesome.
This is an old post which I had written when I started my blog. Now, the post is redesigned with new picture and content, looking back there is a phenomenal change in the pictures and the way of writing. Well, that’s life, we try to get better each day isn’t it? And this post is part of the new group that I have joined Foodies_Redoing Old Posts started by Renu. The purpose is to give a new face to the old posts that we had written long back.
INGREDIENTS :
2 cup urad dal
5 green chilly
coriander leaves
a few fresh coconut pieced
curry leaves
salt
water
oil for frying
METHOD :
Soak urad dal in water for three hours.
Grind it to a fine batter with little water.
In another jar, grind green chilly and coriander and mix with it. Throw in a few roughly cut curry leaves, coconut pieces and salt.
Heat oil in a pan , when done, beat and take some batter, make a hole with the thumb, and slowly release it into the oil. Initially, one needs a little practice to make urad dal wada, but once you know the trick, you can do it.
In the beginning, one may not be able to make them and needs to be satisfied with the usual round balls.
Fry until brown on medium flame, remove and put them on a tissue paper.
The pan is made from cast iron and is ideal for sauting, deep frying or shallow frying. It is toxin free and teflon free. It is sturdy and is durable for a long time. The pan can be used on all kind of cook tops including induction stove.
Pin it for later:
urad dal wada
Evergreendishesdev
Urad Dal Wada
Urad dal wada is a popular fried snack from South India. It is usually served for breakfast along with idli, chutney and sambar.
In another jar, grind green chilly and coriander and mix with it. Throw in a few roughly cut curry leaves, coconut pieces and salt.
Heat oil in a pan , when done, beat and take some batter, make a hole with the thumb, and slowly release it into the oil. Initially, one needs a little practice to make urad dal wada, but once you know the trick, you can do it.
In the beginning, one may not be able to make them and needs to be satisfied with the usual round balls.
Fry until brown on medium flame, remove and put them on a tissue paper.
Serve with coconut chutney.
Notes
Add a little quantity of water while grinding, we need a batter of thick consistency.
If you have liked this post, do share it with your family and friends. If you ever recreate it, take a picture and share it by tagging @foodiejayashree on Instagram or @evergreendishes on Facebook. I will be glad to see your creation.
(Disclosure : As an Amazon Associate, I will get a small commission for qualifying purchases without no addition cost to you.)
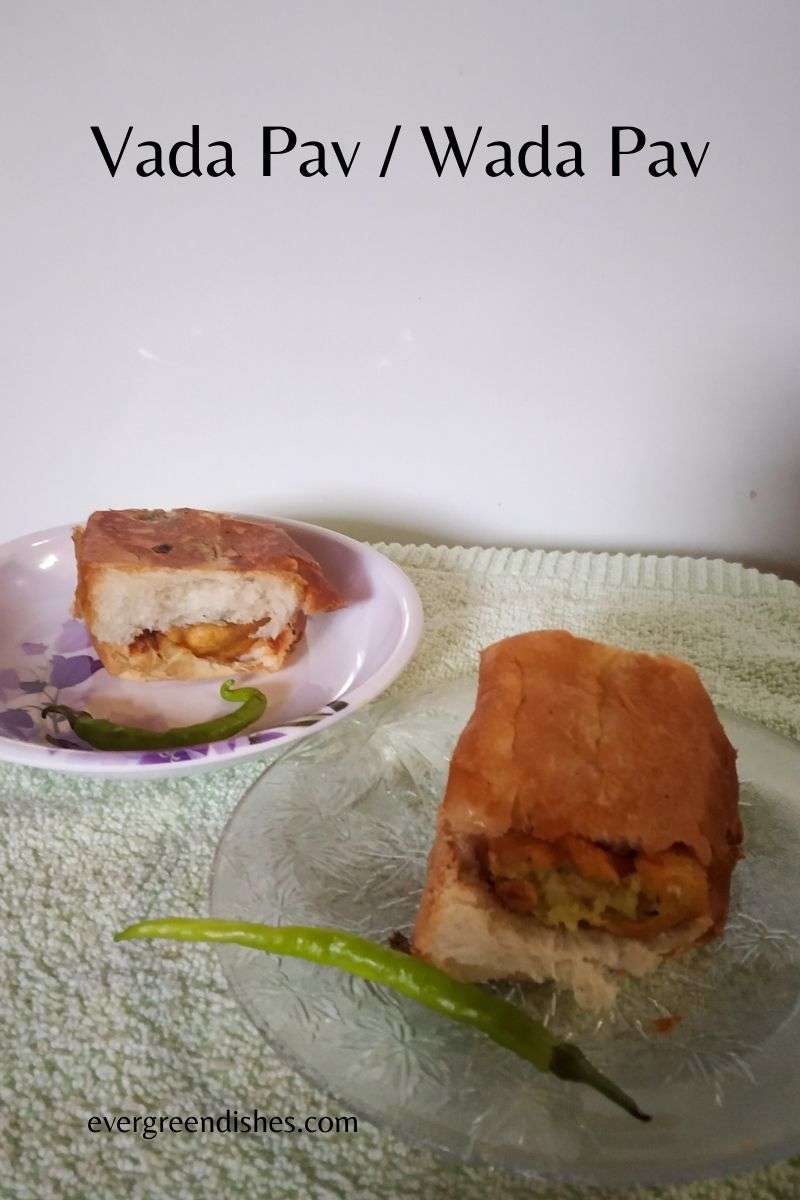
Vada pav is a famous street food of Mumbai and is commonly known as the desi burger. It is tasty and serves as a good snack with a cup of hot tea or coffee.
Growing up, this was not common. But soon, as fast food joints started, we enjoyed them regularly. Later, one day I thought of recreating them at home and it was liked by all. Dinner is loved and memorable when we have a good menu as Vada Pav. This is the Classic Vada Pave recipe. It is one of the favourite snacks at home. Read on further to know more about the other varieties of vada pav.
Vada Pav Recipe
Ingredients that you need :
10 pav buns (outsourced )
butter
tomato ketchup
For the vada (dumpling) :
6 potatoes boiled
2 onions finely cut
1/2 teaspoon garam masala powder
1 teaspoon chilli powder
1 tablespoon coriander leaves finely cut
1/2 teaspoon amchur powder
salt to taste
For the batter :
1 bowl gram flour
1 tablespoon rice flour
1 teaspoon chilli powder
1/2 teaspoon cumin seeds
salt to taste
a pinch of soda bi carbonate
oil for frying
For the green chutney :
1 bunch coriander leaves
30 mint leaves
6 green chillies
4 cloves garlic
salt to taste
Vada Pav / Wada Pav
Method:
To make the green chutney:
Grind all the ingredients together sans water. Remove it in a bowl.
To make the vadas :
Mash the potatoes, add the onions, garam masala, chilli powder ,salt, amchur powder and coriander leaves and mix well. Mix the ingredients of the batter with a little water. It should be of semi thick consistency. Make small balls of the filling, keep aside. Heat oil in a kadai.Take a ball, dip it in the batter and slowly let a few of them in the oil. Fry till a dark hue engulfs them. Remove on an absorbent paper.
To make the vada pav :
Cut the pav bun into halves . Heat a skillet, smear some butter on it and roast it slightly. Apply tomato ketchup on one half and the green chutney on the other half. Take ,a fried dumpling, press it between palms and keep it between the two halves. Warm it on the skillet for a few seconds with a little ghee. Serve hot.
Take a tip:
The vadas can be made sans onion too. You may use green chilli and ginger paste instead of chilli powder. It is a Jain Vada Pav.
Place an aloo tikki in it and you have Aloo Tikki Vada Pav.
For the Masala Vada Pav, make a spicy red chutney with a few cloves of garlic. Smear it on the other side instead of ketchup.
To make Corn Vada Pav, make corn tikkis and place them in between.
To make Schezwan Vada Pav, smear schezwan sauce instead of green chutney. Sprinkle some spice mix over it.
To make Cheese Vada Pav, keep a slice of cheese in between along with the aloo vada.
About the event :
This is an old post which has been redone with better pictures and informative text. Sending this to Foodies Redoing Old Post_70, a fortnightly event. It was started by Renu Agarwal and since then, it’s come a long way.
Vada Pav
Vada Pav is a popular street food from Mumbai. It is now famous all over India and popular as Desi Burger.
Grind all the ingredients together sans water. Remove it in a bowl.
To make the vadas :
Mash the potatoes, add the onions, garam masala, chilli powder ,salt, amchur powder and coriander leaves and mix well. Mix the ingredients of the batter with a little water. It should be of semi thick consistency. Make small balls of the filling, keep aside. Heat oil in a kadai.Take a ball, dip it in the batter and slowly let a few of them in the oil. Fry till a dark hue engulfs them. Remove on an absorbent paper.
To make the vada pav :
Cut the pav bun into halves . Heat a skillet, smear some butter on it and roast it slightly. Apply tomato ketchup on one half and the green chutney on the other half. Take ,a fried dumpling, press it between palms and keep it between the two halves. Heat it on the skillet for a few seconds. Serve hot.
Notes
Take a tip:
The vadas can be made sans onion too. You may use green chilli and ginger paste instead of chilli powder. It is a Jain Vada Pav.
Place an aloo tikki in it and you have Aloo Tikki Vada Pav.
For the Masala Vada Pav, make a spicy red chutney with a few cloves of garlic. Smear it on the other side instead of ketchup.
To make Corn Vada Pav, make corn tikkis and place them in between.
To make Schezwan Vada Pav, smear schezwan sauce instead of green chutney. Sprinkle some spice mix over it.
To make Cheese Vada Pav, keep a slice of cheese in between along with the aloo vada.
If you have liked this post, do share it with your family and friends. If you ever make this, take a picture and share it by tagging @foodiejayashree on Instagram or @evergreendishes on Facebook or Twitter.
Let’s be connected, the follow buttons are on the side bar. Subscribe to get all updates and an e-book for free.
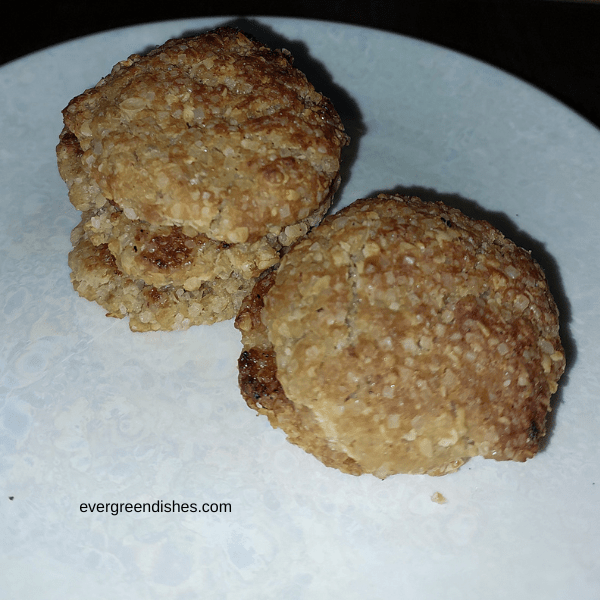
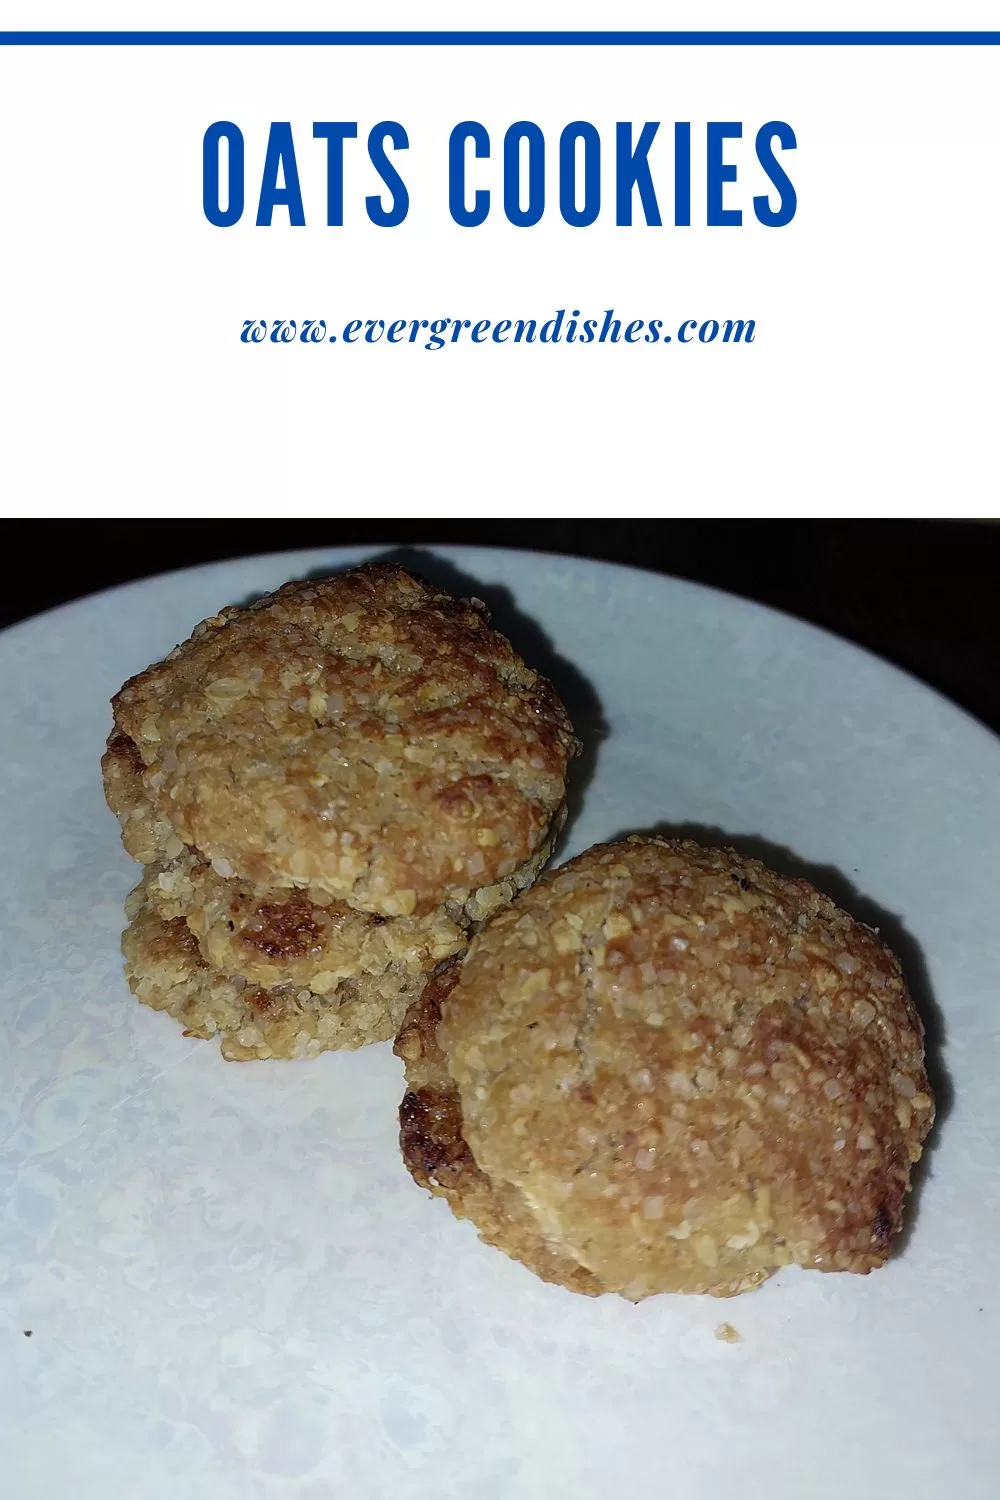
Oats cookies make a good snack to binge. If you are like me, thinking of ways to include oats, the recipe is for you
Cookies are an all time favourite of children. It is holiday time and children look around for snacks in the kitchen, isn’t it ?
Here is an easy to make and tasty cookies made with oats.
The ingredients that you need are
1 cup wheat flour
1 cup oats
1/2 cup butter unsalted
3/4 cup Demerara sugar
1/2 cup regular sugar
1/2 cup cashew pieces
a pinch of salt
a pinch of soda bi carbonate
Method:
To make in the microwave :
Preheat the microwave at 180 degrees celsius. Mix the ingredients in a bowl lightly using your hands, place them in the oven and set timer for five minutes. Again , decrease the temperature and microwave for another three minutes. Tasty oat cookies are ready to serve. Keep them in an airtight jar.
To make in the oven :
Pre-heat the oven at 200 degree Celsius. Mix the ingredients in a bowl and keep it aside for ten minutes. Take a baking tray, line it with parchment paper. Now, shape them into a cookie, put them on the tray and bake for five minutes. Check and repeat for two more minutes. Allow to cool on the rack. Store in an air-tight container.
Take a tip:
Let cool, for sometime before storing.
About the event :
Another old post got a makeover, sending it to Foodies_Redoing Old Post 106. It isa fortnightly event, we work by changing the picture or the text. Here, I have changed the picture, format and added more information in the text part.
Oats Cookies
5 from 3 votes
Oats Cookies are another kind of cookies you can bake with oats in it.
Preheat the microwave at 180 degrees celsius. Mix the ingredients in a bowl lightly using your hands, place them in the oven and set timer for five minutes. Again , decrease the temperature and microwave for another three minutes. Tasty oat cookies are ready to serve. Keep them in an airtight jar.
To make in the oven :
Pre-heat the oven at 200 degree Celsius. Mix the ingredients in a bowl and keep it aside for ten minutes. Take a baking tray, line it with parchment paper. Now, shape them into a cookie, put them on the tray and bake for five minutes. Check and repeat for two more minutes. Allow to cool on the rack. Store in an air-tight container.
Notes
Allow them to cool before storing.
Pin it for later :
oats cookies
I hope you liked the Oats Cookie recipe. If you ever make these cookies in your kitchen, take a picture and tag @foodiejayashree on Instagram or evergreendishes on Facebook. Until next time, Happy Cooking ! Be happy and cheerful.
I remember as kids we loved munching snacks ,more so during holidays with a bowl of fried crunchies watching our favourite serial. Fried peanuts coated with gramflour were one of the favourites. It’s holidays again and we fret. Well, time moves away in a jiffy and so shall these two months. Lets enjoy the vacations!
Here is a tasty snack loved by one and all.
The ingredients that you need are:
250 gms of groundnuts
125gms of gram flour
1tsp of rice flour
a pinch of asafoetida
a pinch of turmeric powder
2 tsp of chilli powder
salt to taste
oil for frying
Method:
Take a wide bowl and mix all the ingredients with very little water. The peanuts need to be coated with the batter, hence use water sparingly. Keep aside for ten minutes.
Take oil in a kadai and allow to heat. Slowly pour a little batter into the oil . Allow to cook on a slow flame until golden in colour. Remove and put them on tissue paper. When cool, store in air tight containers. Makes a good evening snack with tea.
We as parents, need to give our attention to our children and help them to fare well in exams. I came upon a wonderful book and thought I would share with you all. It is of speed study techniques and can be accessed on the link below:
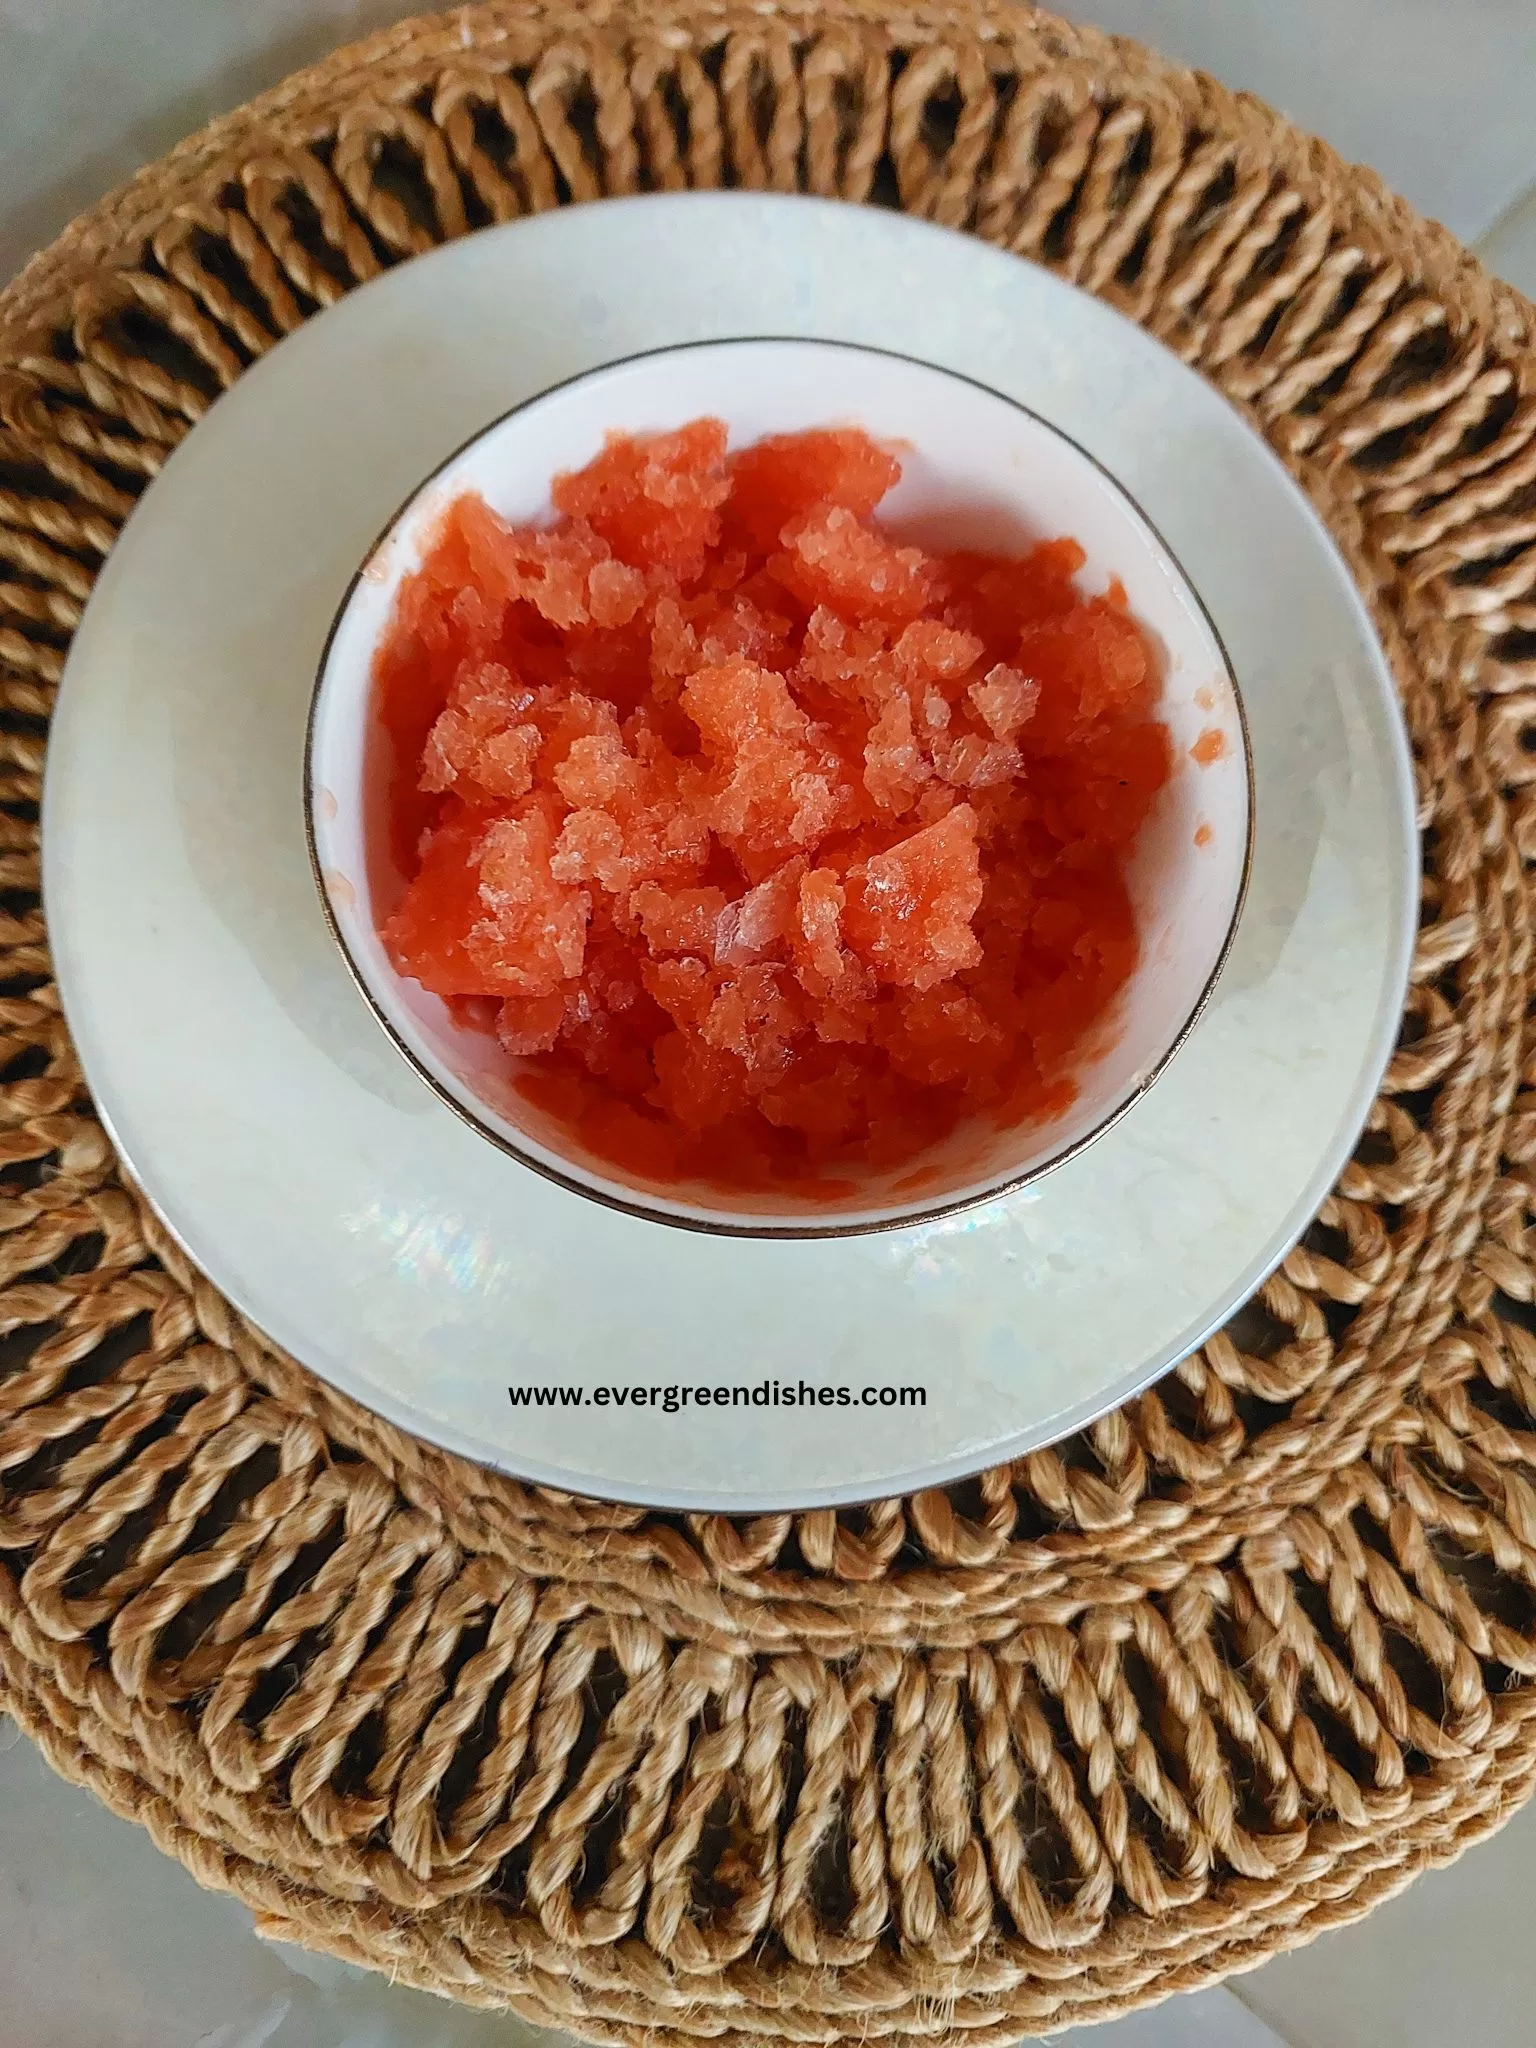
Watermelon Granita is a classic frozen dessert from Italy.
Granita is a frozen Italian dessert. It is one of the simplest desserts we can make with any fruit and just three ingredients.
Summer calls for chilled treats as ice-creams, popsicles, granita, sorbet and loads of chilled water.
Granita is similar to sorbet but it is usually made without a gelato machine. It is one of the simplest dessert you can make at home. Watermelon, lemon, strawnberries, coffee, almond are a few kind of granita one often hears about. Here, the dessert is frozen for three hours, it is then scraped with a fork and again put in the freezer for an hour. Scrape it again and serve.
watermelon granita
Ingredients :
4 cup of watermelon cubes
1/2 cup sugar
1 teaspoon lemon juice
Method:
Cut the watermelon into chunks and put them in a liquidiser along with sugar and lemon juice.
Take the pulp and pour it in a freezer tray or container. Freeze it for three hours.
Scrape it with a fork and put it back in the freezer for an hour.
Cut the watermelon into chunks and put them in a liquidiser along with sugar and lemon juice.
Take the pulp and pour it in a freezer tray or container. Freeze it for three hours.
Scrape it with a fork and put it back in the freezer for an hour.
Scrape and serve.
About the event :
Sending this to Foofies_Redoing Old Post_132. Watermelon Granita was one of the first few posts I wrote when I started blogging. Today, on 27/7/2024, I have redone the whole post but the recipe remains the same.
As the holidays are approaching and with kids at home,it is a big job for the mothers to keep the hunger pangs at bay. Here is a tasty snack recipe for kids.It is a no-cook recipe and can be done very easily. I hope you all enjoy this one as much as I do.
Choco Marie is ideal to serve as a mid-day snack. Making it can be a fun activity, just make sure you are around to supervise them. Never leave children by themselves in the kitchen. Keep all sharp objects away. Cutting of the choco marie is to be carried by an adult only.
The ingredients that you need are: Marie biscuits 8 Cocoa powder 1 tbsp Castor sugar 2tbsp Butter 1/2 tsp Coffee decoction 1/2 cup
choco marie
Method: In a bowl, mix cocoa powder, castor sugar and butter with a little milk. Put the biscuits aside. Take one of them,dip in the decoction and cover with the cocoa paste.Arrange as shown in the picture below. Set for atleast one hour. Cut in cross-section.
Biscuits dipped in solution and and cocoa paste
Cut diagonally
Set it in the freezer for two hours.
Cut it in cross- section as shown in the picture.Alternate layers should be visible.
Choco Marie ready to serve
Choco Marie is ready to serve. I hope you liked it. Do share your views and versions of this recipe.
If you ever make any of these recipes, take a picture and share it by tagging @foodiejayashree on Instagram or @evergreendishes on Facebook. I will be glad to see and share your creation further.
Check out my e-books on Amazon. Do not miss any post, subscribe to get all updates and an e-book for free !
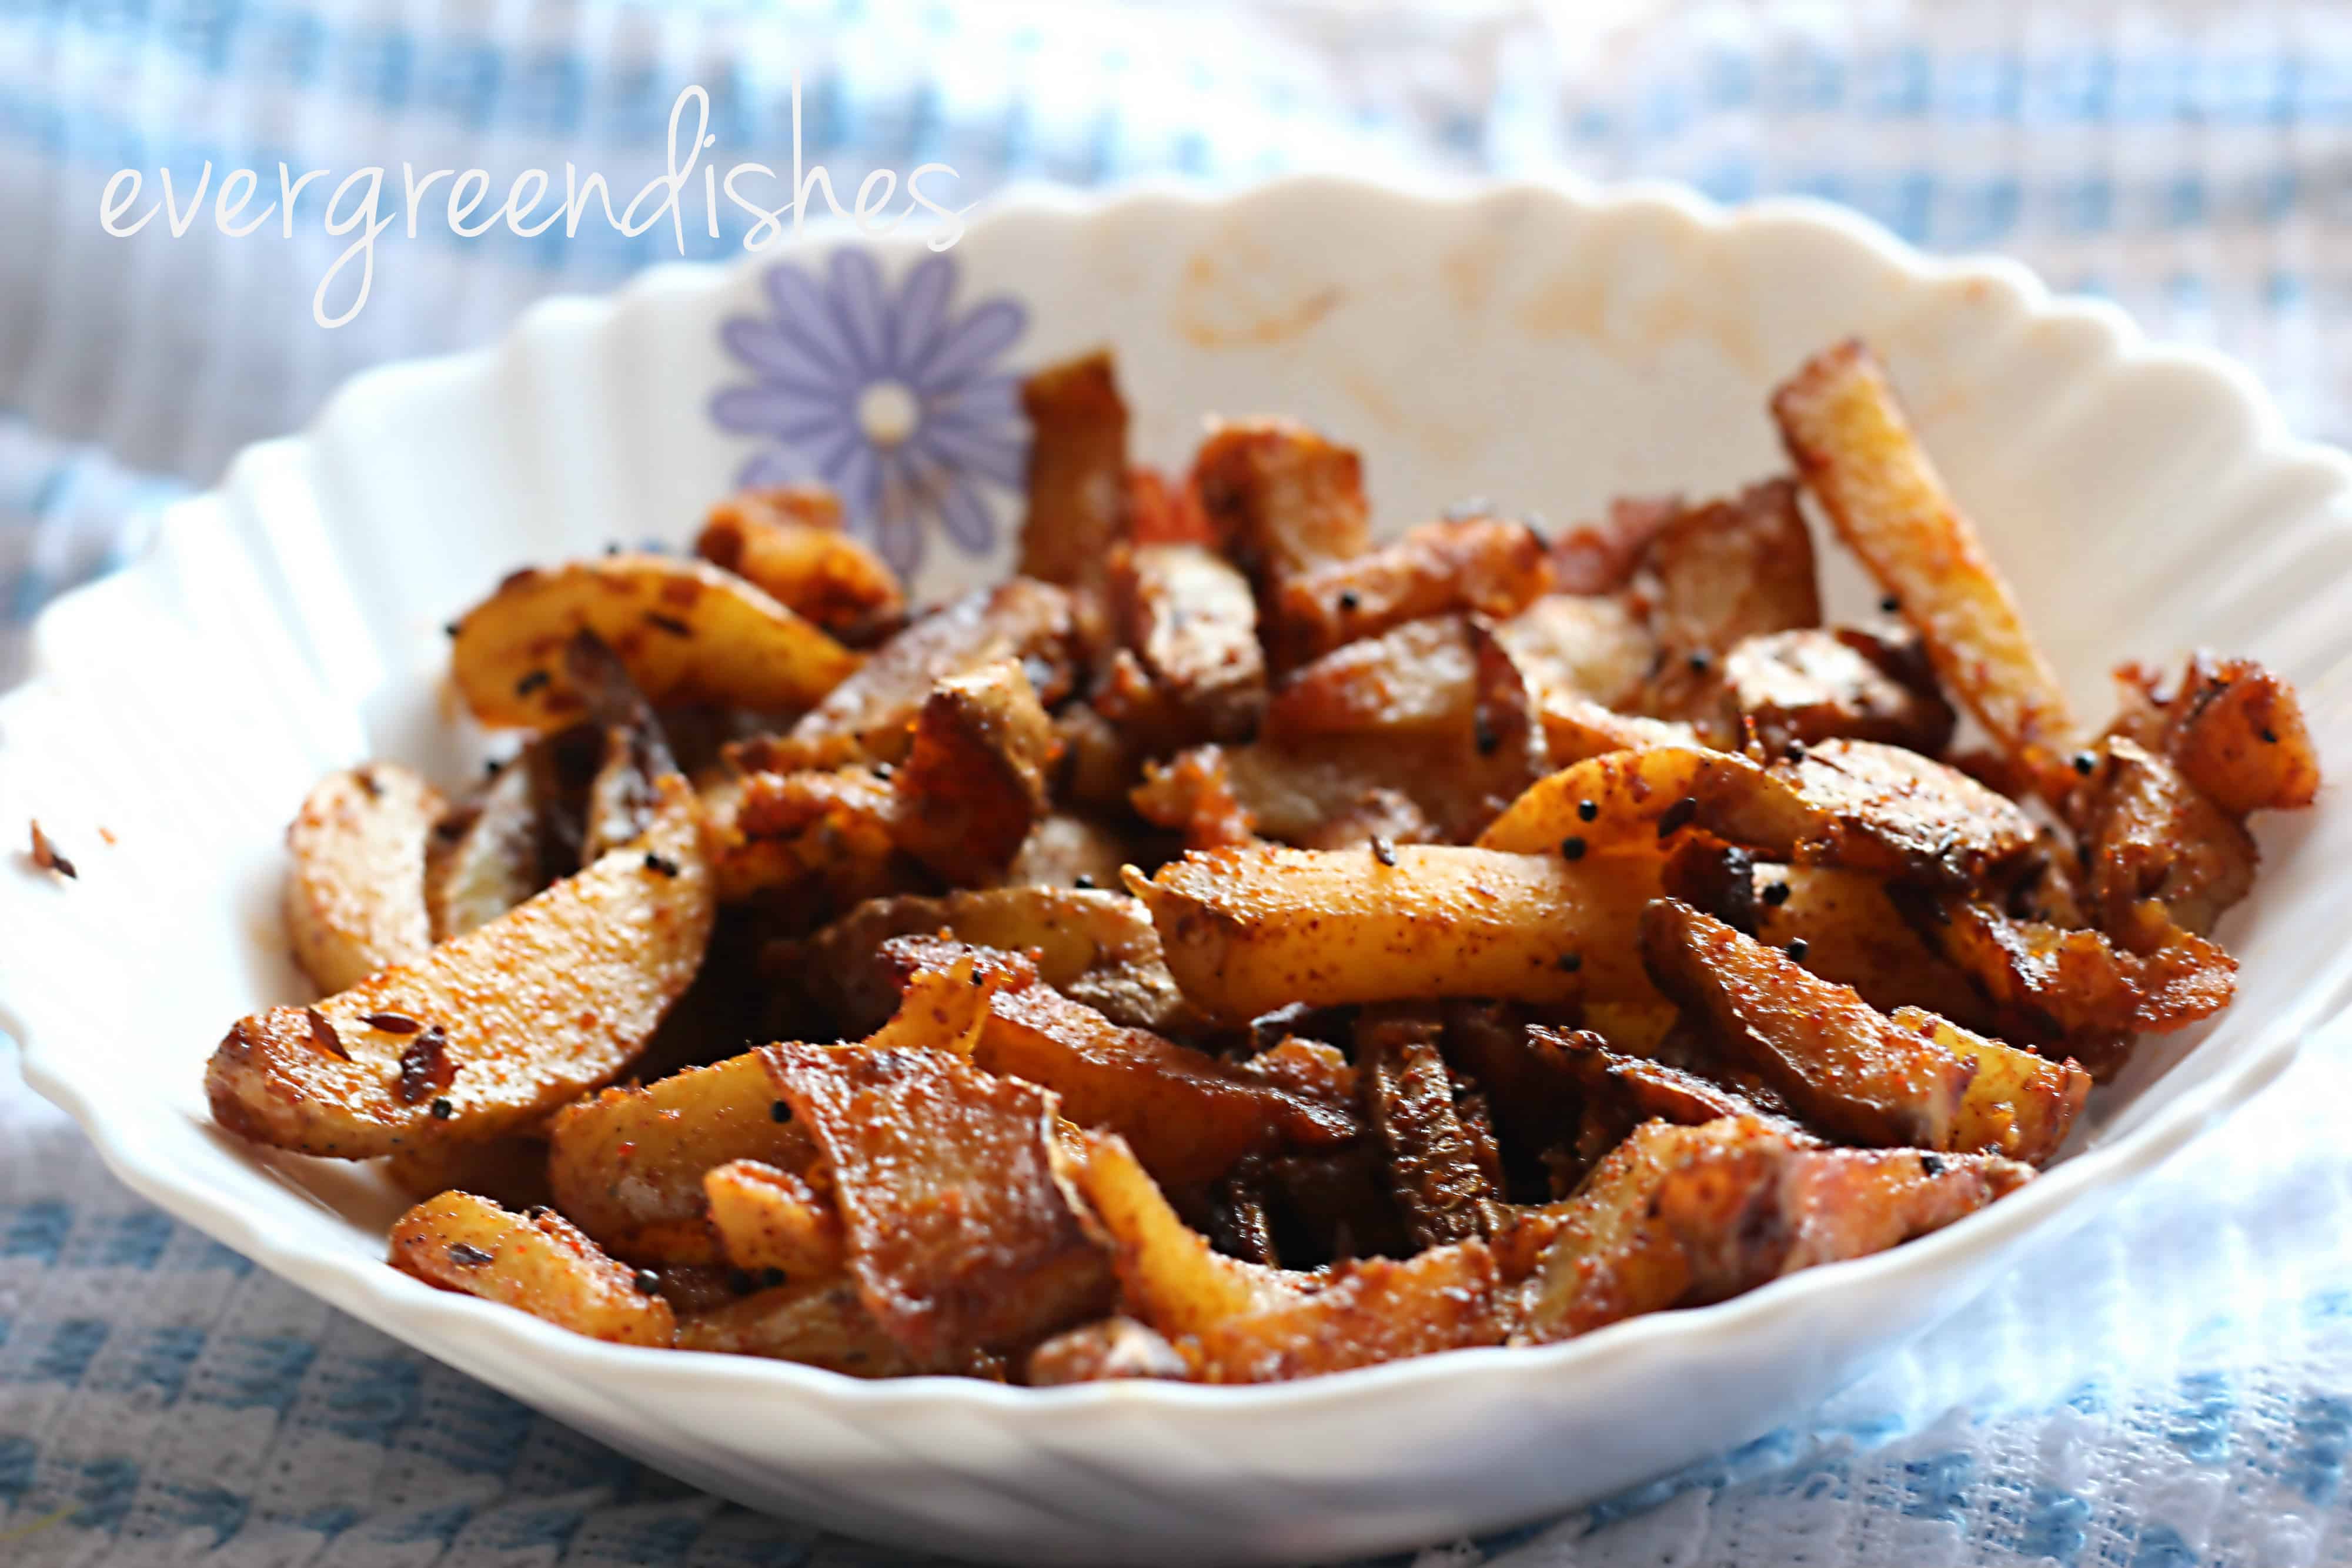
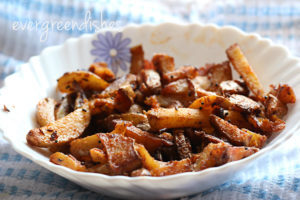
Potatoes play an important role in our daily cooking because of their versatility. You can use it for a wide range of dishes, from stir fry to snacks.
Presenting to you all a tasty and simple vegetable with very few ingredients. Potatoes tossed in cumin is nothing ,but our very own Aloo Jeera, which is loved by one and all. Over to the recipe below.
The ingredients that you need are:
1/2 kilogram potatoes
1/2 tablespoon cumin seeds
1/4 teaspoon turmeric powder
1/4 teaspoon asafoetida
1/4 teaspoon mustard seeds
2 teaspoon chilli powder
salt according to taste
3 tablespoon oil
aloo jeera
METHOD :
Cut the potatoes into medium sized long strips. Wash them well with salt water.
Take a kadai and add oil to it. Add mustard seeds, turmeric and asafoetida. When it splutters, add thecumin seeds. Then add potato slices into it.
Cook on a low flame until done. It needs time , so do not hurry with it.
When done, add salt and chilli powder. Serve with chapati or rice.
Wash the potato and cut them into medium sized long pieces.
Take oil in a pan, make the seasoning. Add the mustard seeds, as it crackles, put asafoetida,cumin and turmeric. Then add the potato pieces.Mix well. Add salt.
Let cook on a low flame, keep sauteing in between.
Once it is done, add chilly powder and let cook for another five minutes.
Alu Jeera is ready to serve.
Notes
Do not peel the skin of potatoes.
Wash the potatoes pieces well in salt water.
Adjust chilly powder to your preference.
If you ever make this recipe, take a picture and share it by tagging @foodiejayashree on Instagram or @evergreendishes on Facebook. I will be glad to see and share your creation further.
Check out my e-books on Amazon. Do not miss any post, subscribe to get all updates and an e-book for free !