Blog

  • Veg Jadoh | Meghalaya cuisine

    Veg Jadoh | Meghalaya cuisine

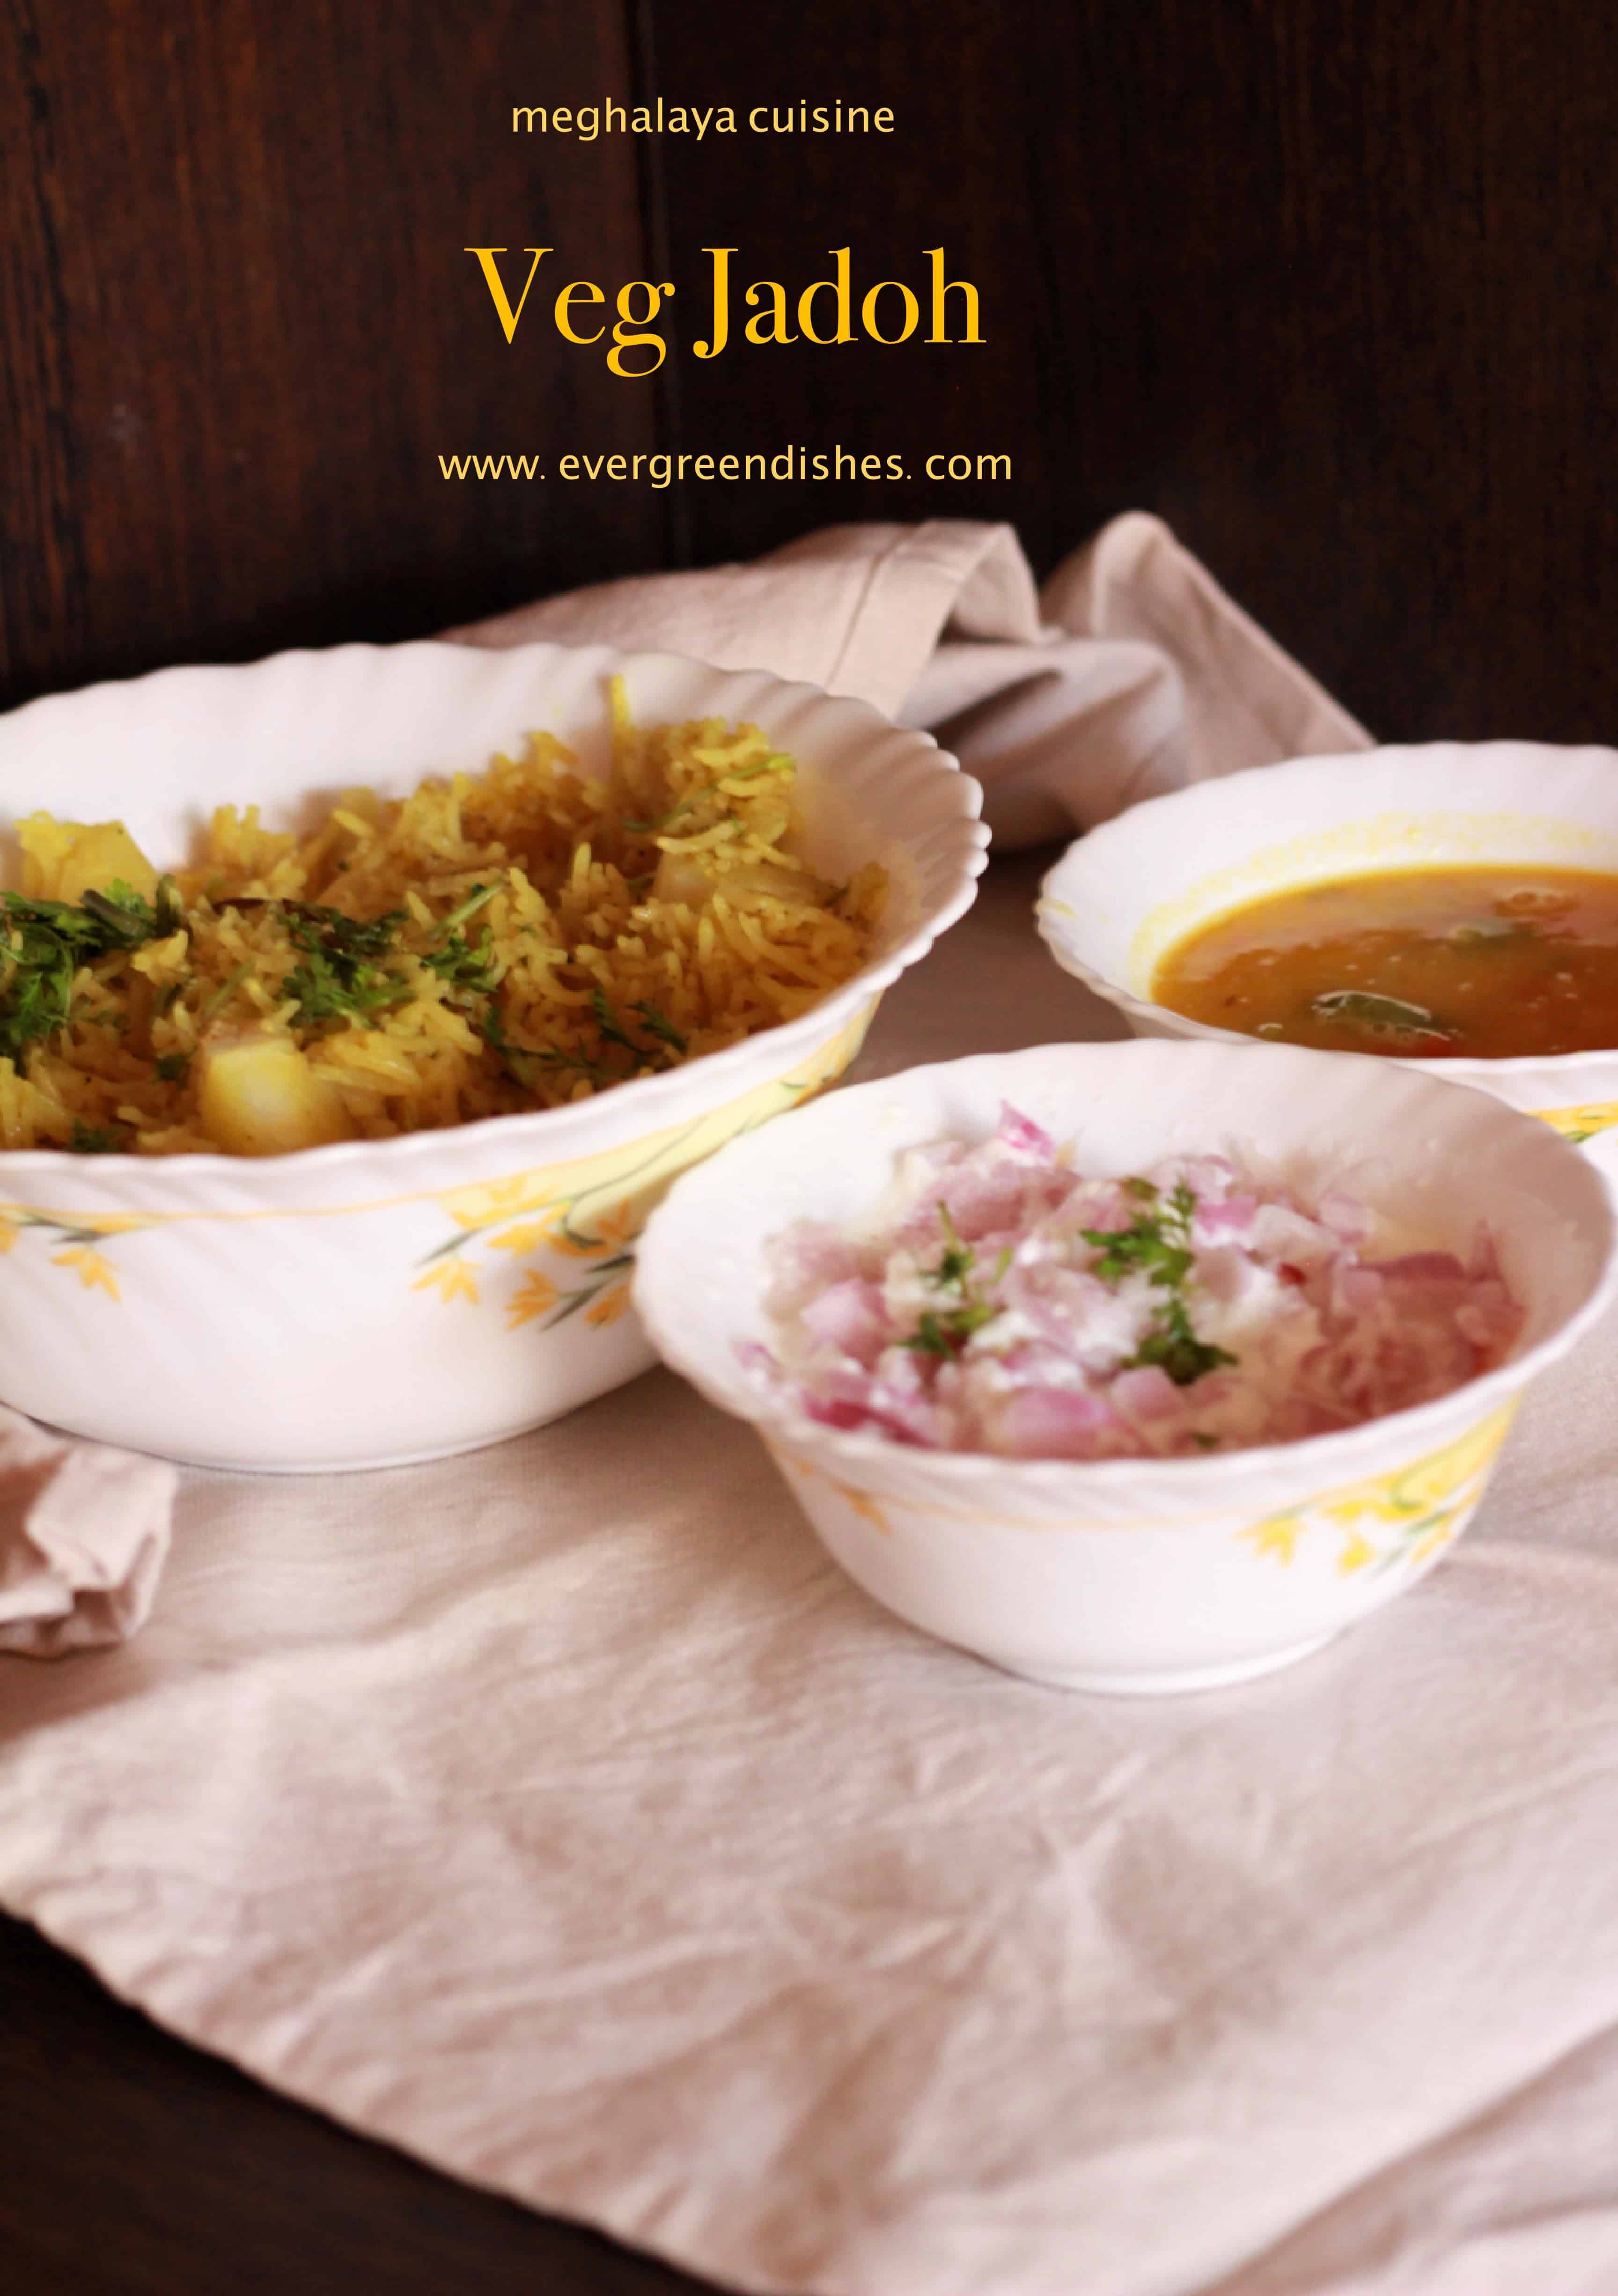
    Veg Jadoh is a delicious rice dish from Meghalaya cuisine. Rice is usually cooked with pork or meat with a few spices, but here is a vegetarian version of the same. I have used potato cubes, it makes a good brunch or a weekend meal. (more…)

  • Aloo Puri | Masala Puri

    Aloo Puri | Masala Puri

    aloo puri
    aloo puri

    Aloo puri is tasty, deep fried flatbread that can be made easily. A little prior preparation and tasty breakfast is ready. Potato, mixed with a few other spices and deep fried to puri makes a delectable snack. It needs no accompaniment as such though pickle tastes good. 

    Children love puri and this aloo puri is one of the favourites. It is ideal to carry as travel food. No elaborate dishes are needed to be packed.


    Ingredients:

    • 2 cups wheat flour
    • 2 boiled potatoes
    • salt to taste
    • 2 teaspoon chilly powder
    • 1 teaspoon carom seed
    • water for kneading
    • oil for frying

    Method :

    To make the dough:

    Take the flour in a wide bowl. Mash the potatoes and put it. Add salt, ajwain and chilly powder. Mix to a crumbly texture. Add little water and make a firm dough.

    To make the puris :

    Take a small ball of the dough and roll it into a circle of four inches diameter. Heat the oil in a pan. Once the oil is heated, slowly add the puri and fry on moderate it. Turn it to the other side with the ladle, remove on a tissue paper. Serve hot.

    Evergreendishesdev

    Aloo Puri

    Aloo Puri is a delectable, deep fried flatbread. It is ideal for breakfast, serve it with pickle, it tastes delicious.
    Prep Time 10 minutes
    Cook Time 20 minutes
    Total Time 30 minutes
    Servings: 4 people
    Course: Breakfast
    Cuisine: South Indian

    Ingredients
      

    • 2 cup wheat flour
    • 2 boiled potato
    • 2 teaspoon chilli powder
    • 1 teaspoon carom seed
    • water for kneading
    • oil for frying

    Method
     

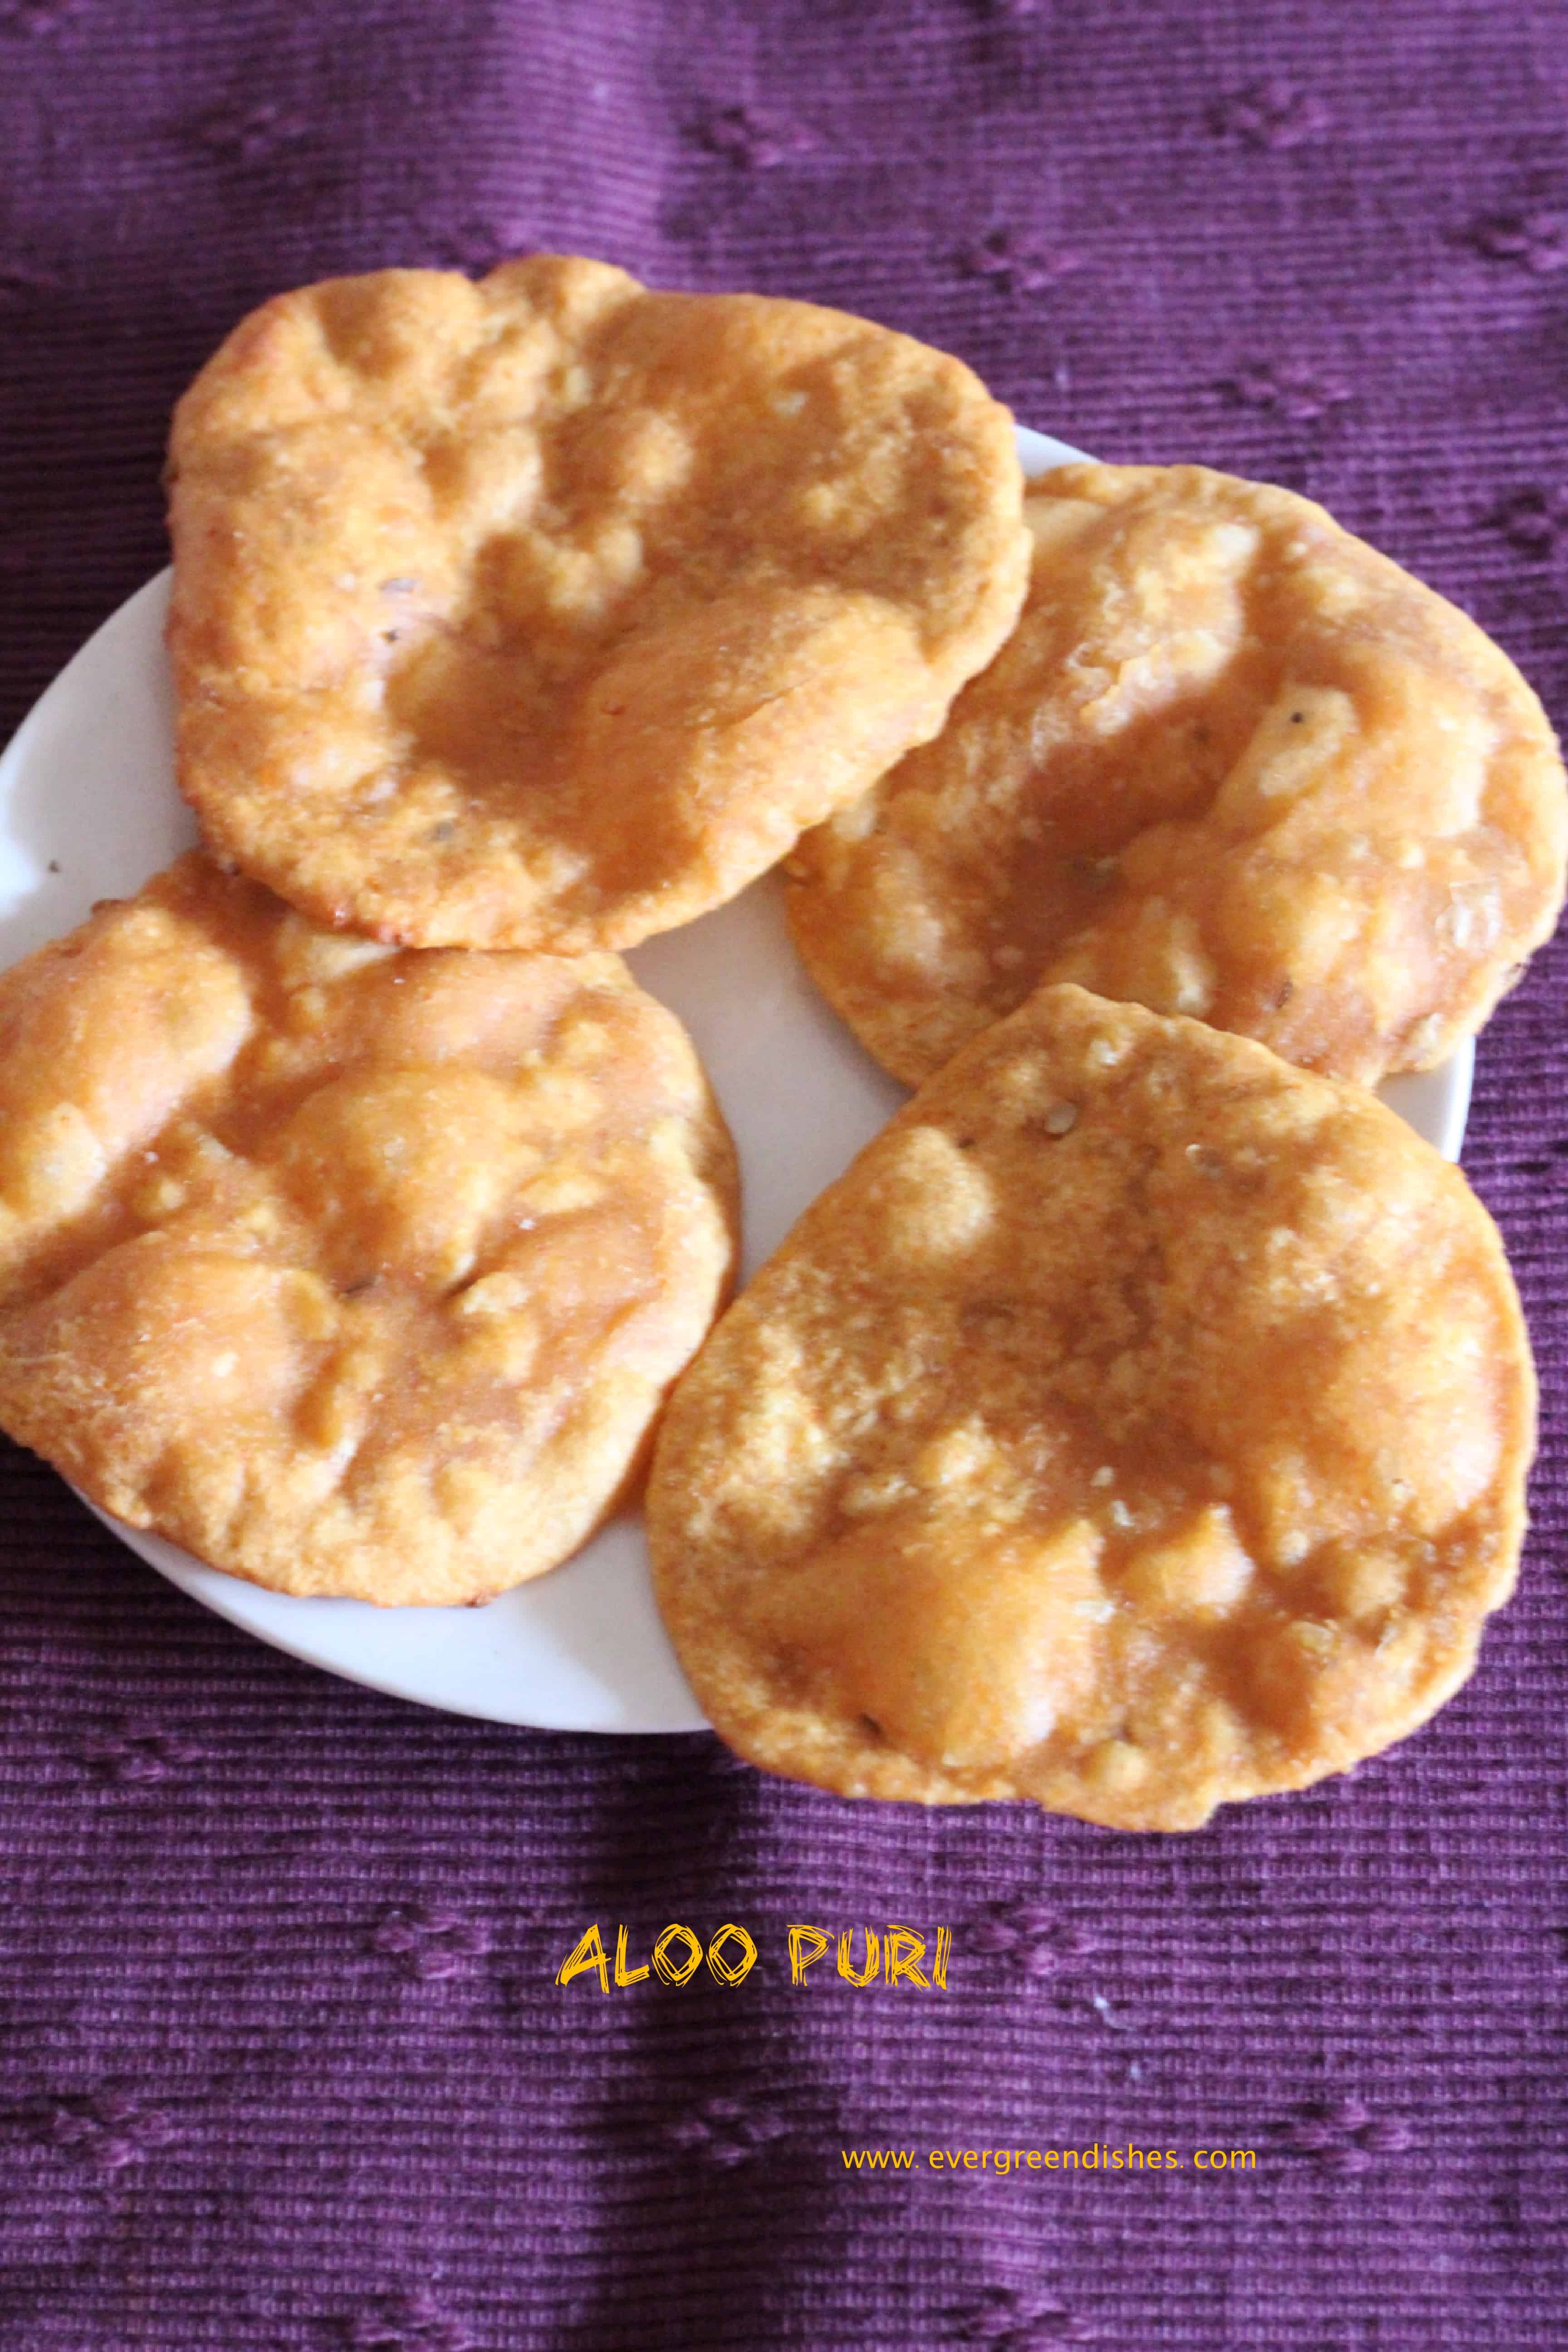
    1. 2 cups wheat flour 
      2 boiled potatoes 
      salt to taste
      2 teaspoon chilly powder 
      1 teaspoon ajwain
      water for kneading
      oil for frying
      Method :
      To make the dough:
      Take the flour in a wide bowl. Mash the potatoes and put it. Add salt, ajwain and chilly powder. Mix to a crumbly texture. Add little water and make a firm dough.
      To make the puris :
      Take a small ball of the dough and roll it into a circle of four inches diameter. Heat the oil in a pan. Once the oil is heated, slowly add the puri and fry on moderate it. Turn it to the other side with the ladle, remove on a tissue paper. Serve hot.
       
      WP Recipe Maker #6662remove
      – 2 cup wheat flour
      – 2 boiled potato
      – chilli powder
      – salt
       
        
    To make the dough
    1. Take the flour in a wide bowl.
    2. Mash the potato, put it along with the flour. Add salt, carom seed and chilli powder.
    3. Mix it to a crumbly mixture. 
    4. Add little water and mix to a stiff dough. 
    5. Keep it aside for five minutes.
    To make the aloo puris
    1. Take a small ball of the dough and roll it into a circle of four inch diameter.
    2. Heat oil in a pan, once the oil is heated slowly add the puri and fry on moderate heat.
    3. Flip it to the other side with the ladle, once it is done, remove on a tissue paper. 
    4. Serve with any pickle.

    Pin it for later:

    aloo puri
    aloo puri

    If you ever make this dish, take a picture and share with me @foodiejayashree on Instagram

    Let’s be social: Facebook, Twitter, Pinterest and Instagram

    I am sending this post to #BM97 for the Kids Special with the theme “Travel Food” co-hosted by Renu.

    BMLogo

    Check out the Blogging Marathon page for the other Blogging Marathoners doing this BM#97

    Subscribe to get all updates and a book of handy hints for free

    book of handyhints
    book of handyhint

    Until next time, be happy and cheerful. Do try these recipes and let me know if you liked them.

  • Methi Mathri / how to make mathri  in steps

    Methi Mathri / how to make mathri in steps

    Methi  Mathri is an Indian snack usually made in many households. It is crispy, tasty and ideal to serve with tea or during mid-day.

    It’s ideal to store these snacks at home, children crave quite often and they make good snacks with masala chai. It is ideal to carry during travelling.

    I have many snack recipes on my blog, from crispy avalakki (poha chiwda) to nippattu and kodbole. these are essential during festivals.

    methi mathri
    methi mathri

    Let’s get to the recipe of Methi Mathri:

    Ingredients:                Measuremnt used: 1 cup = 250ml

    • 2 cups wheat flour
    • 1/4 cup semolina
    • 3/4 cup fenugreek leaves
    • 2 tablespoon ghee
    • 1 teaspoon cumin
    • 1 teaspoon pepper powder
    • 1/2 teaspoon ajwain
    • salt to taste
    • 1/4 cup water
    • oil for frying

    Method:

    1. Cut and wash the fenugreek leaves, put them in a colander.
    2. Mix wheat flour and semolina in a bowl. Add cumin, pepper powder, salt and ajwain to it. Add ghee and rub it well.
    3. Add fenugreek leaves, mix well.
    4. Add water to it, knead to a stiff dough.
    5. Keep it aside for five minutes.
    6. Heat oil in a pan.
    7. Take a ball of the dough, roll into a thin ircle. Cut into discs using a cookie cutter or any circular shaped object. Pork them with a fork.
    8. Put the discs in oil. Deep fry them on slow to medium flame, once they are golden in colour, remove on a plate with a tissue paper/ absorbent paper on it.
    9. Repeat for the rest of the dough.

    Take a tip:

    1. You can take small ball of the dough, roll into a thin puri and then prick with a fork. Repeat for all the balls.
    2. You can reduce the amount of fenugreek leaves to 1/2 cup


    Methi Mathri

    Methi Mathri is a crispy snack from North India. 
    Prep Time 10 minutes
    Cook Time 30 minutes
    Total Time 40 minutes
    Servings: 50 pieces
    Course: dry snack, festive treats, kids favourite, travelling food
    Cuisine: north indian

    Ingredients
      

    • 2 cup wheat flour / atta
    • 1/4 cup semolina
    • 3/4 cup fenugreek leaves
    • 2 tablespoon ghee
    • 1 teaspoon cumin
    • 1 teaspoon pepper powder
    • 1/2 teaspoon ajwain
    • salt to taste
    • 1/4 cup water
    • oil for frying

    Method
     

    1. 2 cups wheat flour
      1/4 cup semolina
      3/4 cup fenugreek leaves
      2 tablespoon ghee
      1 teaspoon cumin
      1 teaspoon pepper powder
      1/2 teaspoon ajwain
      salt to taste
      1/4 cup water
      oil for frying
      Add water to it, knead to a stiff dough.
      Keep it aside for five minutes.
      Heat oil in a pan.
      Take a ball of the dough, roll into a thin ircle. Cut into discs using a cookie cutter or any circular shaped object. Pork them with a fork.
      Put the discs in oil. Deep fry them on medium flame, remove on aplate with a tissue paper on it.
      Repeat for the rest of the dough.
    2. Cut and wash the fenugreek leaves, put them in a colander.
    3.  Mix wheat flour and semolina in a bowl. Add cumin, pepper powder, salt and ajwain to it. Add ghee and rub it well. fenugreek leaves, mix well.
    4. Add water to it, knead to a stiff dough.
    5. Keep it aside for five minutes.
      Heat oil in a pan.
    6. Take a ball of the dough, roll into a thin ircle. Cut into discs using a cookie cutter or any circular shaped object. Pork them with a fork.
    7. Put the discs in oil. Deep fry them on medium flame, remove on aplate with a tissue paper on it.
    8. Repeat for the rest of the dough.

    Pin it for later:

    Methi Mathri
    Methi Mathri

    This post is part of #BM97 with the Kid’s Special for the theme ” Travel Food” co-hosted by Renu

    BMLogo

    Check out the Blogging Marathon page for the other Blogging Marathoners doing this BM#97

    Let’s be social: Facebook, Twitter, Pinterest, Instagram

    If you ever recreate this dish, take a picture and tag @foodiejayashree on Instagram, shall share it further. Will be happy to see your creation too.

    Subscribe to get all updates and an e-book of handyhints for free !

  • Namak Pare/ Namak Para / Nimki / Nimkin

    Namak Pare/ Namak Para / Nimki / Nimkin

    Namak Pare is a deep fried savoury snack usually made during festivals as Holi and Deepavali. It is crispy and tasty and make a good snack for children. It is ideal to carry while travelling.

    Usually namak pare is made with self raising flour or a mix of self raising flour and wheat flour in the same ratio. But, I use only wheat flour along with semolina and they turn out equally good. Deep fried snacks are always welcome at home, children love to binge on this.

    It is that time of the month when I work on my themed post, and I have chosen travel food for kids. So stay tuned for tasty snacks in  the next three days.

    The other snack recipes on blog : Masala Mathri, ring murukku, split gram murukku, nipattu

    namak pare
    namak pare

    Let’s get to the recipe of Namak Pare

    Ingredients:

    • 2 cup wheat flour
    • 2 tablespoon semolina
    • 1 teaspoon ajwain
    • 1/2 teaspoon pepper powder
    • salt to taste
    • 3 tablespoon oil
    • water

    Method:

    1. Take wheat flour in a pan, add semolina to it.
    2. Heat oil in a pan, we need it to mix the dough.
    3. Add ajwain, salt, pepper powder and oil to the flour. Mix it well. It should form a crumbly mixture.
    4. Add little water and mix to a stiff dough.
    5. Divide the dough into two parts, take a ball of the dough, dust with flour and roll into a circle which is nether too thick or thin.
    6. Make diagonal incisions on it. We need to make them in a rhombus shape.
    7. Heat oil, once the oil is put the cut pieces into it. Fry on a low flame. Keep stirring in between. Once they are cooked, remove them and repeat for the other ball of dough.
    8. Once they are cool, store in a air tight container.
    Namak Pare / Nimki
    Namak Pare / Nimki
    namak pare
    Evergreendishesdev

    Namak Pare

    Namak Pare is a crispy snack that can be relished anytime. It is ideal to carry as a travel food. 
    Prep Time 10 minutes
    Cook Time 20 minutes
    Total Time 30 minutes
    Course: dry snack
    Cuisine: Indian

    Ingredients
      

    • 2 cups wheat flour
    • 2 tablespoon semolina
    • 1 teaspoon ajwain
    • 1/2 teaspoon pepper powder
    • salt to taste
    • 3 tablespoon oil
    • water

    Method
     

    1. Take wheat flour in a wide bowl, add semolina to it.
    2. Heat oil in a pan, we need it to mix the dough.
    3. Add ajwain, salt, pepper powder and oil to the flour. Mix it well. It should form a crumbly mixture.
    4. Add little water and mix to a stiff dough.
    5. Divide the dough into two parts, take a ball of the dough, dust with flour and roll into a circle which is nether too thick or thin.
    6. Make diagonal incisions on it. We need to make them in a rhombus shape.
    7. Heat oil, once the oil is put the cut pieces into it. Fry on a low flame. Keep stirring in between. Once they are cooked, remove them and repeat for the other ball of dough.
    8. Once they are cool, store in a air tight container.

    This post  goes to #BM97 with the theme Kids Delight with the theme Travel Food  guest hosted by Renu. 

    If you have liked this post, do share it further.

    If you ever make this, do take a picture and tag me on @foodiejayashree on Instagram

    Let’s be connected Facebook, Twitter, Pinterest and Instagram


    BMLogo

    Check out the Blogging Marathon page for the other Blogging Marathoners doing this BM#97

    Subscribe to get all updates and a book of handy hints for free!

  • Dhaba style Kala Chana

    Dhaba style Kala Chana

    Dhaba style Kala Chana makes a tasty accompaniment with chapati or phulka. One of the tasty accompaniments, it makes a good snack also. It is ideal to pack in the lunch box too.

    It is vegan and gluten free.  (more…)

  • Strawberry Mojito / Mocktails

    Strawberry Mojito / Mocktails

    Jump to Recipe Print Recipe

    Strawberry Mojito is a refreshing, non-alcoholic drink ideal for any bright, sunny day.

    February is the shortest but the most awaited one. Everything seems to be beautiful during this season. It’s the season of love and beauty.

    Valentine’s Day is round the corner and this post is dedicated for this special V- Day. A few lines from my pen

    When life throws

    hundred reasons to hate

    I find one reason

    to hang on to you !

    Love is in the air

    and I can feel it

    with you around

    life is a bliss

    Valentine’s Day also called as Saint Valentine Day or Feast of saint Valentine is celebrated on February 14th every year. It is observed as a significant cultural, religious and commercial celebration of romance and romantic love in many regions around the world.

    strawberry mojito
    strawberry mojito

    Here is a refreshing drink for Valentine’s Day 🙂

    Strawberry Mojito is a refreshing non-alcoholic drink for any bright sunny day.

    Ingredients:

    • 6 strawberries
    • 500 ml water
    • 4 teaspoon sugar
    • 1 lemon
    • 10 mint leaves
    • a few mint leaves to garnish
    • ice cubes

    Method:

    1. Cut the lemon into wedges.
    2. Mull the lemon wedges and mint leaves.
    3. Put the sugar and water to it and keep it in the refrigerator for half an hour.
    4. Make a puree of the strawberries.
    5. Strain the juice.
    6. Add the strawberry pulp to it.
    7. Garnish with a few mint leaves and ice cubes. Serve immediately.
    strawberry mojito
    strawberry mojito


    strawberry mojito
    strawberry mojito
    strawberry mojito
    Evergreendishesdev

    Strawberry Mojito

    5 from 7 votes
    Strawberry Mojito is a refreshing non alcoholic drink.  
    Prep Time 10 minutes
    Resting time 32 minutes
    Servings: 4 people
    Course: Drinks
    Cuisine: American

    Ingredients
      

    • 6 strawberry
    • 500 ml water
    • 4 teaspoon sugar
    • 1 lemon
    • 10 mint leaves
    • a few mint leaves to garnish
    • ice cubes

    Method
     

    1. Cut the lemon into wedges.
    2. Mull the lemon wedges and mint leaves.
    3. Put the sugar and water to it, keep it in therefrigerator for half an hour.
    4. Make a puree of the strawberries.
    5. Stir  the juice and strain it. 
    6. Add strawberry puree to it.
    7. Garnish with ice cubes and a few mint leaves. 
    8. Serve immediately.

    Pin it for later:

    Strawberry Mojito
    Strawberry Mojito

    This post is part of the Valentine’s Day Theme at Healthy Wellthy Cuisines. Here are the other dishes to try by my co-bloggers


    If you ever try this recipe, take a picture and share it on my Facebook page or Instagram. I will be glad to see your creation.

    Have you checked my e-books?  Subscribe to get all updates in your inbox and a book of handy hints for free !


    Subscribe to get all updates in your inbox and a book of handy hints for free

    book of handyhints
    book of handyhints

    Let’s be connected : Facebook, Twitter, Pinterest and Instagram


  • Strawberry and Chia Souffle

    Strawberry and Chia Souffle

    Strawberry and Chia Souffle is a easy dessert to whip, a blend of strawberry and chia gives a unique and healthy twist to it.

    With Valentine’s Day round the corner, I realised that I need to post a couple of posts here. May the season of love and peace bring utmost happiness. To me Valentine’s Day encompasses all the close ones; hubby, family members and all my friends. Cherish the loved ones, create a bond that lasts for a life time.

    strawberry and chia souffle
    strawberry and chia souffle

    Strawberry is one of my favourite fruits or rather the one fruit that I get easily here in my region. Wish I could get mulberries and raspberry for a change, but alas! for now this is good. Presenting Strawberry and Chia Souffle. The benefits of chia seed are so many that I try to add it in some form in our diet. A few other desserts to try : Vanilla Pudding, No Bake Swiss Roll

    strawberry and chia souffle
    strawberry and chia souffle

    STRAWBERRY AND CHIA SOUFFLE

    Ingredients:

    • 200 ml fresh cream
    • 10 strawberries
    • 6 tsp sugar
    • 3 teaspoon agar agar
    • 150 ml water
    • 1 tablespoon chia seeds

    Method:

    1. Soak chia seeds in water.
    2. Wash strawberries and make a pulp with sugar.
    3. Put the cream in a bowl.
    4. Heat the water, put agar agar in it and soak it for five minutes.
    5. Boil the soaked agar agar on a low flame, keep stirring, it becomes a gelatinous substance, put it aside for sometime.
    6. Whisk the cream until peaks are formed, put the pulp to it. Add the soaked chia seeds to it.
    7. Once the agar agar is warm, gently fold in the soaked agar agar to it.
    8. Put it in the glass bowls and allow to set.

    Take a tip:

    1. Adding of chia seeds is optional, you can skip it and use only strawberry.


    strawberry and chia souffle
    Evergreendishesdev

    Strawberry and Chia Souffle

    Strawberry and Chia Souffle is a tasty and easy to make dessert for Valentine’s Day.
    Servings: 4 servings
    Course: Dessert, vegetarian
    Cuisine: international

    Ingredients
      

    • 200 ml fresh cream
    • 10 strawberry
    • 6 teaspoon sugar
    • 4 teaspoon agar agar
    • 150 ml warm water
    • 1 tablespoon chia seed

    Method
     

    1. Soak chia seed in water.
    2. Wash the strawberry and make a puree of it with sugar.
    3. Put the cream in a bowl. 
    4. Heat the water, put agar agar in it and soak it for five minutes.
    5. Boil the soaked agar agar on a low flame, keep stirring, it becomes a gelatinous substance, put it aside for sometime.
    6. Whisk the cream until peaks are formed, put the pulp to it. Add the soaked chia seeds to it.
    7. Once the agar agar is warm, gently fold in the soaked agar agar to it. 
    8. Put it in the glass bowls and allow to set. 

    If you have liked this post, do share it further. If you ever make this, do take a picture and share on Instagram or Facebook


    Pin  Strawberry Chia Souffle to a dessert board:

    strawberry and chia souffle
    strawberry and chia souffle

    Subscribe to get all updates in your inbox and a e-book for free !

    book of handyhints
    book of handyhints

    If you ever make any of these recipes, take a picture and share it by tagging @foodiejayashree on Instagram or @evergreendishes on Facebook. I will be glad to see and share your creation further.
    Check out my e-books on Amazon. Do not miss any post. Subscribe to get all updates and an e-book for free !

  • No Bake Swiss Roll

    No Bake Swiss Roll

    No bake Swiss Roll is a tasty and easy to make snack. It has the goodness of chocolate and coconut in it.

    The variety of biscuits that we get in market are so many, the simple ones are rarely asked by kids. They love to snack on cream filled ones or the heart shaped sugary one is the favourite. But, I love to give these biscuits a makeover. I have created some in the past and when the theme was decided as Recipes with Biscuits, I was excited.

    After thinking for sometime, I finally settled down to No Bake Swiss Rolls,  I had read this in a magazine a few days back. The making process is quite simple but needs some time to set, biscuits are powdered and mixed with some syrup and butter to a dough. The filling is of desiccated coconut and sugar which gave a nice flavour. It is then rolled and allowed to set in refrigerator.

    You can serve it as a sweet or dessert for get-together or children’s party.

    The other recipes with biscuits that I have created Biscuit Cake, Krackjack Sev Puri, Choco Marie, Instant Chocolates

    Let me take you to the recipe without much delay.

    no bake swiss roll
    no bake swiss roll


    No Bake Swiss Roll Recipe


    Ingredients:

    • 140 grams Parle G biscuits
    • 1 teaspoon instant coffee powder
    • 1 tablespoon chocolate syrup
    • 2 teaspoon milk
    • 2 tablespoon butter
    • 1 cup desiccated coconut
    • 1/2 cup castor sugar
    • 1/4 teaspoon cardamom powder

    Method:

    1. Grind the biscuits to a powder.
    2. Add coffee powder, chocolate syrup and half the butter to it. Mix it well. If needed use little milk to make a dough. Keep it aside.
    3. Mix the coconut, castor sugar, butter and cardamom powder together.
    4. Grease a parchment paper with a little butter.
    5. Take a ball of the dough, put it on the parchment paper and roll it.
    6. Put the coconut filling over it, spread it evenly.
    7. Now, slowly holding the parchment paper at one end, roll it into a cylindrical roll, put it in the parchment paper and refrigerate it for four to five hours.
    8. Later, remove the parchment paper and cut into discs.
    9. No bake swiss roll is ready to serve.
    ready to be refrigerated
    ready to be refrigerated
    no bake swiss roll log
    no bake swiss roll log
    refrigerated roll
    refrigerated roll
    no bake swiss roll
    no bake swiss roll
    no bake swiss roll
    no bake swiss roll


    no bake swiss roll

    No Bake Swiss Roll

    If cooking needs to be fun, you need to do something different. These swiss roll are easy to make and loved by children.
    Servings: 8 pieces
    Course: evening snacks
    Cuisine: international

    Ingredients
      

    • 140 grams Parle G biscuits
    • 1 teaspoon instant coffee powder
    • 1 tablespoon chocolate syrup
    • 2 teaspoon milk
    • 2 tablespoon butter
    • 1 cup desiccated coconut
    • 1/2 cup castor sugar
    • 1/4 teaspoon cardamom powder

    Method
     

    1. Grind the biscuits to a powder.
    2. Add coffee powder, chocolate syrup and half the butter to it. Mix it well. If needed use little milk to make a dough. Keep it aside.
    3. Mix the coconut, castor sugar, butter and cardamom powder together.
    4. Grease a parchment paper with a little butter.
    5. Take a ball of the dough, put it on the parchment paper and roll it. 
    6. Put the coconut filling over it, spread it evenly.
    7. Now, slowly holding the parchment paper at one end, roll it into a cylindrical roll, put it in the parchment paper and refrigerate it for four to five hours.
    8. Later, remove the parchment paper and cut into discs.
    9. No bake swiss roll is ready to serve.

    Notes

    • Marie biscuits may be used.
    • Butter should be at room temperature.
    • Let the coconut gratings be thin.

    If you have liked this post, leave a comment and pin it for later. All comments motivate me to write more.

    Pin No Bake Swiss Roll to kids snacks board:

    No Bake Swiss Roll
    No Bake Swiss Roll

    I am sending this post to our fortnightly group Healthy Wellthy Cuisine with the theme ” Recipes With Biscuits” Here are a few by other co-bloggers :

    If you ever recreate this roll, do take a picture and share it on instagram by tagging @foodiejayashree with the #evergreendishes I will share your work further!

    Let’s be connected: Facebook, Twitter, Instagram and Pinterest

    Subscribe to get all updates in your inbox and a  book of handy hints for free!


  • How to make Alu Palak / easy steps inside

    How to make Alu Palak / easy steps inside

    Alu Palak is a popular and tasty accompaniment from North Indian cuisine. Spinach puree is cooked with various spices makes a delectable side dish. Boiled potato cubes or fried potato pieces simmered in it gives added flavour. (more…)

  • Black eyed bean veggie

    Black eyed bean veggie

    Black eyed bean veggie makes a tasty accompaniment with chapati for lunch or dinner. It is loved by children and thus ideal to pack in the lunch box. 


    Today, I am sharing a stir fry with winter vegetable. Fresh black eyed pea are tasty and make a good accompaniment with chapati or jowar roti. This is a simple yet tasty accompaniment that children will surely love. 

    Black eyed pea is nutritious and makes a good accompaniment for children in the lunch box. You can use the frozen ones that are easily available.   As the fresh ones cook quickly, this can be done in under 30 minutes. 

    This post is part of BM#96 

    black eyed bean veggie
    black eyed bean veggie

    Ingredients:

    • 1 cup black eyed bean/ pea
    • water
    • 2 onion
    • 1 tomato
    • 1 tablespoon oil
    • 1/2 teaspoon cumin
    • 1/4 teaspoon asafoetida
    • 1/4 teaspoon turmeric powder
    • 2 green chilly
    • 1/2 inch ginger
    • coriander
    • salt

    Method:

    Cook the black eyed bean in a pressure cooker for one whistle. Take oil in a pan, add cumin, as it splutters put turmeric powder, asafoetida, green chilly , onion and ginger. Let cook, then add tomato and saute it. Put salt to it. Finally, add the cooked beans to it and boil for three minutes. Garnish with fresh coriander.

    Tupperware is widely used everywhere. This lunch box is ideal for school children as it is user friendly

    Here is a trendy lunch box from Tupperware for office use. It has four containers, the lids are tight, microwave safe and can be cleaned easily. 

    Evergreendishesdev

    Black eyed pea stir fry

    Black eyed pea stir fry makes a tasty accompaniment with chapati or jowar roti. Pack it in the lunch box to give a healthy meal for children. 
    Prep Time 10 minutes
    Cook Time 15 minutes
    Total Time 25 minutes
    Course: accompaniments, lunch box
    Cuisine: South Indian

    Ingredients
      

    • 1 cup black eyed pea
    • water
    • 2 onion
    • 1 tomato
    • 1 tablespoon oil
    • 1/2 teaspoon cumin
    • 1/4 teaspoon asafoetida
    • 1/4 teaspoon turmeric powder
    • 2 green chilly
    • 1/2 inch ginger
    • coriander
    • salt

    Method
     

    1. Wash, add water to the black eyed bean and cook in pressure cooker for one whistle. 
    2. Cut the onion and tomato into small pieces. Grate the ginger and keep it aside. 
    3. Take oil in a pan, add cumin as it splutters put turmeric powder, asafoetida, green chilly, ginger and onion. Let cook.
    4. Add tomato and saute it. Put salt to it. 
    5. Finally, add cooked  beans to it and boil for three minutes. 
    6. Garnish with fresh coriander.

    Notes

    • Frozen black eyed peas can be used.
    • When fresh ones are available, I like to use them.
    • Remove the pea from the pod and store them in the refrigerator, it will be handy to use. 


    black eyed bean veggie
    black eyed bean veggie

    If you have liked this post, leave a comment and pin it for later. 

    black eyed bean stir fry
    black eyed bean stir fry

    I am sending this post to the Kids Event hosted by Bhawana under the theme, “Lunch Box Ideas in 30 minutes”


    BMLogo Check out the Blogging Marathon page for the other Blogging Marathoners doing this BM#96

    Follow evergreendishes on Facebook, Twitter, Instagram and Pinterest.

    If you ever recreate this dish, do take a picture and share it on Instagram by tagging @foodiejayashree