Tag: healthy cooking

  • Rawa Kesari | Sheera | Prasad recipe

    Rawa Kesari | Sheera | Prasad recipe

    Jump to RecipePrint Recipe

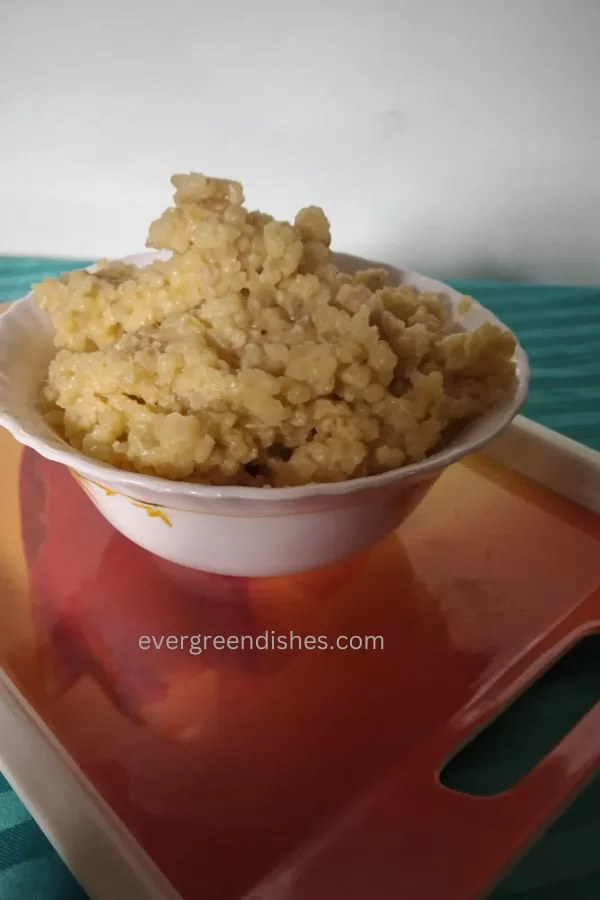
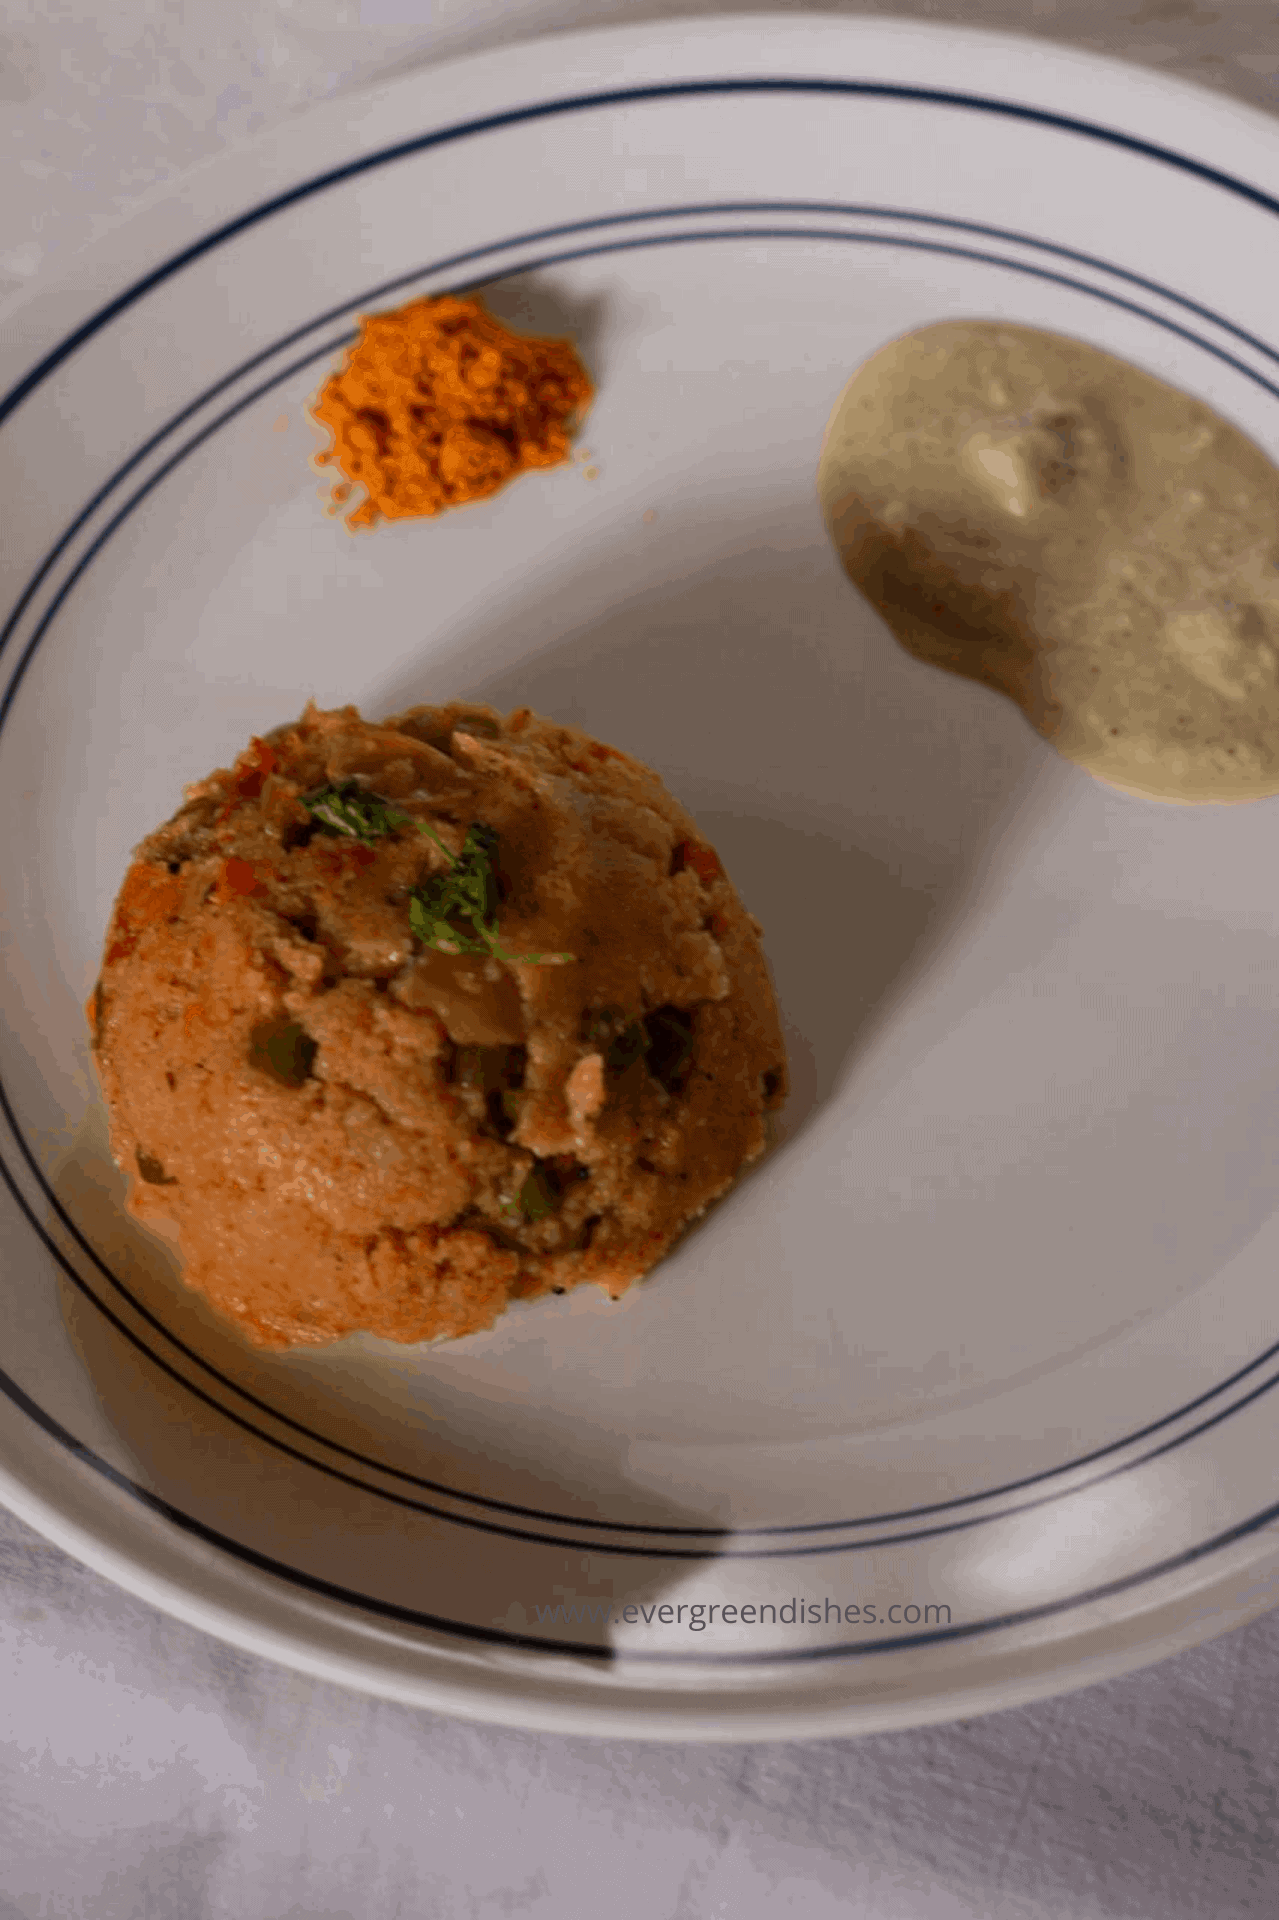
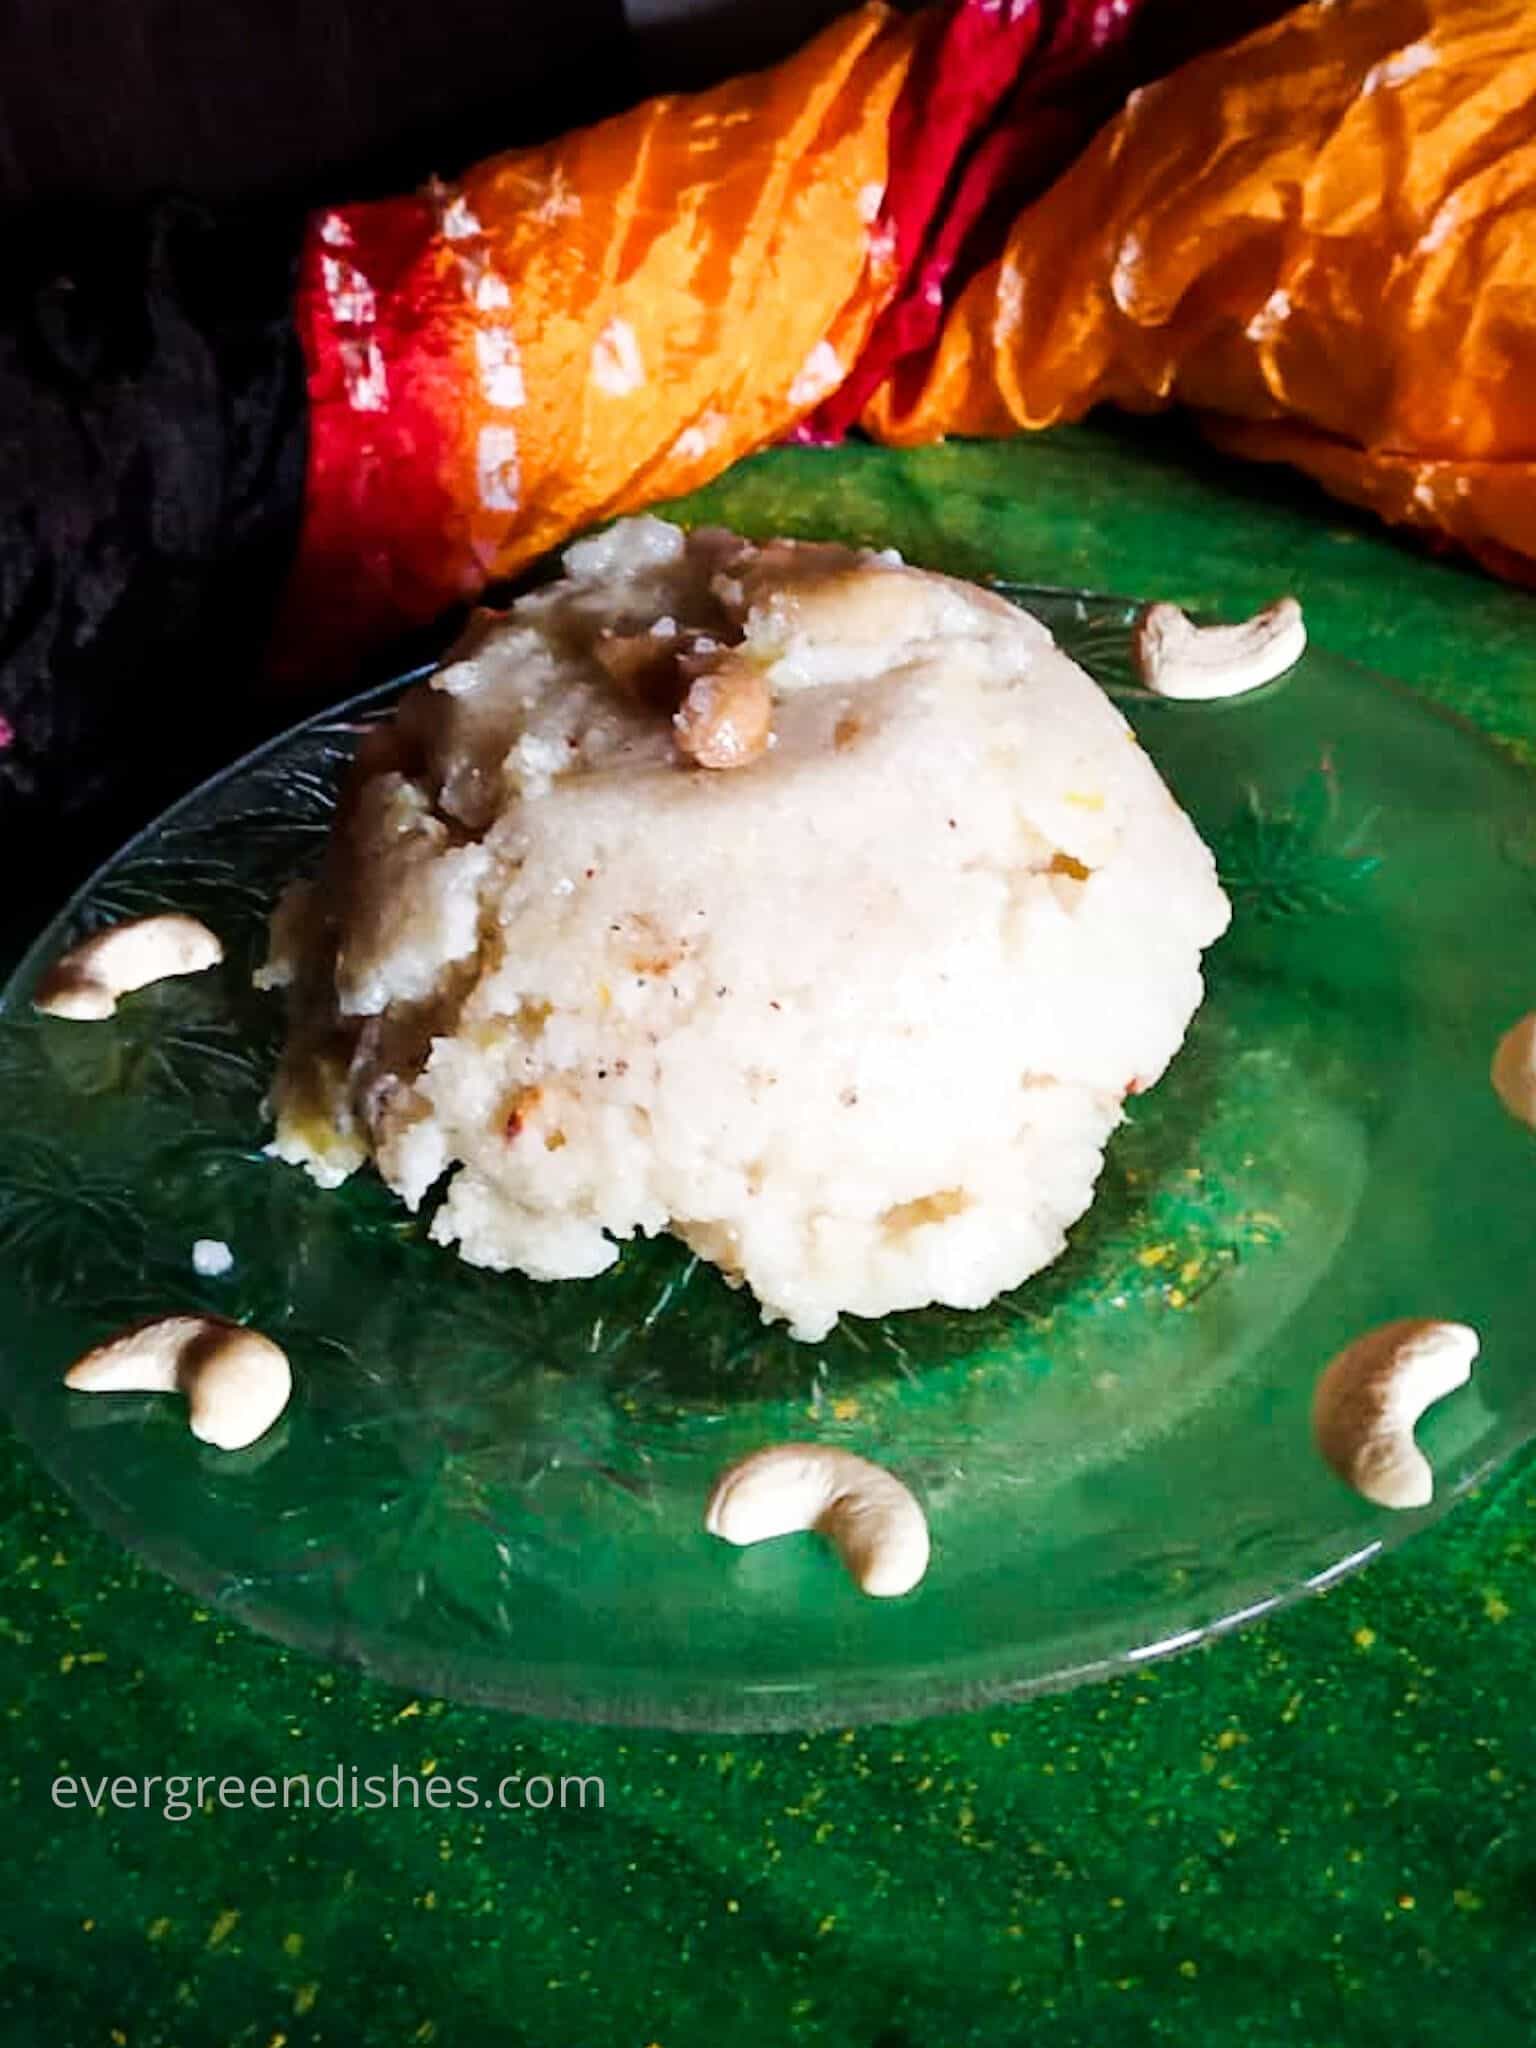
    Rawa Kesari is quite often prepared in most households. It is called by different names as Rawa Kesari, Sheera or as Sooji ka halwa in different parts of the country. In South India, Sheera is made as offering during the Satyanarayan Pooja. 

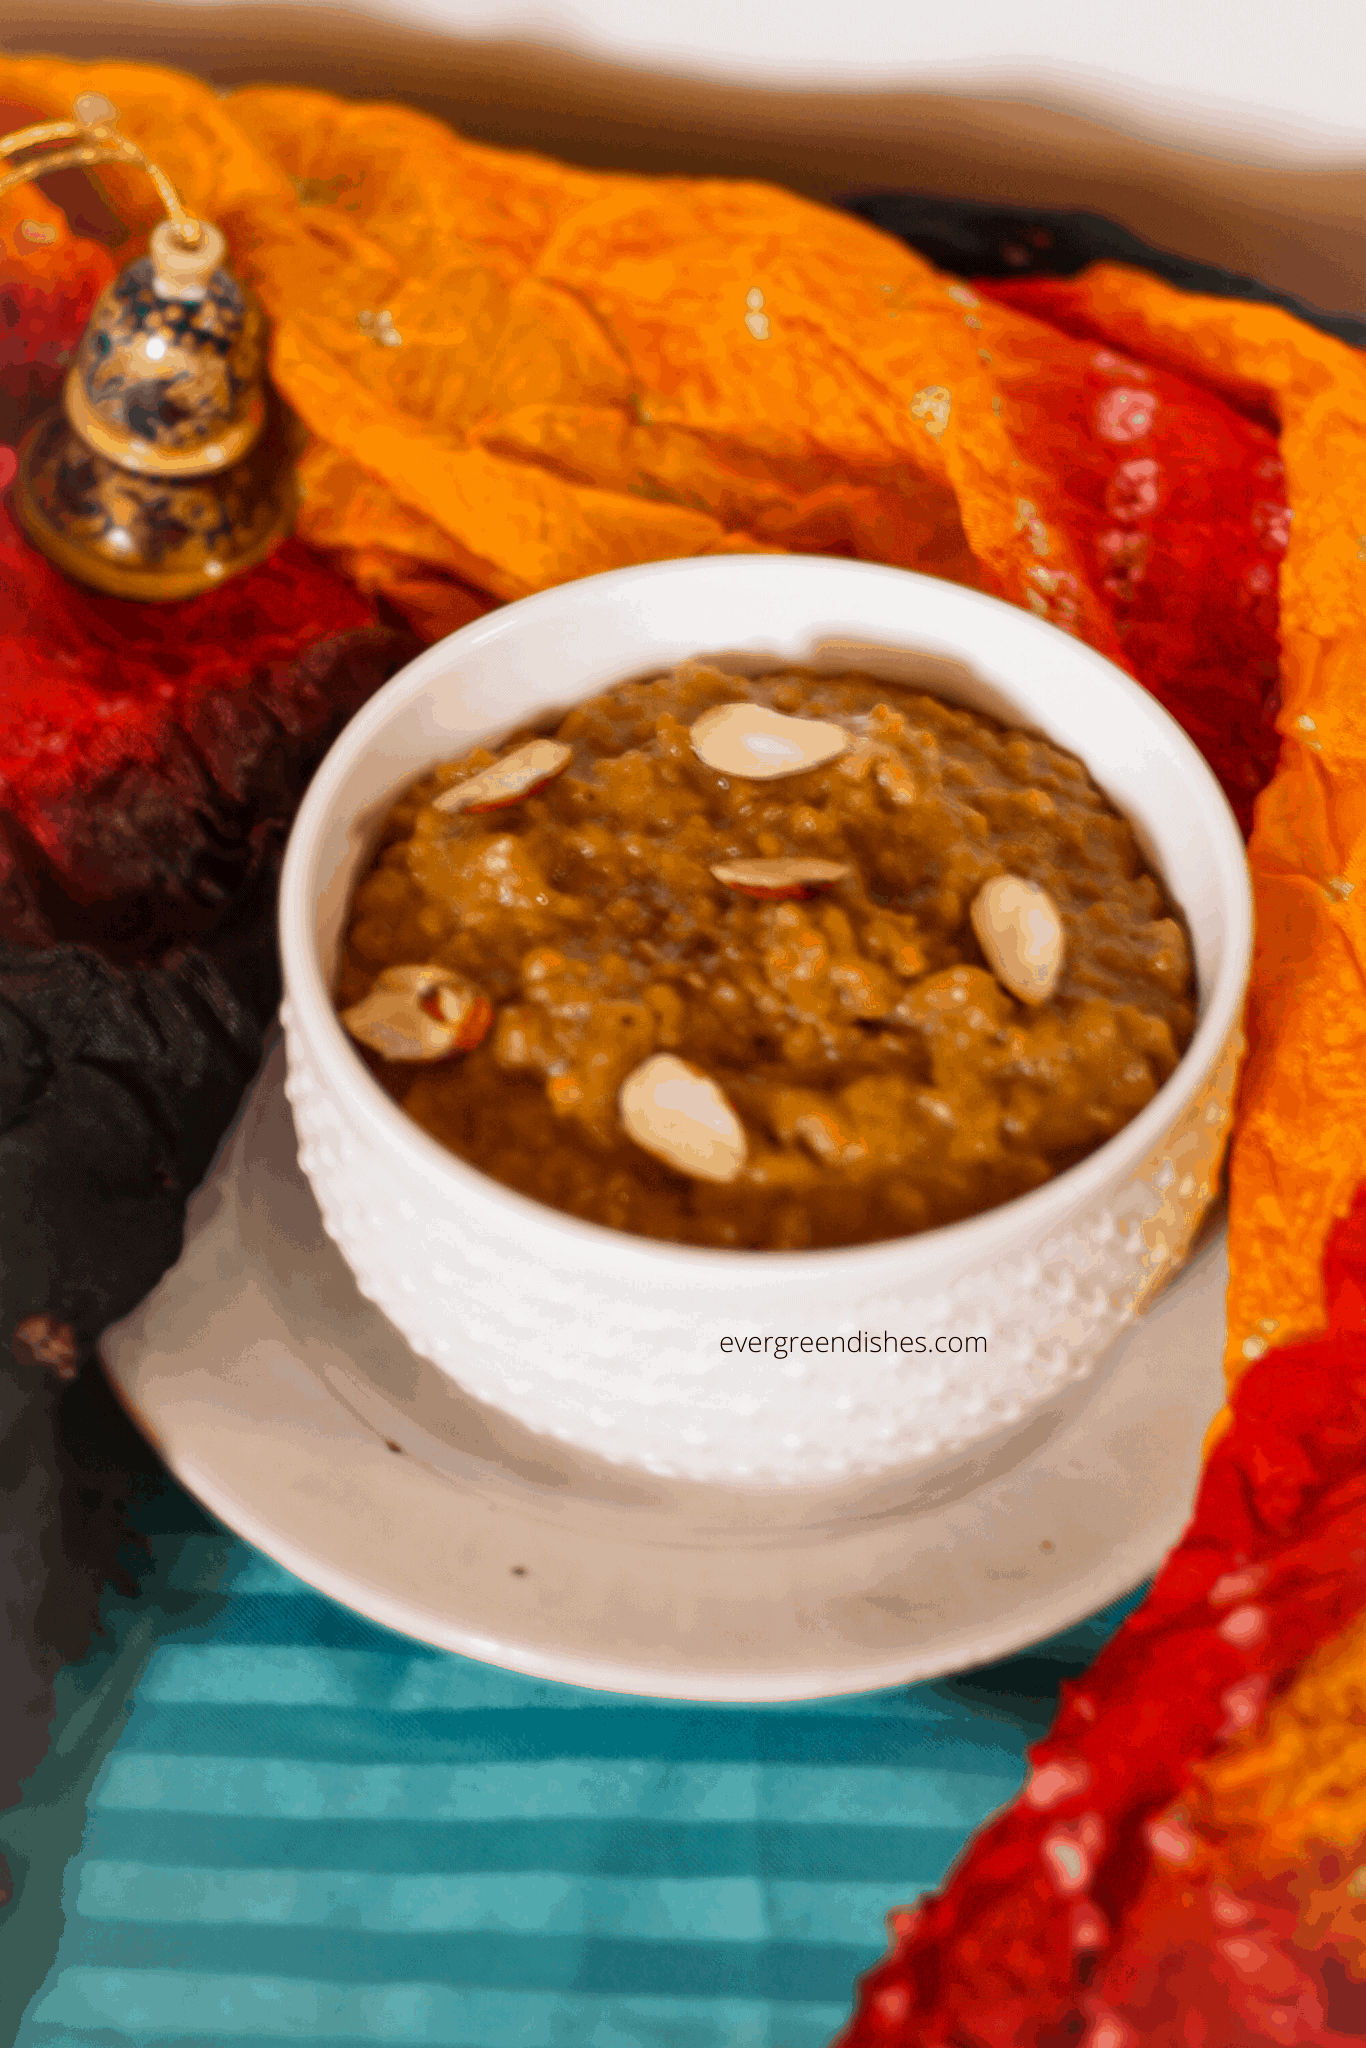
    The ease of making it and the different flavours which one can impart to it makes it a favourite of every household. It is ideal to pair with breakfast, lunch or dinner. In olden times,  kesari with jaggery was often made.  Earlier, I have shared mango kesari.

    The method of making the sheera as offering is different from the usual one. It is tasty and different from the usual one. Today, I am sharing the recipe of the same.
    rawa kesari/ sheera/ satyanarayan prasad


    Let us get to the recipe of Rawa Kesari / Sheera

    Ingredients :


    1 cup semolina ( measurement used :1 cup=200ml)
    2 teaspoon + 2 tablespoon ghee
    8 cashew
    1 cup water
    2 cup milk
    1 banana
    1 cup sugar
    a few strands of saffron
    1/4 teaspoon cardamom powder


    Method:

    • Take a thick bottom pan, add two teaspoon of ghee and roast the semolina to a golden colour along with cashew pieces. Be careful not to burn it.
    • Put the saffron in a little milk and set it aside.Cut thee bananana into pieces.
    • In another pan, add milk and water, put it on a low flame. Add sugar and ghee to it. Put banana pieces to it. Give a stir, once it boils, slowly add the semolina to it. Keep stirring with a ladle, no lumps should be formed. Let cook for sometime..
    • Add saffron soaked in milk  and cardamom powder to it. Give a stir. Rawa Kesari or Sheera is ready to offer to the Lord.

    Take a tip:

    • You can add a little extra ghee to it. 
    • Almonds and raisins may be used. 
    • You can roast the nuts separately in the beginning. 
    rawa kesari/ sheera/ satyanarayan prasad
    Evergreendishesdev

    Rawa Kesari / Sheera / Satyanarayan Prasad

    Rawa Kesari is a traditional sweet dish from Indian sub-continent. This version is also prepared during Satyanarayan Pooja.
    Prep Time 5 minutes
    Cook Time 15 minutes
    Total Time 20 minutes
    Servings: 6 people
    Course: Breakfast, dinner, lunch
    Cuisine: Indian, South Indian

    Ingredients
      

    • 1 cup semolina measurement used :1 cup=200ml
    • 2 teaspoon + 2 tablespoon ghee
    • 8 cashew
    • 1 cup water
    • 2 cup milk
    • 1 banana
    • 1 cup sugar
    • a few strands of saffron
    • 1/4 teaspoon cardamom powder

    Method
     

    1. Take a thick bottom pan, add two teaspoon of ghee and roast the semolina to a golden colour along with cashew pieces. Be careful not to burn it.
    2. Put the saffron in a little milk and set it aside.Cut thee bananana into pieces.
    3. In another pan, add milk and water, put it on a low flame. Add sugar and ghee to it. Put banana pieces to it. Give a stir, once it boils, slowly add the semolina to it. Keep stirring with a ladle, no lumps should be formed. Let cook for sometime..
    4. Add saffron soaked in milk  and cardamom powder to it. Give a stir. Rawa Kesari or Sheera is ready to offer to the Lord.

    Notes

    You can add a little extra ghee to it. 
    Almonds and raisins may be used. 
    You can roast the nuts separately in the beginning. 

    Pin it for later:

    Rawa kesari | Sheera | Prasad recipe is an offering made to the Lord during Satyanarayan Puja. It is tasty dish. Give a try to this version of prasad recipe.
    Rawa Kesari / Sheera

    If you ever make this Rawa Kesari / Sheera recipe, take a picture and tag  @foodiejayashree on Instagram or @evergreendishes on Facebook or Twitter. I will be happy to see your creation and share them further. Subscribe to get all updates and book of handyhints for free.

  • Dalia Payasam | Cracked Wheat Kheer

    Dalia Payasam | Cracked Wheat Kheer

    Jump to Recipe

    Dalia payasam is a traditional sweet dish from Karnataka. It is rich in nutrients and a good food for people of all ages.

    What is Dalia ?

    Dalia is broken wheat grain, it is made from the whole grain. It is used in cooking different kind of dishes as upma, pulav, payasam and porridge.

    What are the other names by which it is known?

    Daliya is commonly known as broken wheat or cracked wheat. In Indian languages it is known as godhuma rava or samba rava.

    Is Dalia and Bulgur, one and same ?

    Dalia is also known as cracked wheat. It is made by milling raw wheat berries. Bulgur wheat is different from dalia. It is made from parboiled wheat berries. dried and then broken into pieces.

    Is dalia healthy ?

    Yes, dalia is a good source of nutrition. It can be used in various ways.

    What are the other kheer/ payasam recipes that you prepare ?

    Kheer/ payasam is one of the essentials during festivities. Rice kheer, moong dal payasam are the sweet dishes that children like and usually prepared. Custard apple kheer is utterly delicious. Komala Payasa is a sweet delicacy from West Bengal.

    dalia payasam

    Dalia Payasam / Broken wheat kheer

    Ingredients:

    • 2 teaspoon ghee
    • 6 almond slivered
    • 1 cup dalia           Measurement: 1 cup= 150 ml
    • 3 cups milk
    • 2 cup water
    • 1 cup grated jaggery
    • 1/2 teaspoon cardamom powder

    Method:

    1. In a small pressure cooker and ghee and roast the almond pieces. Put them aside.
    2. In the same pan, add dalia and roast until it slightly changes colour and gives a good aroma.
    3. Put two glasses of milk and water to it, give a stir, close the lid and cook for one whistle.
    4. Once the pressure releases by itself, remove the lid and mix it. Add jaggery to it and allow to cook. Adjust the consistency by adding the remaining milk and some water if needed.
    5. Finally, add cardamom powder, keep it aside. Garnish with roasted cashew pieces.
    6. Dalia payasam is ready to serve.

    Take a tip:

    1. Only milk may be used.
    2. Cashew nut and raisin can be used.
    3. A few strands of saffron enhances the taste.
    4. Use more quantity of jaggery if you want more sweetness.

    Print Recipe

    Dalia Payasam
    Evergreendishesdev

    Dalia Payasam

    Dalia Payasam is tasty and apt for any festive ocassion. It is healthy and ideal to use on a regular basis.
    Prep Time 10 minutes
    Cook Time 20 minutes
    Total Time 30 minutes
    Servings: 4 people
    Course: traditional recipes, traditional sweets
    Cuisine: Indian

    Ingredients
      

    • 2 teaspoon ghee
    • 6 almond cut into pieces
    • 1 cup dalia
    • 3 cups milk
    • 2 cup water
    • 1 cup grated jaggery
    • 1/2 teaspoon cardamom powder

    Equipment

    • 1 pressure cooker
    • 1 ladle
    • 2 bowls

    Method
     

    1. In a small pressure cooker and ghee and roast the almond pieces. Put them aside.
    2. In the same pan, add dalia and roast until it slightly changes colour and gives a good aroma.
    3. Put two glasses of milk and water to it, give a stir, close the lid and cook for one whistle.
    4. Once the pressure releases by itself, remove the lid and mix it. Add jaggery to it and allow to cook. Adjust the consistency by adding the remaining milk and some water if needed.
    5. Finally, add cardamom powder, keep it aside. Garnish with roasted cashew pieces.
    6. Dalia payasam is ready to serve.

    Notes

    Only milk may be used.
    Cashew nut and raisin can be used.
    A few strands of saffron enhances the taste. 

    Pin it for later:

    dalia payasam
    dalia payasam

    If you ever make this recipe, take a picture and share it by tagging @foodiejayashree on Instagram or @evergreendishes on Facebook. I will be glad to see and share your creation further.
    Check out my e-books on Amazon. Do not miss any post, subscribe to get all updates and an e-book for free !


  • Mysore Rasam

    Mysore Rasam

    The season is mild rainy days and chilly nights, a steaming hot food with a few pakodas is ideal, isn’t it? Today, I have a rasam recipe for you.

    What is rasam?

    Rasam is a lentil based, thin soup like accompaniment served with hot steamed rice. It is popular in South India mainly in the states of Karnataka, Tamilnadu and Andhra Pradesh.

    What are the different variety of rasam that one can make?

    There are many variety of rasam that one can relish. Pepper rasam, tomato rasam, saaru, neer saaru, lemon rasam, andhra rasam, mysore rasam are a few variety of rasam that one can prepare.

    What is the difference between Rasam and Sambar?

    Rasam and Sambar are siblings from South India. Rasam is thinner in consistency and usually served with steamed rice. Sambar is slightly thicker than rasam and has different vegetables in it, onion may or may not be added. It is not only served with rice but also idly, dosa and vada.

    What is Mysore Rasam?

    Mysore Rasam as the name suggests, hails from the sate of Karnataka. It is also known as Arachuvitta Rasam. It is a rasam made using fresh spice mix and coconut. It is flavoursome. Let’s get to the recipe of it.

    Ingredients:

    • 1 cup tur dal
    • 2 tomato
    • 1/2 teaspoon mustard
    • 1/4 teaspoon turmeric powder
    • a small lemon size ball of tamarind
    • 1 teaspoon ghee

    For the rasam mix:

    • 1 tablespoon bengal gram
    • 1 tablespoon coriander seed
    • 1/2 teaspoon cumin
    • 1/2 teaspoon pepper
    • 1/4 teaspoon methi
    • 5 dry red chilli
    • 2 tablespoon fresh coconut

    For the seasoning:

    • 2 teaspoon ghee
    • 1/2 teaspoon mustard seed
    • 1/4 teaspoon asafoetida
    • 1/4 teaspoon turmeric powder
    • 1/4 teaspoon cumin
    • 1 red chilly
    • curry leaves

    Method:

    1. Wash the tur dal, add two cups of water and cook it in pressure cooker for three whistles. The dal should be smoothly cooked.
    2. Soak the tamarind in water.
    3. Make tomato puree, keep it aside.
    4. Take a pan, add a teaspoon of ghee and roast all the ingredients except coconut under “For the rasam mix” for two to three minutes. Put the coconut in the end and roast for another minute. When it is completely cool, grind them together.
    5. Extract the tamarind pulp. Mix it with tomato puree, put it to boil, the raw smell of the tomatoes should go.
    6. Put the ground rasam mix, jaggery, and salt into it. Mix the cooked dal well and put it along with other ingredients. Add three cups of water.
    7. Make seasoning, heat ghee in a pan. Add mustard seeds, as it splutters, put cumin, asafoetida, turmeric powder, red chilly and curry leaves. Pour it over the rasam
    8. Once the rasam boils, it is done.
    9. Serve hot with rice.
    Mysore Rasam

    Mysore Rasam

    Mysore Rasam is spicy- tangy lentil based dish served with hot steamed rice.
    Prep Time 20 minutes
    Cook Time 20 minutes
    Total Time 40 minutes
    Course: lunch ideas, Main Course
    Cuisine: karnataka

    Ingredients
      

    • 1 cup tur dal
    • 2 tomato
    • 1/4 teaspoon turmeric powder
    • small lemon size ball tamarind
    For Rasam Mix
    • 1 teaspoon ghee
    • 1 tablespoon bengal gram
    • 1 tablespoon coriander seed
    • 1/2 teaspoon cumin
    • 1/2 teaspoon pepper
    • 1/4 teaspoon fenugreek
    • 5 red chilli
    • 1 sprig curry leaves
    • 2 tablespoon fresh coconut
    For the seasoning
    • 2 teaspoon ghee
    • 1/2 teaspoon mustard seed
    • 1/4 teaspoon asafoetida
    • 1/8 teaspoon turmeric powder
    • 1/4 teaspoon cumin
    • 1 red chilli
    • 1 sprig curry leaf

    Method
     

    1. Wash the tur dal, add two cups of water and cook it in pressure cooker for three whistles. The dal should be smoothly cooked.
    2. Soak the tamarind in water.Make tomato puree, keep it aside.
    3. Take a pan, add a teaspoon of ghee and roast all the ingredients except coconut under "For the rasam mix" for two to three minutes. Put the coconut in the end and roast for another minute. When it is completely cool, grind them together.
    4. Extract the tamarind pulp. Mix it with tomato puree, put it to boil, the raw smell of the tomatoes should go.Put the ground rasam mix, jaggery, and salt into it. Mix the cooked dal well and put it along with other ingredients. Add three cups of water.
    5. Make seasoning, heat ghee in a pan. Add mustard seeds, as it splutters, put cumin, asafoetida, turmeric powder, red chilly and curry leaves. Pour it over the rasam. Once the rasam boils, it is done.Serve hot with rice.

    Pin it for later:

    Mysore Rasam

    I am sharing this with the Facebook group, “Food for Feast” where like minded bloggers decide a theme to blog every month. The theme for September was “Satvik Recipe”. Satvik food is that food that can be offered to God and does not contain onion and garlic in it.

    I am also sending this post MLLA 131 hosted by Sasmita of First Timer Cook . It is a monthly event started by Susan and now hosted by Lisa of Lisa’s Kitchen.

    If you have liked this post, do leave a comment below. If you ever make it, do take a picture and post it on Facebook by tagging @evergreendishes or on Instagram by tagging @foodiejayashree.

    Subscribe to get a book of handyhints for free !


  • Cabbage stir fry recipe | cabbage palya

    Cabbage stir fry recipe | cabbage palya

    Cabbage stir fry/ palya  is a simple yet flavourful accompaniment. It tastes good with rice and sambar or rasam.  It can also be served with chapati or roti.

    Cabbage is one of the veggies that I cook on a regular basis. It is flavourful and pairs well with  both rice and  chapati. It can be easily made with a few ingredients. The cabbage stir fry is also called as thoran, palya  and poriyal.

    Let’s know a bit of cabbage:

    It is one of the widely grown vegetables in the world. It is a low calorie, fiber rich leafy vegetable. It is the store house of phyto chemicals.

    Variety:

    Different varieties of cabbage are cultivated such as green, purple, red, savoy, bok-choy and napha cabbage.

    Benefits of using cabbage:

    Cabbage  helps in preventing cancer. It helps in reducing bad cholestrol. It aids in weight loss. It can be eaten both raw and cooked. It is a rich source of fibre. It helps prevent constipation. It boosts mental functions.

    Culinary usage:

    It can be used both in raw and cooked form. It is versatile vegetable which eases our cooking. From salads to stir fry, it is one of the veggies that most people consume. It is one of the key ingredients in Indo- Chinese cooking. Cabbage rice is easy to prepare and  tastes awesome. One can make fried snacks and serve with tea.

    Cabbage stir fry| poriyal |thoran| palya

    Ingredients:

    • 1 medium cabbage
    • 1 tablespoon oil
    • 1/2 teaspoon mustard seeds
    • 1/4 teaspoon turmeric powder
    • 1/4 teaspoon asafoetida
    • 1 teaspoon bengal gram
    • 1 teaspoon urad dal
    • 4 green chilly
    • a few curry leaves
    • salt to taste
    • 1 teaspoon milk
    • coriander for garnishing
    • 1/2 bowl fresh coconut

    Method:

    1. Cut the cabbage as finely as you can. The taste of the stir fry to an extent depends on how we cut it. Put it in water, rinse and put in a colander.
    2. Take oil in a pan, add mustard seeds, as it crackles, put bengal gram and urad dal to it. Let it get a golden colour. Add turmeric powder, asafoetida and green chilly to it.
    3. Add the cabbage to it. Put salt and milk. Milk helps in avoiding the smell cabbage emits at times. Since, no onion is used here that can elevate the taste, I add a little milk. Mix it, close a lid and let cook on slow flame.
    4. Once it tender and cooked, remove the lid and let cook for sometime. Sometimes, cabbage tends to get watery.
    5. Add coconut if using and garnish with fresh coriander.

    Take a tip:

    • Adding of coconut enhances the flavour and it is a typical South Indian style of cooking. I have not added here
    • One can use green peas along with cabbage. Add a handful of it along with cabbage and let it cook.
    • Do cut cabbage  as finely as possible.

    cabbage stir fry
    cabbage stir fry

    About the event:

    Cabbage stir fry recipe was posted in 2018, four years later, I have added one more picture to it.  I have also put the pinterest pic and made a few seo related changes.Sending it to Foodies_Redoing Old Post 76, where we edit out old posts with better pictures, text or both.

    cabbage stir fry | thoran | palya
    Evergreendishesdev

    Cabbage Stir Fry

    Cabbage Stir Fry is a simple and tasty accompaniment for any meal. It tastes good with rice as well as chapati.
    Prep Time 10 minutes
    Cook Time 15 minutes
    Total Time 25 minutes
    Course: lunch box, lunch ideas, Side Dish
    Cuisine: Indian, South Indian

    Ingredients
      

    • 1 medium size cabbage
    • 1 tablespoon oil
    • 1/2 teaspoon mustard seeds
    • 1/4 teaspoon turmeric powder
    • 1/4 teaspoon asafoetida
    • 1 teaspoon bengal gram
    • 1 teaspoon urad dal
    • 4 green chilly cut into pieces
    • few curry leaves
    • coriander for garnishing
    • 1/2 cup fresh coconut optional
    • 1 teaspoon milk
    • salt to taste

    Method
     

    1. Shred the cabbage as finely as you can. Put it in water and keep it aside. Put in a colander.
    2. Make seasoning in a pan, add oil, put the mustard seeds, as it splutters, add bengal and urad dal. Let it turn golden, add turmeric powder, asafoetida, green chilly and curry leaves.
    3. Put the shredded cabbage into it, add salt and milk. Mix and cover with a lid. Let cook on a slow flame.
    4. Once it is cooked, add coconut and heat it.
    5. Garnish with fresh coriander.

    Notes

    • Peas may be added to it.
    • Coconut may be avoided.
    • Adding of milk helps to remove the odour of cabbage that it has.

    cabbage stir fry
    cabbage stir fry

    If you ever make Cabbage Stir Fry recipe, take a picture and tag @foodiejayashree on Instagram or @evergreendishes on Facebook. Subscribe to get all updates in your inbox and an e-book for free!

  • Palak Corn | Spinach Corn Sabzi

    Palak Corn | Spinach Corn Sabzi

    Palak Corn  is a delicious spinach side dish with corn kernels in it. It pairs well with roti or paratha.

    Those who read me regularly know that I love using spinach in my daily cooking. It is versatile, can be used in a wide range of dishes and most of all, everyone likes it at home. Spinach makes a good accompaniment with any Indian flat bread. Corn Palak is one such sabzi that I make sometimes.

    Nutrients in Spinach:

    Spinach is rich in niacin, zinc, protein, fibre, vitamin A, C,E, K, thiamin, vitamin B6, folate, calcium, iron, magnesium, phosporous, potassium, copper and manganese. It is low in fat and cholestrol.  With so much of nutrients and we being vegetarians, I find it good  to use this green leaf often.


    The other dishes of Spinach on blog are

    Over to the recipe of Palak Corn | Spinach Corn Sabzi

    palak corn

    Ingredients:

    • 2 clusters Spinach
    • 1 bowl corn kernels
    To make a paste:
    • 1 onion
    • 1 tomato
    • 2 green chilly
    • 1 inch ginger
    • 8 cloves garlic
    • 8 cashews
    • 1 tablespoon melon seeds
    Other ingredients:
    • 2 teaspoon oil
    • 1/4 cup fresh cream ( I used homemade)
    • 1/4 teaspoon turmeric powder
    • 1/2 teaspoon cumin
    • 1/4 teaspoon garam masala powder
    • 1/2 teaspoon chilly powder

    Method:

    1. Remove the stalk of spinach leaves, coarsely cut, wash and blanch it. Once it is cool, make a paste of it.
    2. Soak cashew and melon seeds for sometime.
    3. Grind ingredients under “to make a paste”
    4. Thaw the frozen corn and boil with a little salt.
    5. Heat oil in a pan, add cumin and put the paste into it. Put a little turmeric powder to it. Saute for sometime. Add garam masala and the chilly powder.
    6. Once the raw smell is gone, add the spinach puree to it.
    7. Put salt and corn kernels to it.
    8. Let boil for sometime.
    9. Blend the cream well and mix it. Corn Palak is ready to serve.
    10. Serve hot with phulka, roti or naan.

    Take a tip: If you are using fresh corn, cook them in the pressure cooker.

    Subscribe to get a book of handyhints for free!

    Follow evergreendishes on other social media

    palak corn
    Evergreendishesdev

    Palak Corn

    Palak Corn makes a good dish with any Indian flat bread. It is tasty and lip smacking good. 
    Prep Time 10 minutes
    Cook Time 15 minutes
    Total Time 25 minutes
    Servings: 4 people
    Course: accompaniment, kids favourite, lunch ideas, Main Course, sabzi
    Cuisine: north indian

    Ingredients
      

    • 2 clusters spinach
    • 1 cup corn kernels
    To be made to a paste
    • 1 onion
    • 1 tomato
    • 1 inch ginger
    • 8 cloves garlic
    • 2 green chilly
    • 6 cashew
    • 1 tbsp melon seed
    Other ingredients
    • 2 teaspoon oil
    • 1/4 cup cream
    • 1/4 tsp garam masala
    • 1/2 tsp chilly powder
    • 1/2 tsp cumin
    • salt

    Method
     

    1. Remove the stalk of the spinach leaves, wash and blanch them. When cool grind to a puree.
    2. Thaw the corn kernels. If using, fresh corn, boil them for sometime.
    3. Grind the ingredients under “To  be made to a paste”
    4. Heat oil in a pan , add cumin, as it splutters, put the paste to it. Saute for sometime until the raw smell goes. Add turmeric powder, garam masala, chilly powder and salt to it. Mix well and let the flavours imbibe.
    5. Put the corn kernels to it. Let boil for a minute. Add the cream to it, mix and serve with any indian flat bread. 

    Notes

    • I have used frozen corn. If using fresh corn, cook them in the pressure cooker with a little salt.
    • Soak cashew and melon seeds in water for sometime, it eases grinding.

    A few spinach recipes from my co-bloggers:

    Pin it for later :

    palak corn
    Palak corn


    Subscribe  to get a book of handy hints for free !

    book of handyhints


  • Brown rice with beet and sprouts

    My advent with brown rice landed me to this recipe. The first time I made it I was sceptical and knew it was a disaster, but alas ! it was awesome and since then have made it couple of times. Brown rice with beet and sprouts, tasty one pot meal , serve it with any yoghurt based salad.

    brown rice with beet and sprouts
    brown rice with beet and sprouts

    The benefits of beetroot can be read here.


    To make sprouts : Soak the green moong for eight hours. Drain them into a colander. After some time, tie them in a thin muslin cloth and keep it in a warm place overnight.

    Sprouts are packed with nutrition. You can use them in various ways. Toss them into a salad to make a tasty snack or make a stir fry.

    And now for today’s post,Brown rice with beet and sprouts, do check the recipe below.

    Other brown rice recipes :

    Multigrain Khichdi , Brown rice biryani


    Brown rice with beet and sprouts
    Prep time:
    Cook time:
    Total time:
    Serves: 4
    Ingredients
    • Brown rice 150 grams
    • Beet root 1
    • Moong sprouts 1 cup
    • Onion 1
    • Ginger garlic paste 1tsp
    • Garam masala powder ½ tsp
    • Chilly powder 1tsp
    • Salt to taste
    • Oil 1tbsp
    • Water 500 ml
    Instructions
    1. Soak the brown rice in water for an hour.
    2. Peel the beet and make a paste of it.
    3. Take oil in a pressure cooker and add the onions. Saute for sometime. Add ginger garlic paste and continue to saute. Add the beet paste and saute. Throw in the sprouts and mix well. Drain the water and add the rice, stir for some time. Add the garam masala powder and chilly powder to it. Gently mix, add three cups of water and salt to it. Give a stir, close the lid and pressure cook to one whistle. Serve hot with cucumber and onion salad.


    Ingredients ;

    Brown rice 150 grams
    Beet root 1
    Moong sprouts 1 cup
    Onion 1
    Ginger garlic paste 1tsp
    Garam masala powder ½ tsp
    Chilly powder 1tsp
    Salt to taste
    Oil 1tbsp
    Water 500 ml

    Method:

    Soak the brown rice in water for an hour.
    Peel the beet and make a paste of it.
    Take oil in a pressure cooker and add the onions. Saute for sometime. Add ginger garlic paste and continue to saute. Add the beet paste and saute. Throw in the sprouts and mix well. Drain the water and add the rice, stir for some time. Add the garam masala powder and chilly powder to it. Gently mix, add three cups of water and salt to it. Give a stir, close the lid and pressure cook to one whistle. Serve hot with cucumber and onion salad.

    Subscribe to get a book of handyhints of free !

    [social_share style=”bar” align=”horizontal” heading_align=”inline” facebook=”1″ twitter=”1″ google_plus=”1″ linkedin=”1″ pinterest=”1″ /]

  • Ragi idli /Finger millet idli

    Ragi idli /Finger millet idli

    Ragi Idli / Finger Millet Idli is a healthy twist to the usual variety that is made. It is ideal for breakfast. This is a fermented idli.

    Everyday, it is a dilemma to choose a menu that is liked by all at home. More so, in the days when we are thinking of healthy eating. As we ring into the new year, I plan to bring in more healthy  recipes for you. .Today on the eve of new year, I bring to you all,Ragi idli or finger millet idli , a twist to the usual stuff.

    Ragi is a  multi grain which is highly nutritive in value.It consists of amino acids such as iso leucene, leucene, methionine and phenylanine. It is rich in calcium and potassium.

    My other kind of idli recipes can be read here :


    Benefits of Ragi

    It is a super food which is found to help to reduce diabetes  mellitus. With many people suffering from this disease, this diet is highly recommended. It helps in maintaining the insulin level..

    It  helps in reducing cholestrol. It helps  in weight loss and controlling obesity. The food takes longer time to digest, hence the calories consumed are much lesser.

    It has a cooling effect on the body. Thus, it is an ideal food during summer. Ragi malt is usually taken in the mornings during these months. Ragi halbai is a sweet that is not to to be missed. Ragi Thalipeeth is ideal for weekend lunch or breakfast.

    Now, with so many benefits, let us take a look at the recipe of making Ragi Idli or Finger millet Idli. It is vegan and gluten free. It is ideal for breakfast. It can be served for dinner too.

    What goes in the Ragi Idli / Finger Millet Idli ?

    • Urad dal : We need two ingredients to make it and one of them is urad dal. It is the primary ingredient to make idli, isn’t it ? I prefer to use the split urad dal. It is soaked for three hours
    • Ragi flour: Use good quality ragi flour. I prefer to bring in small quantity and buy fresh ones again. Sieve the flour before using it.
    • Water: It is needed for soaking and grinding the batter. Add water in small quantities.
    • Salt to taste

    Ragi Idli / Finger Millet Idli
    Ragi Idli / Finger Millet Idli


    Idli Cooker:

    Idli Cooker is essential to make idli. It comes with a steamer and a set of plates in which idlis are cooked. Wash the plates. Water is put in the steamer. The batter is poured in the pockets and it is allowed to cook for ten to fifteen minutes. Alternatively, you can use the pressure cooker without the whistle to steam.

    Making idli is common in most household and along with it are the variations one can try. Why not invest in a good idli maker ?


    About the event:

    Sending this to Foodies_Redoing Old Post 27. This is an old post which I have updated with better pictures. Every fortnight, we edit an old post with better pictures and text.

    Ragi Idli

    Ragi idli is tasty and a healthy twist to the usual one.
    Prep Time 2 hours
    Cook Time 30 minutes
    Resting time 7 hours

    Ingredients
      

    • Urad dal 1 cup
    • Ragi flour 3 cups
    • water for grinding and soaking
    • salt to taste

    Method
     

    1. Wash and soak urad dal in water for three hours. Grind it to a smooth batter by adding little  amount of water.
    2. Renove the batter in a bowl. Mix the ragi flour and salt to it.  Keep it in a warm place for eight hours to ferment. Ideally, it is good to keep overnight.
    3. Next day, take the idli stand and wash the plates. Add a spoonful of batter in each mould. Heat the pressure cooker or the idli cooker and keep them to steam on a medium flame for fifteen to twenty minutes. Once done, remove from heat and serve  with coconut chutney.

    Notes

    Add water in small quantities. 
    Sieve the ragi flour before using it.


    Thank you for being  a reader of this blog . Wishing You A Very Happy  New Year ! May the days ahead be filled with immense joy and prosperity!

    Pin it for later:

    Ragi Idli / Finger millet idli

    If you have liked this recipe, do share it with your family members and friends. All comments motivate me to write more. If you ever make this dish, take a picture and tag @foodiejayashree on Instagram or @evergreendishes on Facebook. It is always good to see your creations.

    Let’s be connected. Subscribe to get all updates and an e-book for free !


  • How to make oats cookies

    How to make oats cookies


    Oats cookies make a good snack to binge. If you are like me, thinking of ways to include oats, the recipe is for you 

    Cookies are an all time favourite of children. It is holiday time and children look around for snacks in the kitchen, isn’t it ? 

    Here is an easy to make and tasty cookies made with oats.

    The ingredients that you need are

    • 1 cup wheat flour
    • 1 cup oats
    • 1/2 cup butter unsalted
    • 3/4 cup Demerara sugar
    • 1/2 cup regular sugar
    • 1/2 cup cashew pieces
    • a pinch of salt
    • a pinch of soda bi carbonate

    oats cookies


    Method:

    To make in the microwave :

    Preheat the microwave at 180 degrees celsius. Mix the ingredients in a bowl  lightly using your hands, place them in the oven and set timer for five minutes. Again , decrease the temperature and microwave for another three minutes. Tasty oat cookies are ready to serve. Keep them in an airtight jar.

    To make in the oven :

    Pre-heat the oven at 200 degree Celsius. Mix the ingredients  in a bowl and keep it aside for ten minutes. Take  a baking tray, line it with parchment paper. Now, shape them into a cookie, put them on the tray and bake for five minutes. Check and repeat for two more minutes. Allow to cool on the rack. Store in an air-tight container.

    Take a tip:

    • Let cool, for sometime before storing.

    About the event : 

    Another old post got a makeover, sending it to Foodies_Redoing Old Post 106. It isa fortnightly event, we work by changing the picture or the text. Here, I have changed the picture, format and added more information in the text part. 

    oats cookies

    Oats Cookies

    5 from 3 votes
    Oats Cookies are another kind of cookies you can bake with oats in it.
    Course: Snack
    Cuisine: international

    Ingredients
      

    • 1 cup oats
    • 1 cup wheat flour
    • 3/4 cup demerara sugar
    • 1/2 cup sugar
    • 1/2 cup cashew pieces
    • 1/2 cup butter

    Method
     

    To make in the microwave :
    1. Preheat the microwave at 180 degrees celsius. Mix the ingredients in a bowl  lightly using your hands, place them in the oven and set timer for five minutes. Again , decrease the temperature and microwave for another three minutes. Tasty oat cookies are ready to serve. Keep them in an airtight jar.
    To make in the oven :
    1. Pre-heat the oven at 200 degree Celsius. Mix the ingredients  in a bowl and keep it aside for ten minutes. Take  a baking tray, line it with parchment paper. Now, shape them into a cookie, put them on the tray and bake for five minutes. Check and repeat for two more minutes. Allow to cool on the rack. Store in an air-tight container.

    Notes

    Allow them to cool before storing. 

    Pin it for later :

    oats cookies
    oats cookies

    I hope you liked the Oats Cookie recipe. If you ever make these cookies in your kitchen, take a picture and tag @foodiejayashree on Instagram or evergreendishes on Facebook.  Until next time, Happy Cooking ! Be happy and cheerful.

  • Masala Upma | Khara Bhath

    Masala Upma | Khara Bhath

    Masala Upma is a popular breakfast dish from Bangalore and Mysore region of Karnataka state. Commonly known as khara bhath,  it is healthy, tasty and easy to prepare.

    Upma is a breakfast which is predominantly prepared in South India, at least once a week. It is made of semolina and assorted vegetables are used along with spices.  Upma although a breakfast item, is ideal to serve anytime, breakfast, as a quick snack when unexpected guests turn up  or as a light dinner. It is commonly prepared during gatherings  and functions.

    Masala Upma

    When the usual upma is disliked, make this version. Here it is sans onion, but one can add it in the seasoning. Although, coconut chutney is not a necessity, it tastes good with it.

    Let’s get to the Masala Upma recipe :

    The ingredients that you need are

    • 1 cup semolina
    • 1 tsp ghee
    • 1/2 bowl of assorted vegetables as beans,carrots, peas, potato
    • 1 tomato
    • 2 tbsp oil and ghee mix
    • 1/2 tsp mustard seeds
    • 1/2 tsp cumin
    • a pinch of asafoetida
    • 1/4 tsp turmeric powder
    • 1 tsp Bengal gram
    • 1 tsp urad dal
    • turmeric powder
    • 6 cashew nuts
    • 1 1/2 tsp of sambar powder
    • 1/2 tsp of chilli powder
    • salt to taste
    • 3 cups of water

    Method:

    Take ghee in a wide pan, roast the cashews pieces, put them aside. Now, roast the semolina with a little bit of ghee until pale brown. Put it along with cashew pieces.

    In a small pan, boil the vegetables, when partly done add the tomatoes. Later, add sambar powder, chilli powder and the required quantity of salt to it and let boil for sometime.

    Take oil in a kadai and make the seasoning. Now, add the vegetables with water into it. You need around three glasses of water, put it accordingly. Once, it boils,  add the roasted semolina slowly into it. Keep stirring, lumps may be formed. Allow to cook for ten minutes on a slow flame. Garnish with fresh coriander leaves.

    Take a tip:

    • Other vegetables  as cabbage and capsicum may be used.
    • Onion may be used, add it in the seasoning and saute. Later, put the boiled veggies into it.
    • You can use store bought sambar powder.
    • You may use masala bhath powder also.

    About the event :

    This is an old post which I have done with better pictures and text. Sending this to Foodies_RedoingOld Post 31, a fortnightly event. Over the years, our writing and pictures have changed, so we need to update our old posts with a fresh touch.

    khara bhat
    Evergreendishesdev

    Masala Upma

    Masala Upma is a popular dish from Bangalore and Mysore region of Karnataka state. It is commonly known as Khara Bhath.
    Prep Time 10 minutes
    Cook Time 15 minutes
    Total Time 25 minutes
    Servings: 4 people
    Course: Breakfast
    Cuisine: karnataka

    Ingredients
      

    • 1 cup semolina
    • 1 tsp ghee
    • 1/2 bowl of assorted vegetables as beans carrots, peas, potato
    • 1 to mato
    • 2 tbsp oil and ghee mix
    • 1/2 tsp mustard seeds
    • 1/2 tsp cumin
    • a pinch of asafoetida
    • 1/4 tsp turmeric powder
    • 1 tsp Bengal gram
    • 1 tsp urad dal
    • turmeric powder
    • 6 cashew nuts
    • 1 1/2 tsp of sambar powder
    • 1/2 tsp of chilli powder
    • salt to taste
    • 3 cups of water

    Method
     

    1. Roast the semolina with a little bit of ghee until pale brown. Put it aside.
    2. Boil the vegetables, when partly done add the tomatoes. Later, add sambar powder, chilli powder and the required quantity of salt to it.
    3. Take oil in a kadai and make the seasoning. Now, add the vegetables with water into it. You need around three glasses of water, put it accordingly. Once, it boils,  add the semolina slowly into it. Keep stirring, lumps may be formed. Allow to cook for ten minutes on a slow flame. Garnish with fresh coriander leaves.

    Notes

    Other vegetables  as cabbage and capsicum may be used. 
    Onion may be used, add it in the seasoning and saute. Later, put the boiled veggies into it.
    You can use store bought sambar powder. 

    Pin it for later:

    Masala Upma
    Masala Upma

    If you have liked this post, do share it with your family and friends. If you ever make this, take a picture and share it by tagging @foodiejayashree on Instagram or @evergreendishes on Facebook or Twitter.

    Let’s be connected, the follow buttons are on the side bar. Subscribe to get all updates and an e-book for free!