Tag: vegan food

  • Tuvar and Capsicum Masala

    Tuvar and Capsicum Masala

    Jump to Recipe Print Recipe

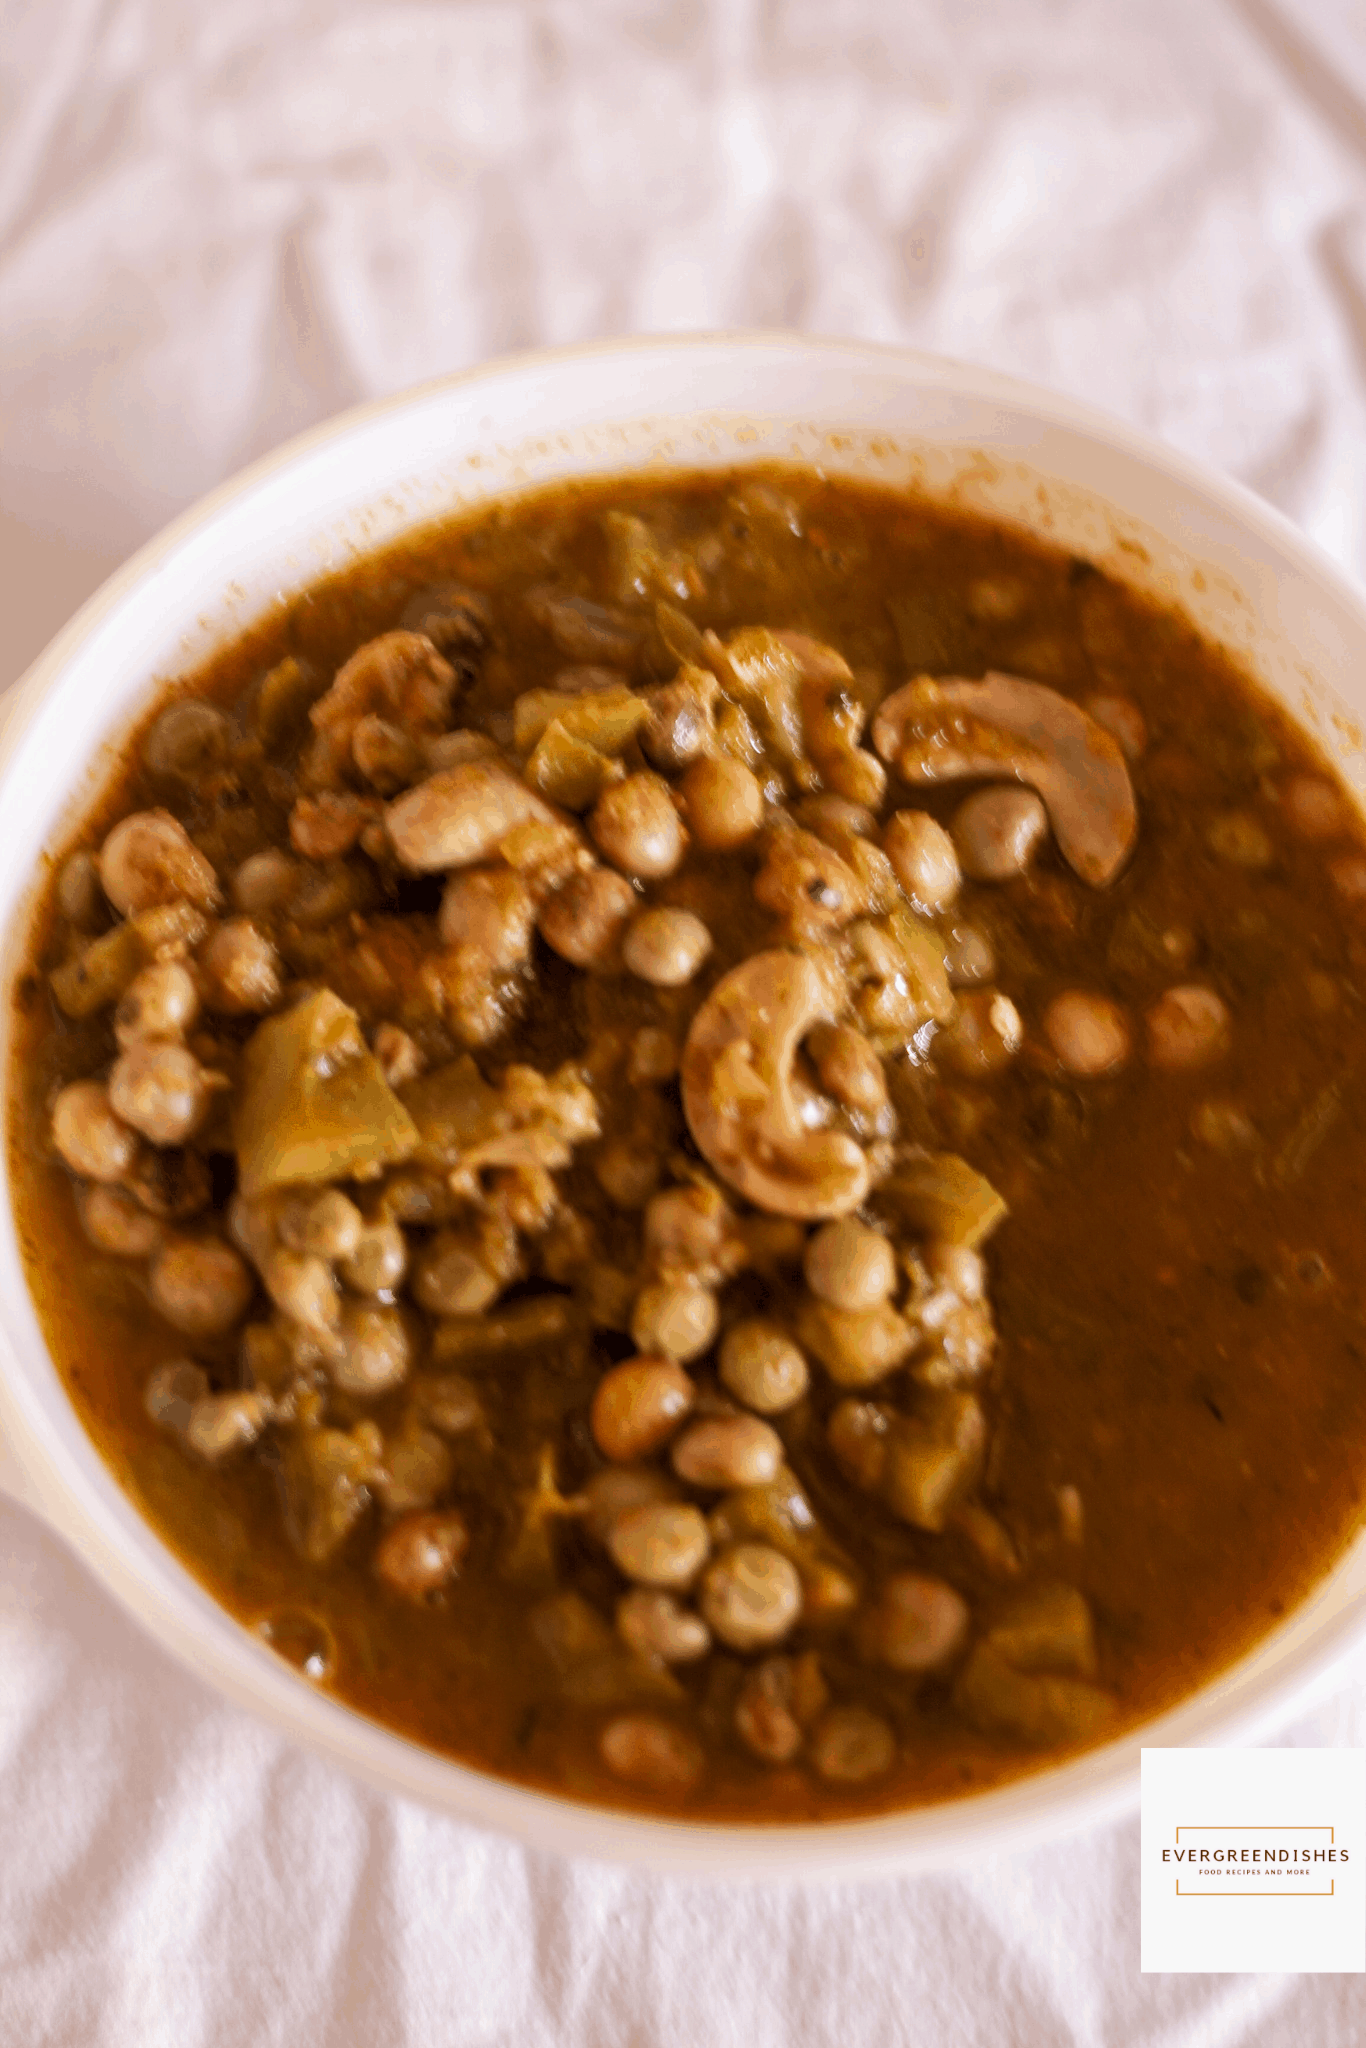
    Tuvar and Capsicum Masala is a winter treat, ideal to pair with chapati or phulka. It is vegan and gluten-free. It makes a good side dish for lunch, brunch or dinner.

    Tuvar lilva or fresh pigeon peas in a winter crop, it is commonly used in Gujarati households to make a variety of dishes. I love using it to make a curry. I also make a kachori but it has not made to the blog yet.

    Tuvar lilva is the fresh form which is later dried to make lentil we consume daily to make dal.

    Today, before I proceed further I want to discuss the difference between vegan and vegetarian.

    What is Vegan diet?

    Vegan is a type of vegetarian diet which  excludes dairy products, eggs, meat and any other animal derived ingredient. These include gelatin, honey, casein, pepsin, carnine, whey, carmine   Thus vegans use substitutes as almond milk, soy milk .

    Difference between vegetarian and vegans

    Vegetarians and vegans differ in their beliefs regarding the use of animal products. Vegetarians consume animal- derived products such as milk and curd but vegans avoid them totally. They use other form of substitutes.

    What are the different kind of milk substitutes for vegans.

    The most widely used non-dairy milks are hazelnut, cashew, soy, almond, oat and even hemp. Different kind of nuts can be used by soaking overnight, blending and straining. These are good substitutes to use in cooking also.


    tuvar and capsicum masala
    tuvar and capsicum masala

    Let’s  get to the recipe of Tuvar and Capsicum Masala

    Ingredients:
    • 1 cup tuvar
    • 8 cashew
    • 1 tablespoon oil
    • 1/2 teaspoon cumin
    • 1 capsicum
    • salt to taste
    • little kasuri methi


    Onion Paste:
    • 1 onion


    Masala paste:
    • 3 tomato
    • 4 cloves garlic
    • 5 green chilli
    • 1/2 bunch coriander
    • 2 cloves
    • 2 cardamom

    Method:

    • Boil tuvar along with cashew pieces. A pinch of salt may be added to it.
    • Make onion paste and keep it aside.
    • Blanch the tomatoes. Once it is cool, make a paste with the listed ingredients under “Masala Paste”.
    • Cut capsicum into small pieces.
    • Take oil in a pan, add cumin. As it splutters, put the onion paste. Saute it for a minute, now throw in the capsicum pieces. Continue to saute for sometime.
    • Now, add the masala paste to it and saute it. Let cook for sometime.
    • Add the cooked tuvar  along with the water in it.
    • Add salt. Adjust the consistency of the gravy.
    • Finally, sprinkle kasuri methi to it. Let the flavours imbibe for two minutes.
    • Tuvar and capsicum masala is ready to serve.

    Take a tip:

    • Boil the cashew with tuvar, it gives a good taste to the curry. The bland taste of tuvar is changed.
    • Kasuri methi is dried fenugreek leaves, available in any super market. It gives a good aroma to the dish.
    • Reduce the number of green chilli if you want it less spicy.
    • Smaller and dark coloured capsicum are spicy while the larger and light coloured are perfect for using in curries.

    Tuvar and Capsicum Masala

    uvar and capsicum masala makes a tasty side dish with chapati or phulka. It is vegan and gluten-free.

    Ingredients
      

    • 1 cup tuvar
    • 8 cashew
    • 1 tablespoon oil
    • 1/2 teaspoon cumin
    • 1 capsicum
    • salt to taste
    • little kasuri methi
    • Onion Paste:
    • 1 onion
    • Masala paste:
    • 3 to mato
    • 4 cloves garlic
    • 5 green chilli
    • 1/2 bunch coriander
    • 2 cloves
    • 2 cardamom

    Method
     

    1. Boil tuvar along with cashew pieces. A pinch of salt may be added to it.
    2. Make onion paste and keep it aside.
    3. Blanch the tomatoes. Once it is cool, make a paste with the listed ingredients under “Masala Paste”.
    4. Cut capsicum into small pieces.
    5. Take oil in a pan, add cumin. As it splutters, put the onion paste. Saute it for a minute, now throw in the capsicum pieces. Continue to saute for sometime.
    6. Now, add the masala paste to it and saute it. Let cook for sometime.
    7. Add the cooked tuvar  along with the water in it.
    8. Add salt. Adjust the consistency of the gravy.
    9. Finally, sprinkle kasuri methi to it. Let the flavours imbibe for two minutes.
    10. Tuvar and capsicum masala is ready to serve.

    Pin it for later:

    Tuvar and capsicum masala makes a good accompaniment with any Indian flat bread. It is vegan and gluten free.
    Tuvar and Capsicum Masala

    About the event :

    Sending this to Veganuary month at Foodies+Bloggers Community on Facebook.  A few more vegan recipes from my blogger friends.


    If you ever make this recipe, take a picture and share it by tagging @foodiejayashree on Instagram or @evergreendishes on Facebook. I will be glad to see and share your creation further.
    Check out my e-books on Amazon. Do not miss any post, subscribe to get all updates and an e-book for free !

  • Mysore Rasam

    Mysore Rasam

    The season is mild rainy days and chilly nights, a steaming hot food with a few pakodas is ideal, isn’t it? Today, I have a rasam recipe for you.

    What is rasam?

    Rasam is a lentil based, thin soup like accompaniment served with hot steamed rice. It is popular in South India mainly in the states of Karnataka, Tamilnadu and Andhra Pradesh.

    What are the different variety of rasam that one can make?

    There are many variety of rasam that one can relish. Pepper rasam, tomato rasam, saaru, neer saaru, lemon rasam, andhra rasam, mysore rasam are a few variety of rasam that one can prepare.

    What is the difference between Rasam and Sambar?

    Rasam and Sambar are siblings from South India. Rasam is thinner in consistency and usually served with steamed rice. Sambar is slightly thicker than rasam and has different vegetables in it, onion may or may not be added. It is not only served with rice but also idly, dosa and vada.

    What is Mysore Rasam?

    Mysore Rasam as the name suggests, hails from the sate of Karnataka. It is also known as Arachuvitta Rasam. It is a rasam made using fresh spice mix and coconut. It is flavoursome. Let’s get to the recipe of it.

    Ingredients:

    • 1 cup tur dal
    • 2 tomato
    • 1/2 teaspoon mustard
    • 1/4 teaspoon turmeric powder
    • a small lemon size ball of tamarind
    • 1 teaspoon ghee

    For the rasam mix:

    • 1 tablespoon bengal gram
    • 1 tablespoon coriander seed
    • 1/2 teaspoon cumin
    • 1/2 teaspoon pepper
    • 1/4 teaspoon methi
    • 5 dry red chilli
    • 2 tablespoon fresh coconut

    For the seasoning:

    • 2 teaspoon ghee
    • 1/2 teaspoon mustard seed
    • 1/4 teaspoon asafoetida
    • 1/4 teaspoon turmeric powder
    • 1/4 teaspoon cumin
    • 1 red chilly
    • curry leaves

    Method:

    1. Wash the tur dal, add two cups of water and cook it in pressure cooker for three whistles. The dal should be smoothly cooked.
    2. Soak the tamarind in water.
    3. Make tomato puree, keep it aside.
    4. Take a pan, add a teaspoon of ghee and roast all the ingredients except coconut under “For the rasam mix” for two to three minutes. Put the coconut in the end and roast for another minute. When it is completely cool, grind them together.
    5. Extract the tamarind pulp. Mix it with tomato puree, put it to boil, the raw smell of the tomatoes should go.
    6. Put the ground rasam mix, jaggery, and salt into it. Mix the cooked dal well and put it along with other ingredients. Add three cups of water.
    7. Make seasoning, heat ghee in a pan. Add mustard seeds, as it splutters, put cumin, asafoetida, turmeric powder, red chilly and curry leaves. Pour it over the rasam
    8. Once the rasam boils, it is done.
    9. Serve hot with rice.
    Mysore Rasam

    Mysore Rasam

    Mysore Rasam is spicy- tangy lentil based dish served with hot steamed rice.
    Prep Time 20 minutes
    Cook Time 20 minutes
    Total Time 40 minutes
    Course: lunch ideas, Main Course
    Cuisine: karnataka

    Ingredients
      

    • 1 cup tur dal
    • 2 tomato
    • 1/4 teaspoon turmeric powder
    • small lemon size ball tamarind
    For Rasam Mix
    • 1 teaspoon ghee
    • 1 tablespoon bengal gram
    • 1 tablespoon coriander seed
    • 1/2 teaspoon cumin
    • 1/2 teaspoon pepper
    • 1/4 teaspoon fenugreek
    • 5 red chilli
    • 1 sprig curry leaves
    • 2 tablespoon fresh coconut
    For the seasoning
    • 2 teaspoon ghee
    • 1/2 teaspoon mustard seed
    • 1/4 teaspoon asafoetida
    • 1/8 teaspoon turmeric powder
    • 1/4 teaspoon cumin
    • 1 red chilli
    • 1 sprig curry leaf

    Method
     

    1. Wash the tur dal, add two cups of water and cook it in pressure cooker for three whistles. The dal should be smoothly cooked.
    2. Soak the tamarind in water.Make tomato puree, keep it aside.
    3. Take a pan, add a teaspoon of ghee and roast all the ingredients except coconut under "For the rasam mix" for two to three minutes. Put the coconut in the end and roast for another minute. When it is completely cool, grind them together.
    4. Extract the tamarind pulp. Mix it with tomato puree, put it to boil, the raw smell of the tomatoes should go.Put the ground rasam mix, jaggery, and salt into it. Mix the cooked dal well and put it along with other ingredients. Add three cups of water.
    5. Make seasoning, heat ghee in a pan. Add mustard seeds, as it splutters, put cumin, asafoetida, turmeric powder, red chilly and curry leaves. Pour it over the rasam. Once the rasam boils, it is done.Serve hot with rice.

    Pin it for later:

    Mysore Rasam

    I am sharing this with the Facebook group, “Food for Feast” where like minded bloggers decide a theme to blog every month. The theme for September was “Satvik Recipe”. Satvik food is that food that can be offered to God and does not contain onion and garlic in it.

    I am also sending this post MLLA 131 hosted by Sasmita of First Timer Cook . It is a monthly event started by Susan and now hosted by Lisa of Lisa’s Kitchen.

    If you have liked this post, do leave a comment below. If you ever make it, do take a picture and post it on Facebook by tagging @evergreendishes or on Instagram by tagging @foodiejayashree.

    Subscribe to get a book of handyhints for free !


  • Avalakki Upkari / Hachida Avalakki / North Karnataka

    Avalakki Upkari / Hachida Avalakki / North Karnataka

    Jump to Recipe Print Recipe

    Avalakki Upkari / Hachida Avalakki is a popular snack from North Karnataka. Thin flakes of flattened rice is mixed with coconut, cucumber, onion, tomato, chilly powder to form a tasty snack. It is commonly made for breakfast or as a evening snack.

    This is a humble snack which has never withered with time. It’s been passed on through generations, the only change is the variety of dressing that we put over it. Onion was hardly used in the earlier days. Now, onion and sev mixture, are added to it along with other ingredients. It is ideal as a quick snack or on those days when you do not want to cook. It is also good for fasting menu sans onion.

    Children like avalakki upkari and most often, it is our Sunday breakfast. One can customise this snack as per their need. Grated carrot, finely cut capsicum may be added, onion can be avoided and the amount of coconut that goes into it is as per the liking of the indivdual.

    A variety of mixture or sev may be added to it. This is one of the snacks I relish anytime.

    Avalakki Upkari / Hachida Avalakki
    Avalakki Upkkari / Hachida Avalakki
    avalakki upkari / hachida avalakki

    Let’s get to the recipe of Avalakki Upkari /Hachida Avalakki

    • 4 cup thin poha
    • 2 teaspoon oil
    • 2 teaspoon ghee
    • 1.5 teaspoon chilly powder
    • salt to taste

    For garnishing: 

    • 1 onion
    • 2 tomato
    • 4 cucumber
    • 2 cup fresh coconut
    • green chilly
    • mixture or sev (optional)
    • 1 lemon

    Method:

    1. Take a wide bowl, add chilly powder and salt to it. Mix it. Add thin poha to it and mix it well. Now, this can be stored for a couple of days. Use as much quantity you need with vegetables.
    2. Take the required quantity of mixed poha, add grated coconut, onion and cucumber to it. Mix it well. Add any mixture that you have to it, this is optional. Put lime juice and tomato pieces, mix it and serve.
    avalakki upkari
    Evergreendishesdev

    Avalakki Upkari / Hachida avalakki

    5 from 2 votes
    Avalakki upkari or hachida avalakki is a traditional snack from North Karnataka. Rice flakes are mixed with fresh coconut and veggies to make a tasty snack.
    Prep Time 15 minutes
    Total Time 15 minutes
    Servings: 6 people
    Course: Breakfast, evening snacks
    Cuisine: karnataka

    Ingredients
      

    • 4 cup thin flattened rice
    • 2 teaspoon oil
    • 2 teaspoon ghee
    • 1.5 teaspoon chilly powder
    • salt
    To make avalakki upkari
    • 4 cucumber
    • 1 onion
    • 2 tomato
    • 2 cup fresh coconut
    • 1 lemon
    • coriander
    Other ingredients
    • sev or mixture for topping (optional)

    Method
     

    1. Take a wide bowl, add ghee and oil to it. Put salt and chilly powder, mix it well. Add rice flakes and mix them together. This mixed rice flakes can be kept for a week.
    2. Chop onion, tomato and cucumber finely.
    3. Take the required quantity of mixed rice flakes, add grated coconut, onion and cucumber. Put lime juice, mix it well. Finally, add tomato and sev (if using), mix and serve immediately.

    Notes

    • No water is added here. The water released from onion and cucumber helps to soften.
    • Roasted papad, sev or mixture may be added.

    Pin it for later:

    Avalakki Upkari is a traditional snack from North Karnataka. It is a no cook vegan and gluten-free snack. Give a try to it.
    Avalakki Upkari / Hachida Avalakki
    Avalakki Upkari

    I am sending this post to 67 th Healthy Wellthy cuisines with the theme “No Cook Affair at HW” . Here are the other no cook recipes by co-bloggers of our blog hop :Carrot and Cucumber Mini Bites,Watermelon Gazpacho, Green Chick Pea Salad in Mustard Vinaigrette, Sun FlowerButter Apple Sandwich,Easy Marinated Veg Salad,Avocado Chaat, Kachumber Salad,

    If you have liked this post, do share it with your family and friends. If you ever recreate it, take a picture and share it on Instagram by tagging @foodiejayashree or on Facebook by tagging @evergreendishes

    Subscribe to get a book of handyhints for free !


  • Palak Sev | Spinach Crispies | Namkeen Snack for Diwali

    Palak Sev | Spinach Crispies | Namkeen Snack for Diwali

    Palak Sev is a crunchy and flavoursome dry snack usually prepared during Diwali. It makes a good snack to serve along with other sweets.

    Diwali is round the corner and so much of enthusiasm all around. It’s the festival we look forward to celebrate and enjoy. Many sweets and snacks are prepared and children are happy enjoying the vacation.

    Today, I bring to you Palak Sev or Spinach Crispies. It’s crunchy and flavoursome, makes a good snack with tea.

    Palak Sev
    Palak Sev

    Let’s get to the recipe without much ado

    Ingredients:    Measurement: 1 cup =200 ml

    • 1 cluster spinach
    • 1cup  gram flour
    • 2 teaspoon rice flour
    • salt
    • 2 teaspoon hot oil
    • 5 green chilly
    • 1 inch ginger
    • 1 teaspoon cumin
    • water
    • oil for frying

    Method:

    1. Remove the stalk of spinach leaves.
    2. Cut and blanch it.
    3. When cool, grind it to a paste with chilly, ginger and cumin.  Do not add water.
    4. Remove the paste in a bowl.
    5. Add salt to it. Mix. Heat oil in a pan.
    6. Put rice flour and gram flour to it. Add two tea spoon of hot oil to it. Mix and knead to a dough. Use only as much gram flour as required.
    7. Take a sev maker, smear some oil to it. Take some dough and make it to a cylindrical shape. Put it inside, close and once the oil is hot, press it directly in the oil. Ensure the oil is on low flame while pressing the sev.
    8. Fry on medium high, use a long handled perforated ladle to toss and remove it.
    9. Remove on a tissue paper. Repeat with the rest of the dough.
    10. Once cool, put in a container and keep it.

    Take a tip: Green chilly used were not spicy, hence used 5.

    Palak Sev
    Palak Sev


    Making of Palak Sev
    Making of Palak Sev

    Palak Sev
    Palak Sev

    Palak Sev
    Evergreendishesdev

    Palak Sev / Spinach Crispies

    5 from 4 votes
    Palak sev is a tasty snack to binge with tea or as an accompaniment with any meal.
    Prep Time 15 minutes
    Cook Time 30 minutes
    Total Time 45 minutes
    Servings: 6
    Course: evening snacks, festive treats
    Cuisine: karnataka

    Ingredients
      

    • 1 cluster spinach
    • 1 cup gram flour 1 cup =200ml
    • 2 teaspoon rice flour
    • salt
    • 5 green chilly
    • 1 teaspoon cumin
    • 1 inch ginger
    • 2 teaspoon oil
    • oil for frying

    Method
     

    1. Remove the stalk of spinach leaves. Cut and blanch it. When cool, grind it to a paste with chilly, ginger and cumin.  Do not add water.
    2. Remove the paste in a bowl.
    3. Add salt to it. Mix. Put rice flour and gram flour to it and knead to a dough. Use only as much gram flour as required. Heat oil in a pan, add two teaspoon of hot oil to the dough.
    4.  Take a sev maker, smear some oil to it. Take some dough and make it to a cylindrical shape. Put it inside, close and once the oil is hot, press it directly in the oil. Ensure the oil is on low flame while pressing the sev.
    5. Fry on medium high, use a long handled perforated ladle to toss and remove it.
    6. Remove on a tissue paper. Repeat with the rest of the dough. Once cool, put in a container and keep it. Stays good for more than a week.

    Notes

    • The green chilly used were not hot, so I used 5.
    •  

    My popular snack recipes : Ragi Halbai, Chiwda, Murukku, Ash gourd Halwa, Nippattu

    palak sev
    palak sev

    This post is part of #DiwaliDhamaka at Desi Bloggers Connect. Do check out tasty treats by other bloggers.

    If you have liked this post, subscribe to get all updates and a free e-book of handy hints!

    Follow Evergreendishes on Facebook, Instagram, Twitter and Pinterest

    Other recipes by co-bloggers:

  • Kidney Bean and Corn Salad

    Kidney Bean and Corn Salad

    Jump to Recipe Print Recipe

    Kidney bean and corn salad is a tasty and nutrition packed snack to binge anytime. Serve it with lunch or as a light snack,  it is definitely a crowd pleaser. 

    Salads form an important part of our diet. They are filling, tasty, easy to prepare and most of all, packed with nutrition and less on calories. It helps in the daily struggle to eat nutrition packed food.

    We love this kidney bean salad, it is so tasty and filling. It is good to indulge in healthy eating on a regular basis.

    Legumes are the seeds or fruits of a family of plants called Fabaceae. Legumes are the essential food in any vegetarian diet. They are a significant source of proteins, dietary fiber, vitamin B and dietary minerals.  The well known legumes are clover, alfalfa, peas, beans, chickpeas, lentils,  lupia bean, soybean, peanuts and tamarind.


    Today, I have chosen kidney beans as the star ingredient here. Kidney bean is popular as Rajma in our country.  Rajma Chawal is one of the cherished food of the North Indians, a gravy in which kidney beans are cooked.

    Kidney beans are rich source of protein, carbohydrates and dietary fiber. It help in building the bones and  keeping the heart healthy. It  helps in weight reduction and improves metabolism. It strengthens the digestive system and improves the metabolism.

    One cup (256 grams)  of cooked kidney beans contains roughly 215 calories. It has 13.4 grams of protein and 13.6 grams of fiber. The folate is 23% of the RDI (Recommended Daily Intake), mangane is 22% of RDI, Vitamin K is 48% while Thiamine is 30% of RDI.   Source : www.healthline.com

    kidney bean and corn salad
    kidney bean and corn salad

    kidney bean and corn salad
    Evergreendishesdev

    Kidney Bean and Corn Salad

    5 from 3 votes
    Kidney bean and corn salad is a tasty and healthy snack to binge anytime. 
    Prep Time 8 hours
    Cook Time 1 hour
    Total Time 9 hours
    Servings: 6 people
    Course: evening snacks, lunch ideas, midday snack

    Ingredients
      

    • 1 cup kidney beans
    • 1 cup sweet corn kernels
    • 1 onion
    • 2 cucumber
    For the dressing
    • 1 teaspoon mustard powder
    • 1/2 teaspoon pepper powder
    • 1/4 teaspoon oregano
    • 1/2 lemon juice
    • 2 teaspoon olive oil
    • salt to taste

    Method
     

    Pre-requisites
    1. Soak black beans overnight or for seven to eight hours.
    Method:
    1. Cook the black beans in pressure cooker for seven to eight whistles. Remove it only after the pressure releases by itself. 
    2. Cut onions finely. Cut cucumber into small chunks.
    3. Put the corn kernels in hot water. 
    4. Take the beans and put them in a bowl. The water may be used later. Add other veggies to it. 
    5. In a small bowl, mix all the ingredients for the seasoning, and put it over it. 
    6. Gently mix and serve.

    Notes

    • Kidney beans need to be well cooked. They should be soft when you touch between fingers, pressure cook it again  if not done properly.
    • Canned beans may be used.
    • I have used frozen corn here. 

    kidney bean and corn salad
    kidney bean and corn salad

    Sending this to My Legume Love Affair #120 hosted by Jagruti of JCookingOdyssey. popular as MLLA, this event which spotlights on Legumes  was  started in 2008 by Susan  of The Well Seasoned Cook. Currently, it is run by Lisa of Lisa’s Kitchen. 

    If you have liked this post, do leave a comment. It motivates me to write more.

    If you ever make this recipe, do take a photo of your creation and tag me on Instagram @foodiejayashree or @evergreendishes on Facebook. Subscribe to get all updates and an e-book for free.

    Pin it for later:

    kidney bean and corn salad