Tag: vegetarian

  • Pepper Rice | Pepper Cumin Rice Recipe

    Pepper Rice | Pepper Cumin Rice Recipe

    Pepper Rice | pepper rice recipe | lunch ideas | easy dinner recipes | 15 minute recipes |pepper cumin rice


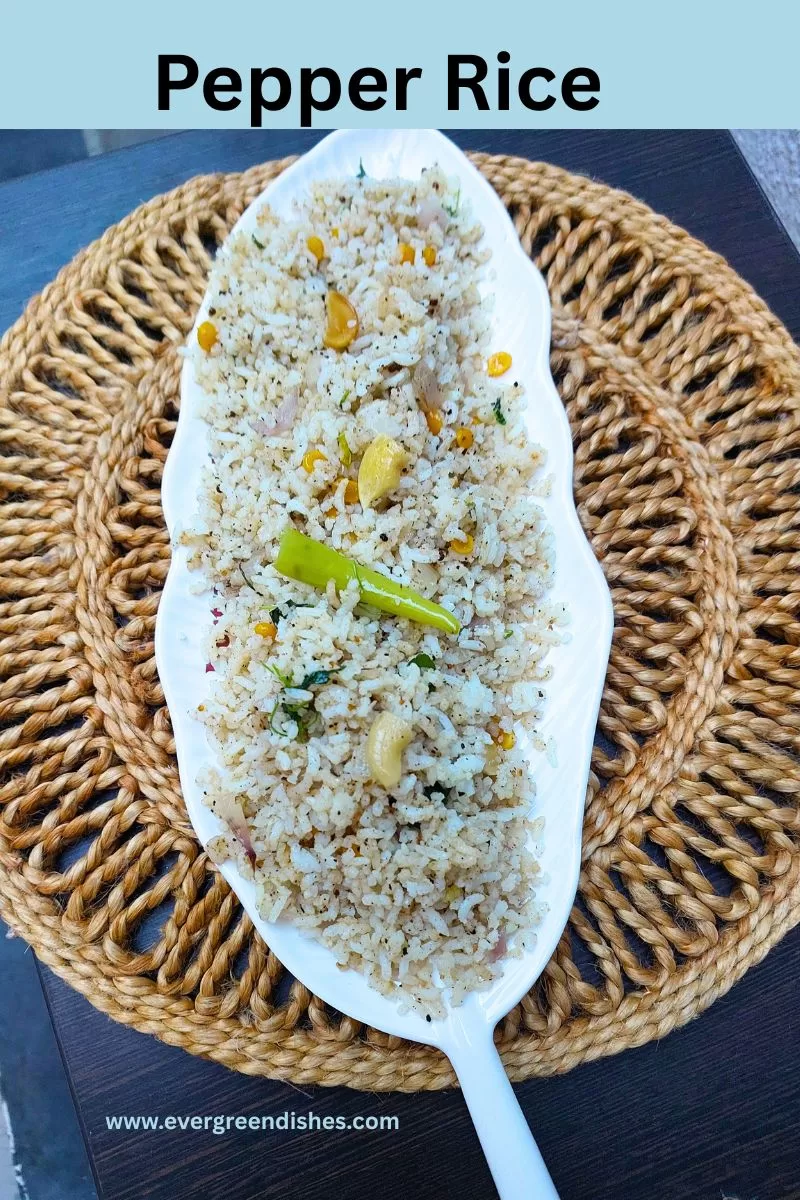
    Pepper Rice is a flavorsome, easy to make rice dish. It is ideal to pack in the lunch box. It also makes a good weekend menu for us.

    I learnt the recipe from a good friend who cooks really well. When you are stuck with the usual menu and looking for an easy lunch option, you can make pepper rice. Leftover rice may be used to make this quick and easy dish. Pepper rice can also be packed in the lunch box. 

    The good thing about the varied rice dishes, can be used both  for lunch or dinner. It makes a good brunch option too. They are loved by children, isn’t it ? It comes an upper hand when compared to the rice and dal option. They serve as a fuss free menu in most household.

    Pepper Rice needs a few simple ingredients; they are easily available in the kitchen. It is ideal to pack in the lunch box. You can make use of the left-over rice and serve it for dinner too.

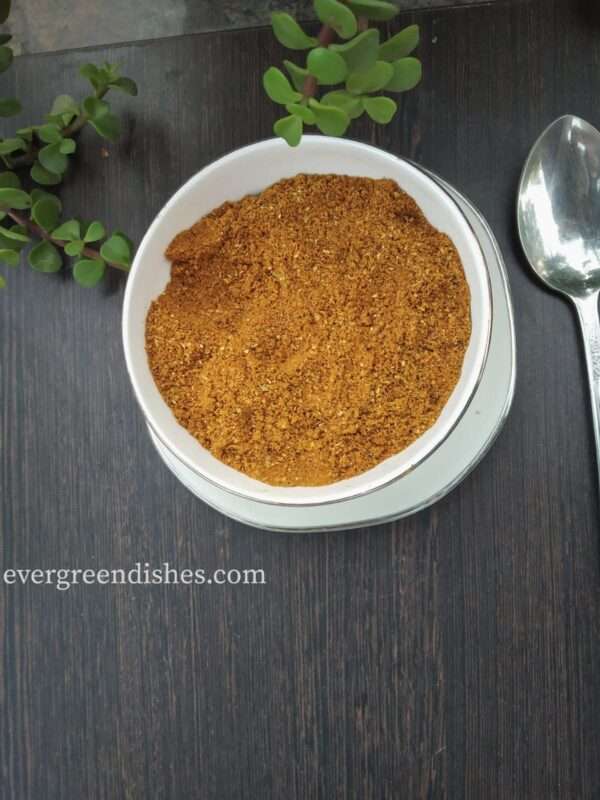
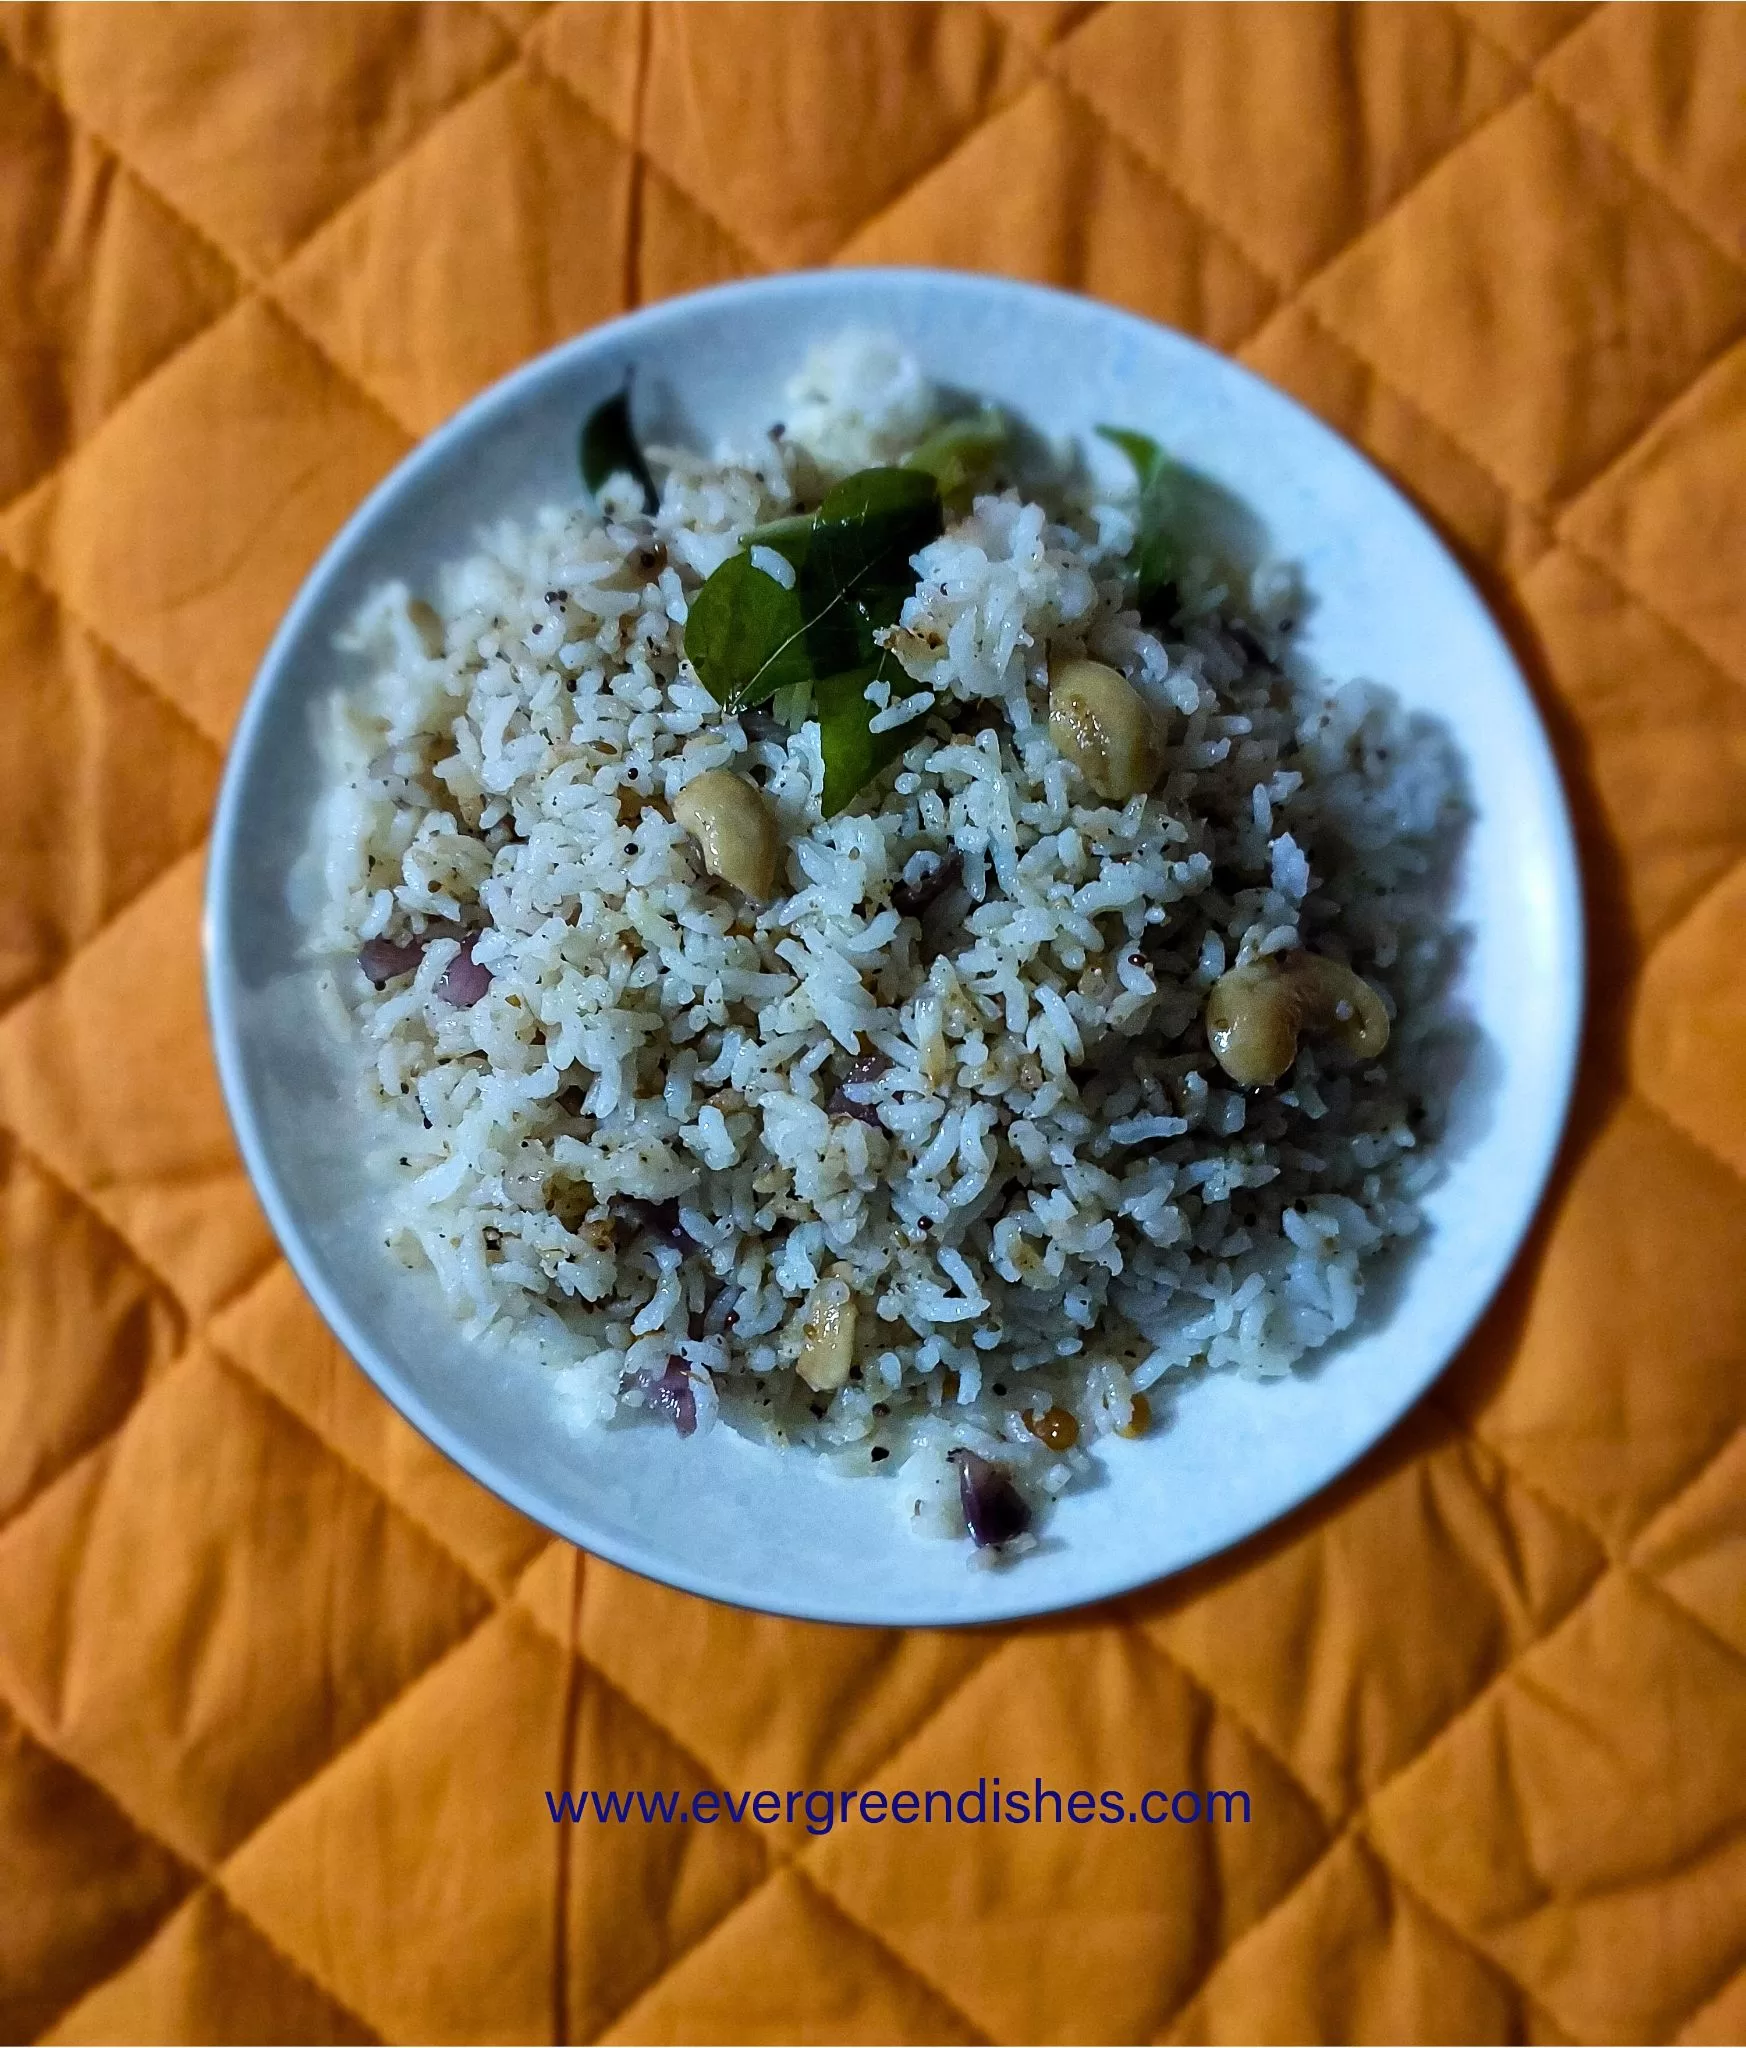
    A few basic ingredients are all that you need and a tasty rice is ready in a jiffy. Cut the onion.  Make a powder of pepper and cumin.  Put the spice mix in the seasoning and mix with cooked rice. Make sure the rice grains are separate and well cooked. 

    You can serve pepper rice with papad, pickle and a cucumber salad.

    pepper rice
    pepper rice

    Why should I make pepper rice ?

    I find three reasons to convince you. It is easy to prepare. It is ideal for lunch or a quick dinner. Most of the times, when you need a change from the normal cooking, I think you can give it a try.

    Can I use left over rice ?

    Yes, you can use left over rice to make pepper rice.

    Can I store the remaining spice mix ?

    Yes, keep it in a clean, air-tight container.

    Can I add garlic to the rice ?

    Yes, go ahead. Put a few cloves of garlic in the seasoning.

    Other kind of South Indian rice recipes :  Coconut Rice, Lemon Rice, Sesame Rice 


    pepper rice

    Pepper Rice

    5 from 7 votes
    Pepper rice makes a good lunch or dinner option. It can be served in the lunch box too.
    Prep Time 10 minutes
    Cook Time 10 minutes
    Total Time 20 minutes
    Course: dinner ideas, lunch, lunch box
    Cuisine: karnataka

    Ingredients
      

    • 1 cup cooked rice
    • 2 tablespoon oil
    • ½ teaspoon mustard
    • 1 teaspoon bengal gram
    • 1 teaspoon urad dal
    • 2 green chilly
    • 1 onion finely cut
    • A few curry leaves
    • 2 teaspoon ground powder
    • Salt to taste
    • For the spice mix :
    • 1 tablespoon pepper
    • 1 teaspoon cumin

    Method
     

    1. Make a coarse powder of pepper and cumin.
    2. Take oil in a pan. Add mustard seeds, as it sputters, put bengal gram, urad dal to it. Allow it to cook for thirty seconds. Put green chilly, saute, stir in the onion and curry leaves. Let cook for sometime.
    3. Put two teaspoons of the ground mix to it.
    4. Add salt. Switch off the flame.
    5. Mix rice to it.
    6. Easy pepper rice is ready to serve.

    Notes

    A few cloves of garlic may be added in the seasoning.
    The spice mix can be stored in a clean, air tight container.
    Depending on the level of spiciness you need, adjust the quantity of the spice powder.

    About the event :

    Sending this to Foodies_Redoing Old Post _150. It is a fortnightly event, a group of bloggers of shared interest, work on an old post either by updating the recipe and content or with better pictures. Here, I have changed the pictures. The post was first published on September,24, 2024. Now, on Aril 27th, 2025 I have redone it with better pictures.
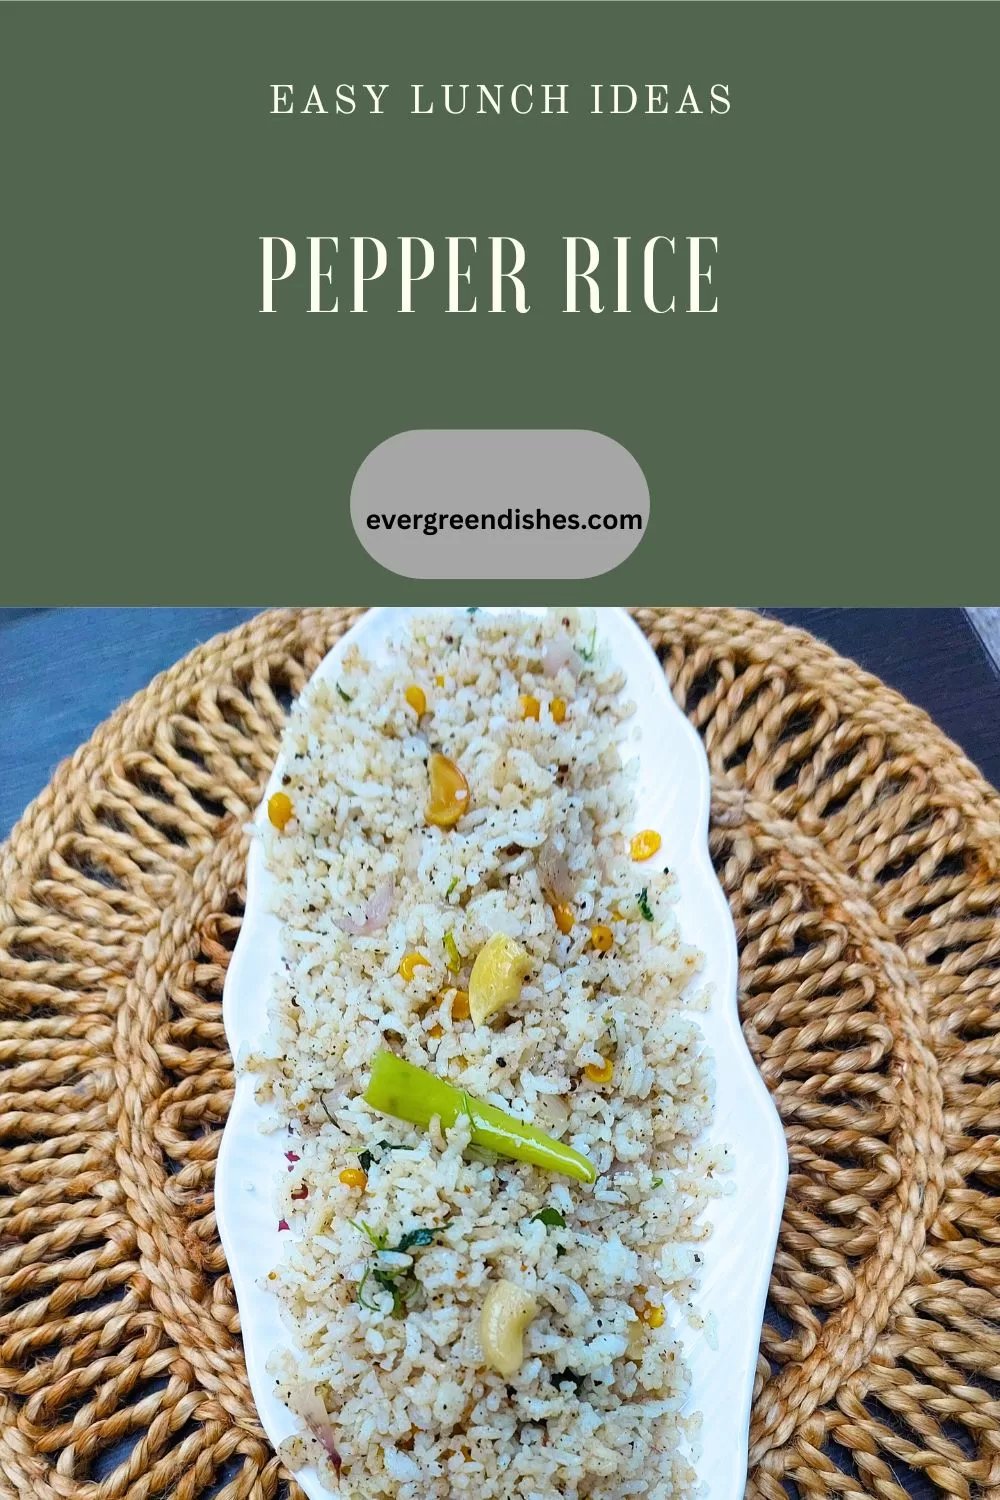
    Pin it for later:

    Pepper Rice
    Pepper Rice


    If you ever make Pepper Rice in your kitchen, take a picture and share on Indtagram by tagging @foodiejayashree. You can also tag me on facebook. Subscribe to get all updates in your inbox and an e-book of handyhints for free. Until next time, happy cooking !


  • Paneer Bhurji | North Indian Cuisine

    Paneer Bhurji | North Indian Cuisine

    Print Recipe Jump to Recipe

    Paneer Bhurji is a classic dish from North Indian cuisine. Scrambled paneer is mixed in a gravy of cooked onion and tomatoes with spice powders to make a tasty accompaniment. Paneer is cottage cheese while bhurji refers to a scramble. Cottage cheese scramble is ideal to pair with any Indian flat bread as roti or paratha. You can also use it as a spread on toasts for a quick and filling  breakfast. 

    Paneer or Cottage cheese is the preferred choice for us. Tofu or egg can also be used. 

    It is good to use fresh, homemade paneer. To make paneer, heat whole milk on a low  flame. Keep the acidic ingredients ready to curdle the milk. Here, we can use curd, lemon or vinegar. Once the milk comes to a boil, put a small quantity of any one of the acidic ingredient and allow it to curdle. Turn off the flame. After a few minutes, drain it over a thin muslin cloth and keep it aside for sometime.

    If buying, opt for a whole piece of paneer instead of cubes. After adding the spices, keep stirring as the spices get burnt easily. Put a little water if needed. 

    What goes in the making of Paneer Bhurji ?

    • Paneer : It is the star ingredient. It is always best to make paneer at home. But, you can use store bought too. Use a good brand paneer. Once you buy, check it properly if it is fit for use. I am writing this as I read so much about the deterioration in the quality of paneer these days.
    • Onion : Cut it finely. Invest in a good chopper, it saves so much time.
    • Tomato: Use the bright, red ones. Cut them finely. 
    • OIl : Any neutral oil will do.
    • Ginger garlic paste : I prefer making it fresh but you can use the store bought ginger garlic paste.
    • Cumin : A little bit of cumin, lends a good flavour.
    • Turmeric powder
    • Amchur powder : It is the dried mango powder which helps in balancing the flavours.
    • Garam Masala : It is a blend of all spices. Use a good quality spice mix.
    • Kasuri Methi: It is dried fenugreek leaves which helps to give a good flavour to the dish.
    • Coriander powder : You can make it by roasting a small quantity of dhania and then grinding to a fine powder.
    • Coriander : The final dressing of the dish is the coriander sprinkled on top.


    Can it be stored ?

    Paneer Bhurji  tastes best when it is cooked fresh and served. The texture of the paneer may change .

    How to serve it ?

    • It tastes great with roti and nan.
    • It can be served as an accompaniment with chapathi or phulka.
    • It is ideal to top it over a bread toast.
    • It can be used as a filling for rolls.
    • It tastes great as a filling for a different kind of dosa.


    Print Recipe

    Paneer Burji

    5 from 4 votes
    Paneer Burji is a popular dish from North Indian cuisine. It pairs well with any Indian flat bread. Scrambled cottage cheese is cooked with spices to make a delectable side dish.

    Ingredients
      

    • 2 tablespoon oil
    • 1/2 teaspoon cumin
    • 2 green chilli
    • 1/2 teaspoon ginger garlic paste
    • 2 onion
    • 3 tomato
    • 1/4 teaspoon turmeric powder
    • 1/2 teaspoon coriander powder
    • 1/2 teaspoon amchur powder
    • 1/2 teaspoon chilli powder
    • 1/2 teaspoon garam masala
    • 200 grams paneer
    • 1/2 teaspoon kasuri methi
    • 2 tablespoon fresh coriander

    Method
     

    1. If you are using fresh homemade paneer, get the paneer ready. Otherwise, put the store bought paneer in hot water for fifteen minutes.
    2. Cut the vegetables
    3. Crumble the paneer.
    4. Grind ginger garlic paste, I prefer to use fresh one.
    5. Take oil in a pan, add cumin and green chilli cut into half pieces.
    6. Put the ginger garlic paste and saute it for a few seconds. Then, add the onions. Saute it to a golden brown colour.
    7. Put the tomato pieces to it and allow it to cook for sometime.
    8. Once the tomatoes are cooked, put the spice powders to it along with salt.
    9. Mix it well and let the flavours blend well.
    10. Put the crumbled paneer to it, mix and saute it for a minute.
    11. Add crushed kasturi methi to it
    12. Finally, add chopped coriander to it.
    13. Paneer Bhurji is ready to serve.

    Other paneer related recipes are : 

    paneer tikka
    paneer tikka
    Kadai Paneer
    Kadai Paneer


    Pin it for later : 

    paneer bhurji
    paneer bhurji

    If you  make  Paneer Bhurji, take a picture and share it by tagging @foodiejayashree on Instagram and @evergreendishes on Facebook.  Subscribe to get all updates and an e-book for free.

  • Kadhi Recipe | Punjabi Kadhi Pakora

    Kadhi Recipe | Punjabi Kadhi Pakora

    Kadhi recipe is the popular Punjabi Kadhi Pakora. It is tasty and one of the cherished meals for north indians. 

    Kadhi chawal is the staple food of many people. It is easy to make and makes a good accompaniment with steamed rice. When the usual cooking needs a change, we resort to other kind of dishes. Kadhi is one of them. Every region has its own version of kadhi. The basic ingredient for kadhi is curd and gram flour.  There is a variation in the method of preparation.

    Kadhi with pakora is a signature dish from North Indian cuisine. Kadhi with pakora is made by dunking the onion pakoras in kadhi.

    a bowl of kadhi with pakora
    punjabi kadhi pakora

    What is Kadhi ?

    Kadhi is a popular yoghurt- based dish from Indian sub-continent. Gram flour is usually used to thicken it along with other ingredients. 

    What are the variation in Kadhi ? 

    Every region in India, has it’s own unique culture and traditions. Kadhi is prepared in most parts of the country but every region has its  own unique recipe. In South India, coconut is used in the preparation of majjige paladya along with other ingredients. It is similar to kadhi, at times we add ambodi in it.  The method of preparation is different in Rajasthan, a simple one with or without badas.  Gujarati kadhi is another version which I am yet to make. Sindhi kadhi is totally different and delectable with vegetables in it.

    Kadhi with Pakora Recipe 

    Ingredients:

    For Kadhi :

    • 1 cup sour curd
    • 1/4 cup gram flour
    • 1/4 teaspoon turmeric powder
    • 1/2 teaspoon red chilli powder
    • 1 teaspoon coriander powder
    • salt to taste
    • 1 tablespoon oil
    • 1/4 teaspoon cumin
    • 1/4 teaspoon fenugreek
    • 1 small onion
    • 1 inch ginger grated
    • 1 tomato
    • 2 green chilli

            For tempering 

    • 1 tablespoon oil
    • 1/4 teaspoon cumin
    • 1/8 teaspoon chilli powder

      For Pakoras:

    • 1/2 cup gram flour
    • 1 big onion
    • 2 green chilli
    • 1 tsp chilli powder
    • 1/4 teaspoon garam masala powder
    • 1/2 teaspoon coriander powder
    • water for mixing

      Method:

      To make kadhi : 

    • Blend the curd. Add gram flour, coriander powder, chilli powder, turmeric powder , and salt  to it. Mix it well, no lumps should be formed. 
    • In a kadai, make seasoning. Put oil, add cumin and fenugreek seed. Once it turns golden, add the grated ginger and onion. Saute it for sometime. Add tomato and green chilli pieces to it. Stir for 2-3 minutes.
    • Add the curd mixture, keep stirring it.
    • Reduce the flame, allow it to cook for sometime.
    • Switch off the flame.

    To make the pakoras:

    1. Take besan in a bowl. Add onion, green chilli, chilli powder, garam masala and coriander powder.Mix them together.
    2. Add little water and mix thoroughly. The batter should be of dropping consistency.
    3. Heat oil in a pan, add a spoonful of batter. Put a few more. 
    4. Deep fry to golden colour.
    5. Remove with a ladle and put it aside. 
    6. Put the pakora in kadhi.

    To make the seasoning:

    • Take oil in a pan, add cumin and chilli powder to it. As it turns golden, remove it and pour over the kadhi.
    kadhi with pakora

    Kadhi with Pakora

    5 from 5 votes
    Kadhi with Pakora is a popular dish from Punjabi cuisine. It is a comfort food.
    Course: lunch
    Cuisine: punjabi

    Ingredients
      

    For Kadhi :
    • 1 cup sour curd
    • 1/4 cup gram flour
    • 1/4 teaspoon turmeric powder
    • 1/2 teaspoon red chilli powder
    • 1 teaspoon coriander powder
    • salt to taste
    • 1 tablespoon oil
    • 1/4 teaspoon cumin
    • 1/4 teaspoon fenugreek
    • 1 small onion
    • 1 inch ginger grated
    • 1 to mato
    • 2 green chilli
    For tempering
    • 1 tablespoon oil
    • 1/4 teaspoon cumin
    • 1/8 teaspoon chilli powder
    For Pakoras:
    • 1/2 cup gram flour
    • 1 big onion
    • 2 green chilli
    • 1 tsp chilli powder
    • 1/4 teaspoon garam masala powder
    • 1/2 teaspoon coriander powder
    • water for mixing

    Equipment

    • 1 thick pan
    • 1 kadhi
    • 1 ladle
    • 1 perforated ladle
    • 2 plates
    • 2 bowls

    Method
     

    To make the kadhi :
    1. Blend the curd. Add gram flour, coriander powder, chilli powder, turmeric powder , and salt  to it. Mix it well, no lumps should be formed.
    2. In a kadai, make seasoning. Put oil, add cumin and fenugreek seed. Once it turns golden, add the grated ginger and onion. Saute it for sometime. Add tomato and green chilli pieces to it. Stir for 2-3 minutes.
    3. Add the curd mixture, keep stirring it.
    4. Reduce the flame, allow it to cook for sometime.
    5. Switch off the flame.
    To make the pakoras:
    1. Take besan in a bowl. Add onion, green chilli, chilli powder, garam masala and coriander powder.Mix them together.
    2. Add little water and mix thoroughly. The batter should be of dropping consistency.
    3. Heat oil in a pan, add a spoonful of batter. Put a few more.
    4. Deep fry to golden colour.
    5. Remove with a ladle and put it aside.
    6. Put the pakora in kadhi.
    To make the seasoning:
    1. Take oil in a pan, add cumin and chilli powder to it. As it turns golden, remove it and pour over the kadhi.
    punjabi kadhi pakora
    punjabi kadhi pakora

    If you ever make  Punjabi Kadhi Pakora  recipe,  do take a picture and tag @foodiejayashree on Instagram or @evergreendishes on Facebook or Twitter. I will be glad to see your creation and share it further. Let’s be connected, do follow on social media platforms. Until next time, let’s stay connected.  Subscribe to get all updates and an e-book for free. Check out my e-books on Amazon.  

  • Srilankan Green Bean Curry

    Srilankan Green Bean Curry

    Srilankan Green Bean Curry is a tasty side dish cooked in coconut milk. It makes a good accompaniment with chapathi or steamed rice. 

    It is a new month and I have a new cuisine on my blog today. It is now to the Srilankan cuisine. Sri Lanka, as we all know is a small country to the south of India. It has a mixed culture traditions.  

    srilankan green bean curry


    About SriLankan cuisine :


    There is a lot to explore in the SriLankan food. I am naive but did a lot of research before I could plunge into cooking it. It is mainly a non-vegetarian cuisine but one can find good vegetarian food too. It is a land of coconut and cinnamon. I think coconut milk or coconut is extensively used. It gives a good taste to the food too. Being a South Indian, I can vouch for the taste it imparts to the dish.

    Ceylon cinnamon is sweetish in taste and gives a good flavour to the dishes. I have used it  and it is more aromatic than the usual one which we use. Pandan leaves are extensively used in many dishes. Although, Srilankan cuisine looks so familiar to us, it is not exactly the same. The spice mix too is different, the food is more spicy than the Indian cuisine as pepper and cinnamon are abundantly used. But, the bottom line is Indian cuisine is quite similar to it. An Indian in Ceylon will be happy with the food that he get there. 

    Srilankan cuisine has many kind of rice based dishes and hoppers . It is mostly served with a coconut milk based curry. I am yet to explore this cuisine, for now I have tried two side dishes, both were good. 

    About the event :

    Narmadha of Nams Corner suggested Sri Lankan cuisine for the month of August. Thanks to Narmadha, I would not have explored this cuisine. She has many dishes on her blog, I have bookmarked her kallu dodol recipe to make it soon.  I was paired with Preethi, she gave me currry leaf and green chilli, I have made this dish. I gave Preethi, mustard seeds and fennel, she has made flavoursome spice mix used in Srilankan cuisine.

    I have adapted the recipe from here.


    shhh cooking secretly


    About the green bean stir fry:

    When I was looking for the dishes to prepare, I had so many in mind. Finally, I decided to make Beans Stir Fry as my family loves the  humble vegetable. The ingredients needed are easily available and the cooking is done quickly if you outsource the coconut milk. Here, I made fresh coconut milk for the dish.. It paired well with chapathi. Let us look at the recipe beans curry in coconut milk


    What goes in Srilankan Green Bean Curry ?

    • Beans : Cut them into two inch long pieces with a diagonal at the end. You will need 150 grams of beans.
    • Coconut milk : You need the thick coconut milk. To extract coconut milk, soak one cup of fresh  grated coconut in hot water for half an hour. Later, grind it and sieve the mixture. The mixture can be pounded again and extracted. The second  extract can be used for any other dish. This is the thick coconut milk. Alternatively, you can use store bought coconut milk. 
    • Onion: Cut it into small pieces.
    • Oil : Any cooking oil will do.
    • Green Chilli
    • Turmeric powder 
    • Salt 
    • Water
    Print Recipe
    a bowl of srilankan green bean curry
    Evergreendishesdev

    Srilankan Green Bean Curry

    Srilankan green bean curry is a tasty side dish cooked in coconut milk. It makes a good accompaniment with chapathi or steamed rice.
    Prep Time 20 minutes
    Cook Time 15 minutes
    Total Time 35 minutes
    Servings: 4 people
    Course: dinner ideas, lunch
    Cuisine: srilanka cuisine

    Ingredients
      

    • 100 ml thick coconut milk (
    • 2 teaspoon oil
    • 1 onion
    • 3 green chilli
    • a few curry leaves
    • 1/4 teaspoon turmeric powder
    • 150 grams beans
    • 75 ml water +100 ml
    • salt

    Equipment

    • 1 pan
    • 1 knife
    • 1 chopping board
    • 2 bowls
    • 1 serving spoon
    • 1 lid cover

    Method
     

    1. To extract coconut milk, soak one cup of fresh  grated coconut in hot water for half an hour. Later, grind it and sieve the mixture. This is the thick coconut milk.
    2. Cut the onion into small pieces.
    3. Cut the beans into two inch long pieces.
    4. Heat oil in a pan, add onion pieces to it. Saute it for some time until it turns pink in colour
    5. Add green chilli and curry leaves to it.
    6. Add the beans, give a stir. Allow to cook for sometime.
    7. Put turmeric powder, salt and water in it.
    8. After two minutes, put the coconut milk.
    9. Cover and cook for two minutes.
    10. Green beans curry is ready to serve.

    Notes

    If you are extracting at home, use only the thick coconut milk. Repeat it second time and use it for any other dish. The milk can be stored in the refrigerator for a day.
    The beans are cut long with a diagonal at the end. 

    Pin it for later : 

    a bowl of srilankan green bean stir fry
    Srilankan green bean stir fry

    If you ever make Srilankan Green Bean Curry, do take a picture and share with me by tagging @foodiejayashree on Instagram or @evergreendishes on Facebook. Subscribe to get all updates and an e-book for free.

  • Tri-colour Dhokla | Gujarati cuisine

    Tri-colour Dhokla | Gujarati cuisine

    Tri-colour dhokla is a three layered dhokla. The green layer is sandwiched between the yellow coloured dhokla and white dhokla. The yellow dhokla is khaman dhokla. It makes a good evening snack.

    Dhokla as we all know is a popular savoury snack from Gujarati cuisine. It was initially made with gram flour but soon different kinds were made. Dhokla in its real form is  fermented and later steamed. Times have changed, today, most of the dhokla recipes we make are the instant versions. The most common scenario is we are on work and need to whip some quick dishes, isn’t it ? I have shared many instant dhokla recipes earlier. Check out my corn dhokla, oats dhokla and multi-millet dhokla

    To make tri-colour dhokla, it needs a little planning. It is made by fermenting the two batters. Ideally, it is best to mix at night and prepare in the morning. But, incase, you want to make it in the evening, you need to mix the batter in the morning itself. Here, I have taken one cup of flour, feel free to use the same measurement in grams.

    Let us get to the tri-colour dhokla recipe:

    tri-colour dhokla

    Tri-colour Dhokla

    Ingredients:

    • 1 cup rice flour      ( 1 cup =240ml)
    • 1 cup gram flour
    • 1 cup sour curd
    • 1 tablespoon green chutney
    • 1 teaspoon gram flour
    • 2 tablespoon + 2 teaspoon oil
    • 1 teaspoon soda
    • salt to taste
    • 1/2 teaspoon mustard
    • 1/4 teaspoon asafoetida
    • 1/2 teaspoon cumin
    • a few curry leaves
    • 2 green chilli
    • 1 tablespoon buttermilk
    • coriander for garnishing

    Method:

    1. Take rice flour and gram flour in two seperate bowls.
    2. Mix some curd with gram flour and put it aside.
    3. Use the remaining curd to mix rice flour.
    4. Cover with a lid and keep them in a warm place. Ferment  for at least five hours.
    5. Mix a spoon of besan in the green chutney. This is used for the green layer.
    6. Heat two tablespoon of oil in a pan, add soda to it . Once it cools, mix into both the batter.
    7. Add the required quantity of salt to both the batter.
    8. Put the dhokla steamer to heat.
    9. Grease the tin.
    10. Now, put half the quantity the oil with soda mixture to the white batter. Mix and pour into the tin.
    11. Allow it to steam.
    12. After five minutes, when it is partially done, spread the green chutney over it. Close the lid and steam for two minutes.
    13. Now, pour the remaining oil and soda mixture to the khaman batter. Mix and pour it over the green chutney which you had spread.
    14. Allow it to steam for sometime, a knife pricked should come out clean.
    15. In the meantime, make the seasoning with nustard, cumin, green chilli and cury leaves. Mix some nutermilk in the seasoning.
    16. Cut the dhokla into pieces, pour the seasoning over it.
    17. Tri-colour dhokla is ready to serve.

    Tips :

    • The curd should be sour but not foul smelling. It is best to use a day old curd kept outside.
    • Fermentation is needed for this variety of dhokla. I, mix the dhokla batter at night and keep it aside.
    • Use a little water, if needed, while mixing the dough.
    • To make green chutney, grind coriander, green chilli and salt with a little water. Later, mix gram flour to it.
    • You can add sesame for topping.

    Are you looking for different kind of Gujarati dishes? Check out  cabbage and methi muthiya, dal dhokli recipe

    tri-colour dhokla
    Evergreendishesdev

    Tri-colour Dhokla

    5 from 1 vote
    Tri-colour dhokla is a fermented, three layered dhokla from Gujarati cuisine.
    Prep Time 15 minutes
    Cook Time 30 minutes
    Resting time 5 hours
    Total Time 5 hours 45 minutes
    Course: evening snacks
    Cuisine: Gujarati

    Ingredients
      

    • 1 cup rice flour 1 cup =240ml
    • 1 cup gram flour
    • 1 cup sour curd
    • 1 tablespoon green chutney
    • 1 teaspoon gram flour
    • 2 tablespoon + 2 teaspoon oil
    • 1 teaspoon soda
    • salt to taste
    • 1/2 teaspoon mustard
    • 1/4 teaspoon asafoetida
    • 1/2 teaspoon cumin
    • a few curry leaves
    • 2 green chilli
    • 1 tablespoon buttermilk
    • coriander

    Equipment

    • 2 bowls
    • 2 ladles
    • dhokla maker
    • tin
    • knife
    • kadai

    Method
     

    1. Take rice flour and gram flour in two seperate bowls.
    2. Mix some curd with gram flour and put it aside.
    3. Use the remaining curd to mix rice flour.
    4. Cover with a lid and keep them in a warm place. Ferment  for at least five hours.
    5. Mix a spoon of besan in the green chutney. This is used for the green layer.
    6. Heat two tablespoon of oil in a pan, add soda to it . Once it cools, mix into both the batter.
    7. Add the required quantity of salt to both the batter.
    8. Put the dhokla steamer to heat.
    9. Grease the tin.
    10. Now, put half the quantity the oil with soda mixture to the white batter. Mix and pour into the tin.
    11. Allow it to steam.
    12. After five minutes, when it is partially done, spread the green chutney over it. Close the lid and steam for two minutes.
    13. Now, pour the remaining oil and soda mixture to the khaman batter. Mix and pour it over the green chutney which you had spread.
    14. Allow it to steam for sometime, a knife pricked should come out clean.
    15. In the meantime, make the seasoning with nustard, cumin, green chilli and cury leaves. Mix some nutermilk in the seasoning.
    16. Cut the dhokla into pieces, pour the seasoning over it.
    17. Tri-colour dhokla is ready to serve.

    Notes

    The curd should be sour but not foul smelling.
    Use a little water, if needed, while mixing the dough.
    To make green chutney, grind coriander, green chilli and salt with a little water. Later, mix gram flour to it.
    You can add sesame for topping.
    Fermentation is needed for this variety of dhokla. I, mix the dhokla batter at night and keep it aside. 

    If you ever make Tri-colour Dhokla recipe, take a picture and tag @foodiejayashree on Instagram or @evergreendishes on Facebook. Subscribe to get all updates in your inbox and an e-book for free!

    Pin it  for later :

    tri-colour dhokla
    tri-colour dhokla


  • Homemade  Pav Bhaji Masala | Pav Bhaji Masala Recipe

    Homemade Pav Bhaji Masala | Pav Bhaji Masala Recipe

    Jump to Recipe Print Recipe

     Homemade Pav Bhaji Masala is aromatic and gives a good taste to the dish. The fresh flavour of roasted spices is too good and made an enjoyable  dinner for us.

    Spice mix are an essential part of our daily cooking. I  believe a day of  hard work  makes it easier for a couple of months.It gives a good flavour and makes cooking easier. The day starts with a chai masala added to tea. Sometimes, I need the sambar powder while making a quick breakfast.too. I like to sprinkle a wee bit of  garam masala and the dhana jeera powder in my cooking. Some days, I use the traditional powder south indian spice mix in my cooking. It is flavoursome and ideal to make an array of dishes. It is ideal to make a quick lunch with gojju. I even use it as a stuffing in cucumber stir fry and it tastes awesome. Pav Bhaji Masala is ideal to use in a variety of dishes.

    pav bhaji masala
    pav bhaji masala

    What is pav bhaji?

    Pav Bhaji is a popular street for from Mumbai. It is ideal to serve as an evening snack. Roasted bread buns are served with a tasty curry made of fresh peas and other vegetables with a generous topping of butter and finely chopped onions.  It makes a good option for dinner as it is filling.

    What is pav bhaji masala ?


    Pav Bhaji Masala is a spice mix made essentially for this snack. It is easily available in the market by various brands. The homemade spice mix is flavoursome and you are in total control of the kind of spices going into it.

    Can it be stored ?


    Yes, it can be stored. Make sure you keep it in a clean, air-tight container. I have made a small quantity, hence kept it outside. I usually put the spice mix in an air-tight container and put them in the freezer. I use them occasionally and it stays good for a long time. 

    How can it used ?

    Pav Bhaji Masala is ideal to use in stir fry. Sprinkle a little spice mix along with chilli powder and it gives a good flavour. You can use it in tava pulao. I use it in spicy pav buns  too.

    About the event :

    It’s time for Shhh Secretly Cooking Challenge. Here onee of the members suggest a theme. The members are paired, they exchange two secret ingredients and make a dish accordingly. The theme was ” Spice Mix ” suggested by me.   My partner for the month was Kalyani Sri. I told I wanted to make pav bhaji masala and she gave me clove and black cardamom as the secret ingredients. I have given shah jeera and anardana as the secret ingredients  and she has made a flavoursome mumbai sandwich masala


    Homemade Pav Bhaji Masala : 

    Ingredients:

    • 1/4 cup coriander seed
    • 4 black cardamom
    • 6 cloves
    • 10 pepper corn
    • 2 tablespoon cumin
    • 1 tablespoon fennel seed
    • 1 stick cinnamon
    • 5 red chilli
    • 1 tablespoon turmeric powder
    • 1.5 tablespoon amchur powder
    • 1 tablespoon black salt


      Method: 

    1. Take coriander seed, cloves, pepper corn, cumin, fennel and red chilli in a pan. Roast them for three minutes until you get a good aroma. Keep tossing them with a spatula.
    2. Let the ingredients  cool.
    3. Grind to a coarse powder. Add amchur powder, turmeric powder and black salt to it. Grind to a fine powder.
    4. Pav Bhaji Masala is ready to use.
    5. Keep it in a clean air tight container. 
    pav bhaji masala

    Pav Bhaji Masala Recipe

    Pav Bhaji Masala is a flavoursome spice mix from Indian cuisine. It is versatile to use.
    Prep Time 10 minutes
    Cook Time 10 minutes
    Course: condiments
    Cuisine: north indian

    Ingredients
      

    • 1/4 cup coriander seed
    • 4 black cardamom
    • 6 cloves
    • 10 pepper corn
    • 2 tablespoon cumin
    • 1 tablespoon fennel seed
    • 1 stick cinnamon
    • 5 red chilli
    • 1 tablespoon turmeric powder
    • 1.5 tablespoon amchur powder
    • 1 tablespoon black salt

    Equipment

    • pan, spatula, measuring cup, pan

    Method
     

    1. Take coriander seed, cardamom, clove, pepper corn, cumin fennel, cinnamon and red chilli  in a pan. Roast them for three minutes until you get a good aroma. Keep tossing them with a spatula.
    2. Allow them to cool.
    3. Grind them to a powder. Add turmeric powder, amchur powder and black salt to it. Grind altogether again to a fine powder.
    4. Pav Bhaji Masala is ready ro use. Store it in a dry container.

    Pin Pav Bhaji Masala Recipe : 

    pav bhaji masala
    pav bhaji masala

    If you ever make Pav Bhaji Masala  in your kitchen, take a picture and tag @foodiejayashree on Instagram or @evergreendishes on Facebook. Subscribe to get all updates in your inbox and an e-book for free! 

  • Mughlai Vegetable Pulao

    Mughlai Vegetable Pulao

    Print RecipeJump to Recipe

    Mughlai VegPulao is a rich, mildly aromatic  and delicious rice dish from Indian sub-continent. It is rich with the addition of nuts and fruit pieces. It makes a good meal for the weekend. 

    Rice dish in any form is always welcome at home.  It serves dual purpose, it is loved by my children and  cooking is made easier for the day. It is ideal for brunch, weekend lunch or dinner. Mughlai Pulav as the name indicates is rich and tasty. It paies well with any curd based salad and a appetiser. 

    Earlier, I have shared some recipes which I often make at home. They are  pudina pulao, spring onion and corn pulao, corn and peas pulao, jeera rice, tri-colour pulav

    To make mughlai veg pulao, initially cook  the rice separately with a bay leaf, a teaspoon of ghee and a pinch of salt. Cut the vegetables into thin strips. Grind coconut along with coriander seed, poppy seed, garlic and ginger to a paste. Here, I have used a mixture of oil and ghee to cook it., it gives a good taste to the dish. One can fry the nuts ahead and keep them aside at this stage. The detailed recipe is given below.

    mughlai vegetable pulao
    mughlai vegetable pulao

    Mughlai Pulao Recipe 

    Ingredients: 

    • 1 cup basmati rice
    • 1 bay leaf
    • 1 teaspoon ghee
    • 1/4 cup beans (cut in one inch long pieces)
    • 1/4 cup carrot  (cut similarly, used in lesser quantity )
    • peas
    • 1/4 cup beetroot ( cut similarly, used in lesser quantity)
    • fruit pieces ( I have used apple and pomegranate)
    • 2 tablespoon oil
    • 1 tablespoon ghee
    • 2 cloves
    • 1 inch stick cinnamon
    • 2 cardamom
    • 1 tablespoon fresh coconut
    • 1.5 teaspoon poppy seed
    • 5 cloves garlic
    • 5 green chilli
    • 1/2 inch ginger
    • 1.5 tablespoon coriander seed
    • salt

    Method : 

    1. Cook the rice with bay leaf and a teaspoon of ghee. We need separate grains of rice, add water accordingly.
    2. In a thick bottom pam, add ghee and oil. Put cardamom, cloves and cinnamon to it. After a few seconds, add beans to it. Put carrot and beetroot pieces after two minutes. Let them cook. Put peas to it. 
    3. Grind together coconut, poppy seed, green chilli, ginger and coriander seed with a little water. 
    4. Put the paste in it and saute it for sometime. Let the raw smell diminish. 
    5. Now, add  the cooked rice and salt to it. Mix it gently.
    6. Fry cashew and raisins in ghee.
    7. Garnish with fruits and dry fruits. Serve Mughlai vegetable pulao with a raita of your choice. 

    Take a tip:

    • You may  add grapes and pineapple pieces to it.
    • Let the pressure release by itself. It is good to spread on a wide plate. 
    • Vegetables are of your choice. You may add potatoes and omit beetroot if you wish.
    • Avoid using garlic to make it a no onion garlic recipe. 

    About the event : 

    Sending this to “Exotic Pulao and Biryanis ” at Shhh Secretly Cooking group. The theme was suggested by Swaty Malik. She has a wide range of dishes on her blog. I have bookmarked her healthy moong dal idlis to try. Here, we are paired together and partners exchange two ingredients as secret ones to cook a dish. Later, other members try to guess the given ingredients. I was paired with Renu. She gave me green chilly and poppy seed and I have prepared  this Mughlai Vegetable Pulao. I gave cinnamon and bada elaichi ( big cardamom) as the secret ingredients and she has prepared a delicious One Pot Vegetable Mangodi Tahiri.  I would love to make  her no bake coffee energy balls soon. 

    shhh cooking secretly

    mughlai vegetable pulao
    Evergreendishesdev

    Mughlai Vegetable Pulao

    Mughlai vegetable pulao is a delicious rice dish prepared with coconut and other spices, cooked with assorted vegetables and garnished with fruits and nuts
    Prep Time 15 minutes
    Cook Time 30 minutes
    Total Time 45 minutes
    Servings: 4
    Course: lunch ideas, Main Course
    Cuisine: Indian

    Ingredients
      

    • 1 cup basmati rice
    • 1 bay leaf
    • 1 teaspoon ghee
    • 1/4 cup beans cut in one inch long pieces
    • 1/4 cup carrot cut similarly, used in lesser quantity
    • peas
    • 1/4 cup beetroot cut similarly, used in lesser quantity
    • fruit pieces I have used apple and pomegranate
    • 2 tablespoon oil
    • 1 tablespoon ghee
    • 2 cloves
    • 1 inch stick cinnamon
    • 2 cardamom
    • 1 tablespoon fresh coconut
    • 1.5 teaspoon poppy seed
    • 5 cloves garlic
    • 5 green chilli
    • 1/2 inch ginger
    • 1.5 tablespoon coriander seed
    • salt

    Method
     

    1. Cook the rice with bay leaf and a teaspoon of ghee. We need separate grains of rice, add water accordingly.
    2. In a thick bottom pam, add ghee and oil. Put cardamom, cloves and cinnamon to it. After a few seconds, add beans to it. Put carrot and beetroot pieces after two minutes. Let them cook. Put peas to it.
    3. Grind together coconut, poppy seed, green chilli, ginger and coriander seed with a little water.
    4. Put the paste in it and saute it for sometime. Let the raw smell diminish.
    5. Now, add  the cooked rice and salt to it. Mix it gently.
    6. Fry cashew and raisins in ghee.
    7. Garnish with fruits and dry fruits. Serve Mughlai vegetable pulao with a raita of your choice.

    Notes

    You may  add grapes and pineapple pieces to it.
    Let the pressure release by itself. It is good to spread on a wide plate. 
    Vegetables are of your choice. You may add potatoes and omit beetroot if you wish.
    Avoid using garlic to make it a no onion garlic recipe. 

    If you ever make this Mughlai Vegetable Pulao,  do take a picture and tag @foodiejayashree on Instagram or @evergreendishes on Facebook or Twitter. I will be glad to see your creation and share it further. Let’s be connected, do follow on social media platforms. Until next time, let’s stay connected.  Subscribe to get all updates and an e-book for free. Check out my e-books on Amazon.  Happy Cooking !

    Mughlai Vegetable Pulao is a delicious rice preparation with coconut, spices, nuts and assorted vegetables. It is ideal to serve during get-togethers.
    Mughlai Vegetable Pulao
  • Veg Shami Kabab | Veg Shammi Kebab recipe

    Veg Shami Kabab | Veg Shammi Kebab recipe

    Jump to Recipe Print Recipe

    Shami Kabab is a kabab made using black chick peas along with other spices. It is mainly a meat based dish but today we find many vegetarian versions also. It is ideal to serve as an appetiser. It can also be used as a filling for burger. 

    What is shami kebab?

    Shami Kebab is a popular snack from Awadhi cuisine. It is made of minced meat. But, it can be made in vegetarian version using brown chick peas. and other spices. It is succulent and crispy. It is ideal to serve as an appetizer or an evening snack.

    Can they be shallow fried?

    Yes, they can be shallow fried, but I prefer to put them on a skillet with very little oil. 

    What are the binding ingredients used in Veg Shami Kabab? 

    The binding ingredients I have used is oats flour and potato. Grind oats and it is ready to use. You may use bread or roasted gram flour too. 

    Do you have any other kabab recipes?

    Yes, I have shared hara bhara kabab, Veg Seekh Kabab and Seekh Moong Kabab earlier. 

    Veg Shami Kababs: 

    Ingredients: 

    • 1/2 cup kala chana
    • 1/2 teaspoon turmeric powder
    • little salt
    • 1 potato
    • 2 teaspoon oil 
    • 2 onion 
    • 1green chilli
    • 1 inch ginger
    • 1 /2 teaspoon amchur powder
    • 1 teaspoon coriander powder
    • 1/2 teaspoon cumin powder
    • 1 tablespoon oats powder
    • coriander leaves
    • salt
    • 1 tablespoon oats flour
    • oil for roasting

    For the mint and coriander dip: 

    • 2 tablespoon coriander
    • a few mint leaves
    • 1green chilly,
    • 2 cloves garlic
    • salt
    • 1/2 cup hung curd 


    Method:

    1. Clean, wash and soak black chana for six to eight hours. 
    2. Discard the water, boil them in a pressure cooker for five whistles. 
    3. Boil the potato.
    4. Cut the onion finely.
    5. Grind green chilli and ginger. 
    6. Take oil in a pan, add onion and saute for sometime. It should be translucent, put the green chilli and ginger paste to it, continue to saute it for a minute. Keep it aside. 
    7. Drain the water from brown chick peas and mash it. I used the potato masher, alternatively you can grind them, 
    8. Mix the mashed chick pea and potato with the onion mixture. Add amchur powder, coriander powder, chilli powder and cumin powder. Put salt and oats flour. Mix all of them together. 
    9. Heat a skillet.
    10. Make them in the shape of a kebab and cook them on the skillet with a little oil. After a while, flip them and let cook the other side.
    11. Serve hot with dip. 

    To make the mint and coriander dip: 

    1. Wash the mint and coriander leaves.
    2. Grind them with green chilli and garlic.
    3. Put a little salt.
    4. Add the hung curd to it and mix it.
    5. Cover it and chill for sometime.
    6. Serve with kababs. 

    Take a tip:

    • A pinch of black salt in the dip enhances the taste.
    • Chick pea should be well cooked.
    • Potato can be boiled ahead and kept in the refrigerator. 
    • Here is a chaat masala which you can use in the preparation of this dish. You can put a little of it in the kebab and the dip too. 


    veg shami kebab
    veg shami kebab

    About the event: 

    Sending this to Shhh Secretly Cooking group challenge with the theme, ” Kabab Time”. The theme was suggested by Sujata Roy. She is a blogger who showcases many tasty dishes from Bengal. I liked her lauki kheer and would love to try it soon. Here, we are paired with a partner and exchange two secret ingredients. A dish is prepared and later, the members guess the ingredients. My pat=rtner was Aruna Saras Chandra. She has given me potato and ginger and I made these tasty kabas. I had given her green chilly and coriander, she has prepared Paneer Vegetable Kebabs

    shhh cooking secretly

    Veg Shami Kabab

    Veg Shami Kabab is a delicious snack or appetizer made with brown chick peas. This is a vegetarian version of popular meat based kabab.
    Prep Time 30 minutes
    Cook Time 30 minutes
    6 hours
    Total Time 7 hours
    Servings: 20 pieces
    Course: Appetizer, evening snacks
    Cuisine: north indian

    Ingredients
      

    • For the kababs:
    • 1/2 cup kala chana
    • 1/2 teaspoon turmeric powder
    • little salt
    • 1 potato
    • 2 onion
    • 1 green chilli
    • 1 inch ginger
    • 1 /2 teaspoon amchur powder
    • 1 teaspoon coriander powder
    • 1/2 teaspoon cumin powder
    • 1 tablespoon oats powder
    • coriander leaves
    • salt
    • 1 tablespoon oats flour
    • oil for roasting
    • For the mint and coriander dip:
    • 2 tablespoon coriander
    • a few mint leaves
    • 1 green chilly
    • 2 cloves garlic
    • salt
    • 1/2 cup hung curd

    Method
     

    1. Clean, wash and soak black chana for six to eight hours.
    2. Discard the water, boil them in a pressure cooker with a little turmeric powder and a pinch of salt for five whistles. Let the pressure release by itself.
    3. Boil the potato.
    4. Cut the onion finely.
    5. Grind green chilli and ginger.
    6. Take oil in a pan, add onion and saute for sometime. It should be translucent, put the green chilli and ginger paste to it, continue to saute it for a minute. Keep it aside.
    7. Drain the water from brown chick peas and mash it. I used the potato masher, alternatively you can grind them,
    8. Mix the mashed chick pea and potato with the onion mixture. Add amchur powder, coriander powder, chilli powder and cumin powder. Put salt and oats flour. Mix all of them together.
    9. Heat a skillet.
    10. Make them in the shape of a kebab and cook them on the skillet with a little oil. After a while, flip them and let cook the other side.
    11. Serve hot with dip. Repeat for the rest of the dough.
    12. To make the mint and coriander dip:
    13. Wash the mint and coriander leaves.
    14. Grind them with green chilli and garlic.
    15. Put a little salt.
    16. Add the hung curd to it and mix it.
    17. Cover it and chill for sometime.

    Notes

    • Add a pinch of black salt to the dip for better taste
    • The chick peas should be well cooked. 
    • Potato can be boiled ahead and kept in the refrigerator. 

    Pin it for later:

    Veg Shami Kabab is a delicious snack or appetizer made wiith brown chick peas. This is the vegetarian version of the popular shami kebab.
    Veg Shami Kabab

    If you ever make this vegetable spice mix recipe,  do take a picture and tag @foodiejayashree on Instagram or @evergreendishes on Facebook or Twitter. I will be glad to see your creation and share it further. Let’s be connected, do follow on social media platforms. Until next time, let’s stay connected.  Subscribe to get all updates and an e-book for free. Check out my e-books on Amazon.  Happy Cooking!

  • Rumali Roti | Roomali Roti recipe

    Rumali Roti | Roomali Roti recipe

    Jump to Recipe Print Recipe

    Rumali Roti / Roomali roti is a soft, thin, unleavened flat bread from Indian sub-continent. Roomal translates to a handkerchief, these rotis are thin and may be folded as a hand- kerchief, hence the name.

    Rumali roti is also known as Manda roti. In Punjab, it is called as lamboo roti. The roti is made into a thin, long flatbread, hence the name.

    It is usually made with all-purpose flour. A mix of wheat flour and maida too gives a good one.


    Rumali Roti / Roomali Roti
    Rumali Roti /Roomali Roti


    The other kind of flat breads shared earlier are potato and peas paratha, zucchini paratha, gujarati thepla, masala paratha, mint paratha

    A few side dish to pair with it are Alu Palak, Dal Palak, Malai Kofta, Dum AlooMethi Chaman

    On a busy day, you can make this Rumali roti and pair it with Butter Paneer Masala from Alco Foods. They also have Royal Paneer and Paneer with Onion and Capsicum which are delicious. Children will be happy with these curries. 


    Let us get to the  Rumali Roti / Roomali Roti recipe


    Ingredients:


    2 cup wheat flour
    1/2 cup maida
    1 teaspoon ghee
    salt
    1.25 cup water
    2 teaspoon oil

    Equipments: 

    pan, rolling pin, kadai, 


    Method:

    1. In a wide bowl, take wheat flour and maida. Add salt and ghee to it and mix well. 
    2.  Using a small quantity of water at a time, mix the dough. 
    3. Smear a little oil over the dough, cover it with a muslin cloth and keep it aside for an hour. 
    4. Remove the dough, knead it again for sometime. 
    5. Take a ball, dust it with a little flour and roll it into a thin roti.
    6. Heat a kadai. Once it is hot, put the rolled roti over it, cook it on a  slow to medium flame.   Press the edges, lightly with a thin cloth. 
    7. Once it is cooked, flip it to the other side and let cook for sometime. After  a few spots are visible, it is done.
    8. Serve it hot with any curry. 

    Take a tip: 

    • You may use only maida.
    • These rotis are best served hot. They turn crisp if left for sometime.
    • Do not use non-stick kadai. Iron kadai is the best. 
    Rumali Roti / Roomali Roti
    Evergreendishesdev

    Rumali Roti / Roomali Roti

    Rumali Roti is a soft, unleavened flatbread. It is ideal to serve with any curry.
    Prep Time 20 minutes
    Cook Time 40 minutes
    2 hours
    Total Time 3 hours
    Servings: 4 people
    Course: dinner, lunch
    Cuisine: north indian

    Ingredients
      

    • 2 cup wheat flour
    • 1/2 cup maida
    • 1 teaspoon ghee
    • salt
    • 1.25 cup water
    • 2 teaspoon oil

    Equipment

    • pan
    • rolling pin
    • kadai
    • small plate
    • bowl

    Method
     

    1. In a wide bowl, take wheat flour and maida. Add salt and ghee to it and mix well.
    2. Using a small quantity of water at a time, mix the dough.
    3. Smear a little oil over the dough, cover it with a muslin cloth and keep it aside for an hour.
    4. Remove the dough, knead it again for sometime.
    5. Take a ball, dust it with a little flour and roll it into a thin roti.
    6. Heat a kadai. Once it is hot, put the rolled roti over it, cook it on a  slow to medium flame.   Press the edges, lightly with a thin cloth.
    7. Once it is cooked, flip it to the other side and let cook for sometime. After  a few spots are visible, it is done.
    8. Serve it hot with any curry.

    Notes

    You may use only maida.
    These rotis are best served hot. They turn crisp if left for sometime.


    Pin it for later:

    Rumali Roti/ Roomali Roti is a soft, unleavened flatbread. It is ideal to serve for lunch or dinner.
    Rumali Roti / Roomali Roti

    If you ever make this Lemon Rasam   recipe or any of my other dishes,  do take a picture and tag @foodiejayashree on Instagram or @evergreendishes on Facebook or Twitter. I will be glad to see your creation and share it further. Let’s be connected, do follow on social media platforms. Until next time, let’s stay connected.  Subscribe to get all updates and an e-book for free. Check out my e-books on Amazon.  Happy Cooking !


  • Aloo Matar / Potato Pea Curry

    Aloo Matar / Potato Pea Curry

    Aloo matar/ potato pea curry  is a classic  North Indian accompaniment. Chunks of boiled potato and green peas are immersed and cooked in a delicious gravy laden with spices, it makes a tasty accompaniment with any Indian flat bread as roti, nan, chapathi or phulka.

    Potato is a versatile vegetable and easy to prepare. It helps to prepare tasty dishes that is loved by all.

    Aloo Matar can be served  during breakfast, lunch or dinner. It is ideal to pack in lunch box too. It is vegan and gluten free.

    My other North Indian curry on the blog

    Restaurant Style Veg Hariyali, Tuvar Lilva Masala Curry, Matar Paneer

    aloo matar potato pea curry
    aloo matar potato pea curry

    Aloo Matar, Potato Pea Curry

    Measurment used : 1 cup =200 ml

    Ingredients:

    • 4 potatoes boiled
    • 1 cup green peas
    • 2 onions
    • 3 tomatoes
    • 1 tablespoon melon seeds
    • 1 tablespoon oil
    • 1/2 teaspoon cumin
    • 1 teaspoon ginger garlic paste
    • 1/2 teaspoon turmeric powder
    • 2 teaspoon coriander powder
    • 3/4 teaspoon garam masala powder
    • 1 teaspoon chilly powder
    • salt to taste
    • 1/4 teaspoon kasuri methi ( dried fenugreek leaves)

    Method:

    1. Blanch the tomatoes.
    2. Soak the melon seeds in water.
    3. Peel the skin and cut into cubes.
    4. Make a puree of the tomatoes.
    5. Make a puree of the soaked melon seeds.
    6. Boil the green peas, if using frozen peas, put them in hot water.
    7. Take oil in a pan, add cumin, as it splutters, add onion to it.
    8. Saute it for sometime.
    9. Add the puree and continue to saute for three minutes. Add turmeric powder, garam masala and coriander powder to it. Let cook for sometime.
    10.  Put the melon paste to it.
    11. Add water accordingly to get the consistency of the gravy.
    12. Peel the skin of potatoes and cut into cubes. Put potato pieces and boiled peas to the gravy.
    13. Crush kasuri methi with fingers and sprinkle over it.
    14. Cook for three minutes.
    15. Serve with hot phulkas.

    Take a tip:

    • Having boiled potatoes in the refrigerator eases quicking.
    • Kasuri methi is readily available in the market. You can make it at home also. Take a bunch of fresh fresh fenugreek leaves, cut the stalk, wash the leaves by rinsing a couple of times in water and put it dry. After sometime, put the fenugreek leaves in a microwave safe bowl and mixcrowave for two or three minutes. Fresh kasuri methi is ready. You can also dry the leaves in sunlight.

    Aloo matar| Potato and peas curry
    Aloo Matar | Potato and peas curry

    Evergreendishesdev

    Aloo Matar Potato Pea Curry

    5 from 2 votes
    Aloo matar is a delicious north indian side dish served with any Indian flat bread as roti, nan or phulka.
    Prep Time 10 minutes
    Cook Time 20 minutes
    Total Time 30 minutes
    Servings: 4 person
    Course: kids favourite, lunch box, lunch ideas, Main Course
    Cuisine: Indian, north indian

    Ingredients
      

    • 4 potato
    • 1 cup green peas 1 cup =200 ml
    • 2 onion finely cut
    • 3 tomato
    • 1 teaspoon ginger garlic paste
    • 1 tablespoon oil
    • 1/2 teaspoon cumin
    • 3/4 teaspoon garam masala powder
    • 1 teaspoon chilly powder
    • 2 teaspoon coriander powder
    • salt to taste
    • 1/2 teaspoon kasuri methi

    Method
     

    1. Boil potatoes in pressure cooker.
    2. Boil peas separately. If using frozen, do not boil for long. Soak melon seeds in hot water for fifteen minutes. 
    3. Blanch tomatoes and make a puree. Make paste of melon seeds. 
    4. Take oil in a pan, add cumin, as it splutters, put onion in it.  Saute for sometime, until it turns light pink in colour. Add ginger garlic paste and let cook for sometime.
    5. Add tomato puree, let cook for two minutes. Add turmeric powder, garam masala, coriander powder and salt to it. Let cook for sometime, add the melon paste and mix it well. 
    6. Adjust the consistency of the curry. 
    7. Peel the potatoes and cut them into cubes. Throw them into the curry along with green peas. Crush the kasur methi with finger and sprinkle over it.Let cook for sometime.
    8. Serve hot with phulkas.

    Notes

    • Having boiled potatoes eases cooking.


    Aloo matar Potato pea curry
    Aloo Matar Potato pea curry

    Pin it for later:

    Aloo Martar
    Aloo matar

    Subscribe to get all updates in your inbox. If you ever recreate this dish, do tag me @foodiejayashree on Instagram, i would love to see your creation.

    Follow evergreendsihes on Facebook and Pinterest

    Sending this to

    CookBlogshare

    Fiesta Friday