Tag: winter recipes

  • Mooli Paratha | Radish Stuffed Flatbread

    Mooli Paratha | Radish Stuffed Flatbread

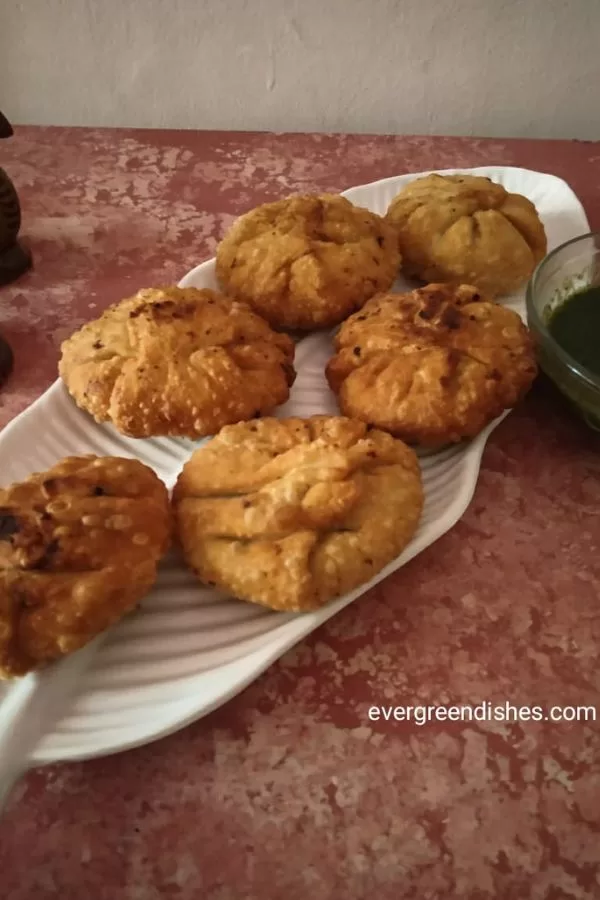
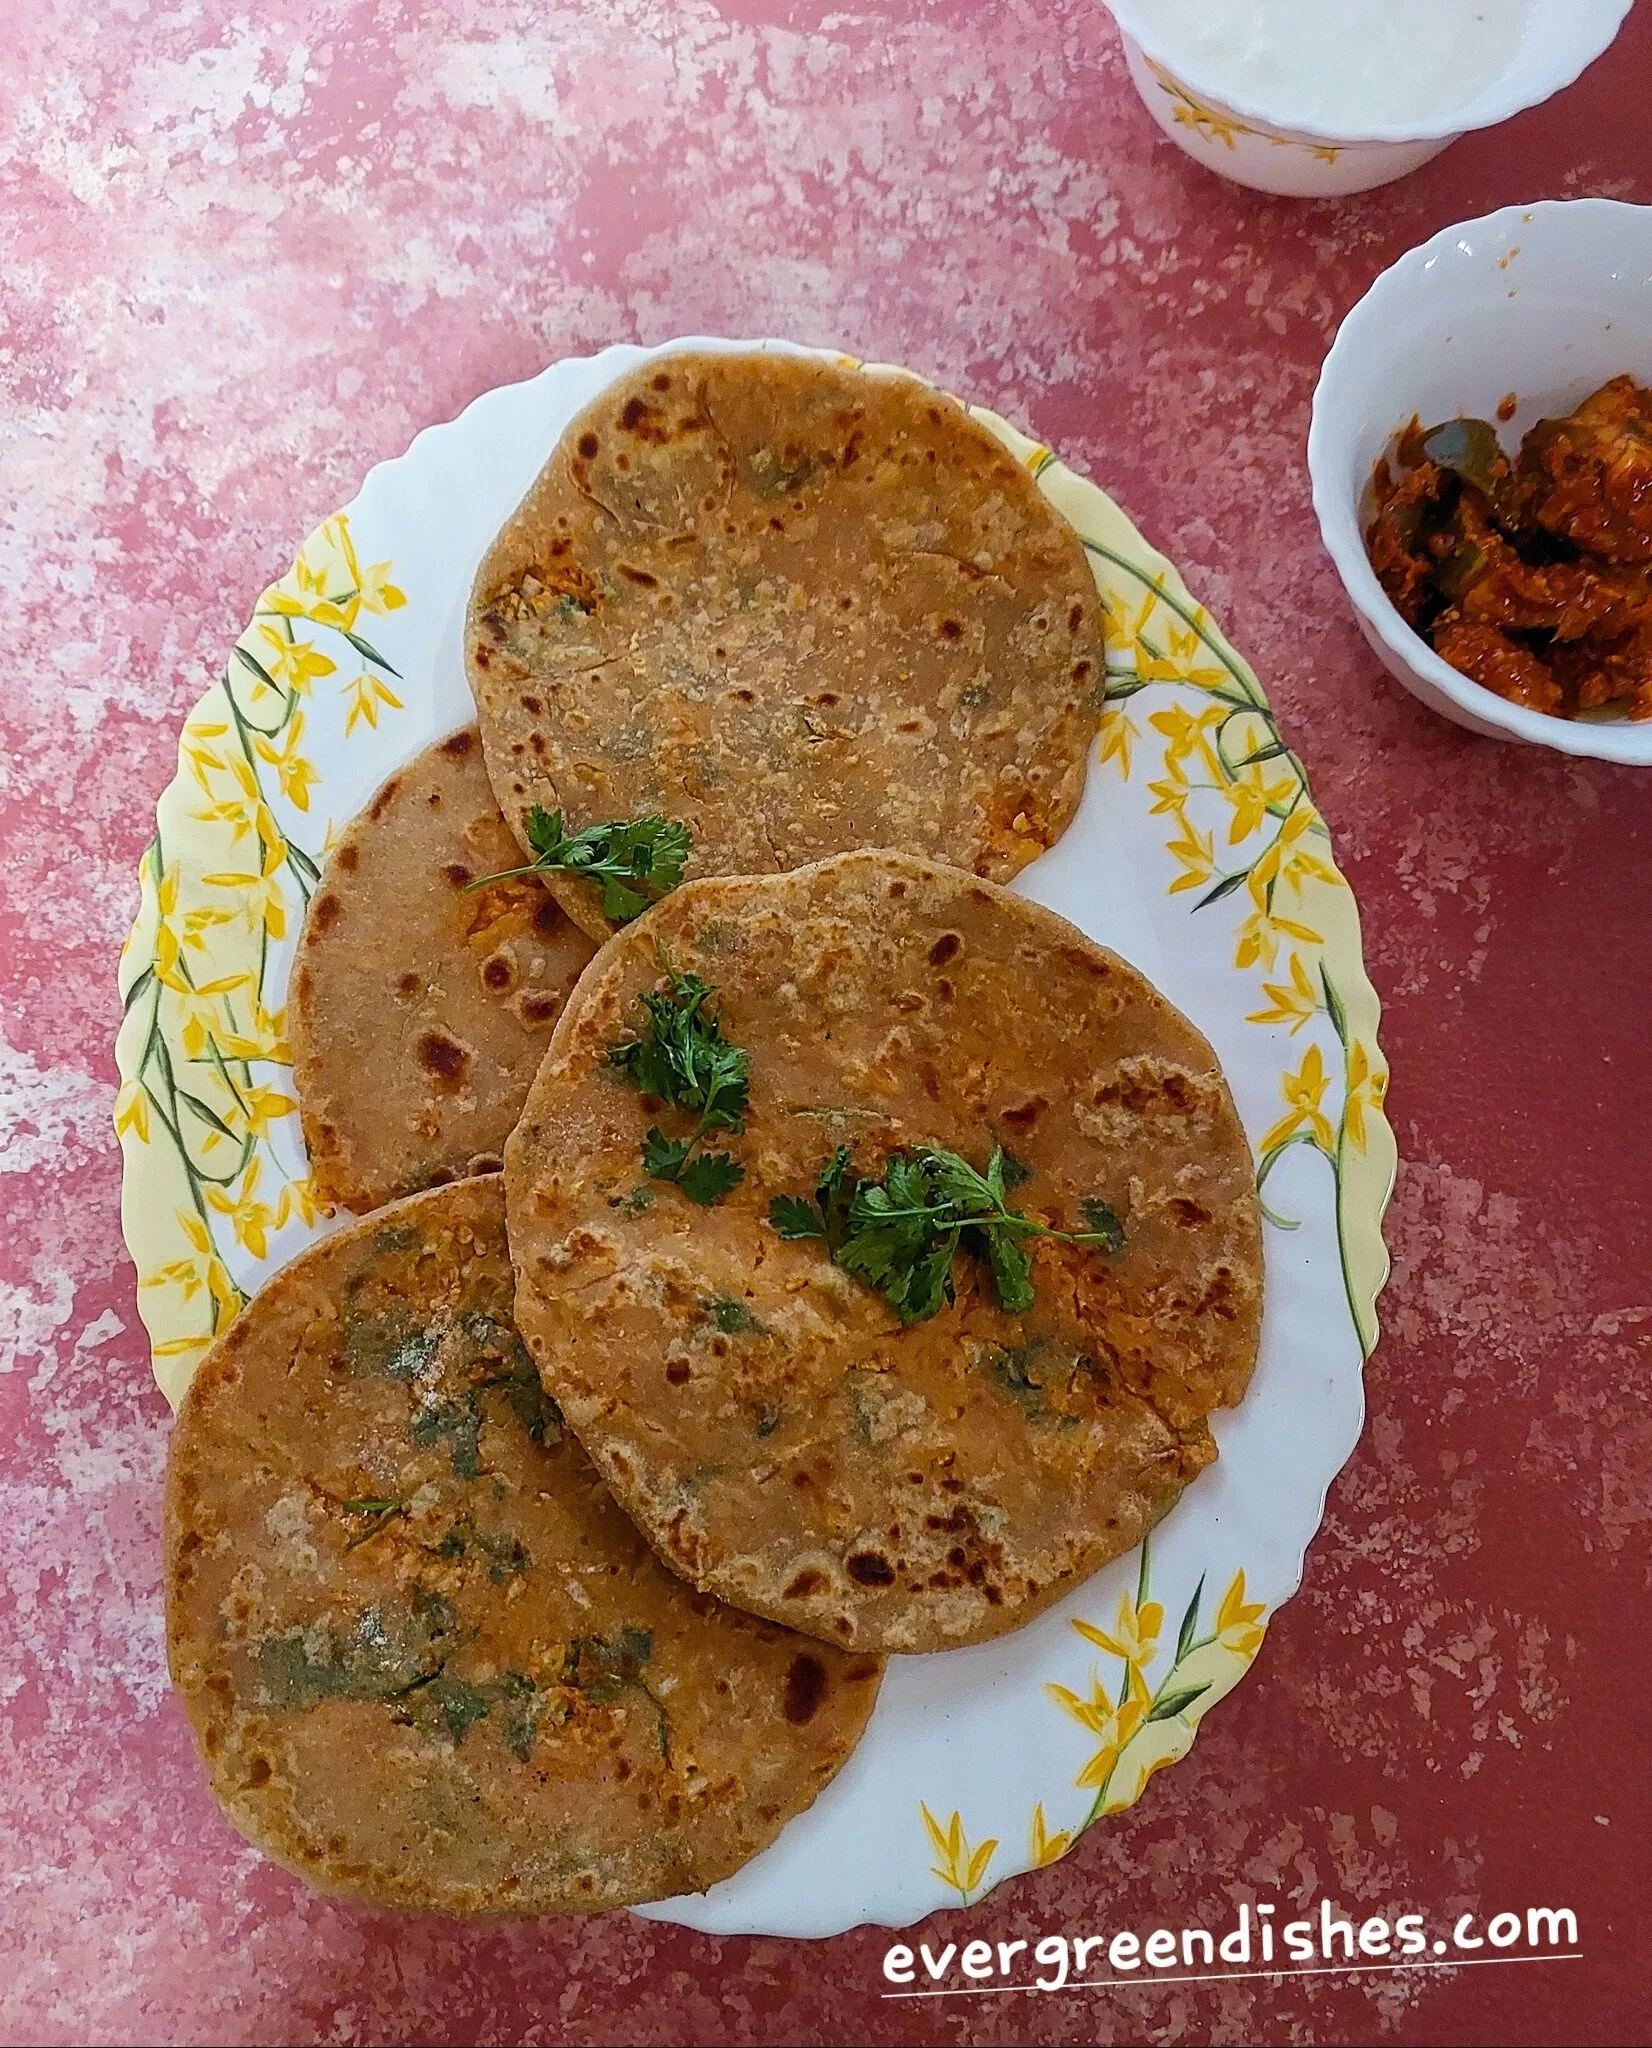
    Mooli Paratha is a tasty stuffed flatbread from North India.
    Mooli or radish is a winter vegetable. It is often used to make tasty stir fry and sambar.

    Winter is bountiful with fresh vegetables and fruits. Varied kind of vegetables are available in the market. Green peas, radish, pumpkin, brinjal are some of the winter vegetables we find here. Green leaf of different kinds are in large produce. 


    Radish is a flowering plant in the mustard family Brassicaceae. Though the vegetable is a tap root, the leaves too are consumed as greens. Earlier, it was used only in Asia, but today it is used throughout the world.

    Mooli as it is commonly called in India, is often disliked for its smell by some of them. But, one must consider the numerous health benefits . Being rich in fiber, it aids in weight loss and digestion. Radish helps in the blood sugar management. It also helps to cure urinary tract infections.

    It also improves the texture of the skin. It promotes better circulation of blood.

    How to use radish :

    Radish can be eaten in both ways, raw and cookwed. It is often used in making tasty stir fry and salad.
    It can also be used in sambar along with other vegetables.
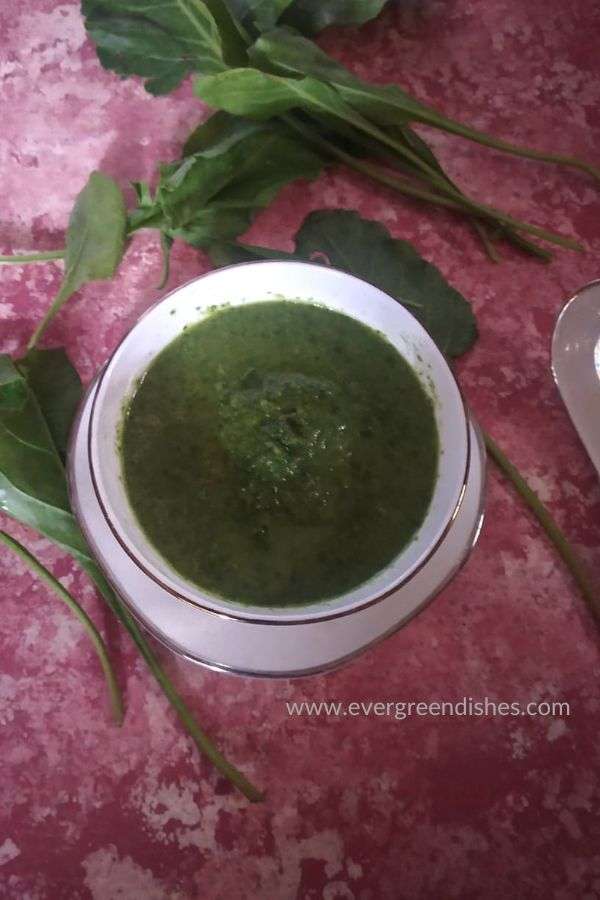
    The leaves of radish can be used in making tasty salads and soups.
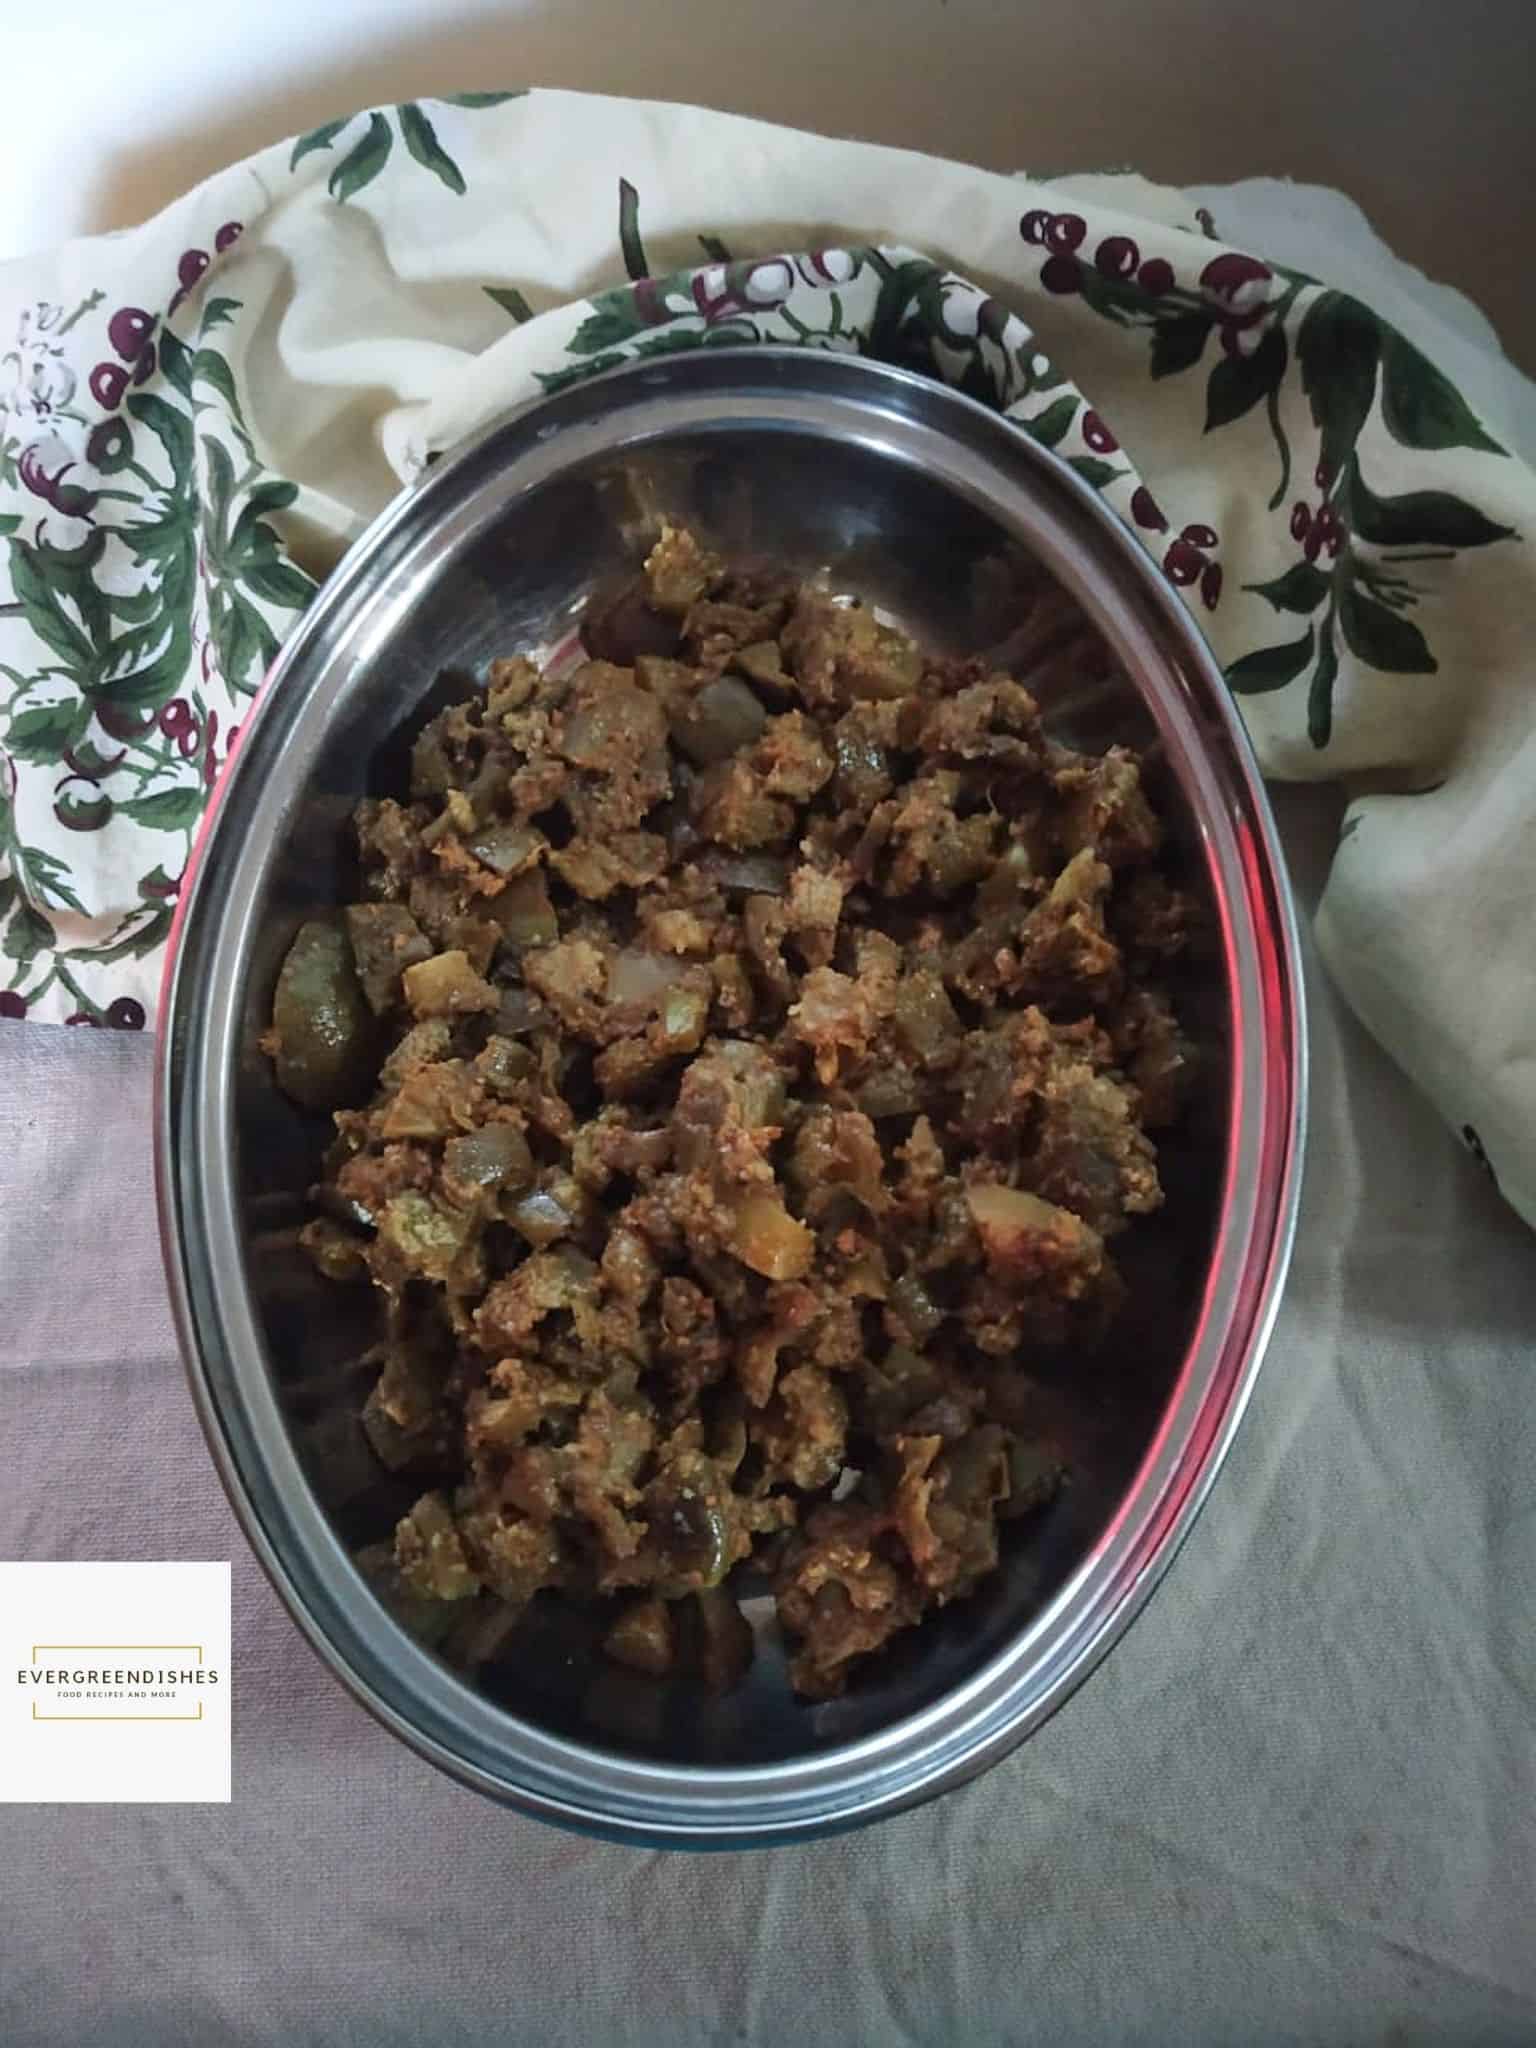
    Radish can also be used as a stuffing in parathas. It makes a tasty punjabi breakfast.


    mooli parathaMooli Paratha Recipe :


    Radish contains 75% water, hence it is difficult to roll easily. Salt is mixed to the grated radish and kept covered for sometime. It helps to remove the moisture.

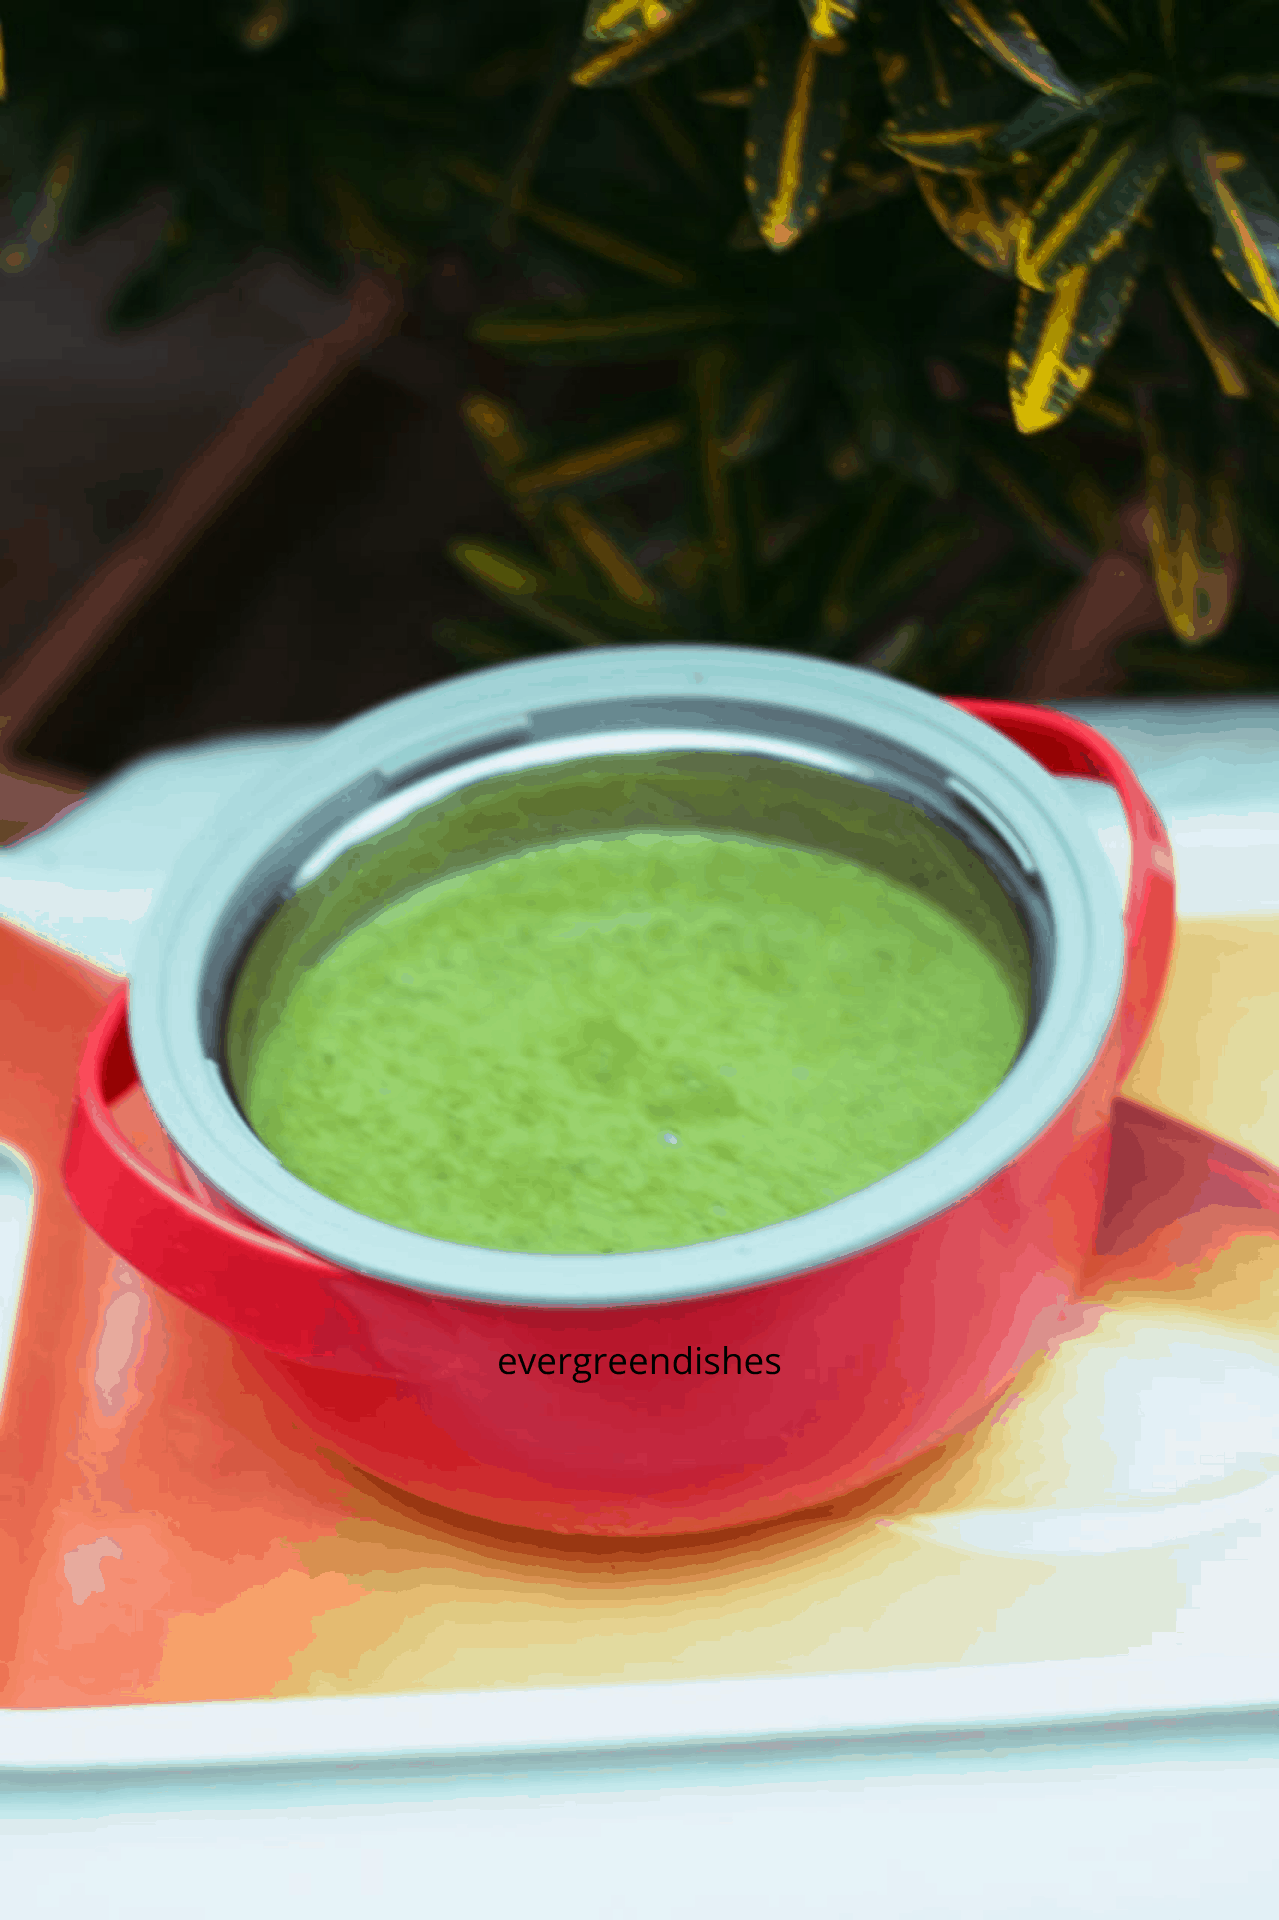
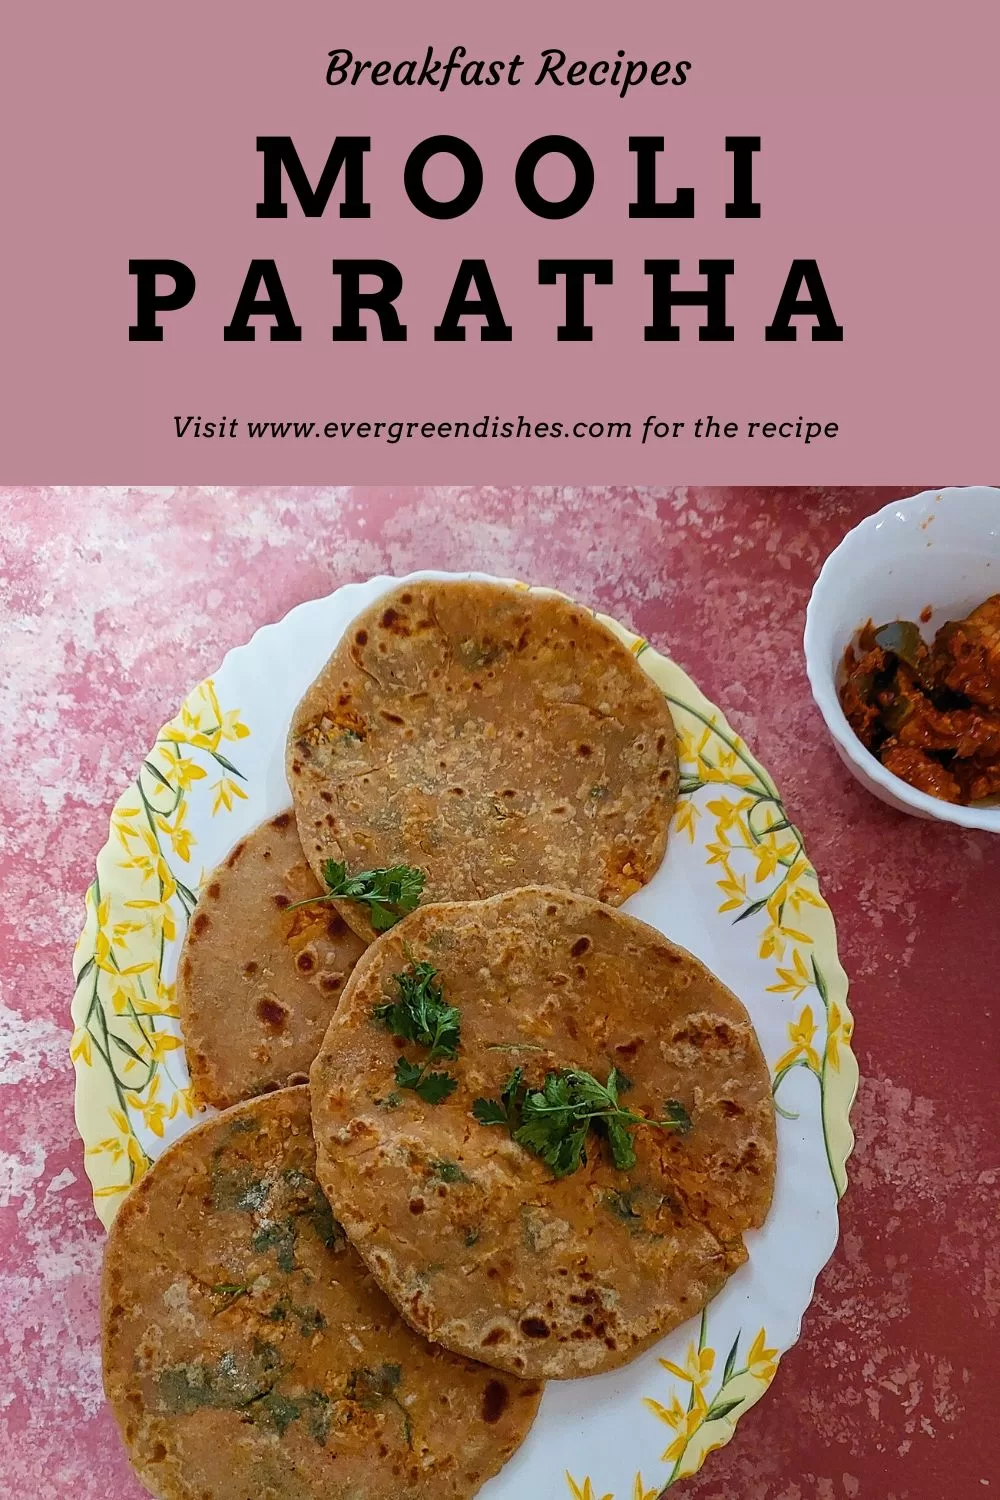
    Radish paratha can be made in two ways. You can either add green chilli or chilli powder as I have added here to the stuffing. There is a variation in taste. Mooli paratha is best enjoyed with pickles and curds. You may add chaat masala or dahi masala to the curd to enhance the taste. The other alternative is to use a green chutney.


    Ingredients :

    For the dough :

    • 2 cup wheat flour
    • ½ teaspoon ghee
    • A pinch of salt
    • Water for kneading
    • 1 teaspoon oil     

    For the stuffing :

    • 4 radish
    • ½ teaspoon garam masala
    • 1 teaspoon chilli powder
    • 1/2 teaspoon salt
    • 1 tablespoon fresh chopped coriander

      Other ingredients :

    • Mixture of oil and ghee for roasting

    Wheat flour for dusting

    Method :

    To make the stuffing :

    • Wash the radish, pat dry and peel the skin.
    • Grate the radish, the finer the shreddings, it will be better to roll.
    • Put ½ teaspoon of salt and keep it aside for ten minutes.
    • Remove the radish by squeezing the water. Put it another bowl
    • Add chilli powder, garam masala and chopped coriander. Mix well. Be careful, if you are adding salt,  as it was added earlier.

    To make the dough :

    In a wide bowl, add wheat flour. Add ghee and salt. At first, mix them well. Then add water in small quantity and mix to a stiff dough. Smear a little oil, cover it with a cloth and keep it aside for ten minutes.

    To make mooli paratha :

    • Take a ball of the dough and roll it a bit.
    • Take a spoonful of the filling, put it in the centre of the rolled dough.
    • Slowly, take the extended sides and make a covering over it.
    • Now, dust the ball lightly and roll it.
    • Heat a griddle, put the rolled paratha on the griddle.
    • Smear some oil and ghee mixture on top of it.
    • Turn it to the other side and smear some oil over it. Cook it to a golden colour on both the sides.

    Serve hot with pickle and curd.

    Take a tip :

    • It is best to keep the spices minimal as radish gives a good taste to the flatbread.
    • You may add ginger and chilli to the grated radish instead of chilli powder and garam masala.
    • The squeezed water may be used for mixing the dough. It can also be used in curry and sambar.
    mooli paratha
    Evergreendishesdev

    Mooli Paratha

    Mooli Paratha is a popular flat bread from North India. It is usually served for breakfast.
    Prep Time 10 minutes
    Cook Time 15 minutes
    Total Time 25 minutes
    Servings: 6 parathas
    Course: Breakfast
    Cuisine: punjabi

    Ingredients
      

    For the dough :
    • 2 cup wheat flour
    • ½ teaspoon ghee
    • A pinch of salt
    • Water for kneading
    • 1 teaspoon oil
    For the stuffing :
    • 4 radish
    • ½ teaspoon garam masala
    • 1 teaspoon chilli powder
    • 1/2 teaspoon salt
    • 1 tablespoon fresh chopped coriander
    Other ingredients :
    • Mixture of oil and ghee for roasting
    • Wheat flour for dusting

    Equipment

    • 2 wide bowl
    • grater
    • scraper
    • rolling board
    • rolling pin
    • skillet
    • ladle
    • small bowl
    • 2 plates
    • 1 small plate
    • 1 small spoon

    Method
     

    To make the stuffing :
    1. Wash the radish, pat dry and peel the skin.
    2. Grate the radish, the finer the shreddings, it will be better to roll.
    3. Put ½ teaspoon of salt and keep it aside for ten minutes.
    4. Remove the radish by squeezing the water. Put it another bowl
    5. Add chilli powder, garam masala and chopped coriander. Mix well. Be careful, if you are adding salt,  as it was added earlier.
    To make the dough :
    1. In a wide bowl, add wheat flour. Add ghee and salt. At first, mix them well. Then add water in small quantity and mix to a stiff dough. Smear a little oil, cover it with a cloth and keep it aside for ten minutes.
    To make mooli paratha :
    1. Take a ball of the dough and roll it a bit.
    2. Take a spoonful of the filling, put it in the centre of the rolled dough.
    3. Slowly, take the extended sides and make a covering over it.
    4. Now, dust the ball lightly and roll it.
    5. Heat a griddle, put the rolled paratha on the griddle.
    6. Smear some oil and ghee mixture on top of it.
    7. Turn it to the other side and smear some oil over it. Cook it to a golden colour on both the sides.
    8. Serve hot with pickle and curd.

    Notes

    It is best to keep the spices minimal as radish gives a good taste to the flatbread.
    You may add ginger and chilli to the grated radish instead of chilli powder and garam masala.

    Pin it for later : 

    If you ever make Mooli Paratha in your kitchen, take a picture and share on Instagram by tagging @foodiejayashree. You can also tag me on facebook. Subscribe to get all updates in your inbox and an e-book of handyhints for free. Until next time, happy cooking !

  • Fresh Fenugreek salad | Hasi menthe kosambri

    Fresh Fenugreek salad | Hasi menthe kosambri

    Jump to Recipe

    Fresh Fenugreek salad is a simple, healthy and tasty salad. It pairs well with jowar roti. It is commonly called as Hasi Menthe Kosambri in Kannada.

    Hasi Menthe is the Kannada word which translates as raw fenugreek leaves and kosambri refers to a salad.

    In North Karnataka, a variety of dishes are served with jowar roti. Chutney, palya, kossambri and not mention the various podis. It is one such food the people of the region enjoy. Menthe kosambri is a simple, rustic yet tasty to the core. Now, one need not wonder if the recipe is of any use. If you do not make jowar roti, you can serve it with chaapthi. The best thing is it can be eaten as a snack too, add a few cherry tomatoes, top with nuts and a salad bowl packed with nutrients is ready.

    I was amazed when I read the numerous benefits of fenugreek leaves. It is rich in nutrients as Folic acid, Vitamin A, B, K and C. It also contains riboflavin and niacin. The fibre helps in flushing out the toxins from the body. It also helps in treating gastritis and indigestion. Fenugreek leaves are one of the richest source of  Vitamin K.  It is heart friendly. It is rich in antioxidants. They help in proper functioning of the kidney. It helps in controlling cholesterol which may result in stroke, high blood pressure and heart failure.

    Ways to serve the salad :

    • It tastes great with millet flat bread. It is quite common to pair it with jowar roti along with a sabzi and chutney.
    • It pairs well with khichdi along with pickle
    • It can also be used as a side dish with any meal.


    fresh fenugreek salad
    platter of green salad

    What goes in the salad ?

    • Fenugreek leaves : Use fresh leaves. Use only the leaves, discard the stem. Use whole leaves in salad. Wash them and put them in a colander for sometime. The long fenugreek leaves are ideal for salads.
    • Onion : Chop it finely.
    • Tomato : chop it finely.
    • Cucumber : wash well and cut into bits.
    • Peanuts : Roast and discard the skin. Grind coarsely.
    • Salt : to taste
    • Pepper powder: for that spicy kick
    • lemon juice : to balance all flavours

    How to assemble :

    Put all the ingredients in a bowl and toss them

    You may add cherry tomatoes, grated cheese and a splash of olive oil. Be creative with your choices.


    Other  kind of salad recipes :

    kidney bean and corn salad
    kidney bean and corn salad

    watermelon rind salad
    watermelon rind salad


    Print Recipe

    fresh fenugreek salad
    Evergreendishesdev

    Fresh Fenugreek Salad

    5 from 8 votes
    Fenugreek leaves salad is a simple, easy to make salad. It tastes good with jowar roti.
    Prep Time 15 minutes
    Total Time 15 minutes
    Servings: 4 people
    Course: lunch, mid-day snack
    Cuisine: Indian, karnataka

    Ingredients
      

    • 1 cup fenugreek leaves
    • 1 onion
    • 1 cucumber
    • 1 tomato
    • salt
    • pepper powder
    • lemon juice
    • 1 teaspoon roasted peanut coarsely powdered

    Equipment

    • 4 small bowl
    • 1 big bowl
    • 1 serving spoon
    • 1 colander

    Method
     

    1. Wash the greens and keep it aside. Refer tips below on using it.
    2. Cut onion, cucumber and tomato into small pieces.
    3. In a bowl add the ingredients and toss them.
    4. Serve it fresh.

    Notes

    Use fresh fenugreek leaves. Use only the leaves, discard the stems. Whole leaves do not taste bitter, hence whole leaves are used after washing and drying them on a colander.
    Add salt just before serving.
    Do not skip on lemon juice, it lends a good taste to it. 

    About the event :

    Sending this to, ” Greens on My Plate” at Shhh Cooking Secretly. The theme for the month of August was was suggested by Seema Doraiswamy Sriram. Seema has used Asian greens to make a tasty  Gailan Stirfry.

    My partner was Aruna Saras Chandra. As the salad fits the theme, I requested to give the ingreedients accordingly. She suggested pepper and lemon juice. Aruna made Gongura Pachadi with cumin and fenugreek seed, the secret ingredients I had given

    shhh cooking secretly

    About the event :

    An old post was updated with better content. Sending it to Foodies_Redoing Old Post No 142, a fortnightly event. I am joining after a break for sometime.

    Pin it for later :

    fresh fenugreek salad
    fresh fenugreek salad                                                                                                                                                                              If you ever make Fresh Fenugreek Salad in your kitchen, take a picture and tag @foodiejayashree on Instagram or @evergreendishes on Facebook. Subscribe to get all updates in your inbox and an e-book for free!


  • Lilva Kachori | Fresh Tuvar Kachori

    Lilva Kachori | Fresh Tuvar Kachori

    Jump to RecipePrint Recipe

    Tuvar Lilva Kachori is a tasty winter snack from Indian sub-continent. It makes use of fresh pigeon peas which is a seasonal produce. 

    Kachori is a popular snack from Indian sub-continent. Round shaped, crispy and flaky on the outside, it has a tasty filling inside. The filling is varied as moong dal or any other. Every state has it own version of kachori. . Here is the one made with fresh pigeon peas. Green pea is also used, thus it makes use of the fresh winter produce. 

    Tuvar lilva or Pigeon pea is abundantly available in pods. Indian sub-continent, Africa and Central America are the top three regions producing pigeon pea. India alone grows 63% of the totl produce. It is the fresh produce of legume which we use to make dal. It  is used to make stir fry and curries. Today, I am sharing a snack, tuvar lilva kachorii. It is called  as togare kalu in kannada, kandi ginjalu in telugu, dinger in Punjabi, lilva in Gujarati,  tomara payu in malyalam. in Hindi it is called as arhar while in Assamese and Bengali, it is called as Arahar. ( source : Wikipedia

    What is kachori ?

    Kachori is a round shaped, flaky, fried snack from Indian sub-continent. It is medley of flavours with the different spices used in it. 

    What is  lilva kachori ?

     Lilva is the Gujarati name for fresh pigeon pea. Fresh pigeon peas are abundantly used in Gujarati cuisine. These kachoris are relished and often made as a snack, thus it called as lilva kachori. 

    Can I make it only using  pigeon peas? 

    Yes, you can make it with  pigeon peas. Since, it is a winter produce, I like to use a combination of green peas and pigeon peas. Alternatively, you can also use boiled potato. It is important to balance the flavours of sweet, spicy and tartness in it. Do not skip on those ingredients. 


    tuvar lilva kachori

    Tuvar Lilva Kachori Recipe : 

    Ingredients :

    For the filling : 

    • 1 cup fresh pigeon peas
    • 1 cup green peas
    • 5 green chilli
    • 1 inch ginger
    • handful of coriander
    • salt
    • 1/4 teaspoon cumin
    • 1/4 teaspoon asafoetida
    • 1/4 teaspoon turmeric powder
    • 1/2 teaspoon sugar
    • 1/2 lemon juice

    For the covering :

    • 1.5 cup maida
    • 4 tablespoon oil
    • 1/2 teaspoon salt
    • little water for mixing

    Other ingredients :

    • oil for frying
    • flour for dusting :


    Method : 

    To make the filling :

    1. Soak fresh pigeon peas and green peas for sometime.
    2. Drain, wipe and griind to a coarse paste.
    3. Grind green chilli and ginger to a paste.
    4. Take oil in a pan, add cumin. Put asafoetida, turmeric powder and green chilli paste. Saute it for sometime.
    5. Now, put the ground tuvar pasteto it.Saute for five minutes. 
    6. Add salt, coriander and lemon juice. Mix well.
    7. Allow to cool.
    8. Make balls of the dough and also of the filling.

    To make the dough : 

    1. Take maida in a bowl.
    2. Add oil and salt to it. Rub it thoroughly with the fingers.
    3. Put water in small quantities and make a stiff dough.
    4. Keep the dough covered with a thin muslin cloth. 

    To make kachoris :

    1. Make small balls of the filling.
    2. Make small balls  of the dough and keep  it covered.
    3. Take a ball from the covered sheet, roll it into a four inch circle. 
    4. Put the filling in the centre. Seal the edges by making it pleat like. Gently press the ball between palms.
    5. Heat oil in a wok.
    6. Once it is hot, deep fry on a low to medium flame to a golden colour. Repeat for the rest of the dough. 
    7. Serve it with green chutney and tomato ketchup.


    Related Recipes : 

    I like to use fresh pigeon peas in my cooking. I usually, make Tuvar and Capsicum Curry, it is tasty and pairs well with chapathi. You can also use it to make a simple sir fry with fresh grated coconut. Here is the other recipe with tuvar lilva

    About the event : 

    Sending this to Vegan Dishes for the month of January in Shhh Secretly Cooking Challenge group. The theme was suggested by Radha Rajagopalan.  Here, we are paired as partners. The partners exchange two secret ingredients to cook, prepare the dish as per the theme and later the ingredients are guessed by other members in the group. It is a fun group where we interact  and learn more about different cuisines. 

    My partner was Radha Rajagopalan. She gave me fresh pigeon pea and salt as the secret ingredients and I have made Tuvar Lilva Kachori. She has made Vegan Kofta Curry with the bay leaf and garam masala which I had given. Do take a look at the delicious curry. 


    Tuvar Lilva Kachori

    5 from 10 votes
    Tuvar Lilva Kachori is a snack made with fresh pigeon pea and green peas. It is tasty and makes a good snack to serve with tea.
    Course: evening snacks

    Ingredients
      

    • 1 cup fresh pigeon peas
    • 1 cup green peas
    • 5 green chilli
    • 1 inch ginger
    • handful of coriander
    • salt
    • 1/4 teaspoon cumin
    • 1/4 teaspoon asafoetida
    • 1/4 teaspoon turmeric powder
    • 1/2 teaspoon sugar
    • 1/2 lemon juice
    • For the covering :
    • 1.5 cup maida
    • 4 tablespoon oil
    • 1/2 teaspoon salt
    • little water for mixing
    • Other ingredients :

    Method
     

    1. To make the filling :
    2. Soak fresh pigeon peas and green peas for sometime.
    3. Drain, wipe and griind to a coarse paste.
    4. Grind green chilli and ginger to a paste.
    5. Take oil in a pan, add cumin. Put asafoetida, turmeric powder and green chilli paste. Saute it for sometime.
    6. Now, put the ground tuvar pasteto it.Saute for five minutes.
    7. Add salt, coriander and lemon juice. Mix well.
    8. Allow to cool.
    9. Make balls of the dough and also of the filling.
    10. To make the dough :
    11. Take maida in a bowl.
    12. Add oil and salt to it. Rub it thoroughly with the fingers.
    13. Put water in small quantities and make a stiff dough.
    14. Keep the dough covered with a thin muslin cloth.
    15. To make kachoris :
    16. Make small balls of the filling.
    17. Make small balls  of the dough and keep  it covered.
    18. Take a ball from the covered sheet, roll it into a four inch circle.
    19. Put the filling in the centre. Seal the edges by making it pleat like. Gently press the ball between palms.
    20. Heat oil in a wok.
    21. Once it is hot, deep fry on a low to medium flame to a golden colour.
    22. Serve it with green chutney and tomato ketchup.
    23. Take a tip :
    24. You can shape them as round balls also.

    Notes

    You can shape them as round balls also. 

    Pin it for later : 

    tuvar lilva kachori
    tuvar lilva kachori

    If you  make Tuvar Lilva Kachori recipe, take a picture and share it by tagging @foodiejayashree on Instagram and @evergreendishes on Facebook.  Subscribe to get all updates and an e-book for free. Until next time, happy cooking ! 

    shhh cooking secretly

  • Palak Soup | Healthy Spinach Soup

    Palak Soup | Healthy Spinach Soup

    Jump to Recipe Print Recipe

    Palak Soup is a healthy and tasty soup to have on a cold night. 

    Winter has set in and calls for warm drinks and hot pakoras. Dinners are changed to soups and hot casseroles. Soups serve two purpose: they are filling and ideal for the weight watchers. Instead of binging on snacks, we can opt for the soup anyway. If you are looking for tasty and easy to make recipes, give a try to this palak soup. I like the fact it can be made in a few minutes. 

    Spinach is a good source of iron. It is one of the green leaf I often use at home. I have shared many recipes with palak as alu palak, dry sabzi of palak with potato, dal palak and palak chutney. The palak rice turns out good and is ideal for brunch. I remember using spinach to make paratha and it tasted awesome. Among the dry snacks, I make palak sev and recently made chakli too.  What is your favourite recipe using spinach ? 

    palak soup / spinach soup
    Palak Soup

    About Palak Soup :

    Palak aka Spinach is one of the greens we eat as a family, I find ways to use it in my cooking. Soup is one of them, often made during winters. It is flavoursome and ideal to serve for dinner. It is easy to prepare and ready in a few minutes. Clean the spinach leaves thoroughly. Make sure to use fresh, tender spinach leaves.Olive oil can be replaced with any other medium which is odourless.  I prefer using olive oil in a few dishes, this is one of them. Lastly, addition of cream is optional but it elevates the taste. 

    Other Soup Recipes: 

    I have shared a couple of soup recipes earlier. Tomato Shorba is the Indian version of tomato soup. Carrot Soup, Green Pea Soup, Tomato Soup, Vegetable Manchow Soup, are the other recipes you can check here. 

    About the event :

    It is raining soup in Shhh Secretly Cooking Group. Priya Iyer suggested this wonderful theme and its apt for the season we are dwelling right now. I loved her  carrot soup with coconut milk. I am sure it tastes awesome. Here, we are paired with partners, exchange two secret ingredients and cook as per the theme. The dish is later shared in the group,  other members guess the ingredients. It makes a change to the usual way we share the recipe. Moreover, a fun activity to engage with other members. 

    I was paired with Preethi Prasad. I gave Preethi, amla and coriander powder as the secret ingredients for the Amla Soup she wanted to prepare. Do check it out, it looks delicious. Palak soup was on my list since a long time, She gave me clove and salt accordingly for the dish. 

    Palak Soup Recipe / Spinach Soup


    Ingredients :

    • 2 teaspoon olive oil
    • 1 bay leaf
    • 2 cloves
    • 1 onion
    • 2 cloves garlic
    • 1 bunch spinach 
    • salt to taste
    • 1/4 teaspoon pepper powder
    • 1/4 cup milk
    • 2 teaspoon cream

    Method :

    1. Remove the stalk of the spinach leaves and wash them thoroughly. Cut it into bits.
    2. Chop the onion.
    3. Take oil in a pan, add bay leaf and clove to it. Put the onion and saute it for sometime.
    4. Now, put the spinach leaves into it. Let cook for a minute. The green wilts in a minute.
    5. Once it cools, remove the bay leaf and put it in a processor.
    6. Put puree it in a pan. Add quarter cup of water to it. 
    7. Add salt, pepper powder and milk to it. Let it cook for sometime
    8. Top it with cream and serve.

    Take a tip: 

    • You can use any refined oil instead of olive oil.
    • You may add a piece of cinnamon too.
    • Addition of cream is optional but it gives a good taste.
    • I prefer making in small batches, hence used only one bunch of spinach. You can double the recipe. 
    • You can add bread croutons as topping if you want.
    • You can use the hand blender to make puree. 
    • Sprinkle a little pepper just before serving. 
    palak soup

    Palak Soup

    5 from 9 votes
    Palak Soup is tasty and ideal to serve on cold winter night.
    Prep Time 10 minutes
    Cook Time 10 minutes
    Total Time 20 minutes
    Course: appetisers
    Cuisine: Indian

    Ingredients
      

    • 2 teaspoon olive oil
    • 1 bay leaf
    • 2 cloves
    • 1 onion
    • 2 cloves garlic
    • 1 bunch palak /spinach
    • salt to taste
    • 1/4 teaspoon pepper powder
    • 1/4 cup milk
    • 2 teaspoon cream

    Method
     

    1. Remove the stalk of the spinach leaves and wash them thoroughly. Cut it into bits.
    2. Chop the onion.
    3. Take oil in a pan, add bay leaf and clove to it. Put the onion and saute it for sometime.
    4. Now, put the spinach leaves into it. Let cook for a minute. The green wilts in a minute.
    5. Once it cools, remove the bay leaf and put it in a processor.
    6. Put puree it in a pan. Add quarter cup of water to it.
    7. Add salt, pepper powder and milk to it. Let it cook for sometime
    8. Top it with cream and serve.

    Notes

    You can use any refined oil instead of olive oil.
    You may add a piece of cinnamon too.
    Addition of cream is optional but it gives a good taste.
    I prefer making in small batches, hence used only one bunch of spinach. You can double the recipe. 
    You can add bread croutons as topping if you want.
    You can use the hand blender to make puree. 
    Sprinkle a little pepper just before serving. 
    palak soup
    Palak Soup

    If you ever make Palak Soup  recipe, take a picture and share it on Facebook or Instagram by tagging @evergreendishes and @foodiejayashree  respectively. I will be happy to see your creation and share it further.

    Subscribe to get all updates and an e-book for free.

  • How to make Apple Pomegranate Jam

    How to make Apple Pomegranate Jam

    Apple Pomegranate Jam is a tasty spread. The flavours blend beautifully and is moderately sweet. It 

    Apples are good to use in numerous ways. It can be used in ice cream and  milkshake, Apple pie is loved by all. When I have many apples, I like to toss them into a salad with a few nuts. 

    When I decided to make apple pomegranate jam, the first reaction was, At last ! after a long time she is making it. I had the Granny Smith variety and used the same. The other varieties as Sweet Tango and Pink Lady can also be used in making apple jam as they have good quantity of pectin. 

    If you extract the pomegranate juice ahead of preparation time, put it in the freezer  to keep the flavours intact. 

    Why should you make this jam ? 

    • Ideal as a spread for bread
    • Children relish these variety of jam
    • the excess fruits are not wasted
    • it has no pectin in it

    How long does it last ? 

    Canning should be done properly, sterilize the bottles. Homemade canned food , if preserved rightly stay good for at least six months. That said, I prefer to prepare in small quantities, it is used within a month. 

    The other kind of jam recipes shared earlier are : 

    About the event : 

    In the Shhh Secretly Cooking Challenge, Preethi Tandon Sridhar, suggested the theme as, “Jam, Jellies, Chutney and Relishes”.  Here, we are paired with partners and the two ingredients are exchanged between the partners. Later, the dish is prepared and the other members try to guess the ingredients.Preethi has varied kind of recipes on her blog. Her Jeera and Cumin Cookies have been on my list since a long time, will make them soon.

      I was paired with Narmadha of Nams Corner. Despite her busy schedule, she finds time for blogging. She has prepared pineapple crush  with ingredients, namely brown sugar and yellow colour, given by me. This is a good one I can store at home.  I was given pomegranate and salt as the secret ingredients, I have made this delicious Apple Pomegranate Jam.

    shhh cooking secretly

    Easy way to deseed the pomegranate: 

    To deseed pomegranate, with a sharp knife, cut the head and root portion of the fruit. Then, make two incisions and cut it  along. Separate the seeds. 


    Apple Pomegranate Jam Recipe 

    Ingredients : 

    • 4 apple
    • 2 pomegranate (extracted into juice)
    • 1 lemon
    • 1 cup sugar
    • a pinch of salt


    Method : 


    1. Wash, peel and remove the arils. Make juice in the processor.
    2. Wash and peel the apple. Cut the apple into cubes.
    3. Put the apple pieces and pomegranate in a pan to boil. Let it cook for sometime. Add sugar to it. After a few minutes of cooking, add lemon juice and a pinch of salt to it. Cook further for five minutes. 
    4. Let the mixture cool for sometime. Blend it with a hand blender. Put it in the pan and cook for sometime. You should get the consistency of jam . Once cool, store in a clean, air-tight container.

    Take a tip:

    • Addition of salt is optional, but it gives a good taste.

    • After blending, if the consistency is proper, you can store it. I have cooked for two minutes. 
    • Use clean jars to store the jam. 
    Evergreendishesdev

    Apple Pomegranate Jam

    5 from 13 votes
    Apple Pomegranate Jam is a tasty spread. The flavour of pomegranate blends well with apple to make a delicious jam.
    Course: condiments
    Cuisine: international

    Ingredients
      

    • 4 apple
    • 2 pomegranate
    • 1 lemon
    • 1 cup sugar
    • a pinch of salt

    Method
     

    1. Wash, peel and remove the arils. Make juice in the processor.
    2. Wash and peel the apple. Cut the apple into cubes.
    3. Put the apple pieces and pomegranate in a pan to boil. Let it cook for sometime. Add sugar to it. After a few minutes, add lemon juice and pinch of salt to it. Cook further for five minutes.
    4. Let the mixture cool for sometime. Blend it with a hand blender. Store in a clean, air-tight container.
    a bowl of apple pomegranate jam
    Apple Pomegranate Jam

    If you ever make this Apple Pomegranate Jam recipe, take a picture and share it on Facebook or Twitter by tagging @evergreendishes and @evergreendishes . I will be happy to see your creation and share it further. 

    Subscribe to get all updates and an e-book for free. 


  • Brinjal Stir Fry | Badanekayi Palya

    Brinjal Stir Fry | Badanekayi Palya

    Brinjal Stir Fry / Badanekayi palya  is a simple, vegan stir fry with a spice mix from Karnataka. The roasted spice mix lends a good taste to it. It is ideal to serve with chapati or jowar roti.

    Fresh vegetables are available in winter and brinjal is one of them. In Kannada it is called as badanekayi, baingan in Hindi and Gujarati, Kathirikai in Tamil, Vankaya in Telugu and Begun in Bengali. It is more popular as egg plant in England and aubergine in Germany and  France.

    Not everyone likes the taste of brinjal. But most people, who tend to like it are greats fans of this vegetable. It is versatile to use and stir fry and raita are quite common dishes. Sometimes, it is also added in Sambar. Vangi Bhat is a popular rice dish from Maharashtra.

    Sadly, I have not shared any recipe using brinjal. So, today I thought of posting this stir fry recipe which we regularly prepare at home.  Makar Sankranti is round the corner. The day prior is celebrated as Bhogi. It is a harvest festival and all fresh grown grains and vegetables are used. Sajje rotti and brinjal stir fry are usually prepared in most households of Karnataka.  The other dishes on the platter  are Khara pongal and gojju.

    Brinjal comes in different varieties. The medium sized purple and light green coloured brinjals  are the ones I regularly use. Here, I have used the green variety, they are tender and cook very well. The spice mix is usually available at home. You can make a small quantity and use it for the stir fry.

    Brinjal strir fry / Badane kayi palya
    Brinjal Stir fry / badane kayoi palya is a simple and tasty side dish from Karnataka. It makes a good accompaniment with any meal.

    Let’s get to the recipe of Brinjal Stir Fry | Badanekayi Palya

    Ingredients:

    • 2 tablespoon oil
    • 1/2 teaspoon mustard
    • 1/4 teaspoon asafoetida
    • 1/4 teaspoon turmeric powder
    • 1/2 kilogram brinjal
    • salt
    • a little water
    • 3 teaspoon vegetable spice mix
    • 1/2 teaspoon chilli powder (optional)

    Method:

    1. Cut the brinjal into small pieces. Put them in water to avoid discolouration.
    2. Take oil in a pan, add mustard seeds. As it crackles, tip in turmeric powder an asafoetida. Discard the water and put the brinjal pieces to it.
    3. Put salt and sprinkle some water to it. Close a lid and allow it to cook. Give a stir in between.
    4. Once the brinjal is cooked, give a stir and mash it lightly with the ladle.
    5. Put the spice powder to it. Depending on the taste, use chilli powder.
    6. Let cook for a minute.
    7. Remove and serve with hot chapati or phulka. Brinjal Stir Fry is also used with hot steamed rice.

    Take a tip:

    • The spice mix stays good for two months. Store it in an air-tight container.
    • You can use the spice mix in other dishes as well.

    Brinjal strir fry / Badane kayi palya
    Evergreendishesdev

    Brinjal Stir Fry / Badane kayi palya

    5 from 11 votes
    Brinjal stir fry / Badane kayi palya is a simple, tasty side dish. It is ideal to serve with any meal.
    Prep Time 10 minutes
    Cook Time 15 minutes
    Total Time 25 minutes
    Course: dinner, lunch
    Cuisine: karnataka

    Ingredients
      

    • 2 tablespoon oil
    • 1/2 teaspoon mustard
    • 1/4 teaspoon asafoetida
    • 1/4 teaspoon turmeric powder
    • 1/2 kilogram brinjal
    • salt
    • a little water
    • 3 teaspoon vegetable spice mix
    • 1/2 teaspoon chilli powder optional

    Method
     

    1. Cut the brinjal into small pieces. Put them in water to avoid discolouration.
    2. Take oil in a pan, add mustard seeds. As it crackles, tip in turmeric powder an asafoetida. Discard the water and put the brinjal pieces to it.
    3. Put salt and sprinkle some water to it. Close a lid and allow it to cook. Give a stir in between.
    4. Once the brinjal is cooked, give a stir and mash it lightly with the ladle.
    5. Put the spice powder to it. Depending on the taste, use chilli powder.
    6. Let cook for a minute.
    7. Remove and serve with hot chapati or phulka. Brinjal Stir Fry is also used with hot steamed rice.

    Notes

    Cut the vegtable into small pieces.
    Allow to cook with a lid closed over it.
    Spice mix can be freshly made. Check the recipe.

    Pin it for later :

    Brinjal Stir fry is a tasty side dish from Karnataka. It is usually made along with sajje roti.
    Brinjal Stir Fry / Badane kayi palya


    If you ever make this recipe,  do take a picture and tag @foodiejayashree on Instagram or @evergreendishes on Facebook or Twitter. I will be glad to see your creation and share it further.   

    Subscribe to get all updates and an e-book for free. Check out my e-books on Amazon.  Happy Cooking !

  • Tuvar and Capsicum Masala

    Tuvar and Capsicum Masala

    Jump to Recipe Print Recipe

    Tuvar and Capsicum Masala is a winter treat, ideal to pair with chapati or phulka. It is vegan and gluten-free. It makes a good side dish for lunch, brunch or dinner.

    Tuvar lilva or fresh pigeon peas in a winter crop, it is commonly used in Gujarati households to make a variety of dishes. I love using it to make a curry. I also make a kachori but it has not made to the blog yet.

    Tuvar lilva is the fresh form which is later dried to make lentil we consume daily to make dal.

    Today, before I proceed further I want to discuss the difference between vegan and vegetarian.

    What is Vegan diet?

    Vegan is a type of vegetarian diet which  excludes dairy products, eggs, meat and any other animal derived ingredient. These include gelatin, honey, casein, pepsin, carnine, whey, carmine   Thus vegans use substitutes as almond milk, soy milk .

    Difference between vegetarian and vegans

    Vegetarians and vegans differ in their beliefs regarding the use of animal products. Vegetarians consume animal- derived products such as milk and curd but vegans avoid them totally. They use other form of substitutes.

    What are the different kind of milk substitutes for vegans.

    The most widely used non-dairy milks are hazelnut, cashew, soy, almond, oat and even hemp. Different kind of nuts can be used by soaking overnight, blending and straining. These are good substitutes to use in cooking also.


    tuvar and capsicum masala
    tuvar and capsicum masala

    Let’s  get to the recipe of Tuvar and Capsicum Masala

    Ingredients:
    • 1 cup tuvar
    • 8 cashew
    • 1 tablespoon oil
    • 1/2 teaspoon cumin
    • 1 capsicum
    • salt to taste
    • little kasuri methi


    Onion Paste:
    • 1 onion


    Masala paste:
    • 3 tomato
    • 4 cloves garlic
    • 5 green chilli
    • 1/2 bunch coriander
    • 2 cloves
    • 2 cardamom

    Method:

    • Boil tuvar along with cashew pieces. A pinch of salt may be added to it.
    • Make onion paste and keep it aside.
    • Blanch the tomatoes. Once it is cool, make a paste with the listed ingredients under “Masala Paste”.
    • Cut capsicum into small pieces.
    • Take oil in a pan, add cumin. As it splutters, put the onion paste. Saute it for a minute, now throw in the capsicum pieces. Continue to saute for sometime.
    • Now, add the masala paste to it and saute it. Let cook for sometime.
    • Add the cooked tuvar  along with the water in it.
    • Add salt. Adjust the consistency of the gravy.
    • Finally, sprinkle kasuri methi to it. Let the flavours imbibe for two minutes.
    • Tuvar and capsicum masala is ready to serve.

    Take a tip:

    • Boil the cashew with tuvar, it gives a good taste to the curry. The bland taste of tuvar is changed.
    • Kasuri methi is dried fenugreek leaves, available in any super market. It gives a good aroma to the dish.
    • Reduce the number of green chilli if you want it less spicy.
    • Smaller and dark coloured capsicum are spicy while the larger and light coloured are perfect for using in curries.

    Tuvar and Capsicum Masala

    uvar and capsicum masala makes a tasty side dish with chapati or phulka. It is vegan and gluten-free.

    Ingredients
      

    • 1 cup tuvar
    • 8 cashew
    • 1 tablespoon oil
    • 1/2 teaspoon cumin
    • 1 capsicum
    • salt to taste
    • little kasuri methi
    • Onion Paste:
    • 1 onion
    • Masala paste:
    • 3 to mato
    • 4 cloves garlic
    • 5 green chilli
    • 1/2 bunch coriander
    • 2 cloves
    • 2 cardamom

    Method
     

    1. Boil tuvar along with cashew pieces. A pinch of salt may be added to it.
    2. Make onion paste and keep it aside.
    3. Blanch the tomatoes. Once it is cool, make a paste with the listed ingredients under “Masala Paste”.
    4. Cut capsicum into small pieces.
    5. Take oil in a pan, add cumin. As it splutters, put the onion paste. Saute it for a minute, now throw in the capsicum pieces. Continue to saute for sometime.
    6. Now, add the masala paste to it and saute it. Let cook for sometime.
    7. Add the cooked tuvar  along with the water in it.
    8. Add salt. Adjust the consistency of the gravy.
    9. Finally, sprinkle kasuri methi to it. Let the flavours imbibe for two minutes.
    10. Tuvar and capsicum masala is ready to serve.

    Pin it for later:

    Tuvar and capsicum masala makes a good accompaniment with any Indian flat bread. It is vegan and gluten free.
    Tuvar and Capsicum Masala

    About the event :

    Sending this to Veganuary month at Foodies+Bloggers Community on Facebook.  A few more vegan recipes from my blogger friends.


    If you ever make this recipe, take a picture and share it by tagging @foodiejayashree on Instagram or @evergreendishes on Facebook. I will be glad to see and share your creation further.
    Check out my e-books on Amazon. Do not miss any post, subscribe to get all updates and an e-book for free !

  • Green Pea Soup | how to make green pea soup

    Green Pea Soup | how to make green pea soup

    Jump to Recipe Print Recipe

    Green Pea Soup is a flavoursome soup to enjoy during winter season. Addition of a few mint leaves gives a good taste to it.

    Winter is here and calls for warm drinks and fried snacks. The vendor lady brings a stack of peas everyday, I love these green beauties but how much can one store!  Well, I made this soup and it was perfect for the cold nights.

    There is hardly any chopping involved,  and peas are  usually shelled and put in the freezer.

    The quantity given here produces more than six bowls of the drink. Feel free to reduce the quantity or you can store it in the refrigerator and use the next day.

    green pea soup
    green pea soup

    Nutrients in Green Peas :

    Peas are in rich in Vitamin A, B, C E, zinc and calcium.

    Benefits of green peas:

    • Peas are packed with anti-oxidants. They help to build the immune system.
    • The anti-inflammatory nutrients in peas helps in reducing the risk of diabetes, heart disease and arthritis.
    • Peas are rich in fiber and protein,  it slows down the break down of carbohydrates and helps to control blood sugar.
    • They have low-glycemic index.
    • They help to prevent inflammation.

    Portion Size:

    The recommended quantity is half cup serving. One should be careful as peas are relatively high in carbohydrates.

    Other Soup Recipes :

    Tomato soup is the family favourite. Of late, it is the Indian Shorba that we enjoy. The carrot soup is also ideal for those who love Indi-Chinese cuisine. Children prefer manchow soup as it has a topping of noodles.


    About the event:

    Sending this to Hot Pot theme  at Shhh secretly challenge group. The theme was suggested by Priya Iyer. She has recipes of different cuisines on her blog. I loved her Indian Style Vegetable Quesdilla and bookmarked it to try. Here, members are paired as partners and two secret ingredients are exchanged. The dish is prepared using the given ingredients and later other members try to find the secret ingredient. I was paired with Narmadha of Nams corner, she gave me salt and pepper and I prepared this tasty soup. I had given bengal gram and green chilli and tasty masala vada is perfect for the season.

    shhh cooking secretly

    green pea soup

    Green Pea Soup Recipe

    Ingredients:

    • 2 cup green peas          1 cup= 200 ml
    • 20 mint leaf
    • 1 onion
    • 2 teaspoon butter
    • 1 teaspoon olive oil
    • salt to taste
    • pepper powder
    • 2 cups of stock or water

    Method:

    1. Cut the onion into medium bits.
    2. Take oil and butter in a pan. Add onion to it. Saute it for sometime.
    3. Put green peas and mint and cook further. Put a little water if needed.
    4. Once it cooked, let  cool. Make a puree of it.
    5. Remove it in a pan, add water or stock to it. Put salt and pepper powder to it. Let it cook for five minutes.
    6. Green pea soup is ready to serve.

    Take a tip:

    • Stock can be prepared ahead and stored. Usually vegetables are put in it. But I have used  the gratings that remain and are to be thrown. Put gratings of cucumber, a few stalks of coriander, clean peel of any vegetable, a few onion pieces in a litre of water and boil for sometime. Later, strain it and use the water as stock. Remember, to wash the gratings before using them.
    • Addition of mint gives a good taste to it.


    green pea soup
    Evergreendishesdev

    Green Pea Soup

    Green pea soup is healthy, tasty winter warmer. It is ideal to make it when fresh peas are available.
    Course: Appetizer, dinner, dinner ideas
    Cuisine: international

    Ingredients
      

    • 2 cup green peas
    • 20 mint leaf
    • 1 onion
    • 2 teaspoon butter
    • 1 teaspoon olive oil
    • salt to taste
    • pepper powder
    • 2 cups of stock or water

    Method
     

    1. Cut the onion.
    2. Take oil and butter in a pan.
    3. Add onion to it. Saute it for sometime.
    4. Put green peas and mint and cook further.
    5. Put a little water if needed.
    6. Once it cooked, let  cool.
    7. Make a puree of it.
    8. Remove it in a pan, add water or stock to it.
    9. Put salt and pepper powder to it.
    10. Let it cook for five minutes.
    11. Green pea soup is ready to serve.

    Pin it for later :

    Green Pea Soup is a flavoursome soup to enjoy during winter season. Addition of a few mint leaves gives a good taste to it.
    Green Pea Soup

    If you ever make this recipe, take a picture and share it by tagging @foodiejayashree on Instagram or @evergreendishes on Facebook. I will be glad to see and share your creation further.
    Check out my e-books on Amazon. Do not miss any post, subscribe to get all updates and an e-book for free !


  • Tomato Shorba | How to make tomato shorba

    Tomato Shorba | How to make tomato shorba

    Jump to Recipe Print Recipe

    Tomato Shorba is an Indian soup ideal for cold winter nights. It is light, mildly spicy and good for relief from cold and cough.

    Winter calls for warm drinks, nothing seems better than soups for me. It is filling and I usually have a menu sorted for dinner with soup and a snack.

    What is Shorba?

    Shorba is Indian soup which is prepared using various spices. It is ideal to serve as a warm drink before dinner.  It is a Persian term meaning salty stew. Shorba is also called as Chorba, Shurpa, Sorpa. It is a Mughlai dish and has vegetarian version as Tomato Shorba.

    Winter Warmers:

    Make sure you give all these winter warmers to your children,  hot chocolate milk, badam milk, I have shared a few soup recipes earlier. This healthy tomato soup is what I mostly prepare for my family. It has the goodness of other vegetables in it. Vegetable Manchow Soup is the favourite of most children.

    Tomato Shorba
    Tomato Shorba

    About the event:

    Sending this post to #WinterWarmersatHW. It is a fortnightly event where we work on a theme suggested by a member of the group. As winter has set in Swati, suggested Winter Warmers as the theme. Swati is a wonderful blogger with many varieties of dishes on her blog. I loved her Kesar Pista Burfi and No Yeast Bread bookmarked it to try in future.


    Tomato Shorba is made in three steps. Seasoning is prepared and tomatoes are cooked along with spices. Next, it is made into a pulp and passed through a sieve. Lastly, it is boiled and garnished with fresh coriander.

    Tomato Shorba Recipe:

    Ingredients:

    • 2 teaspoon oil
    • 3 cloves
    • 2 cardamom
    • 1 bay leaf
    • 1/2 inch cinnamon
    • 1/4 teaspoon cumin
    • 1/4 teaspoon fennel seed
    • 1/2 teaspoon ginger garlic paste
    • 1 onion
    • 4 tomato
    • a  few stalks of coriander
    • 1/2 teaspoon chilli powder
    • 1/2 teaspoon coriander powder
    • 1/4 teaspoon turmeric powder
    • 1/2 teaspoon pepper powder
    • 3 cup water
    • salt
    • coriander for garnishing

    Method:

    1. Take oil in a pan, add cloves, cardamom, cinnamon and bay leaf. Put cumin and fennel seed, as it splutters, add the ginger-garlic paste and saute for a few seconds. Put the onion and continue to saute.
    2. After two minutes, put the tomatoes and coriander stalk to it. Allow  to cook.
    3. Add turmeric powder, coriander powder and chilli powder to it.
    4. Switch off the stove.
    5. Once it cools, make a puree and pass through the strainer.
    6. Put it in a pan, put salt to it  and simmer for two minutes. Adjust the consistency. Garnish with fresh coriander leaves.
    7. Tomato Shorba is ready to serve.

    Tomato Shorba
    Evergreendishesdev

    Tomato Shorba

    5 from 8 votes
    Tomato Shorba is an Indian soup ideal for cold winter nights.
    Prep Time 15 minutes
    Cook Time 15 minutes
    Servings: 4 medium size cups
    Course: appetisers
    Cuisine: Indian

    Ingredients
      

    • 2 teaspoon oil
    • 3 cloves
    • 2 cardamom
    • 1 bay leaf
    • 1/2 inch cinnamon
    • 1/4 teaspoon cumin
    • 1/4 teaspoon fennel seed
    • 1/2 teaspoon ginger garlic paste
    • 1 onion
    • 4 tomato
    • a few stalks of coriander
    • 1/2 teaspoon chilli powder
    • 1/2 teaspoon coriander powder
    • 1/4 teaspoon turmeric powder
    • 1/2 teaspoon pepper powder
    • 3 cup water
    • salt
    • coriander for garnishing

    Method
     

    1. Take oil in a pan, add cloves, cardamom, cinnamon and bay leaf. Put cumin and fennel seed, as it splutters, add the ginger-garlic paste and saute for a few seconds. Put the onion and continue to saute.
    2. After two minutes, put the tomatoes and coriander stalk to it. Allow  to cook.
    3. Add turmeric powder, coriander powder and chilli powder to it.
    4. Switch off the stove.
    5. Once it cools, make a puree and pass through the strainer.
    6. Put it in a pan, put salt to it  and simmer for two minutes. Adjust the consistency. Garnish with fresh coriander leaves.
    7. Tomato Shorba is ready to serve.

    If you ever make any of these recipes, take a picture and share it by tagging @foodiejayashree on Instagram or @evergreendishes on Facebook. I will be glad to see and share your creation further.
    Check out my e-books on Amazon. Do not miss any post, subscribe to get all updates and an e-book for free !

    Yum

  • Healthy Carrot Soup

    Healthy Carrot Soup

    Carrot soup is spicy, tasty and apt for the cold weather. It is from Indo- Chinese cuisine.It is vegan, gluten- free and zero oil recipe.

    I love soups, they are filling and healthy and hope many will resonate with me. The weather too is perfect to indulge in them.

    I had used carrot along with other vegetables but it was not the star ingredient. Today, I have carrot soup, at first, I was wondering if I will ever like it. But, I was mistaken, it’s really good, spicy and zero oil.

    Nutrients in carrot:

    Carrots are rich in anti-oxidants, vitamins, mineral and fibre. They help boost the immune system and prevent disease. It may help regulate blood sugar. It may help in preventing night blindness as it is rich in Vitamin A. It lowers the risk of prostrate and colon cancer.

    Uses of Carrot:

    Carrots are versatile in their use. They can be eaten raw, boiled, steamed or roasted. One can use them in salad, pickle, stir-fry. It is used to make a variety of rice dishes along with other vegetables.

    Storing of carrot:

    Wash the carrots, pat dry and keep them in a zip lock pouch in the refrigerator.

    a few other soup recipes that I have shared earlier are Sweet Corn Vegetable Soup, Veg Manchow Soup, Chipotle chilli Corn Soup

    Let’s get to the recipe of Carrot Soup:

    Ingredients:

    • 4 medium carrot
    • 1 potato
    • 1 red chilly
    • 1 clove garlic
    • 1/2 teaspoon soya sauce
    • 1/4 teaspoon pepper powder
    • salt to taste
    • stock /water

    Method:

    1. Wash the carrots, scrub them well, cut into small cubes.
    2. Wash the potato, peel the skin and cut into cubes.
    3. Boil veggies along with red chilly and garlic.
    4. Let cool.
    5. Make a puree of it.
    6. Remove in a pan, add salt, soya sauce, pepper powder to it. Adjust the consistency of the soup.
    7. Let boil.
    8. Pour in bowl, top with fresh coriander and roasted sesame.
    9. Serve immediately.

    Take a tip:

    • Onion may be used, but I have not used. It should be sauted in oil and then the puree must be added to it.
    • This, carrot soup is spicy, be careful before blending the red chilli.
    • It is good to use stock for soups. If you do not have stock, use water.
    carrot soup

    Healthy Carrot Soup

    Carrot soup is spicy, tasty and apt for the cold weather. It is from Indo- Chinese cuisine.It is vegan, gluten- free and zero oil recipe.
    Prep Time 10 minutes
    Cook Time 10 minutes
    Cooling time 15 minutes
    Total Time 35 minutes
    Servings: 2 bowl
    Course: Soup
    Cuisine: Indo-Chinese

    Ingredients
      

    • 4 carrot medium size
    • 1 potato
    • 1 red chilly
    • 1 clove garlic
    • 1/2 teaspoon soya sauce
    • 1/4 teaspoon pepper powder
    • salt
    • water
    For garnishing
    • roasted sesame
    • coriander

    Method
     

    1. Wash the carrot, scrub it well. Cut into small cubes.
    2. Wash the potato, peel and cut into cubes.
    3. Boil the veggies along with red chilly and garlic.
    4. Let cool.
    5. Make a puree of the veggies.
    6. Put it in a pan, add soya sauce, pepper powder and salt. Adjust the consistency of it.
    7. Let boil.
    8. Put in bowl, garnish with roasted sesame and fresh finely chopped coriander and serve.

    Pin it for later:

    Healthy Carrot Soup

    This post is part of the Food Bloggers Recipe Swap, every month we are shuffled and chosen a partner, we need to cook a recipe from that blog. I had to cook from Ivana Meric’s blog The Peasant’s Daughter. I loved the carrot soup and I have adopted it from here.

    If you have liked this post, do leave a comment. If you ever make it, do take a picture and tag us @ evergreendishes on Facebook or @foodiejayashree on Instagram, I will share it further.

    Do check out my e-books. Subscribe to get a book of handyhints for free !