Author: Evergreendishesdev

  • Spicy Murmura Snack | No Cook Recipe

    Spicy Murmura Snack | No Cook Recipe

    Jump to Recipe

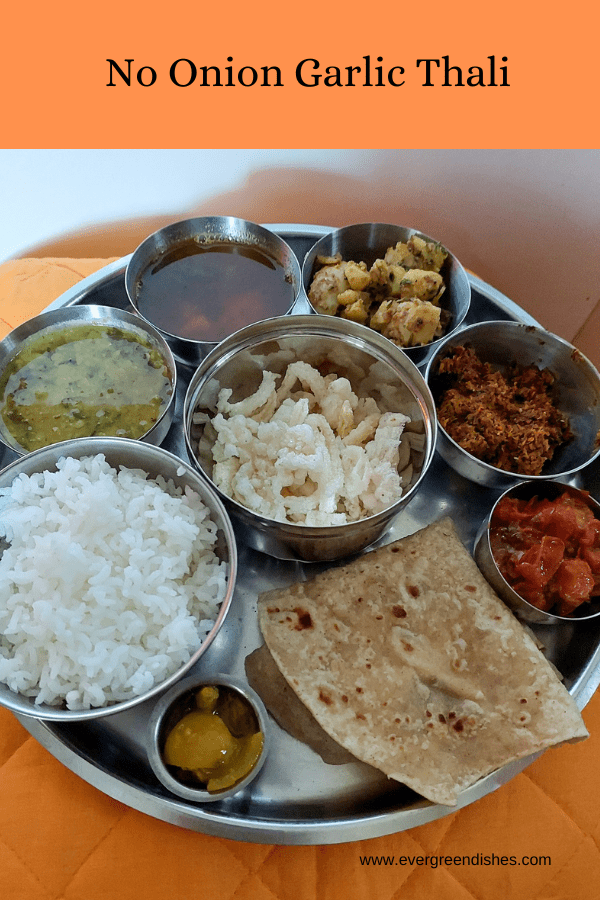
    murmura snack | spicy murmura snack | mandala snack  | no cook recipe | cooking without fire | 

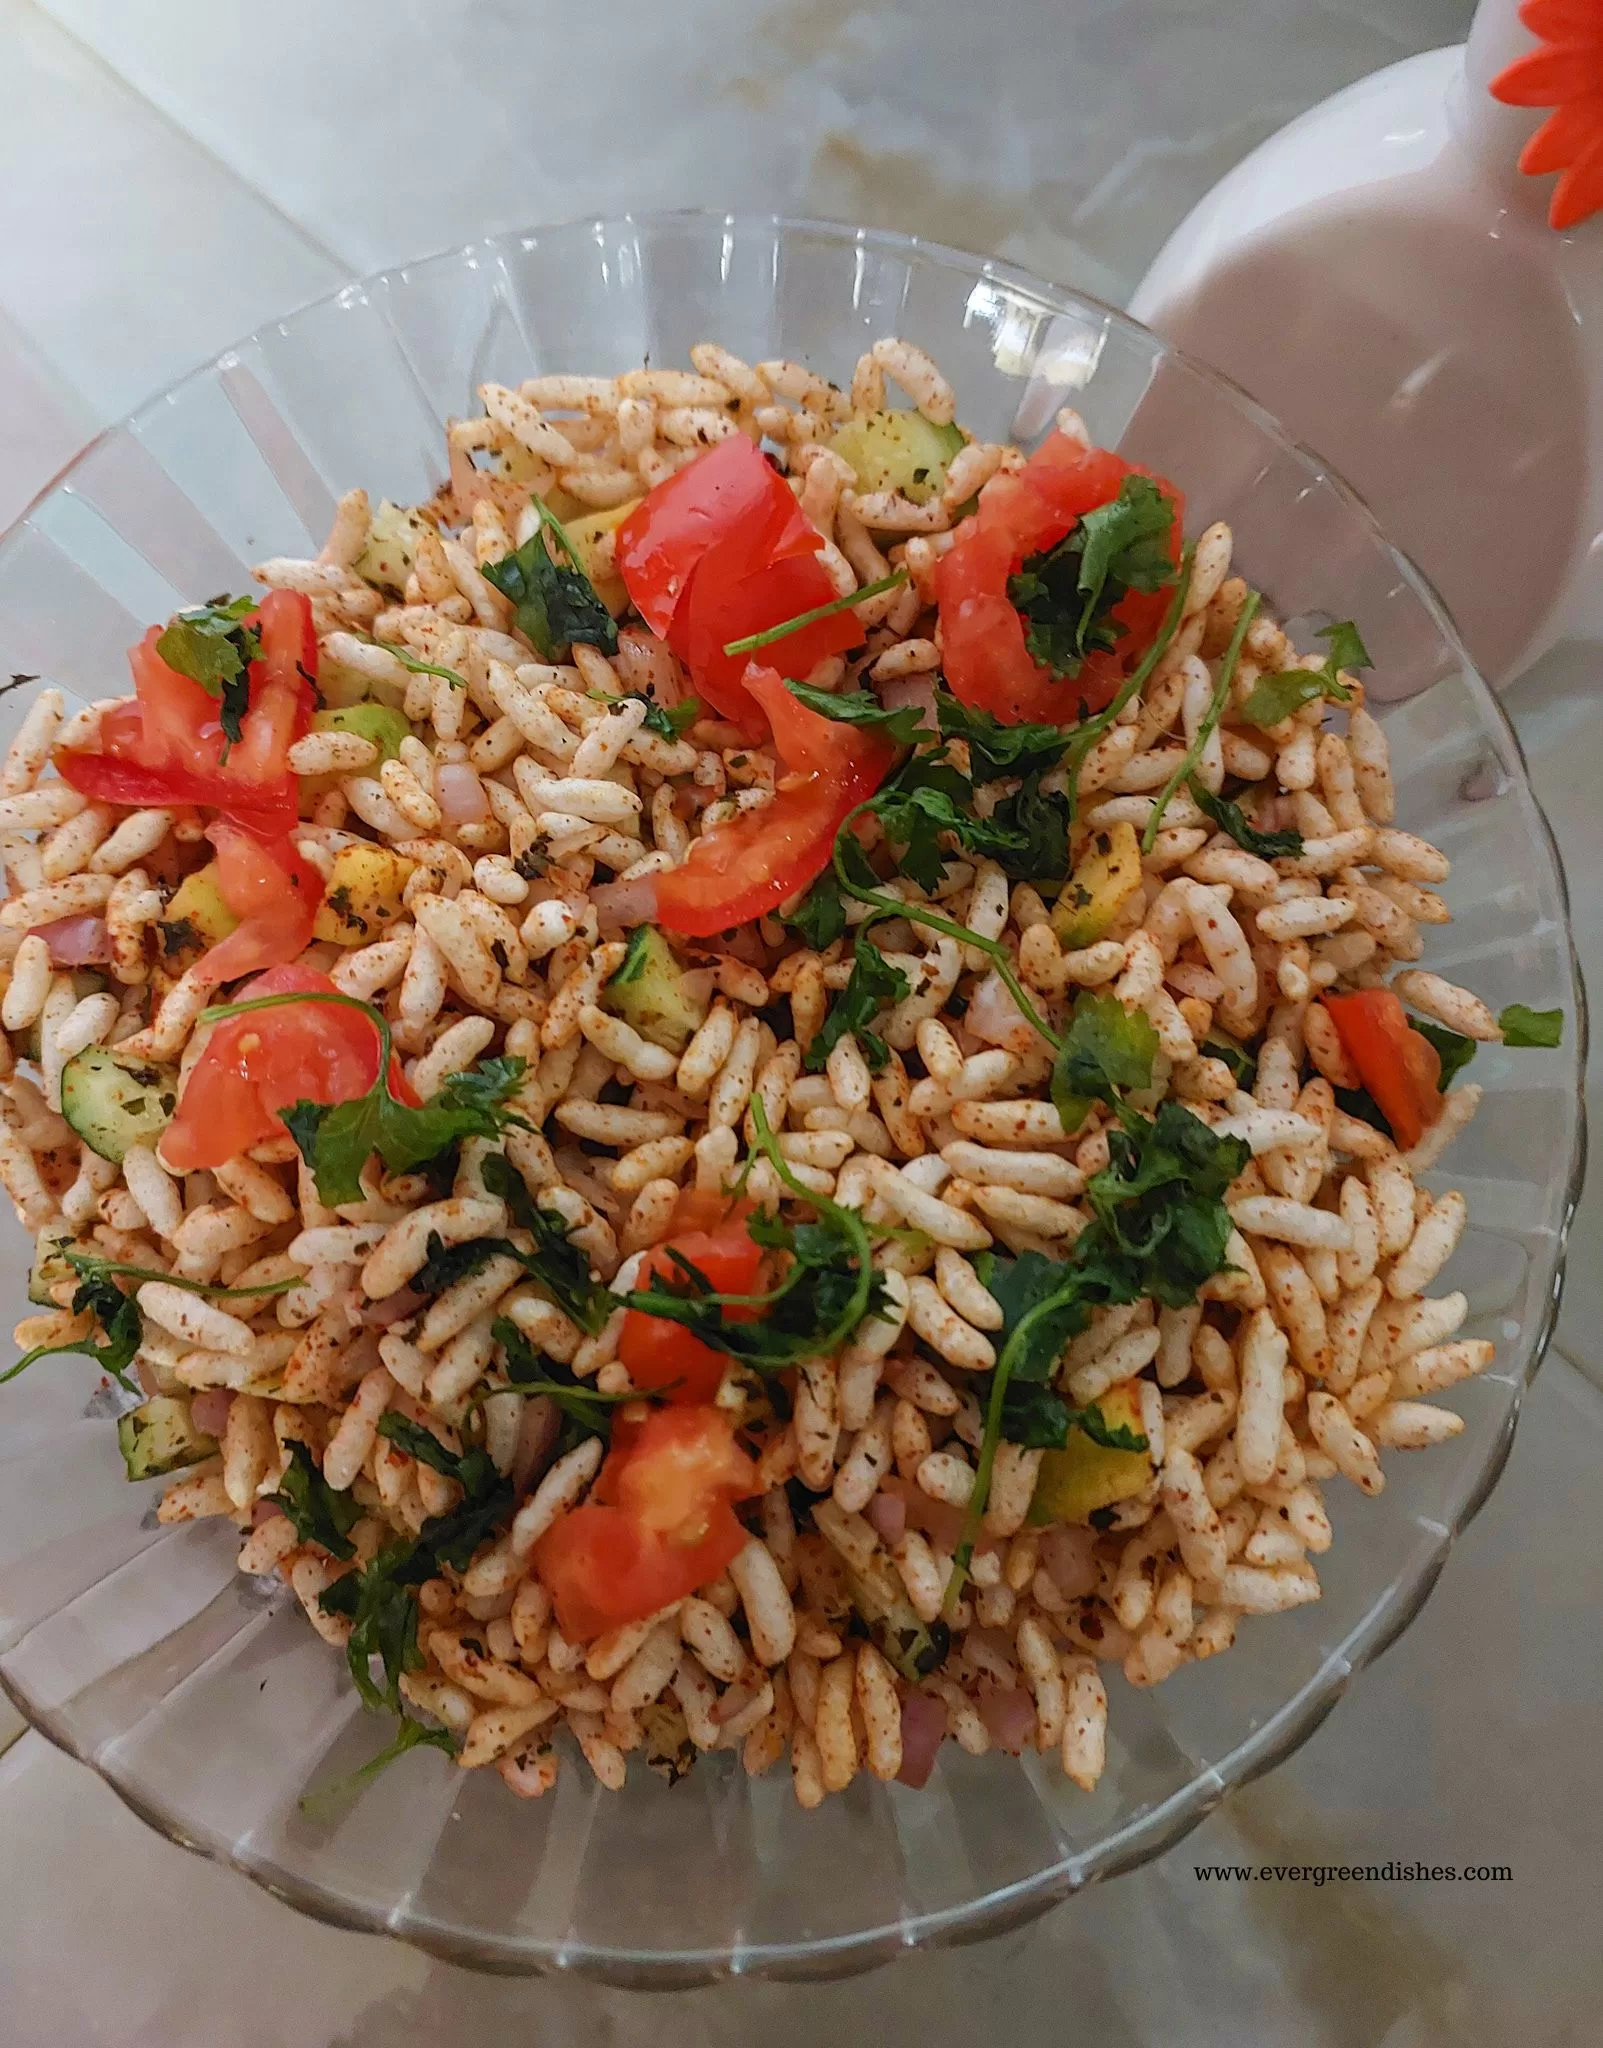
    Spicy Murmura Snack is a tasty, easy to make, no cook, vegan snack. 

    Murmura snacks are loved at home. We can have it anytime depending on the form it is created. I will share other kind of murmura recipes  soon. This version of murmura snack is spicy and ideal for the rainy days, when you long to have a cup of chai with some namkeen. 


    Murmura snack is ready in 15 minutes. It is a no cook recipe ideal for those small hunger pangs in the evening. It can also be served as a snack with tea.

    Here, I have made a spice mix and used it. The spice mix can be used in raita or over bread sandwich along with veggies. 

    murmura snack
    murmura snack

    The  murmura story :

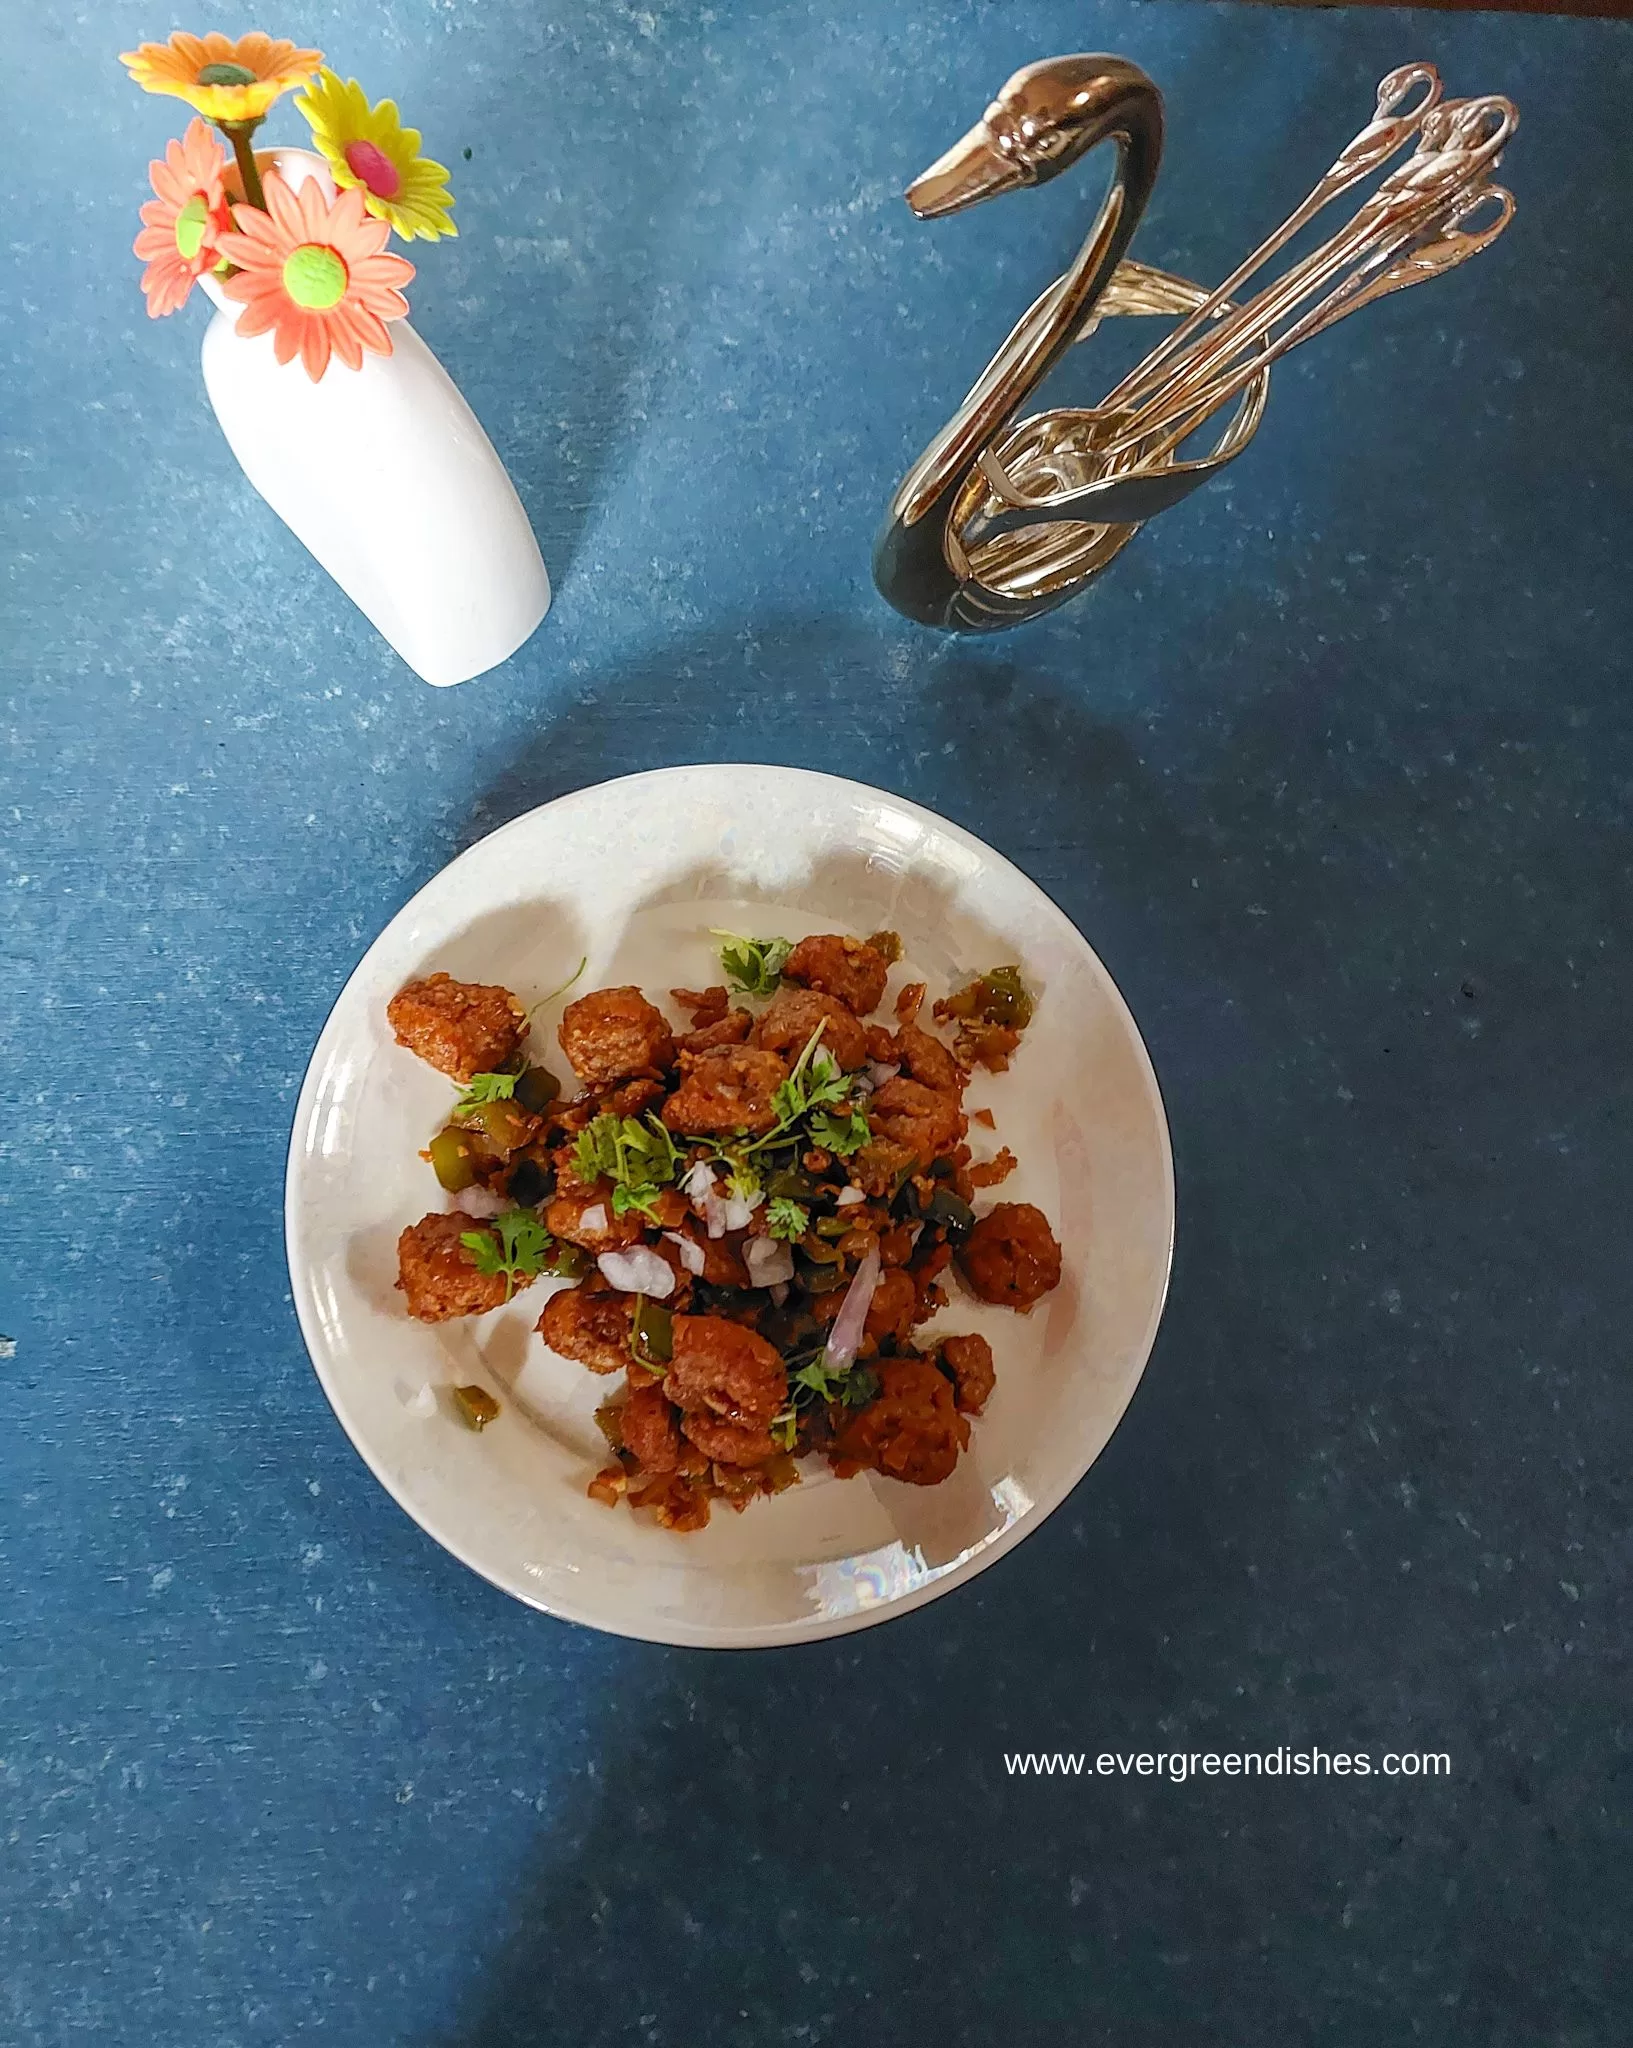
    Murmura is also called as puffed rice or popped rice. It is made using par-boiled  rice by tossing in salt or deep frying in oil . It is also made by heating rice kernels under high pressure. The method of manufacture does differ from region to region.  It is commonly used in Asian countries. Puffed rice  is mainly used as a street food where hawkers sell puffed rice cakes and other snacks. In India, it is usually used to make a chaat called bhel.  It is also used in making street style snacks as shown below.

    Ingredients : 

    • 1 cup murmura
    • 1 onion 
    • 1 tomato
    • 1 cucumber
    • ½ raw mango 
    • ¼ teaspoon chaat masala
    • ¼ teaspoon pepper powder
    • 1/ teaspoon chilli powder
    • Salt
    • Fresh coriander

    To be made into a powder

    • ¼ cup mint leaves
    • 4 green chilly
    • 1 clove garlic
    • 1 teaspoon coriander seed
    • 1 teaspoon cumin 
    • Pinch of black salt


    Method:

    1. Cut the vegetables into fine pieces. 
    2. Separate the mint leaves, wash and dry it on a cloth. 
    3. Grind the ingredients to be made into a powder.
    4. In a bowl take murmura, add  onion, cucumber and raw mango pieces to it. Put a spoon of the powder. Add chaat masala, pepper powder and salt. Mix them together.
    5. Finally, add tomatoes and garnish with fresh coriander.
    6. Spicy murmura is ready to serve. 

    Take a tip : 

    • You may add fried snacks as aloo bhujia or sev.
    • If you do not have raw mango, add juice of half lemon.
    • Once mixed, consume immediately. 
    spicy murmura snack
    Evergreendishesdev

    Spicy Murmura Snack

    5 from 6 votes
    Spicy Murmura Snack is a no cook, easy to make, tasty snack ready in fifteen minutes.

    Ingredients
      

    • 1 cup murmura
    • 1 onion
    • 1 tomato
    • 1 cucumber
    • ½ raw mango
    • ¼ teaspoon chaat masala
    • ¼ teaspoon pepper powder
    • 1/ teaspoon chilli powder
    • Salt
    • Fresh coriander
    • To be made into a powder
    • ¼ cup mint leaves
    • 4 green chilly
    • 1 clove garlic
    • 1 teaspoon coriander seed
    • 1 teaspoon cumin
    • Pinch of black salt

    Method
     

    1. Cut the vegetables into fine pieces.
    2. Separate the mint leaves, wash and dry it on a cloth.
    3. Grind the ingredients to be made into a powder.
    4. In a bowl take murmura, add  onion, cucumber and raw mango pieces to it. Put a spoon of the powder. Add chaat masala, pepper powder and salt. Mix them together.
    5. Finally, add tomatoes and garnish with fresh coriander.
    6. Spicy murmura is ready to serve.

    Notes

    You may add fried snacks as aloo bhujia or sev.
    If you do not have raw mango, add juice of half lemon.
    Once mixed, consume immediately. 

    About the event : 

    Sending this to the Shhh Secretly Cooking Challenge. It is a monthly event.  The theme for the month of May was No Cook Recipes. It was suggested by Renu Agarwal Dongre of cookwithrenu.com. She has made a tasty tofu avocado and chive spread

    I was paired with Seema of Mildly Indian. Seema asked me to use raw mango and I have prepared  the spicy murmura snack with the same. In turn, I asked  Seema to make something with avocado and she made a no cook spinach avocado soup

    Pin it for later : 

    spicy murmura snack
    spicy murmura snack

    If you  ever make  Spicy Murmura Snack , take a picture and share it by tagging @foodiejayashree on Instagram and @evergreendishes on Facebook.  Subscribe to get all updates and an e-book for free.

  • Okra Sambar | Bendekayi Huli | Ladies finger Sambar

    Okra Sambar | Bendekayi Huli | Ladies finger Sambar

    Jump to Recipe

    Okra Sambar is one of the kinds of dish  you can prepare when you need something different and easy, filling that will pair up with steamed rice and a simple stir fry. It is an ideal lunch idea for a busy day.  Okra is commonly called as ladies finger in English speaking countries. The scientific name is Abelmoschus esculentus. 

    Sambar is dense and more nutritious as it has the goodness of lentils and vegetables in it. It can be made in various ways as using varied vegetables or green leaf. Pulses such as horse gram taste good along with vegetables. Today, I am sharing the recipe of Bendekayi Sambar.

    Bendekayi is ideal to make as a crispy  fry. My family loves all kinds of okra fry. This sambar is one of the lesser made items. But, believe me, it is tasty and a winner for those who like ladies finger. 

    Initially, soak the tur dal for sometime and cook it with a pinch of turmeric and oil. I prefer to soak for atleast two hours, it eases the cooking. The bhendi should be washed and dried. There should be no trace of water in it, it turns slimy. 

    bendekayi sambar | ladies finger sambar
    bendekayi sambar

    What goes in the making ?

    Choose tender okra. The quality of okra will either elevate or spoil the dish. Wash them and pat them dry. The bhindi should be cut evenly. This will help in proper cooking of the vegetable.

    Tur Dal:  I prefer to soak for atleast two hours. Add a pinch of turmeric and a little oil while cooking it. Cook it for three whistles and allow the pressure to release by itself.

    Sambar powder : I make most of the  spice mix at home. You can use any good brand of sambar powder.

    Tamarind : It needs to be  wash and soaked for at least for fifteen minutes. Alternatively, you can use the tamarind extract which is readily available.

    Chilli powder : Check for spiciness and adjust by adding a little bit of chilli powder. The flavour should be a mix of sweet, spicy and sour.

    A few other recipes with okra are :

    crispy okra fry 2 ways
    2 ways of making okra fry


    Okra with tomatoes / bhindi tamatar ki sabzi
    okra with tomatoes / bhindi tamatar ki sabzi


    Bharli bhendi /stuffed okra
    Bharli bhendi / stuffed okra


    Print Recipe
    okra sambar
    Evergreendishesdev

    Bendekayi Sambar

    Ladies finger sambar makes a good and easy lunch menu. Pair it with hot steamed rice along with a stir fry for a good meal.
    Prep Time 10 minutes
    Cook Time 20 minutes
    10 minutes
    Total Time 45 minutes
    Servings: 4 people
    Course: lunch ideas, Main Course
    Cuisine: karnataka

    Ingredients
      

    • ½ cup tur dal
    • ½ teaspoon oil
    • ¼ teaspoon turmeric powder
    • 2 cup water
    • 1 teaspoon oil
    • ¼ kg tender okra
    • Marble size ball of tamarind
    • 2 teaspoon sambar powder
    • 2 tablespoon oil
    • ½ teaspoon mustard
    • ¼ teaspoon asafoetida
    • ¼ teaspoon turmeric powder
    • ¼ teaspoon fenugreek powder
    • A few curry leaves

    Equipment

    • 1 pan
    • 1 ladle
    • 1 lid
    • 1 pressure cooker with pan

    Method
     

    1. Initially, begin the prep work by soaking the tur dal in water for ateast half an hour.
    2. Cut the washed okra into one inch pieces.
    3. Cook the lentil with a pinch of turmeric powder and oil.
    4. Saute the okra pieces in a teaspoon of oil for a couple of minutes. They should be cooked with a tinge on the edges. Put them aside.
    5. In a pan, add oil. Put mustard, asafoetida and turmeric powder. As it crackles, put the okra pieces to it and let it cook for a minute.
    6. Mix the lentil with a ladle, pour it into the pan. Put salt. Allow to cook for sometime.
    7. Extract the pulp from the tamarind.
    8. Put the tamarind extract along with sambar powder. Cook for two minutes, allow the flavours to blend on a low flame.
    9. Okra Sambar is ready to serve.

    Notes

    Choose a tender lady finger. Cut them into appropriate sizes.
    A little bit of jaggery lends a good taste.
    Add a little bit of chilli powder if needed. The sambar should be flavoursome, a balance of sour, spicy, hot and a little sweetness if needed.

    Pin it for later :

    bendekayi sambar
    bendekayi sambar

    If you  ever make  Okra Sambar , take a picture and share it by tagging @foodiejayashree on Instagram and @evergreendishes on Facebook.  Subscribe to get all updates and an e-book for free.

  • No Onion Garlic Thali

    No Onion Garlic Thali

    A no onion garlic thali which you can easily prepare at home.

    Some days call for a simple, no onion garlic meals. I usually add onion regularly except for a few days as Ekadasi, festive days and my mood.


    Here is one such thali. The lunch menu consists of red coconut chutney, two kinds of stir fry, a green dal, rasam, papad, chapathi and steamed rice. Along with it I have served pickle and fryums. Here is the other thali which I shared earlier. 

    All the recipes are easy to prepare. Here is a short method of the cooking. Soak the dal and tamarind,  cut the vegetables  and prepare the dough. Soon, you can put the lentil in the pressure cooker along with potatoes. Make the seasoning for the tomato chutney and the rasam. In the meantime, wash the green leaf thoroughly and get ready with the seasoning. Once the pressure is released, cook the dal and make alu methi sabzi. The chapathis are made in the end after the rice is cooked.
    Alu Methi – It makes a good accompaniment with chapathi.
    Tomato chutney : A simple, flavoursome chutney which is often made at home.
    Red coconut chutney – Abundant of coconut and this chutney happened.
    Dal with green leaves – The dal can be made with any kind of green leaves as fenugreek, palak or amaranth. I often use a combination of palak and fenugreek or only hunase leaf to make dal with green leaf aka mudddipalya      

               Nimbehannina Saaru – A comfort meal by itself, it needs the simplest of ingredients. 


    Pin it for later :

    No onion garlic thali

    If you have liked this post, hit the share button. For more such posts, follow @evergreendishes on Facebook or @foodiejayashree on Instagram


  • Paneer Bhurji | North Indian Cuisine

    Paneer Bhurji | North Indian Cuisine

    Print Recipe Jump to Recipe

    Paneer Bhurji is a classic dish from North Indian cuisine. Scrambled paneer is mixed in a gravy of cooked onion and tomatoes with spice powders to make a tasty accompaniment. Paneer is cottage cheese while bhurji refers to a scramble. Cottage cheese scramble is ideal to pair with any Indian flat bread as roti or paratha. You can also use it as a spread on toasts for a quick and filling  breakfast. 

    Paneer or Cottage cheese is the preferred choice for us. Tofu or egg can also be used. 

    It is good to use fresh, homemade paneer. To make paneer, heat whole milk on a low  flame. Keep the acidic ingredients ready to curdle the milk. Here, we can use curd, lemon or vinegar. Once the milk comes to a boil, put a small quantity of any one of the acidic ingredient and allow it to curdle. Turn off the flame. After a few minutes, drain it over a thin muslin cloth and keep it aside for sometime.

    If buying, opt for a whole piece of paneer instead of cubes. After adding the spices, keep stirring as the spices get burnt easily. Put a little water if needed. 

    What goes in the making of Paneer Bhurji ?

    • Paneer : It is the star ingredient. It is always best to make paneer at home. But, you can use store bought too. Use a good brand paneer. Once you buy, check it properly if it is fit for use. I am writing this as I read so much about the deterioration in the quality of paneer these days.
    • Onion : Cut it finely. Invest in a good chopper, it saves so much time.
    • Tomato: Use the bright, red ones. Cut them finely. 
    • OIl : Any neutral oil will do.
    • Ginger garlic paste : I prefer making it fresh but you can use the store bought ginger garlic paste.
    • Cumin : A little bit of cumin, lends a good flavour.
    • Turmeric powder
    • Amchur powder : It is the dried mango powder which helps in balancing the flavours.
    • Garam Masala : It is a blend of all spices. Use a good quality spice mix.
    • Kasuri Methi: It is dried fenugreek leaves which helps to give a good flavour to the dish.
    • Coriander powder : You can make it by roasting a small quantity of dhania and then grinding to a fine powder.
    • Coriander : The final dressing of the dish is the coriander sprinkled on top.


    Can it be stored ?

    Paneer Bhurji  tastes best when it is cooked fresh and served. The texture of the paneer may change .

    How to serve it ?

    • It tastes great with roti and nan.
    • It can be served as an accompaniment with chapathi or phulka.
    • It is ideal to top it over a bread toast.
    • It can be used as a filling for rolls.
    • It tastes great as a filling for a different kind of dosa.


    Print Recipe

    Paneer Burji

    5 from 4 votes
    Paneer Burji is a popular dish from North Indian cuisine. It pairs well with any Indian flat bread. Scrambled cottage cheese is cooked with spices to make a delectable side dish.

    Ingredients
      

    • 2 tablespoon oil
    • 1/2 teaspoon cumin
    • 2 green chilli
    • 1/2 teaspoon ginger garlic paste
    • 2 onion
    • 3 tomato
    • 1/4 teaspoon turmeric powder
    • 1/2 teaspoon coriander powder
    • 1/2 teaspoon amchur powder
    • 1/2 teaspoon chilli powder
    • 1/2 teaspoon garam masala
    • 200 grams paneer
    • 1/2 teaspoon kasuri methi
    • 2 tablespoon fresh coriander

    Method
     

    1. If you are using fresh homemade paneer, get the paneer ready. Otherwise, put the store bought paneer in hot water for fifteen minutes.
    2. Cut the vegetables
    3. Crumble the paneer.
    4. Grind ginger garlic paste, I prefer to use fresh one.
    5. Take oil in a pan, add cumin and green chilli cut into half pieces.
    6. Put the ginger garlic paste and saute it for a few seconds. Then, add the onions. Saute it to a golden brown colour.
    7. Put the tomato pieces to it and allow it to cook for sometime.
    8. Once the tomatoes are cooked, put the spice powders to it along with salt.
    9. Mix it well and let the flavours blend well.
    10. Put the crumbled paneer to it, mix and saute it for a minute.
    11. Add crushed kasturi methi to it
    12. Finally, add chopped coriander to it.
    13. Paneer Bhurji is ready to serve.

    Other paneer related recipes are : 

    paneer tikka
    paneer tikka
    Kadai Paneer
    Kadai Paneer


    Pin it for later : 

    paneer bhurji
    paneer bhurji

    If you  make  Paneer Bhurji, take a picture and share it by tagging @foodiejayashree on Instagram and @evergreendishes on Facebook.  Subscribe to get all updates and an e-book for free.

  • Sprouted Moong Methi Stir Fry

    Sprouted Moong Methi Stir Fry

    Sprouted Moong Methi Stir Fry is a tasty, healthy, easy to prepare side dish from Konkani cuisine. It is  a good  way to  include sprouted fenugreek, which is a slightly difficult to consume by itself. You can serve it as an accompaniment with chapathi or along with rice and rasam.

    Sprouting duration varies for both.  Moong sprouts in a day while fenugreek needs more time. Soak them separately for six to eight hours, put them in a colander, once the water is drained and semi-dry, tie them in a thin  muslin cloth and keep them in a warm place. Check them the next day and store them in a container in refigerator. Alternatively, you can keep in a closed container with a tight lid.

    I have shared in detail here regarding the making of sprouts. Do check the post. The other recipes with moong which we often relish is the salad, it is ideal as a snack too.

    The stir fry is called as Sukke in Konkani households and the recipe is adopted from  Healthy Cooking with Mitha. We know each other through a facebook group and remember reading and trying her recipe then. We liked it and it has been a regular feature.The bitterness of the fenugreek is neglible and adds a good taste to the moong stir fry. You can also check out the earlier shared menthe gojju  


      What goes in the sprouted moong methi stir fry ?

    • sprouted green gram : Planning is essential here. We need to soak and sprout them a day prior.
    • sprouted fenugreek seed: Make it two days prior, as sometimes it needs a little longer time.
    • oil: The preferred oil is coconut oil for this recipe but you can use any other oil.
    • mustard seed : for seasoning
    • tamarind paste: You can add a little bit of tamarind extract if you do not have the tamarind paste.
    • coconut: Do not skip it for this recipe.
    • salt: As per the taste
    • chilli powder: For the hot and spicy taste.
    • curry leaves : A few leaves are needed

    Pre-requisites :

    You need to have the sprouted moong and fenugreek ready. To make the sprouts, read the above paragraph, it is mentioned in detail. 1 cup of green gram yields three cups of sprouted moong while 1/4 cup of fenugreek yields a cup of sprouted fenugreek.

    Take adequate precaution while sprouting. Keeping them for a longer may turn them sticky. Weather conditions too play an important role.

    1. Why should you make sprouted moong methi stir fry ?
    1. It is easy to prepare if you have the sprouted grains.
    2. A good way to include fenugreek in your diet.
    3. It is vegan and gluten-free.
    4. It is a no onion garlic recipe.
    5. It makes a good accompaniment with any meal.

    Evergreendishesdev

    Sprouted Moong Methi Stir Fry

    5 from 10 votes
    Sprouted Moong Methi Stir Fry is a tasty, healthy, easy to make accompaniment.
    Course: dinner, lunch
    Cuisine: karnataka

    Ingredients
      

    • 3 cup sprouted green gram moong
    • 1 cup sprouted fenugreek seed menthe
    • 2 teaspoon coconut oil
    • 1/2 teaspoon mustard
    • a few curry leaves
    • 3 cups water
    • 1 tablespoon tamarind paste
    • 2 teaspoon chilli powder
    • salt to taste
    • 1/4 cup fresh grated coconut

    Method
     

    1. Take oil in a pan, add mustard seeds. As it splutters, put curry leaves and the sprouted green gram. Also add the sprouted fenugreek seed. Put some water to it and allow to cook for sometime.
    2. Once it is cooked, add salt to it.
    3. Now, put the tamarind paste and chilli powder to it.
    4. Finally, put grated coconut to it, heat for a minute and keep it aside.
    5. Serve with any meal as an accompaniment.

    Notes

    You need to have the sprouted moong and fenugreek ready. To make the sprouts, read the above paragraph, it is mentioned in detail. 1 cup of green gram yields three cups of sprouted moong while 1/4 cup of fenugreek yields a cup of sprouted fenugreek.
    Take adequate precaution while sprouting. Keeping tied for a longer time may turn them sticky. Weather conditions too play an important role.

    About the event:

    Sending this to Cooking with Sprouts theme for the month of January 2024 at Shhh Secretly Cooking Challenge. The theme was suggested by yours truly. I was paired with Kalyani Sri of sizzling tastebuds, a blog with varied kind of recipes.  Kalyani has prepared Sprouts Dosa with Jowar, a filling breakfast to kickstart a busy day with chana sprrouts and spinach, the secret ingredients given by me. Inturn, I have made moong methi sprouts stir fry with the secret ingredients, chilli powder and methi sprouts.

    shhh cooking secretlyIf you  make  Sprouted Moong Methi Stir Fry, take a picture and share it by tagging @foodiejayashree on Instagram and @evergreendishes on Facebook.  Subscribe to get all updates and an e-book for free.

    sprouted moong methi stir fry
    sprouted moong methi stir fry

  • Soya Chunks Manchurian Recipe

    Soya Chunks Manchurian Recipe

    soya manchurian | soya chunks manchurian recipe | dry soya manchuri | soya manchuri recipe

    Soya Chunks Manchurian is a tasty party appetiser from Indo–Chinese cuisine.

    Manchurian is loved by all and today, many varieties of the same are prepared. Soya Manchurian is made using soya nuggets. Today, I am sharing the recipe of the same.

    Soya Chunks Manchurian Recipe

    Ingredients :

    • 1 cup soya chunks
    • 2 tablespoon corn flour
    • 3 tablespoon maida
    • 1/2 teaspoon ginger garlic paste
    • salt to taste
    • water
    • oil for frying

    For the sauce :

    • 1 onion
    • 1 capsicum
    • 1/4 teaspoon ginger garlic paste
    • 1 tablespoonspoon soya sauce
    • 1 tablespoonspoon chilli sauce
    • 1 tablespoon vinegar
    • 1 teaspoon chilli powder

    Method :

    1. Put the soya chunks in boiling water for four minutes.
    2. Remove and put it aside.
    3. Coat them with cornflour, maida, ginger garlic paste, salt  and keep them aside, use a little water if needed.
    4. Heat oil in a pan, deep fry the coated soya chunks.
    5. To make the sauce, take oil in a pan. Add ginger garlic paste. Now, put onion and saute for sometime. Put the capsicum pieces and saute them.
    6. Now, add soya sauce, chilli sauce, tomato ketchup, vinegar and chilli  powder. A little salt may be needed, be careful as the sauces we added earlier contain salt in them
    7. Cook for a minute, add the deep fried soya chunks.
    8. Cook for a minute. Soya Manchurian is ready to serve.

    Take a tip :

    1. Spring onion can be used.
    2. This is the dry version of soya manchurian. To make gravy, you need to add some water and cook it with a little paste of corn starch before adding the fried soya chunks.

    Print Recipe

    soya manchurian
    Evergreendishesdev

    Soya Chunks Manchurian | Soya Manchurian Recipe

    5 from 7 votes
    Soya Manchurian is a tasty appetiser from Indo-Chinese cuisine.
    Course: appetisers
    Cuisine: Indo-Chinese

    Ingredients
      

    • 1 cup soya chunks
    • 2 tablespoon corn flour
    • 3 tablespoon maida
    • 1/2 teaspoon ginger garlic paste
    • salt to taste
    • water
    • oil for frying
    • For the sauce :
    • 1 onion
    • 1 capsicum
    • 1/4 teaspoon ginger garlic paste
    • 1 tablespoon soya sauce
    • 1 tablespoon chilli sauce
    • 1 tablespoon vinegar
    • 1 teaspoon chilli powder

    Method
     

    1. Put the soya chunks in boiling water for fifteen minutes.
    2. Squeeze the water from the soya chunks and put them in a bowl.
    3. Coat them with cornflour, maida, ginger garlic paste, salt  and keep them aside, use a tablespoon of water if needed.
    4. Heat oil in a pan, deep fry the coated soya chunks.
    5. To make sauce :
    6. Take oil in a pan. Add ginger garlic paste. Now, put onion and saute for sometime. Put the capsicum pieces and saute them.
    7. Now, add soya sauce, chilli sauce, tomato ketchup, vinegar and chilli  powder. A little salt may be needed, be careful as the sauce contain salt in them
    8. Cook for a minute, add the deep fried soya chunks.
    9. Cook for a minute. Soya Manchurian is ready to serve.

    Notes

    Spring onion can be used.
    This is the dry version of soya manchurian. To make gravy, you need to add some water and cook it with a little paste of corn starch before adding the fried soya chunks. 

    About the event :

    It’s that time of the month when we create recipe Shhh Secretly Cooking Challenge theme. The theme was “Party Appetizers” and it was stated by Radha Rajagopalan. Radha has made a flavoursome chatpata falafel, I am sure we will relish it.

    My partner for the month of December was Mayuri Patel of mayuris-jikoni. I was given soya nuggets and ginger, I have made soya manchurian. I had given lemon and peanuts, she has made a delicious  Farali Beetroot Tikki. It is ideal to serve as an evening snack.

    If you  make  Soya Chunks Munchurian, take a picture and share it by tagging @foodiejayashree on Instagram and @evergreendishes on Facebook.  Subscribe to get all updates and an e-book for free.

    Pin it for later :

    soya manchurian
    soya manchurian

  • How to make Avalakki Bisibele

    How to make Avalakki Bisibele

    Jump to Recipe

    Avalakki Bisibele is a twist to the popular bisibelebath of Karnataka. It is made with moong and flattened rice along with vegetables and  spice mix. It is tasty, nutrient rich and ideal for breakfast.

    Looking for a different kind of breakfast ? Avalakki Bisibele is  an easy to make, filling and  made with flattened rice. It needs no accompaniment, and ready in an hour. I often make avalakki bisibele for breakfast but it has not made to the blog. In my quest for varied options, it has matched my family likes. The combination of moong and rice flakes cooks faster and makes  a good choice. The other breakfast ideas shared earlier are sago idli, kanchipuram idli, all time favourite masala dosa and masala upma.

    We do not  need a well cooked dal, so I prefer to cook it in a thick bottom pan. The vegetable I normally use are beans, carrots green peas and potato. At times, I do add capsicum in the seasoning. You may use varied vegetables but the taste will differ a little. I do not use onion as I prefer to keep a few dishes sans onion. You may add onion in the seasoning.

    Avalakki is the regional name for rice flakes. It is available in three variety; thick, medium and thin.  The thin variety gets mushy and is not ideal to use. We should use the medium variety of rice flakes. Bisibele bath is made using tur dal and rice which requires longer time to prepare.

    Why should you make Avalakki Bisibele ?

    • It is easy to prepare.
    • It is filling.
    • It is different from the usual poha and a good twist to the bisibelebath which needs ample time.
    • It is rich in proteins.
    • You can use different kind of vegetables.

    Is it ideal for breakfast ?

    Yes, you can serve it for breakfast. Alternatively, you can have it for brunch or dinner.

    What do I pair it with ?

    You can pair it any fried snack as sev or chiwda.  For a healthy option, you can use air fried snacks as papad or fryums,

    Can I cook it in the pressure cooker ?

    We do need a mushy cooked lentil here. So I prefer to cook it in a direct mode.

    avalakki bisibele

    What goes into Avalakki Bisibele:

    • Moong Dal : The lentil used here is moong dal. It needs less time to cook and gut friendly. It is also a good source of protein.
    • Flattened Rice : It is quite common to use flattened rice in our daily cooking. I have used the medium poha you get in the market. It gets in perfectly with the recipe. Alternatively, you can use the thick poha too. But do not use the thin poha as it gets absorbed quickly.
    • Vegetables : You can use varied vegetables here. I often use beans, carrots, potato and peas. You can use other veggies as per your liking. The vegetables are cut into moderate, equal sized pieces. Capsicum le
    • Tamarind pulp : Soak tamarind for sometime and extract the pulp. Alternatively, you may use the ready extract.
    • Spice mix: Use any good bisibelebath powder.
    • Seasoning: Oil is used for the seasong. Put a few mustard seeds, as they crackle, put the other ingredients. Put a few cashew pieces for the good taste. You may add a dry chilli and a few curry leaves in the seasoning.
    • Water : We need water to cook and wash the vegetables.
    • Salt : The mother of all spices.
    • Ghee : It lends a good aroma.


    Print Recipe

    avalakki bisibele
    Evergreendishesdev

    Avalakki Bisibele

    5 from 2 votes
    Avalakki Bisibele is a filling breakfast made with moong dal and rice flakes along with varied vegetables.
    Prep Time 10 minutes
    Cook Time 30 minutes
    Total Time 40 minutes
    Servings: 4 people
    Course: Breakfast
    Cuisine: karnataka

    Ingredients
      

    • 4 litre water
    • 1 cup moong dal
    • 1/4 teaspoon turmeric powder
    • 1 gooseberry size tamarind
    • 1/4 cup beans cut into small pieces
    • 1 carrot chopped
    • 1 potato sliced
    • 1/4 cup green peas
    • 4 cup rice flakes poha
    • 3 teaspoon sambar powder
    • 1 teaspoon ghee
    • 3 tablespoon oil
    • 1/4 teaspoon mustard
    • 1/4 teaspoon asafoetida
    • 1/4 teaspoon turmeric powder
    • 1/2 teaspoon cumin
    • 6 cashewnut

    Equipment

    • thick bottom pan
    • ladle
    • lid
    • small pan
    • serving spoon
    • bowl

    Method
     

    1. Take a thick boottom pan, add water and put it to boil. Once the water boils, put washed moong dal to it along with a pinch of turmeric powder. Let it cook for sometime.
    2. In the meantime, soak tamarind in water. Cut the vegetables and keep them ready.
    3. After sometime, add the veggies. At first, put the beans, followed by carrot and potato pieces. You can also put the green peas if you are using fresh ones. The frozen peas do not need much time, add them at a little later stage.
    4. Clean the flattened rice, wash it well and keep it aside.
    5. Once the moong dal is partially cooked, add the rice flakes. Let it cook for sometime.
    6. Put salt.
    7. Extract the pulp from the tamarind.
    8. Put some pulp and sambar powder to it. Mix well.
    9. In a small pan, make the seasoning.  Add oil, put mustard seeds, as it splutters, add cumin, asafoetida and turmeric powder to it.  Put the groundnut, after a few seconds, add the cashew pieces and pour it over the avallakki bisibele that is cooking.
    10. It is now ready to serve.
    11. You can top it with some sev or mixture.

    Notes

    • The moong dal should not be mushy.
    • Ready tamarind pulp may be used.
    • Various brands of sambar powder are available in the market.
    • You may add capsicum pieces in the seasoning, it lends a good taste.
    • You may add a little ghee while cooking.
    • Adjust the consistency by adding water if needed.
     

    If you  make  Avalakki Bisibele, take a picture and share it by tagging @foodiejayashree on Instagram and @evergreendishes on Facebook.  Subscribe to get all updates and an e-book for free.

    Pin it for later :

    avalakki bisibele

  • Quinoa Kheer Recipe | Quinoa Payasam

    Quinoa Kheer Recipe | Quinoa Payasam

    quinoa kheer | quinoa payasam | quinoa pudding | sweets |

    Quinoa Kheer is a tasty, varied kind, naturally healthy kheer. It is a delicious twist to the usual kheer made with rice or vermicelli.The quinoa consumers are steadily increasing in number. It is one of the preferred choice of food for many people. 

    quinoa kheer
    a bowl of quinoa kheer

    Quinoa is versatile to use. Today, I am sharing a kheer recipe with it. It is nutty, tastes good and ideal to prepare for the festive days.

    A simple and easy recipe which you can make for any occasion. With quinoa gaining popularity,  I wanted to give a try to the favourite Indian sweet payasam with quinoa. Wash the quinoa to remove the saponins and soak it in water for two hours. You can use any variety of quinoa.  In the meantime, boil the milk in a thick bottom pan. Put the saffron strands, it gives a good aroma and color to the kheer. Take the soaked quinoa, put half a cup of water and cook in a pressure cooker for one whistle.

    Grind the dry fruits to a powder. Add the cooked quinoa to the milk along with the dry fruit powder. As it thickens, add sugar and cook for two minutes. Remove and keep aside. Garnish with cardamom powder.

    If you want to add dry fruit pieces, boil the milk until it is reduced to half. Then, roast the dry fruit pieces in ghee and put it in the prepared payasam. You can serve it warm or chilled. 

    The other recipes with quinoa shared earlier are :

    Quinoa Dosa
    Quinoa Dosa
    Quinoa Upma
    quinoa upma


    quinoa pongal
    quinoa pongal


    Print Recipe
    quinoa kheer
    Evergreendishesdev

    Quinoa Kheer

    5 from 5 votes
    Quinoa Kheer is a delectable sweet dish made with milk and quinoa.
    Course: Dessert, milk based sweets

    Ingredients
      

    • 3/4 litre milk
    • 1/3 cup quinoa
    • 1/2 cup water +extra for soaking
    • 1/2 cup sugar
    • 7 almond
    • 7 cashewnut
    • 2 cardamom
    • a few strands of saffron

    Equipment

    • pan
    • ladle
    • pressure cooker with containers
    • mixer along with small jar

    Method
     

    1. Wash and soak the quinoa for two hours. It should be rinsed well to remove the saponin covering.
    2. Put the milk in a thick bottom pan and boil it for sometime. Put the saffron strands to the milk.
    3. Pressure cook the quinoa with half a cup of water for one whistle.
    4. In the meantime, make a powder of dry fruits along with cardamom.
    5. Once the pressure releases by itself, put the quinoa to the boiled milk and cook it for sometime. Put the dry fruit powder to it.
    6. Once it thickens, add sugar to it and give a stir. Boil for two minutes. Keep it aside. Quinoa kheer is ready to serve.

    Notes

    • You can use any variety of quinoa.
    • It can be served warm or chilled.
    • If you want to add roasted nuts instead of powder, you need to boil the milk until it reduces to half the quantity. 

    If you  make Quinoa Kheer, take a picture and share it by tagging @foodiejayashree on Instagram and @evergreendishes on Facebook.  Subscribe to get all updates and an e-book for free.

    Pin it for later : 

    quinoa kheer
    quinoa kheer
  • Stuffed Dates Recipe  | Healthy Dessert

    Stuffed Dates Recipe | Healthy Dessert

    Jump to Recipe

    Stuffed Dates are the new trendy dessert you find at parties or get-together. They are easy to create, look good, healthy to serve  and make a good snack to binge anytime.

    Dates are a good source of nutrition.They are packed with Vitamin A, B1, B2, B3,B5, C, anti-oxidants  and many other nutrients as potassium, calcium, iron, manganese, sodium, zinc. If you are not eating them regularly, make them a part of your diet.

    It helps to fight anemia.. It boosts overall energy of the body. It helps in promoting cardio-vascular health. These are a few benefits of including dates in your diet. 

    Stuffed Dates originated in the Levant region  of Middle East. They are tasty, packed with nutrients, bite sized, can be varied and tasty. They are made in a couple of ways. They are slitted, seed is removed and stuffed with peanut butter, almond butter or cream cheese along with other ingredients.  Here, my version is a little different, it has banana. I have used the ripe banana and desiccated coconut for stuffed dates recipe. The other ingredients are nuts along with cocoa powder which lend a good taste. 

    stuffed dates

    Why should I make stuffed dates ?

    • If you are looking for something creative or different kind of dessert.
    • It is ideal as a party snack.
    • The fillings can be made in different varieties.
    • It is an healthy snack.

    What kind of dates should I use ? 

    You can use any variety of dates. I have used zahidi dates here.


    Print Recipe
    stuffed dates
    Evergreendishesdev

    Stuffed Dates

    5 from 9 votes
    Stuffed Dates are the new, trendy desserts. They are tasty and ideal to serve as a snack.
    Prep Time 15 minutes
    Freezing 30 minutes
    Total Time 45 minutes
    Course: Dessert, Snack
    Cuisine: middle east

    Ingredients
      

    • 15 Dates
    • 1 ripe banana
    • 1/4 cup + 2 tablespoon desiccated coconut
    • 4 cashew
    • 10 raisins
    • 1/2 teaspoon cocoa powder

    Method
     

    1. Make an incision and remove the seed from the dates.
    2. In a small bowl, put the banana and mash it with a spoon.
    3. Set aside some desiccated coconut for Add desiccated coconut, cashew pieces, rains and cocoa powder. Mix it well.
    4. Take a small portion of the stuffing and stuff in the dates. Roll it in the grated coconut andd keep it aside.
    5. Repeat the filling and rolling for all the dates.
    6. Freeze them for two hours.
    7. Stuffed Dates is ready to serve.

    About the event :  

    Sending this to “Healthy Desserts” at Shhh Secretly Cooking Challenge. For the monthof October, Rafeeda AR of bigsweettooth suggested us to make a healthy dessert. This meant we could use only natural sweeteners as dates, honey etc. or sugar in a minimal quantity. Rafeeda has made this delightful dry fruit kheer ideal for the festive days. 

    I was paired with Radha Rajagopalan. After pondering for sometime, I decided to make stuffed dates. Radha has used seasonal fruits to make apple date sugar halwa

    shhh cooking secretly

    The other dates recipes shared earlier are :

    Dates Burfi
    Dates Burfi
    dates payasam
    Dates Payasam

    If you ever make Stuffed Dates recipe  in your kitchen, take a picture and tag @foodiejayashree on Instagram or @evergreendishes on Facebook.  Until next time, Happy Cooking ! Wishing one and all a very happy Deepawali. May the festival of lights bring in joy, peace and prosperity. 

    Pin it for later : 

    stuffed dates
    stuffed dates
  • Paan Laddu | Betel leaf Balls

    Paan Laddu | Betel leaf Balls

    Jump to Recipe

    Paan Laddu is a delectable sweet made with betel leaves along with a few other ingredients.

    Paan Laddu is made of all things good along with betel leaves. The festive season is here and it is customary to keep  betel leaves and arecanut slices  along with fruits as an offering to the Lord.  The  betel leaves may be later used to make this sweet dish.   I have earlier shared a banana betel milkshake using betel leaves. 

    Betel leaves aids in digestion and is usually chewed after meals with a filling of arecanuts and slaked lime. It is called as paan. The paan is made of varied kind  with a filling of any of these substances; saunf, cherries, dates, menthol, sugar, saffron, cardamom etc  


    paan laddu

    What goes into Paan laddo ?

    • Condensed milk : Use any brand of  200 grams of condensed milk.
    • Betel leaves : You may use the fresh ones or the used ones for pooja.
    • Desiccated coconut : It is quite common to grate and use the dry copra. However, you may use the store bought coconut shredding.
    • Dates : Taste enhancers
    • Cashewnut : Another ingredient which gives taste to the dish. You may add other nuts.
    • Cardamom powder : Indian sweets seems to be incomplete without it.
    • Ghee : It is used in all sweet dishes


    The easy peasy dessert 

    Grind dates and cashew nut pieces together and keep it aside. Wash the betel leaves, pat dry and remove the mid-line. We need to grind the betel leaves and condensed milk together. In a thick bottom pan, add the betel and condensed milk mixture. Keep stirring. Put ghee to it. Once it thickens, put the dates and cashew powder you had prepared. Mix well. Finally, add cardamom powder and switch off the flame. Make small balls and serve. If storing for more than two days, keep it in the refrigerator.


    Print Recipe
    Evergreendishesdev

    Paan Laddu

    5 from 6 votes
    Paan Laddu is a unique sweet made with betel leaves. It is a good way to make use of the betel leaves after festivities.
    Prep Time 10 minutes
    Cook Time 10 minutes
    Total Time 20 minutes
    Servings: 12 small balls
    Course: evening snacks
    Cuisine: karnataka

    Ingredients
      

    • 200 grams condensed milk
    • 7 betel leaves
    • 1/2 cup desiccated coconut
    • 4 dates
    • 4 cashew
    • 1/4 teaspoon cardamom powder
    • 2 teaspoon ghee

    Equipment

    • 4 small bowls
    • 1 thick bottom pan
    • 1 ladle

    Method
     

    1. Grind dates and cashew nut together, keep it aside.
    2. Remove the mid-line of the betel leaf. Grind it along with condensed milk.
    3. In a thick bottom pan, put the betel mixture and desiccated coconut, keepstirring.
    4. add two teaspoon of ghee.
    5. Once it thickens, put the dates mixture along with a little cardamom powder, mix it well and remove from flame.
    6. Make small balls and keep them in an air-tight container.

    Notes

    Keep it in the refrigerator if you are storing for over two days.
    paan laddu
    paan laddu

    If you ever make Kohrabi Stir Fry  in your kitchen, take a picture and tag @foodiejayashree on Instagram or @evergreendishes on Facebook.  Until next time, Happy Cooking ! Wishing all a happy festive season.