Author: Evergreendishesdev

  • Kadhi Recipe | Punjabi Kadhi Pakora

    Kadhi Recipe | Punjabi Kadhi Pakora

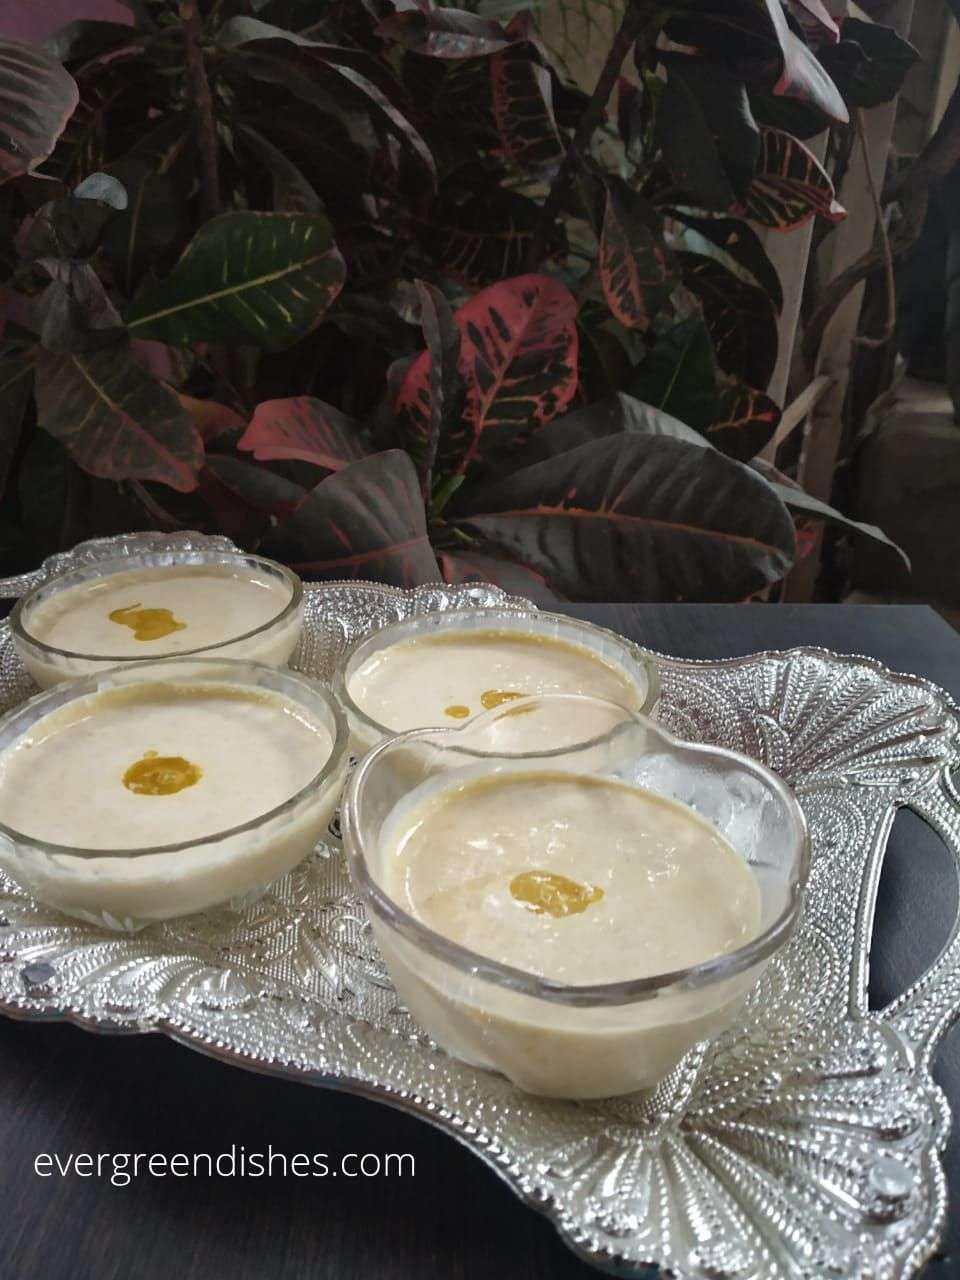
    Kadhi recipe is the popular Punjabi Kadhi Pakora. It is tasty and one of the cherished meals for north indians. 

    Kadhi chawal is the staple food of many people. It is easy to make and makes a good accompaniment with steamed rice. When the usual cooking needs a change, we resort to other kind of dishes. Kadhi is one of them. Every region has its own version of kadhi. The basic ingredient for kadhi is curd and gram flour.  There is a variation in the method of preparation.

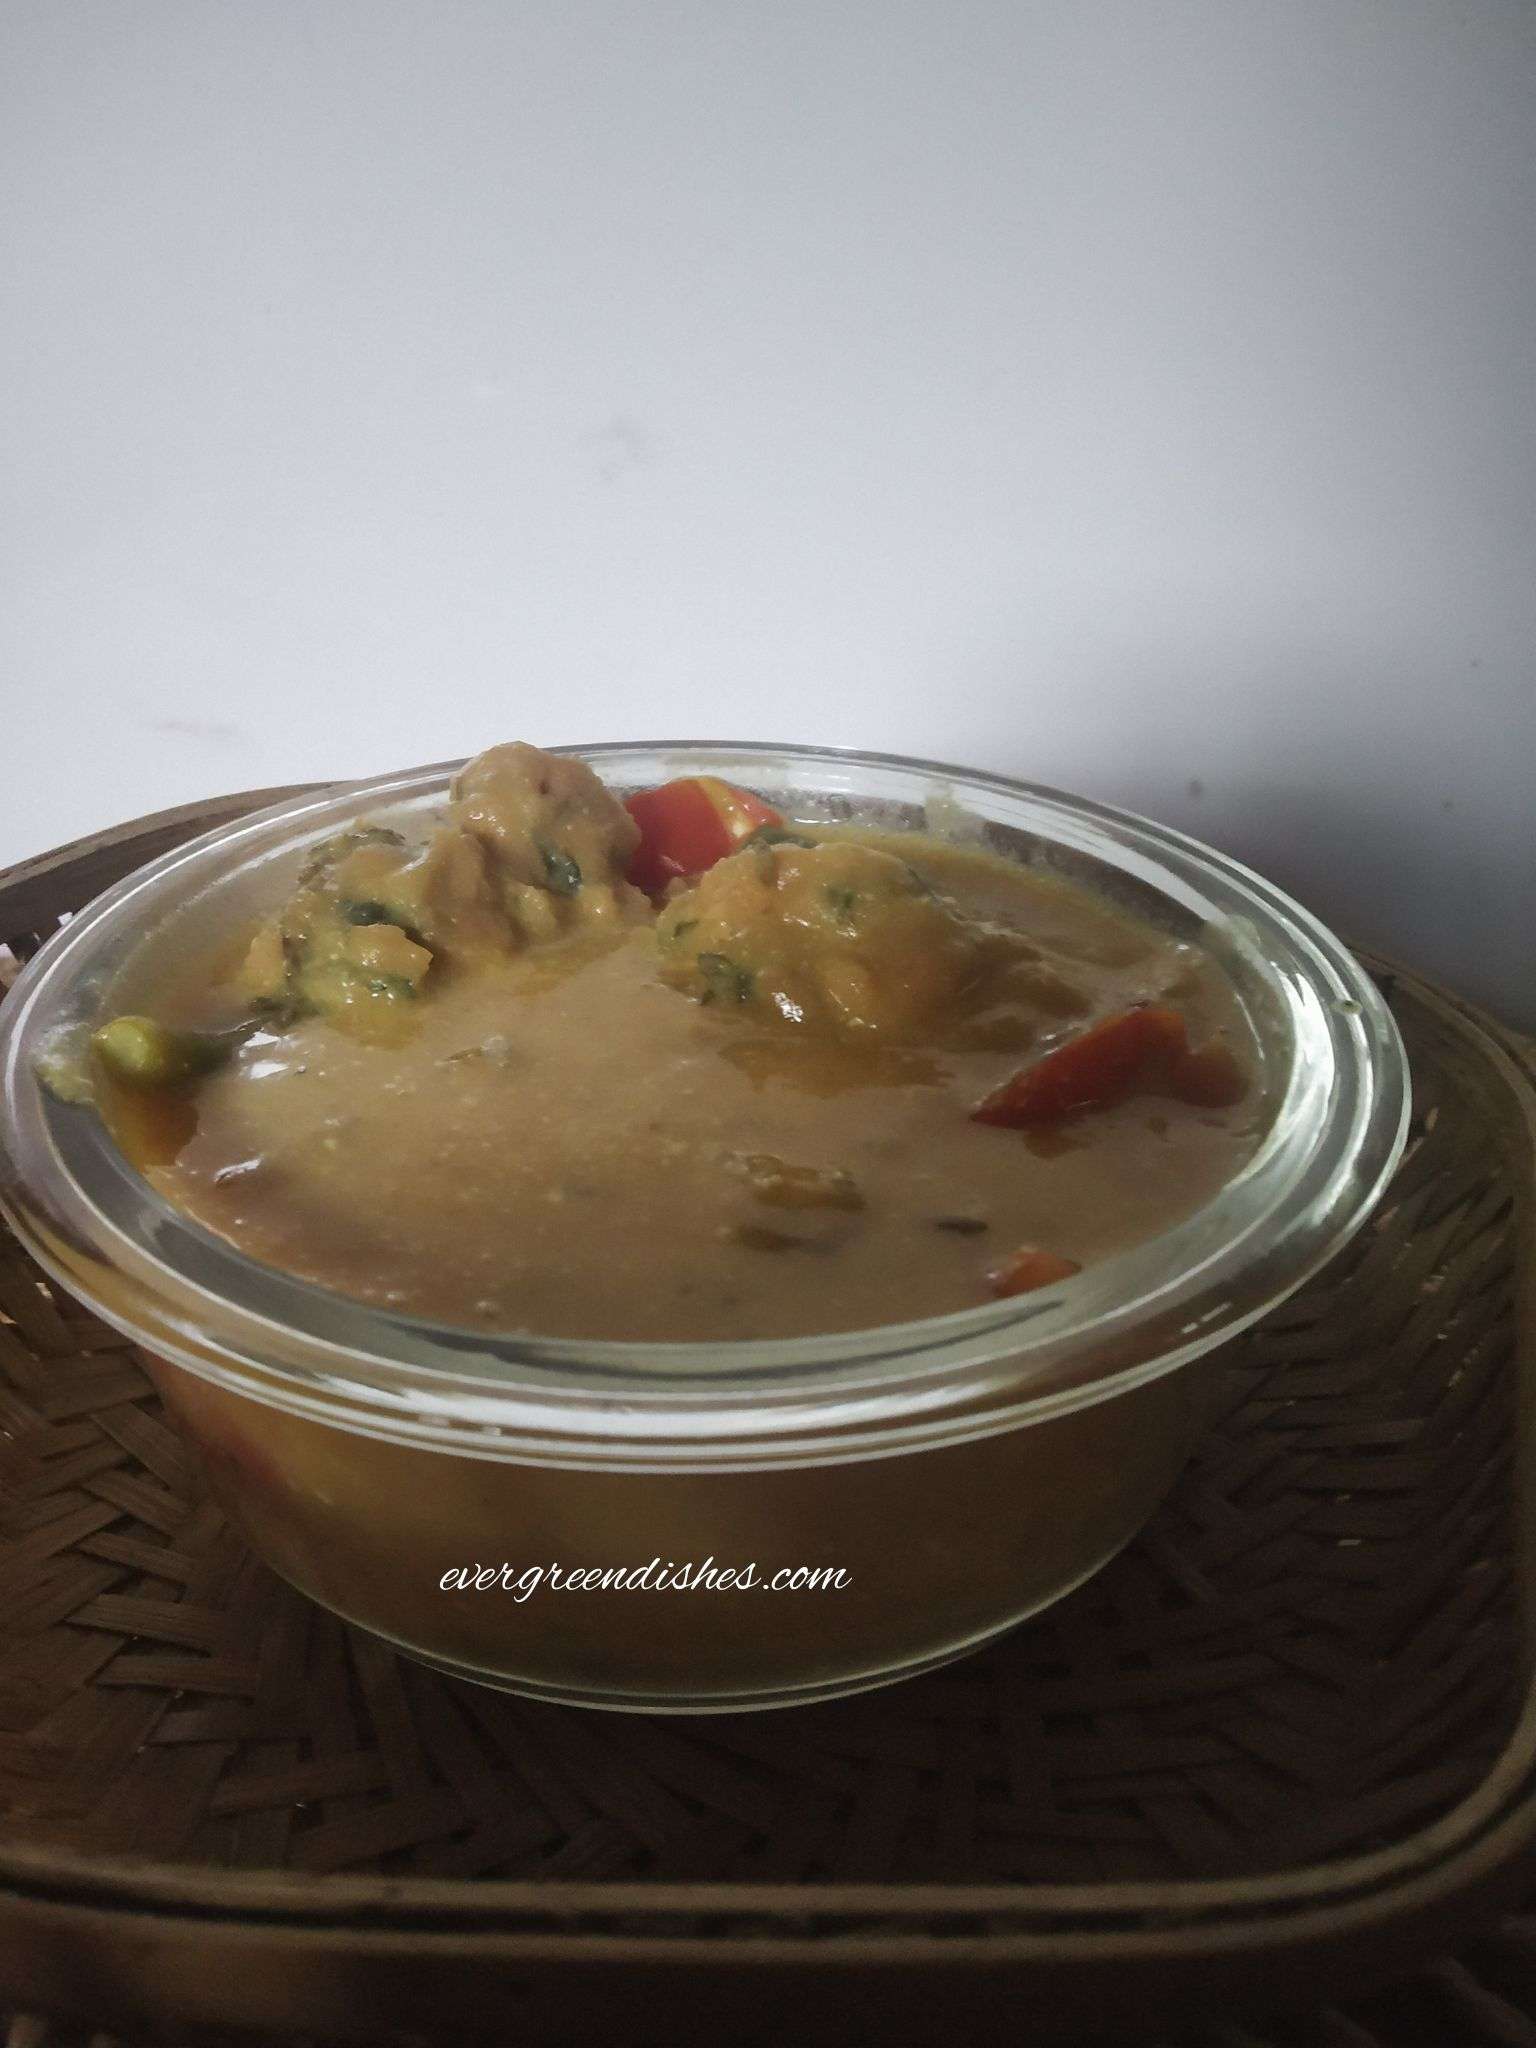
    Kadhi with pakora is a signature dish from North Indian cuisine. Kadhi with pakora is made by dunking the onion pakoras in kadhi.

    a bowl of kadhi with pakora
    punjabi kadhi pakora

    What is Kadhi ?

    Kadhi is a popular yoghurt- based dish from Indian sub-continent. Gram flour is usually used to thicken it along with other ingredients. 

    What are the variation in Kadhi ? 

    Every region in India, has it’s own unique culture and traditions. Kadhi is prepared in most parts of the country but every region has its  own unique recipe. In South India, coconut is used in the preparation of majjige paladya along with other ingredients. It is similar to kadhi, at times we add ambodi in it.  The method of preparation is different in Rajasthan, a simple one with or without badas.  Gujarati kadhi is another version which I am yet to make. Sindhi kadhi is totally different and delectable with vegetables in it.

    Kadhi with Pakora Recipe 

    Ingredients:

    For Kadhi :

    • 1 cup sour curd
    • 1/4 cup gram flour
    • 1/4 teaspoon turmeric powder
    • 1/2 teaspoon red chilli powder
    • 1 teaspoon coriander powder
    • salt to taste
    • 1 tablespoon oil
    • 1/4 teaspoon cumin
    • 1/4 teaspoon fenugreek
    • 1 small onion
    • 1 inch ginger grated
    • 1 tomato
    • 2 green chilli

            For tempering 

    • 1 tablespoon oil
    • 1/4 teaspoon cumin
    • 1/8 teaspoon chilli powder

      For Pakoras:

    • 1/2 cup gram flour
    • 1 big onion
    • 2 green chilli
    • 1 tsp chilli powder
    • 1/4 teaspoon garam masala powder
    • 1/2 teaspoon coriander powder
    • water for mixing

      Method:

      To make kadhi : 

    • Blend the curd. Add gram flour, coriander powder, chilli powder, turmeric powder , and salt  to it. Mix it well, no lumps should be formed. 
    • In a kadai, make seasoning. Put oil, add cumin and fenugreek seed. Once it turns golden, add the grated ginger and onion. Saute it for sometime. Add tomato and green chilli pieces to it. Stir for 2-3 minutes.
    • Add the curd mixture, keep stirring it.
    • Reduce the flame, allow it to cook for sometime.
    • Switch off the flame.

    To make the pakoras:

    1. Take besan in a bowl. Add onion, green chilli, chilli powder, garam masala and coriander powder.Mix them together.
    2. Add little water and mix thoroughly. The batter should be of dropping consistency.
    3. Heat oil in a pan, add a spoonful of batter. Put a few more. 
    4. Deep fry to golden colour.
    5. Remove with a ladle and put it aside. 
    6. Put the pakora in kadhi.

    To make the seasoning:

    • Take oil in a pan, add cumin and chilli powder to it. As it turns golden, remove it and pour over the kadhi.
    kadhi with pakora

    Kadhi with Pakora

    5 from 5 votes
    Kadhi with Pakora is a popular dish from Punjabi cuisine. It is a comfort food.
    Course: lunch
    Cuisine: punjabi

    Ingredients
      

    For Kadhi :
    • 1 cup sour curd
    • 1/4 cup gram flour
    • 1/4 teaspoon turmeric powder
    • 1/2 teaspoon red chilli powder
    • 1 teaspoon coriander powder
    • salt to taste
    • 1 tablespoon oil
    • 1/4 teaspoon cumin
    • 1/4 teaspoon fenugreek
    • 1 small onion
    • 1 inch ginger grated
    • 1 to mato
    • 2 green chilli
    For tempering
    • 1 tablespoon oil
    • 1/4 teaspoon cumin
    • 1/8 teaspoon chilli powder
    For Pakoras:
    • 1/2 cup gram flour
    • 1 big onion
    • 2 green chilli
    • 1 tsp chilli powder
    • 1/4 teaspoon garam masala powder
    • 1/2 teaspoon coriander powder
    • water for mixing

    Equipment

    • 1 thick pan
    • 1 kadhi
    • 1 ladle
    • 1 perforated ladle
    • 2 plates
    • 2 bowls

    Method
     

    To make the kadhi :
    1. Blend the curd. Add gram flour, coriander powder, chilli powder, turmeric powder , and salt  to it. Mix it well, no lumps should be formed.
    2. In a kadai, make seasoning. Put oil, add cumin and fenugreek seed. Once it turns golden, add the grated ginger and onion. Saute it for sometime. Add tomato and green chilli pieces to it. Stir for 2-3 minutes.
    3. Add the curd mixture, keep stirring it.
    4. Reduce the flame, allow it to cook for sometime.
    5. Switch off the flame.
    To make the pakoras:
    1. Take besan in a bowl. Add onion, green chilli, chilli powder, garam masala and coriander powder.Mix them together.
    2. Add little water and mix thoroughly. The batter should be of dropping consistency.
    3. Heat oil in a pan, add a spoonful of batter. Put a few more.
    4. Deep fry to golden colour.
    5. Remove with a ladle and put it aside.
    6. Put the pakora in kadhi.
    To make the seasoning:
    1. Take oil in a pan, add cumin and chilli powder to it. As it turns golden, remove it and pour over the kadhi.
    punjabi kadhi pakora
    punjabi kadhi pakora

    If you ever make  Punjabi Kadhi Pakora  recipe,  do take a picture and tag @foodiejayashree on Instagram or @evergreendishes on Facebook or Twitter. I will be glad to see your creation and share it further. Let’s be connected, do follow on social media platforms. Until next time, let’s stay connected.  Subscribe to get all updates and an e-book for free. Check out my e-books on Amazon.  

  • Lemon Gojju | Nimbe hannina gojju recipe

    Lemon Gojju | Nimbe hannina gojju recipe

    Lemon gojju | Nimbe hannina gojju is a tasty condiment used in South India. Nimbe hannu is the Kannada name of lemon. 

    The taste of lemon  is citrusy, tasty, refreshing and loved by all. During the season, I try to find ways to include it in my cooking.

    Lemon is usually used to make pickles, it makes a good accompaniment  with curds riice. Lemon juice is the preferred drink during summer. 

    In daily cooking, it helps to balance the taste in all dishes by its citrus flavour as in lemon rice. It can also  be used to make lemon rasam. I make lemon gojju often and store in the refrigerator. I can say it is a recipe of cooking with lemon peels. Here, the lemon are boiled and then blended  along with some spices. The tartness of the lemon, the sweetness of the jaggery and the spiciness of the chilli powder, altogether make the dish a tangy and tasty one. Lemon Gojju has a refreshing taste, ideal to pair with hot, steamed rice. It stays good for a couple of days in the refrigerator. 

    A lemon tree in the backyard is useful, it gives limes quite often. The lemon are refreshing and makes a good drink.

    lemon gojju | nimbe hannina gojju

    An easy hack to store lemons :

    Lemon tend to wither after a few days even when you keep in the refrigerator too. Take a bottle, fill it with water to half the capacity. Put the lemons in it and close it. Change the water after a couple of days.

    Last year, I had got many lemon. I did not know what to do. I made a concentrate of lemon juice and put it in the ice cube tray. 


    The ingredients used for Nimbehannina Gojju are :

    1. Lemon- It is the main ingredient used here. Rubbing  the lemon on the kitchen platform for sometime helps to extract juice properly. 
    2. Cumin- It gives a good taste to the dish.
    3. Fenugreek –  It helps in balancing the taste of the dish.
    4. Red chilli – It imparts spiciness.
    5. Jaggery- It gives a sweet flavour.
    6. Oil – Any neutral cooking oil can be used. 
    7. Asafoetida – One of the essentials for seasoning.
    8. Mustard – Another essential ingredient in South Indian cooking. 


    How to use the gojju :

    The lemon gojju is usually served with hot steamed rice along with a dollop of ghee. The freshness of lemon gives a good taste to the dish. It is usually eaten in the beginning of the meal before the main meal. It can also be used as an accompaniment with curds rice. 

    Ingredients:

    Lemon Gojju | Nimbe Hannina Gojju

    Lemon Gojju | Nimbe Hannina

    5 from 5 votes
    Lemon Gojju | NimbeHannina Gojju is a tasty condiment used with hot steamed rice.
    Course: lunch ideas
    Cuisine: karnataka

    Ingredients
      

    • 4 lemons
    • 1/2 teaspoon oil
    • 1 teaspoon cumin
    • 1 teaspoon mustard
    • 1/4 teaspoon fenugreek
    • 6 red chilli
    • 3 teaspoon jaggery
    • For seasoning:
    • 2 teaspoon oil
    • 1/2 teaspoon mustard
    • 1/2 teaspoon cumin
    • 1/4 teaspoon asafoetida

    Method
     

    1. Wash the lemon and pat dry. Roll them on the platform with your palm. Cut them into small pieces, remove the seeds and boil them with water
    2. Once they are soft, turn off the stove.
    3. In a pan, take oil and roast the cumin, mustard and fenugreek seeds along with red chilli. Leet it cool.
    4. Grind the roasted ingredients to a powder, add the lemon pieces, jaggery and salt to it. Grind all the ingredients together.
    5. Remove it in a bowl.
    6. Make the seasoning. Heat oil in a pan. Add mustard seeds,. Once it crackles put asafoetida, cumin and turmeric powder.Put it into the prepared gojju.
    7. Tasty gojju is ready to serve.


    Pin it for later :


    lemon gojju | nimbe hannina gojju
    lemon gojju | nimbe hannina gojjju

    If you ever make  Lemon Gojju | Nimbe hannina gojju  recipe,  do take a picture and tag @foodiejayashree on Instagram or @evergreendishes on Facebook or Twitter. I will be glad to see your creation and share it further. Let’s be connected, do follow on social media platforms. Until next time, let’s stay connected.  Subscribe to get all updates and an e-book for free. Check out my e-books on Amazon.  

                                                                  Until next time,  Ciao  !

  • Srilankan Green Bean Curry

    Srilankan Green Bean Curry

    Srilankan Green Bean Curry is a tasty side dish cooked in coconut milk. It makes a good accompaniment with chapathi or steamed rice. 

    It is a new month and I have a new cuisine on my blog today. It is now to the Srilankan cuisine. Sri Lanka, as we all know is a small country to the south of India. It has a mixed culture traditions.  

    srilankan green bean curry


    About SriLankan cuisine :


    There is a lot to explore in the SriLankan food. I am naive but did a lot of research before I could plunge into cooking it. It is mainly a non-vegetarian cuisine but one can find good vegetarian food too. It is a land of coconut and cinnamon. I think coconut milk or coconut is extensively used. It gives a good taste to the food too. Being a South Indian, I can vouch for the taste it imparts to the dish.

    Ceylon cinnamon is sweetish in taste and gives a good flavour to the dishes. I have used it  and it is more aromatic than the usual one which we use. Pandan leaves are extensively used in many dishes. Although, Srilankan cuisine looks so familiar to us, it is not exactly the same. The spice mix too is different, the food is more spicy than the Indian cuisine as pepper and cinnamon are abundantly used. But, the bottom line is Indian cuisine is quite similar to it. An Indian in Ceylon will be happy with the food that he get there. 

    Srilankan cuisine has many kind of rice based dishes and hoppers . It is mostly served with a coconut milk based curry. I am yet to explore this cuisine, for now I have tried two side dishes, both were good. 

    About the event :

    Narmadha of Nams Corner suggested Sri Lankan cuisine for the month of August. Thanks to Narmadha, I would not have explored this cuisine. She has many dishes on her blog, I have bookmarked her kallu dodol recipe to make it soon.  I was paired with Preethi, she gave me currry leaf and green chilli, I have made this dish. I gave Preethi, mustard seeds and fennel, she has made flavoursome spice mix used in Srilankan cuisine.

    I have adapted the recipe from here.


    shhh cooking secretly


    About the green bean stir fry:

    When I was looking for the dishes to prepare, I had so many in mind. Finally, I decided to make Beans Stir Fry as my family loves the  humble vegetable. The ingredients needed are easily available and the cooking is done quickly if you outsource the coconut milk. Here, I made fresh coconut milk for the dish.. It paired well with chapathi. Let us look at the recipe beans curry in coconut milk


    What goes in Srilankan Green Bean Curry ?

    • Beans : Cut them into two inch long pieces with a diagonal at the end. You will need 150 grams of beans.
    • Coconut milk : You need the thick coconut milk. To extract coconut milk, soak one cup of fresh  grated coconut in hot water for half an hour. Later, grind it and sieve the mixture. The mixture can be pounded again and extracted. The second  extract can be used for any other dish. This is the thick coconut milk. Alternatively, you can use store bought coconut milk. 
    • Onion: Cut it into small pieces.
    • Oil : Any cooking oil will do.
    • Green Chilli
    • Turmeric powder 
    • Salt 
    • Water
    Print Recipe
    a bowl of srilankan green bean curry
    Evergreendishesdev

    Srilankan Green Bean Curry

    Srilankan green bean curry is a tasty side dish cooked in coconut milk. It makes a good accompaniment with chapathi or steamed rice.
    Prep Time 20 minutes
    Cook Time 15 minutes
    Total Time 35 minutes
    Servings: 4 people
    Course: dinner ideas, lunch
    Cuisine: srilanka cuisine

    Ingredients
      

    • 100 ml thick coconut milk (
    • 2 teaspoon oil
    • 1 onion
    • 3 green chilli
    • a few curry leaves
    • 1/4 teaspoon turmeric powder
    • 150 grams beans
    • 75 ml water +100 ml
    • salt

    Equipment

    • 1 pan
    • 1 knife
    • 1 chopping board
    • 2 bowls
    • 1 serving spoon
    • 1 lid cover

    Method
     

    1. To extract coconut milk, soak one cup of fresh  grated coconut in hot water for half an hour. Later, grind it and sieve the mixture. This is the thick coconut milk.
    2. Cut the onion into small pieces.
    3. Cut the beans into two inch long pieces.
    4. Heat oil in a pan, add onion pieces to it. Saute it for some time until it turns pink in colour
    5. Add green chilli and curry leaves to it.
    6. Add the beans, give a stir. Allow to cook for sometime.
    7. Put turmeric powder, salt and water in it.
    8. After two minutes, put the coconut milk.
    9. Cover and cook for two minutes.
    10. Green beans curry is ready to serve.

    Notes

    If you are extracting at home, use only the thick coconut milk. Repeat it second time and use it for any other dish. The milk can be stored in the refrigerator for a day.
    The beans are cut long with a diagonal at the end. 

    Pin it for later : 

    a bowl of srilankan green bean stir fry
    Srilankan green bean stir fry

    If you ever make Srilankan Green Bean Curry, do take a picture and share with me by tagging @foodiejayashree on Instagram or @evergreendishes on Facebook. Subscribe to get all updates and an e-book for free.

  • How to make Aloo Palak Paratha

    How to make Aloo Palak Paratha

    Jump to Recipe Print Recipe

    Aloo Palak Paratha is a tasty and filling breakfast. Spinach puree is mixed in the dough, rolled  are filled with a potato mix to make a colourful and delicious paratha. The green colour filled paratha looks good, is healthier and filling.

    Parathas are always welcome at home, they make the best breakfast recipes. Aloo Paratha, is obviously the first choice for my family. But at times, I do make variations as potato and pea paratha or aloo methi paratha. Today, I am sharing aloo palak paratha.

    Spinach is a store house of nutrients, I find ways to include it in my cooking. We all know spinach and potato are a match made in heaven. They comprehend well in a gravy like or a sabzi. I have made this paratha a couple of times, but could not share it with you all.

    aloo palak paratha

    Aloo Palak Paratha Recipe:

    Ingredients:

    For the dough:

    • 2 cup wheat flour
    • 150 grams spinach
    • 1/2 teaspoon ghee
    • 1/2 teaspoon salt
    • water

    For the stuffing:

    • 7 medium sized potato ( 400 grams)
    • 3/4 teaspoon chilli powder
    • 1/2 teaspoon chat masala
    • salt to taste
    • 2 green chilli
    • 1 inch ginger

    Method:

    To make the dough :

    1. Remove the stalk of the spinach leaves. Wash them thoroughly, cut and blanch. Make a paste of it.
    2. In a wide bow, take wheat flour, add ghee, salt and spinach puree to it.
    3. Mix it thoroughly.
    4. Use small quantity of water and make a stiff dough.
    5. Cover it with a muslin cloth and keep it aside for ten minutes.

    To make the stuffing:

    1. Boil the potatoes in a pressure cooker for two whistles.
    2. Grind green chilli and ginger together.
    3. Once the pressure releases by itself, peel the potatoes and mash them
    4. Add chilli powder, salt, chat masala and the ginger chilli paste to it.
    5. Mix and keep it aside.

    To make parathas:

    1. Heat a skillet.
    2. Take a small ball of the dough. Roll it into a small circle.
    3. Take a small ball of the filling, put it the centre, seal the edges together and flatten it slowly between the palms.
    4. Using a little flour, roll it gently to a small paratha.
    5. Put it on the skillet. After a few seconds, turn it to the other side and brush some oil over it.
    6. Flip it and now smear oil on the reverse side.
    7. Once it is golden in colour, pput a little ghee and remove it.
    8. Serve it with pickle and curd.

    Aloo Palak Paratha

    Aloo Palak Paratha is tasty, healthy and filling. The dough is mixed with spinach puree and filled with a potato filling. It makes a good breakfast option.
    Prep Time 20 minutes
    Cook Time 40 minutes
    Total Time 1 hour
    Course: Breakfast, brunch, dinner ideas, lunch
    Cuisine: north indian

    Ingredients
      

    For the dough:
    • 2 cup wheat flour
    • 150 grams spinach
    • 1/2 teaspoon ghee
    • 1/2 teaspoon salt
    • water
    For the stuffing:
    • 7 medium sized potato 400 grams
    • 3/4 teaspoon chilli powder
    • 1/2 teaspoon chat masala
    • salt to taste
    • 2 green chilli
    • 1 inch ginger

    Equipment

    • wide bowl, rolling board, rolling pin, small bowl,

    Method
     

    To make the dough :
    1. Remove the stalk of the spinach leaves. Wash them thoroughly, cut and blanch. Make a paste of it.
    2. In a wide bow, take wheat flour, add ghee, salt and spinach puree to it.
    3. Mix it thoroughly.
    4. Use small quantity of water and make a stiff dough.
    5. Cover it with a muslin cloth and keep it aside for ten minutes.
    To make the stuffing:
    1. Boil the potatoes in a pressure cooker for two whistles.
    2. Grind green chilli and ginger together.
    3. Once the pressure releases by itself, peel the potatoes and mash them
    4. Add chilli powder, salt, chat masala and the ginger chilli paste to it.
    5. Mix and keep it aside.
    To make parathas:
    1. Heat a skillet.
    2. Take a small ball of the dough. Roll it into a small circle.
    3. Take a small ball of the filling, put it the centre, seal the edges together and flatten it slowly between the palms.
    4. Using a little flour, roll it gently to a small paratha.
    5. Put it on the skillet. After a few seconds, turn it to the other side and brush some oil over it.
    6. Flip it and now smear oil on the reverse side.
    7. Once it is golden in colour, pput a little ghee and remove it.
    8. Serve it with pickle and curd.

    Notes

    Incase, you need it spicier, add another half teaspoon of chilli powder.
    Using of ghee for roasting is optional, but it gives a good taste.

    aloo palak paratha served with pickle and curd
    Aloo Palak Paratha

    If you ever make Aloo Palak Parat in your kitchen, take a picture and tag @foodiejayashree on Instagram or @evergreendishes on Facebook. Subscribe to get all updates in your inbox and an e-book for free!

  • How to make Tri-Colour Idli

    How to make Tri-Colour Idli

    Tri-colour idli is idli of saffron, white and green colour. A post to celebrate 75th Independence of India.

    As India celebrates its 75th Independence Day, it is indeed a moment of joy and pride for every Indian. The hard won freedom is cherished and celebrated. Many lives were lost and the struggle was unbearable. Today, we have come a long way since then. Remembering the great leaders who underwent treacherous sufferings to make us a free country.

    The Indian flag is tri-colour or tiranga as it it popularly known. It was designed by Pingali Venkayya. It is a horizontal, rectangular flag with saffron, white and green colours. The Ashoka Chakra  in the middle is navy blue in colour. Saffron stands for renounciation, white denotes the path of truth and green represents the relation to the vegetation life. The Ashoka Chakra signifies motion. Our country should be moving ahead and we should never dread the change.

    As the country moves ahead to celebrate the 76th year of Independence, here is a small contribution from me. Tri-Colour Idli is a platter of colourful idlis. Earlier, I have shared Tri-colour Pulav, do check it.

    tri-colour idli
    tri-colour idli

    Tri-Colour Idli :

    Ingredients:

    • 1 cup  urad dal
    • 1 cup iidli rawa ( 2 cup for wet grinder)
    • water
    • salt
    • 1/2 cup spinach
    • 1 tablespoon coriander
    • 1 green chilli
    • 1 carrot

    Method :

    To make idli batter:

    1. Soak urad dal for two hours.
    2. Before grinding, soak the cream of rice in water. If you are using mixer, use one cup of cream of rice. If you are grinding in the wet-grinder, soak two cups of cream of rice.
    3. Grind urad dal with water.
    4. Remove the batter in a wide bowl. Add the soaked cream of rice to it and mix thoroughly using your hand.
    5. Close a lid and keep it in a warm place to ferment.
    6. Next day, mix salt to it.
    7. Divide the batter into three parts.

    To make saffron / orange colour idli :

    1. Make a puree of carrot.
    2. Mix it one part of the batter.
    3. Grease the tray, pour the batter and steam it.
    4. Initially, keep it on a medium high for five minutes. Then, steam it on a low flame.
    5. Once, they are done, turn off.
    6. Unmold after sometime.

    To make white colour idli:

    1. Steam them in the regular way.

    To make green colour idli:

    1. Blanch the spinach along with coriander.
    2. Once it cools, grind it with a green chilli.
    3. Mix the puree in the other bowl of batter.
    4. Put a spoonful of batter in each of the compartments.
    5. Steam it for eight to ten minutes.
    6. Green colour idlis are ready.

    Take a tip: 

    • Serve idli with chutney and sambar.
    • Take a note about the use of quantity of idli rawa. Check in the method to make idli batter.
    • Use of coriander and green chilli is optional. It gives a good taste.
    • Do not store the mixed batter in the refrigerator.

    Tri-colour Idli Recipe

    Tri-colour idli is a platter of colourful idlis. It is made using natural ingredients available in the kitchen.
    Course: Breakfast
    Cuisine: karnataka

    Ingredients
      

    • 1 cup urad dal
    • 1 cup iidli rawa 2 cup for wet grinder
    • water
    • salt
    • 1/2 cup spinach
    • 1 tablespoon coriander
    • 1 green chilli
    • 1 carrot

    Equipment

    • wide bowl, lids, ladle, 3 medium bowls, idli stand, idli cooker

    Method
     

    1. To make idli batter:
    2. Soak urad dal for two hours.
    3. Before grinding, soak the cream of rice in water. If you are using mixer, use one cup of cream of rice. If you are grinding in the wet-grinder, soak two cups of cream of rice.
    4. Grind urad dal with water.
    5. Remove the batter in a wide bowl. Add the soaked cream of rice to it and mix thoroughly using your hand.
    6. Close a lid and keep it in a warm place to ferment.
    7. Next day, mix salt to it.
    8. Divide the batter into three parts.
    TO MAKE SAFFRON/ORANGE COLOUR IDLI
    1. Make a puree of carrot.
    2. Mix it one part of the batter.
    3. Grease the tray, pour the batter and steam it.
    4. Initially, keep it on a medium high for five minutes. Then, steam it on a low flame.
    5. Once, they are done, turn off.
    6. Unmould after sometime.
    TO MAKE WHITE COLOUR IDLI
    1. Steam them in the regular way.
    To MAKE GREEN COLOUR IDLI
    1. Blanch the spinach along with coriander.
    2. Once it cools, grind it with a green chilli.
    3. Mix the puree in the other bowl of batter.
    4. Put a spoonful of batter in each of the compartments.
    5. Steam it for around ten minutes.
    6. Green colour idlis are ready.

    Notes

    Make use of idli rawa as per the instructions given.
    Adjust the quantity of water while grinding the batter.
    Use of coriander is optional, but it gives a good taste.

    tri-colour idli
    tri-colour idli

    If you ever make Tri-Colour Idli in your kitchen, take a picture and tag @foodiejayashree on Instagram or @evergreendishes on Facebook. Subscribe to get all updates in your inbox and an e-book for free!

    Discover latest Indian Blogs

  • Pesarattu Recipe | Moong Dal Dosa

    Pesarattu Recipe | Moong Dal Dosa

    Pesarattu is a popular breakfast from Andhra Pradesh. It is a lacy crepe made with moong dal. It is usually served with upma and chutney. 

    Pesarattu is a  moong crepe from Andhra Pradesh. The green moong or the yellow lentil can be used in the preparation. It needs no fermentation. 

    The beauty of India is the varied culture and traditions we see in each part of the country. Every state has its own set of recipes. Andhra cuisine is known for its spicy food. Pickles and chutneys are quite common in the menu.  Earlier, I have shared gongura chutney recipe. I have also shared Andhra pappu and Andhra rasam. My son is fond of these dishes. 

    Today, I am sharing a breakfast  recipe  from Andhra Pradesh. When we are bored of the usual dosa, moong dal dosa or pesarattu comes to the rescue. 

    pesarattu served with upma and chutney
    pesarattu

    Pesarttu Recipe | Moong Dal Dosa 

    Ingredients:


    For Pesarattu:


    1 cup moong dal
    2 green chillli
    1 inch ginger
    150 ml water
    salt
    1 onion
    coriander leaves

    For upma:


    1 cup semolina
    2 teaspoon ghee
    1 tablespoon oil
    1/2 teaspoon mustard
    1/2 teaspoon cumin
    1 teaspoon bengal gram
    1 teaspoon urad dal
    4 green chilli
    2.5 cup water
    salt
    coriander for garnishing

    For chutney :


    1 cup coconut
    1 teaspoon oil
    2 green chili
    1/4 cup gram dal
    small piece of tamarind
    water
    salt


    Method:

    To make pesarattu batter :

    1. Soak moong dal for two hours.
    2. Later, put the dal in a mixie. Add ginger, grreen chilli, water and grind it to a smooth paste with little water.  Remove it in a bowl. Mix a teaspoon of rice flour and salt to it. The batter of pesarattu is ready.

    To make upma :

    1. In a thick pan, add a teaspoon of ghee and roast the semolina to a golden colour.
    2. Put the roasted semolina in a bowl. Add oil. Make the seasoning, add mustard seeds, as it crackles, put cumin, asafoetida, bengal gram,urad dal and gren chilli. Now, put the onion and saute it for sometime.
    3. Put water and salt to it. I have used Bombay Rawa and the  semolina and water proportion is 1: 2.5. 
    4. Once the water boils, slowly add the semolina to it and mix thoroughly. Let cook for  sometime. Put lemon juice and garnish with coriander leaves.

    To make chutney:

    1. In a small pan, take a little oil and roast the green chillies.
    2. Grind coconut, roasted chillies, salt and  water. Put a little tamarind extract to it and give a swirl.
    3. Coconut chutney is ready to serve.

    To make pesarattu:

    1. Heat a skillet.
    2. Check the consistency of the batter. Put a small quantity of water if needed.
    3. Now, take a spoonnful of batter, pour it on the skillet and make it into a thin crepe. Take the batter and roll it inside out in concentric circles.Smear a little oil.
    4. Sprinkle onion pieces and coriander over it.
    5. Once it is cooked, put a little upma and fold it. Serve with coconut chutney.

    Take a tip:

    • Moong dal can be soaked for one to three hours.
    • The consistency of the batter should be thick.
    • It can be spread into thin crepes.
    • The dosa is best made with fresh batter. Soak the required quantity and use the batter.
    • The batter kept in the refrigerator does not taste good. Moreover, the crepes fall apart while preparing. 
    • Green moong is usually used to make this crepe. Soak it overnight, next day,  grind it with a little water and other spices the next day. Make crepes in the usual way. 
    pesarattu
    pesarattu served with upma and chutney

    Pesarattu | Moong Dal Dosa

    5 from 5 votes
    Pesarattu is a thin crepe made from green gram or yellow lentil. It is a popular breakfast from Andhra Pradesh. It is usually served with upma and chutney.
    Prep Time 15 minutes
    Cook Time 15 minutes
    2 hours
    Total Time 2 hours 30 minutes
    Course: Breakfast
    Cuisine: Andhra pradesh

    Ingredients
      

    For Pesarattu:
    • 1 cup moong dal
    • 2 green chillli
    • 1 inch ginger
    • 150 ml water
    • salt
    • 1 onion
    • coriander leaves
    For upma:
    • 1 cup semolina
    • 2 teaspoon ghee
    • 1 tablespoon oil
    • 1/2 teaspoon mustard
    • 1/2 teaspoon cumin
    • 1 teaspoon bengal gram
    • 1 teaspoon urad dal
    • 4 green chilli
    • 2.5 cup water
    • salt
    • coriander for garnishing
    For chutney :
    • 1 cup coconut
    • 1 teaspoon oil
    • 2 green chili
    • 1/4 cup gram dal
    • small piece of tamarind
    • water
    • salt

    Method
     

    To make pesarattu batter :
    1. Soak moong dal for two hours.
    2. Later, put the dal in a mixie. Add ginger, grreen chilli, water and grind it to a smooth paste with little water.  Remove it in a bowl. Mix a teaspoon of rice flour and salt to it. The batter of pesarattu is ready.
    To make upma :
    1. In a thick pan, add a teaspoon of ghee and roast the semolina to a golden colour.
    2. Put the roasted semolina in a bowl. Add oil. Make the seasoning, add mustard seeds, as it crackles, put cumin, asafoetida, bengal gram,urad dal and gren chilli. Now, put the onion and saute it for sometime.
    3. Put water and salt to it. I have used Bombay Rawa and the  semolina and water proportion is 1: 2.5.
    4. Once the water boils, slowly add the semolina to it and mix thoroughly. Let cook for  sometime. Put lemon juice and garnish with coriander leaves.
    To make chutney:
    1. In a small pan, take a little oil and roast the green chillies.
    2. Grind coconut, roasted chillies, salt and  water. Put a little tamarind extract to it and give a swirl.
    3. Coconut chutney is ready to serve.
    To make pesarattu:
    1. Heat a skillet.
    2. Check the consistency of the batter. Put a small quantity of water if needed.
    3. Now, take a spoonnful of batter, pour it on the skillet and make it into a thin crepe. Take the batter and roll it inside out in concentric circles.Smear a little oil.
    4. Sprinkle onion pieces and coriander over it.
    5. Once it is cooked, put a little upma and fold it. Serve with coconut chutney.

    Notes

    Moong dal can be soaked for one to three hours.
    The consistency of the batter should be thick.
    It can be spread into thin crepes.
    The dosa is best made with fresh batter. Soak the required quantity and use the batter.
    The batter kept in the refrigerator does not taste good. Moreover, the crepes fall apart while preparing. 
    Green moong is usually used to make this crepe. Soak it overnight and grind it with a little water and other spices the next day. Make crepes in the usual way. 

    Pin it for later: 

    pesarattu served with upma and chutney
    pesarattu | moong dal dosa

    If you ever make Pesarattu  recipe, take a picture and tag @foodiejayashree on Instagram or @evergreendishes on Facebook. Subscribe to get all updates in your inbox and an e-book for free!

  • Horse gram Stir fry | Hurali kalu palya

    Horse gram Stir fry | Hurali kalu palya

    Horse gram stir fry is a simple yet tasty side dish. It is ideal to pair with jowar roti or chapathi. This is a recipe from the state of Karnataka and is commonly known as Hurali kalu palya.

    Horse gram is a popular lentil used by many people. It is known for its distinctive taste and the many nutrients it contains. Macrotyloma iniflorum is the botanical name. It is called by various names as kulith, kollu, hurali in regional languages. Did you know that it is the common feed of horses? It is rich in proteins and a good source of energy  for racing horses. Thus it is called as horse gram. 

    Horse gram is used in preparing a variety of dishes. Rasam and stir fry or hurali kalina palya  as it is commonly known are the favoured dishes at my place. You can also use it to make idli, dosa and a variety of tasty snacks.

    Horse gram stir fry pairs well with jowar roti or chapathi. It makes a good accompaniment with rice and rasam too. 

    Including horse gram regularly in our diet has many benefits. It is a good source of protein and low in fat. It also contains minerals along with anti-oxidants and flavonoids. 100 grams of proteins contains 22 grams of protein, 3 grams of minerals, 57 grams of carbohydrates along with other minerals, anti-oxidants and flavonoids.

    Benefits of using horse gram:

    1. Regular use of horse gram may help in weight loss. it is a rich source of fiber, aids in proper digestion. The high protein content helps to satiate hunger for a longer period. Horse gram and cumin powder is put in water and taken every morning.
    2. It helps to reduce the blood sugar level. The horse gram seeds can be used in salads regularly.
    3. It helps to reduce the cholesterol levels. It helps to remove the bad cholesterol that is stuck in heart veins. 
    4. It helps in the proper functioning of the liver. The flavonoids and polyphenols are organic compounds which are hepatoprotective, they aid in proper functioning of the liver. Boiling and consuming as a side dish helps to get the maximum benefits.
    5. It helps in keeping the ulcers away.
    6. It has diuretic properties. It helps in increasing urine flow. It also helps to eliminate the kidney stones.
    7. It helps to keep the body warm during winters.
    8. Being rich in iron, it helps to increase the hemoglobin level. It aids in irregular menstrual cycles.
    horse gram stir fry
    horse gram stir fry

    Horse gram Stir Fry | Hurali Palya Recipe 

    Ingredients :


    1 cup horse gram
    2 teaspoon oil
    1/2 teaspoon mustard
    1/4 teaspoon turmeric powder
    1/4 teaspoon asafoetida
    1/2 teaspoon cumin
    a few curry leaves
    1 onion
    1/2 teaspoon chilli powder
    coriander for garnishing

    Method:


    Wash the horsegram and soak it for six hours.
    Cut the onion finely.
    Discard the water and wash the soaked horsegram. Put it in a bowl with a glass of water and pressure cook it to three whistles.
    Let the pressure release by itself.
    Take oil in a pan, add mustard seeds. As they crackle, put cumin, turmeric powder and asafoetida. Add a few curry leaves. Put onion to it and saute it for sometime.
    Remove the water, from the horsegram, keep it aside. Put the boiled horse gram to it. Put one fourth cup of boiled water to it. Add salt and chilli powder. Let it cook for sometime. Garnish with fresh coriander leaves.

    The other kind of stir fry recipes from Karnataka are Menthe Matvadi Palya, Brinjal Stir Fry, I love this kind of stuffed brinjal palya from our state cuisine. 

    If you ever make Horse gram Stir Fry  recipe, take a picture and tag @foodiejayashree on Instagram or @evergreendishes on Facebook. Subscribe to get all updates in your inbox and an e-book for free!


    Pin Horse gram stir fry for easy reference: 

    horse gram stir fry | hurali palya
    Horse gram stir fry | hurali palya


  • Tri-colour Dhokla | Gujarati cuisine

    Tri-colour Dhokla | Gujarati cuisine

    Tri-colour dhokla is a three layered dhokla. The green layer is sandwiched between the yellow coloured dhokla and white dhokla. The yellow dhokla is khaman dhokla. It makes a good evening snack.

    Dhokla as we all know is a popular savoury snack from Gujarati cuisine. It was initially made with gram flour but soon different kinds were made. Dhokla in its real form is  fermented and later steamed. Times have changed, today, most of the dhokla recipes we make are the instant versions. The most common scenario is we are on work and need to whip some quick dishes, isn’t it ? I have shared many instant dhokla recipes earlier. Check out my corn dhokla, oats dhokla and multi-millet dhokla

    To make tri-colour dhokla, it needs a little planning. It is made by fermenting the two batters. Ideally, it is best to mix at night and prepare in the morning. But, incase, you want to make it in the evening, you need to mix the batter in the morning itself. Here, I have taken one cup of flour, feel free to use the same measurement in grams.

    Let us get to the tri-colour dhokla recipe:

    tri-colour dhokla

    Tri-colour Dhokla

    Ingredients:

    • 1 cup rice flour      ( 1 cup =240ml)
    • 1 cup gram flour
    • 1 cup sour curd
    • 1 tablespoon green chutney
    • 1 teaspoon gram flour
    • 2 tablespoon + 2 teaspoon oil
    • 1 teaspoon soda
    • salt to taste
    • 1/2 teaspoon mustard
    • 1/4 teaspoon asafoetida
    • 1/2 teaspoon cumin
    • a few curry leaves
    • 2 green chilli
    • 1 tablespoon buttermilk
    • coriander for garnishing

    Method:

    1. Take rice flour and gram flour in two seperate bowls.
    2. Mix some curd with gram flour and put it aside.
    3. Use the remaining curd to mix rice flour.
    4. Cover with a lid and keep them in a warm place. Ferment  for at least five hours.
    5. Mix a spoon of besan in the green chutney. This is used for the green layer.
    6. Heat two tablespoon of oil in a pan, add soda to it . Once it cools, mix into both the batter.
    7. Add the required quantity of salt to both the batter.
    8. Put the dhokla steamer to heat.
    9. Grease the tin.
    10. Now, put half the quantity the oil with soda mixture to the white batter. Mix and pour into the tin.
    11. Allow it to steam.
    12. After five minutes, when it is partially done, spread the green chutney over it. Close the lid and steam for two minutes.
    13. Now, pour the remaining oil and soda mixture to the khaman batter. Mix and pour it over the green chutney which you had spread.
    14. Allow it to steam for sometime, a knife pricked should come out clean.
    15. In the meantime, make the seasoning with nustard, cumin, green chilli and cury leaves. Mix some nutermilk in the seasoning.
    16. Cut the dhokla into pieces, pour the seasoning over it.
    17. Tri-colour dhokla is ready to serve.

    Tips :

    • The curd should be sour but not foul smelling. It is best to use a day old curd kept outside.
    • Fermentation is needed for this variety of dhokla. I, mix the dhokla batter at night and keep it aside.
    • Use a little water, if needed, while mixing the dough.
    • To make green chutney, grind coriander, green chilli and salt with a little water. Later, mix gram flour to it.
    • You can add sesame for topping.

    Are you looking for different kind of Gujarati dishes? Check out  cabbage and methi muthiya, dal dhokli recipe

    tri-colour dhokla
    Evergreendishesdev

    Tri-colour Dhokla

    5 from 1 vote
    Tri-colour dhokla is a fermented, three layered dhokla from Gujarati cuisine.
    Prep Time 15 minutes
    Cook Time 30 minutes
    Resting time 5 hours
    Total Time 5 hours 45 minutes
    Course: evening snacks
    Cuisine: Gujarati

    Ingredients
      

    • 1 cup rice flour 1 cup =240ml
    • 1 cup gram flour
    • 1 cup sour curd
    • 1 tablespoon green chutney
    • 1 teaspoon gram flour
    • 2 tablespoon + 2 teaspoon oil
    • 1 teaspoon soda
    • salt to taste
    • 1/2 teaspoon mustard
    • 1/4 teaspoon asafoetida
    • 1/2 teaspoon cumin
    • a few curry leaves
    • 2 green chilli
    • 1 tablespoon buttermilk
    • coriander

    Equipment

    • 2 bowls
    • 2 ladles
    • dhokla maker
    • tin
    • knife
    • kadai

    Method
     

    1. Take rice flour and gram flour in two seperate bowls.
    2. Mix some curd with gram flour and put it aside.
    3. Use the remaining curd to mix rice flour.
    4. Cover with a lid and keep them in a warm place. Ferment  for at least five hours.
    5. Mix a spoon of besan in the green chutney. This is used for the green layer.
    6. Heat two tablespoon of oil in a pan, add soda to it . Once it cools, mix into both the batter.
    7. Add the required quantity of salt to both the batter.
    8. Put the dhokla steamer to heat.
    9. Grease the tin.
    10. Now, put half the quantity the oil with soda mixture to the white batter. Mix and pour into the tin.
    11. Allow it to steam.
    12. After five minutes, when it is partially done, spread the green chutney over it. Close the lid and steam for two minutes.
    13. Now, pour the remaining oil and soda mixture to the khaman batter. Mix and pour it over the green chutney which you had spread.
    14. Allow it to steam for sometime, a knife pricked should come out clean.
    15. In the meantime, make the seasoning with nustard, cumin, green chilli and cury leaves. Mix some nutermilk in the seasoning.
    16. Cut the dhokla into pieces, pour the seasoning over it.
    17. Tri-colour dhokla is ready to serve.

    Notes

    The curd should be sour but not foul smelling.
    Use a little water, if needed, while mixing the dough.
    To make green chutney, grind coriander, green chilli and salt with a little water. Later, mix gram flour to it.
    You can add sesame for topping.
    Fermentation is needed for this variety of dhokla. I, mix the dhokla batter at night and keep it aside. 

    If you ever make Tri-colour Dhokla recipe, take a picture and tag @foodiejayashree on Instagram or @evergreendishes on Facebook. Subscribe to get all updates in your inbox and an e-book for free!

    Pin it  for later :

    tri-colour dhokla
    tri-colour dhokla


  • Dal Dhokli Recipe | Gujarati cuisine

    Dal Dhokli Recipe | Gujarati cuisine

    Jump to Recipe Print Recipe

    Dal Dhokli is a sweet, spicy, tangy lentil based with wheat flour dumplings from Gujarati cuisine. It is a popular dish and made regularly in most households. It is a comfort food and holds a special place in every Gujarati’s heart. It is ideal to serve for lunch or brunch.


    Being a South Indian, it was not made at home. Chapathi was prepared regularly and dal was quintessential but dal dhokli was hardly known to us. I had heard from friends about it. The past few years has seen a shift and different kind of cuisine are liked at home. it is now made regularly, at least twice in a year.  It makes a tasty food when we are bored of the usual routine cooking. 
    Dal Dhokli is a healthy, filling, no onion garlic, vegan meal which you can make with ingredients easily available at home. A simple, filling, tasty dish which makes a good food by itself. It is filling and the goodness of lentil makes a wholesome diet.

    Coming to the Gujarati cuisine, I have shared couple of recipes here. Dhokla is a family favourite, I keep making a variety of them. Oats Dhokla, Millets Dhokla, Corn Dhokla are some of them. Tri-colour dhokla recipe  will be posted soon, watch out this space. Thepla makes a good breakfast option and make it atleast once in a month. Khakhra is a crispy, savoury snack  ideal to store at home. I have also shared cabbage and methi muthiya recipe earlier. Among the sweets, I have ABC Halwa and Sukhdi


    dal dhokli
    dal dhokli


    Ingredients :


    For the dhokli :


    1/2 cup wheat flour
    2 tsp chickpea flour
    1/4 teaspoon ajwain
    1/4 teaspoon cumin
    1/8 teaspoon asafoetida
    1/8 teaspoon turmeric powder
    1/2 teaspoon chilli powder
    salt
    water


    For the dal:


    1/2 cup tur dal / pigeon pea/ yellow dal 
    1/4 teaspoon turmeric powder
    1.5 cup water
    2 tablespoon groundnut
    2 teaspoon oil
    1/2 teaspoon mustard
    1/2 teaspoon cumin
    2 red chilli
    1 green chilli
    a few curry leaves
    1/2 inch ginger
    1/2 teaspoon sugar
    salt
    water as required

    Method: 

    1. Wash the dal and keep it a pressure pan with three times the water in it. Add a pinch of turmeric powder. In another bowl, put the peanuts and cook them together in a pressure cooker. Let it cook for three whistles. Allow the pressure to release by itself. The dal should be well cooked. Give a stir and keep it aside.
    2. Take a wide bowl, put the ingredients for dhokli except water.Give a mix. Now, add little water at a time and make a stiff dough.Keep it covered for sometime. 
    3. Take oil in a pan, add mustard seeds as it crackles, put cumin. Then add pieces of  red chilli, curry leaves and slit green chilli. Give a mix, put the dal to it. Add salt and sugar. Put the cooked peanuts to it. Adjust the consistency, the dal should be of a thicker consistency. But since, you will be boiling it, you can add some water to it. 
    4. Make three balls of the dough, roll them into chapathi and cut them into rectangular shaped pieces. As you cut it, put a few into the dal which is kept on the other side of the stove. Repeat for the rest of the dough. 
    5. Add the dhoklis with a time interval, lest they may stick together and form a lump. Let it boil for sometime. Keep stirring in between. 
    6. You can garnish with fresh coriander and lime juice. It is best served hot. 
    7. Dal Dhokli is ready to serve. 
    Evergreendishesdev

    Dal Dhokli

    Dal Dhokli is a sweet, spicy, tangy lentil based with wheat flour dumplings in it. It makes a good lunch menu.
    Prep Time 20 minutes
    Cook Time 20 minutes
    Total Time 40 minutes
    Course: brunch, lunch
    Cuisine: Gujarati

    Ingredients
      

    For the dhokli
    • 1/2 cup wheat flour
    • 2 tsp chickpea flour
    • 1/4 teaspoon ajwain
    • 1/4 teaspoon cumin
    • 1/8 teaspoon asafoetida
    • 1/8 teaspoon turmeric powder
    • 1/2 teaspoon chilli powder
    • salt
    • water
    For the dal:
    • 1/2 cup tur dal / pigeon pea/ yellow dal
    • 1/4 teaspoon turmeric powder
    • 1.5 cup water
    • 2 tablespoon groundnut
    • 2 teaspoon oil
    • 1/2 teaspoon mustard
    • 1/2 teaspoon cumin
    • 2 red chilli
    • 1 green chilli
    • a few curry leaves
    • 1/2 inch ginger
    • 1/2 teaspoon sugar
    • salt
    • water as required

    Equipment

    • pan, ladle, rolling pin, bowls, serving spoon

    Method
     

    1. Wash the dal and keep it a pressure pan with three times the water in it. Add a pinch of turmeric powder. In another bowl, put the peanuts and cook them together in a pressure cooker. Let it cook for three whistles. Allow the pressure to release by itself. The dal should be well cooked. Give a stir and keep it aside.
    2. Take a wide bowl, put the ingredients for dhokli except water.Give a mix. Now, add little water at a time and make a stiff dough.Keep it covered for sometime.
    3. Take oil in a pan, add mustard seeds as it crackles, put cumin. Then add pieces of  red chilli, curry leaves and slit green chilli. Give a mix, put the dal to it. Add salt and sugar. Put the cooked peanuts to it. Adjust the consistency, the dal should be of a thicker consistency. But since, you will be boiling it, you can add some water to it.
    4. Make three balls of the dough, roll them into chapathi and cut them into rectangular shaped pieces. As you cut it, put a few into the dal which is kept on the other side of the stove. Repeat for the rest of the dough.
    5. Add the dhoklis with a time interval, lest they may stick together and form a lump. Let it boil for sometime. Keep stirring in between.
    6. You can garnish with fresh coriander and lime juice. It is best served hot.
    7. Dal Dhokli is ready to serve.
    Dal Dhokli

    If you ever make Dal Dhokli recipe, take a picture and tag @foodiejayashree on Instagram or @evergreendishes on Facebook. Subscribe to get all updates in your inbox and an e-book for free!

  • Mango Mousse Recipe | Eggless Desserts

    Mango Mousse Recipe | Eggless Desserts

    Mango Mousse is a delectable, easy to make dessert. It is my go to dessert during summer when we need a quick and easy dessert.

    Mango, mango, I wait for you all year.
    Here, I come with various kinds
    Choose the ones you like and
    treat yourself in many ways

    Well, that’s a kind of feeling I have when the mango season starts. What else can I make with mangoes? 

    For the past two years, mangoes are not much. A few years back, I remember we had a good number of fruits.
    I have shared many mango recipes earlier. They are Mango kesariamba bhat,  Desserts with a international touch are  mango pannacotta, chocolate streaked mango ice cream 
    The ambua, mumbazha pulissery are some of the regional dishes you can prepare. 


    mango mousse


    Why should you make this dessert ?

    • a healthy version
    • needs only three ingredients 
    • easy to make
    • eggless mango mousse for those who prefer it
    • can be made ahead and kept in the refrigerator. 


      Mango Mousse Recipe 

    Ingredients:

    • 2 cups mango puree
    • 1 cup cream 
    • 2 tablespoon honey

      Method:

    • Take the puree and blend it.
    • Add honey to it.
    • Fold the cream into the mango puree.
    • Put it into glass bowls and allow it to set in the refrigerator.
    • Mango mousse is ready to serve.

      Take a tip:
    • Choose good quality mangoes. 
    • Castor sugar may be used instead of honey.
    • Use any whipping cream 

    About the event :
    Sending this to Mango Mania at Shhh Secretly Cooking Challenge. Here, The theme was suggested by Mayuri Patel. Check out her Fajeto recipe, which she has shared for the theme.

    I was partnered with Archana Gunjanikar Potdar,  she wanted to make mango sticky rice and I gave her the ingredients accordingly  coconut milk and jaggery.  Check out the recipe of it. Archana gave me cream and honey, mango mousse recipe is my contribution.

                                shhh cooking secretly


    Evergreendishesdev

    Mango Mousse

    Mango Mousse is a delectable, easy to make dessert.
    Prep Time 15 minutes
    5 hours
    Total Time 5 hours 15 minutes
    Course: Dessert
    Cuisine: international

    Ingredients
      

    • 2 cups mango puree
    • 1 cup cream
    • 2 tablespoon honey

    Equipment

    • bowl, blender, serving bowls

    Method
     

    1. Take the puree and blend it.
    2. Add honey to it.
    3. Fold the cream into the mango puree.
    4. Put it into glass bowls and allow it to set in the refrigerator.
    5. Mango mousse is ready to serve.

    Notes

    • Choose good quality mangoes.
    • Castor sugar may be used instead of honey.
    • Any whipping cream may be used
     

    About the event :
    Sending this to Mango Mania at Shhh Secretly Cooking Challenge. The theme was suggested by Mayuri Patel. Check out her Fajeto recipe, which she has shared for the theme. Here the secret ingrdients are exchanged between the partners and a dish is prepared corresponding to the theme. Later, the prepared dish is shared in the group and other members try to guess the ingredients. 

    I was partnered with Archana Gunjanikar Potdar,  she wanted to make mango sticky rice and I gave her the ingredients accordingly  coconut milk and jaggery.  Archana was kind enough to give me cream and honey, mango mousse recipe is my contribution.

    Pin it for later:

    mango mousse


    If you ever make Mango Mousse recipe,  take a picture and tag @foodiejayashree on Instagram or @evergreendishes on Facebook. Subscribe to get all updates in your inbox and an e-book for free!