Category: breakfast time

  • Urad dal wada / uddina wade

    Urad dal wada / uddina wade

    (Disclosure : As an Amazon Associate, I will get a small commission for qualifying purchases without no addition cost to you.)

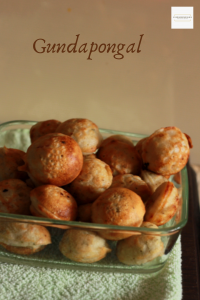
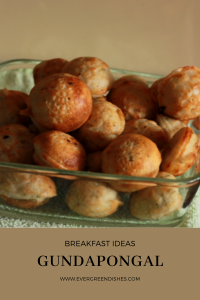
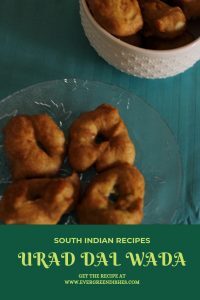
    urad dal wada | uddina wade | wada recipe | uddina vade| south indian recipes |

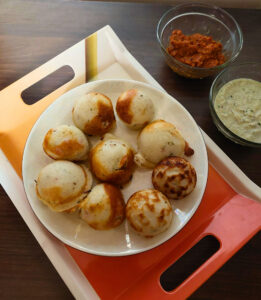
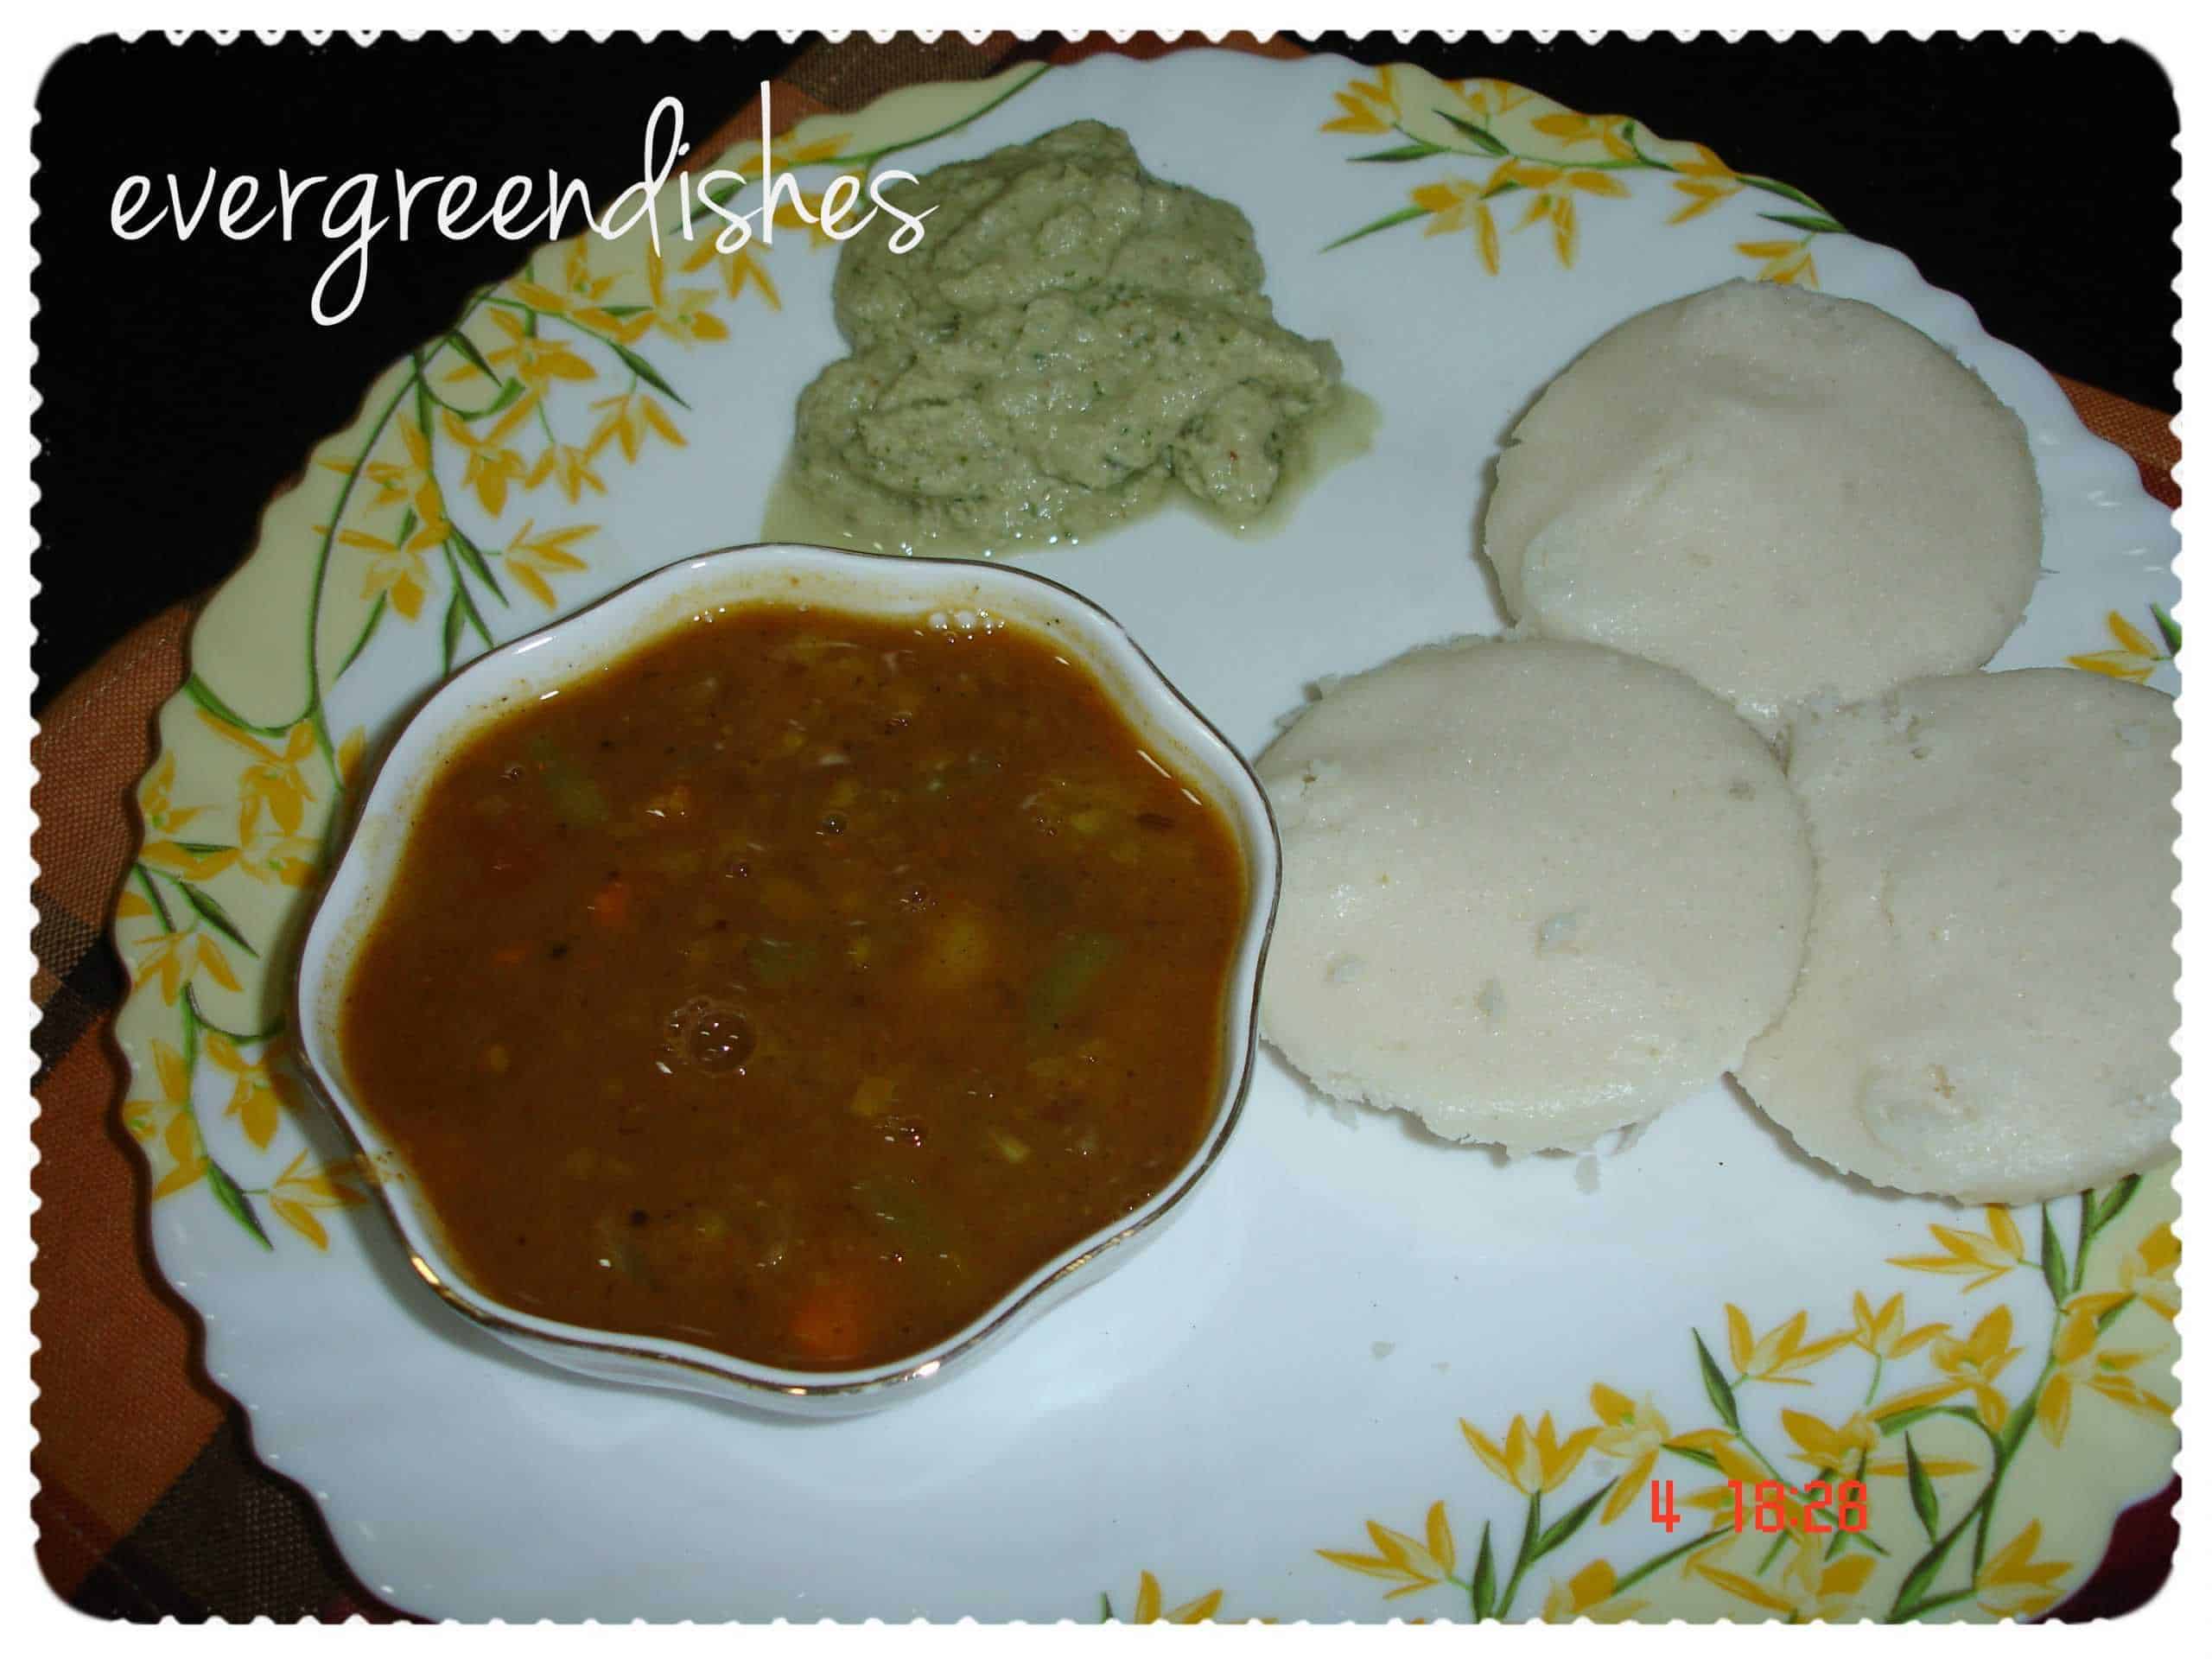
    Urad dal wada are tasty and loved by all. It is usually served along  with idli in restaurants. It is one of the essentials of South Indian breakfast. 

    Urad dal is soaked and then made into a thick batter, seasoned with spices and then deep fried in oil. Shaped like doughnuts, these have always been my favourite. With or without chutney, I love these fried dumplings. Today, a sneak and peek at this one.

    This is vegan and gluten free snack, ideal for breakfast along with idly or as an accompaniment with any meal. It is tasty and one cannot  resist having a couple of them. It is usually served with coconut chutney but one can dunk them in sambar or thick curd, it tastes awesome.

    This is an old post which I had written when I started my blog. Now, the post is redesigned with new picture and content, looking back there is a phenomenal change in the pictures and the way of writing. Well, that’s life, we try to get better each day isn’t it? And this post is part of the new group that I have joined Foodies_Redoing Old Posts started by Renu. The purpose is to give a new face to the old posts that we had written long back.

    urad dal wada

    INGREDIENTS :

    • 2 cup urad dal
    • 5 green chilly
    • coriander leaves
    • a few fresh coconut pieced
    • curry leaves
    • salt
    • water
    • oil for frying

    METHOD :

    • Soak urad dal in water for three hours.
    • Grind it to a fine batter with little water.
    • In another jar, grind green chilly and coriander and mix with it. Throw in a few roughly cut curry leaves, coconut pieces  and salt.
    • Heat oil in a pan , when done, beat and take some batter, make a hole with the thumb, and slowly release it into the oil. Initially, one needs a little practice to make urad dal wada, but once you know the trick, you can do it. 
    • In the beginning, one may not be able to make them and needs to be satisfied with the usual round balls.
    • Fry until brown on medium flame, remove and put them on a tissue paper. 
    • Serve with coconut chutney.


    About the Lifelong Iron Pan

    The pan is made from cast iron and is ideal for sauting,  deep frying or shallow frying. It is toxin free and teflon free. It is sturdy and is durable for a long time. The pan can be used on all kind of cook tops including induction stove.

    Pin it for later:

    urad dal wada
    urad dal wada


    urad dal wada
    Evergreendishesdev

    Urad Dal Wada

    Urad dal wada is a popular fried snack from South India. It is usually served for breakfast along with idli, chutney and sambar.
    Course: Breakfast
    Cuisine: South Indian

    Ingredients
      

    • 2 cup urad dal
    • 5 green chilly
    • coriander leaves
    • a few fresh coconut pieces
    • curry leaves
    • salt
    • water
    • oil for frying

    Method
     

    1. Soak urad dal in water for three hours.
    2. Grind it to a fine batter with little water.
    3. In another jar, grind green chilly and coriander and mix with it. Throw in a few roughly cut curry leaves, coconut pieces  and salt.
    4. Heat oil in a pan , when done, beat and take some batter, make a hole with the thumb, and slowly release it into the oil. Initially, one needs a little practice to make urad dal wada, but once you know the trick, you can do it.
    5. In the beginning, one may not be able to make them and needs to be satisfied with the usual round balls.
    6. Fry until brown on medium flame, remove and put them on a tissue paper.
    7. Serve with coconut chutney.

    Notes

    Add a little quantity of water while grinding, we need a batter of thick consistency.


    If you have liked this post, do share it with your family and friends. If you ever recreate it, take a picture and share it by tagging @foodiejayashree on Instagram or @evergreendishes on Facebook. I will be glad to see your creation.

    (Disclosure : As an Amazon Associate, I will get a small commission for qualifying purchases without no addition cost to you.)


  • upma

    I am pretty excited as I write this one. Eight like minded  bloggers together have started a blog hop and this is our first one. So let me start right away. We will be working on a particular theme, twice a month and its ” Breakfast ” in the beginning. I am making our very own Upma here today. (more…)

  • vegetable sandwich

    Every morning it is a dilemma what has to be served for the kids, before they leave for school. The time is quite early to have a heavy breakfast nor can they be sent with just a glass of milk. This sandwich can be easily made and served.

    INGREDIENTS :

    • bread slices 12
    • butter 2tbsp
    • salt
    • pepper powder 1/4 tsp
    • carrot 1
    • cucumber 1
    • tomato 1
    • onion 1
    • fresh coconut 1 small bowl
    • green chilly 2
    • coriander leaves 1/2 bowl
    • mint leaves 1/2 bowl

    vegetable sandwich

    METHOD :

    • Mix butter, a pinch of salt and pepper powder together in a bowl.
    • Grind coriander leaves, mint leaves, fresh coconut, green chilly and salt together . Avoid making it too hot.
    • Wash and cut veggies into round circles and keep aside.
    • Onions need to be cut into fine thin circles.
    • Now, take two slices of bread and smear the butter paste with a knife. Then apply  some mint chutney on both the slices.
    • Keep veggies on one slice and close with the other.
    • Cut diagonally.
    • Serve with tomato ketchup.

    [social_share style=”bar” align=”horizontal” heading_align=”inline” facebook=”1″ twitter=”1″ google_plus=”1″ linkedin=”1″ pinterest=”1″ /]


    Linked to to the following parties:

    Create with Joy, The Dedicated House, Treasure Box Tuesday, LouLou girls fabulous party, Freedom Friday with all my blogging friends, A Dish of Daily Life ,Weekend Retreat Link Party, Thriving Thursdays

    Linking at Cooking 4all seasons at”Come,join us for breakfast” December event

  • Chennai Idli

    Idli are an all time favourite for many of us. I love making this one, as they are soft and supple. There may be a variation in other recipe as this is modified by me.They make an ideal breakfast with sambar and chutney. Why is this named as “Chennai Idli” ? Chennai is a place in South India,it is the capital city of the state of Tamilnadu. It is here, they were first made  and  was very famous for these soft and supple idlis. Hence the name as “Chennai Idli”

    Ingredients :

    soft idlis
    ideal breakfast

    Procedure :

    • Soak the rice in hot water for 4 hours.
    • Soak urad dal seperately  in cold water for two hours.
    • Grind both of them seperately with adequate quantity of water. Later ,mix both together.
    • Now, rinse the semolina in water for sometime. Mix into the ground batter.
    • Keep in a warm place to ferment for 8 hours.
    • Add salt, mix and  and make idlis the usual way, in a steamer.
    • Serve with coconut chutney and sambar and a dollop of butter if you wish !

    Just a note :

    Idli rice is a different kind of rice, which is used in making idlis and dosas. It is partially brown and  smaller in size. Here, in south india, it is called as salem rice.

    My other idli recipes on the blog:

    chennai idli
    Evergreendishesdev

    Chennai Idli

    Soft and supple idli make ideal breakfast, chennai idlis are that kind. 
    Prep Time 2 hours
    Cook Time 20 minutes
    Total Time 2 hours 20 minutes
    Course: Breakfast, healthy, lunch box
    Cuisine: Indian, South Indian

    Ingredients
      

    • 1 cup urad dal
    • 2 cup idli rice
    • 1 cup semolina (idli)
    • salt
    • water

    Method
     

    1. Clean and wash the rice. Boil water in a pan. Put the rice in it and soak it for four hours.
    2. Soak urad dal in regular water for two hours.
    3. Grind both of them separately to a smooth batter. Later, mix them in a wide bowl.
    4. Wash the semolina and soak it for ten minutes, mix it in the batter and keep it in a warm place to ferment, preferably overnight.
    5. Add salt to the batter and mix it well.
    6. Take the idli stand, put the batter in each of the cavity, steam it for fifteen to twenty minutes.
    7. Once, it is done, let cool, then remove and serve with coconut chutney and sambar. 

    Notes

    • Batter is to be kept in a warm place.
    • Keep a wide plate below the container, lest it may not overflow on fermenting.
    • Fermenting time differs according to the season and the region where you are. 

    Make sure to get your copy of ” Book of Handyhints” which contains many useful tips for you. Subscribe to the mailing list and get it now.

    Chutney recipe can be found here

    Note: This post contains affilate links

    Sharing is Caring

    [social_share style=”bar” align=”horizontal” heading_align=”inline” facebook=”1″ twitter=”1″ google_plus=”1″ linkedin=”1″ pinterest=”1″ /]

    Subscribe to this blog to get a free book of handy hints.

    ****UPDATED****

    Do get the mobile app if you have not got it yet. Follow evergreendishes on other social media: Facebook, Instagram, Pinterest, Twitter

    Check out my e-books on Amazon


  • How to make custard apple milkshake

    How to make custard apple milkshake

    Custard Apple Milkshake is creamy and tasty. It is ideal to serve for breakfast. 

    Custard apple, a seasonal fruit, creamy, sugary  and pulpy is loved by many. It is considered to be the fruit of the Lords. It is a delicious fruit ideal to make desserts.

    Custard apple is a delicious fruit grown in tropical countries with high altitudes.. It is also commonly called as sugar apple , cheimoya  or sweet pop. It is a pale green, spherical or conical shaped fruit with a thick rind, outer existence has knobby segments.  The flesh is sweet and tasty. A typical fruit has twenty to thirty hard, black seeds in it. I have heardthe seedless variety is available but not seen to date. Custard apple  is available during the months of October to February in India. It is called as sitaphal in Kannada, Gujarati and Marathi, Shareefa in Hindi and a Seetapazham in Malyalam. 

    custard apple milkshake

    Custard apple is usually eaten as a fruit. tastes good when it is chilled. You can make delicious desserts as ice cream or kheer. Sitaphal milkshake is creamy and tasty.

    Custard Apple is rich in anti-oxidants, vitamins and minerals. It is rich in Vitamin B6, which helps to improve the mood and fights depression. It helps to build the immune system of the body.The cartoneiod antioxidant helps to maintain good vision. Lutein, may also help in preventing cataract and AMD conditions. Cheerimoya helps to fight against cancer.


    Custard Apple Milkshake Recipe / Sitaphal Milkshake :

    Ingredients 

     2 Custard apple 

    2 cup chilled milk chilled 

    1 teaspoon sugar 

     1 teaspoon vanilla milk powder 

    Method :

    Remove the pulp from the seeds. Blend all the ingredients together. Serve chilled.


    About the event :

    This is an old post which I have redone with better pictures and text. Sending this to Foodies_Redoing Old Post 88, a fortnightly event. Here, we as a group, work on an old post either by changing the pictures or writing better text. Here, I have changed the picture and put more information in the body of the article. The recipe remains the same. It was published on 31/ 8/2014. I have redone it on 30/9/2022.

    Pin in for later :

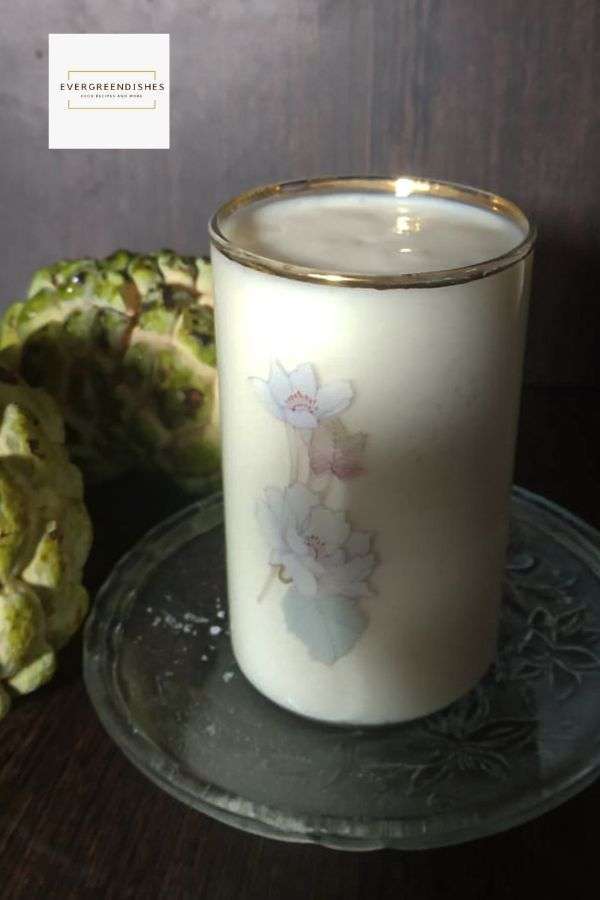
    custard apple milkshakeIf you ever make  Custard Apple Milkshake, take a picture and share it on Facebook or Instagram by tagging @evergreendishes and @foodiejayashree  respectively. I will be happy to see your creation and share it further.
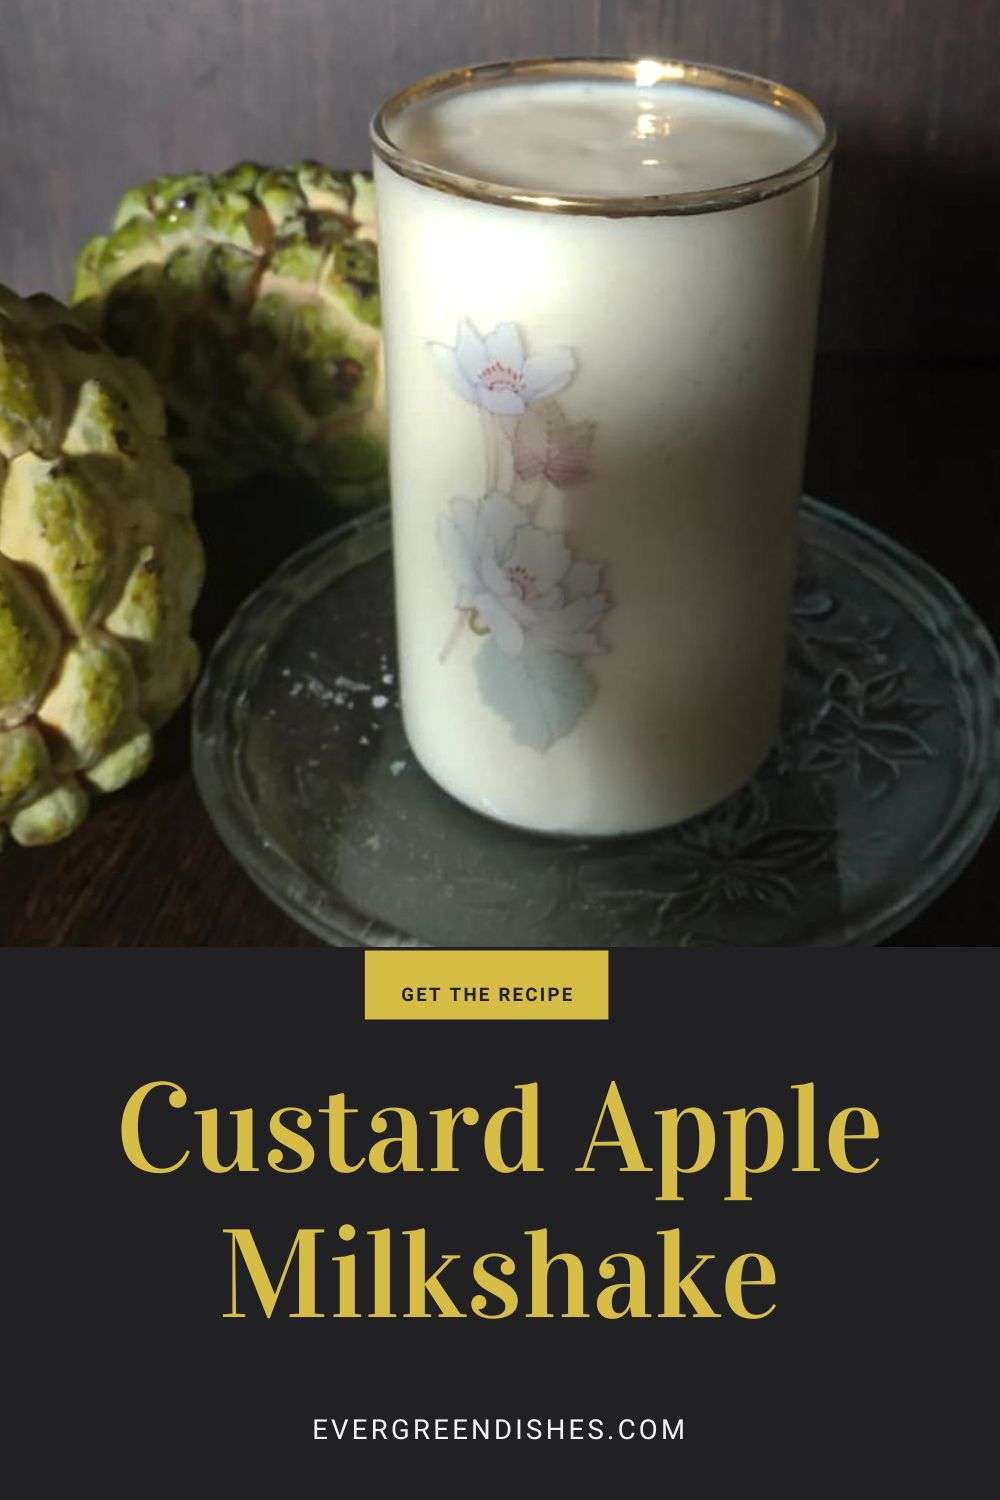
    Subscribe to get all updates and an e-book for free.


  • Gojjavalakki / Huli Avalakki

    Gojjavalakki / Huli Avalakki

    Jump to Recipe

    Gojjuavalakki  or Gojju Avalakki is a staple food in South India. It is tangy and also called as Huli Avalakki. Huli is the regional word meaning sour. It is not only sour, but I can say tangy.

    Beaten rice  popularly known as  “avalakki ” in karnataka and “poha ” in maharashtra  is one of the staple food of the Kannadigas. They relish eating in any form, just as a chivda with tea or for breakfast. Here is one such recipe which many of you can relate.

    gojjavalakki
    gojjavalakki

    The ingredients needed are : 

    • 4 cup beaten rice 
    • 300 ml tamarind pulp 
    • a lemon size ball of jaggery 
    • 2 tablespoon oil 
    • 1/2 teaspoon mustard seeds 
    • a pinch of asafoetida  
    • 1/4 teaspoon turmeric powder 
    • 2 tablespoon groundnuts 
    • 1/2 teaspoon bengal gram 
    • 1/2 teaspoon urad dal 
    • 6 cashew nuts broken into pieces
    •  a few curry leaves 
    • salt to taste
    • 1 teaspoon chilli powder 
    • 2 teaspoon rasam powder 
    • coriander for garnishing


    Method :

    • Take the beaten rice , immerse in water for a second and drain the water.
    • Take the tamarind pulp, jaggery, salt, chilli powder and rasam powder and boil in a pan. It should be of a moderately thick consistency. 
    • Take oil in a large pan and make the seasoning. Add the mustard seeds, and as they crackle add asafoetida, turmeric powder, bengal gram urad dal, groundnuts, cashew nut pieces  and curry leaves . Leave aside for a minute. 
    •  As the colour changes, add the pulp to it and mix well. Now add the washed beaten rice to it and mix well. Keep on a low flame for sometime. Garnish with coriander.

    Take a tip :

    • The taste of gojju avalakki is a  blend of sour, sweet and spicy, hence it can be described as khatta meetha.
    • One needs to let the ground nuts cook for some time in the oil. Otherwise,  it does not taste good.
    • One  can add onions to it, when the seasoning is done, saute  and prepare in the same way. But, this is also equally good.


    Pin it for later :

    Gojjavalakki
    gojjavalakki


    Print Recipe

    gojjavalakki

    Gojjavalakki

    Gojjavalakki is a tasty and healthy breakfast option from South India.
    Course: Breakfast
    Cuisine: Andhra pradesh, karnataka, South Indian

    Ingredients
      

    • 4 cup medium poha /avalakki
    • 300 ml tamarind pulp
    • a lemon size ball of jaggery
    • 2 tablespoon oil
    • 1/2 teaspoon mustard seeds
    • a pinch of asafoetida
    • 1/4 teaspoon turmeric powder
    • 2 tablespoon groundnuts
    • 1/2 teaspoon bengal gram
    • 1/2 teaspoon urad dal
    • 6 cashew nuts broken into pieces
    • a few curry leaves
    • salt to taste
    • 1 teaspoon chilli powder
    • 2 teaspoon rasam powder
    • coriander for garnishing

    Method
     

    1. Take the poha or avalakki and wash it in water. Let the impurities be drained. Then, immerse in water for a second and drain the water.
    2. Take the tamarind pulp, jaggery, salt, chilli powder and rasam powder and boil in a pan. It should be of a moderately thick consistency.
    3. Take oil in a large pan and make the seasoning. Add the mustard seeds, and as they crackle add asafoetida, turmeric powder, bengal gram urad dal, groundnuts, cashew nut pieces  and curry leaves . Leave aside for a minute.
    4. As the colour changes, add the pulp to it and mix well. Now add the washed beaten rice to it and mix well. Keep on a low flame for sometime. Garnish with coriander.

    Notes

    Tamarind pulp can be extracted by soaking the tamarind in water for fifteen minutes. It is squeezed well and then extracted. It is moderately thick in consistency.
    The taste of gojju avalakki is a  blend of sour, sweet and spicy, hence it can be described as khatta meetha.
    One needs to let the ground nuts cook for some time in the oil. Otherwise,  it does not taste good.
    One  can add onions to it, when the seasoning is done, saute  and prepare in the same way. But, this is also equally good.

  • Onion Chutney

    Onion chutney makes a tasty accompaniment with many dishes as dosa and chapathi.

    Our food looks awfully dull with the usual  or the not so desirable accompaniments. Tasty side dishes makes the meal interesting and palatable. Here is another kind of chutney with onion that you can prepare with dosa or chapati.

    Onion Chutney Recipe

    Ingredients :

    • fresh grated coconut 1 bowl
    • onions 2
    • green chillies 5
    • coriander leaves  a small quantity
    • salt to taste
    • tamarind pulp 1 tsp
    • dalia split 1 tbsp

    For the seasoning :

    • oil  2 tsp
    • mustard seeds 1/2 tsp
    • asafoetida 1/4 tsp
    • turmeric powder 1/4 tsp
    • a few curry leaves
    • urad dal 1/2 tsp

    onion chutney
    food seems to be at its best

    Method : Take a little oil and roast the green chillies. Grind all the ingredients together with a little water. Remove it in a bowl. Make seasoning and add to it. Here is the other variety of chutney which you can make along with one. Happy cooking. If you  make  Onion Chutney, take a picture and share it by tagging @foodiejayashree on Instagram and @evergreendishes on Facebook.  Subscribe to get all updates and an e-book for free.

  • Mango smoothie with varied toppings

    Mango smoothie with varied toppings

    Mango smoothie is healthy and makes an excellent breakfast for all. It is packed with the goodness of mango, yoghurt and milk.

    It is the season of mangoes and no reason not to use mangoes. As children, we enjoyed eating mangoes. Now, I find ways to cook with it.

    The recipe of mango smoothie is given below. Addition of sugar is optional. It depends on the sweetness of the mango and most time, we rarely need it. Here, topping can be varied, you can put some chopped nuts, cherries or serve with a wafer.

    The reason I love smoothies, it is filling and can be made in a jiffy.

    The other mango recipes are : mango pannacotta, amba bhaat, mango sheera,


    mango smoothie
    manggo smoothie


    Mango Smoothie Recipe


    Ingredients :

    • 2 mango
    • 1 cup cold milk
    • 200 ml yoghurt

    METHOD :

    Cut mango into chunks. Put it in a liquidiser with yoghurt and milk. Serve with any topping given below

    Toppings :

    • cherries
    • nuts as cashew, almond and raisin cut into pieces
    • wafers
    • roasted flax seeds
    • soaked chia seeds

    Take a tip :

    • Any kind of sweetener may be used if needed.
    • Addition of milk is optional but it helps in balancing the taste if the curd is slightly sour.


    Pin it for later :

    mango smoothie
    mango smoothie

    mango smoothie

    Mango Smoothie

    Mango Smoothie is an easy to make, tasty and filling breakfast. Use any of the toppings or a combination of them.

    Ingredients
      

    • 2 mango
    • 1 cup cold milk
    • 200 ml yoghurt

    Method
     

    1. Cut mango into chunks. Put it in a liquidiser with yoghurt and milk. Serve with any topping given below
    Toppings :
    1. cherries
    2. nuts as cashew, almond and raisin cut into pieces
    3. wafers
    4. roasted flax seeds
    5. soaked chia seeds

    Notes

    Any kind of sweetener may be used if needed.
    Addition of milk is optional but it helps in balancing the taste if the curd is slightly sour.

    About the event:

    This is an old post, which I have redone with better pictures and text. Sending it to Foodies Redoing _98. It is a fortnightly event and so many of my posts have been redone here.

    If you ever make Mango Smoothie, take a picture and share it by tagging @foodiejayashree on Instagram or @evergreendishes on Facebook or Twitter.

    Let’s be connected, the follow buttons are on the side bar. Subscribe to get all updates and an e-book for free!

  • Mango Milkshake Recipe

    Mango Milkshake Recipe

    Mango milkshake is a tasty drink to serve during. Children will drink this without any fuss. It is creamy and tasty.

    It’s the season of mangoes. Various kind of desserts, juices and sweets are made with it. Milkshake, juice, ice cream, sorbet and souffle are some of them. But the most prevalent is the mango pulp or the aamras as it is popularly known,  which is served as an accompaniment. But, there’s nothing like eating a fruit all by itself messing our hands.

    Mango milkshake is tasty, filling and ideal to serve during any time of the day. Serve it during breakfast, as a refreshing drink at noon or in the evening after the children come back from play.

    A few mango recipes that I have on the blog are the following : mango jam with chia seed, mambazha pulissery, raw mango rice, ambua, raw mango salad

    mango milkshake
    mango milkshake

    Ingredients: 

    • 3 mango (alphanso)
    • 2 scoop mango ice cream
    • 1/2 litre milk
    • 2 teaspoon sugar
    • ice cubes for serving

    Method:

    Cut chunks of mango and put them in a freezer for sometime. This gives a good texture to the milkshake. Put them in a liquidiser. Add ice cream, milk and sugar  to it, give a swirl. Serve chilled with ice cubes in it.

    Take a tip:

    • One can use other variety of mango but avoid the fibrous ones.
    • Addition of sugar is optional. If you are on diet, skip adding it. 

    A few other recipes from co-bloggers are : 

    Giangi uses a combination of fruits in her  Italian smoothie or Frullato as it is called. Azlin has made a frappe using raspberry and white chocolate. 


    Pin it for later :

    mango milkshake
    mango milkshake

    This was one of the first few posts that I wrote when I started my blog. Now, it’s time to update the pictures and sending this to Foodies_Redoing Old Post 3

    If you have liked this post, do leave a comment, it will be nice to hear from you. Let’s be connected.

    Follow @foodiejayashree on Instagram for regular updates or @evergreendishes on Facebook and Twitter.

    Subscribe to get a book of handy hints for free!

  • Gundapongal | Paddu| Kuzhi Paniyaram

    Gundapongal | Paddu| Kuzhi Paniyaram

    ( Disclosure : As an Amazon Associate, I will get a small commission for qualifying purchases without no addition cost to you.)

    Gundapongal | Paddu | Kuzhi Paniyaram | South Indian Breakfast | Indian food | Tamilnadu | Andhra Pradesh | Karnataka


    Gundapongal is a popular breakfast in South India. It is also known as paddu, guliyappa and kuzhi paniyaram. The batter is mixed with onion and other ingredients and cooked in a paddu maker, it makes a good breakfast.

    Mornings are quite busy, many errands and you have to prepare breakfast and pack the lunch box. Well, we Indians love idly and dosa for breakfast. I think it is ideal to keep a box of batter in the refrigerator, it just saves some time. The chutney too can be pre-made and refrigerated.

    I often have dosa batter as I can make gundapongal or uttappam the next day. The same batter can be used for all the three recipes. Serve gundapongal with coconut chutney. Crispy dosa smeared with ghee and some podi tastes good.

    About the pan:

    Gundapongal is made in a special pan with cavities. The number of cavities depends on the size of the pan and the cavities in-built. You can either buy a cast iron or a non-stick as per your convenience.  Cooking in non-stick is easier and needs a small quantity of of oil. The cast iron  pan gives  a different taste, it is crispy on the outside and soft inside.

    Other South Indian breakfast recipes:

    Gundapongal / Gundu Pongal / Paddu / Kuzhi Paniyaram

    Ingredients:

    • a bowl of dosa batter
    • a bowl of finely chopped onions
    • curry leaves
    • a teaspoon of soaked bengal gram

    Grind to a paste :

    • 4 green chillies
    • a bowl of coriander leaves
    • 1 inch ginger
    • 1 tsp cumin

    Method:

    1. Take the required quantity of batter in a bowl. Make a paste of the listed ingredients. Put the onions, green chilly paste, salt if needed. Tear the curry leaves and throw them in it.
    2. Take the gundapongal pan, heat it on a low flame. Smear some oil in each of the perforations. Add a spoonful of batter in each of the perforations and close it with a lid.
    3. Let cook for sometime. Turn each of them with a spoon. Allow it to cook for sometime.
    4. Once they are done, remove and serve hot with chutney.

    Take a tip:

    • You can make plain paddus also.
    • Addition of onion is optional. You can make sans onion on festive days.
    • Adjust the level of spiciness.
    • Addition of soaked bengal gram is optional, it gives a good taste in it. It should be soaked for two hours atleast.


    gundapongal
    gundapongal


    gundapongal
    gundapongal

    About the event:

    The old posts are often neglected but they need to be looked up. I am sending this to Foodies_Redoing Old Post 23, a group where we every fortnightly, work on an old post and share it. This is one of the first few posts I wrote, now I have changed both the text and pictures.

    Gundapongal

    Gundapongal is a popular breakfast from South India. It is also known as Paddu or Kuzhi Paniyaram. Onion pieces and other ingredients are mixed in the dosa batter and cooked in a paddu pan, it is served with coconut chutney.
    Course: Breakfast
    Cuisine: South Indian

    Ingredients
      

    • a bowl of dosa batter
    • a bowl of finely chopped onions
    • curry leaves
    • a teaspoon of soaked bengal gram
    • Grind to a paste :
    • 4 green chillies
    • a bowl of coriander leaves
    • 1 inch ginger
    • 1 tsp cumin

    Method
     

    1. Take the required quantity of batter in a bowl. Make a paste of the listed ingredients. Put the onions, green chilly paste, salt if needed. Tear the curry leaves and throw them in it.
    2. Take the gundapongal mould, heat it on a low flame. Smear some oil in each of the perforations. Add a spoonful of batter in each of the perforations and close it with a lid.
    3. Let cook for sometime. Turn each of them with a spoon. Let cook.
    4. Once they are done, remove and serve hot with chutney.

    Notes

    Addition of onion is optional.
    Adjust the spiciness as per the taste required.

    Pin it for later:

    gundupongalu
    gundapongal

    If you have liked this post, do share it with your family and friends. You can save the above image on Pinterest for further reference.

    If you ever make this recipe, do take a picture and tag @foodiejayashree on Instagram or @evergreendishes on Facebook

    Let’s be connected, do follow us on social media. Subscribe to get a book of handy hints for free !

    ( Disclosure : As an Amazon Associate, I will get a small commission for qualifying purchases without no addition cost to you.)