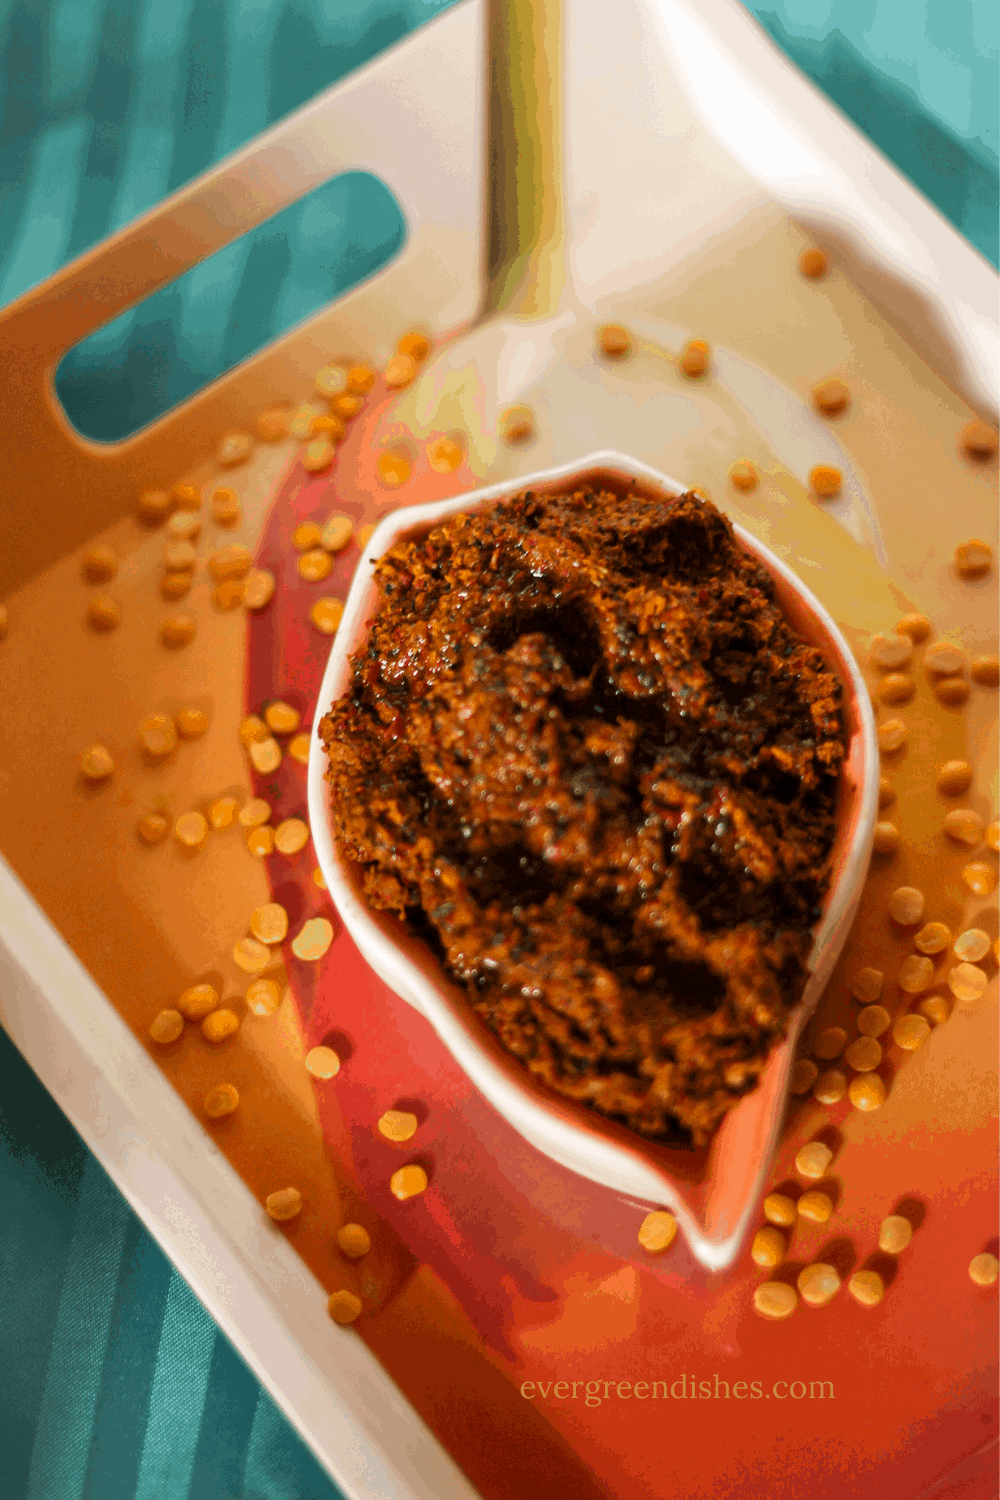
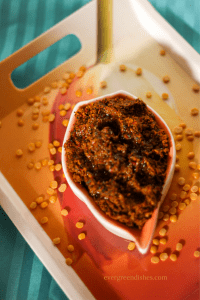
Chana Dal chutney makes a good accompaniment with idli, dosa, gundapongal and even hot, steamed rice. Bengal gram chutney is easy to prepare. A few ingredients from the pantry, a little of your time and your chutney is ready.
What is chutney ?
Chutney is an integral part of lunch/ thali in Indian cuisine. It is one of the essentials in any South Indian home as the breakfast mainly comprises of idli and dosa. Chutney is an accompaniment made by roasting chilli, coconut, along with lentil or vegetables and a few other substances with a seasoning over it. It is spicy and makes a good accompaniment with any meal.
Different kind of chutney
Different varieties of chutney are prepared as the need for different dishes arises each day. Making a chutney is less cumbersome. It make a good accompaniment with hot steamed rice and a dollop of ghee. Using peels of vegetables to make a chutney conserves the waste. One is not deprived of the nutrients that are usually lost by throwing in garbage. I have shared orange peel chutney and ridge gourd chutney earlier.
Today, I am sharing a chutney made using Chana Dal. Bengal gram chutney pairs well with idli, dosa or gundapongal. One can use it with hot steamed rice too. It is quite common in many parts of Karnataka to eat chutney and rice.
bengal gram chutney
Bengal gram chutney recipe:
Ingredients:
1+1 teaspoon oil
4 red chilli
2 tablespoon bengal gram
a few curry leaves
1 table spoon coconut
1onion
1 tomato
little coriander
tamarind
salt
For seasoning:
1 teaspoon oil
1/2 teaspoon mustard seed
a little asafoetida
a little turmeric powder
Method:
Take a little oil in a pan, roast bengal gram, put it aside. Next add red chilli and curry leaves, once they are crisp, put them aside.
Add a little oil, saute the onion. Once they are translucent, add tomato to it. Once it is soft, add coriander to it. Saute for a minute, let it cool.
At first, grind the lentil and green chilli. Now, put the cooked onion and tomato and pulse.
Finally, add salt and tamarind to it, give a final pulse.
Put the chutney in a bowl.
Make seasoning, pour it over the chutney and serve.
About the group:
This post is part of Shhh Secret Cooking Group. Priya Vijayakrishnan suggested the theme.as Chutney. I liked her kunukku paniyaram and bookmarked it to try. She is also my partner for this month and the secret ingredients given are curry leaves and tamarind. I gave urad dal and turmeric, she has made raw mango chutney, known as mango thogayal.
Bengal gram chutney
Bengal gram chutney is tasty and makes a good accompaniment with rice, idly or dosa.
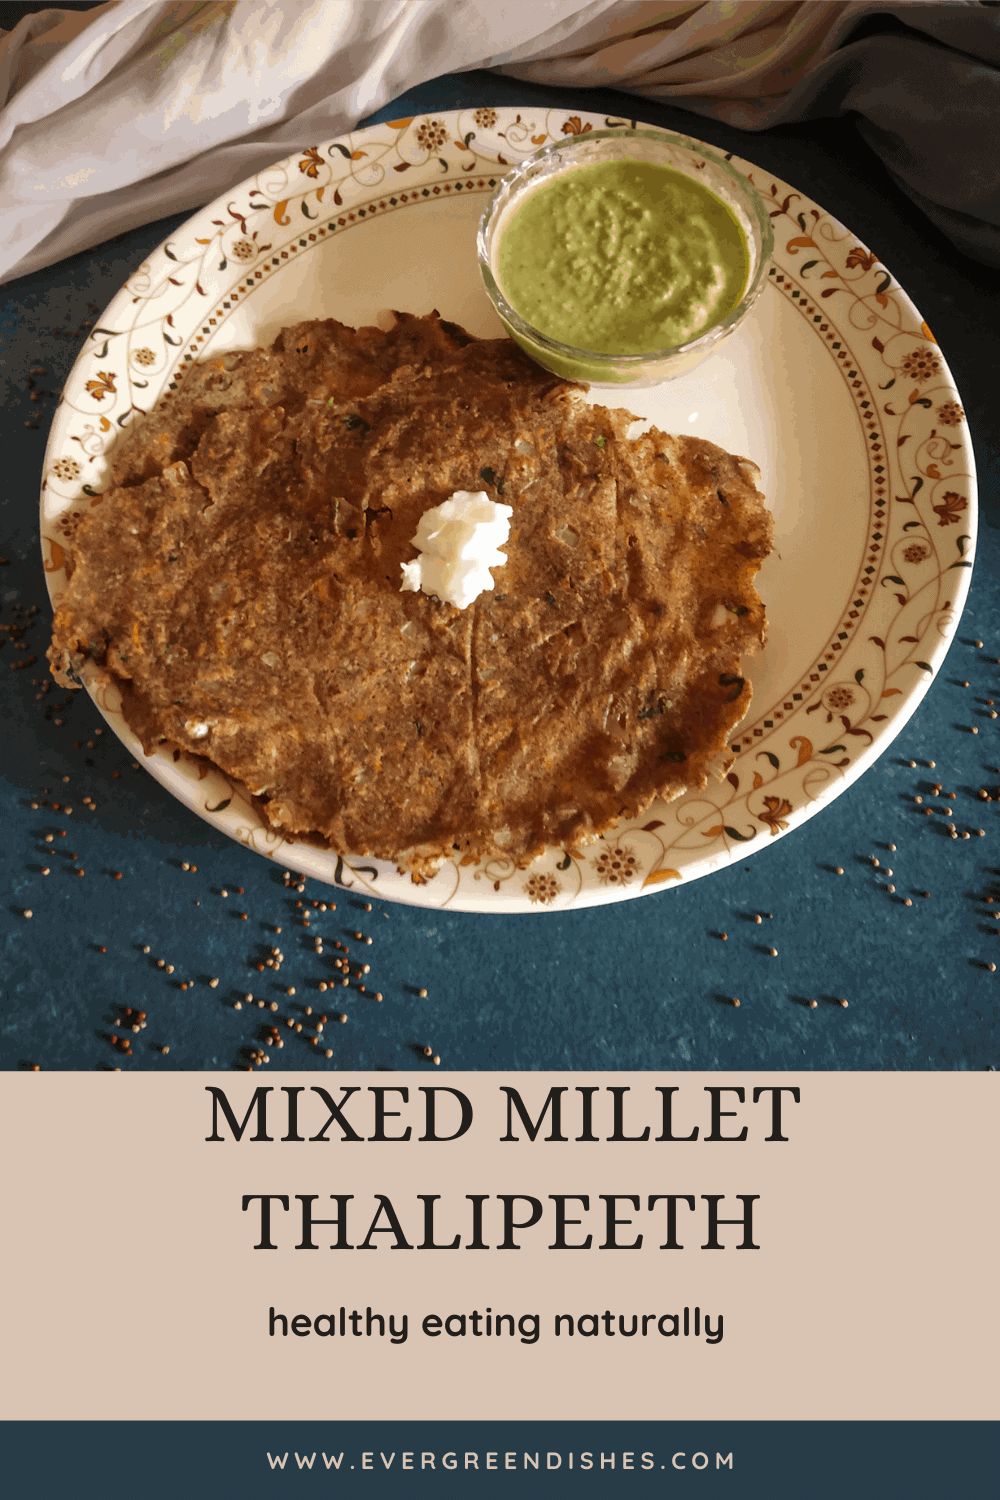
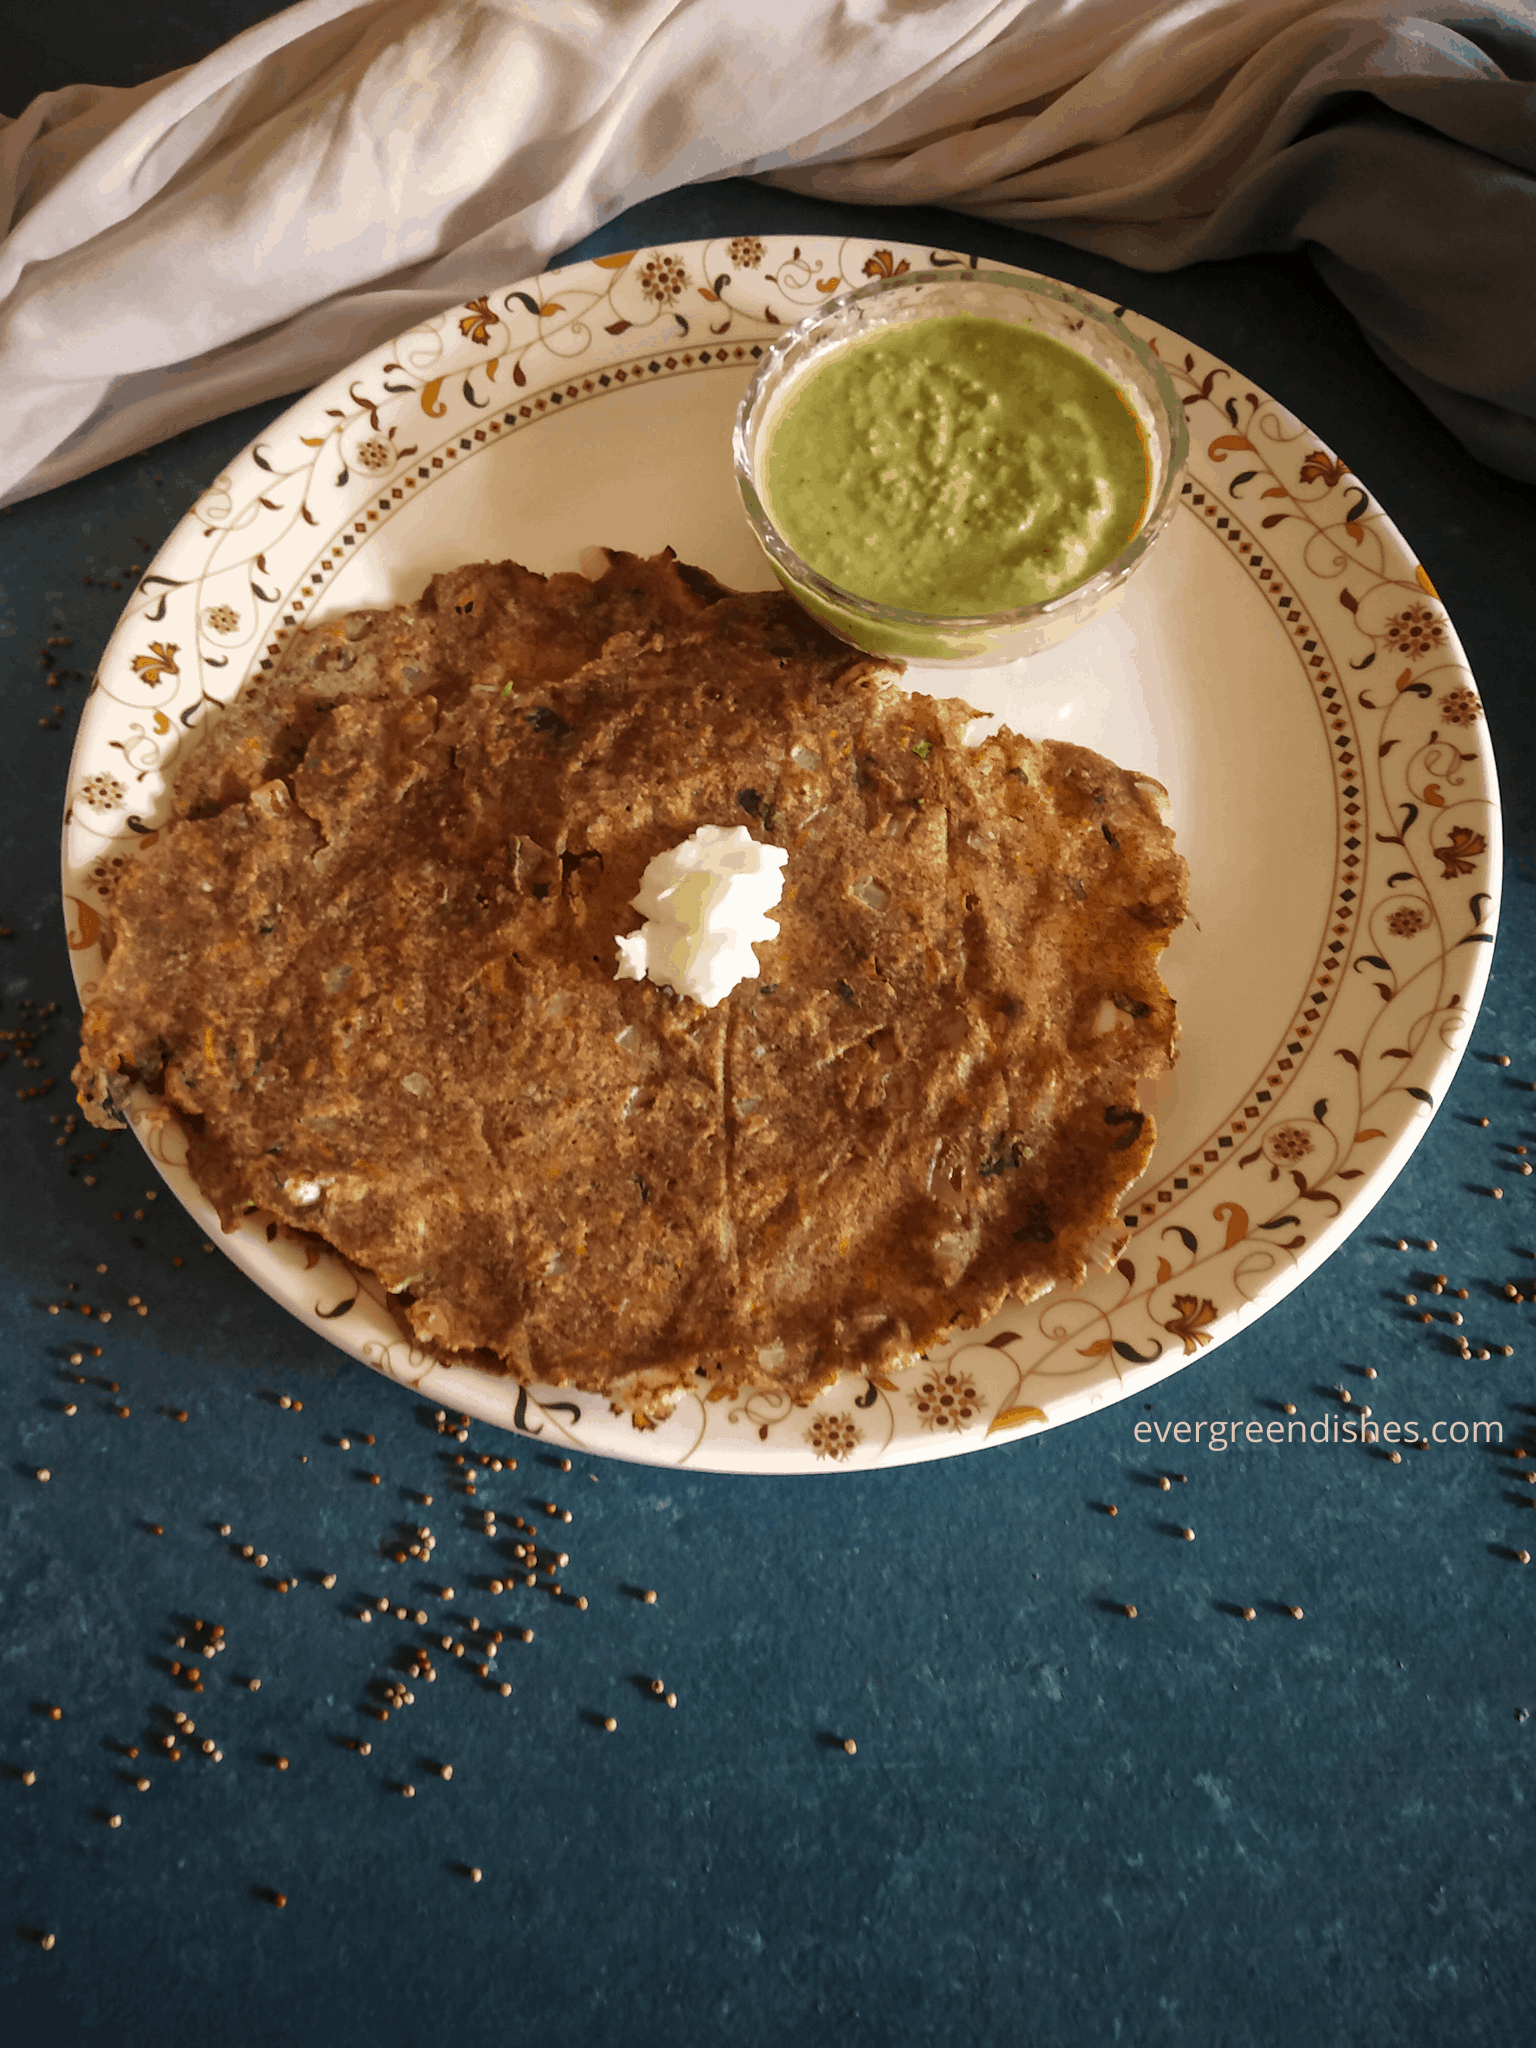
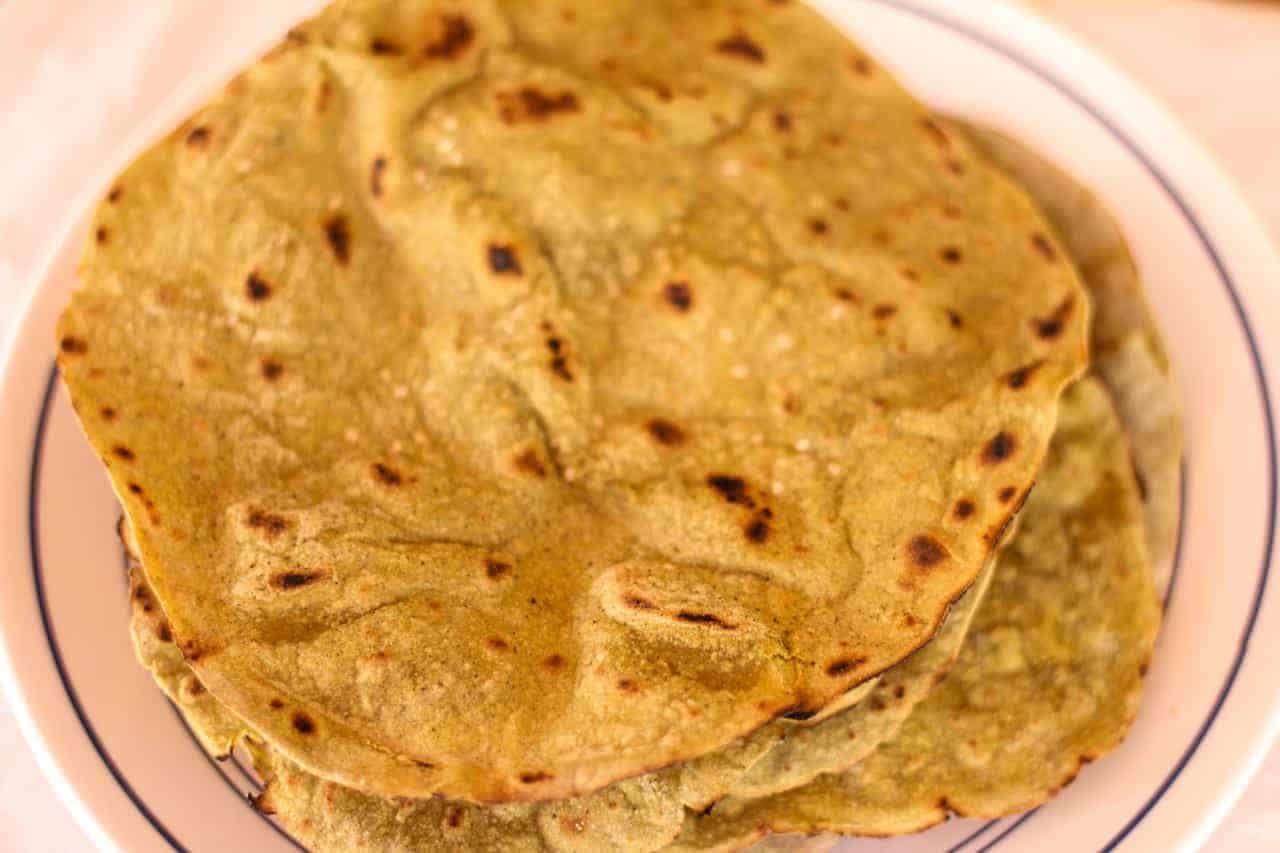
Multi-millet thalipeeth is a healthy twist to the usual one. Different flours are mixed to make a delectable flatbread. It is ideal to serve for breakfast, lunch or dinner.
Thalipeeth is one of the popular recipes from South India. Different flours or at times, only rice flour is mixed with coconut and spices. It is then kneaded to a soft dough and patted into a thin flatbread on a sheet and roasted. It is crispy and tasty. With the increasing importance of millets, we are destined to add them in umpteen ways. We usually mix jowar flour along with rice flour and a little gram flour. But here, I had a packet of multi-millet flour and have used it. Multi millet thalipeeth is a healthy twist to the usual one made with rice flour. It is ideal to serve for breakfast or lunch.
Mixed millet flour is easily available in the super markets. Otherwise, you need to mix equal quantity of finger millet, foxtail millet, kodo millet, pearl millet and little millet along with a little quantity of amaranth. The seeds are usually washed, dried and then finely powdered.
Grate carrot, cut onion into pieces. Cut and wash the fenugreek leaves.
Grind coconut, green chilli and cumin to a paste.
In a wide bowl, add the multi-millet flour and rice flour. Put the grated carrot, onion, methi leaves, ground paste, salt and mix them together.
Put water little at a time and mix to a dough. The dough is softer than the chapathi dough.
Take parchment paper, grease with a little oil. Take a lemon sized ball and pat it slowly with the tip of the fingers to a circle. Spread it slowly into a thin roti
Heat a skillet. Put it on the skillet and allow to cook. Once, it is slightly cooked, the parchment paper can be removed.
Flip to the other side and allow to cook for sometime.
Once it is done, serve hot with coconut chutney.
Take a tip:
Increase the quantity of chilli, if you want it spicy.
Adding of fenugreek leaves is optional. It gives a good taste but must be added in small quantity.
Instead of fenugreek leaves, use fresh coriander leaves.
Quantity of rice flour used may be increased to half a cup.
If you do not have multi-millet flour, take jowar flour and mix it with rice flour. A little gram flour may be added to it.
Jayashree
Multi millet Thalipeeth
Multi-millet thalipeeth is tasty and ideal as breakfast or lunch menu. It is usually served hot with cocnut chutney.
Grate carrot, cut onion into pieces. Cut and wash the fenugreek leaves.
Grind coconut, green chilli and cumin to a paste.
In a wide bowl, add the multi-millet flour and rice flour. Put the grated carrot, onion, methi leaves, ground paste, salt and mix them together.
Put water little at a time and mix to a dough. The dough is softer than the chapathi dough.
Take parchment paper, grease with a little oil. Take a lemon sized ball and pat it slowly with the tip of the fingers to a circle. Spread it slowly into a thin roti
Heat a skillet. Put it on the skillet and allow to cook. Once, it is slightly cooked, the parchment paper can be removed.
Flip to the other side and allow to cook for sometime.
Once it is done, serve hot with coconut chutney.
Take a tip:
Increase the quantity of green chilli if you need it more spicy.
Fenugreek leaves is optional, it gives a good taste. One can use fresh coriander leaves too.
Quantity of rice flour may be increased to half a cup.
Notes
ncrease the quantity of chilli, if you want it spicy.
Adding of fenugreek leaves is optional. It gives a good taste but must be added in small quantity.
Instead of fenugreek leaves, use fresh coriander leaves.
Pin Multi Millet Thalipeeth to a Healthy Recipes Board on Pinterest:
Multi millet thalipeeth
If you ever make this recipe, take a picture and share it by tagging @foodiejayashree on Instagram or @evergreendishes on Facebook. I will be glad to see and share your creation further.
Check out my e-books on Amazon. Do not miss any post, subscribe to get all updates and an e-book for free !
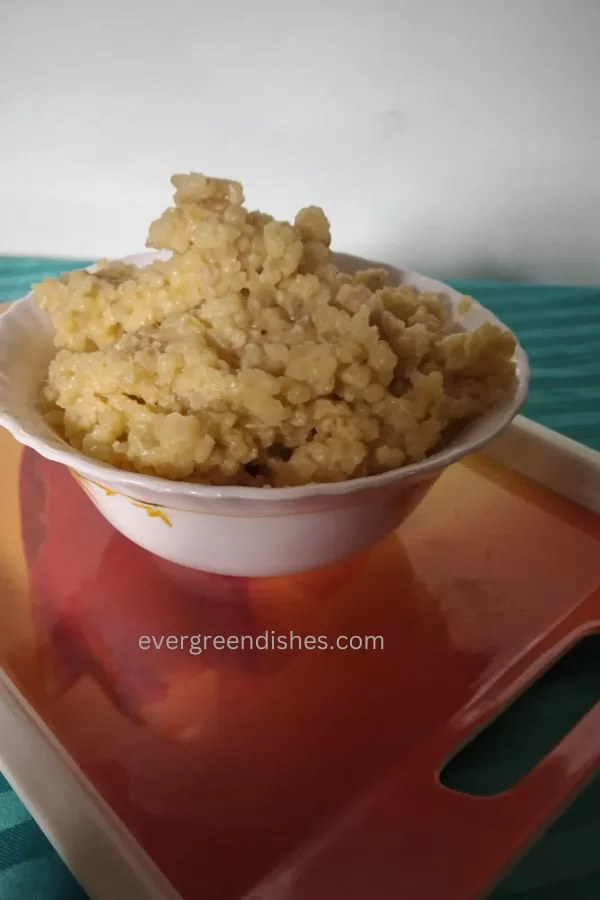
Dalia payasam is a traditional sweet dish from Karnataka. It is rich in nutrients and a good food for people of all ages.
What is Dalia ?
Dalia is broken wheat grain, it is made from the whole grain. It is used in cooking different kind of dishes as upma, pulav, payasam and porridge.
What are the other names by which it is known?
Daliya is commonly known as broken wheat or cracked wheat. In Indian languages it is known as godhuma rava or samba rava.
Is Dalia and Bulgur, one and same ?
Dalia is also known as cracked wheat. It is made by milling raw wheat berries. Bulgur wheat is different from dalia. It is made from parboiled wheat berries. dried and then broken into pieces.
Is dalia healthy ?
Yes, dalia is a good source of nutrition. It can be used in various ways.
What are the other kheer/ payasam recipes that you prepare ?
Kheer/ payasam is one of the essentials during festivities. Rice kheer, moong dal payasam are the sweet dishes that children like and usually prepared. Custard apple kheer is utterly delicious. Komala Payasa is a sweet delicacy from West Bengal.
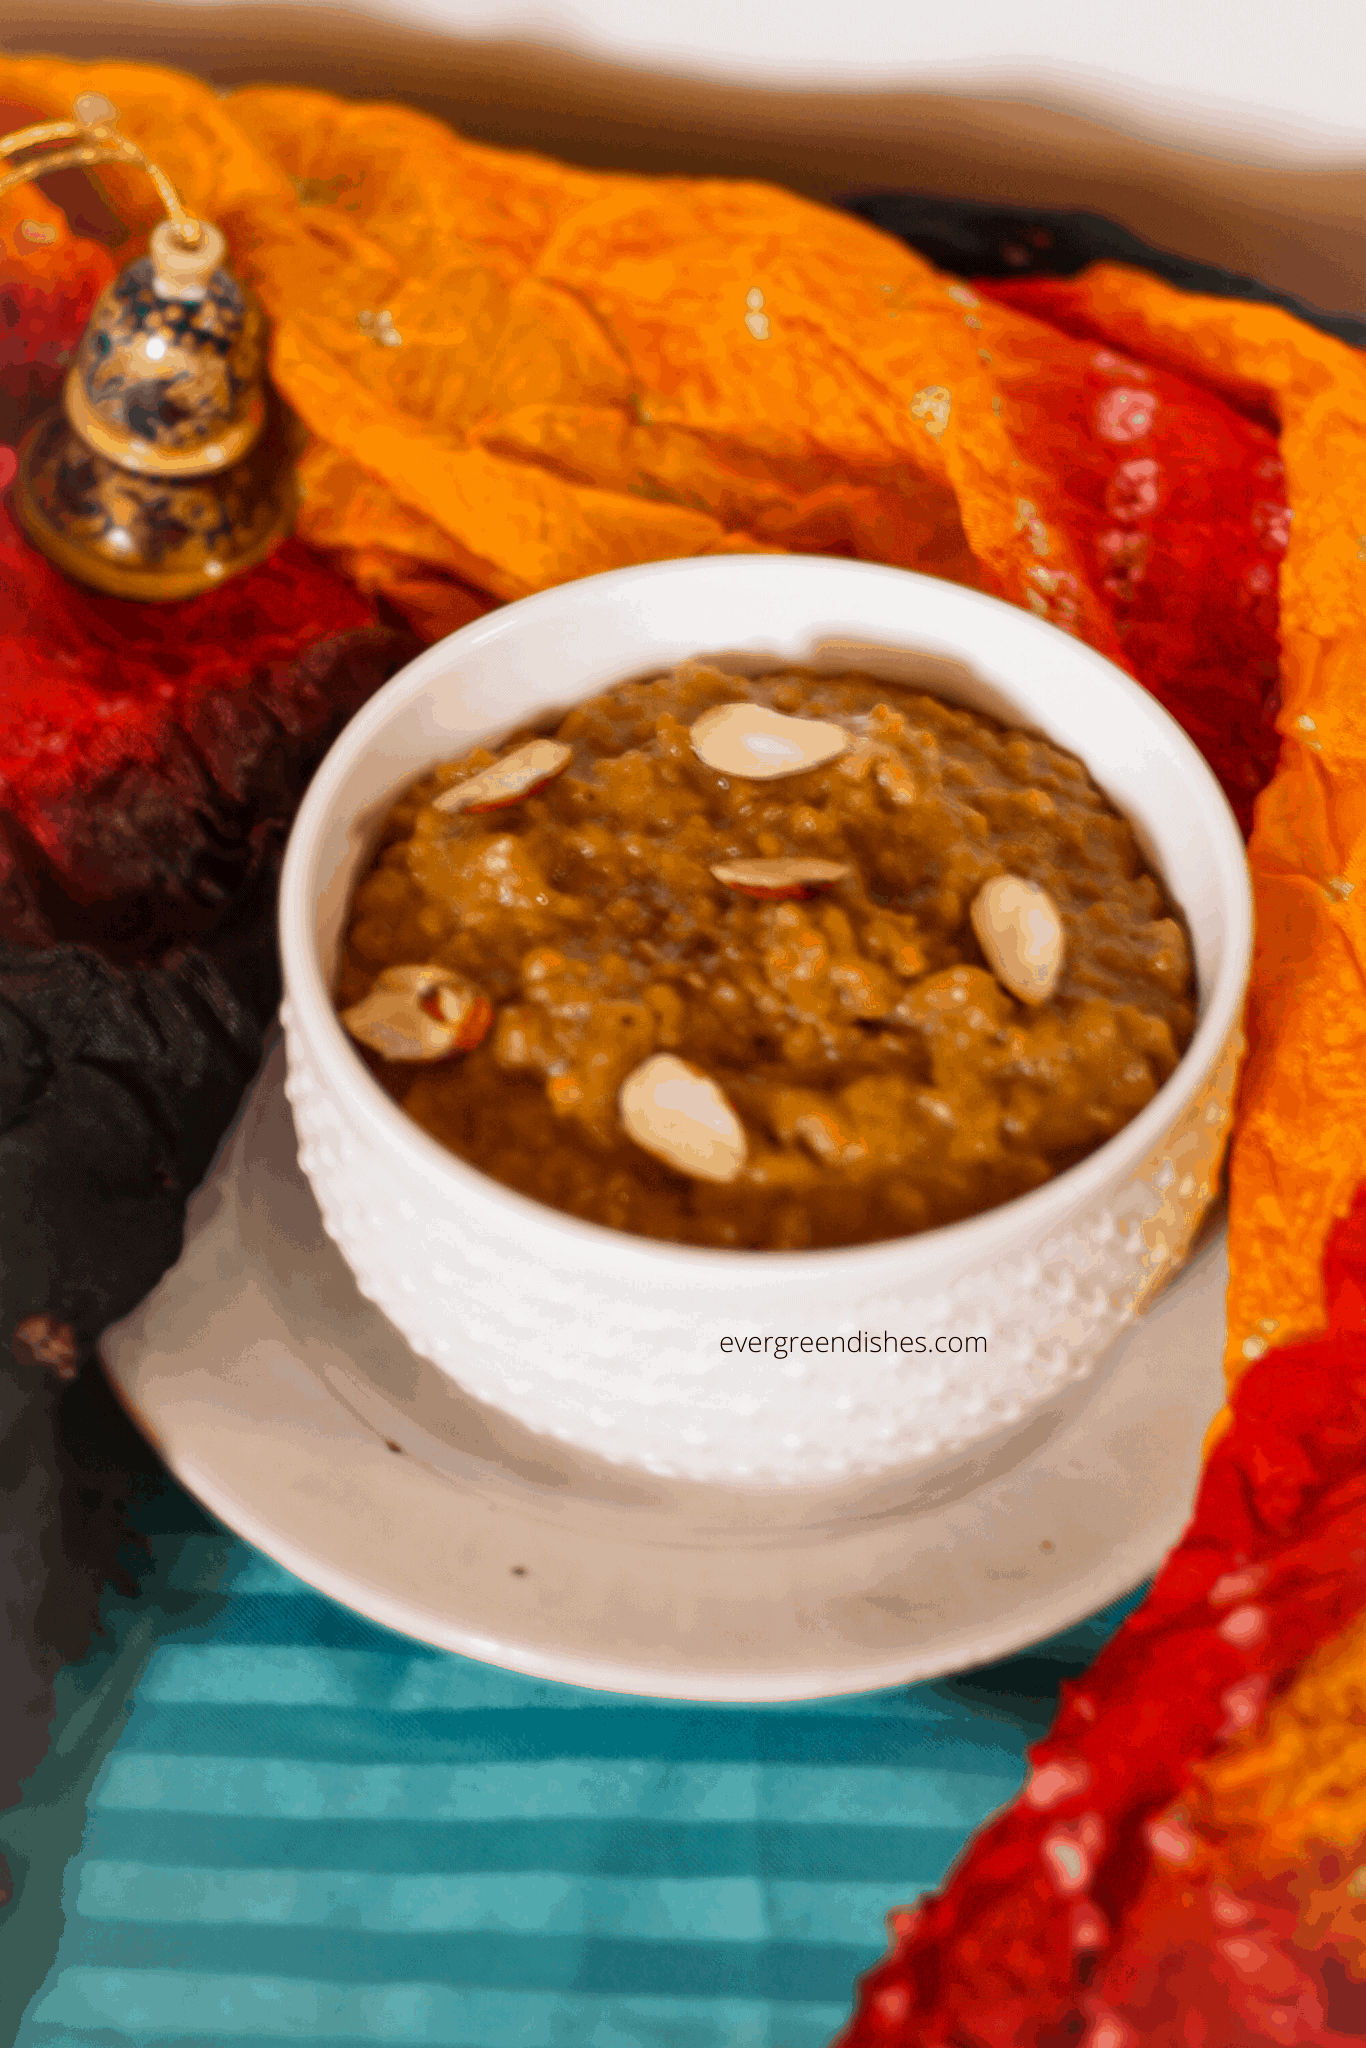
dalia payasam
Dalia Payasam / Broken wheat kheer
Ingredients:
2 teaspoon ghee
6 almond slivered
1 cup dalia Measurement: 1 cup= 150 ml
3 cups milk
2 cup water
1 cup grated jaggery
1/2 teaspoon cardamom powder
Method:
In a small pressure cooker and ghee and roast the almond pieces. Put them aside.
In the same pan, add dalia and roast until it slightly changes colour and gives a good aroma.
Put two glasses of milk and water to it, give a stir, close the lid and cook for one whistle.
Once the pressure releases by itself, remove the lid and mix it. Add jaggery to it and allow to cook. Adjust the consistency by adding the remaining milk and some water if needed.
Finally, add cardamom powder, keep it aside. Garnish with roasted cashew pieces.
Dalia payasam is ready to serve.
Take a tip:
Only milk may be used.
Cashew nut and raisin can be used.
A few strands of saffron enhances the taste.
Use more quantity of jaggery if you want more sweetness.
In a small pressure cooker and ghee and roast the almond pieces. Put them aside.
In the same pan, add dalia and roast until it slightly changes colour and gives a good aroma.
Put two glasses of milk and water to it, give a stir, close the lid and cook for one whistle.
Once the pressure releases by itself, remove the lid and mix it. Add jaggery to it and allow to cook. Adjust the consistency by adding the remaining milk and some water if needed.
Finally, add cardamom powder, keep it aside. Garnish with roasted cashew pieces.
Dalia payasam is ready to serve.
Notes
Only milk may be used.
Cashew nut and raisin can be used.
A few strands of saffron enhances the taste.
Pin it for later:
dalia payasam
If you ever make this recipe, take a picture and share it by tagging @foodiejayashree on Instagram or @evergreendishes on Facebook. I will be glad to see and share your creation further.
Check out my e-books on Amazon. Do not miss any post, subscribe to get all updates and an e-book for free !
Whole wheat strawberry cake is tasty and naturally healthy. It has no butter, sugar or egg in it. Strawberries give a good taste to this bake.
When it’s raining strawberries, you need to bake at least once isn’t it ? Life is good living and enjoying each moment. Baking is therapeutic and helps to relax the senses.
Today, it’s a healthy bake with strawberry. Let us see what ingredients are used to make it healthier and the other options that you have here:
Wheat flour: Atta or wheat flour is naturally healthy and better than all purpose flour.
Corn flour: As cakes made with corn flour turn out dense, a little corn flour is added. Do not skip on sieving the flour.
Honey : As I thought of baking a healthy cake, I have used honey here. Castor sugar or brown sugar may be used.
Curd : It is the replacement for egg.
Baking powder and baking soda : They are the essentials of baking.
Milk : Milk is added to get the right consistency of the batter.
1.75 cup wheat flour/ atta (measurement used 1 cup=250ml)
2 tbsp cornflour
1 teaspoon baking powder
1/2 teaspoon baking soda
1/2 cup honey
1/2 cup milk
3/4 cup curd
1/2 cup oil
8 strawberries
Method:
Wash and cut the strawberries into medium sized chunks. Take the dry ingredients and sieve them together twice.
Mix oil, curd, honey and milk. Whisk them together.
Add the dry ingredients and slowly mix them together.Add the strawberry pieces to it.
Heat the microwave oven.
Take the baking tray, line it with a parchment paper. Pour the cake mixture and bake it for ten minutes. A toothpick inserted should come out clean. Once it is done, allow to cool completely. Cut and serve.
Take a tip:
The strawberries that I used were large in size.
You may bake it in the oven.
Sieve the flour as the cakes with wheat flour are dense.
Whole Wheat Strawberry Cake
Whole wheat strawberry cake is tasty and a healthy twist to the usual one. It has no sugar, egg or butter in it.
Wash and cut the strawberry into medium size pieces.
Take the dry ingredients and sieve them together.
Mix oil, curd, honey and milk. Whisk them together.
Add the dry ingredients and slowly mix them together.Add the strawberry pieces to it.
Heat the microwave oven.
Take the baking tray, line it with a parchment paper. Pour the cake mixture and bake it for ten minutes. A toothpick inserted should come out clean.
Once it is done, allow it to cool completely. Cut and serve.
Notes
All purpose flour may be used.
Powdered sugar may be used. If using sieve it with the dry ingredients.
The strawberries that I used were large in size.
You may bake it in the oven.
Pin it for later :
Whole wheat strawberry cake
f you ever make this recipe, take a picture and share it by tagging @foodiejayashree on Instagram or @evergreendishes on Facebook. I will be glad to see and share your creation further.
Check out my e-books on Amazon. Do not miss any post, subscribe to get all updates and an e-book for free !
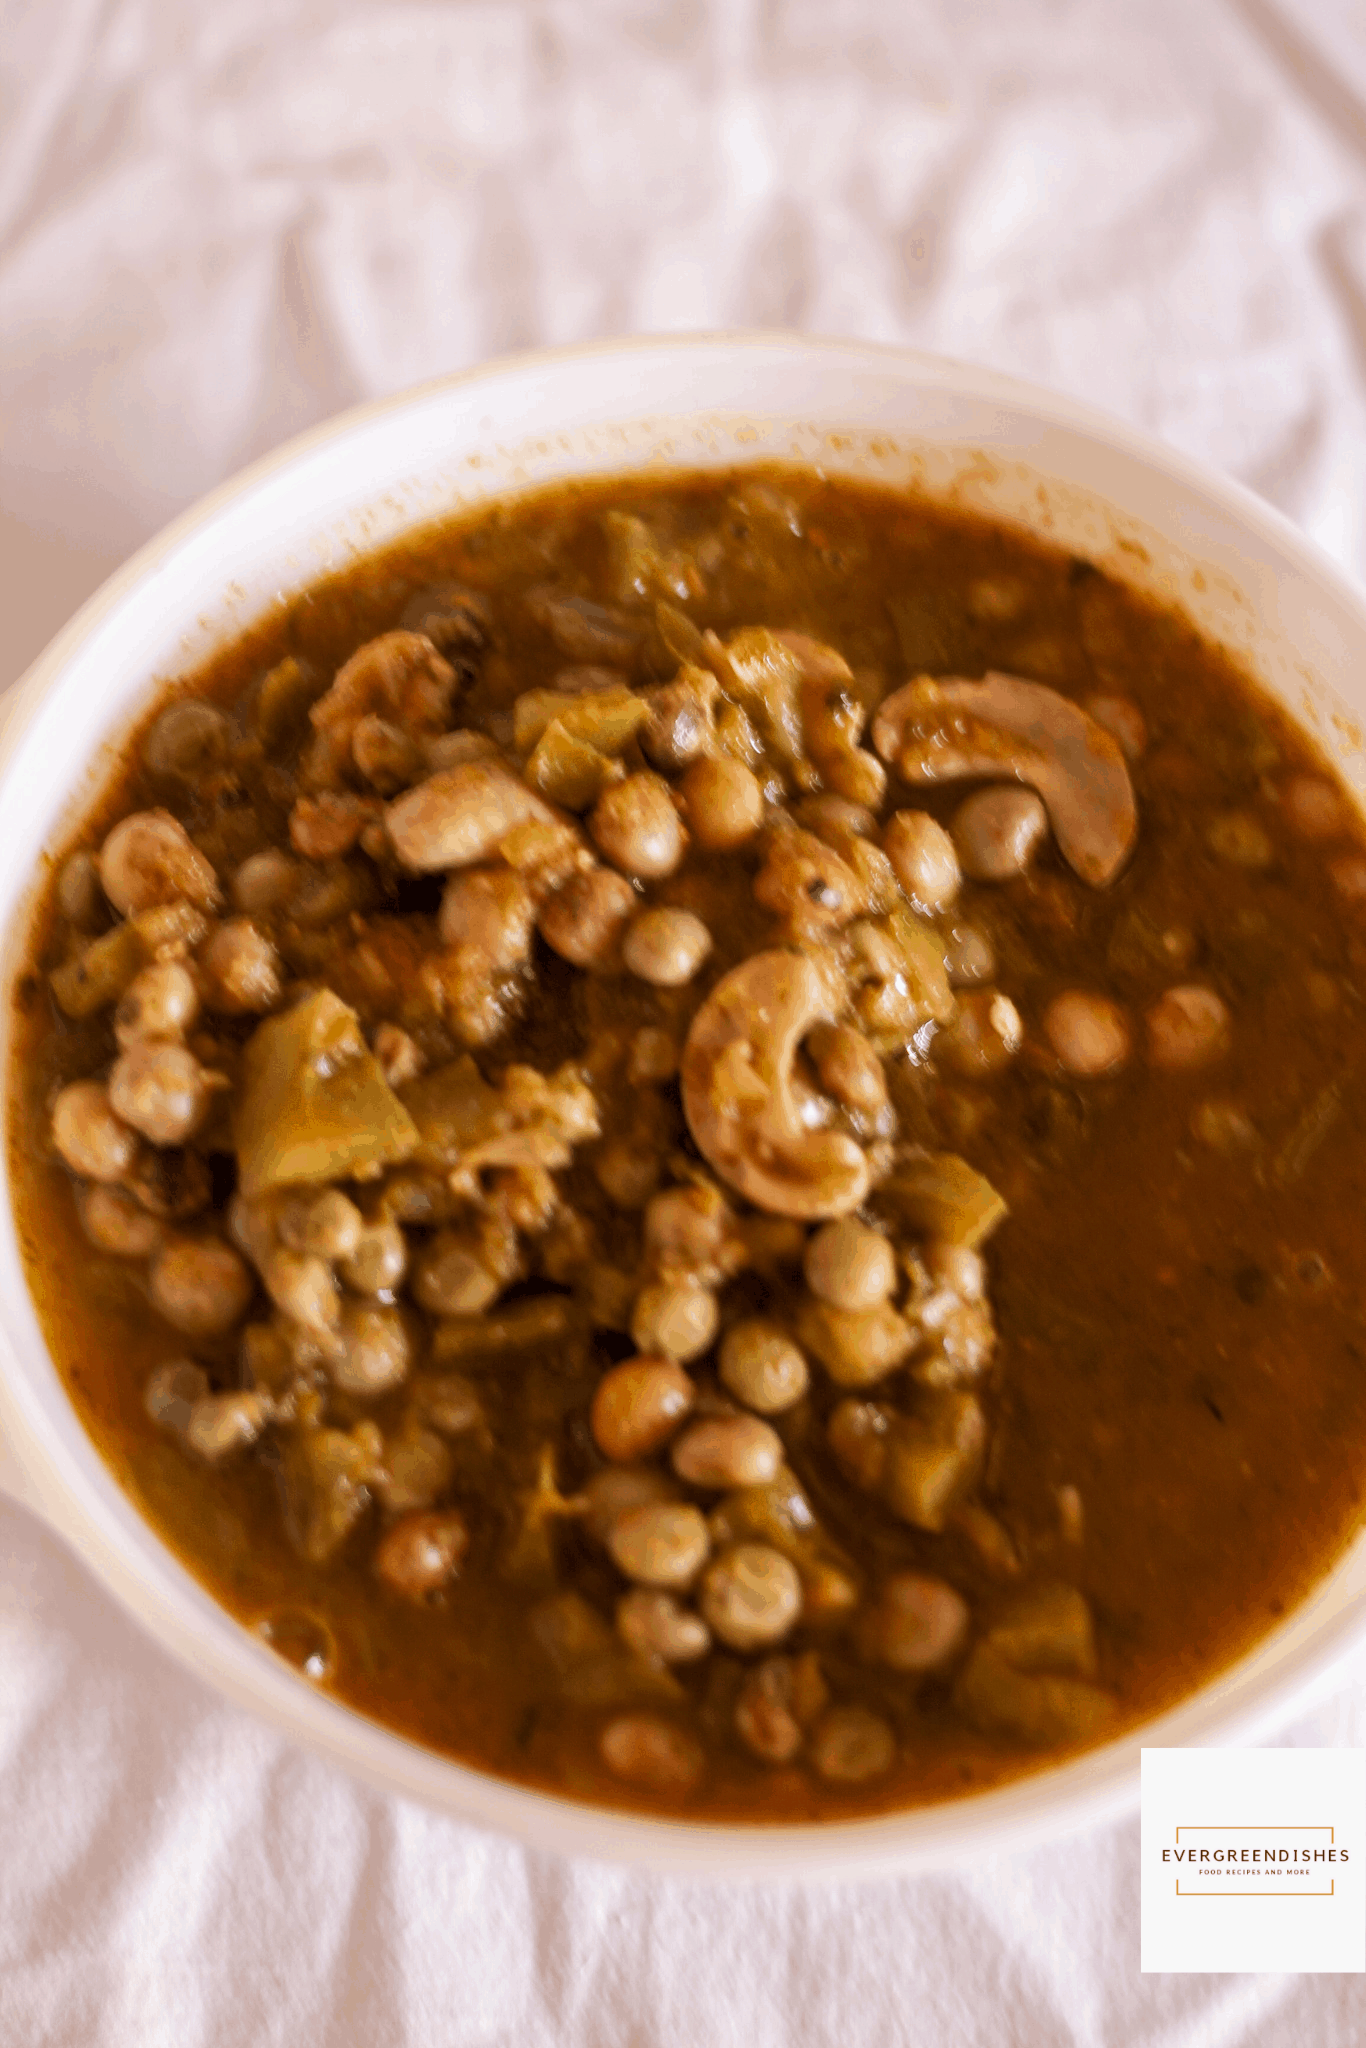
Tuvar and Capsicum Masala is a winter treat, ideal to pair with chapati or phulka. It is vegan and gluten-free. It makes a good side dish for lunch, brunch or dinner.
Tuvar lilva or fresh pigeon peas in a winter crop, it is commonly used in Gujarati households to make a variety of dishes. I love using it to make a curry. I also make a kachori but it has not made to the blog yet.
Tuvar lilva is the fresh form which is later dried to make lentil we consume daily to make dal.
Today, before I proceed further I want to discuss the difference between vegan and vegetarian.
What is Vegan diet?
Vegan is a type of vegetarian diet which excludes dairy products, eggs, meat and any other animal derived ingredient. These include gelatin, honey, casein, pepsin, carnine, whey, carmine Thus vegans use substitutes as almond milk, soy milk .
Difference between vegetarian and vegans
Vegetarians and vegans differ in their beliefs regarding the use of animal products. Vegetarians consume animal- derived products such as milk and curd but vegans avoid them totally. They use other form of substitutes.
What are the different kind of milk substitutes for vegans.
The most widely used non-dairy milks are hazelnut, cashew, soy, almond, oat and even hemp. Different kind of nuts can be used by soaking overnight, blending and straining. These are good substitutes to use in cooking also.
tuvar and capsicum masala
Let’s get to the recipe of Tuvar and Capsicum Masala
Ingredients:
1 cup tuvar
8 cashew
1 tablespoon oil
1/2 teaspoon cumin
1 capsicum
salt to taste
little kasuri methi
Onion Paste:
1 onion
Masala paste:
3 tomato
4 cloves garlic
5 green chilli
1/2 bunch coriander
2 cloves
2 cardamom
Method:
Boil tuvar along with cashew pieces. A pinch of salt may be added to it.
Make onion paste and keep it aside.
Blanch the tomatoes. Once it is cool, make a paste with the listed ingredients under “Masala Paste”.
Cut capsicum into small pieces.
Take oil in a pan, add cumin. As it splutters, put the onion paste. Saute it for a minute, now throw in the capsicum pieces. Continue to saute for sometime.
Now, add the masala paste to it and saute it. Let cook for sometime.
Add the cooked tuvar along with the water in it.
Add salt. Adjust the consistency of the gravy.
Finally, sprinkle kasuri methi to it. Let the flavours imbibe for two minutes.
Tuvar and capsicum masala is ready to serve.
Take a tip:
Boil the cashew with tuvar, it gives a good taste to the curry. The bland taste of tuvar is changed.
Kasuri methi is dried fenugreek leaves, available in any super market. It gives a good aroma to the dish.
Reduce the number of green chilli if you want it less spicy.
Smaller and dark coloured capsicum are spicy while the larger and light coloured are perfect for using in curries.
Tuvar and Capsicum Masala
uvar and capsicum masala makes a tasty side dish with chapati or phulka. It is vegan and gluten-free.
Boil tuvar along with cashew pieces. A pinch of salt may be added to it.
Make onion paste and keep it aside.
Blanch the tomatoes. Once it is cool, make a paste with the listed ingredients under “Masala Paste”.
Cut capsicum into small pieces.
Take oil in a pan, add cumin. As it splutters, put the onion paste. Saute it for a minute, now throw in the capsicum pieces. Continue to saute for sometime.
Now, add the masala paste to it and saute it. Let cook for sometime.
Add the cooked tuvar along with the water in it.
Add salt. Adjust the consistency of the gravy.
Finally, sprinkle kasuri methi to it. Let the flavours imbibe for two minutes.
Tuvar and capsicum masala is ready to serve.
Pin it for later:
Tuvar and Capsicum Masala
About the event :
Sending this to Veganuary month at Foodies+Bloggers Community on Facebook. A few more vegan recipes from my blogger friends.
If you ever make this recipe, take a picture and share it by tagging @foodiejayashree on Instagram or @evergreendishes on Facebook. I will be glad to see and share your creation further.
Check out my e-books on Amazon. Do not miss any post, subscribe to get all updates and an e-book for free !
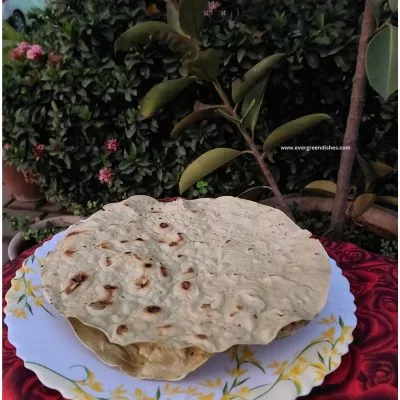
Sajje Rotti / Pearl Millet Roti / Bajra Roti is a vegan and gluten-free, unleavened flat bread from South India. It is usually made crisp and served with different accompaniments. It is commonly prepared during Sankranti in South India.
What is Makar Sankranti ?
Makar Sankranti is a popular festival celebrated according to the Hindu calendar. It is dedicated to Sun God, when the sun enters the zodiac sign of Capricorn and transcends towards the North or Uttarayan. Thus, this festival is also known as Uttarayan. It is also known as Magha, Pongal and Bhogi. It officially marks the end of winter solstice and the beginning of longer days and autumn. It is also a harvest festival, it marks the beginning of harvest season when new crops are worshipped and relished. This festival is celebrated as per the solar cycle, it usually falls on the same date every year, Jan 14 / 15.
Celebrations in Karnataka
In Karnataka this festival is celebrated over two days, the first day is Bhogi and the next day is Makar Sankranti. As it is the festival of harvest, on the day of Bhogi, all married women donate fresh harvest as grains and pulses to an elderly married lady. It is a traditional custom passed through generations. The menu prepared on this day bajra roti, brinjal stir fry or stuffed, green gram stir fry, raw tomato chutney, spicy pongal and gojju. The food on this day is scrumptious.
The next day is Makar Sankranti. On this day, front yard of every house is decorated with beautiful kolam in breathtaking designs adorned vibrantly and painstakingly. The sesame plays a very important role during this festival. Sankranti Ellu is prepared and offered to the Lord. It is also exchanged with all friends and family members. Sweets such as til ladoos and chikkis are prepared. Even lamps made with sesame and jaggery are lit. The sweet dish prepared on this day is usually Sakkarai Pongal but one can prepare any other sweet.
Sajje rotti / pearl millet roti / bajra roti
Why is Sesame used during this festival ?
Sesame is considered as a seed par excellence and consumed and donated during Makar Sankranti. A story in our mythology says that God Yama blessed the sesame seed and they are epitome of immortality.
According to nutritionist Shruti Sharma, sesame is rich in nutrients. It consists of vitamins, oils, calcium, iron, magnesium, copper, zinc, Vitamin B6 and folate. It helps to support a healthy digestive system. The copper present in it helps to reduce swelling and pain due to arthritis.Magnesium gives relief to respiratory diseases and the zinc helps in maintaining the bone health. It is one of the essential foods for vegetarians. The season needs food that helps to keep the body warm and healthy, sesame does it in a good way.
What other side dishes can one use with Sajje Rotti ?
Many different kind of dishes such as dal with methi and cabbage stir fry may be prepared. Chutneys are ideal to serve with bajra roti. The raw tomato chutney tastes awesome. Gongura chutney is also often served with it. Dal with green leaf is commonly prepared in most south indian homes.
Can sajje rotti be stored?
As these rotis are crisp, you can stored for a couple of days. Keep them in a closed container. You can make them ahead and serve when needed.
Let us now get to the recipe of Sajje Rotti :
Equipments:
wide bowl or plate for mixing and kneading
a small bowl to boil water
skillet ( slightly curved and a different one is kept for roti)
spatula
a small piece of muslin cloth to smear the water
two plate to stack them
Ingredients:
1 cup bajra flour
1/4 teaspoon turmeric powder
a little salt
1/2 cup hot water
1/2 cup normal water (use as needed)
Other ingredients:
1 tablespoon sesame
flour for dusting
Method:
Put the flour in a wide bowl.
Add salt and turmeric powder to it. Mix it thoroughly.
Boil the water.
Slowly, put the water and mix the flour thoroughly with the fingers.
Now, use normal water to further mix the dough. Make it into a pliable dough by kneading it well with the palm.
Take a small ball of the dough, dust with the flour and beat it a little. Smear a few sesame seeds and continue to make it to a thin circle. You may do it on the rolling board or directly on the kitchen platform.
Heat a skillet, slowly pick the roti and put it on the skillet. Smear a little water over it.
Once it is done, turn it to the other side and roast it. Usually, this is done directly on the stove and put aside.
Repeat for the rest of the dough.
Take a tip:
Use good quality flour. Always use fresh flour while making rotis as it is easier to prepare, otherwise they tear apart.
Making rotis needs a little practice, but one can easily do it with a little practice. Each time, knead the ball of dough and then begin to tap it.
Applying of water is usually done with a small piece of muslin cloth. The cloth is dipped in a small bowl of water and applied to the roti, this helps in proper cooking of the roti.
These rotis are usually made crisp by keeping near the flame or on the skillet for sometime in between while making them.
You cannot roll the rotis with a rolling pin in this method. This is to be beaten with the palm only. The method to roll with a rolling pin is different, I am yet to learn that method. After the roti is beaten, you may use the rolling pin to make it even and thinner.
Evergreendishesdev
Sajje Rotti / Bajra Roti / Pearl Millet Roti
Sajje Rotti is vegan, gluten-free flat bread made from pearl millet. It is usually made on the day before Makar Sankranti in South India.
Add salt and turmeric powder to it. Mix it thoroughly.
Boil the water.
Slowly, put the water and mix the flour thoroughly with the fingers.
Now, use normal water to further mix the dough. Make it into a pliable dough by kneading it well with the palm.
Take a small ball of the dough, dust with the flour and beat it a little. Smear a few sesame seeds and continue to make it to a thin circle. You may do it on the rolling stone or directly on the kitchen platform.
Heat a skillet, slowly pick the roti and put it on the skillet. Smear a little water over it.
Once it is done, turn it to the other side and roast it. Usually, this is done directly on the stove and put aside.
Repeat for the rest of the dough.
Notes
Use good quality of flour.
Making of rotis needs a little practice, but one can do it. Each time, knead the ball of dough and then begin to tap it.
Applying of water is usually done with a small piece of muslin cloth. The cloth is dipped in a small bowl of water and applied to the roti, this helps in proper cooking of the roti.
These rotis are usually made crisp by keeping near the flame or on the skillet for sometime in between while making them.
Pin it for later :
sajje rotti
If you ever make this recipe, take a picture and share it by tagging @foodiejayashree on Instagram or @evergreendishes on Facebook. I will be glad to see and share your creation further.
Check out my e-books on Amazon. Do not miss any post, subscribe to get all updates and an e-book for free !
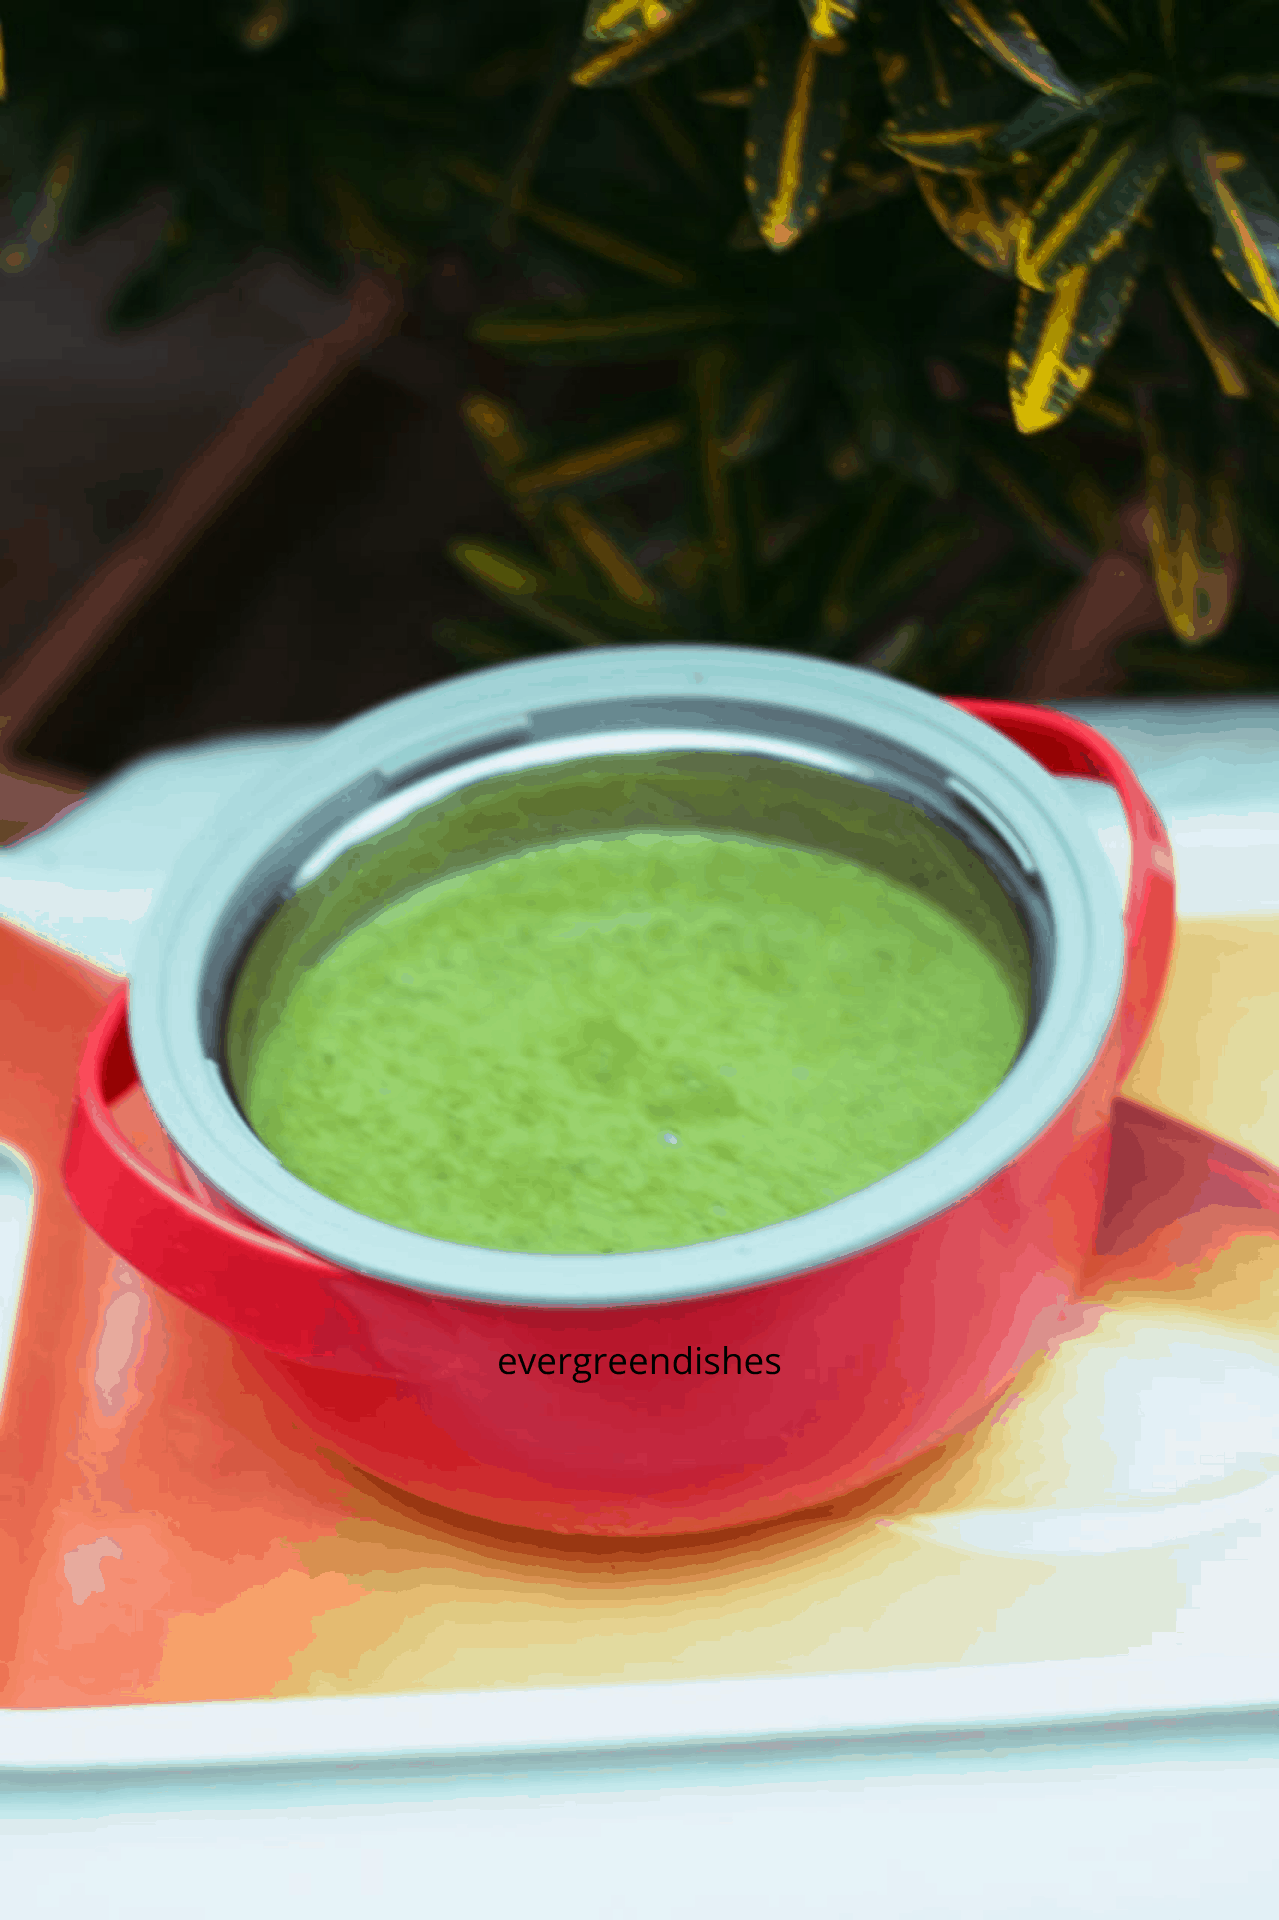
Green Pea Soup is a flavoursome soup to enjoy during winter season. Addition of a few mint leaves gives a good taste to it.
Winter is here and calls for warm drinks and fried snacks. The vendor lady brings a stack of peas everyday, I love these green beauties but how much can one store! Well, I made this soup and it was perfect for the cold nights.
There is hardly any chopping involved, and peas are usually shelled and put in the freezer.
The quantity given here produces more than six bowls of the drink. Feel free to reduce the quantity or you can store it in the refrigerator and use the next day.
green pea soup
Nutrients in Green Peas :
Peas are in rich in Vitamin A, B, C E, zinc and calcium.
Benefits of green peas:
Peas are packed with anti-oxidants. They help to build the immune system.
The anti-inflammatory nutrients in peas helps in reducing the risk of diabetes, heart disease and arthritis.
Peas are rich in fiber and protein, it slows down the break down of carbohydrates and helps to control blood sugar.
They have low-glycemic index.
They help to prevent inflammation.
Portion Size:
The recommended quantity is half cup serving. One should be careful as peas are relatively high in carbohydrates.
Other Soup Recipes :
Tomato soup is the family favourite. Of late, it is the Indian Shorba that we enjoy. The carrot soup is also ideal for those who love Indi-Chinese cuisine. Children prefer manchow soup as it has a topping of noodles.
About the event:
Sending this to Hot Pot theme at Shhh secretly challenge group. The theme was suggested by Priya Iyer. She has recipes of different cuisines on her blog. I loved her Indian Style Vegetable Quesdilla and bookmarked it to try. Here, members are paired as partners and two secret ingredients are exchanged. The dish is prepared using the given ingredients and later other members try to find the secret ingredient. I was paired with Narmadha of Nams corner, she gave me salt and pepper and I prepared this tasty soup. I had given bengal gram and green chilli and tasty masala vada is perfect for the season.
green pea soup
Green Pea Soup Recipe
Ingredients:
2 cup green peas 1 cup= 200 ml
20 mint leaf
1 onion
2 teaspoon butter
1 teaspoon olive oil
salt to taste
pepper powder
2 cups of stock or water
Method:
Cut the onion into medium bits.
Take oil and butter in a pan. Add onion to it. Saute it for sometime.
Put green peas and mint and cook further. Put a little water if needed.
Once it cooked, let cool. Make a puree of it.
Remove it in a pan, add water or stock to it. Put salt and pepper powder to it. Let it cook for five minutes.
Green pea soup is ready to serve.
Take a tip:
Stock can be prepared ahead and stored. Usually vegetables are put in it. But I have used the gratings that remain and are to be thrown. Put gratings of cucumber, a few stalks of coriander, clean peel of any vegetable, a few onion pieces in a litre of water and boil for sometime. Later, strain it and use the water as stock. Remember, to wash the gratings before using them.
Addition of mint gives a good taste to it.
Evergreendishesdev
Green Pea Soup
Green pea soup is healthy, tasty winter warmer. It is ideal to make it when fresh peas are available.
If you ever make this recipe, take a picture and share it by tagging @foodiejayashree on Instagram or @evergreendishes on Facebook. I will be glad to see and share your creation further.
Check out my e-books on Amazon. Do not miss any post, subscribe to get all updates and an e-book for free !
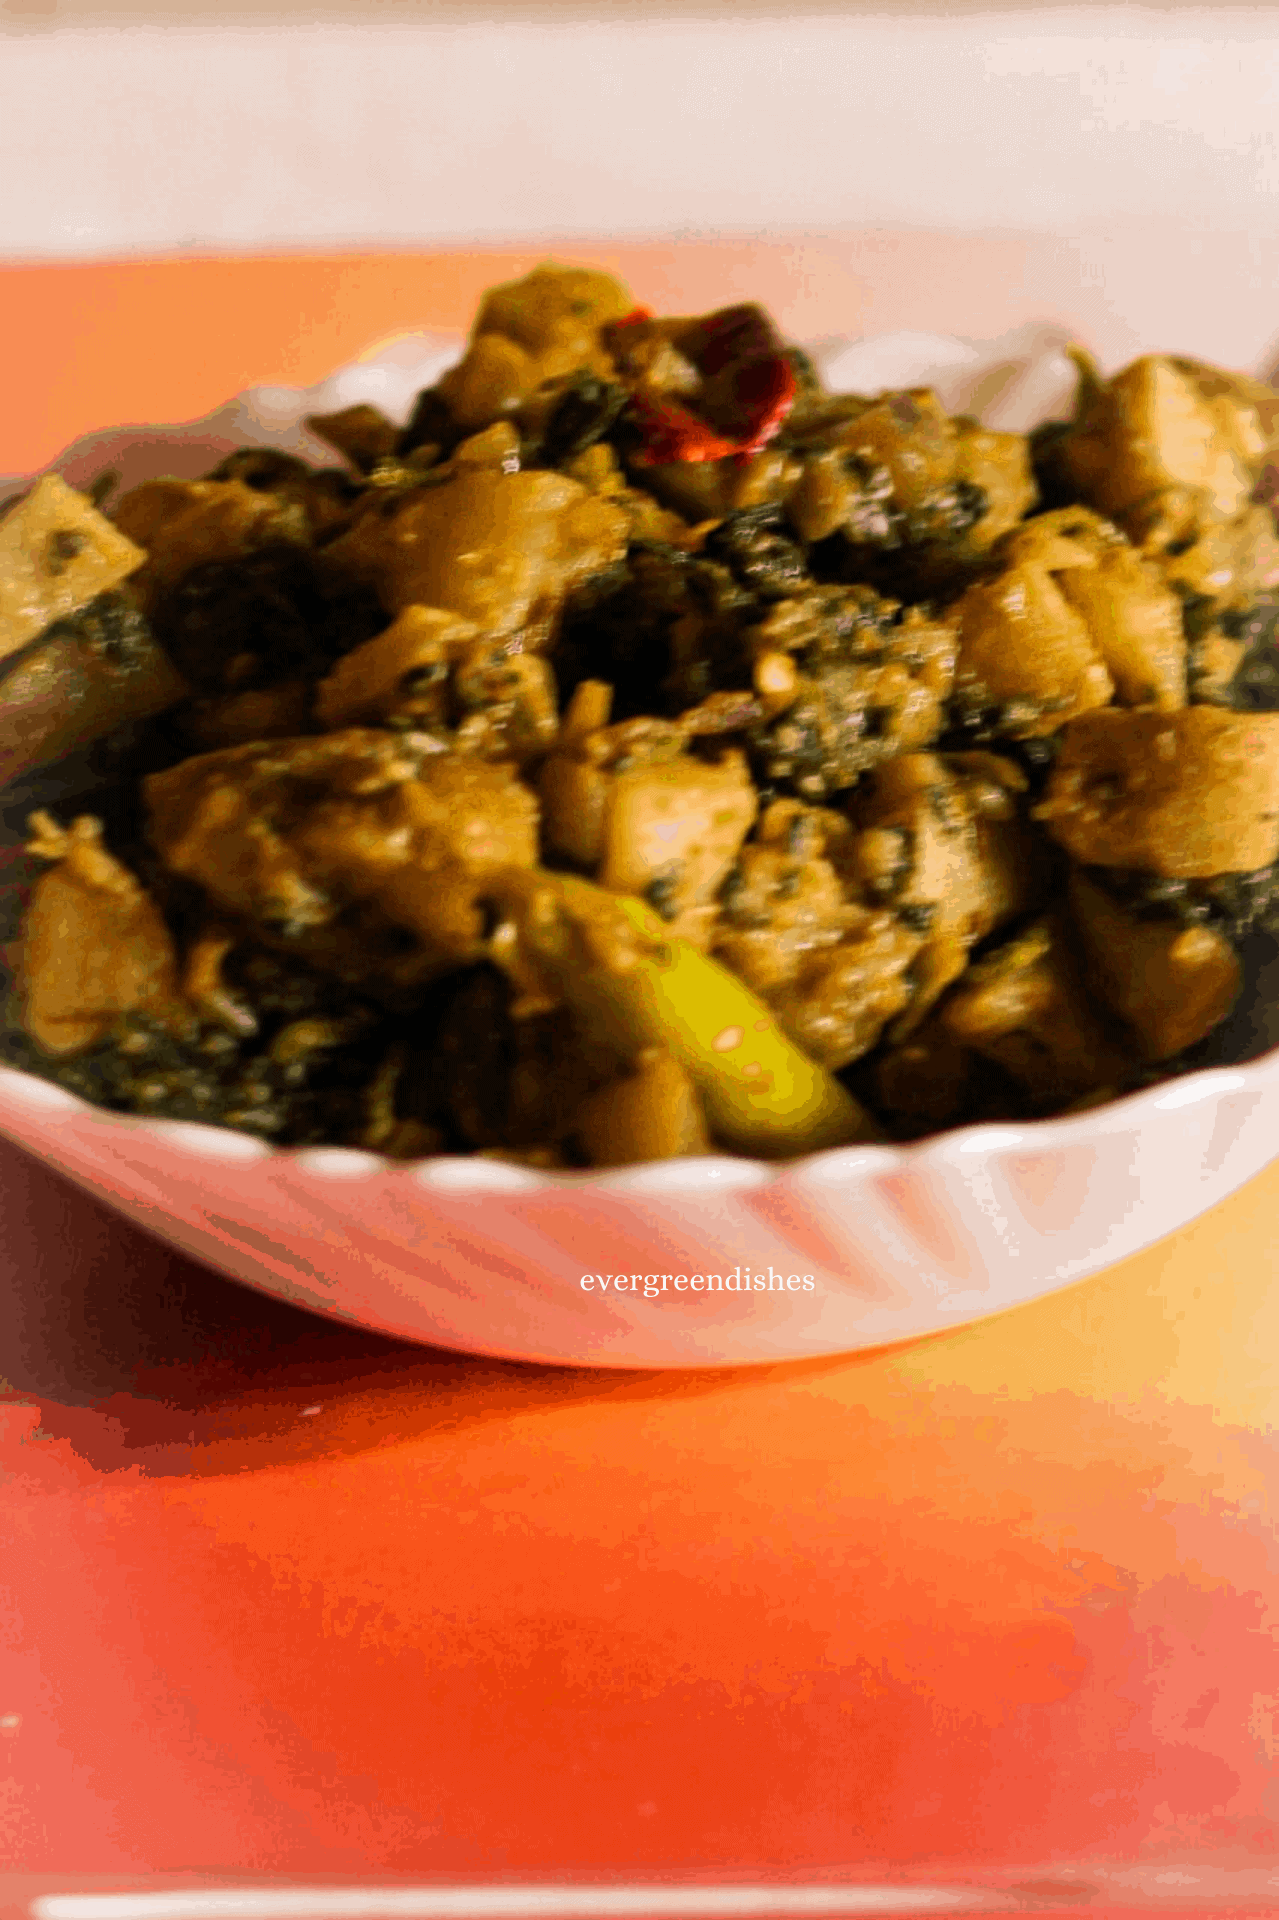
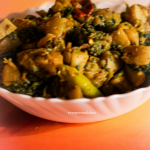
Spinach with potato/ Aloo Palak Sukhi Sabzi is a semi-dry, vegan, gluten-free side dish from North Indian cuisine. It is tasty and ready in 30 minutes. It makes a good side dish with any kind of Indian flat bread as roti, chapati or phulka.
Spinach and potato makes a good combination. One can make the delicious aloo palak or gravy with koftas too in it. These days, I often cook spinach along with fenugreek as in Kafuli or Methi Chaman, love the tartness of fenugreek, it gives a good flavour to the dish.
Love Winter Season
Winters are one of the finest season to cook good meals. We as bloggers are happy to see all kind of fresh vegetables and green leaves. Spinach is one of the green vegetable I frequently cook at home. It is not only an ideal food for a vegetarians but we as a family like it, thus one can find many spinach recipes here.
spinach with potato
What goes in Aloo Palak Sukhi Sabzi ?
Potao : It is one of the star ingredients.
Spinach : We need fresh spinach to make the tasty accompaniment.
Oil : Any neutral oil will do.
Cumin
Red chilli
Green chilli
Coriander powder
Amchur powder
Garlic
Ginger
Salt
Evergreendishesdev
Spinach with potato / Aloo Palak Sukhi Sabzi
Spinach with potato / Aloo Palak sukhi sabzi is a semi-dry, tasty side dish. It is ideal to serve for any meals or pack in the lunch box.
Remove the stalk of spinach, cut it and wash in salt water.
Cut the potato into cubes, put them in water. Rinse it.
Take oil in a pan, add cumin. As it splutters, break the red chilli into pieces and put it. Put green chilli, ginger and garlic. Saute for a minute, add the onions to it.
As the onions turn light pink, throw the potato cubes to it. Add salt, sprinkle a little water, let it cook for sometime.
Once the potatoes are soft, add the spinach leaves. Toss the vegetables.
The spinach shrinks quickly, add coriander powder and chilli powder to it. Mix well, if needed, add a little more salt. Remember, we had already added salt in the beginning
Spinach with potato is ready to serve.
Pin it for later :
Save the recipe on pinterest
Spinach with potato
If you ever make this recipe, take a picture and share it by tagging @foodiejayashree on Instagram or @evergreendishes on Facebook. I will be glad to see and share your creation further.
Check out my e-books on Amazon. Do not miss any post, subscribe to get all updates and an e-book for free !
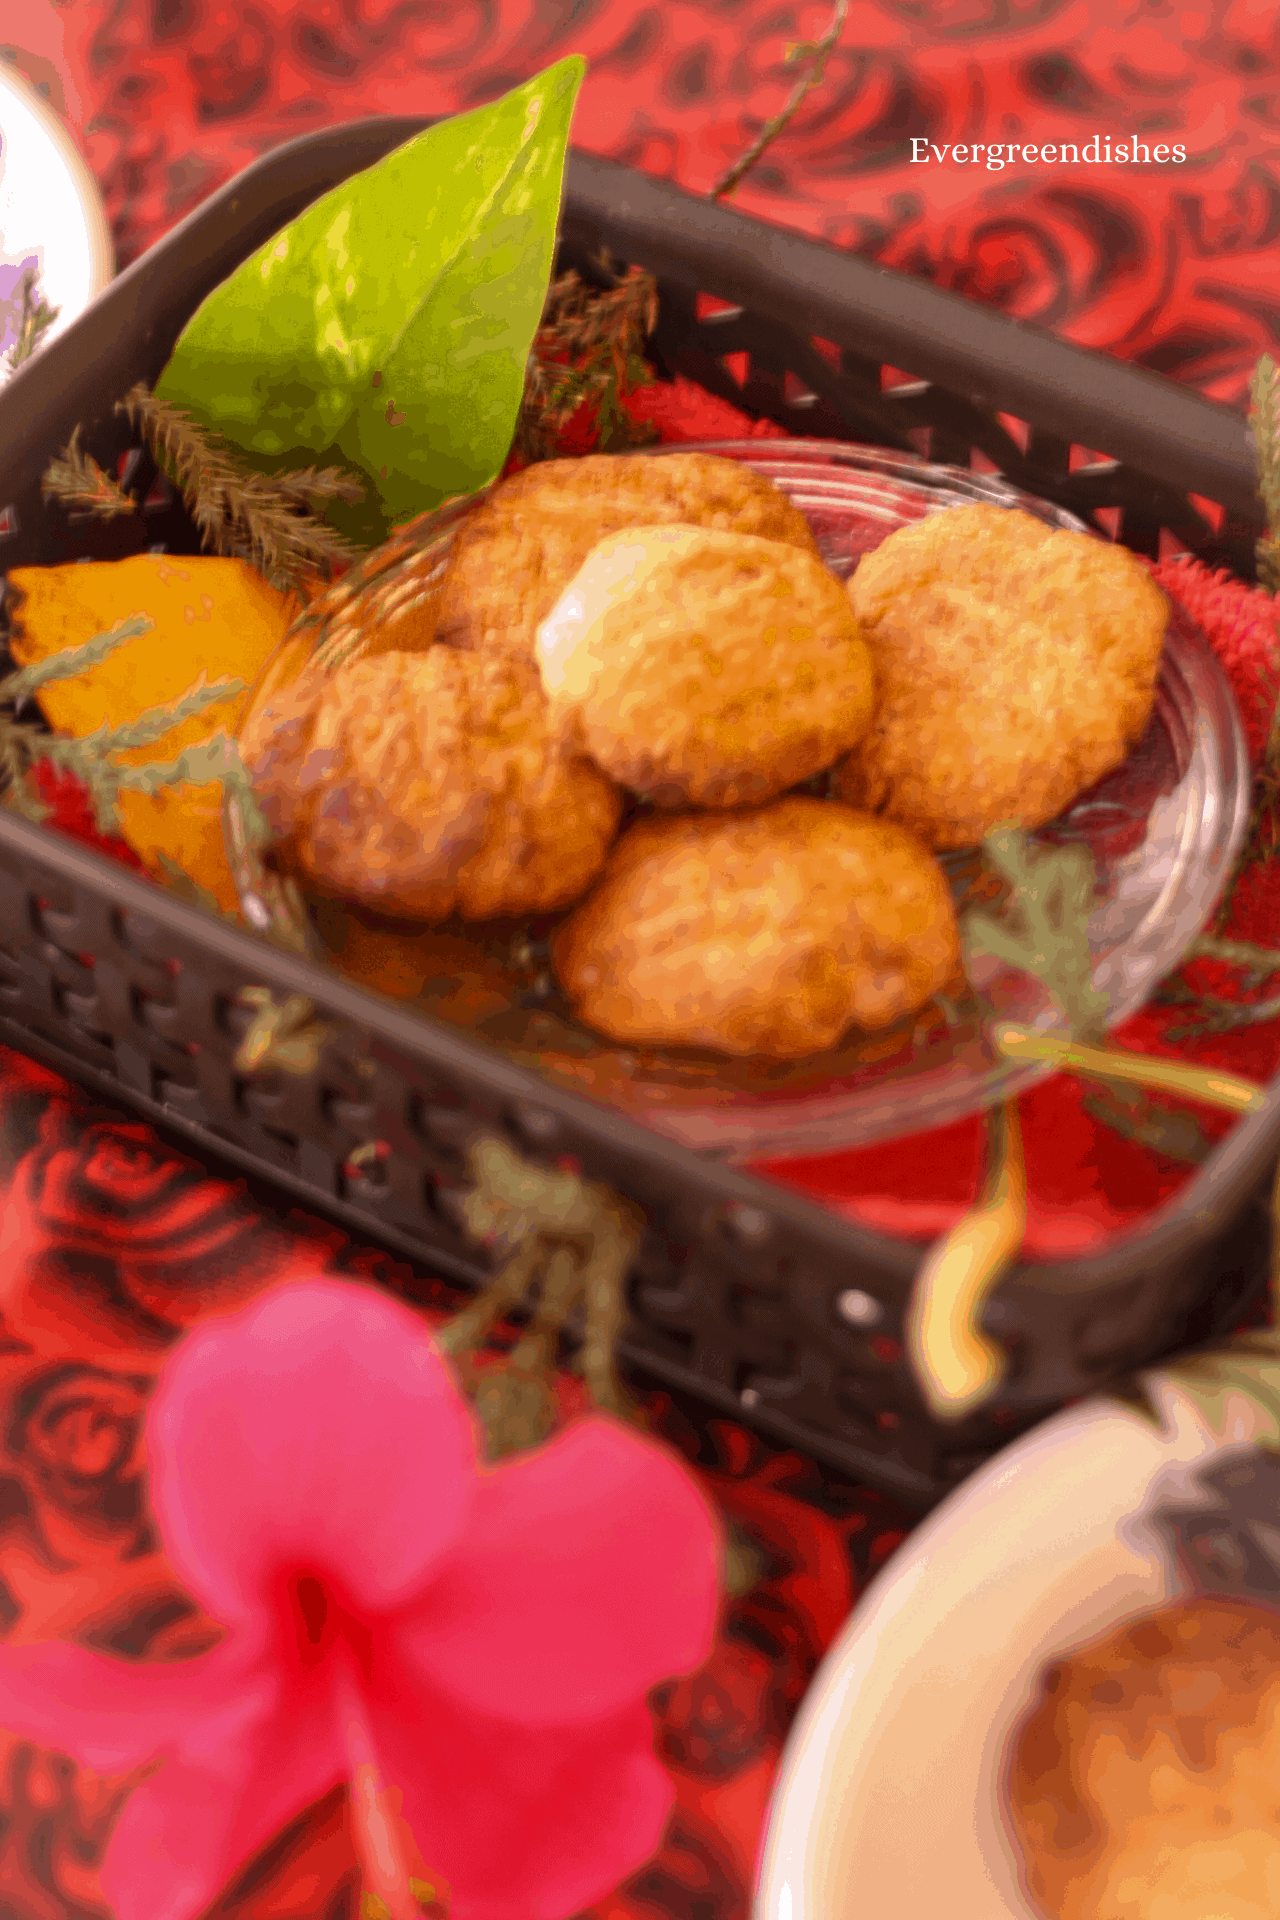
Almond Cookies | Almond Cookies Recipe | Christmas Treats |
Almond cookies are soft, tasty, melt-in the-mouth cookies. They are made with a few ingredients and are egg free.
We are in the last month of the year, 2020 is at last coming to a close. There seems to be a light at the end of the tunnel now. Christmas is here and time to celebrate isn’t it? Time to bake wonderful cakes and cookies. We do look forward to this month of merry and singing. Wishing all a Merry X-mas !
Almond cookies are melt in the mouth cookies, absolutely delicious and soft. They were crisp on the outside and soft inside. This is one of the cookies we loved the most.
For the almond cookies recipe, grind almonds to a powder in the small jar. All purpose flour and almond powder are mixed together with sugar and butter. A few drops of essence is added and later bind to a dough with a little milk. Refrigeration is important, you can keep it upto four hours. Later, shape them to cookies, make a design and bake them. One can dust them with castor sugar, but I have not done it.
About the event:
Sending this to X-mas Bakes at Healthy Wellthy Cuisines. The theme was suggested by Vanita Bhat, a wonderful cook with some classic regional recipes. I loved her baked maddur vada, bookmarked it to try soon.
Let us now get to Almond Cookies Recipe:
Ingredients: measurement used: 1 cup=200ml
1.25 cup all purpose flour
1.25 cup almond powder
0.75 cup butter
0.75 cup granular sugar
4-5 drops of vanilla essence
2 tablespoon milk
Method:
Take all purpose flour, almond powder, sugar and butter, mix it well. Make a dough by mixing it in parts with little milk. Cling it and keep it in refrigerator for two hours.
Remove the dough, take a small ball, make it into the shape of a cookie. Make a cross with the back of the fork.
Make a couple more, the number of cookies that you can bake in one batch.
Heat the oven at 160 degree Celsius
Place a baking sheet in the tin, put the shaped cookies and bake them for ten to fifteen minutes.
Once they are done, allow to cool on the rack.
Store in an airtight container.
Repeat for the rest of the dough.
Take a tip:
Use cold butter.
If you can mix the dough without the milk, you can do it.
Evergreendishesdev
Almond Cookies
Almond cookies are soft, tasty, melt-in- the- mouth cookies.
Take all purpose flour, almond powder, sugar and butter, mix it well. Make a dough by mixing it in parts with little milk. Cling it and keep it in refrigerator for two hours.
Remove the dough, take a small ball, make it into the shape of a cookie. Make a cross with the back of the fork.
Make a couple more, the number of cookies that you can bake in one batch.
Heat the oven at
Place a sheet in the tin, put the shaped cookies and bake them for ten to fifteen minutes.
Once they are done, allow to cool on the rack.
Store in an airtight container.
Repeat for the rest of the dough.
Notes
Use cold butter.
If you can mix the dough without the milk, you can do it.
Almond Cookies
If you ever make any of these recipes, take a picture and share it by tagging @foodiejayashree on Instagram or @evergreendishes on Facebook. I will be glad to see and share your creation further.
Check out my e-books on Amazon. Do not miss any post, subscribe to get all updates and an e-book for free !
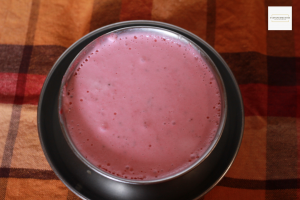
Strawberry Yoghurt is flavoursome and makes a good dessert. It is ideal to serve as breakfast with a topping of cereal and nuts.
Flavoured yoghurts are tasty and make a good dessert anytime. One can serve it as breakfast along with cereals. Top it with nuts and it is tasty and ready in a few minutes.
I often go to the super market and buy these flavoured yoghurts, isn’t that ridiculous when you can easily make it at home.
Strawberry Yoghurt is healthy and tasty. It’s the season of berries and time to make it now.
strawberry yoghurt
About Strawberry :
Strawberries are bright red, juicy and sweet. As the name suggests, most of us conclude that it is a berry. But it is neither a fruit nor a berry. It is the enlarged receptacle of the flower. They are usually consumed raw and fresh. It is also used in jams, jellies, ice creams and delicious milk shakes.
Strawberries are packed with vitamins, carbohydrates, fiber, and anti-oxidants. It is sodium free, fat free, cholesterol-free, low calorie food.
Health Benefits of Strawberry :
Strawberries is good for the heart.
Consuming of strawberries after meal is good for diabetic patients as it slow down the glucose digestion and reduce the spike of glucose and insulin level.
It helps in reducing inflammation and oxidative stress.
Adverse effects:
Consuming of strawberries may give an allergy to some, especially children. It contains a protein that cause symptoms in people who are sensitive to birch pollen or apples.
Bottom line:
Strawberries are delicious, healthy and low in calories. It has many health benefits. Here is the Strawberry Yoghurt Recipe.Do check it below
Evergreendishesdev
Strawberry Yoghurt
5 from 5 votes
Strawberry Yoghurt is flavoursome and ideal as a summer treat.
Take the strawberries, wash, clean and cut them into chunks.
Grind them along with greek yoghurt, honey and sugar.
Remove it in a bowl and chill it for some time.
Strawberry Yoghurt is ready to serve.
Notes
Greek yoghurt is easily available in the market. If you do not get it, take the curd and put it in a strainer or cheese cloth. Allow the whey to drain for sometime. Greek yoghurt is ready to use.
Pin it for later:
Strawberry Yoghurt
Serving options:
Serve it chilled as it is.
Top it with cereal and nuts.
Top it with strawberry pieces and granola.
If you ever make any of these recipes, take a picture and share it by tagging @foodiejayashree on Instagram or @evergreendishes on Facebook. I will be glad to see and share your creation further.
Check out my e-books on Amazon. Do not miss any post, subscribe to get all updates and an e-book for free !