Blog

  • Sukhdi / Gud Papdi recipe

    Sukhdi / Gud Papdi recipe

    Jump to Recipe Print Recipe

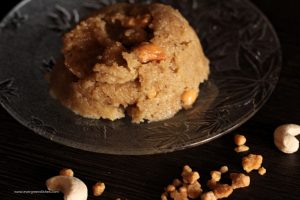
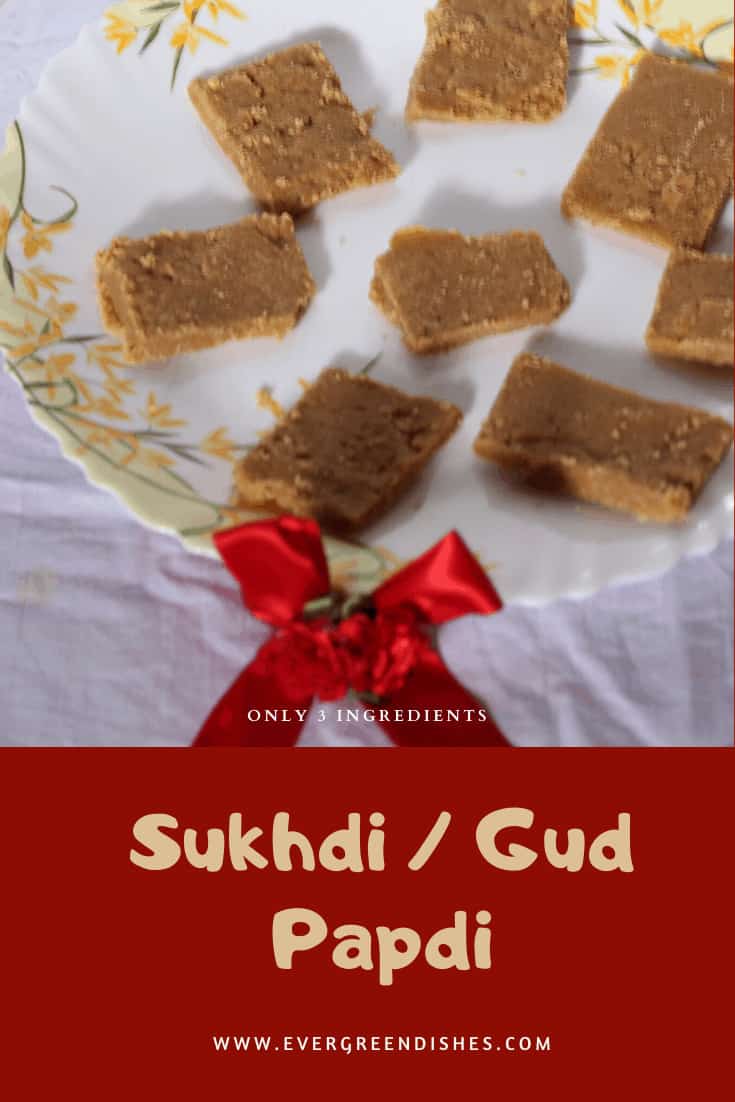
    Sukhdi / Gud Papdi is a popular Gujarati sweet. It is made using whole wheat flour, jaggery and ghee. It is soft, crumbly and has melt in the mouth texture.

    Sukhdi is quite an easy to make sweet that can be made in fifteen minutes. It is ideal to make during festivities or as a snack to eat anytime. I have tried to keep the recipe authentic, so not added any embellishments to it. One may add cashew pieces, cardamom powder or even grated coconut to it. Anyway, it tastes good as it is if made perfectly.

    It is called as Sukhdi in Gujarat while in Maharashtra it is popular as Gud Papdi or Gol Papdi.

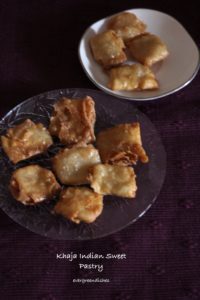
    A few other sweet recipes from the blog that you may like are Mamra na ladoo, Tapeshwara Khaja, Ellu Holige

     Sukhdi / Gud Papdi.

    Ingredients:

    • 2/3 cup wheat flour
    • 1/3 cup ghee
    • 1/4 cup jaggery

    Method:

    1. Keep all the ingredients ready, grate the jaggery or powder it.
    2. Grease a plate with little ghee.
    3. Take ghee in a pan and heat it on a low flame.
    4. Once the ghee melts, add wheat flour to it and mix it with a ladle.
    5. Let it cook on a slow flame, keep stirring. Once the mixture changes it colour and aroma is felt, it is done.
    6. Switch off the stove, add jaggery to it mix it well and spread it over the greased plate.
    7. Let it cool for a few minutes.
    8. Cut into desired shape.
    9. Sukhdi / Gud Papdi is ready to serve

    Take a tip:

    • Quantity of ghee is in semi-liquid form.
    • Keep stirring and let the wheat flour be brown in colour. If you do not stir, it will get burnt easily.
    • Jaggery needs to be grated or powdered finely.
    • Do not add jaggery and heat it further. It may become chewy.

    Pin it for later:

    sukhdi / gud papdi
    sukhdi / gud papdi

    Here’s the video of the making of Sukhdi / Gud Papdi

    Evergreendishesdev

    Sukhdi / Gud Papdi

    Sukhdi / Gid Papdi is a soft, melt in the mouth sweet from Gujarati cuisine.
    Prep Time 5 minutes
    Cook Time 15 minutes
    Course: indian sweets
    Cuisine: Gujarati

    Ingredients
      

    • 2/3 cup wheat flour
    • 1/3 cup ghee
    • 1/4 cup jaggery

    Method
     

    1. Keep all the ingredients ready, the jaggery should be grated.
    2. Grease a plate with a little ghee.
    3. Take ghee in a pan and heat it. Once it melts, put the flour in it and roast it to a golden colour.
    4. Keep stirring, once it is done, switch off the gas.
    5. Add jaggery, mix it well and pour it on the greased plate and spread it with the spatula.
    6. Let cool for a few minutes, cut into desired shape.

    Notes

    • Quantity of ghee is in semi-liquid form.
    • Keep stirring and let the wheat flour be brown in colour. If you do not stir, it will get burnt easily.
    • Jaggery needs to be grated or powdered finely.
    • Do not add jaggery and heat it further. It may become chewy.

    If you have liked this post, do share it further.

    Follow us on social media: Facebook, Twitter, Pinterest, Instagram and YouTube

    If you ever recreate this recipe, do take a picture and tag me on Facebook or Instagram, I shall share it further with due credits.

    Check out my e-books

    Subscribe to get all updates and an e-book for free!

  • Vegetable Curry / Rajasthani Cuisine

    Vegetable Curry / Rajasthani Cuisine

    Jump to Recipe Print Recipe

    Vegetable curry from Rajasthani cuisine is a blend of unique vegetables. Raw tomato and long cucumber along with a medley of other vegetables and spices makes a tasty side dish.

    The love for trying different dishes from various cuisines landed me to this dish which I had jotted in my book many years back. Yes, a crazy soul, who loves to save these. We had raw tomatoes and thus made this and it was good.

    Raw tomatoes are still available and hope you will try making it. I loved the fact that rare veggies as long cucumber and raw tomato are used in it. Moreover, it is a no onion garlic recipe. This vegetable curry pairs well with any Indian flat bread.

    I had earlier shared a chutney using raw tomato, it stays good for 2-3 days if refrigerated.

    vegetable curry

    Vegetable Curry | Rajasthani cuisine

    Ingredients:

    • 1 large cucumber
    • 1/4 kilogram raw tomato
    • 1/2 cup peas
    • 2 capsicum
    • 1 tablespoon oil
    • 1/2 teaspoon cumin seed
    • 1/4 teaspoon asafoetida
    • 1/4 teaspoon turmeric powder
    • 1 tablespoon coriander seed powder
    • 1 teaspoon cumin powder
    • 1/2 teaspoon garam masala
    • 1 teaspoon chilli powder
    • salt

    Method:

    1. Peel and cut the cucumber into small cubes.
    2. Cut raw tomato and capsicum into small pieces.
    3. Take oil in a pan, add cumin, asafoetida, turmeric powder to it. Put capsicum and peas to it, let cook for sometime.
    4. Now add raw tomato and cucumber pieces, mix and let cook on a low flame until the moisture is absorbed completely.
    5. Add salt, chilli powder, coriander powder and cumin powder. Mix it well.
    6. Finally, sprinkle garam masala and give a stir.
    7. Vegetable Curry is now ready to serve.
    Take a tip:
    • Check the bitterness of the cucumber. Otherwise, it may spoil the dish.
    • Use raw tomatoes, not the slightly ripened ones.
    • Use fresh green peas. if it is not available, use the frozen ones.
    • Quantity of capsicum may be increased to three.
    • Capsicum of the larger variety are not spicy and ideal for cooking.
    Evergreendishesdev

    Vegetable Curry

    5 from 6 votes
    The vegetable curry is different and tasty. It makes use of raw tomatoes and long cucumber along with a few other veggies. It pairs well with chapati.
    Prep Time 10 minutes
    Cook Time 15 minutes
    Course: lunch ideas, Side Dish
    Cuisine: rajasthani,

    Ingredients
      

    • 1 large cucumber
    • 1/4 kg raw tomato
    • 1/2 cup green peas
    • 2 capsicum
    • 1 tbsp oil
    • 1/2 tsp cumin seed
    • 1/4 tsp asafoetida
    • 1/4 tsp turmeric powder
    • 1 tbsp coriander powder
    • 1 tsp cumin powder
    • 1/2 tsp garam masala
    • 1 tsp chilli powder
    • salt

    Method
     

    1. Wash and peel the skin of the cucumber, cut it into cubes.
    2. Cut capsicum and raw tomato into small pieces.
    3. Take oil in a pan, add cumin, asafoetida and turmeric powder to it. Put capsicum and peas to it, let cook for sometime.
    4. Now add raw tomato and cucumber pieces, mix and let cook on a low flame until the moisture is absorbed completely.
    5. Add salt, chilli powder, coriander powder and cumin powder. Mix it well.
    6. Finally, sprinkle garam masala and give a stir.
    7. Vegetable Curry is now ready to serve.

    Notes

    • Use fresh green peas, if they are not available use frozen ones.
    • Check bitterness of cucumber. Otherwise, it may spoil the dish.
    • Use firm, raw tomatoes.
    • One can increase the quantity of capsicum to three. 
    Vegetable Curry

    A few other Rajasthani dishes that I have on the blog are all easy to make Moong Dal Bada, Imli Ka Amlana, Gatte ki Sabzi

    If you have liked this dish, do leave a comment below.

    Let’s be connected : Facebook, Twitter, Instagram, You Tube, Pinterest

    If you ever make this dish, take a picture and share it on Facebook or Instagram by tagging me, I will be glad to share it further.

    Do not miss any recipes, subscribe to get all updates and an e-book for free !


  • Chana Masala (Authentic Chick Pea Curry)

    Chana Masala (Authentic Chick Pea Curry)

    Chana Masala is a favourite side dish of one and all. It is from North Indian cuisine but popular in all regions of India. It pairs well with rice as well as any Indian flat bread.

    Chana Masala is made in various ways, some make it without onion and garlic while a few like it dry as Pindi Chana.

    Today’s recipe is an authentic chick pea curry , the masala is prepared and used in it. Thus, it is flavoursome with the fragrance of fresh spices.

    chana masala
    chana masala
    chana masala

     Chana Masala / Authentic Chick Pea Curry

    Ingredients:

    • 1 cup Chana or Chick Pea
    • 2 onion
    • 4 tomato
    • 1 inch ginger
    • 4 cloves garlic
    • 1 tablespoon oil
    • 1/2 teaspoon cumin
    • 1/2 teaspoon turmeric powder
    • 1 teaspoon chilly powder
    • 1 teaspoon coriander powder
    • 1/2 teaspoon anardana
    • salt

    For the chana masala powder:

    • 1/2 teaspoon pepper
    • 2 black cardamom
    • 4 cloves
    • 2 bay leaf
    • 1/4 inch cinnamon

    For garnishing:

    • fresh coriander
    • lemon pieces

    Method:

    1. Soak chana for 8-10 hours or overnight.
    2. Cut onion, blanch the tomato.
    3. Pressure cook chana with a tea bag in it.
    4. Dry roast the spices under “For the Chana Masala Powder” for two minutes on a low flame. Keep tossing them.
    5. Once it cools, grind to a powder.
    6. Make a puree of tomato, onion, ginger and garlic.
    7. Take oil in a pan, add cumin. Once it splutters, put tomato puree and saute it.
    8. After sometime, add turmeric powder, chilly powder, anardana, coriander powder and the spice mix. Put a little water and mix thoroughly. Let the flavours amalgamate
    9. Add salt and water to it. Adjust the quantity of water as per the desired consistency.
    10. Once the pressure releases, remove the boiled chana. Mash a few of them.
    11. Put the boiled chana and the mashed mixture to it. This gives volume to the gravy.
    12. Let boil for sometime.
    13. Garnish with fresh coriander.
    14. Chana Masala is ready to serve.
    Evergreendishesdev

    Chana Masala (Authentic Chick Pea Curry)

    5 from 3 votes
    Chana Masala is tasty and makes a tasty meal anytime. The flavours of fresh pound spices makes it delicious.
    Prep Time 15 minutes
    Cook Time 45 minutes
    Soaking time 10 hours
    Total Time 11 hours
    Servings: 6 people
    Course: Breakfast, brunch, lunch box, lunch ideas
    Cuisine: north indian

    Ingredients
      

    • 1 cup chana / chick pea
    • 2 onion
    • 4 tomato
    • 1 inch ginger
    • 4 cloves garlic
    • 1 tbsp oil
    • 1 tsp cumin
    • 1/2 tsp turmeric powder
    • 1 tsp chilli powder
    • 1 tsp coriander powder
    • salt
    For Chana Masala Powder
    • 1/2 tsp pepper
    • 2 black cardamom
    • 4 clove
    • 2 bay leaf
    • 1/4 inch cinnamon

    Equipment

    • pressure cooker
    • pan
    • perforated ladle
    • plain ladle

    Method
     

    1. Soak chana for 8-10 hours or overnight.
    2. Pressure cook chana for three whistles with a tea bag in it.
    3. Cut onion, blanch the tomato
    4. Dry roast the spices under "For the Chana Masala Powder" for two minutes on a low flame. Keep tossing them.
    5. Once it cools, grind to a powder.
    6. Make a puree of tomato, onion, ginger and garlic.
    7. Take oil in a pan, add cumin. Once it splutters, put tomato puree and saute it.
    8. After sometime, add turmeric powder, chilly powder, anardana, coriander powder and the spice mix.
    9. Put a little water and mix thoroughly. Let the flavours amalgamate.
    10. Add salt and water to it. Adjust the quantity of water as per the desired consistency.
    11. Once the pressure releases, remove the boiled chana. Mash a few of them.Put the boiled chana and the mashed mixture to it. This gives volume to the gravy.Let boil for sometime.Garnish with fresh coriander. Chana Masala is ready to serve.

    Here is the video recipe of Chana Masala, do like and subscribe to this channel.

    If you have liked this recipe, do leave a comment. If you ever make this recipe, take a picture and tag me @evergreendishes on Facebook or @foodiejayashree on Instagram, shall share it further.

    You can even pin it for further reference.

    chana masala


    Did you like this recipe? Do share it further, with your family and friends. If you ever make this dish, take a picture and share it with us by tagging @foodiejayashree on Instagram or @evergreendishes on Facebook

    Subscribe to get a book of handy hints for free ! Do check out my e-books on Amazon

  • Top Sweets and Savoury for Diwali

    Top Sweets and Savoury for Diwali

    Diwali is the time to enjoy with good sweets and savoury snacks. Here is a collection of top sweets and savoury from the blog.

    Diwali, festival of lights is most awaited by all as it calls for enormous celebrations. It begins with cleaning and preparation of various sweets and savoury snacks. Good food, meeting of friends and relatives, exchange of sweets usually take place.

    Diwali is the time to replenish and be happy. Whatever you decide to do, let it make you happy and contented. Immerse yourself for sometime in devotion to God, it gives peace and joy.

    May the festive season bring joy and immense happiness. May all dreams come true and let success knock at your door. Wishing you a very Happy Deepawali.

    Have you started your Diwali preparation? What are the variety of snacks you plan to make? Here are a few ideas from the blog, do check them out. Click on the title or the picture for the recipe.

    Ellu Holige / Til Poli

    Ellu Holige is a sweet stuffed flat bread. A filling of sesame and jaggery is stuffed and rolled into a pancake. It is tasty and ideal during any festivities.

    ellu holige / til poli
    ellu holige

    Chaler Payesh / Bengali Rice Kheer

    Chaler Payesh is similar to the kheer that is made in South India with a subtle change. It is tasty and loved by all at home.

    chaler payesh /bengali rice kheer
    chaler payesh / bengali rice kheer

    Papaya Halwa

    Papaya is one of the healthiest fruit but disliked by many. This sweet dish is tasty and hardly noticeable.

    papaya halwa
    papaya halwa

    Coconut Ladoo

    Coconut ladoo is one of the easiest sweets that you can make, it is tasty and ideal for any festival.

    coconut ladoo/ nariyal ladoo
    coconut ladoo /nariyal ladoo

    Oats Ladoo

    Oats Ladoo is a healthy twist to the usual sweet that you make.

    oats ladoo
    oats ladoo

    Rawa Kesari with Jaggery

    Rawa Kesari is one of the sweets that we cherish, here is a healthy twist to it. Jaggery is added to it, it tastes divine.

    bellada sheera

    Ragi Halbai / Finger Millet Fudge

    Ragi Halbai is a sweet made using finger millet. It is also a twist to the usual rice halbai that is made.

    Ragi Halbai / Fingermillet fudge
    Ragi Halbai / Fingermillet fudge

    Kul Kul Goan Sweet

    Kul kul are crispy, crunchy snacks that can be had any time of the day. It is one of the favourites of children, so I chose to add it here.

    kul kul
    kul kul

    Peanut Ladoo / Shenga Undi

    Peanut ladoo is easy to make and can be stored for a long time.

    peanut ladoo/shenga undi
    peanut ladoo / shenga undi

    Hayagreeva Maddi

    Hayagreeva Maddi is made using bengal gram, it is cooked well, simmered with jaggery and other ingredients. Tastes exotic if well cooked.

    hayagreeva maddi
    hayagreeva maddi

    Ash gourd Halwa / Dum root halwa

    Ash gourd halwa is a delectable sweet, commonly made in South India. It is usually made during marriages and ceremonies.

    dum root halwa
    dum root halwa

    Khaja / Kaja

    Khaja, crispy and flaky, makes a festive treat.

    Khaja, Tapeshwaram Khaja
    Khaja, Tapeshwaram Khaja

    Carrot Halwa

    Carrot halwa, another delectable sweet, made in a quicker version here.

    Carrot Halwa
    Carrot Halwa

    Basundi

    Basundi and Puri is an all time favourite.

    basundi
    basundi

    Karchikayi / Kajjikayalu

    Diwali seems incomplete without Karchikayi.

    karchikayi
    karchikayi

    Palak Sev/ Spinach Crispies

    After all the delectable sweets, we do need these savoury. The usual sev has palak flavour in it, sounds tasty, isn’t it?

    palak sev
    palak sev

    Butter Murukku

    Murukku and Chakli are two siblings which bring cheer to any festive ocassion.

    butter murukku

    Split gram Murukku

    Another variety of murukku, I love making these dry snacks as they are loved by all at home.

    murukku
    murukku

    Methi Mathri

    The freshness of fenugreek leaves gives a good flavour

    Methi Mathri
    Methi Mathri

    Salted Cashewnut in Microwave

    Salted cashewnuts give a lavish look to any ocassion, do give a try to it.

    salted cashewnuts

    Chiwda

    Chiwda is one of the essentials during Diwali, but ideal for any season.

    chiwda
    chiwda

    Namak Pare

    Crispy, crunchy snacks are kids favourite.

    namak pare
    namak pare

    If you have liked the collection, do share it further. Pin it for later:

    Diwali Collection 2019

    I have recently started my YouTube Channel. Please do like and subscribe to it.

    If you ever recreate any dish, do take a picture and tag me @foodiejayashree on Instagram or @evergreendishes on Facebook.

    If you have not yet subscribed, sign up to get an e-book of handy hints for free and be informed of new posts.

  • Dal with Methi

    Dal with Methi

    Dal with methi makes a tasty side dish with any meal. It tastes good with hot steamed rice, jeera rice, pulav or even with chapati or phulka.

    I love making a variety of dals, it is not only filling but packed with vital nutrients essential for carrying on day to day activities. It serves dual purpose, tastes good with both rice and chapati. Moreover, my family members have a special liking for dal, thus I find many good reasons to play round it.

    Dal with methi or fenugreek leaves tastes good, thus I make three kinds of dal with it. One is the south indian dal  (muddipalya) we make  regularly, it is a traditional recipe loved by all elders. Let’s get to the recent addition that I have made in my cooking.

    Dal with Methi

    Measurement: 1 cup = 200 ml

    Ingredients:
    • 1 cup tur dal
    • 1/4 teaspoon turmeric powder
    • 2 teaspoon oil
    • 1 teaspoon cumin
    • 2 cluster of fenugreek leaves
    • 1 onion
    • 2 tomato
    • 2 teaspoon red chilli
    • salt to taste
    Method:
    1. Wash the tur dal and cook it in the pressure cooker with a little turmeric powder.
    2. Cut the onion and tomato.
    3. Cut the stem of the fenugreek leaves, chop the leaves and put them in water for sometime. A little salt may be added, it helps to remove the grime.
    4. Take oil in a pan, add cumin seeds, as they splutter, add onion, turmeric powder and asafoetida. Let cook for sometime.
    5. Now, add the fenugreek leaves to it.
    6. Put the tomatoes and salt. Let cook for sometime.
    7. Once the tomatoes are soft, add chilly powder to it and mix.
    8. Take the cooked dal and mix it thoroughly.
    9. Put the dal and allow to simmer for sometime.
    10. Dal with methi is ready to serve.
    Evergreendishesdev

    Dal with Methi

    Dal with methi is tasty and makes a good accompaniment with both rice and chapati.
    Prep Time 10 minutes
    Cook Time 30 minutes
    Soaking time 30 minutes
    Servings: 4 people
    Course: lunch ideas, Main Course
    Cuisine: north indian

    Ingredients
      

    • 1 cup tur dal
    • 1/4 teaspoon turmeric powder
    • 1 tablespoon oil
    • 1 teaspoon cumin
    • 2 bunch fenugreek leaves
    • 1 onion
    • 2 tomato
    • 2 teaspoon red chilli
    • salt to taste

    Method
     

    1. Take oil in a pan, add cumin seeds, as they splutter, add onion, turmeric powder and asafoetida. Let cook for sometime.Now, add the fenugreek leaves to it.Put the tomatoes and salt. Let cook for sometime. Once the tomatoes are soft, add chilly powder to it and mix.Wash the tur dal and cook it in the pressure cooker with a little turmeric powder.
      Cut the onion and tomato.
      Cut the stem of the fenugreek leaves, chop the leaves and put them in water for sometime. A little salt may be added, it helps to remove the grime.

      Now, add the fenugreek leaves to it.

      Take the cooked dal and mix it thoroughly.
      Put the dal and allow to simmer for sometime.
      Dal with methi is ready to serve.
    2. Wash the tur dal and cook it in the pressure cooker with a little turmeric powder.
      Cut the onion and tomato
    3. Cut the stem of the fenugreek leaves, chop the leaves and put them in water for sometime. A little salt may be added, it helps to remove the grime.
    4. Take oil in a pan, add cumin seeds, as they splutter, add onion, turmeric powder and asafoetida. Let cook for sometime. Now, add the fenugreek leaves.
    5. Put the tomatoes and salt. Let cook for sometime.
    6. Once the tomatoes are soft, add chilly powder to it and mix.
    7. Take the cooked dal and mix it thoroughly. Put the dal and allow to simmer for sometime.Dal with methi is ready to serve.

    I have recently started a You Tube Channel. Do like and subscribe to it. Here is the video recipe.

    Pin it for later:

    dal with methi
    dal with methi

    If you have liked this post, do leave a comment below. It really motivates me to write more. Do share it with your family members.

    If you ever make this, take a picture and share it with us by tagging @foodiejayashree on Instagram or @evergreendishes on Facebook.

    Do check out my e-book, 30 Tasty Dal Recipes for more such recipes.

    Subscribe to get a book of handy hints and all updates in your inbox.


  • Tasty Dosa in minutes/ iD  Organic Dosa  Batter

    Tasty Dosa in minutes/ iD Organic Dosa Batter

    Today’s post is slightly different from the usual one. What do you do on a busy and hectic day? You have a long list of pending errands, meeting with client, go to market to buy vegetables and then visit the dentist, later go to school for the meeting. I prefer to bring a ready to cook food at home and make something that is not only tasty but also healthy for the family.

    iD Fresh Food is a leader in breakfast foods in South India. It was started in 2005 by five brothers in a small kitchen in Bangalore. Since then, it has come a long way and are a leading name today in South Indian breakfasts. They have a wide range of natural and organic products which one can easily make at home without any compromise in taste and quality. The variety of products that they have to their belt are Dosa and Idly batter, Vada batter, rawa idly mix, wheat and oats dosa, a range of parathas and a coffee decoction.

    I loved the Organic iD Dosa and Idly batter which is made of pure, organic ingredients. The batter serves a dual purpose, one can either make idly or dosa with it. Plan ahead what you want to make, if it is dosa, you need to add a little quantity of water. Soft, fluffy idly with coconut chutney and piping hot sambar, sound so delicious isn’t it ? It can be made easily with this packet of batter, no hassle of prior soaking and grinding the lentils, it is ready within an hour, just make the side dishes and the breakfast is sorted

    The iD dosa batter is perfect blend of ingredients, I did add a little salt though. I spread a scoopful of batter, put a little oil, smeared a little red chutney after a while and voila, it was beautiful golden brown hued, crispy, the way I often make it at home. I served it with potato sbbji and coconut chutney.


    iD crispy dosa

    It is such a blessing to get these kind of semi-made food that are chemical free, farm fresh and most of all similar to homemade. I could make 13 dosas from one packet, quite sufficient for a family of four for breakfast. The packet comes in a pouch of 1Kilogram and costs Rs80. It is available online at Bigbasket

    Regarding the storage since it is a wet ingredient, it needs to be kept refrigerated. Do not freeze it.

    How to make Dosa with iD Dosa batter:

    Equipments: bowl, ladle, non stick skillet, flipper spatula, small bowl, spoon, plate

    Ingredients:

    • 1 kg iD idly/ dosa batter
    • a little salt
    • water
    • oil /ghee

    Method:

    1. Keep the batter pouch outside, it should be at the room temperature while cooking.
    2. Cut the pouch and remove the batter in a bowl. Add a little salt and water. Make it to the consistency of the usual dosa batter.
    3. Heat the skillet, take a ladleful of batter and put it on the skillet. Spread it inside out to a thin crepe.
    4. Drizzle oil around it and cook it on medium to high for a minute.
    5. Once it golden brown in colour, remove and serve with chutney.

    Serving suggestions:

    • Put a dollop of butter, it tastes heavenly.
    • Spread red onion chutney over thin crepes.
    • You can serve with potato bhaji and coconut chutney.
    • Even uttappa can be made, mix it with finely cut onion and tomato pieces and make small circular dosas.
    • On a lazy day, serve with podi.


    iD organic idly and dosa batter

    You can check the product at www.idfreshfood.com

    I liked this one and will soon be trying other products too. They are ideal for busy days when we are packed with other errands. I love the fact that there are no added preservatives in it.

    Do give a try to this, do check out the online store or at your nearest super market. Feel free to share with us if you ever make any dishes with iD Fresh Food.


  • Milagai Podi/ Idli Podi

    Milagai Podi/ Idli Podi

    Milagai Podi (pudi) is a lentil based spice powder stored in the kitchen shelves. It is ideal with idli and dosa. It is commonly made in Tamilnadu cuisine.

    I love the flavours of Tamilnadu, variety of dosa and idli with delicious chutney and flavoursome sambar, not to mention the crispy vada. They also have a variety of tasty snacks such as murukku and thattai. Among the rice dishes, puliodarai and lemon rice are commonly prepared.

    But, why am I speaking of Tamil Nadu cuisine ? The Shhhh secretly cooking group is preparing from this state for the month of September and I was paired with Kalyani. Kalyani gave me black gram and dry red chilly as the secret ingredients and I decided to make this humble Milgai Podi.

    The secret ingredients given by me were bengal gram and dry red chilly, she has prepared the Arichivitta Mulangi Sambar . Do check it out, it pairs well with hot steamed rice.

    Now, coming to the Milagai Podi, this is one of the essentials in any Tamilian home. It is a lentil based, dry chutney powder, preserved all round the year. They serve it with idli as an additional accompaniment along with chutney and sambar. It is usually mixed with sesame oil or ghee, the nutty flavour of sesame is really good.

    The other uses of Milagai Podi :

    • It can also be used with hot steamed rice. It tastes good with chapati and roti too.
    • In times of urgency, one can serve it immediately with idly or dosa. It is also handy during travelling.
    • You can use the left over idlis, lightly roast them on a skillet with ghee and sprinkle this chutney powder over it.
    • It makes a good accompaniment with curds rice.

    Milagai Podi / Idli Podi

    Ingredients:

    • 1 cup bengal gram
    • 1 cup black gram
    • 1 cup sesame
    • 8-10 dry red chilly
    • a few curry leaves
    • a small piece tamarind
    • jaggery
    • salt
    • 1/4 teaspoon asafoetida

    Method:

    1. Dry roast the sesame seed until they splutter and lend a good aroma.
    2. dry roast the curry leaves.
    3. Take half a teaspoon of oil and roast bengal gram on a low flame. Let them turn golden in colour.
    4. Now, similarly roast the black gram with a little oil
    5. Put half teaspoon of oil and roast the red chillies. Once, it is done, put asafoetida over it.
    6. Take a small piece of tamarind and slightly toss it in the pan.
    7. Grind the lentils and sesame seed together, do not pulse for a long time. Grind for a few seconds and again repeat it, the sesame seeds may ooze the oil out of them. Then, add the red chillly, salt, tamarind and jaggery to it, pulse it again. The chutney powder should be coarse.
    8. Once it is done, store in a clean, air tight jar.

    Take a tip:

    • Different versions of milagai podi are prepared. The quantity of bengal gram may be reduced, but I used both equally.
    • Tamarind and jaggery may be avoided, but they do give a good taste to it.
    milagai podi
    Milagai Podi
    Evergreendishesdev

    Milagai Podi

    Milagai Podi is a earthy, nutty, flavoursome side dish used with idly and dosa.
    Prep Time 10 minutes
    Total Time 10 minutes
    Servings: 2 cups of powder
    Course: condiments
    Cuisine: south india

    Ingredients
      

    • 1/2 cup bengal gram
    • 1/2 cup black gram
    • 1/2 cup sesame seed
    • 6-8 dry red chilli
    • 2 teaspoon oil
    • 1 small piece tamarind
    • 1/4 teaspoon jaggery
    • salt

    Method
     

    1. Dry roast the sesame seeds. they splutter and give a good aroma. Similarly, dry roast the curry leaves.
    2. Take half a teaspoon of oil and roast the bengal gram. It should be golden in colour. Put it aside.
    3. Similarly, roast the black gram.
    4. Put the tamarind and toss it in the kadai for sometime.
    5. Take a little oil and roast the red chillies.
    6. Once the ingredients, cool down, at first grind the lentils and sesame. Do not run it for long, the oil may ooze out from the sesame seeds.
    7. Then, add the red chillies, salt, jaggery and tamarind. Grind them once again.
    8. Once, it is a coarse powder, remove and store in an airtight container.

    Pin it for later :

    Milagai Podi (Pinterest)
    milagai podi

    If you have liked this post, do share it further. If you ever make it, take a picture and tag @foodiejayashree on Instagram or @evergreendishes on Facebook.

    Let’s be connected, follow us on Twitter, YouTube, Instagram, Facebook and Pinterest

    Subscribe to get all updates and an e-book for free !

    shhhhh secret cooking challenge
    shhhhh secret cooking challenge


  • Mysore Rasam

    Mysore Rasam

    The season is mild rainy days and chilly nights, a steaming hot food with a few pakodas is ideal, isn’t it? Today, I have a rasam recipe for you.

    What is rasam?

    Rasam is a lentil based, thin soup like accompaniment served with hot steamed rice. It is popular in South India mainly in the states of Karnataka, Tamilnadu and Andhra Pradesh.

    What are the different variety of rasam that one can make?

    There are many variety of rasam that one can relish. Pepper rasam, tomato rasam, saaru, neer saaru, lemon rasam, andhra rasam, mysore rasam are a few variety of rasam that one can prepare.

    What is the difference between Rasam and Sambar?

    Rasam and Sambar are siblings from South India. Rasam is thinner in consistency and usually served with steamed rice. Sambar is slightly thicker than rasam and has different vegetables in it, onion may or may not be added. It is not only served with rice but also idly, dosa and vada.

    What is Mysore Rasam?

    Mysore Rasam as the name suggests, hails from the sate of Karnataka. It is also known as Arachuvitta Rasam. It is a rasam made using fresh spice mix and coconut. It is flavoursome. Let’s get to the recipe of it.

    Ingredients:

    • 1 cup tur dal
    • 2 tomato
    • 1/2 teaspoon mustard
    • 1/4 teaspoon turmeric powder
    • a small lemon size ball of tamarind
    • 1 teaspoon ghee

    For the rasam mix:

    • 1 tablespoon bengal gram
    • 1 tablespoon coriander seed
    • 1/2 teaspoon cumin
    • 1/2 teaspoon pepper
    • 1/4 teaspoon methi
    • 5 dry red chilli
    • 2 tablespoon fresh coconut

    For the seasoning:

    • 2 teaspoon ghee
    • 1/2 teaspoon mustard seed
    • 1/4 teaspoon asafoetida
    • 1/4 teaspoon turmeric powder
    • 1/4 teaspoon cumin
    • 1 red chilly
    • curry leaves

    Method:

    1. Wash the tur dal, add two cups of water and cook it in pressure cooker for three whistles. The dal should be smoothly cooked.
    2. Soak the tamarind in water.
    3. Make tomato puree, keep it aside.
    4. Take a pan, add a teaspoon of ghee and roast all the ingredients except coconut under “For the rasam mix” for two to three minutes. Put the coconut in the end and roast for another minute. When it is completely cool, grind them together.
    5. Extract the tamarind pulp. Mix it with tomato puree, put it to boil, the raw smell of the tomatoes should go.
    6. Put the ground rasam mix, jaggery, and salt into it. Mix the cooked dal well and put it along with other ingredients. Add three cups of water.
    7. Make seasoning, heat ghee in a pan. Add mustard seeds, as it splutters, put cumin, asafoetida, turmeric powder, red chilly and curry leaves. Pour it over the rasam
    8. Once the rasam boils, it is done.
    9. Serve hot with rice.
    Mysore Rasam

    Mysore Rasam

    Mysore Rasam is spicy- tangy lentil based dish served with hot steamed rice.
    Prep Time 20 minutes
    Cook Time 20 minutes
    Total Time 40 minutes
    Course: lunch ideas, Main Course
    Cuisine: karnataka

    Ingredients
      

    • 1 cup tur dal
    • 2 tomato
    • 1/4 teaspoon turmeric powder
    • small lemon size ball tamarind
    For Rasam Mix
    • 1 teaspoon ghee
    • 1 tablespoon bengal gram
    • 1 tablespoon coriander seed
    • 1/2 teaspoon cumin
    • 1/2 teaspoon pepper
    • 1/4 teaspoon fenugreek
    • 5 red chilli
    • 1 sprig curry leaves
    • 2 tablespoon fresh coconut
    For the seasoning
    • 2 teaspoon ghee
    • 1/2 teaspoon mustard seed
    • 1/4 teaspoon asafoetida
    • 1/8 teaspoon turmeric powder
    • 1/4 teaspoon cumin
    • 1 red chilli
    • 1 sprig curry leaf

    Method
     

    1. Wash the tur dal, add two cups of water and cook it in pressure cooker for three whistles. The dal should be smoothly cooked.
    2. Soak the tamarind in water.Make tomato puree, keep it aside.
    3. Take a pan, add a teaspoon of ghee and roast all the ingredients except coconut under "For the rasam mix" for two to three minutes. Put the coconut in the end and roast for another minute. When it is completely cool, grind them together.
    4. Extract the tamarind pulp. Mix it with tomato puree, put it to boil, the raw smell of the tomatoes should go.Put the ground rasam mix, jaggery, and salt into it. Mix the cooked dal well and put it along with other ingredients. Add three cups of water.
    5. Make seasoning, heat ghee in a pan. Add mustard seeds, as it splutters, put cumin, asafoetida, turmeric powder, red chilly and curry leaves. Pour it over the rasam. Once the rasam boils, it is done.Serve hot with rice.

    Pin it for later:

    Mysore Rasam

    I am sharing this with the Facebook group, “Food for Feast” where like minded bloggers decide a theme to blog every month. The theme for September was “Satvik Recipe”. Satvik food is that food that can be offered to God and does not contain onion and garlic in it.

    I am also sending this post MLLA 131 hosted by Sasmita of First Timer Cook . It is a monthly event started by Susan and now hosted by Lisa of Lisa’s Kitchen.

    If you have liked this post, do leave a comment below. If you ever make it, do take a picture and post it on Facebook by tagging @evergreendishes or on Instagram by tagging @foodiejayashree.

    Subscribe to get a book of handyhints for free !


  • Banana Betel Milkshake | No Cook Recipes

    Banana Betel Milkshake | No Cook Recipes

    Banana Betel Milkshake is tasty and healthy. It is ideal for breakfast or as a refreshing summer drink.

    Betel leaves holds a great value in India since ancient times. It is used since 400B.C. Betel leaves are used in auspicious functions as an offering to the Lord. They are also given to guests as a token of respect along with betel nut during ceremonies.

    It is a practice to chew paan especially after a heavy meal. This dates back to the ages; chewing of paan is associated with digestion, betel leaf is smeared with slate lime and arecanut powder is added to it. Betel leaves are used as antiseptic, breath freshener and stimultant while arecanut is aphrodasiac.

    While betel leaf and areca nut powder are the main ingredients in paan, many vibrant varieties are made and relished today. It is a trend to have with chocolate topping or with a smoky touch. Some use katechu, while a few add sweeteners and gulkand to it.

    Pros and Cons of Betel Leaf

    The use of betel leaf aids in the treatment of headache, cuts, abrasions and injuries, itching mastitis and constipation. But one needs to be aware of its downside too and be careful in regular consumption. According to CDC, using of betel leaf, areca nut and betel quid usage causes an increased risk of developing white and reddened lesions in the mouth that may lead to cancer.

    While we do make recipes with betel, it is not a regular feature at home. I rarely buy betel leaves on a daily basis. With this being said, today I present to you Banana Betel Milkshake

    Banana Betel Milkshake

    Ingredients:

    • 1 cup milk
    • 1 banana
    • 2 betel leaves
    • 1/2 teaspoon honey
    • 1 teaspoon soaked chia seed

    Method:

    1. Wash the betel leaf and remove the stalk and strands.
    2. Cut the banana.
    3. Blend milk along with banana and betel leaf. Add honey, give a swirl.
    4. Pour in glass, top with chia seed and serve.

    Take a tip:

    • Sugar may be added instead of sugar.
    • Adding of chia seed is optional.
    • Use the green coloured betel leaf and it is good to use tender leaves.
    • You can alternately make only paan milkshake, blend betel leaf and a spoon of gulkand along with milk.

    Pin it for later:

    glass of banana betel milkshake
    banana betel milkshake


    A few other recipes with chia seed that I keep making are mango jam with chia seed, chocolate chia seed pudding, strawberry and chia souffle

    About the event :

    This post was first published on 13/9/22. On 17/9/22, I have changed the picture of it. Sending this to Foodies_Redoing Old Post 85. It is a fortnightly event, we work on old posts which need a new look either by changing the pictures or the text. Here I have changed the picture only. 


    banana betel milkshake
    Evergreendishesdev

    Banana Betel Milkshake

    Banana Betel Milkshake is tasty and healthy.
    Prep Time 5 minutes
    Total Time 5 minutes
    Servings: 1 glass
    Course: Breakfast
    Cuisine: Indian

    Ingredients
      

    • 1 cup cold milk 1 cup = 240 ml
    • 1 banana
    • 2 betel leaf
    • 1/2 teaspoon honey
    • 1 teaspoon soaked chia seed

    Equipment

    • blender

    Method
     

    1. Wash the betel leaves, remove the stalk and strand.
    2. Cut the banana.
    3. Blend them along with milk.
    4. Add honey and swirl it once again.
    5. Pour in glass, top with chia seed and serve.

    Notes

    • Sugar may be used instead of honey.
    • Using of chia seed is optional.
    • One can make Paan Milkshake, use betel leaves and gulkand along with milk. 
    • It is best served chilled, thus use cold milk. 

    If you have liked this post, do share it with your family and friends. If you ever make it, take a picture and share it with me by tagging @foodiejayashree on Instagram or @evergreendishes on Facebook, I will share it further.

    Subscribe to get all updates and a book of handy hints for free !


  • Sel Roti / how to make  sel roti

    Sel Roti / how to make sel roti

    Sel Roti is a ring shaped, mildly sweet bread from Nepalese cuisine. It is commonly made during festivals of Dashain and Tihar in Sikkim and Darjeeling. It is one of the essentials during ceremonies and functions.

    It’s that time of the month, when we folks at Shhhh Secretly Cooking Challenge Group cook from a particular state and for the month of August it is Sikkim. My partner was unavailable due to personal reasons and the secret ingredients, oil and rice were given by Mayuri. Do check out her blog Mayuris-Jikoni where she has a wide range of dishes from different cuisine. I want to try the Veg /Thukpa soup that she made for this cuisine, it looks so tempting.

    Rice is the staple food of many people in the world. Sikkimese are mainly rice eaters. They have a lot of influence from Nepal as it is the only state in India with ethnic majority of Nepalese. Gundruk and Sinki are the two popular vegetarian dishes from Sikkim. (Source : Wikipedia)

    Now, here is the Sikkimese dish that I prepared, amazingly unique, I loved trying and making this one. It needs a little practice initially, but you can do it.


    Sel Roti

    Ingredients:

    • 1/2 cup rice
    • 2 tablespoon sugar
    • 2 tablespoon ghee
    • water for soaking + some water for grinding
    • oil for frying

    Method:

    1. Wash the rice and soak it overnight.
    2. Drain the water, rinse it again, put in a colander.
    3. Grind it along with ghee and sugar along with a little water to a batter. The batter should be moderate in consistency.
    4. Remove the batter in a bowl.
    5. Keep it aside for fifteen minutes.
    6. Mix the batter well .
    7. Take a squeezy bottle or use an old bottle as I did. Take a disposable half litre bottle and cut it at one-third of its length. You can easily put the batter in it and slowly open the cap when you are ready to drop the batter in the oil. It is fine if you pour it with the ladle.
    8. Heat oil in a pan, pour into ring shape and deep fry on a high flame to golden colour. Remove it on a plate with tissue paper and repeat for the rest of the batter.
    9. It is usually served with a potato stir fry, but may be eaten by itself.

    Take a tip:

    • Sel Roti has a long shelf life, but when making for the first time, make a small quantity.
    • It can be eaten as a snack.
    • The batter should be neither too thick nor thin. It can be put with hand but needs practice. Using an old bottle is ideal.
    sel roti
    sel roti
    Evergreendishesdev

    Sel Roti

    Sel Roti is a unique, mildly sweet flatbread from Nepalese cuisine. It is commonly made during festivals and celebrations in Sikkim and Darjeeling.
    Course: lunch ideas
    Cuisine: nepalese, sikkim

    Ingredients
      

    • 1/2 cup rice
    • 2 tablespoon sugar
    • 2 tablespoon ghee
    • water for soaking and grinding
    • oil / ghee for frying

    Method
     

    1. Wash the rice and soak it overnight in water.
    2. Next day, discard the water and rinse it. Grind rice along with ghee and sugar. Let the batter be of medium consistency
    3. You may use a squeezy bottle to make the rings, otherwise cut a disposable half litre bottle and use it. It comes out good with it too.
    4. Heat oil in a pan. once the oil is hot, put batter in the mould and drop it in the shape of a ring. Deep fry until golden in colour. Repeat for the rest of the dough.

    Notes

    • Jhir are long sticks used to deep fry and remove the rings from oil.
    • The batter can be put using hand but it needs practice.
    • The used bottle technique works good, just ensure the lid is closed, open the lid while you are ready to drop the batter. 

    If you ever make this dish, take a picture and share it by tagging @foodiejayashree on Instagram or @evergreendishes on Facebook.

    You can also save this recipe on pinterest, pin it for later:

    Sel Roti

    Subscribe to get a book of handy hints for free and all updates in your inbox. Check out my e-books on Amazon.