Blog

  • Pomegranate Pudding | Kids Favourite Recipe

    Pomegranate Pudding | Kids Favourite Recipe

    Jump to Recipe Print Recipe

    Pomegranate pudding is a good dessert to serve for children. Children will be happy and now you are a super mom who knows how to keep all things good. Pomegranate jelly is healthier as the fruit juice is used here.

    This is a vegan and gluten free dessert.

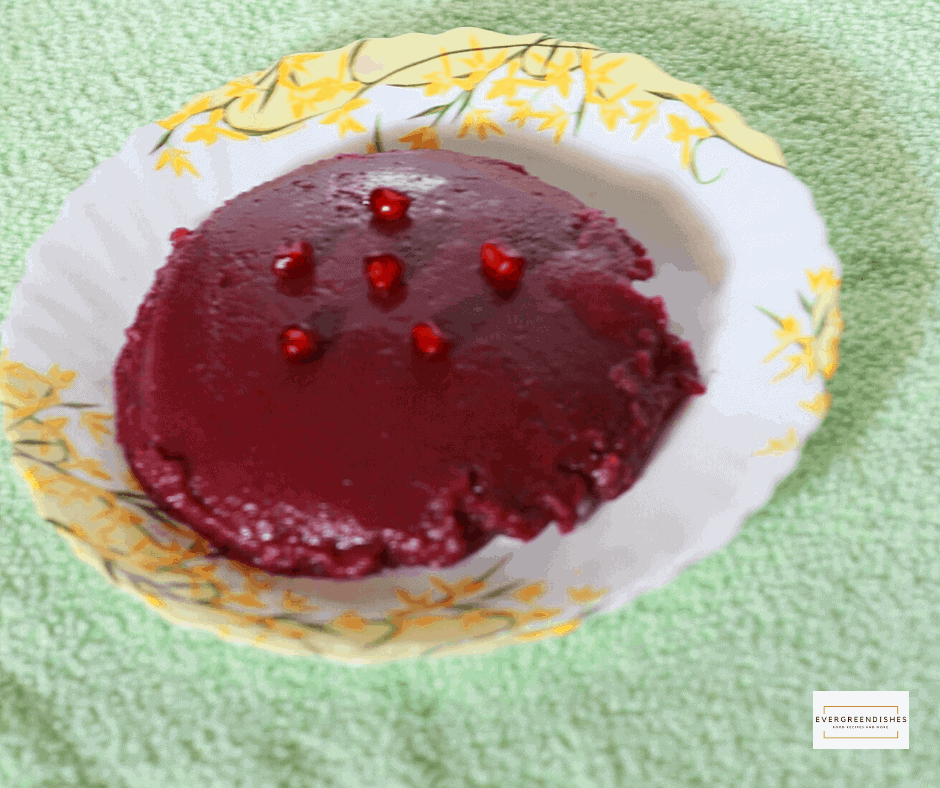
    Kids are fussy eaters and this jelly like dessert is ideal to serve them. Love the dark colour of it, it looks amazingly good. You can add a few arils while setting it, I have not put it.

    Pomegranate Pudding Recipe

    Ingredients:
    Measurement : 1 cup =250 ml
    • 2 cups pomegranate juice
    • 3 tbsp sugar
    • 3 tbsp corn flour
    • 1 tablespoon butter

    Method:

    1. Remove the skin and separate the arils.
    2. Put them in the juicer and extract the juice, do not add water to it. I required four pomegranates to get the required quantity of extract.
    3. Mix cornflour and sugar to it. Stir it well so that no lumps remain.
    4. Put it in a pan and set it to boil on a low flame. Keep stirring in between. Now, add the butter to it and let it continue to cook. It needs some time but once it thickens put it in a mould.
    5. Chill it for three hours and serve.
    Take a tip:
    1. Do not add water while grinding. If necessary, add only half a glass of water.
    2. It can be poured in small moulds and set aside.

    pomegranate pudding

    Pomegranate Pudding

    Pomegranate pudding is a tasty and healthy dessert ideal to serve for children.
    Prep Time 15 minutes
    Cook Time 25 minutes
    Setting time 2 hours
    Course: Dessert
    Cuisine: international

    Ingredients
      

    • 2 cups pomegranate juice
    • 3 tbsp sugar
    • 3 tbsp corn flour
    • 1 tbsp butter

    Method
     

    1. Remove the skin and separate the arils.
    2. Put them in the juicer and extract the juice, do not add water to it. I required four pomegranates to get the required extract.
    3. Mix cornflour and sugar to it. Stir it well so that no lumps remain.
    4. Put it in a pan and set it to boil on a low flame. Keep stirring in between. Now, add the butter to it and let it continue to cook. It needs some time but once it thickens put it in a mould.
    5. Chill it for three hours and serve.

    Notes

    Do not add water while grinding. If necessary, add only half a glass of water.
    It can be poured in small moulds and set aside.

    The other recipes with pomegranate that I have on blog are : Pomegranate chaat, Pomegranate Mousse
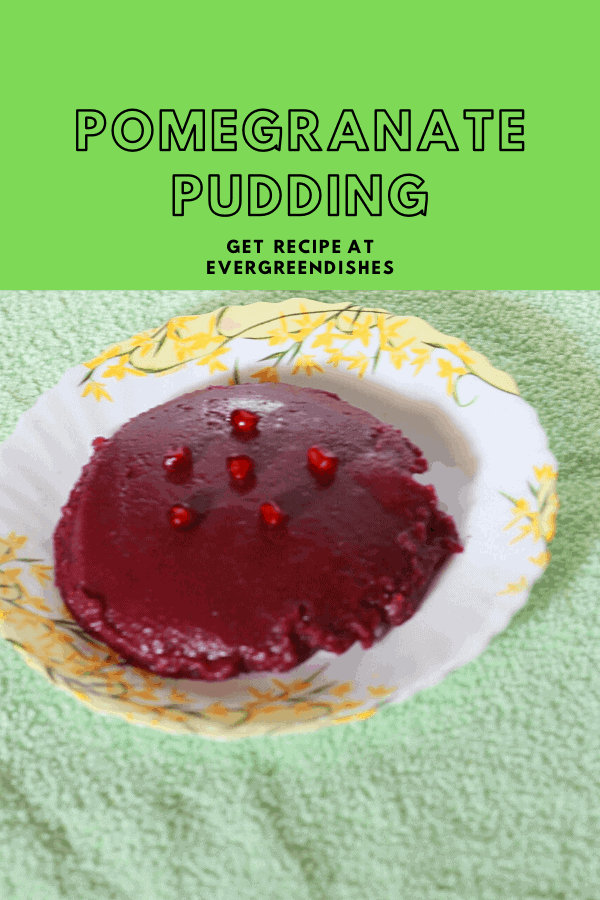
    Pin it for later:
    pomegranate pudding
    pomegranate pudding


    If you have liked this recipe, do share it with your family and friends. If you ever recreate it, take a picture and tag @foodiejayashree on Instagram, or @evergreendishes on Facebook and Twitter.

    Let’s be connected !

    Subscribe to get all updates and a book of handy hints for free !


  • Moringa leaves chutney powder / Drumstick leaves powder recipe

    Moringa leaves chutney powder / Drumstick leaves powder recipe

    I had heard and read so much of moringa leaves, but I had never seen them. Using it in my cooking was just a dream, I did ask a few vegetable vendors but I never got a futile answer. Thus, my search for moringa leaf ended. But suddenly, last week, one morning, my maid brings a bagful of these leaves and I was in awe. Well, at last I did cook with these leaves in my lifetime and now I know from where to get them.

    Moringa leaves are super healthy and rightly called as “Magical Moringa”. It is rich in iron, fibre and anti-oxidants. A  few benefits of these leaves are listed below.

    Benefits of moringa leaves:

    • It aids in weight loss.
    • It helps to lower the cholesterol level.
    • It helps to improve the digestive system.
    • It fights insomnia. It is rich in proteins and helps to boost the feel good hormones.
    • It is rich in nutrients. It has three times more iron than spinach and  twice the amount of protein in milk.

    Moringa leaf chutney powder makes a good condiment. It tastes good with hot steamed rice when served with a little ghee or oil. It pairs well with curd rice. It is ideal to use with idly and dosa.

    How to separate the moringa leaves:

    I learnt this from the vegetable vendor who comes regularly to my house. Separating the moringa leaves from the stalk is a tremendous task.  The leaves are small and one needs ample time and patience to do it. The best way to remove the leaves is to put the fresh stalk of leaves in a polythene bag, tie it tightly and keep it aside for a day. The next day, most of the leaves shed by themselves. You can also string them very easily now.


    moringa leaf chutney powder

     Moringa Leaves Chutney Powder

    Ingredients:
    • 1 cup moringa leaves (drumstick leaves, nuggekayi soppu)
    • 1/2 cup dessicated coconut
    • 1 tablespoon urad dal
    • 2 teaspoon chilly powder
    • a small piece of tamarind
    • jaggery
    • salt
    • 1 tablespoon oil
    • asafoetida
    Method:
    1. Wash the moringa leaves and put them to dry on a cloth.
    2. Dry roast the coconut. Put it aside on a plate.
    3. Dry roast the urad dal. Put it aside.
    4. Dry roast the moringa leaves until they are crispy.
    5. Take a little oil, put the chilly powder and roast it.
    6. Roast the tamarind for a few seconds.
    7. Once they are cool, at first, grind the coconut and urad dal together. Then, add the roasted moringa leaves and grind them together for a few seconds. Add tamarind, salt and  jaggery to it. Grind.
    8. Take oil in a pan, heat it, add asafoetida and remove it. Put the ground powder to it and mix well.
    9. Moringa leaf chutney powder is ready to serve.

    Recently, I made another version of moringa chutney powder and it turned out good.

    2nd kind of Moringa Leaf Chutney Powder :

    Ingredients:

    • 1 cup desiccated coconut
    • 1 tablespoon urad dal
    • 2 teaspoon sesame
    • 1 tablespoon groundnut
    • 1 cup moringa leaves
    • 1/2 cup curry leaves
    • tamarind
    • 1 teaspoon oil
    • 5 red chilli
    • 1 tablespoon oil
    • asafoetida

    Method:

    1. Wash the moringa leaves and lay them on a cotton cloth.
    2. Wash the curry leaves and wrap them in a cloth.
    3. Dry roast the coconut pieces. Put it aside in a plate.
    4. Dry roast urad dal, it should be golden in colour.
    5. Dry roast sesame and ground nut separately.
    6. Dry roast curry leaves and moringa leaves separately until crisp.
    7. Dry roast the tamarind.
    8. In a little oil add the red chilli and saute them until crisp.
    9. Coarsely grind coconut pieces, now add urad dal, sesame and ground nut to it, give a swirl.
    10. Add red chilli to it and grind them together.
    11. Finally, add the curry leaves and moringa leaves to it. Put salt and give a swirl.
    12. Add the roasted tamarind and a little jaggery to balance the flavours. Grind them for the last time.
    13. Make seasoning with asafoetida, put the powder into it and mix.
    14. Once it is cool, store in an air-tight container.
    moringa leaf chutney powder

    Moringa Leaf Chutney Powder

    Moringa leaf chutney powder is a tasty, healthy condiment ideal to store at home. It tastes good with steamed rice, idli, dosa or chapati.
    Course: condiments
    Cuisine: South Indian

    Ingredients
      

    • 1 cup moringa leaves drumstick leaves
    • 1/2 cup dessicated coconut
    • 1 tablespoon urad dal
    • 2 teaspoon chilly powder
    • a small piece of tamarind
    • jaggery
    • salt
    • a pinch of asafoetida

    Method
     

    1. Wash the moringa leaves and put them to dry on a cloth.
    2. Dry roast the coconut. Put it aside on a plate.
    3. Dry roast the urad dal. Put it aside.
    4. Dry roast the moringa leaves until they are crispy.
    5. Take a little oil, put the chilly powder and roast it. Put the asafoetida over it.
    6. Roast the tamarind for a few seconds.
    7. Once they are cool, at first, grind the coconut and urad dal together. Then, add the roasted moringa leaves and grind them together for a few seconds. Add tamarind, salt and  jaggery to it. Grind.
    8. Moringa leaf chutney powder is ready to serve.

    Notes

    Store in clean jar.

    The other kind of chutney powder recipes that I have on blog are : Garlic chutney powder, Peanut chutney powder, Curry leaf powder

    The other recipe that I have using moringa leaves is a guest post by Lathiya used in dal 

    Pin it for later:

    moringa leaves chutney powder

    If you have liked this recipe, do share it with your family and friends. If you ever recreate it, take a picture and tag @foodiejayashree on Instagram, or evergreendishes on Facebook and Twitter.

    Let’s be connected !

    Subscribe to get all updates and a book of handy hints for free !


  • Strawberry Banana Milkshake

    Strawberry Banana Milkshake

    Strawberry Banana Milkshake is creamy, tasty and filling. It is ideal to serve along with breakfast.

    Milkshakes are one of my family’s favourite, every season is good for it.  Here is another delicious drink to whip for breakfast. The addition of banana makes it wholesome and filling.

    Banana is a healthy fruit with many nutrients. Banana in all stages ( firm to ripe) is good and the ripe ones are more sweeter. Once the fruit is slightly over ripe, it is hardly eaten  by anyone at home. I put it in the freezer and use it to make milkshake.

    It’s the season of strawberries and I love to make the best use of it. Strawberry Banana milkshake is creamy, tasty and filling. It is ideal to serve along with breakfast. Children might like to relish in the evening after coming back home.

    Milkshakes made with fresh fruits taste awesome but putting the fruit pieces in freezer gives a good texture to it.

    This has no added sugar in it, thus it is a healthy recipe and ideal for weight watchers.

    strawberry banana milkshake

    Ingredients:

    • 1 cup cold milk
    • 1 banana
    • 4 strawberry

    Method:

    Cut the banana. Wash the strawberry. Put them in the blender along with milk and swirl for thirty seconds. Banana milk shake is ready to use.

    Take a tip:

    • A scoop of vanilla or strawberry ice cream may be added but I do not add.
    • Sugar may be added if serving it for  children.
    • Honey may be added.
    • To make it vegan, use almond milk.
    • Freezing strawberry and banana gives a frothy texture to the milkshake.

    A few other recipes using strawberry are Strawberry Lassi, Strawberry Mojito, Strawberry Icecream, Strawberry Mousse, Strawberry Jam

    Strawberry Banana Milkshake

    Strawberry Banana Milkshake is a tasty and filling drink. It is ideal to serve for breakfast.
    Course: Breakfast
    Cuisine: international

    Ingredients
      

    • 1 cup cold milk
    • 1 banana
    • 4 strawberry

    Method
     

    1. Cut the banana. Wash the strawberry. Put them in the blender along with milk and swirl for thirty seconds. Banana milk shake is ready to use.

    Notes

    • A scoop of ice cream may be added.
    • Add sugar if serving for children.
    • Honey may be added.
    • Freezing banana and strawberry gives a frothy texture to the milkshake.

    Pin

    What are the ways you use strawberries in cooking?  Do let me know in the comments section.

    If you have liked this recipe, do share it with your family and friends. If you ever make this recipe, do take a picture and tag me @foodiejayashree on Instagram or @evergreendishes on Facebook, I will share it further.

    Let’s be connected:Facebook, Twitter, Pinterest, Instagram, YouTube

    Subscribe to get all updates and a book of handy hints for free !

  • Kafuli Recipe / how to make Kafuli | Uttarakhand cuisine

    Kafuli Recipe / how to make Kafuli | Uttarakhand cuisine

    Jump to Recipe Print Recipe

    Kafuli is a popular and delectable side dish from Uttarakhand cuisine. A rustic make, it is absolutely tasty and pairs well with steamed rice, chapati or parathas.

    The cuisine of Uttarakhand is packed with nutrition, simple and makes use of local vegetables. It is mostly vegetarian. The two regions have different cuisine, thus they have Garhwali uisine and Kumaoni cuisine. They have a wide range of tasty dishes such as aloo tamatar ki jhol, kafuli, phaanu, baadi, chainsoo to name a few. I would love to try these delicacies sometime but for now, it is Kafuli and I am so happy that I made it.

    Well, I am back again with  Shhhh Secretly Cooking Group after two month break and this month, the state we are deriving inspiration  is the one and only Uttarakhand. My partner is Shobha Keshwani of Shoba’s Food Maaza. Her blog has many dishes from different cuisines. Do check it out. The two ingredients that she gave me were fenugreek leaves and salt. I had given urad dal and onion and Shobha madeUrad Dal Ke Pakode.

    Kafuli

    Kafuli recipe | Uttarakhand cuisine

    Ingredients:

    • 2 bunch spinach
    • 1 bunch fenugreek leaves
    • 3 green chilly
    • 2 tablespoon oil (preferably mustard oil)
    • 1 teaspoon cumin
    • a pinch of asafoetida
    • 2 inch ginger
    • 5 cloves garlic
    • 1/2 teaspoon turmeric powder
    • 1/2 teaspoon coriander powder
    • 1/2 teaspoon chilly powder
    • 1 tablespoon curd
    • 1 teaspoon rice flour
    • salt to taste

    Method:

    1. Wash the green leaves and chop them.
    2. Boil spinach, fenugreek leaves and green chillies with  half a cup of water.
    3. Make a paste of ginger and garlic.
    4. Make a puree of boiled green leaves.
    5. Take oil in a pan, add cumin. As it splutters, put ginger-garlic paste to it and saute for sometime.
    6. Add the puree, turmeric powder, coriander powder, salt and water according to the consistency required.
    7. Let cook for sometime.
    8. Make a paste of rice flour in a little water and put it.
    9. Blend the curds and add it.
    10. Let simmer for sometime.
    11. Kafuli is ready, serve it phulka or chapati.
    Evergreendishesdev

    Kafuli / Uttarakhand cuisine

    Kafuli is a delicious and healthy accompaniment from Uttarakhand cuisine. It pairs well with rice as well as chapati. 2 bunch spinach
    Prep Time 10 minutes
    Cook Time 15 minutes
    Total Time 25 minutes
    Course: dinner, lunch
    Cuisine: uttarakhand

    Ingredients
      

    • 2 bunch spinach
    • 1 bunch fenugreek leaves
    • 3 green chilly
    • 2 tablespoon oil
    • 1 teaspoon cumin
    • 2 inch ginger
    • 5 cloves garlic
    • 1/2 teaspoon turmeric powder
    • 1/2 teaspoon coriander powder
    • 1/2 teaspoon chilly powder
    • 1 tablespoon curd
    • 1 teaspoon rice flour
    • salt to taste

    Method
     

    1. Wash the green leaves and chop them.
    2. Boil spinach, fenugreek leaves and green chillies with  half a cup of water.
    3. Make a paste of ginger and garlic.
    4. Make a puree of boiled green leaves.
    5. Take oil in a pan, add cumin. As it splutters, put ginger-garlic paste to it and saute for sometime.
    6. Add the puree, turmeric powder, coriander powder, salt and water according to the consistency required.
    7. Let cook for sometime.
    8. Make a paste of rice flour in a little water and put it.
    9. Blend the curds and add it.
    10. Let simmer for sometime.
    11. Kafuli is ready, serve it phulka or chapati.


    If you ever make this Kafuli recipe,  do take a picture and tag @foodiejayashree on Instagram or @evergreendishes on Facebook or Twitter. I will be glad to see your creation and share it further. Let’s be connected, do follow on social media platforms. Until next time, let’s stay connected.  Subscribe to get all updates and an e-book for free. Check out my e-books on Amazon.  Happy Cooking !

    Pin it for later:

    Kafuli

    Subscribe to get all updates and an e-book for free!

  • Cabbage and Methi Muthiya | Gujarati cuisine

    Cabbage and Methi Muthiya | Gujarati cuisine

    Jump to Recipe

    muthiya | methi muthiya | gujarati muthiya | muthiya recipe

    Muthiya is a popular steamed snack from Gujarati cuisine. It was usually made with bottle gourd traditionally. But today, we find muthiyas of many kind. Here, I have used cabbage and fenugreek leaves along with onion. It turned out tasty and made a good side dish. 

    Muthia / Muthiya is made in different versions. Dudhi or bottle gourd is used in it and this is the  traditional  method of making muthiya. The others are made using different veggies and green leaves. Some of them are palak muthiya, alu muthiya, methi muthiya,  veg muthia. 

    Muthiya is steamed and then later tossed in a seasoning. Thus, it is a healthy Gujarati snack and ideal with a cup of hot tea. It may be deep fried also, but I love the steamed version. The deep fried muthias are usually used in ondhiyo and other kind of stir fry recipes of this cuisine.

    Do note that no water is used while mixing the dough, if needed, a tablespoon of it is added. 

    cabbage and methi muthiya
    cabbage and methi muthiya

    The other Gujarati dishes on the blog are:

    Gud Papdi, KhandviMethi khakra, Tri-colour dhokla, Oats dhokla

     Cabbage Methi Muthiya

    Ingredients:

    • 1 cup besan
    • 1 cup wheat flour
    • 1/2 cup semolina
    • 1 cup cabbage grated
    • 1 onion grated
    • 1 bunch fenugreek finely chopped
    • ginger chilly paste ( 2 chilly and a inch of ginger)
    • 1 teaspoon cumin powder
    • 1 teaspoon coriander powder
    • 1/2 teaspoon turmeric powder
    • asafoetida
    • 1 teaspoon sugar
    • salt
    • 2 tablespoon oil
    • 1 tablespoon curd
    • 1/4 teaspoon soda
    • 1 teaspoon sesame
    Seasoning:
    • 1 tablespoon oil
    • 1 teaspoon mustard
    • asafoetida
    • turmeric powder
    • 1 teaspoon sesame
    • a few curry leaves

    Equipment: 

    steamer, cooking pan, ladle, spoon, steaming pan

    Method:

    1. Grate the cabbage.
    2. Grate the onion. 
    3. Cut the methi leaves and wash it well. Put it in a colander for sometime. 
    4. Take a wide bowl, add wheat flour, gram flour, semolina, turmeric powder, cumin powder, coriander powder, asafoetida, sesame, baking powder and salt. Mix them.
    5. Squeeze the water from the  grated cabbage and onion. Put them along with fenugreek leaves, oil, curd and mix them thoroughly.  Knead it to form a dough. 
    6. Make them into four rolls of elongated shape.
    7. Heat a steamer with some water. Smear a little oil in the tin and keep the rolls in it.
    8. Steam it for 10-12 minutes, once it is done, remove them and cut them into discs.
    9. Take oil in a pan, put mustard seeds, once it splutters, put asafoetida, turmeric powder, sesame and curry leaves. Now, put the discs in it and mix it well. Once it is warm, remove and serve. 

    Print Recipe

    cabbage and methi muthiya
    Evergreendishesdev

    Cabbage and Methi Muthiya

    5 from 8 votes
    Cabbage and methi muthiya is a tasty and healthy snack from Gujarati cuisine.
    Prep Time 15 minutes
    Cook Time 15 minutes
    Course: evening snacks
    Cuisine: Gujarati

    Ingredients
      

    • 1 cup besan
    • 1 cup wheat flour
    • 1/2 cup semolina
    • 1 cup cabbage grated
    • 1 onion grated
    • 1 bunch fenugreek finely chopped
    • ginger chilly paste 2 chilly and a inch of ginger
    • 1 teaspoon cumin powder
    • 1 teaspoon coriander powder
    • 1/2 teaspoon turmeric powder
    • asafoetida
    • 1 teaspoon sugar
    • salt
    • 1 tablespoon curd
    • 1/4 teaspoon soda
    • 1 teaspoon sesame
    • Seasoning:
    • 1 tablespoon oil
    • 1 teaspoon mustard
    • asafoetida
    • turmeric powder
    • 1 teaspoon sesame
    • a few curry leaves

    Method
     

    1. Grate the cabbage.
    2. Grate the onion.
    3. Cut the methi leaves and wash it well. Put it in a colander for sometime.
    4. Take a wide bowl, add wheat flour, gram flour, semolina, turmeric powder, cumin powder, coriander powder, asafoetida, sesame, baking powder and salt. Mix them.
    5. Squeeze the water from the grated onion and cabbage. Put them along with fenugreek leaves, oil, curd and mix it well. Knead it to form a stiff dough.
    6. Make them into four rolls of elongated shape.
    7. Heat a steamer with some water. Smear a little oil in the tin and keep the rolls in it.
    8. Steam it for 10-12 minutes, once it is done, remove them and cut them into discs.
    9. Take oil in a pan, put mustard seeds, once it splutters, put asafoetida, turmeric powder, sesame and curry leaves. Now, put the discs in it and mix it well. Once it is warm, remove and serve.

    cabbage and methi muthiya

    Subscribe to get an e-book for free !


  • Tuvar Sabzi / Winter Special

    Tuvar Sabzi / Winter Special

    Tuvar Lilva is a winter vegetable, it is abundantly available. It makes a good accompaniment with chapati or jowar roti. Kachoris are often made and they taste good. It is often used in sambar along with other vegetables. 

    Tuvar  is mainly cultivated as a legume and is the primary food for the majority of the Indian population. Dal makes a good accompaniment with rice and chapati.

    Today, I have a stir fry and it can be made in 15 minutes if  peeled and kept ready.  What do you make with it? I had shared another variety earlier. 

    Tuvar is known as green pigeon pea and commonly called as Togare kalu in Karnataka and in Kerala as Tomara Payaru. In Europe, it is known as Congo Pea.

    tuvar sabzi
    tuvar sabzi

    Do you know the best way to store green pea and tuvar? Pour them in a zip lock bag, lock and deep freeze it. It stays good for atleast one month. If you keep it longer, the taste may not be all that good.

    To store green pea for a longer time, it is blanched, dried and then put in deep freezer. 

    Here is another recipe using Tuvar, ideal with chapati. 

    And here is the recipe of Tuvar Sabzi that I am sharing 

    Ingredients:

    • 1 cup tuvar lilva
    • 2 onion
    • 2 tomato
    • 1 tablespoon oil
    • 1/2 bunch coriander
    • 1 inch ginger
    • 6 green chilly
    • 4 cloves garlic
    • 6 cashew
    • salt

    Method:

    • Grind coriander, green chilly, ginger and garlic to a paste.
    • Cook tuvar lilva in pressure cooker with a little water.
    • Take oil in a pan, add onion and saute it.
    • Once it is light pink in colour, cashew pieces to it.
    • Then, add tomato and let cook for sometime.
    • Put turmeric powder to it.
    • Put the paste and the required salt.
    • Now, put the boiled peas to it and let cook for sometime.
    • Tuvar lilva stir fry is ready to serve.
    tuvar sabzi

    Tuvar Sabzi

    Tuvar Sabzi makes a quick and tasty accompaniment with chapati or jowar roti. It can be prepared in 15 minutes.
    Course: curry, vegetable
    Cuisine: Indian, Vegan,

    Ingredients
      

    • 1 cup tuvar lilva
    • 2 onion
    • 2 to mato
    • 1 tablespoon oil
    • 1/2 bunch coriander
    • 1 inch ginger
    • 6 green chilly
    • 4 cloves garlic
    • 6 cashew
    • salt

    Method
     

    1. Grind coriander, green chilly, ginger and garlic to a paste.
    2. Cook tuvar lilva in pressure cooker with a little water.
    3. Take oil in a pan, add onion and saute it.
    4. Once it is light pink in colour, cashew pieces to it.
    5. Then, add tomato and let cook for sometime.
    6. Put turmeric powder to it.
    7. Put the paste and the required salt.
    8. Now, put the boiled legumes to it and let cook for sometime.
    9. Tuvar Sabzi is ready to serve.

    If you ever make this recipe, take a picture and share it with us by tagging @foodiejayashree on Instagram or @evergreendishes on Facebook. It will be nice to see your creation. 

    You Tube Update:

    I have posted Strawberry Yoghurt on YouTube, do check it out.  Do like and subscribe to the channel. 

    Before I end my post, if you are not eating seasonal vegetables and fruits, I urge you to try tasting them. The fruits and vegetables  are good in quality, available in abundance and the price is less expensive. Buy from the local suppliers, they too are striving hard to make a living.

    Pin this for later:

    Tuvar Sabzi Winter Special
    Tuvar Sabzi Winter Special


    Subscribe to get a book of handyhints for free ! 


  • Oats Khichdi / healthy eating

    Oats Khichdi / healthy eating

    Jump to Recipe Print Recipe

    Oats Khichdi is a flavoursome, nutrition packed dish ideal to serve for breakfast, brunch or dinner. 

    One cannot deny the need of a good breakfast, it should be healthy, filling and tasty. Every morning it is a dilemma, what needs to be prepared, isn’t it? You can use oats a couple of times in a week to prepare variety of dishes.

    I used the Zerobeli Oats to make porridge and it was awesome. It is rich in fiber and protein, gluten free and ISO certified. Moreover, it cooks very easily and is creamy. It needs no topping such as nuts.

    I use oats to make a variety of dishes, it is versatile in use and the taste is liked at home, thus I can easily make it anytime of the day.

    I often make different varieties of khichdi at home and now thought of making it with oats. I used vegetables in it along with some masala powder, the result it was a filling and tasty meal.

    Have you tried making khichdi with oats? Khichdi is quite similar to the savoury pongal that is made in South India. Give a try to it, a few papad and pickle makes a good accompaniment with it. 

    The New Year, New Beginnings and Goals

    Today is the first day of 2020 and I want to make it an awesome one. I do not make big resolutions but something, which I can relate and stick to. I plan to eat healthy food in the coming days and thus oats will be my companion along with salads and fruits.

    oats khichdi
    oats khichdi


    Ingredients:

    • 1/2 cup moong dal
    • 1 cup oats
    • 1 cup mixed vegetables ( I used beans, carrot, peas )
    • 1 onion
    • 4-5  cup water
    • 1 tablespoon oil and ghee
    • 1/2 teaspoon cumin
    • 1 inch ginger
    • 1 green chilly
    • 1/2 teaspoon turmeric powder
    • 1/4 teaspoon asafoetida
    • 1/2 teaspoon chilly powder
    • 1/2 teaspoon pepper powder

    Method:

    1. Wash and soak the moong dal for at least one hour, this helps in proper cooking of the lentil.
    2. Chop the onion.
    3. Take oil and ghee in a pressure pan, add cumin. As it splutters, put grated ginger and green chilly along with some asafoetida. Add onion and saute it for sometime, put the vegetables into it. Saute for two minutes. Put turmeric powder and chilli powder to it.
    4. Now add moong dal to it and saute for a minute.
    5. Add oats and mix well for a minute. 
    6. Put water and salt to it and stir thoroughly.
    7. Close the lid and cook it until two whistles.
    8. Once the pressure releases, mix it and serve hot.

    Take a tip:

    • Soaking of lentil helps in cooking the lentil properly.
    • Soaking for longer time too is not recommended, it becomes slimy. 
    Evergreendishesdev

    Oats Khichdi

    Oats Khichdi is an easy to make, one pot breakfast dish. It is filling, tasty and healthy.
    Prep Time 15 minutes
    Cook Time 15 minutes
    Soaking time 30 minutes
    Servings: 2 people
    Course: Breakfast, lunch
    Cuisine: karnataka

    Ingredients
      

    • 1/2 cup moong dal
    • 1 cup oats
    • 1 cup mixed vegetables
    • 1 onion
    • 4 cup water
    • 1 tablespoon oil and ghee
    • 1/2 teaspoon cumin
    • 1 inch ginger
    • 1 green chilly
    • 1/2 teaspoon turmeric powder
    • 1/4 teaspoon asafoetida
    • 1/2 teaspoon chilli powder
    • 1/2 teaspoon pepper powder

    Method
     

    1. Wash and soak the moong dal for at least one hour, this helps in proper cooking of the lentil.
    2. Chop the onion
    3. Take oil and ghee in a pressure pan, add cumin. As it splutters, put grated ginger and green chilly along with some asafoetida. Add onion and saute it for sometime, put the vegetables into it. Saute for two minutes.
    4. Put turmeric powder and chilli powder to it.Now add moong dal to it and saute for a minute. Add oats and mix it well for a minute. Put water,salt and pepper powder to it and stir thoroughly.Close the lid and cook it until two whistles. Once the pressure releases, mix it and serve hot.

    Do check out the Zerobeli products now. You can either buy from their website on on Amazon.


    Disclaimer: This is a brand collaboration with Zerobeli. I received products from Zerobeli to test and review them. All inputs given are my own.

    Wishing all a fabulous year 2020 ahead ! May the new year be the beginning of many good things.

    Pin it for later:

    oats khichdi
    oats khichdi

    Let’s be connected. If you ever make this dish, take a picture and tag @foodiejayashree on Instagram or @evergreendishes on Facebook

    Subscribe to get all updates and a book of handy hints for free !

  • Cornflakes Cookies / how to make cornflakes cookies

    Cornflakes Cookies / how to make cornflakes cookies

    Jump to Recipe Print Recipe

    Cornflakes cookies are crunchy and tasty. They make a good snack to store in the jar.  Cornflakes cookies are made with a few ingredients easily available at home. They are eggless. 

    Cornflakes makes a good breakfast cereal. It is ideal to serve as a quick fix with cold or hot milk. Zerobeli cornflakes is crispy and tasty. It is rich in fibre, packed with vitamin and nutrients. With different flavors and rich taste it makes a good choice of breakfast every morning.

    Zerobeli is the innovative brand name for cereals by Georgia Foods Pvt Ltd. Cornflakes, oats, muesli in different flavors is not only tasty but also filling. It is a quick fix breakfast for busy week day mornings. I regularly use them and find them to be an ideal choice with taste and cost as well.

    We loved these cornflakes, it is not only tasty but keeps satiated for a long time. The breakfast has to be ready at 7.30a.m and some days, I find it difficult to prepare. Moreover, I can play around between milk and greek yoghurt and with different toppings. Some times, I top it with almonds while at times with cashew and berries.

    It makes a good choice for snack too as I am happy that children are not eating fried snacks to satisfy the hunger pangs. I love using these cornflakes to make different kind of snacks. You can opt to make the cornflakes chaat or chiwda with it. It makes a quick light snack to serve in the evenings.

    It is rich in dietary fibre and thus helps in controlling weight naturally. It makes ideal choice for adults also. Healthy eating is a choice which we need to make and help our family members to adopt.

    Now, for the festive season, I have some goodies here.

    With Christmas round the corner, I thought of making cookies and they were delicious. I am elated with these and shall make them again.


                                                                                                          Cornflakes Cookies

     Cornflakes Cookies Recipe

    Ingredients:

    Measurement: 1 cup = 150 ml

    • 1 cup Zerobeli cornflakes crushed
    • 1 cup softened butter
    • 1 cup castor sugar
    • 1 cup all purpose flour
    • 1/2 teaspoon baking powder
    • 1 tablespoon lemon juice
    • 1/2 teaspoon vanilla essence

    Method:

    1. Take butter and castor sugar in a bowl and beat it until it is smooth and creamy.
    2. Add lemon juice, vanilla essence and baking powder to it.
    3. Now mix the flour to it.
    4. Pre-heat the oven at 170 degree centigrade.
    5. Put a baking sheet on the tray.
    6. Take a small ball of the dough and press it in the form of a cookie.
    7. Dust it with cornflakes on either side and arrange on the lined sheet.
    8. Repeat with the rest of dough.
    9. Bake it for 10-12 minutes.
    10. Once they are golden in colour, keep them to cool on the rack.

    Take a tip:

    • You can take wheat flour instead of plain flour.
    • A mixture of wheat flour and plain can also be taken.
    Evergreendishesdev

    Cornflakes Cookies

    Cornflakes cookies are tasty and make a good snack to store at home. The freshness of lime gives a good taste to it.
    Course: dry snack
    Cuisine: Vegetarian

    Ingredients
      

    • 1 cup zerobeli cornflakes crushed
    • 1 cup softened butter
    • 1 cup castor sugar
    • 1 cup all purpose flour
    • 1/2 tsp baking powder
    • 1 tbsp lemon juice
    • 1/2 tsp vanilla essence

    Method
     

    1. Take butter and sugar in a bowl, beat them until smooth and creamy.
    2. Add baking powder, vanilla essence and lemon juice to it.
    3. Put the flour and slowly knead to a dough.
    4. Pre-heat the oven at 170 degree celsius
    5. Place parchment paper on the baking tray.
    6. Take a small ball of the dough, press it lightly and roll it in the crushed cornflakes.
    7. Repeat with the rest of the dough.
    8. Bake for 10-12 minutes, they should be golden in colour.
    9. Let cool on the rack.
    10. Store in an air-tight container.

    Do check out Zerobeli products on their website. You can order online from Amazon also at discounted price.


    Disclaimer: This is a brand collaboration with Zerobeli . I received products from Zerobeli to test and review them. All inputs given are my own.

    Pin it for later:

    Cornflakes Cookies are crunchy, tasty and refreshing with every bite. They are ideal to make during Christmas and New Year eve.
    cornflakes cookies

    Are you making this one? If you ever make, take a picture and tag me @foodiejayashree on Instagram or @evergreendishes on Facebook. I will share it further.

    Are you looking for more interesting recipes?  Do  check out almond cookies and kulkul.

    Let’s be connected !

    Subscribe to get a book of handyhints for free !

  • How to make Mexican wedding cookies / Polvorones

    How to make Mexican wedding cookies / Polvorones

    Jump to Recipe Print Recipe

    Mexican Wedding Cookies / Polvorones are soft, crumbly, heavy, short bread cookies from Spain. They are often served during Mexican wedding menu and thus the name.

    It’s the season of baking and I am so happy about it. My daughter loves baking and is eagerly waiting to make these mexican cookies which we had made earlier.

    Polvorones are made with different kinds of nuts, it is one of the essentials during Mexican wedding and thus they are called by that name.

    They are classic ones which are simply irresistible. Sugar coated, they look so good. You take a bite, they are crunchy and soon melt in the mouth.

    I love these Mexican Wedding Cookies / Polvorones as they are tasty, easy to make, eggless, have a lovely texture and love the beautiful sugar coated look.

    A few pointers to make good cookies:

    • Always use butter at room temperature. Keep it outside ahead of time.
    • Make sure you are using good ingredients, do not regret later of throwing it.
    • Use proper measurements while baking.
    • Inspite of using proper measurements, you may end up in a disaster. It may be a difference in the oven setting or timing.
    • Do take a proper note of the oven settings as each one is different.


    Mexican Wedding Cookies/ Polvorones 


    Mexican Wedding Cookies / Polvorones 

    Ingredients 

    • 1 cup softened butter
    • 1/2 cup powdered sugar
    • 1 teaspoon vanilla essence
    • 2.25 cup all purpose flour
    • 1/4 teaspoon salt
    • 3/4 cup walnuts
    • sugar for coating

    Method:

    1. Take butter and sugar in a bowl and whip them together until they are well incorporated and smooth in texture.
    2. Add vanilla essence and salt to it.
    3. Slowly, add the flour in two batches to it.
    4. Mix it well.
    5. Fold the nuts into it.
    6. Take small ball of it and make it into small circle.
    7. Take a baking tray, put a sheet over it.
    8. Line the cookies on a sheet.
    9. Pre-heat the oven at 170 degree centigrade.
    10. Bake for five to ten minutes.
    11. Once they are golden in color, remove and coat them in the powdered sugar and put them on the rack again to cool.
    12. Serve when cool for the crumbly texture.

    Take a note:

    • You may reduce the quantity of walnuts if needed.
    • Pecans and walnuts are usually added to it. You may add any other nut to it.
    • A little bit of cinnamon powder may be added to the castor sugar while dusting them.
    • Butter should be at room temperature.

    Pin it for later:

    Mexican Wedding Cookies / Polvorones
    Mexican wedding cookies / polvorones
    Mexican wedding cookies/ polvorones
    Evergreendishesdev

    Mexican Wedding Cookies / Polvorones

    Mexican wedding cookies or polvorones are classic cookies which are easy to make, tasty and melt in the mouth.
    Course: Breakfast, evening snacks
    Cuisine: Mexican, spanish

    Ingredients
      

    • 1 cup butter
    • 1/2 cup castor sugar
    • 1 tsp vanilla essence
    • 1/4 tsp salt
    • 2.25 cup all purpose flour
    • 3/4 cup walnuts

    Method
     

    1. Take butter and sugar in a bowl and whip them together until they are well incorporated and smooth in texture.
    2. Add vanilla essence and salt to it.
    3. Slowly, add the flour in two batches to it. Mix it well.
    4. Fold the nuts into it.
    5. Take small ball of it and press it into a small circle.
    6. Take a baking tray, put a sheet over it. Line the cookies on a sheet.
    7. Pre-heat the oven at 170 degree centigrade.
    8. Bake for five to ten minutes, until golden in colour.
    9. Remove and coat them in the castor sugar.
    10. Put them back on the rack.
    11. Once they are cool, store in an airtight container.

    Notes

    • Decrease the amount of nuts if needed.
    • Pecans or walnuts are usually added to these cookies. You may add other nuts.
    • Butter should be at room temperature.

    Other Christmas treats that I have on the blog are: Kul Kul, Butter cookies, ghee coookies, mocha banana cake, easy pizza, salted cashew nuts, mocha coffee cookie


    If you ever make any of these recipes, take a picture and share it with me on Facebook by tagging evergreendishes or on Instagram as foodiejayashree. I will be glad to see your creation and share it further.

    Baking is made easier with these, a good OTG, baking tray, baking sheets and of course the gloves.

    If you ever make these  Mexican Wedding Cookies,  do take a picture and tag @foodiejayashree on Instagram or @evergreendishes on Facebook or Twitter. I will be glad to see your creation and share it further. Let’s be connected, do follow on social media platforms. Until next time, let’s stay connected.  Subscribe to get all updates and an e-book for free. Check out my e-books on Amazon.  Happy Cooking !

    Wishing one and all a Merry Christmas and a very happy new year ! Be happy, enjoy and have fun. Have a great holidays !

    Disclaimer: This post contains affilate links, you can check the Disclosure Policy.

  • Khandvi | Suralichi Vadi | Recipe with video

    Khandvi | Suralichi Vadi | Recipe with video

    Jump to Recipe Print Recipe

    Khandvi / Suralichi Vadi is a savoury snack from Maharashtrian and Gujarati cuisine. Yellowish, tight rolls of gramflour and curd , tempered with spices make a good snack anytime. They are slightly spicy and tangy in taste. It is also known as Surlicha Vadi and Patuli. It is one of the dishes that you can easily make in less than 30 minutes, tasty and ideal to serve with any course of meal.

    Any tips for making perfect khandvi?

    Like any new recipe, this dish also needs practice. The key to making a perfect khandvi:

    • You need sour butter milk.
    • Take the proper measurement of ingredients.
    • Once it is done, spread it quickly on the greased plate as thin as you can.
    • Sieve the gram flour before using it.

    Is there any substitute for buttermilk?

    Thick curd can be used. Blend and mix it with two glasses of water. 

    What can one do if the curd is not sour?

    It is best to keep a day out prior to making. But incase, you have not kept it or planned in the last minute, lime juice may be added to the batter.

     Khandvi/ Suralichi Vadi Recipe

    1 cup = 200 ml

    Ingredients:

    • 1 cup gram flour
    • 1 cup sour curd
    • 2 cup water
    • 1 inch ginger
    • 2 green chilly
    • 2 tablespoon oil
    • 1/2 teaspoon mustard seeds
    • 1/4 teaspoon asafoetida
    • 1/2 teaspoon turmeric powder
    • 2 tablespoon fresh grated coconut
    • 1 tablespoon chopped coriander
    • salt

    Method:

    1. Sieve the gram flour.
    2. Take a plate and at the back side, grease it with a little oil. You will need it later.
    3. Whisk the curd, mix it with water.
    4. Grind green chilly and ginger together.
    5. Mix together gram flour, a little turmeric salt, salt, ginger-chilli paste and butter milk. No lumps should be formed.
    6. Put the batter in a thick pan and cook it on a low flame. Keep stirring.
    7. Once the mixture thickens and is done, put it on the greased plate and spread it as soon as possible.
    8. Make seasoning in a small pan. Take oil, add mustard seeds, as it crackles, put asafoetida and turmeric powder.
    9. Garnish with grated coconut and finely chopped coriander over it.
    10. Put seasoning over it.
    11. Slowly, roll it from one end to the other.
    12. Cut into small spirals.
    13. Khandvi is ready to serve.

    Take a tip:

    • Make in small quantities, it will be easier to spread it. 
    • Making perfect khandvi needs practice. My suggestion is to make it in a small quantity. Use the same measurements as given above. 

    Check out the video :

    Khandvi / Suralichi Vadi
    Evergreendishesdev

    Khandvi / Suralichi Vadi

    5 from 6 votes
    Khandvi is a popular snack from Maharashtrian as well as Gujarati cuisine of India. It is a savoury, bite sized snack ideal to serve with tea.
    Prep Time 5 minutes
    Cook Time 15 minutes
    Course: appetisers, evening snacks
    Cuisine: Gujarati, Maharashtrian

    Ingredients
      

    • 1 cup gram flour
    • 1 cup sour curd
    • 2 cup water
    • 1 inch ginger
    • 2 green chilly
    • 2 tbsp oil
    • 1/2 tsp mustard seed
    • 1/4 tsp asafoetida
    • 1/2 tsp turmeric powder
    • salt

    Method
     

    1. Sieve the gram flour.
    2. Take a plate and at the back side, grease it with a little oil.
    3. Whisk the curd, mix it with water. Again, whisk it.
    4. Grind green chilly and ginger together.
    5. Mix together gram flour, a little turmeric salt, salt, ginger-chilli paste and butter milk. No lumps should be formed.
    6. Put the batter in a thick pan and cook it on a low flame. Keep stirring.
    7. Once the mixture thickens and is done, put it on the greased plate and spread it as soon as possible.Make seasoning in a small pan.
    8. Take oil, add mustard seeds, as it crackles, put asafoetida and turmeric powder. Garnish with grated coconut and finely chopped coriander over it.
    9. Put seasoning over it.Slowly, roll it from one end to the other
    10. Cut into small spirals. Khandvi is ready to serve.

    A few other snack recipes from blog are Vegetable and Vermicelli Cutlets, Cornflakes Bhel,

    My e-books on Amazon


    Disclaimer: This post contains affilate links. You can read the policy here.

    If you ever make this, do take a picture and share it with us. I will be glad to share it further. Follow us on Facebook, Twitter, Instagram and Pinterest.

    Want to start a blog? I have my hosting with A2 Hosting and happy with the service they provide.

    Subscribe to get a book of handyhints for free !