Tag: side dish

  • 5 Chutney to pair for breakfast

    5 Chutney to pair for breakfast

    (Disclosure : As an Amazon associate, I will get a small commission for qualifying purchases without no addition cost to you.)

    chutney recipe | 5 chutney recipes| south indian breakfast | indian cooking |

    5 chutney to pair for breakfast, when one feels bored of the usual one, make a different kind. Variety is the spice of life, isn’t it. Most of them are  easy to prepare and the ingredients are available in the kitchen.

    Chutney is a condiment from Indian cuisine made with varied kinds of ingredients. The main ingredients can be a simple coconut to vegetables, lentils or even peels of vegetables sometimes. The South Indian breakfast needs these five kinds of chutneys. You can serve any one or two of them as per your preference.

    The chutney comes from a Hindi word.”Chatna” which means to lick. It means a dish which is irrestibly tasty. It is paired with millet based breads, chapathi, idli, dosa and many others.
    In the hotels of Tamil Nadu, Idlis are served with four kinds of chutney along with a sambar.

    Tips to store the chutney :

    Always store the chutney in a clean container with a lid in the refrigerator. Take a small quantity of chutney and put the seasoning over it. Do not store the one with the seasoning. Consume the chutney in two days as the flavor will not be the same thereafter.

    Is seasoning necessary ?

    The final seasoning gives more flavor to  the chutney. It is not mandatory to serve with a  seasoning. 


    Coconut Chutney

    Coconut Chutney is the most relished condiment with idli and dosa. Fresh coconut is used here along with green chillies, split dahlia, ginger, coriander and tamarind. Again, even a simple coconut chutney has many variations.

    Ingredients:

    • 1 cup fresh grated coconut
    • ¼ cup dahlia or split gram
    • 4 green chilli
    • Heap of coriander
    • Salt
    • ½ tablespoon tamarind pulp
    • Water for grinding
    • 1 teaspoon oil

    For the seasoning:

    • 2 teaspoon oil
    • ¼ teaspoon mustard
    • A pinch of turmeric
    • ¼ teaspoon asafoetida
    • A few curry leaves

    Method:


    Take oil in a pan, add green chilli. After a few seconds, add in dahlia, coconut, coriander to it and roast for a minute. Turn off the flame. Once cool,  grind the ingredients. Add some water, salt, tamarind pulp and run it again for a few seconds.

    Make seasoning. To make the seasoning, take oil in a small pan add mustard seeds, turmeric powder and asafoetida. Heat it, as it crackles, throw in the curry leaves and put it over the prepared chutney.
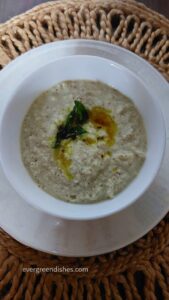
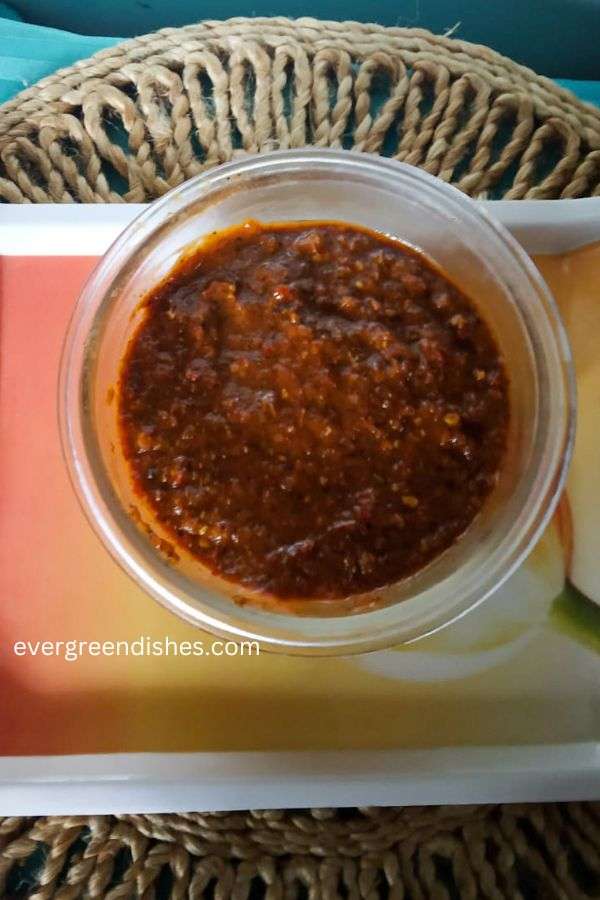
    coconut chutney
    coconut chutney


    Kara Chutney

    The second chutney is the Kara Chutney. It is made with lentils, onion and tomato. It is tasty and quite famous in Tamil Nadu.

    Ingredients:

    • 1 teaspoon oil
    • 1 tablespoon urad dal
    • 1 tablespoon bengal gram
    • 1 teaspoon oil
    • 2 onion
    • 2 tomato
    • 4 garlic
    • 4 dry red chilli
    • 1 teaspoon tamarind pulp
    • Salt
    • Water if needed

    For seasoning:

    • 2 teaspoon oil
    • ¼ teaspoon mustard
    • ¼ teaspoon asafoetida
    • ¼ teaspoon turmeric powder
    • 6 curry leaves


    Method:

    • Take a pan, add oil to it. Roast the lentils to a golden colour.
    • Cut the onion and tomato into pieces.
    • Take oil in a pan. Add garlic cloves and onion to it. Put tomato pieces and let it cook for sometime.
    • Add the roasted lentils to it.
      Put salt and grind them together.
      Make seasoning. In a small pan, add a little oil, along with it put the mustard seeds, asafoetida and turmeric powder. As it crackles, tear a few curry leaves and throw in.
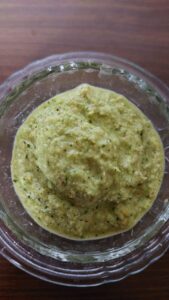

    Mint Chutney


    Ingredients

    • 1cup mint leaves
    • ½ cup coriander
    • ½ cup fresh coconut
    • 4 green chillies
    • ½ teaspoon cumin
    • ½ inch ginger
    • Salt
    • ½ teaspoon lemon juice

    Seasoning:

    • 2 teaspoon oil
    • ¼ teaspoon asafoetida
    • ½ teaspoon urad dal
    • 1/8 teaspoon turmeric powder
    • 6 curry leaves torn


    Method:

    • Pluck the mint leaves from the stalk and clean them. Wash the coriander leaves.
    • Take a little oil in a pan, add cumin, green chilli and ginger.
    • Put the mint leaves and coriander in it. Saute it for sometime.
    • Finally, add the grated coconut and saute for a minute.
    • Once it cools, grind all the ingredients with a little  water. Add lemon juice to it and mix.
    • Make the seasoning and put it.
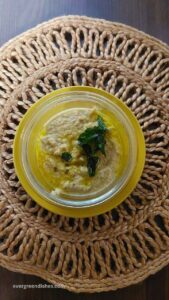
    mint chutney
    mint chutney


    Pottukadlai Chutney


    Pottukadlai Chutney pairs well with any kind of idli and dosa.

    Ingredients:

    • 1 teaspoon oil
    • 5 green chilli
    • ½ inch ginger
    • 6 curry leaves
    • 1 onion cut into pieces
    • ½ cup roasted gram
    • A small piece of tamarind
    • Salt
    • Water


    Seasoning:

    • 2 teaspoon oil
    • ¼ teaspoon asafoetida
    • 6 curry leaves torn
    • ¼ teaspoon turmeric powder
      Method:
    • Take oil in a pan. Add green chilli and saute it.
    • Put the curry leaves and the onion pieces to it.
    • Saute it for sometime. Then, add the roasted gram and ginger to it. Continue to saute.
    • Allow to cool.
    • Put all the ingredients in a jar and grind it.
    • Add salt and a little water to it, give a swirl. Put tamarind pulp and grind again.
    • Put the seasoning and serve.
    pottukadlai chutney
    pottukadlai chutney


    Peanut Chutney


    It is popular in Andhra Pradesh, served with dosa and pesarittu.

    Ingredients:
    ½ cup peanuts
    ½ teaspoon oil
    3 green chilli
    1 teaspoon tamarind pulp
    A little water
    Salt
    Method:
    Dry roast the peanuts for sometime, a few dark spots should be visible. Allow to cool
    In a small pan, roast the chillies in oil.
    Put them in a small jar and grind them
    Add tamarind pulp, salt and water, grind again.
    The consistency should be moderate, neither too thick or thin.


    I hope you liked the chutney collection. Let me know which variety of chutney you would like to try in your kitchen. Follow @evergreendishes on Facebook and @foodiejayashree on Instagram.


    (Disclosure : As an Amazon associate, I will get a small commission for qualifying purchases without no addition cost to you.)

  • Capsicum Stir Fry | Donna Menasinakayi Palya

    Capsicum Stir Fry | Donna Menasinakayi Palya

    Capsicum Stir Fry  is a tasty and easy to make side dish. It  is a flavoursome dish from North Indian cuisine. It is ideal to serve for lunch, dinner or pack in the lunch box.

    Capsicum Stir Fry needs a few ingredients as sesame seed, cumin, garam masala, chilli powder apart from capsicum and onions. This recipe is from my diary written many years back. When you are bored of the usual cooking, or need a quick side dish, you can prepare this capsicum stir fry. It is ideal to serve with chapathi or phulka.

    About the kind of capsicum :

    Cpsicum is a versatile vegetable used in all kind of cuisines. The capsicum available in the market are of two kind, big ones and the small ones. The small ones are spicy. Thus, I prefer the big ones for our cooking. If you like using the smaller variety, go ahead but be mindful of the extra chilli powder that is added.

    Capsicum Stri Fry

    What goes in the Capsicum Stir Fry :

    • Capsicum : It is the star ingredient. I prefer using the large, green  coloured ones. They re not spicy and just right for the stir fry. Here the vegetables are cut into thin, long slices.
    • Onion and garlic : The onion is cut into thin long  pieces while the garlic is crushed.
    • Oil is one of the essentials in any cooking.
    • Kasuri methi for that fragrance
    • Spices like cumin, sesame, chilli powder are essential.
    • Garam masala for the enhanced flavour. You can  make it  at home and use it regularly.
    • Curd is added in the end.
    • Peanut powder lends an amazing taste to the dish. To make it, roast the peanuts on a low flame. Allow them to cool, remove the skin and grind to a coarse powder.
    • Coriander for garnishing. Always use fresh coriander.
    • Salt

    Making of stir fry :

    The making of stir fry involves two steps. Initially, we saute the onion and capsicum in a little oil. Adding a bit of kasuri methi, fresh coriander and chilli powder gives a good aroma to it. It is then seasoned with spices and peanut powder in another pan. Finally, the addition of blended curd gives a good taste.

    Serve it with hot phulka, roti or chapathi. It is ideal o pack in the lunch

    Capsicum Stri Fry

    If you ever make Capsicum Stir Fry in your kitchen, take a photo and share with me by tagging @foodiejayashree on Instagram and @evergreendishes on Facebook.

  • Amla Tambli | Nellikayi Tambuli

    Amla Tambli | Nellikayi Tambuli

    Amla Tambli is a tasty, healthy dish from South Canara. It pairs well with hot, steamed rice.

    Amla or the Indian gooseberry is a fruit native to South Asia. It is widely used in Ayurvedic medicine. The botanical name of Amla is Phyllanthus emblica. It is a rich source of Vitamin C. It also contains anti-oxidants and other essential nutrients as iron, calcium and fiber.

    Amla is generally round in shape and greenish yellow in colour. It is usually available during months of December and January. It is used to make various kind of dishes as amla pickle, amla murabba, amla rasam, amla tambuli and amla chitranna. Sadly, I have not posted any amla recipes on the blog. So, here is to new beginnings.

    Benefits of Amla :

    1. Boosts immunity  : Being a good source of Vitamin C, one can include it to get the nutrients and anti-oxidants. The anti-oxidants helps in replenishing the cells and fights against the diseases.
    2. Aids in digestion: The dietary fibre helps in preventing constipation.
    3. Good for the heart : The amla extracts are found to be ideal to lower cholesterol and triglycerides. It also helps to reduce the blood pressure.
    4. Good for the kidneys: Studies have shown that it is good for the kidneys.
    5. Ideal for skin health : The high concentration of vitamin C promotes the texture and elasticity of the skin.
    6. Good for hair care : Amla is often used in hair care products.

    Side effects :

    I am not a  health worker or a doctor.  Please use any suggested food ideas as per your health conditions. Although, amla is a good source of Vitamin C, it is suggested to be used  in moderation. Excess use may cause varied kinds of problems. The high fibre content  may cause bloating and diarrhoea in some individuals.

    It can affect the blood sugar levels also. People with diabetes should be careful about using it.

    Amla Tambli

    Amla Tambli

    Amla Tambli is an easy to make, tangy dish ideal to serve with hot, steamed rice. It is a good way to include amla in our diet. Usually, the round shaped known as bettada nellikayi is used in cooking.

    Amla pickle is often made in made home. Here is an instant amla pickle by my co-blogger Seema.

    Why should you make amla tambli ?

    Amla tambli is an easy to make dish. It is ready in ten minutes. It is ideal to serve with hot steamed rice.

    Can it be stored for a couple of days ?

    No. I suggest to make it in a small quantity and consume it.

    Can I use other kind of oil?

    Coconut oil lends a good taste but feel free to use any neutral cooking oil

    Can I make it spicy ?

    You my add an extra chilli if you need.

    Can I use sour curd ?

    No, use fresh curd to make tambli.


    Evergreendishesdev

    Amla Tambli

    Amla Tambli is an easy to make, tasty, healthy and a no cook side dish. It makes a good accompaniment with hot steamed rice.
    Prep Time 10 minutes
    Total Time 10 minutes
    Course: dinner, lunch
    Cuisine: South Canara

    Ingredients
      

    • To be made into a paste :
    • 4 amla washed and cut into pieces
    • 1/2 cup fresh coconut
    • 2 green chillies
    • 1/2 teaspoon cumin
    • Other ingredients :
    • 4 tablespoon curd
    • 1/2 cup water
    • salt to taste
    • For the seasoning :
    • 2 teaspoon coconut oil
    • 1/4 teaspoon mustard
    • dash of asafoetida
    • 1/4 teaspoon turmeric powder
    • a few curry leaves

    Method
     

    1. Grind the ingredients under the section,”To be made into a paste”. Put  curd and blend it again. Remove it in a bowl.
    2. Add some water to it. Put salt.
    3. Make seasoning with coconut oil. Add mustard seeds. As it splutters,  put a few curry leaves, asafoetida and turmeric powder. Pour it over the prepared dish. Amla Tambli is ready to serve.

    Notes

    You may use any other oil. But, coconut oil gives a good taste to the dish.
    Use fresh curd.
    You may adjust the quantity of green chilly as per the need.

    If you ever make Amla Tambli in your kitchen, take a picture and share on Instagram by tagging @foodiejayashree. You can also tag me on facebook. Subscribe to get all updates in your inbox and an e-book of handyhints for free. Until next time, happy cooking !

    Pin it for later :

    Amla Tambli
    Amla Tambli


  • Sprouted Moong Methi Stir Fry

    Sprouted Moong Methi Stir Fry

    Sprouted Moong Methi Stir Fry is a tasty, healthy, easy to prepare side dish from Konkani cuisine. It is  a good  way to  include sprouted fenugreek, which is a slightly difficult to consume by itself. You can serve it as an accompaniment with chapathi or along with rice and rasam.

    Sprouting duration varies for both.  Moong sprouts in a day while fenugreek needs more time. Soak them separately for six to eight hours, put them in a colander, once the water is drained and semi-dry, tie them in a thin  muslin cloth and keep them in a warm place. Check them the next day and store them in a container in refigerator. Alternatively, you can keep in a closed container with a tight lid.

    I have shared in detail here regarding the making of sprouts. Do check the post. The other recipes with moong which we often relish is the salad, it is ideal as a snack too.

    The stir fry is called as Sukke in Konkani households and the recipe is adopted from  Healthy Cooking with Mitha. We know each other through a facebook group and remember reading and trying her recipe then. We liked it and it has been a regular feature.The bitterness of the fenugreek is neglible and adds a good taste to the moong stir fry. You can also check out the earlier shared menthe gojju  


      What goes in the sprouted moong methi stir fry ?

    • sprouted green gram : Planning is essential here. We need to soak and sprout them a day prior.
    • sprouted fenugreek seed: Make it two days prior, as sometimes it needs a little longer time.
    • oil: The preferred oil is coconut oil for this recipe but you can use any other oil.
    • mustard seed : for seasoning
    • tamarind paste: You can add a little bit of tamarind extract if you do not have the tamarind paste.
    • coconut: Do not skip it for this recipe.
    • salt: As per the taste
    • chilli powder: For the hot and spicy taste.
    • curry leaves : A few leaves are needed

    Pre-requisites :

    You need to have the sprouted moong and fenugreek ready. To make the sprouts, read the above paragraph, it is mentioned in detail. 1 cup of green gram yields three cups of sprouted moong while 1/4 cup of fenugreek yields a cup of sprouted fenugreek.

    Take adequate precaution while sprouting. Keeping them for a longer may turn them sticky. Weather conditions too play an important role.

    1. Why should you make sprouted moong methi stir fry ?
    1. It is easy to prepare if you have the sprouted grains.
    2. A good way to include fenugreek in your diet.
    3. It is vegan and gluten-free.
    4. It is a no onion garlic recipe.
    5. It makes a good accompaniment with any meal.

    Evergreendishesdev

    Sprouted Moong Methi Stir Fry

    5 from 10 votes
    Sprouted Moong Methi Stir Fry is a tasty, healthy, easy to make accompaniment.
    Course: dinner, lunch
    Cuisine: karnataka

    Ingredients
      

    • 3 cup sprouted green gram moong
    • 1 cup sprouted fenugreek seed menthe
    • 2 teaspoon coconut oil
    • 1/2 teaspoon mustard
    • a few curry leaves
    • 3 cups water
    • 1 tablespoon tamarind paste
    • 2 teaspoon chilli powder
    • salt to taste
    • 1/4 cup fresh grated coconut

    Method
     

    1. Take oil in a pan, add mustard seeds. As it splutters, put curry leaves and the sprouted green gram. Also add the sprouted fenugreek seed. Put some water to it and allow to cook for sometime.
    2. Once it is cooked, add salt to it.
    3. Now, put the tamarind paste and chilli powder to it.
    4. Finally, put grated coconut to it, heat for a minute and keep it aside.
    5. Serve with any meal as an accompaniment.

    Notes

    You need to have the sprouted moong and fenugreek ready. To make the sprouts, read the above paragraph, it is mentioned in detail. 1 cup of green gram yields three cups of sprouted moong while 1/4 cup of fenugreek yields a cup of sprouted fenugreek.
    Take adequate precaution while sprouting. Keeping tied for a longer time may turn them sticky. Weather conditions too play an important role.

    About the event:

    Sending this to Cooking with Sprouts theme for the month of January 2024 at Shhh Secretly Cooking Challenge. The theme was suggested by yours truly. I was paired with Kalyani Sri of sizzling tastebuds, a blog with varied kind of recipes.  Kalyani has prepared Sprouts Dosa with Jowar, a filling breakfast to kickstart a busy day with chana sprrouts and spinach, the secret ingredients given by me. Inturn, I have made moong methi sprouts stir fry with the secret ingredients, chilli powder and methi sprouts.

    shhh cooking secretly
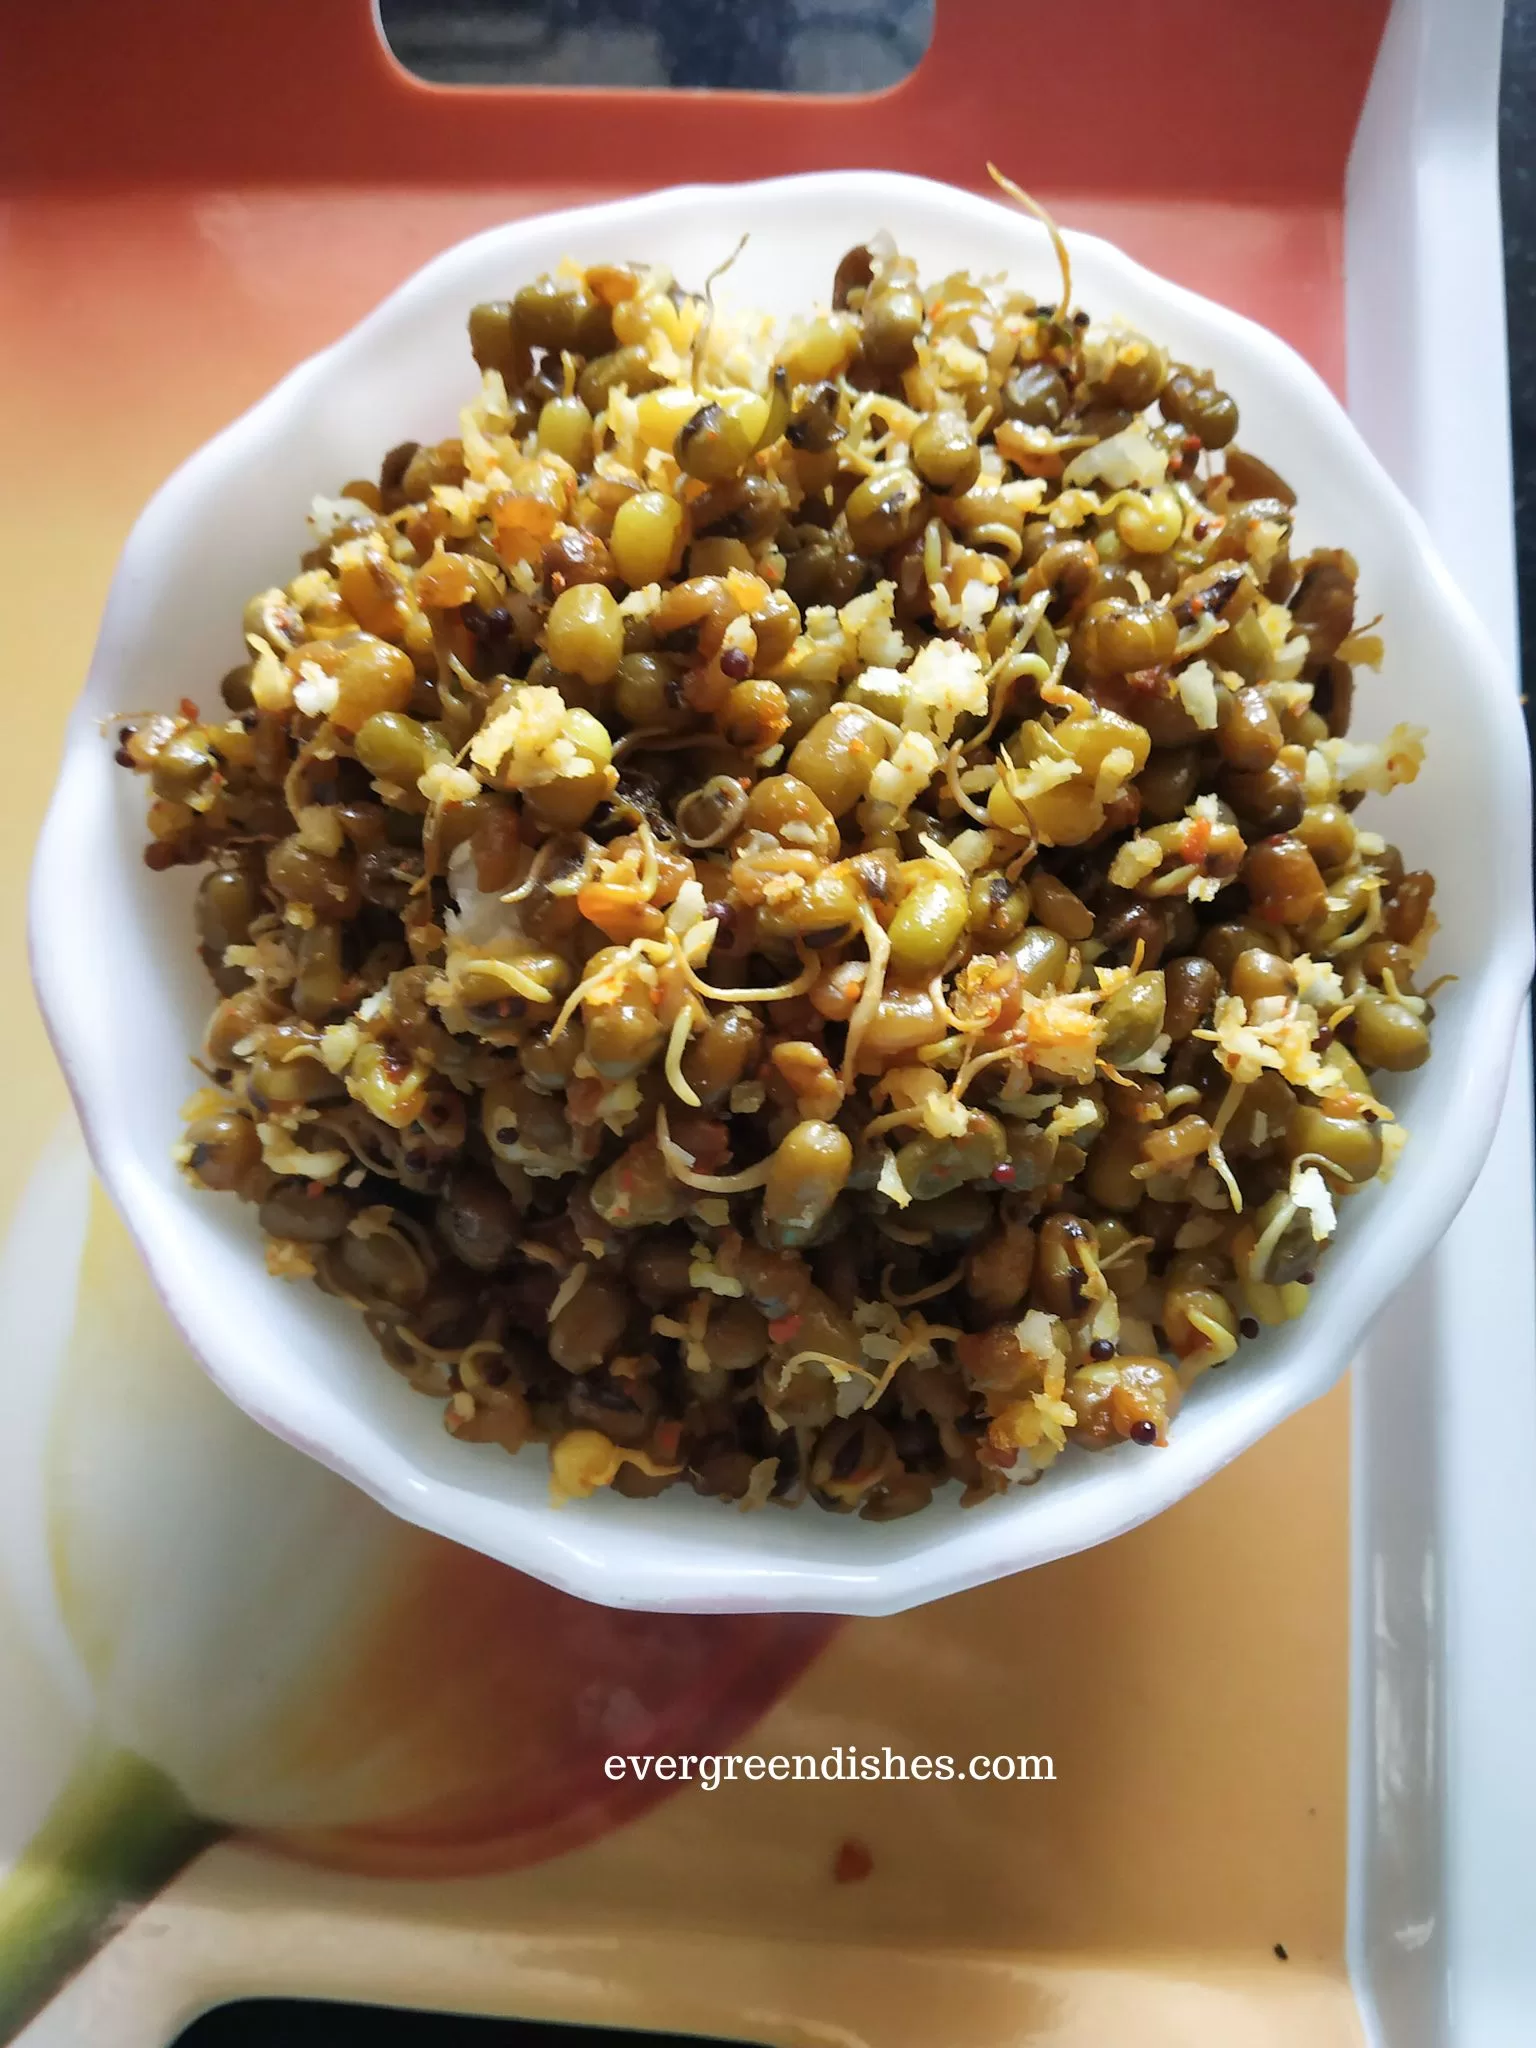
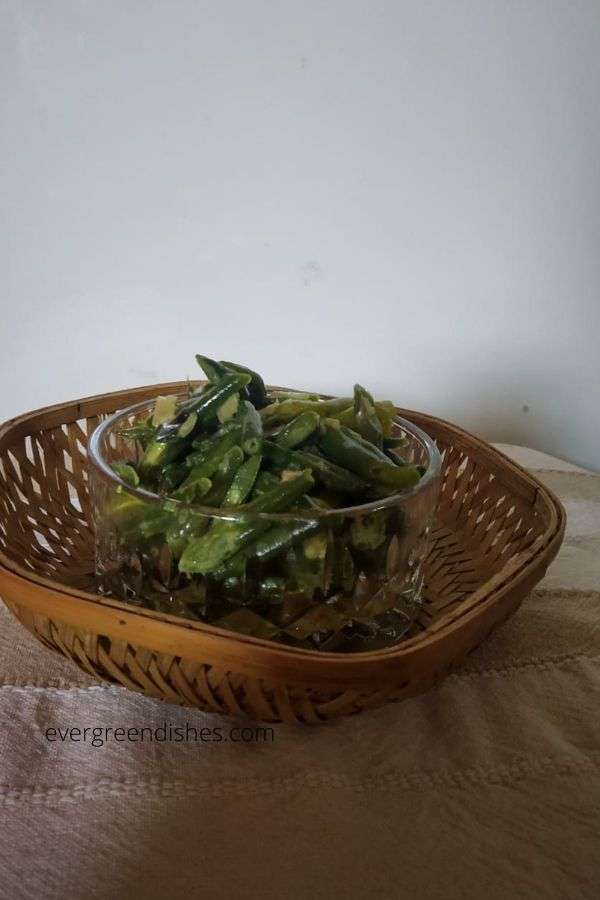
If you  make  Sprouted Moong Methi Stir Fry, take a picture and share it by tagging @foodiejayashree on Instagram and @evergreendishes on Facebook.  Subscribe to get all updates and an e-book for free.
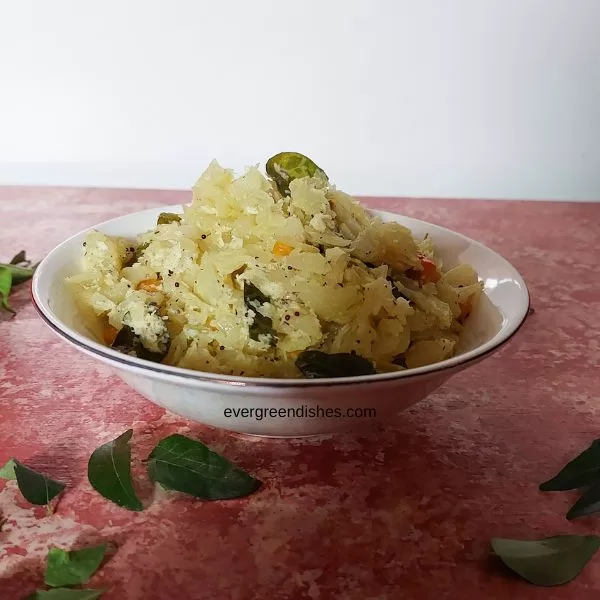
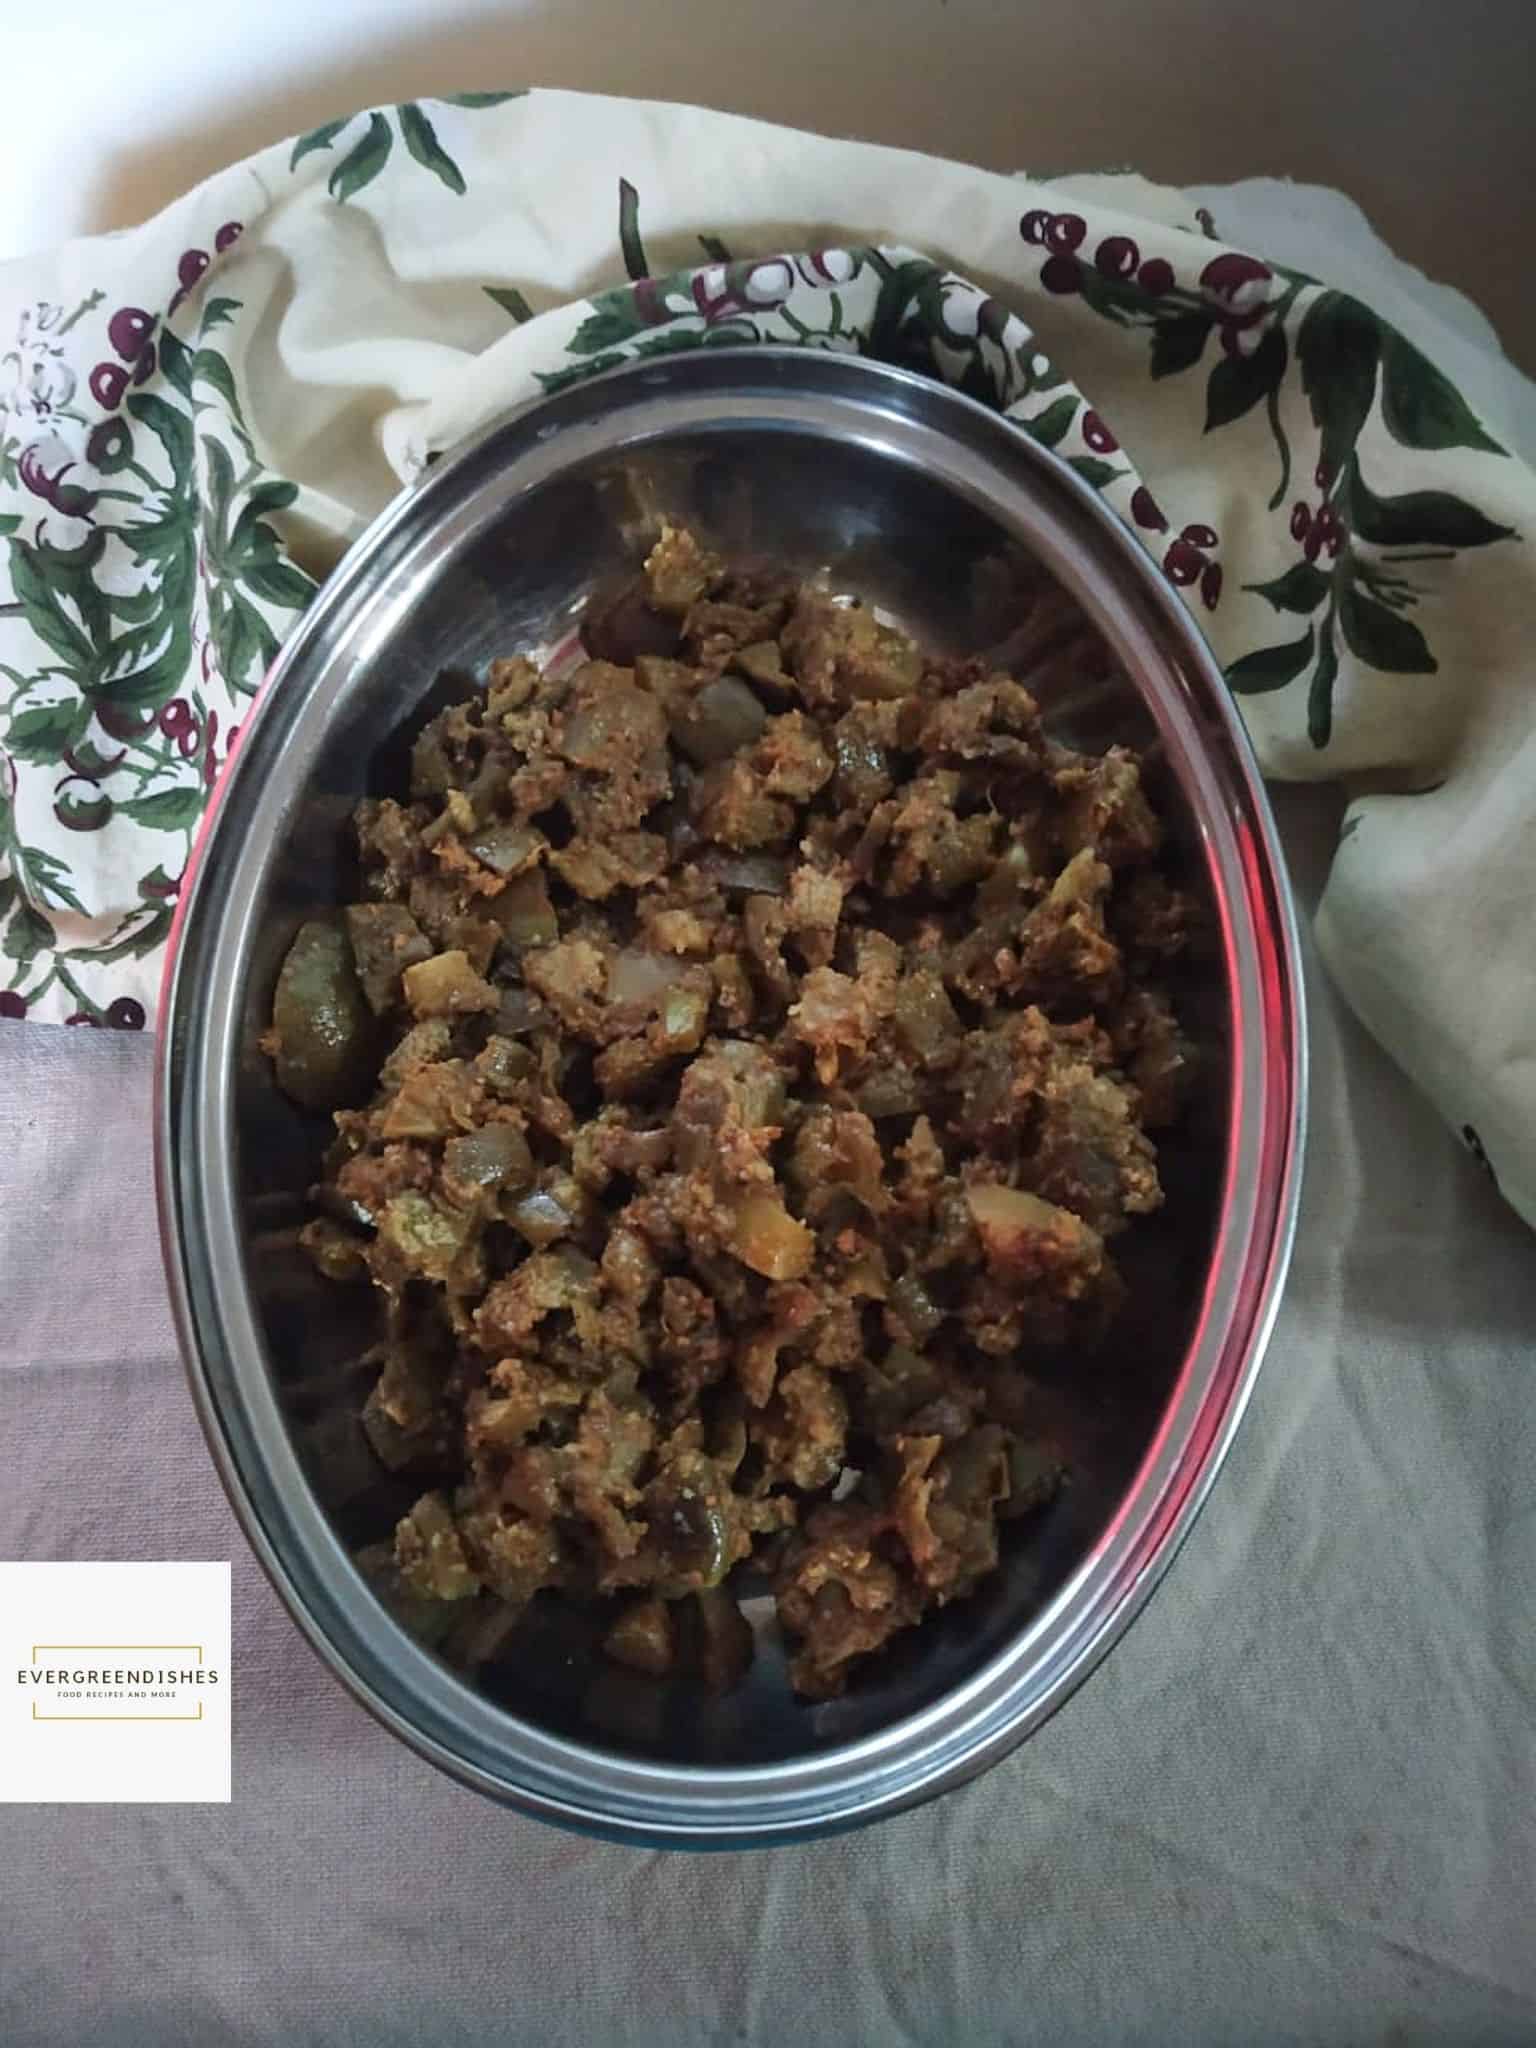
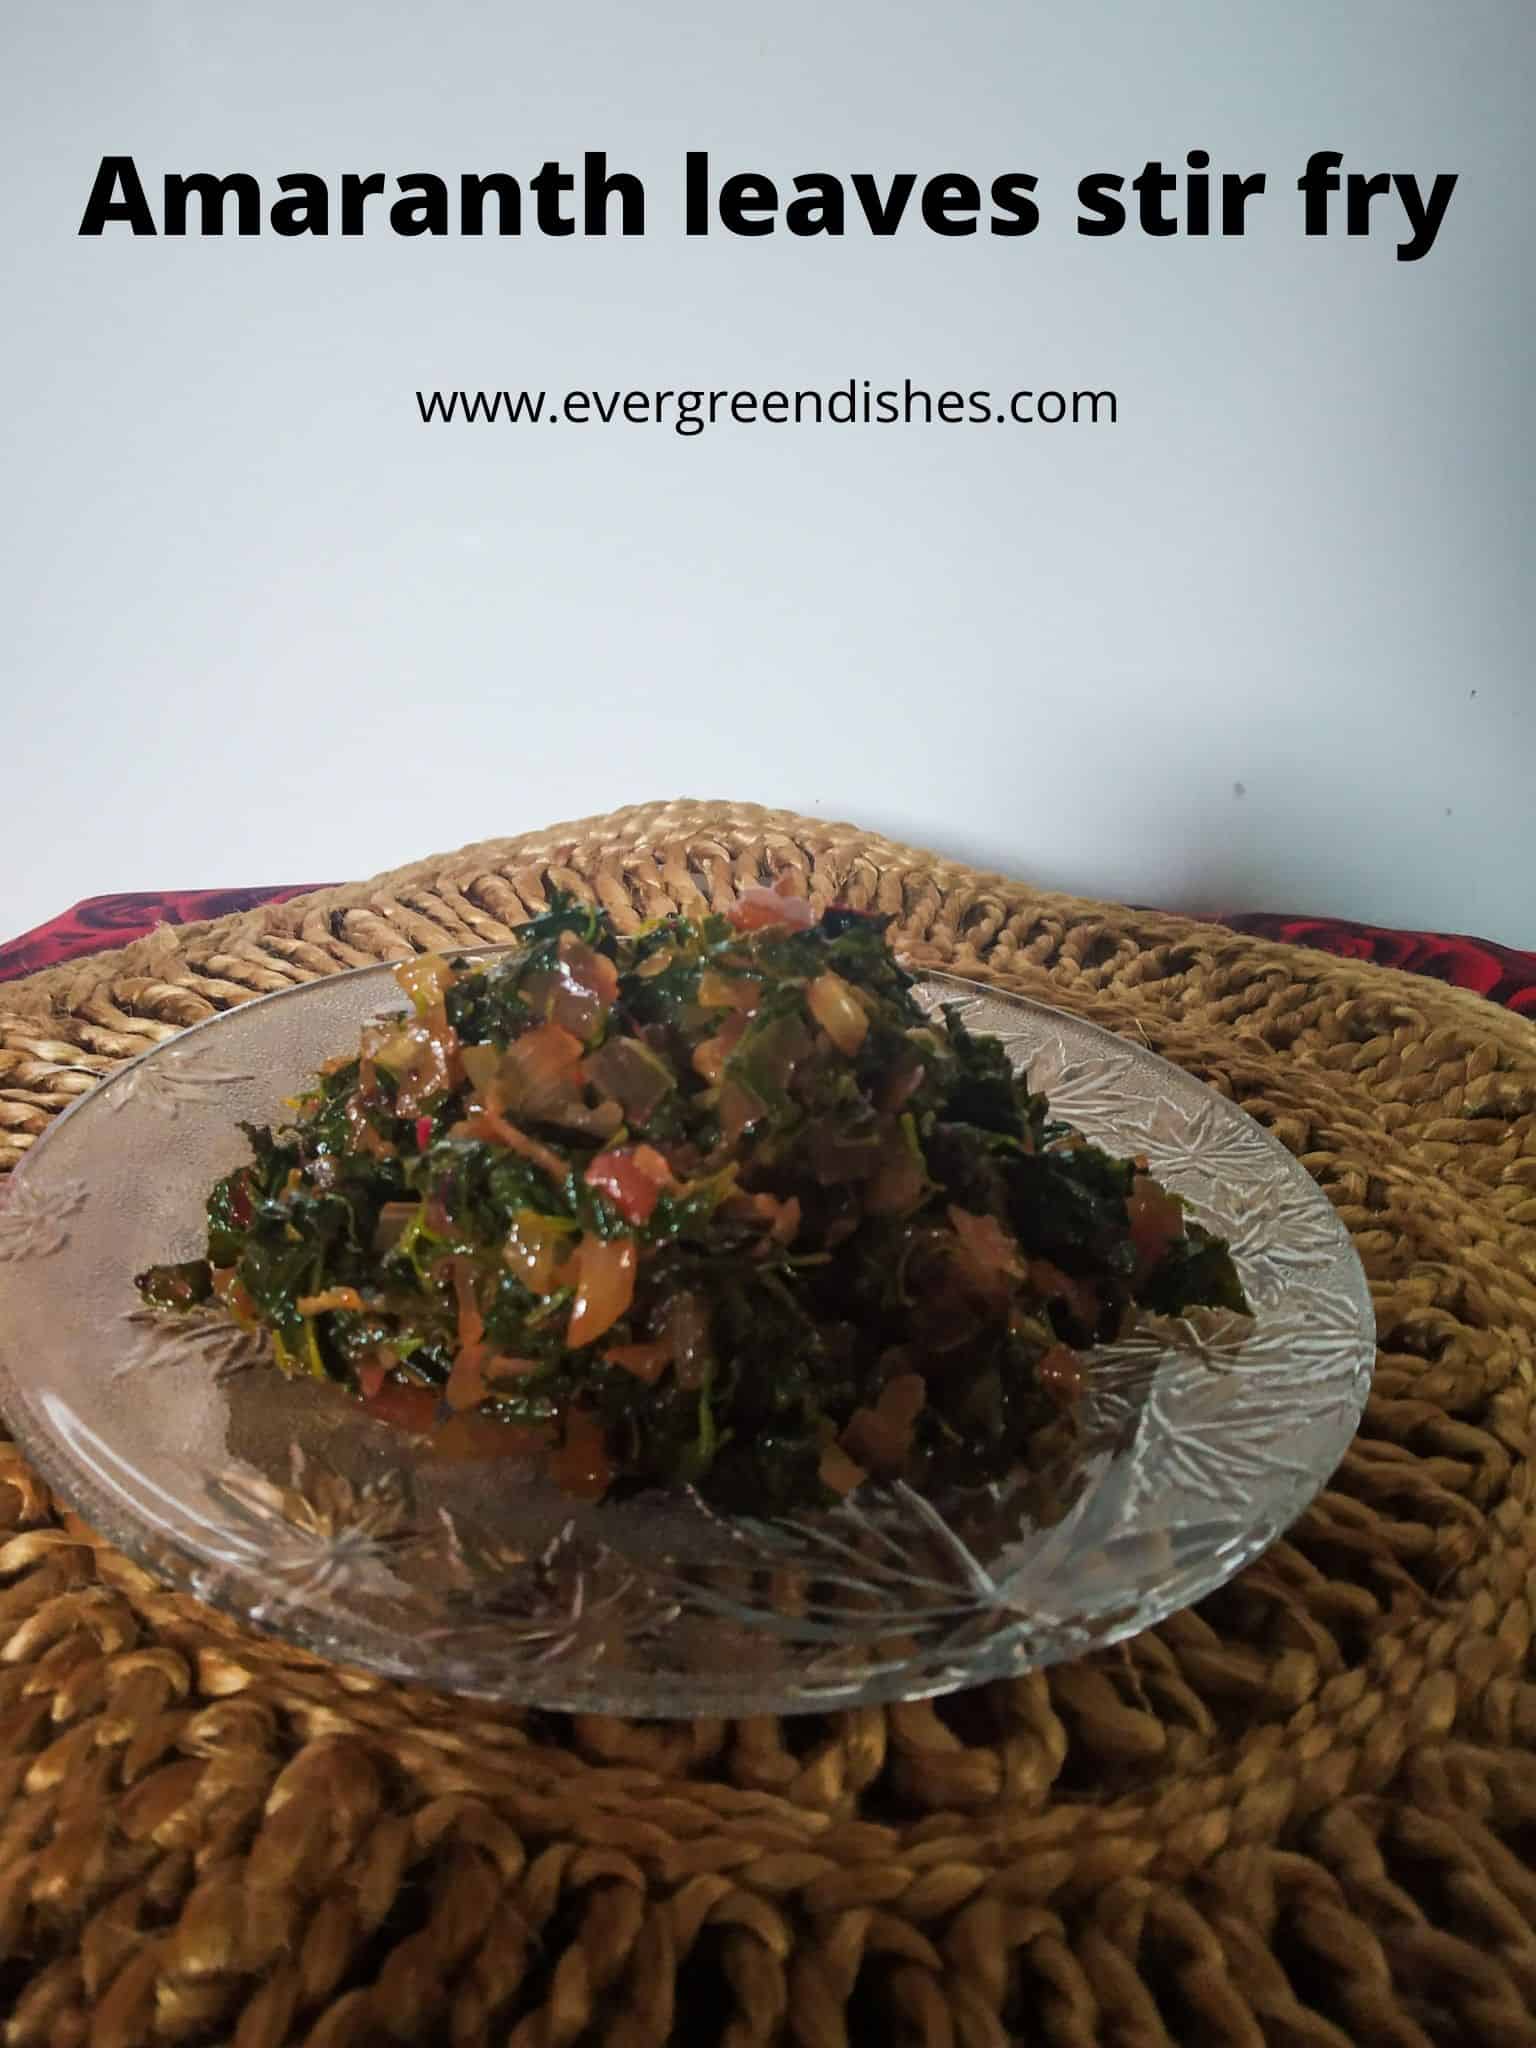
    sprouted moong methi stir fry
    sprouted moong methi stir fry

  • Kohlrabi Stir Fry | Navilakosu Palya | No Onion Garlic Recipe

    Kohlrabi Stir Fry | Navilakosu Palya | No Onion Garlic Recipe

    Jump to Recipe

    kohlrabi stir fry | navilakosu palya | 

    Kohlrabi stir fry is a simple, tasty, healthy  side dish for daily lunch menu. You can pair it with sambar, rice and a stir fry. It tastes good with chapathi or jowar roti too. It is vegan and a low calorie dish. 

    Some days we avoid using onion and garlic for religious or personal interests. Today’s recipe is a no onion recipe

    Kohlrabi or German Turnip is a cruciferous vegetable and  belongs to the family Brassica Oleracea, same species as cabbage, cauliflower and brussel sprouts. It grows above the ground and looks like a turnip, but it is neither a root vegetable nor belongs to the turnip family. It has long leafy stems as an alien and a round bulb which may be purple, light green or white. The inside is whitish green . The bulb as well as the leaves are used in cooking. It is eaten both in cooked and raw form. Kohlrabi lends a different taste on cooking which is different from cabbage. 

    The stalk is used in salads. The leaves are used in dal and stir fry. The vegetable can be used in different dishes as stir fry, sambar and chutney. 

    Knolkhol is a good source of nutrients as Vitamin C, B6, potassium and magnesium. It is also a good source of anti-oxidants. 

    Kohlrabil is called by different names in different regions. It is Navilkosu in Kannada, Navalkol in Maharashtra, monj hakh in Kashmiri and Su Hao in Bengali. 

    kohlrabi stri fry
    a bowlful of kohlrabi stir fry


    How to use kohlrabi in cooking:

    Wash the vegetable, remove the leaves if any. Here, we are not using the greens in any way. Remove the skin and chop it. The middle portion is hard and discarded. 


    What goes in the stir fry ? 

    • Kohlrabi : It is the star ingredient here. You can chop it unevenly as it is usually done or cut into small bits. The way you cut the vegetable alters the taste of the vegetabel.
    • Oil : Any cooking coil may be used. 
    • Seasoning : All the usual ingredients of seasoning are needed. They are mustard seeds, asafoetida, bengal gram, urad dal. 
    • Chilli : For that spicy flavour
    • Fresh coconut : Essential but no compulsion.
    • Ginger : You may add a small piece of grated ginger in the seasoning.
    • Curry leaves : Essential in south indian cooking. It gives a distinctive flavour.
    • Coriander : for garnishing


    Making the stir fry : 

    The kohlrabi has a thick outer covering. It needs to be removed slowly. Wash and then peel the skin. Chop it and keep it aside. Make the seasoning and add the chopped vegetable. Sprinkle a little water and put salt. Allow to cook. Once it is tender, add grated coconut and fresh coriander to it.. 


    A few South Indian no onion garlic recipes :

    lemon rasam
    lemon rasam
    instant raw mango pickle
    instant raw mango pickle


    cucumber stir fry
    cucumber stir fry
    Print Recipe

    Kohlrabi Stir Fry

    5 from 11 votes
    Kohlrabi stir fry is a simple yet tasty side dish with any meal.

    Ingredients
      

    • 2 tablespoon oil
    • 1/2 teaspoon mustard
    • 1/4 teaspoon asafoetida
    • 1/4 teaspoon turmeric powder
    • 1 teaspoon bengal gram
    • 1 teaspoon urad dal
    • 4 green chilli
    • a few curry leaves
    • 1/2 kilogram kohlrabi
    • salt to taste
    • 1/2 cup fresh coconut

    Equipment

    • 1 pan with lid
    • 1 plate
    • 1 ladle
    • 1 bowl

    Method
     

    1. Wash, peel the skin  and chop the vegetable.
    2. Take oil in a pan. Add mustard seeds, as it crackles, put bengal gram, urad dal, turmeric powder and asafoetida. Now, add green chilli to it along with a few curry leaves.
    3. Put the chopped kohlrabi to it along with a little salt.
    4. Sprinkle a little water to it.
    5. Allow it to cook for sometime. Close a lid, it helps in proper cooking.
    6. Once it is cooked, add grated coconut and fresh coriander to it.
    7. Kohlrabi stir fry is ready to serve.

    About the event : 

          Priya Iyer suggested  “No Onion Garlic Stir Fry or Curry ” at Shhh Secretly Cooking Challenge for the month of September. Priya has prepared a delicious gravy dish Sweet Corn Masala for the theme,  do check it out. 

    Here, we are paired with a parter, exchange two ingredients and the dish is prepared using those ingredients. Later, it is put in the group for guessing. It is a fun way to  engage with like minded individuals. I was paired with Mayuri Patel. She is a versatile cook  whom I have closely seen in my blogging journey. I discussed about my plan to prepare kohlrabi stir fry and she gave me kohlrabi and urad dal as the secret ingredients. Mayuri Patel wanted to make Methi Corn Malai and I suggested jaggery and cumin accordingly. It is something which my children will relish, will be making it soon. 

    kohlrabi stir fry kohlrabi stir fry

    If you ever make Kohrabi Stir Fry  in your kitchen, take a picture and tag @foodiejayashree on Instagram or evergreendishes on Facebook.  Until next time, Happy Cooking ! Be happy and cheerful. 

  • Lemon Gojju | Nimbe hannina gojju recipe

    Lemon Gojju | Nimbe hannina gojju recipe

    Lemon gojju | Nimbe hannina gojju is a tasty condiment used in South India. Nimbe hannu is the Kannada name of lemon. 

    The taste of lemon  is citrusy, tasty, refreshing and loved by all. During the season, I try to find ways to include it in my cooking.

    Lemon is usually used to make pickles, it makes a good accompaniment  with curds riice. Lemon juice is the preferred drink during summer. 

    In daily cooking, it helps to balance the taste in all dishes by its citrus flavour as in lemon rice. It can also  be used to make lemon rasam. I make lemon gojju often and store in the refrigerator. I can say it is a recipe of cooking with lemon peels. Here, the lemon are boiled and then blended  along with some spices. The tartness of the lemon, the sweetness of the jaggery and the spiciness of the chilli powder, altogether make the dish a tangy and tasty one. Lemon Gojju has a refreshing taste, ideal to pair with hot, steamed rice. It stays good for a couple of days in the refrigerator. 

    A lemon tree in the backyard is useful, it gives limes quite often. The lemon are refreshing and makes a good drink.

    lemon gojju | nimbe hannina gojju

    An easy hack to store lemons :

    Lemon tend to wither after a few days even when you keep in the refrigerator too. Take a bottle, fill it with water to half the capacity. Put the lemons in it and close it. Change the water after a couple of days.

    Last year, I had got many lemon. I did not know what to do. I made a concentrate of lemon juice and put it in the ice cube tray. 


    The ingredients used for Nimbehannina Gojju are :

    1. Lemon- It is the main ingredient used here. Rubbing  the lemon on the kitchen platform for sometime helps to extract juice properly. 
    2. Cumin- It gives a good taste to the dish.
    3. Fenugreek –  It helps in balancing the taste of the dish.
    4. Red chilli – It imparts spiciness.
    5. Jaggery- It gives a sweet flavour.
    6. Oil – Any neutral cooking oil can be used. 
    7. Asafoetida – One of the essentials for seasoning.
    8. Mustard – Another essential ingredient in South Indian cooking. 


    How to use the gojju :

    The lemon gojju is usually served with hot steamed rice along with a dollop of ghee. The freshness of lemon gives a good taste to the dish. It is usually eaten in the beginning of the meal before the main meal. It can also be used as an accompaniment with curds rice. 

    Ingredients:

    Lemon Gojju | Nimbe Hannina Gojju

    Lemon Gojju | Nimbe Hannina

    5 from 5 votes
    Lemon Gojju | NimbeHannina Gojju is a tasty condiment used with hot steamed rice.
    Course: lunch ideas
    Cuisine: karnataka

    Ingredients
      

    • 4 lemons
    • 1/2 teaspoon oil
    • 1 teaspoon cumin
    • 1 teaspoon mustard
    • 1/4 teaspoon fenugreek
    • 6 red chilli
    • 3 teaspoon jaggery
    • For seasoning:
    • 2 teaspoon oil
    • 1/2 teaspoon mustard
    • 1/2 teaspoon cumin
    • 1/4 teaspoon asafoetida

    Method
     

    1. Wash the lemon and pat dry. Roll them on the platform with your palm. Cut them into small pieces, remove the seeds and boil them with water
    2. Once they are soft, turn off the stove.
    3. In a pan, take oil and roast the cumin, mustard and fenugreek seeds along with red chilli. Leet it cool.
    4. Grind the roasted ingredients to a powder, add the lemon pieces, jaggery and salt to it. Grind all the ingredients together.
    5. Remove it in a bowl.
    6. Make the seasoning. Heat oil in a pan. Add mustard seeds,. Once it crackles put asafoetida, cumin and turmeric powder.Put it into the prepared gojju.
    7. Tasty gojju is ready to serve.


    Pin it for later :


    lemon gojju | nimbe hannina gojju
    lemon gojju | nimbe hannina gojjju

    If you ever make  Lemon Gojju | Nimbe hannina gojju  recipe,  do take a picture and tag @foodiejayashree on Instagram or @evergreendishes on Facebook or Twitter. I will be glad to see your creation and share it further. Let’s be connected, do follow on social media platforms. Until next time, let’s stay connected.  Subscribe to get all updates and an e-book for free. Check out my e-books on Amazon.  

                                                                  Until next time,  Ciao  !

  • Srilankan Green Bean Curry

    Srilankan Green Bean Curry

    Srilankan Green Bean Curry is a tasty side dish cooked in coconut milk. It makes a good accompaniment with chapathi or steamed rice. 

    It is a new month and I have a new cuisine on my blog today. It is now to the Srilankan cuisine. Sri Lanka, as we all know is a small country to the south of India. It has a mixed culture traditions.  

    srilankan green bean curry


    About SriLankan cuisine :


    There is a lot to explore in the SriLankan food. I am naive but did a lot of research before I could plunge into cooking it. It is mainly a non-vegetarian cuisine but one can find good vegetarian food too. It is a land of coconut and cinnamon. I think coconut milk or coconut is extensively used. It gives a good taste to the food too. Being a South Indian, I can vouch for the taste it imparts to the dish.

    Ceylon cinnamon is sweetish in taste and gives a good flavour to the dishes. I have used it  and it is more aromatic than the usual one which we use. Pandan leaves are extensively used in many dishes. Although, Srilankan cuisine looks so familiar to us, it is not exactly the same. The spice mix too is different, the food is more spicy than the Indian cuisine as pepper and cinnamon are abundantly used. But, the bottom line is Indian cuisine is quite similar to it. An Indian in Ceylon will be happy with the food that he get there. 

    Srilankan cuisine has many kind of rice based dishes and hoppers . It is mostly served with a coconut milk based curry. I am yet to explore this cuisine, for now I have tried two side dishes, both were good. 

    About the event :

    Narmadha of Nams Corner suggested Sri Lankan cuisine for the month of August. Thanks to Narmadha, I would not have explored this cuisine. She has many dishes on her blog, I have bookmarked her kallu dodol recipe to make it soon.  I was paired with Preethi, she gave me currry leaf and green chilli, I have made this dish. I gave Preethi, mustard seeds and fennel, she has made flavoursome spice mix used in Srilankan cuisine.

    I have adapted the recipe from here.


    shhh cooking secretly


    About the green bean stir fry:

    When I was looking for the dishes to prepare, I had so many in mind. Finally, I decided to make Beans Stir Fry as my family loves the  humble vegetable. The ingredients needed are easily available and the cooking is done quickly if you outsource the coconut milk. Here, I made fresh coconut milk for the dish.. It paired well with chapathi. Let us look at the recipe beans curry in coconut milk


    What goes in Srilankan Green Bean Curry ?

    • Beans : Cut them into two inch long pieces with a diagonal at the end. You will need 150 grams of beans.
    • Coconut milk : You need the thick coconut milk. To extract coconut milk, soak one cup of fresh  grated coconut in hot water for half an hour. Later, grind it and sieve the mixture. The mixture can be pounded again and extracted. The second  extract can be used for any other dish. This is the thick coconut milk. Alternatively, you can use store bought coconut milk. 
    • Onion: Cut it into small pieces.
    • Oil : Any cooking oil will do.
    • Green Chilli
    • Turmeric powder 
    • Salt 
    • Water
    Print Recipe
    a bowl of srilankan green bean curry
    Evergreendishesdev

    Srilankan Green Bean Curry

    Srilankan green bean curry is a tasty side dish cooked in coconut milk. It makes a good accompaniment with chapathi or steamed rice.
    Prep Time 20 minutes
    Cook Time 15 minutes
    Total Time 35 minutes
    Servings: 4 people
    Course: dinner ideas, lunch
    Cuisine: srilanka cuisine

    Ingredients
      

    • 100 ml thick coconut milk (
    • 2 teaspoon oil
    • 1 onion
    • 3 green chilli
    • a few curry leaves
    • 1/4 teaspoon turmeric powder
    • 150 grams beans
    • 75 ml water +100 ml
    • salt

    Equipment

    • 1 pan
    • 1 knife
    • 1 chopping board
    • 2 bowls
    • 1 serving spoon
    • 1 lid cover

    Method
     

    1. To extract coconut milk, soak one cup of fresh  grated coconut in hot water for half an hour. Later, grind it and sieve the mixture. This is the thick coconut milk.
    2. Cut the onion into small pieces.
    3. Cut the beans into two inch long pieces.
    4. Heat oil in a pan, add onion pieces to it. Saute it for some time until it turns pink in colour
    5. Add green chilli and curry leaves to it.
    6. Add the beans, give a stir. Allow to cook for sometime.
    7. Put turmeric powder, salt and water in it.
    8. After two minutes, put the coconut milk.
    9. Cover and cook for two minutes.
    10. Green beans curry is ready to serve.

    Notes

    If you are extracting at home, use only the thick coconut milk. Repeat it second time and use it for any other dish. The milk can be stored in the refrigerator for a day.
    The beans are cut long with a diagonal at the end. 

    Pin it for later : 

    a bowl of srilankan green bean stir fry
    Srilankan green bean stir fry

    If you ever make Srilankan Green Bean Curry, do take a picture and share with me by tagging @foodiejayashree on Instagram or @evergreendishes on Facebook. Subscribe to get all updates and an e-book for free.

  • Dal Makhani / Easy Dal Makhani Recipe

    Dal Makhani / Easy Dal Makhani Recipe

    Jump to Recipe Print Recipe

    Dal Makhani is a rich creamy, delectable side dish from North Indian cuisine. It makes a good accompaniment to all kinds of flat breads, rice dishes and steamed rice. Dal is the Hindi word for lentil while Makhani translates to butter. It is a whole black lentil cooked in butter. 

    The first time I had it was decades back and since then it has been a family favourite. I learnt this recipe from a good Punjabi friend who is no more. She was kind enough to share this recipe with me. Dal Makhani is synonymous to the traditional Maa ki dal. Whole black dal  is cooked on a low flame for long hours with spices. 

    Here is an easy restaurant style dal makhni recipe. It is rich, creamy and tastes delicious. It can be paired with any kind of flatbread like roti, nan, paratha,  roomali roti or phulka.


    A few pointers while cooking dal makhni at home.  It needs time and patience, the lentil needs to be soaked for at least six hours. Once they are soaked,  put them in a colander, after sometime, clean it thoroughly, discard the hard ones. The hard pulses never cook and do not taste good. Later, it is cooked in a pressure cooker for six whistles  along with kidney beans and a few other ingredients. Once the pressure releases, the makhan comes into action. After sauting the onion and tomato in butter, lentils are again cooked in a pressure cooker. This is the usual procedure  I have been following to get a creamy dal makhani. 

    Dal Makhani
    Dal Makhani

    Dal Makhani Recipe

    Ingredients :

    250 grams black urad dal
    50 grams rajma
    1 inch ginger
    2 green chillies
    3 cups water
    2 tablespoon butter
    1/2 teaspoon cumin
    1 onion
    2 tomato
    salt to taste
    1/2 teaspoon chilli powder
    coriander for garnshing


    Method:

    1. Wash black urad dal a couple of times and soak in water overnight.
    2. Soak kidney bean  in another bowl .
    3. The next day, put the soaked urad dal in a colander for sometime.
    4. Now, clean the lentil. Some of them are hard as pellets and will never cook. They need to be discarded.
    5. In a bowl, add the cleaned lentils and kidney beans with three cups of water. Cut the green chilli into two pieces and throw it. Put the grated ginger and a little turmeric powder to it. Pressure cook for five or six whistles.
    6. In another pressure pan, add butter. Add cumin, as it splutters, put onion pieces. Saute it for sometime, until light pink in colour. Put tomato  in it. Saute it. Once it is mushy, add the cooked lentil and bean mixture to it. Put salt. Allow it to simmer for sometime. Put chilli powder and pepper powder. Check the consistency, add water accordingly. The consistency, will be thicker on cooling, you need a medium, flowing consistency. Pressure cook for one whistle.
    7. Once the pressure release, check the taste and adjust accordingly. Garnish with fresh coriander. 

    Take a tip:

    1. I have not added garlic, if you wish, put it and saute with onions.
    2. You can make tomato puree and use it.  
    3. The measurement given here may be more for some of you. Reduce the quantity of lentil and kidney beans used. Use the other ingredients as per your need.
    4. You may add some cream in the end.


    Evergreendishesdev

    Dal Makhni

    Dal Makhni is a delicious side dish from North India. Black urad dal and kidney bean are cooked together to form a creamy and tasty accompaniment. It is ideal to pair with roti, nan or steamed rice.

    Ingredients
      

    • 250 grams black urad dal
    • 50 grams rajma
    • 1 inch ginger
    • 2 green chillies
    • 3 cups water
    • 2 tablespoon butter
    • 1/2 teaspoon cumin
    • 1 onion
    • 2 to mato
    • salt to taste
    • 1/2 teaspoon chilli powder
    • coriander for garnshing

    Method
     

    1. Wash black urad dal a couple of times and soak in water overnight.
    2. Soak kidney bean  in another bowl .
    3. The next day, put the soaked urad dal in a colander for sometime.
    4. Now, clean the lentil. Some of them are hard as pellets and will never cook. They need to be discarded.
    5. In a bowl, add the cleaned lentils and kidney beans with three cups of water. Cut the green chilli into two pieces and throw it. Put the grated ginger and a little turmeric powder to it. Pressure cook for five or six whistles.
    6. In another pressure pan, add butter. Add cumin, as it splutters, put onion pieces. Saute it for sometime, until light pink in colour. Put tomato  in it. Saute it. Once it is mushy, add the cooked lentil and bean mixture to it. Put salt. Allow it to simmer for sometime. Put chilli powder and pepper powder. Check the consistency, add water accordingly. The consistency, will be thicker on cooling, you need a medium, flowing consistency. Pressure cook for one whistle.
    7. Once the pressure release, check the taste and adjust accordingly. Garnish with fresh coriander.

    About the event:

    Sending this post at Shhh Cooking Secretly Challenge  for the  theme “Restaurant style food at home”. The theme was suggested by Aruna Sahas Chandra. I like the variety of different dishes she puts on her blog. Recently, she posted Paneer Do Pyaza, would like to recreate the same as my children love paneer dishes. 

    Here, it  is a monthly event, partners are paired and secret ingredients are exchanged between them.  The dish is prepared and shared in the Facebook group. Guessing the ingredients is a fun activity. My partner for the event was talented blogger Anu Kollon. The two ingredients given to me where cumin and onion. I made Dal Makhni which I intended to post since a long time. I had given ginger and tomato, she has made delicious, Paneer Butter Masala

    shhh cooking secretly

    A few  North Indian dishes shared earlier are :

    Pin Dal Makhani to Indian Food Board: 

    Dal Makhani is a creamy and tasty side dish from North Indian cuisine.
    Dal Makhani

    If you ever make this Dal Makhani recipe, do take a picture and tag me @foodiejayashree on Instagram, I will be glad to see your creation.Follow evergreendishes on FacebookTwitterPinterest and Instagram, let’s be connected. Subscribe to get all updates and a book of handy hints for free! Check out my e-books

  • Brinjal Stir Fry | Badanekayi Palya

    Brinjal Stir Fry | Badanekayi Palya

    Brinjal Stir Fry / Badanekayi palya  is a simple, vegan stir fry with a spice mix from Karnataka. The roasted spice mix lends a good taste to it. It is ideal to serve with chapati or jowar roti.

    Fresh vegetables are available in winter and brinjal is one of them. In Kannada it is called as badanekayi, baingan in Hindi and Gujarati, Kathirikai in Tamil, Vankaya in Telugu and Begun in Bengali. It is more popular as egg plant in England and aubergine in Germany and  France.

    Not everyone likes the taste of brinjal. But most people, who tend to like it are greats fans of this vegetable. It is versatile to use and stir fry and raita are quite common dishes. Sometimes, it is also added in Sambar. Vangi Bhat is a popular rice dish from Maharashtra.

    Sadly, I have not shared any recipe using brinjal. So, today I thought of posting this stir fry recipe which we regularly prepare at home.  Makar Sankranti is round the corner. The day prior is celebrated as Bhogi. It is a harvest festival and all fresh grown grains and vegetables are used. Sajje rotti and brinjal stir fry are usually prepared in most households of Karnataka.  The other dishes on the platter  are Khara pongal and gojju.

    Brinjal comes in different varieties. The medium sized purple and light green coloured brinjals  are the ones I regularly use. Here, I have used the green variety, they are tender and cook very well. The spice mix is usually available at home. You can make a small quantity and use it for the stir fry.

    Brinjal strir fry / Badane kayi palya
    Brinjal Stir fry / badane kayoi palya is a simple and tasty side dish from Karnataka. It makes a good accompaniment with any meal.

    Let’s get to the recipe of Brinjal Stir Fry | Badanekayi Palya

    Ingredients:

    • 2 tablespoon oil
    • 1/2 teaspoon mustard
    • 1/4 teaspoon asafoetida
    • 1/4 teaspoon turmeric powder
    • 1/2 kilogram brinjal
    • salt
    • a little water
    • 3 teaspoon vegetable spice mix
    • 1/2 teaspoon chilli powder (optional)

    Method:

    1. Cut the brinjal into small pieces. Put them in water to avoid discolouration.
    2. Take oil in a pan, add mustard seeds. As it crackles, tip in turmeric powder an asafoetida. Discard the water and put the brinjal pieces to it.
    3. Put salt and sprinkle some water to it. Close a lid and allow it to cook. Give a stir in between.
    4. Once the brinjal is cooked, give a stir and mash it lightly with the ladle.
    5. Put the spice powder to it. Depending on the taste, use chilli powder.
    6. Let cook for a minute.
    7. Remove and serve with hot chapati or phulka. Brinjal Stir Fry is also used with hot steamed rice.

    Take a tip:

    • The spice mix stays good for two months. Store it in an air-tight container.
    • You can use the spice mix in other dishes as well.

    Brinjal strir fry / Badane kayi palya
    Evergreendishesdev

    Brinjal Stir Fry / Badane kayi palya

    5 from 11 votes
    Brinjal stir fry / Badane kayi palya is a simple, tasty side dish. It is ideal to serve with any meal.
    Prep Time 10 minutes
    Cook Time 15 minutes
    Total Time 25 minutes
    Course: dinner, lunch
    Cuisine: karnataka

    Ingredients
      

    • 2 tablespoon oil
    • 1/2 teaspoon mustard
    • 1/4 teaspoon asafoetida
    • 1/4 teaspoon turmeric powder
    • 1/2 kilogram brinjal
    • salt
    • a little water
    • 3 teaspoon vegetable spice mix
    • 1/2 teaspoon chilli powder optional

    Method
     

    1. Cut the brinjal into small pieces. Put them in water to avoid discolouration.
    2. Take oil in a pan, add mustard seeds. As it crackles, tip in turmeric powder an asafoetida. Discard the water and put the brinjal pieces to it.
    3. Put salt and sprinkle some water to it. Close a lid and allow it to cook. Give a stir in between.
    4. Once the brinjal is cooked, give a stir and mash it lightly with the ladle.
    5. Put the spice powder to it. Depending on the taste, use chilli powder.
    6. Let cook for a minute.
    7. Remove and serve with hot chapati or phulka. Brinjal Stir Fry is also used with hot steamed rice.

    Notes

    Cut the vegtable into small pieces.
    Allow to cook with a lid closed over it.
    Spice mix can be freshly made. Check the recipe.

    Pin it for later :

    Brinjal Stir fry is a tasty side dish from Karnataka. It is usually made along with sajje roti.
    Brinjal Stir Fry / Badane kayi palya


    If you ever make this recipe,  do take a picture and tag @foodiejayashree on Instagram or @evergreendishes on Facebook or Twitter. I will be glad to see your creation and share it further.   

    Subscribe to get all updates and an e-book for free. Check out my e-books on Amazon.  Happy Cooking !

  • Amaranth leaves Stir Fry | Rajgiri Soppu Palya

    Amaranth leaves Stir Fry | Rajgiri Soppu Palya

    Jump to Recipe Print Recipe

    Amaranth leaves stir fry is a simple, tasty and healthy side dish from Karnataka. It is ideal to serve with chapathi or jowar roti. 

    Amaranth leaves are not so popular as spinach. It is regularly used in daily cooking by one sect of people here. While the other section have a dislike and few have never used it. 

    In Kannada, it is called as Dantina Palya or Harive Soppu . It is commonly known as Chaulai or Rajgira. The leaves are green or red  with a moderate stem depending on the region they are grown. One needs to include more of it as it is a good source of Vitamin A, C and K.  It is also rich in fiber, iron, magnesium and. phosphorous. It is often given to lactating mothers. It is versatile to use, one can use it in stir fry, dal and stew. Cook it with tur dal and it turns out a good accompaniment with steamed rice. Use a good quantity of fresh leaves to make a delectable chutney. In North India, it is made as a saag. 

    Today, I am sharing a healthy stir fry using amaranth leaves. I have hardly shared any stir fry with greens here. You can use either the red or the green coloured leaves for this stir fry. You may add a few cloves of garlic if you like along with onion. Fresh coconut can also be added to it. Amaranth leaves stir fry, spicy chutney, a mixed dal  and chapathi make a good meal. 

    Amaranth leaves stir fry
    Amaranth leaves stir fry

    What goes in the stir fry ?

    Amaranth leaves :Separate the amaranth  leaves from the stalk. You may use the stalk if it is tender. It will eventually get cooked. You can use either the red amaranth or the regular one. The green leaf vegetable reduces considerably on cooking. 

    Onion : Cut them into medium size pieces. 

    Oil : You can use any oil ideal for cooking. 

    Mustard seed : Any south indian cooking starts with a dash of mustard seeds. The spluttering also indicates the temperature of the oil is right for cooking.

    Asafoetida : Just a small pinch of asafoetida, lends a good aroma to the dish.

    Turmeric powder : It has anti-bacterial properties. 

    Chilli powder: The quantity of chilli powder depends on how much spicy it is.

    Fresh Coconut : South Indian cooking is incomplete without the addition of fresh grated coconut. It is optional, serve it just like that. I have it sans coconut.

    How to wash green leafy vegetables? 

    The question often arises if we should wash and then cut the leafy vegetables or the other way round. Very often, it is suggested to first wash them thoroughly  and then cut the leaves as the nutrients are lost in the process. However, most of us tend to cut the green leaf and then wash it.


    Amaranth leaves stir fry
    Evergreendishesdev

    Amaranth leaves Stir Fry | Rajgiri Soppu Palya

    Amaranth leaves stir fry is a simple, tasty and healthy sidde dish. It is ideal to pair with jowar roti or chapathi.
    Prep Time 10 minutes
    Cook Time 10 minutes
    Total Time 20 minutes
    Course: dinner, lunch ideas
    Cuisine: Indian, karnataka

    Ingredients
      

    • 1 tablespoon oil
    • 1/2 teaspoon mustard seed
    • 1/4 teaspoon turmeric powder
    • a pinch of asafoetida
    • 1 big onion
    • 2 bunch rajgiri soppu / amaranth leaves
    • salt to taste

    Method
     

    1. Separate the leaves from the stalk. Cut them and wash a couple of times in water to remove the grime.
    2. Cut the onion.
    3. Take oil in a pan, add mustard seeds. As it splutters, sprinkle a little asafoetida and turmeric powder. Tip in the onions. Saute for sometime.
    4. In the meantime, remove the amaranth leaves and put them in a colander.
    5. Once the onion is pink in colour, put the amaranth leaves and salt. Mix and let cook for two minutes.
    6. Once the water has evaporated, add chilli powder
    7. Fresh grated coconut may be added. Amaranth leaves stir fry is ready to serve.

    Notes

    1. Two cloves of garlic may be added along with onion.
    2. It can be garnished with fresh grated coconut.

    Pin it for later: 

    Amaranth leaves stir fry is a simple, tasty and healthy side dish from Karnataka. It pairs well with  chapathi or jowar roti. Give a try to this version of amaranth leaves stir fry. Check out the post to know the other names for this green leaf.  #healthycooking #sidedish
    Amaranth leaves stir fry

    If you ever make this recipe,  do take a picture and tag @foodiejayashree on Instagram or @evergreendishes on Facebook or Twitter. I will be glad to see your creation and share it further.   

    Subscribe to get all updates and an e-book for free. Check out my e-books on Amazon.  Happy Cooking !