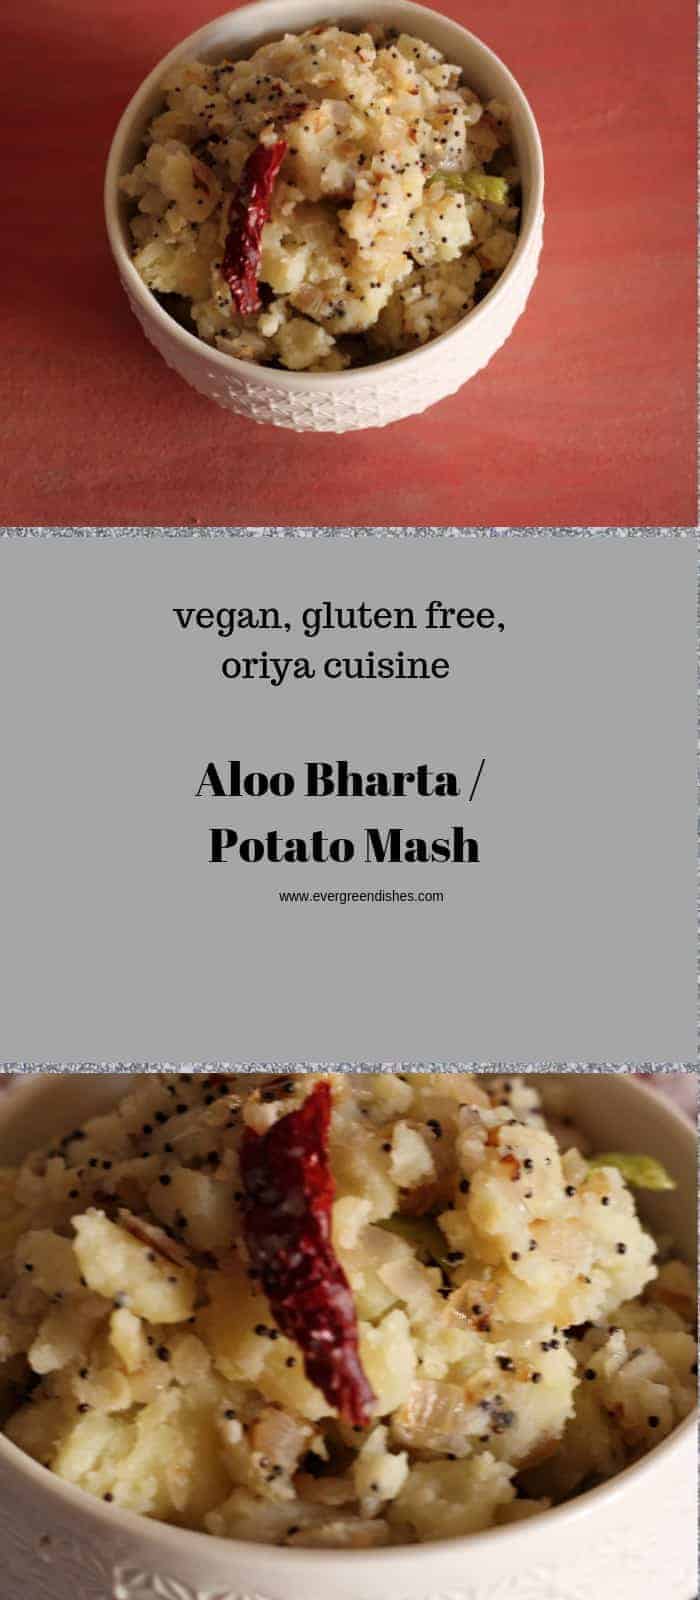
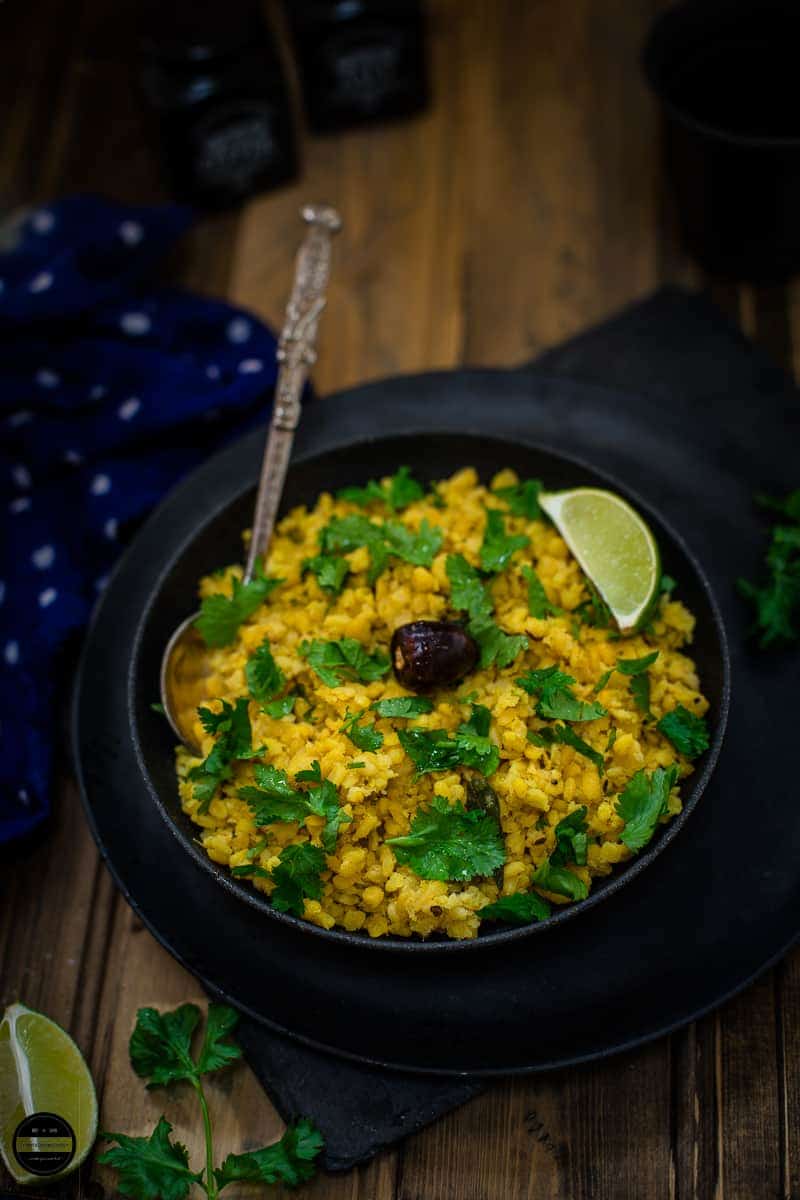
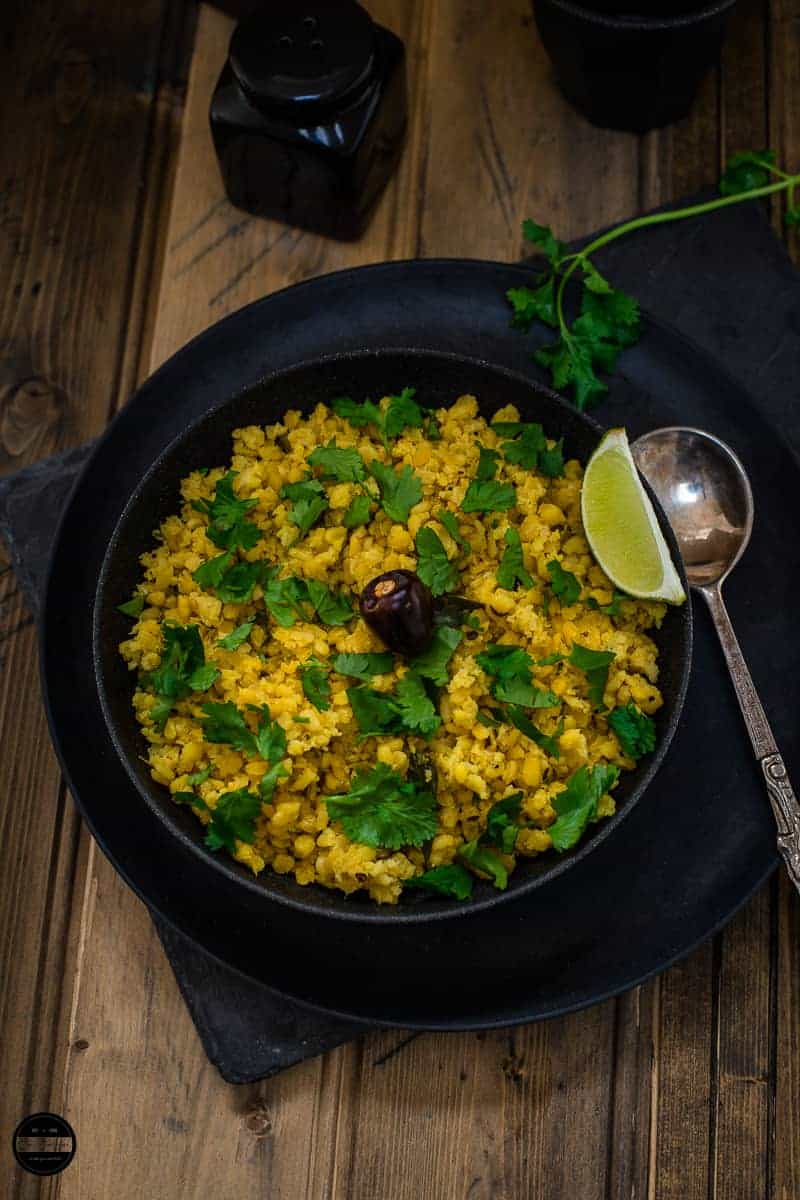
Aloo Bharta or Potato Mash of Oriya cuisine is a simple yet flavoursome accompaniment to any meal. It is mainly used with rice but pairs well with chapati too.
A little about the Oriya cuisine:
The cuisine of Orissa is different from the other states, it has a distinctive style of cooking and it is mostly followed in all the traditional recipes. Panch phoran is an essential spice mix in their cooking, it is a blend of five spices namely cumin, mustard, fenugreek, aniseed and kalonji. The food is less spicy and mustard oil is used in some of their dishes.
Most of the people are non-vegetarian and fish forms an integral part of their traditional cuisine. Rice is the staple food of this region.
Today, I am sharing another potato recipe here, it is called as Aloo Bharta or Potato mash. It is mainly used with rice. Priya Sateesh of Priyas Menu gave me potato and mustard as the two secret ingredients and I prepared this dish. Yes, you guessed it right, it’s time for the monthly challenge at Shhhh Cooking Secretly Challenge group and we have entered the state of Orissa now.
Potato Mash can be used :
dosa
chapati
rice
puri
as a filling for bread
Aloo Bharta / Potato Mash
Ingredients:
4 potato boiled
1 teaspoon mustard seed
3 dry red chilly broken
1 onion
1 green chilly chopped
1 tablespoon mustard oil
salt to taste
Method:
Pressure cook the potatoes.
Cut the onion finely.
Once the pressure releases, peel the potatoes and mash them.
Take oil in a pan, add mustard seed, as they crackle put the onion and saute for sometime. Let it turn translucent.
Put the red chilly and green chilly to it, stir, after a few seconds put the mashed potato and salt. Mix well.
Serve hot aloo bharta with phulka or chapati.
Pin it for later:
Aloo Bharta / Potato Mash
Aloo Bharta/ Potato Mash
Aloo Bharta is a simple yet flavoursome side dish from Oriya cuisine. It pairs well with hot steamed rice.
If you have liked this post, do leave a comment. I will be glad to hear from you. If you ever make this dish, take a picture and share it on Instagram by tagging @foodiejayashree or on Facebook by tagging @evergreendishes.
Subscribe to get an e-book for free and all updates in your inbox !
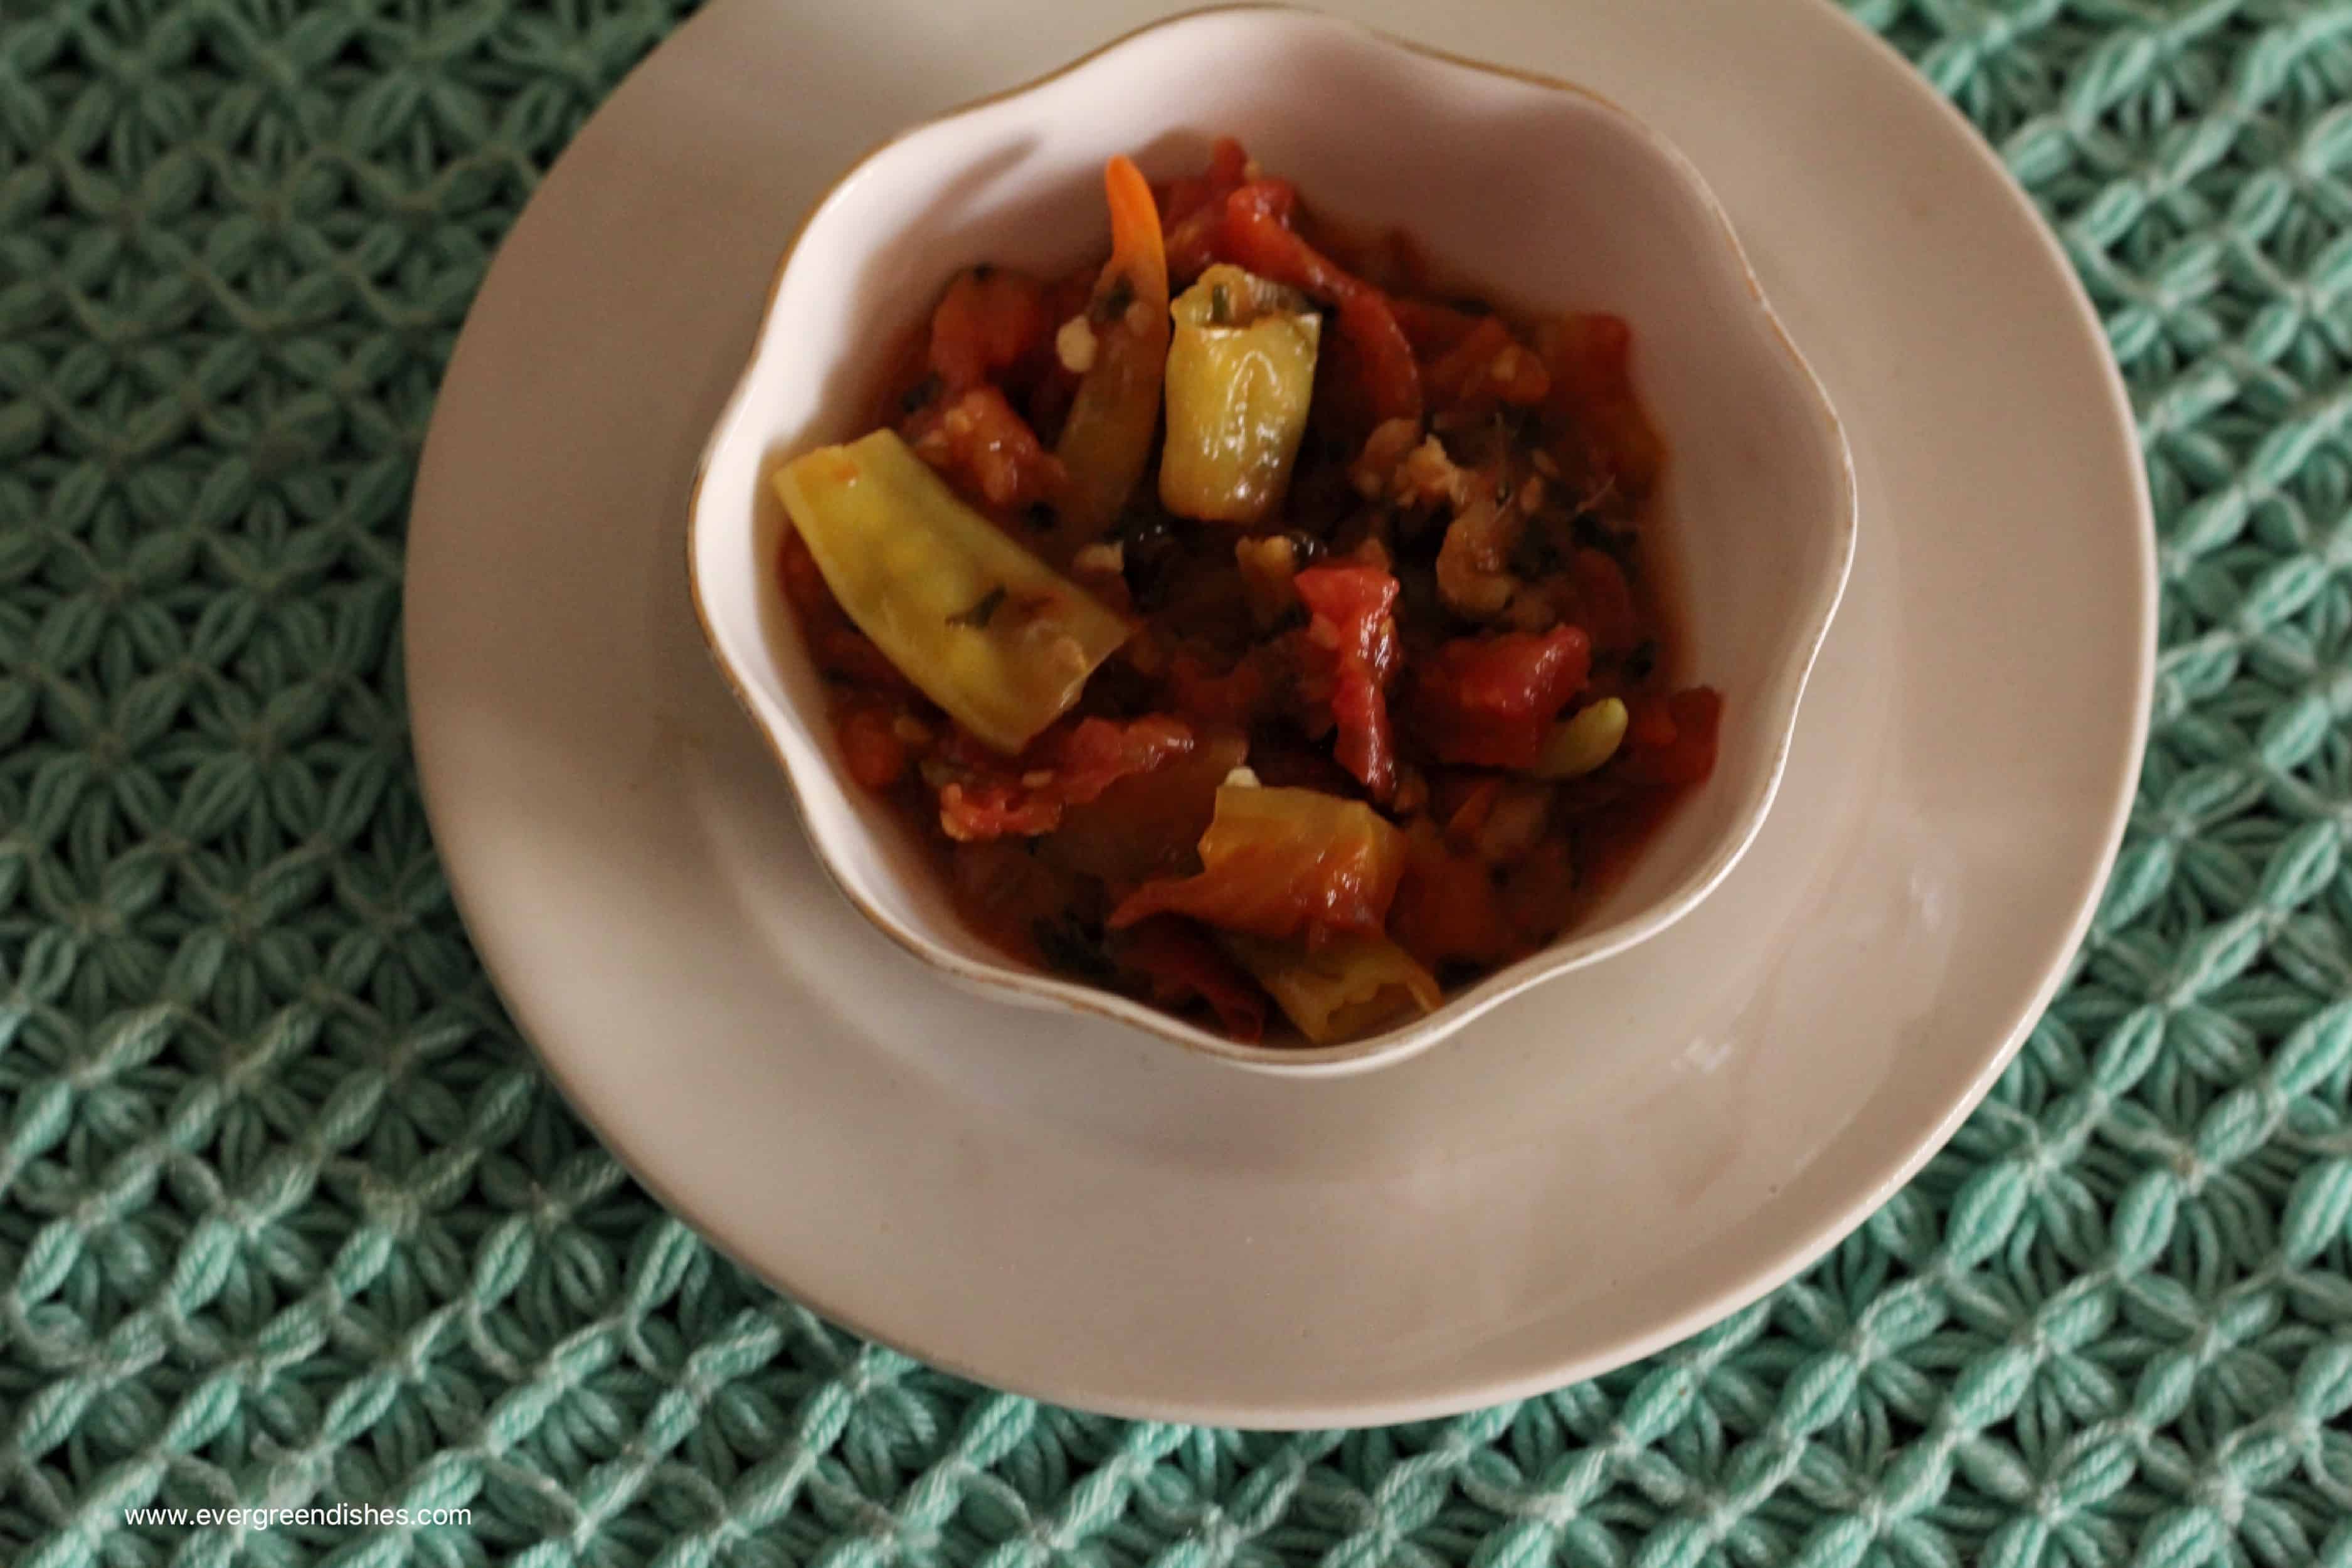
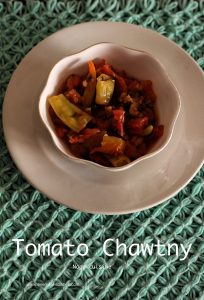
Tomato Chawtny (chutney) is a simple, rustic, tasty accompaniment from Naga cuisine. It is commonly served with rice and meat.
Nagaland is a small state in the North-eastern part of India. It is the home to 16 tribes which are well settled in that region. Each region has its own culture and tradition, thus the cuisine too varies. It is mainly non-vegetarian which they consume on a daily basis. Along with a meat dish, boiled veggies and chutney is usually prepared along with rice. The food is spicy, Nagas are known to grown the hottest chilli, bhut jholokia.
The state dish is a smoked pork cooked with fermented soya bean.
The Shhhh Secretly Cooking group is visiting Nagaland and I am happy to have Seema of www.mildlyindian.com as my partner. Seema is a good friend and a talented blogger. Seema gave me tomato and salt as the secret ingredients and I came upon this tomato chutney (pronounced as chawtny), it is such a simple one but absolutely delicious. You can make it ten minutes with easily available ingredients.Without much ado, let me take you to the recipe of this chutney. I served it with phulka and also with rice and rasam.
tomato chawtny
Tomato Chawtny
Ingredients:
2 tomato cut into slices
3 cloves garlic
1/2 inch ginger
a little coriander
salt to taste
1 cup water
Method:
Put the ingredients and boil for 5 to 10 minutes, the tomato pieces should be mushy. Mash them well with the back of a ladle, the chutney is ready to serve.
Evergreendishesdev
Tomato Chawtny
Tomato chawtny is a simple, no fuss accompaniment from Naga cuisine. It is usually served with rice as an accompaniment.
Put the ingredients in a pan along with water. Boil for 5 to 10 minutes. The tomato should be mushy. Remove and mash it with the back of a ladle. Tomato chawtny is ready to serve.
If you have liked this post, do share it with your family and friends. If you ever make this, do take a picture and tag @foodiejayashree on Instagram. Let’s be connected Facebook, Twitter, Pinterest and Instagram
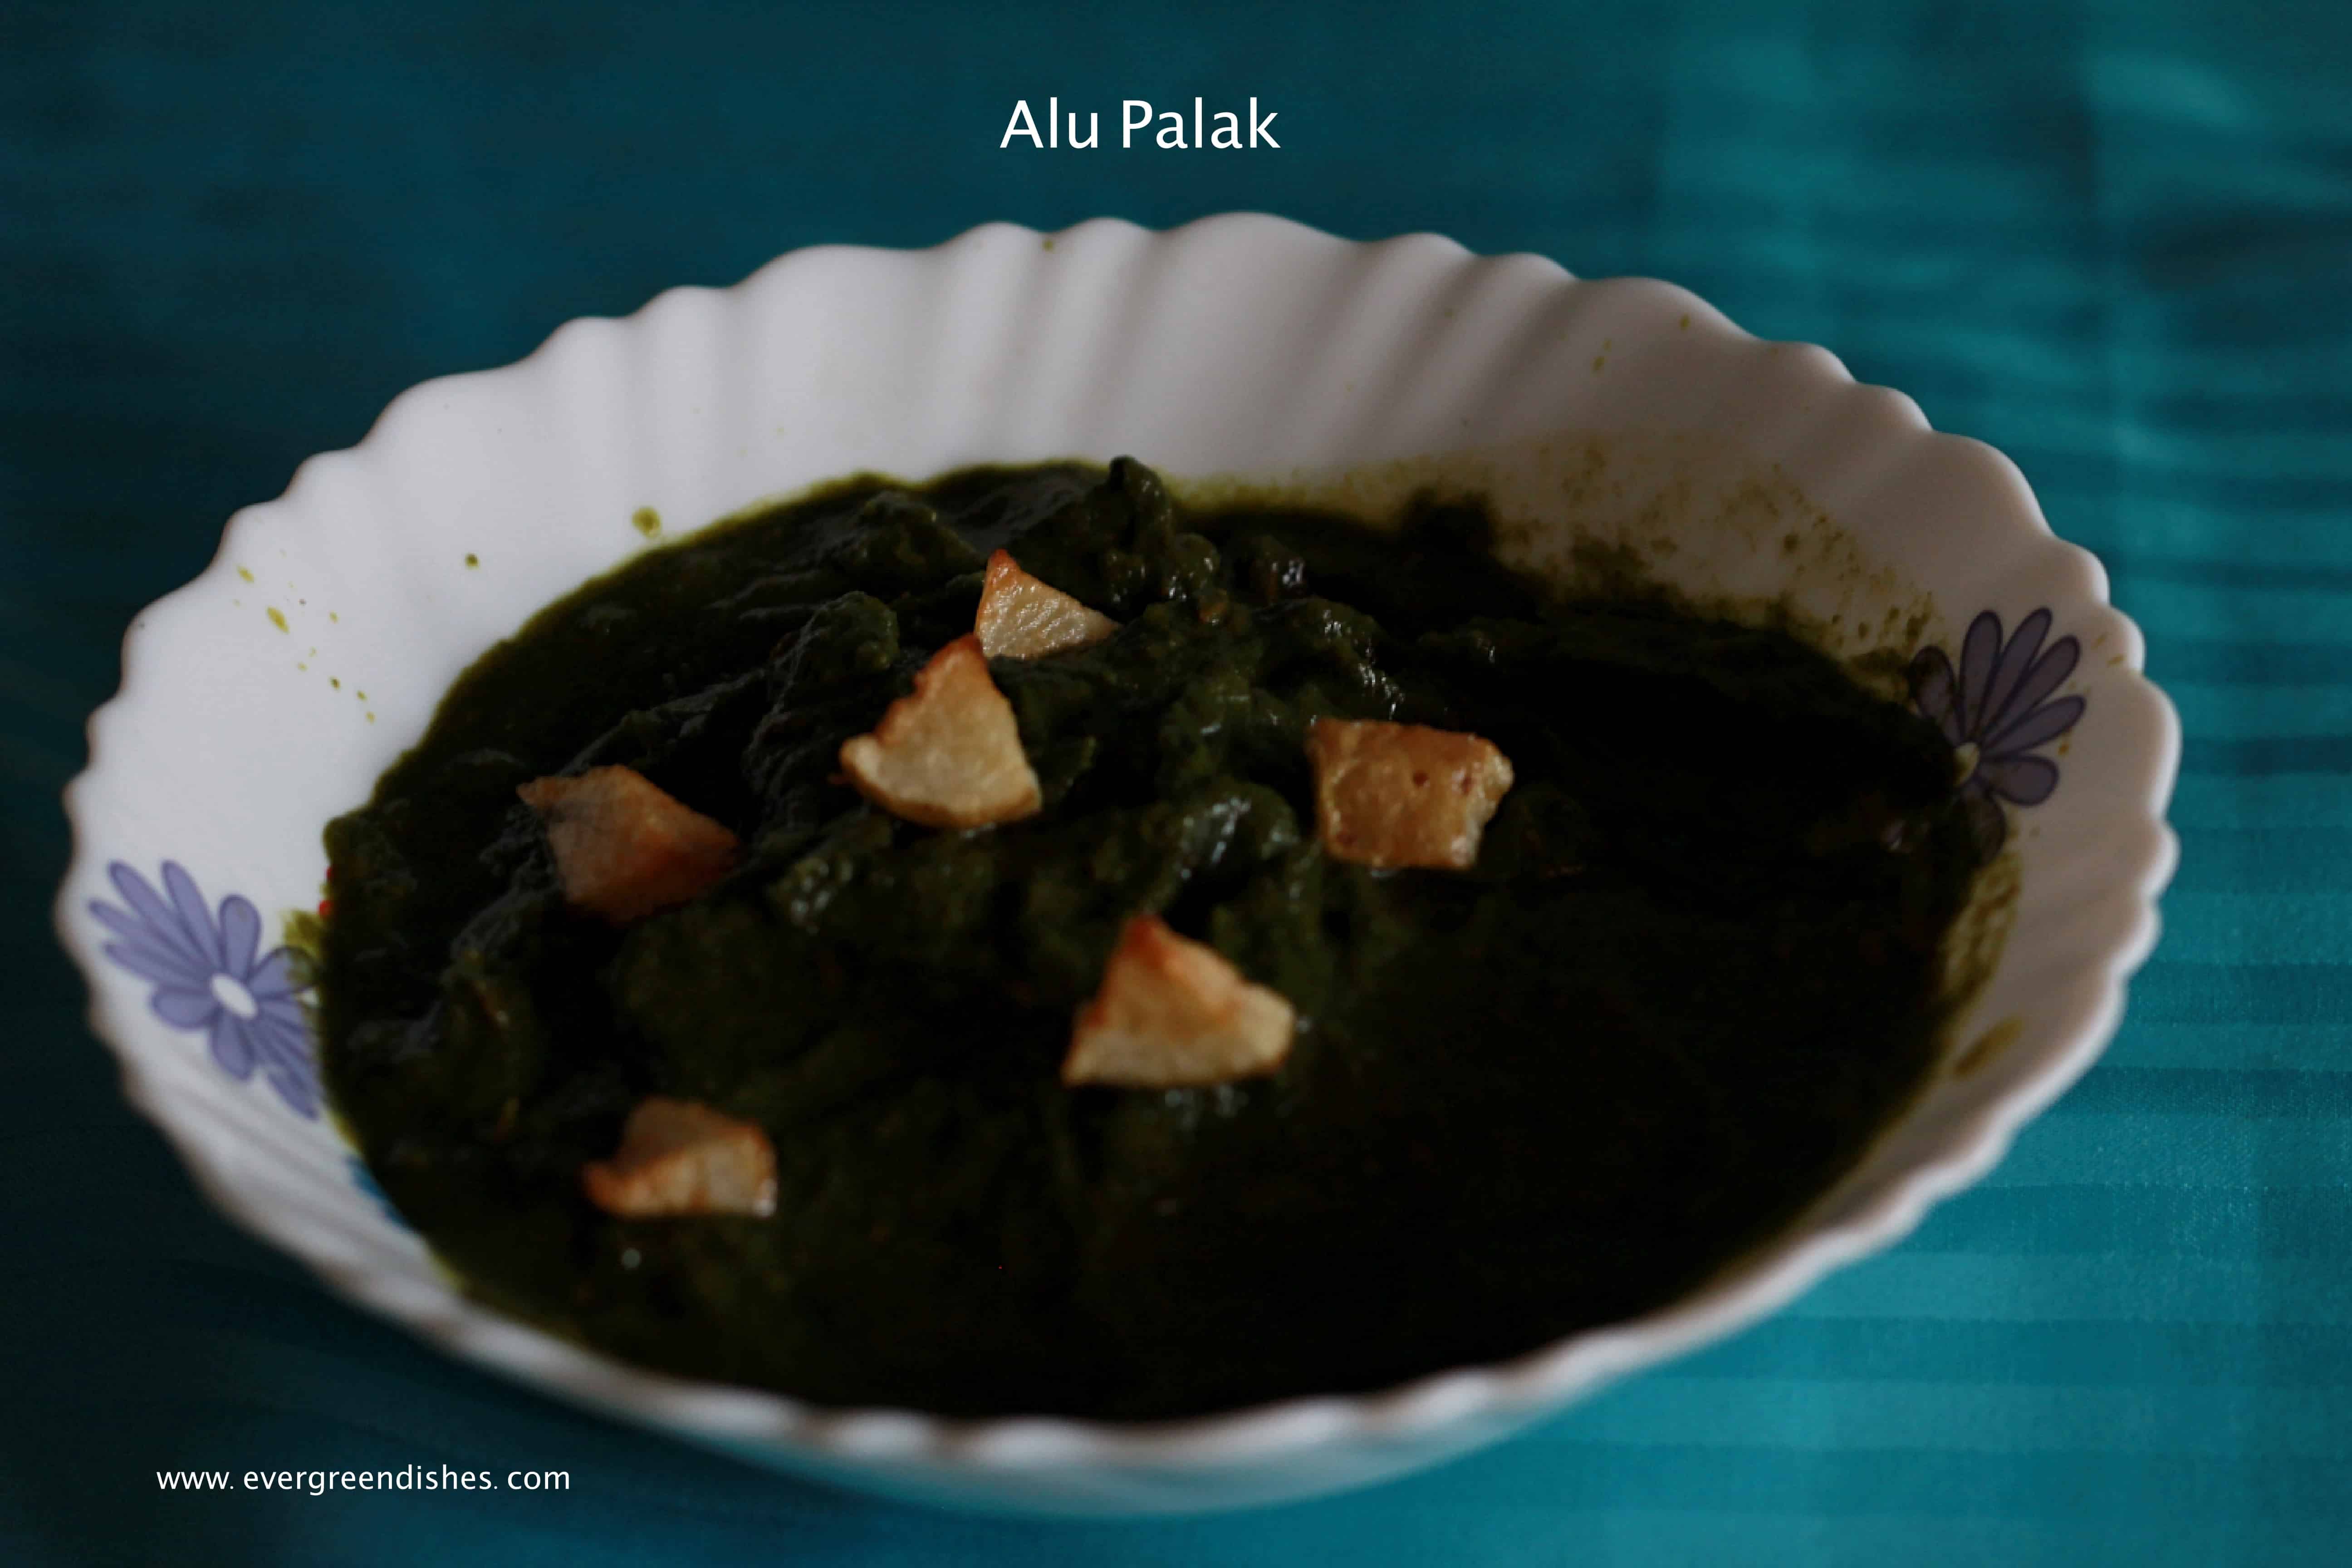
Alu Palak is a popular and tasty accompaniment from North Indian cuisine. Spinach puree is cooked with various spices makes a delectable side dish. Boiled potato cubes or fried potato pieces simmered in it gives added flavour. (more…)
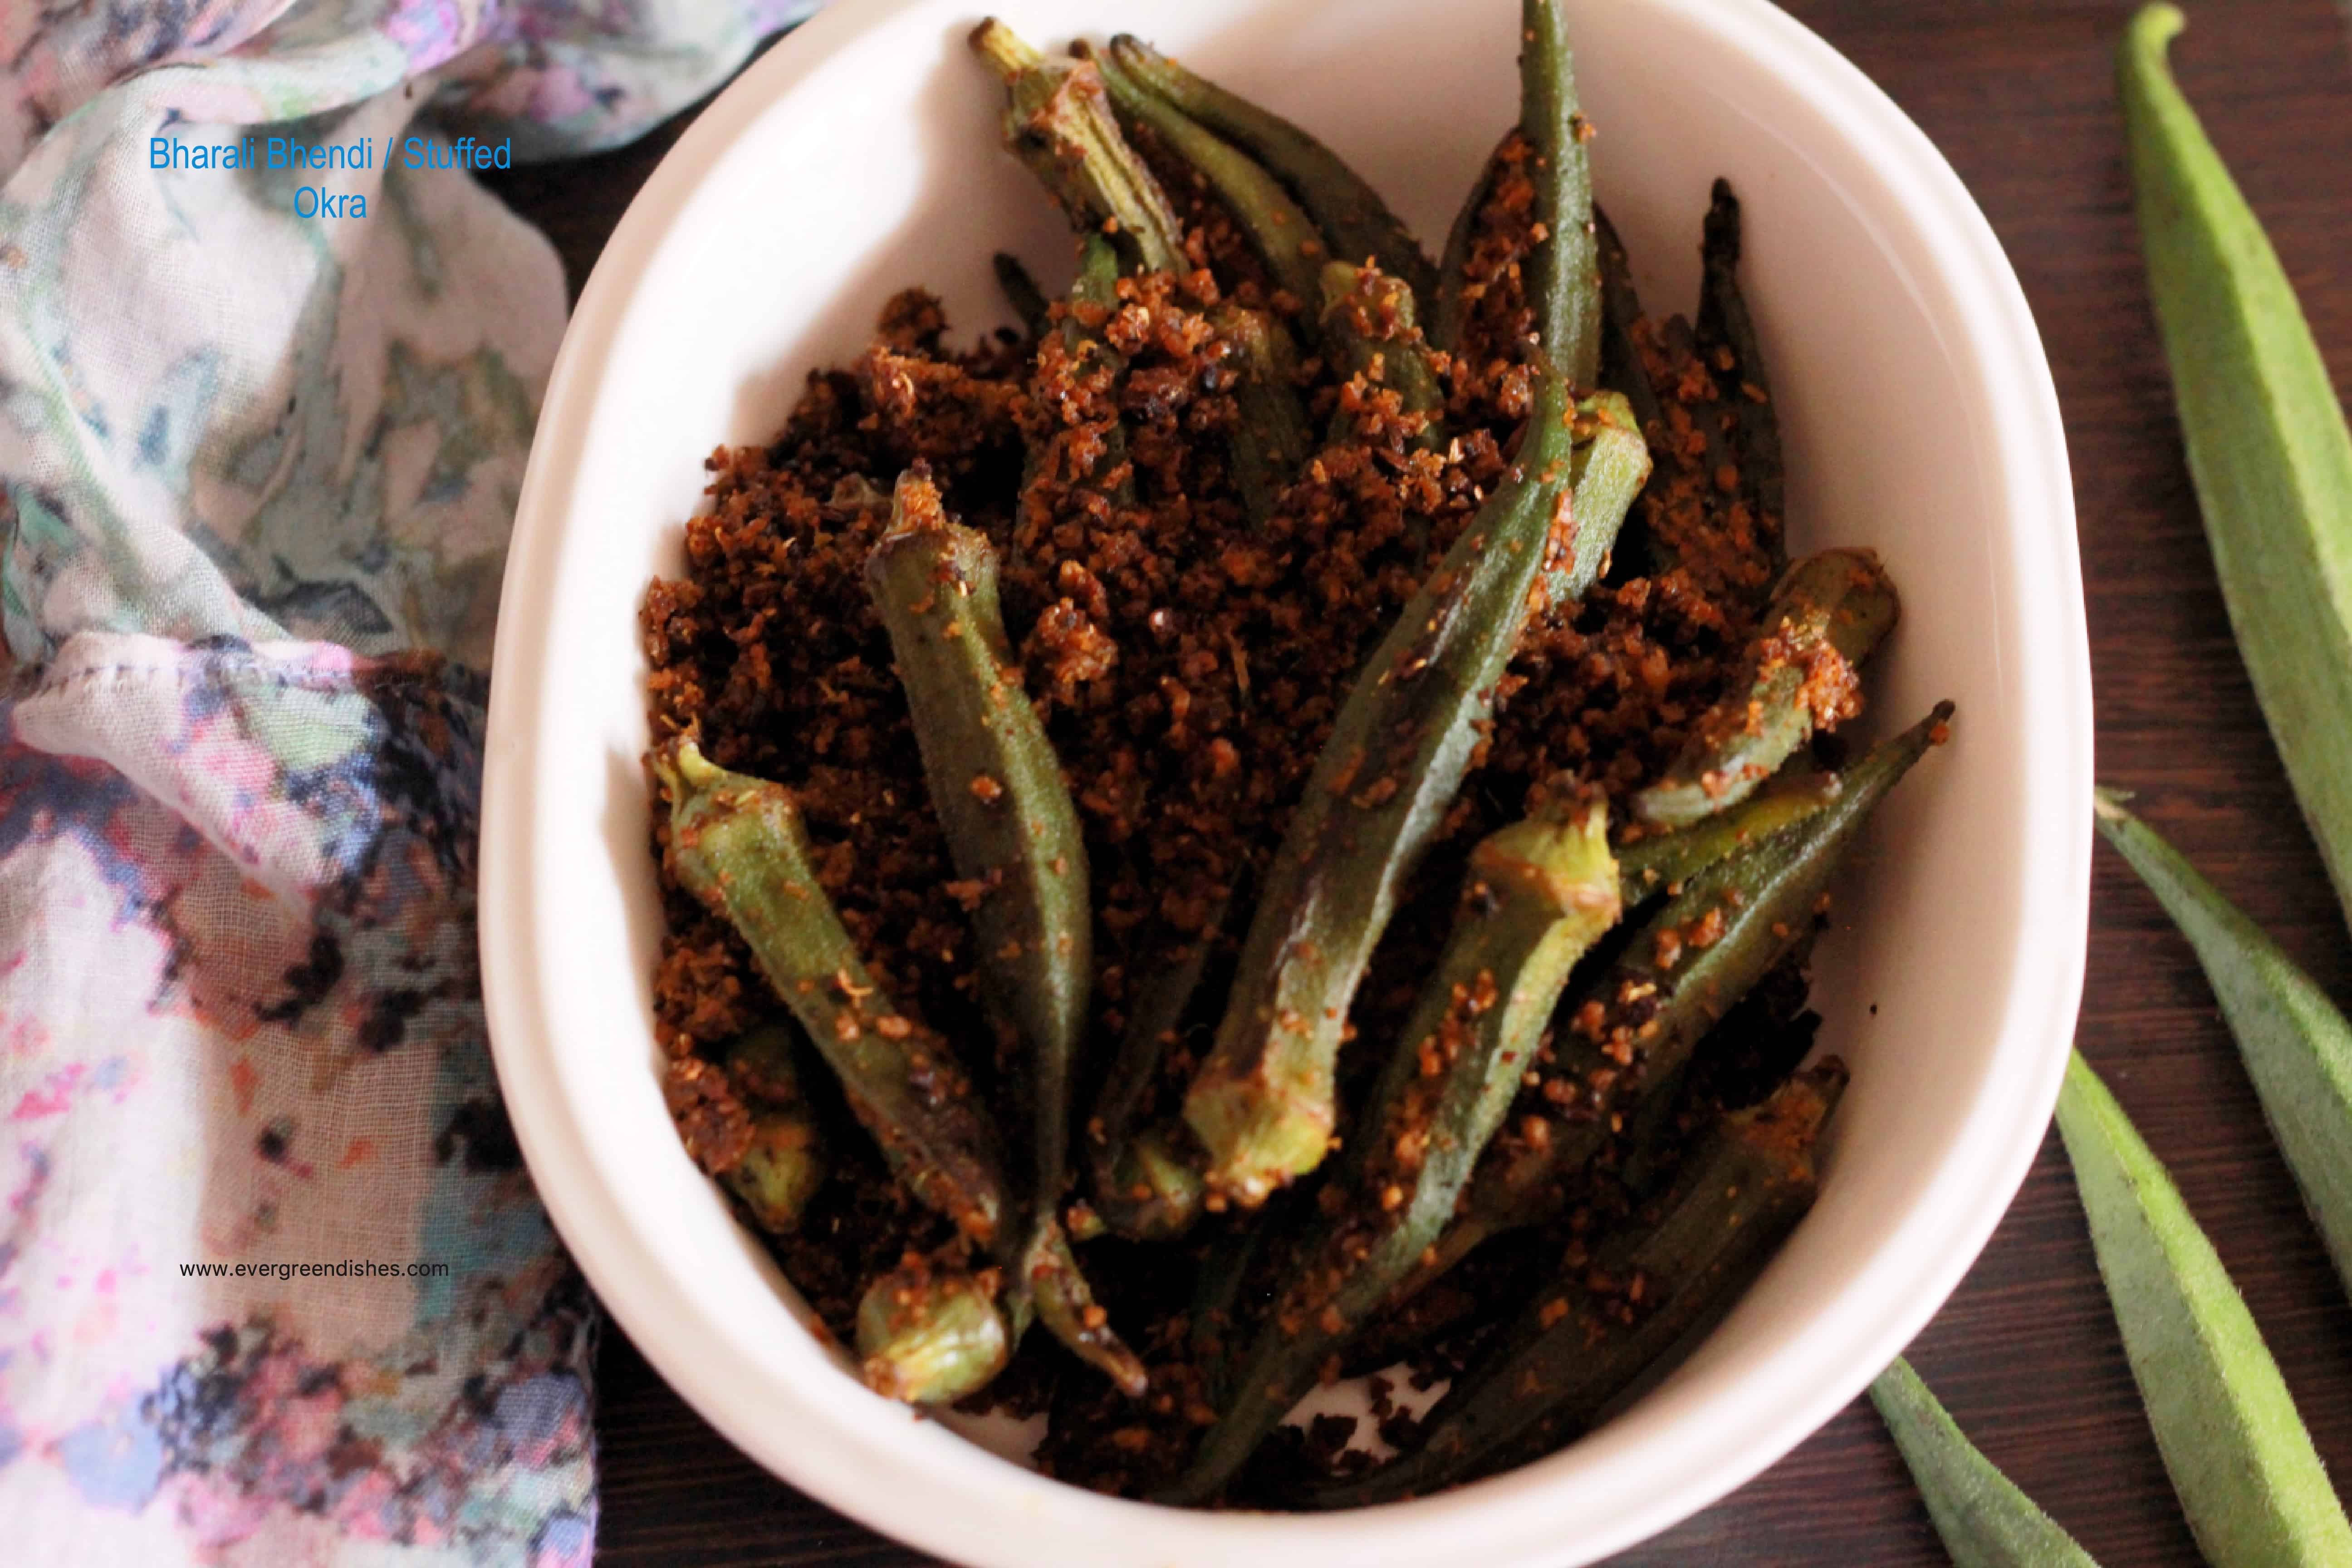
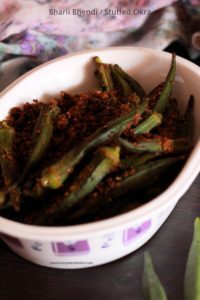
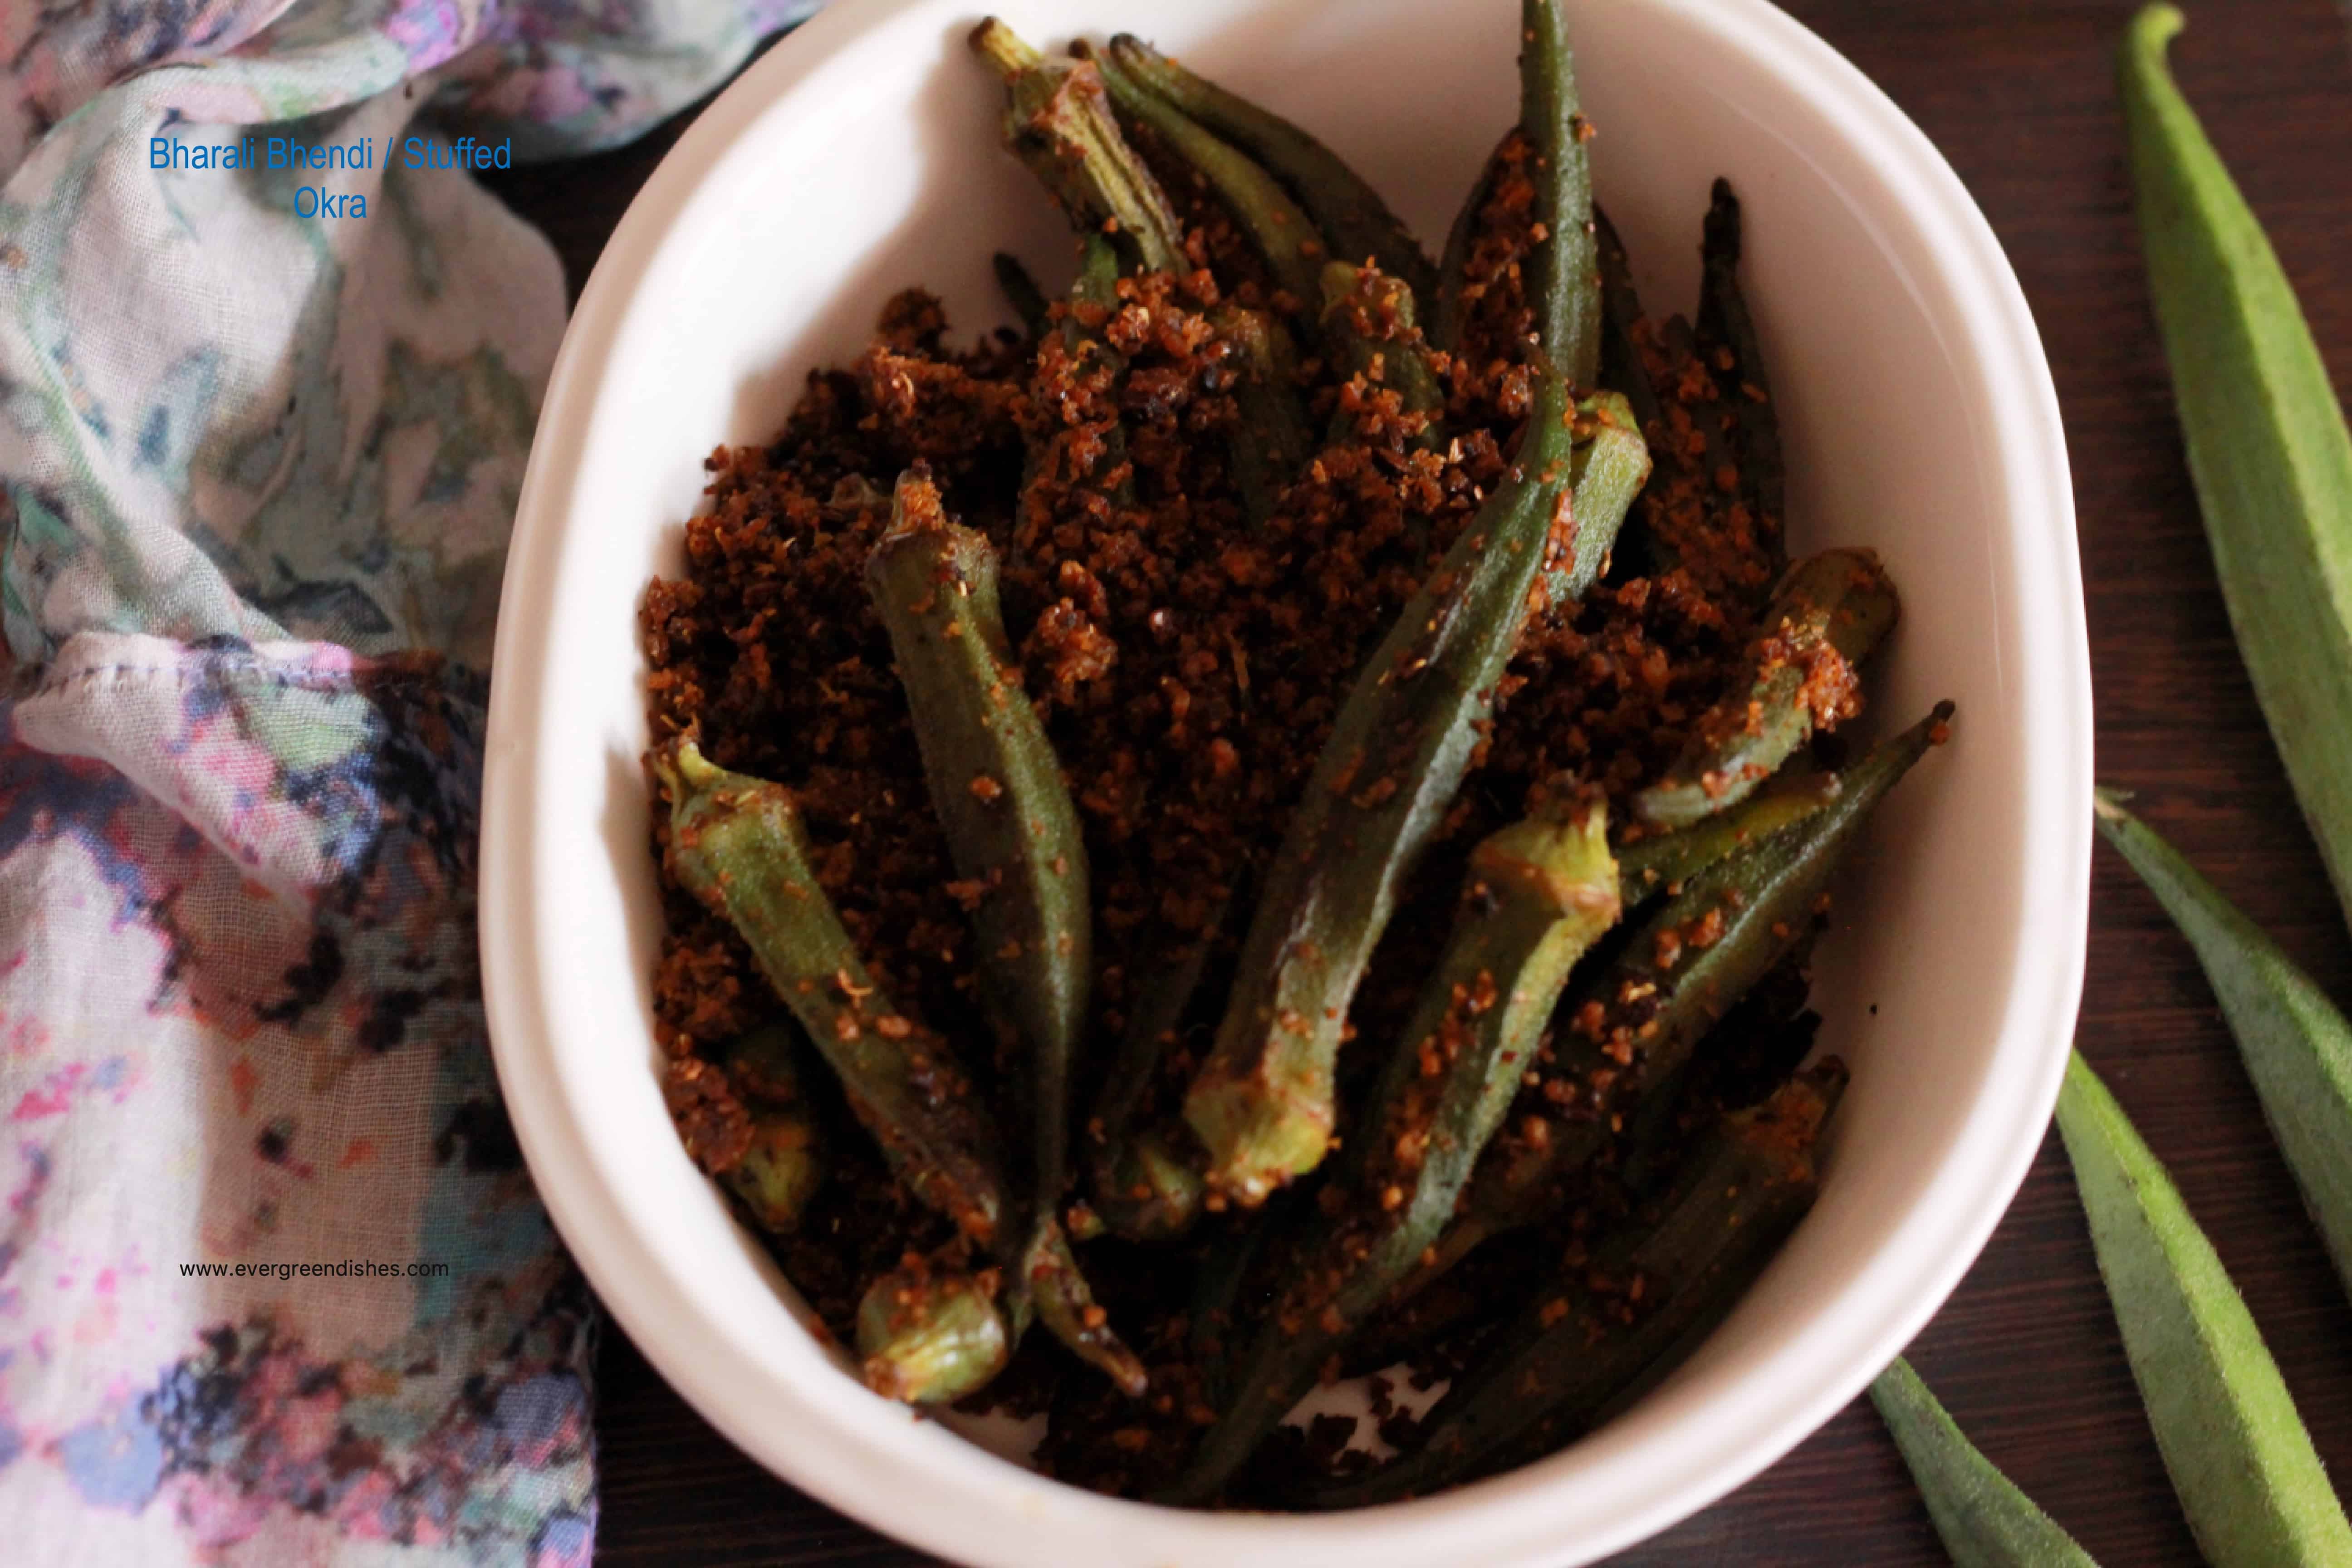
Maharashtrian Bharli Bhendi is okra stuffed with spices and cooked. It is tasty and pairs well with chapati or as a side dish with rice and amti..
Maharashtrian cuisine is spicy, tasty, has a distinctive taste and makes a good meal anytime. It is mostly vegetarian though not restricted, the jowar roti and the chapati are essentials in daily meals. A few dishes which one can resonate with Maharashtrian cuisine are junka, patal bhaji, bharli baingan and amti. Snacks such as wada pav, surlicha wadi, pav bhaji, kothimbircha wadi, dahi puri, bhel puri to name a few, so tempting isn’t it ?
The Shhhhh Cooking Secretly Challenge group is now all set to explore the beautiful state of Maharashtra, a cuisine which a foodie cherishes and a blogger love to create the myriad dishes from that state. I was paired with Poonam and she gave me groundnut and jaggery, I prepared Bharli Bhendi, it was tasty and we enjoyed it. Bharli Bhendi is a Marathi word which means stuffed okra. Poonam writes at www.poonambachhav.com. Do check her blog for a wide range of dishes. She has many dishes from Maharashtrian cuisine. I had given wheat flour and milk and she had prepared the tasty Goad Dashmi.
Increase the quantity of ingredients proportionately if you are using varied measurements.
Bharli Bhindi Recipe :
Ingredients:
1/2 kilogram okra
2 tablespoon roasted peanuts
1/2 cup coriander
4 cloves garlic
1 green chilly
1/2 cup fresh coconut
4 teaspoon goda masala
1/2 teaspoon chilli powder
1/2 teaspoon turmeric
1 teaspoon cumin
a little jaggery
salt
Method:
Wash the bhendi and pat dry.
Make an incision in the centre with a sharp knife.
For the stuffing, grind these together : peanuts, coriander, garlic, green chilly, fresh coconut, goda masala, turmeric powder, jaggery and lemon juice.
Put the stuffing into the slit vegetable, keep the remaining mixture, can be used later.
Heat oil in a pan, add mustard seeds, turmeric powder and asafoetida, once it splutters, put the stuffed bhendi into it.
Let cook for sometime.
Toss in between, it needs to be well cooked on all sides. Put the remaining mixture into it. Let cook for a few more minutes, remove and serve Bharli Bhendi with any flat bread.
Maharashtrian Bharli bhendi / stuffed okra
Evergreendishesdev
Maharashtrian Bharli Bhendi / Stuffed Okra
Maharashtrian Bharli Bhendi is stuffed okra stir fry from Maharashtrian cuisine. Fresh coconut is mixed with other ground ingredients and made into a filling.
Wash the bhendi and pat dry. Make an incision in the centre with a sharp knife.
For the stuffing, grind these together : peanuts, coriander, garlic, green chilly, fresh coconut, goda masala, turmeric powder, jaggery and lemon juice.
Put the stuffing into the slit vegetable, keep the remaining mixture, can be used later.
Heat oil in a pan, add mustard seeds, turmeric powder and asafoetida, once it splutters, put the stuffed bhendi into it. Let cook for sometime.
Toss in between, it needs to be well cooked on all sides. Put the remaining mixture into it. Let cook for a few more minutes, remove and serve Bharli Bhendi with any flat bread.
Notes
Use tender lady finger for filling.
The grated coconut can be directly mixed with the ground mixture and then filled. But, I did grind it.
Sugar can be used instead of jaggery.
If you have liked this post, do share it further. All comments motivate me to write more.
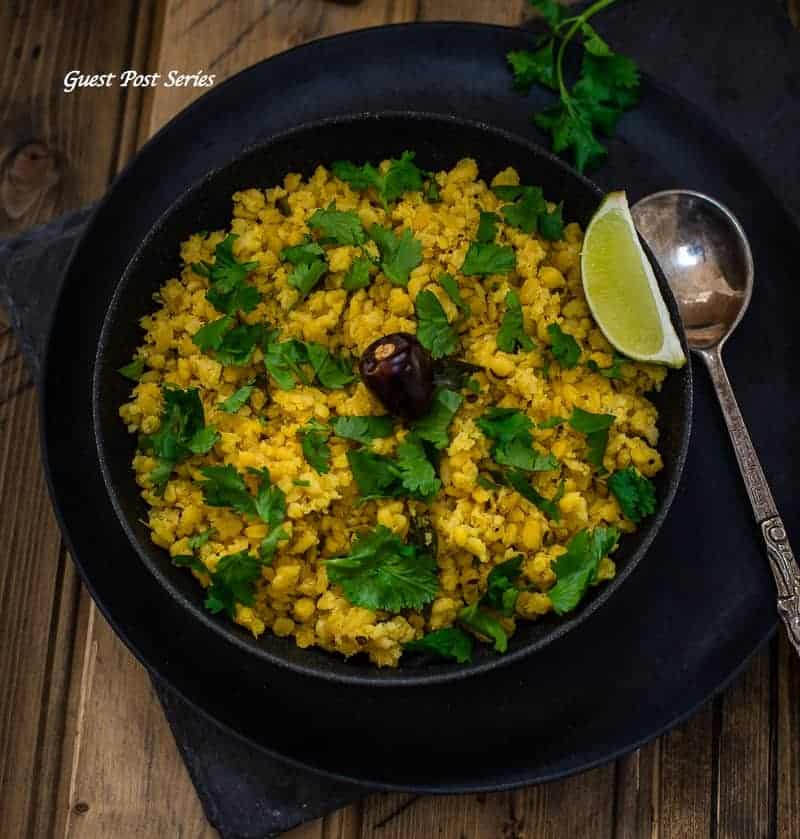
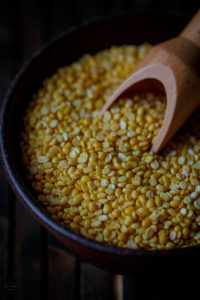
Mug/Mag Ni Chutti Daal is a popular dish from Gujarati cuisine. It is dry sabzi of moong dal which pairs well with rice and kadhi.
It’s a new week with a new face on my blog. Today, I have my other good friend Jagruti sharing her recipe here. Jagruti, Sapana and myself are three like minded person running a group on facebook since a few months and thus our interactions are on daily basis.
Jagruti is an excellent cook who can play easily with many cuisines. She is another vegetarian blogger. I love her photography skills. She is a passionate blogger who strives hard to keep herself updated. Do take a look at her blog www.jcookingodyssey.com
Over to Jagruti:
How to make Mug ni chutti daal | Mug ni chutti daal is a simple, delicious and homely Gujarati side dish that can be served in a daily Gujarati meal. This daal requires just a handful of ingredients that are easily available in the Indian kitchens. This dish makes a perfect protein-rich dish without using any expensive ingredients.
BTW Chutti translates Sukhi in Hindi and Dry in English.
Mug ni chutti daal is a dry preparation of huskless yellow moong daal with basic spices but made without onion and garlic. Usually, this daal is served with Gujarati Kadhi and plain boiled rice. These three dishes go so well when mixed together. Whenever my husband tries this combination together, he describes this as ‘ Pudding’ 🙂
We Gujarati try to eat a well-balanced meal every day and when we prepare a thali, we make sure that we cook everything making sure that in the one meal, all flavours and nutrients can be found. So for protein, we make at least two dishes, and whenever there is kadhi on the menu, Mug Ni Chutti daal, automatically becomes a side dish in the thali.
This post is dedicated to all you Gujarati food lovers out there and my lovely friend Jayashree’s readers!
Hey guys
How are you all?
When one passionate foodie meets another passionate foodie, what would you do? You become best pals, don’t you agree? Mine and Jaya’s friendship is not even a year old, but it seems like we know each other for years. I met Jayashree virtually on Facebook through one of the group. We became very close friends since we created our facebook group ‘Desi Bloggers Connect’. She is a dedicated and enthusiastic food blogger who creates delicious, tasty yet easy to prepare recipes. I love all her Karnataka specialities and can’t wait to try them in my own kitchen.
I was so delighted and honoured when Jayashree request for the guest post and that when I decided to share this delicious and healthy Gujarati daal recipe. A really tasty and protein packed dish that is perfectly suitable for vegan too, also it is made without onion and garlic thus this recipe can be prepared during fasting season when such ingredients onion and garlic are prohibited.
Thank you Jayashree for giving me this honour to share my recipe with your readers, hope they like it and make it in their own kitchens. Please shoot with any questions and inquiries regarding this recipe
Let’s look at the recipe
Mug ni chutti daal- guest post
Mug/Mag Ni Chutti Daal – Gujarati Dry Moong Daal
Ingredients
1 cup yellow moong daal ( Mug Ni Daal )
2 Tbsp. oil
1/2 tsp. Mustard seeds
1/2 tsp. Cumin seeds
Pinch hing
1 red dry chilli
1 tsp. red chilli powder
1/2 tsp. turmeric powder
1/2 tsp. green chilli and ginger minced
Lemon juice
Fresh coriander leaves to garnish
Method:-
Clean, wash and soak moong daal in cold water for half an hour.
Discard the water.
Once you are ready to cook the daal, heat oil in a thick bottom pan or kadai.
Add mustard and cumin seeds, once they crackle add hing and dry red chilli.
Then add soaked daal, and minced chilli ginger.
Mix well, then add red chilli powder, turmeric and salt.
Once again mix well.
Add sufficient water to cook daal perfectly.
Don’t add too much water in the beginning, if you need then add later.
Cover the pan with the lid and cook the daal on a low heat.
Daal should not be mushy but cooked well and each daal should be separate.
Once the daal is cooked add lemon juice and mix.
Turn off the heat and garnish the daal with the coriander leaves.
Serve hot with Gujarati Kadhi and Rice in a typical everyday Gujarati thali.Enjoy!
Clean, wash and soak moong daal in cold water for half an hour.Discard the water. Once you are ready to cook the daal, heat oil in a thick bottom pan or kadai.
Add mustard and cumin seeds, once they crackle add hing and dry red chilli. Then add soaked daal, and minced chilli ginger. Mix well, then add red chilli powder, turmeric and salt. Once again mix well.
Add sufficient water to cook daal perfectly. Don’t add too much water in the beginning, if you need then add later. Cover the pan with the lid and cook the daal on a low heat. Daal should not be mushy but cooked well and each daal should be separate. Once the daal is cooked add lemon juice and mix. Turn off the heat and garnish the daal with the coriander leaves. Serve hot with Gujarati Kadhi and Rice in a typical everyday Gujarati thali.
yellow-moong-daal-guest-post
Mug-ni-chutti-daal-guestpost
About the author:
She is the owner of Jagruti Cooking Odyssey, a blog of pure vegetarian dishes. She has cooked on IndianTV channels and printed in UK magazines, previously winning the top prize. She loves cooking different cuisines. Follow Jagruti on Facebook, Twitter, Instagram and Pinterest
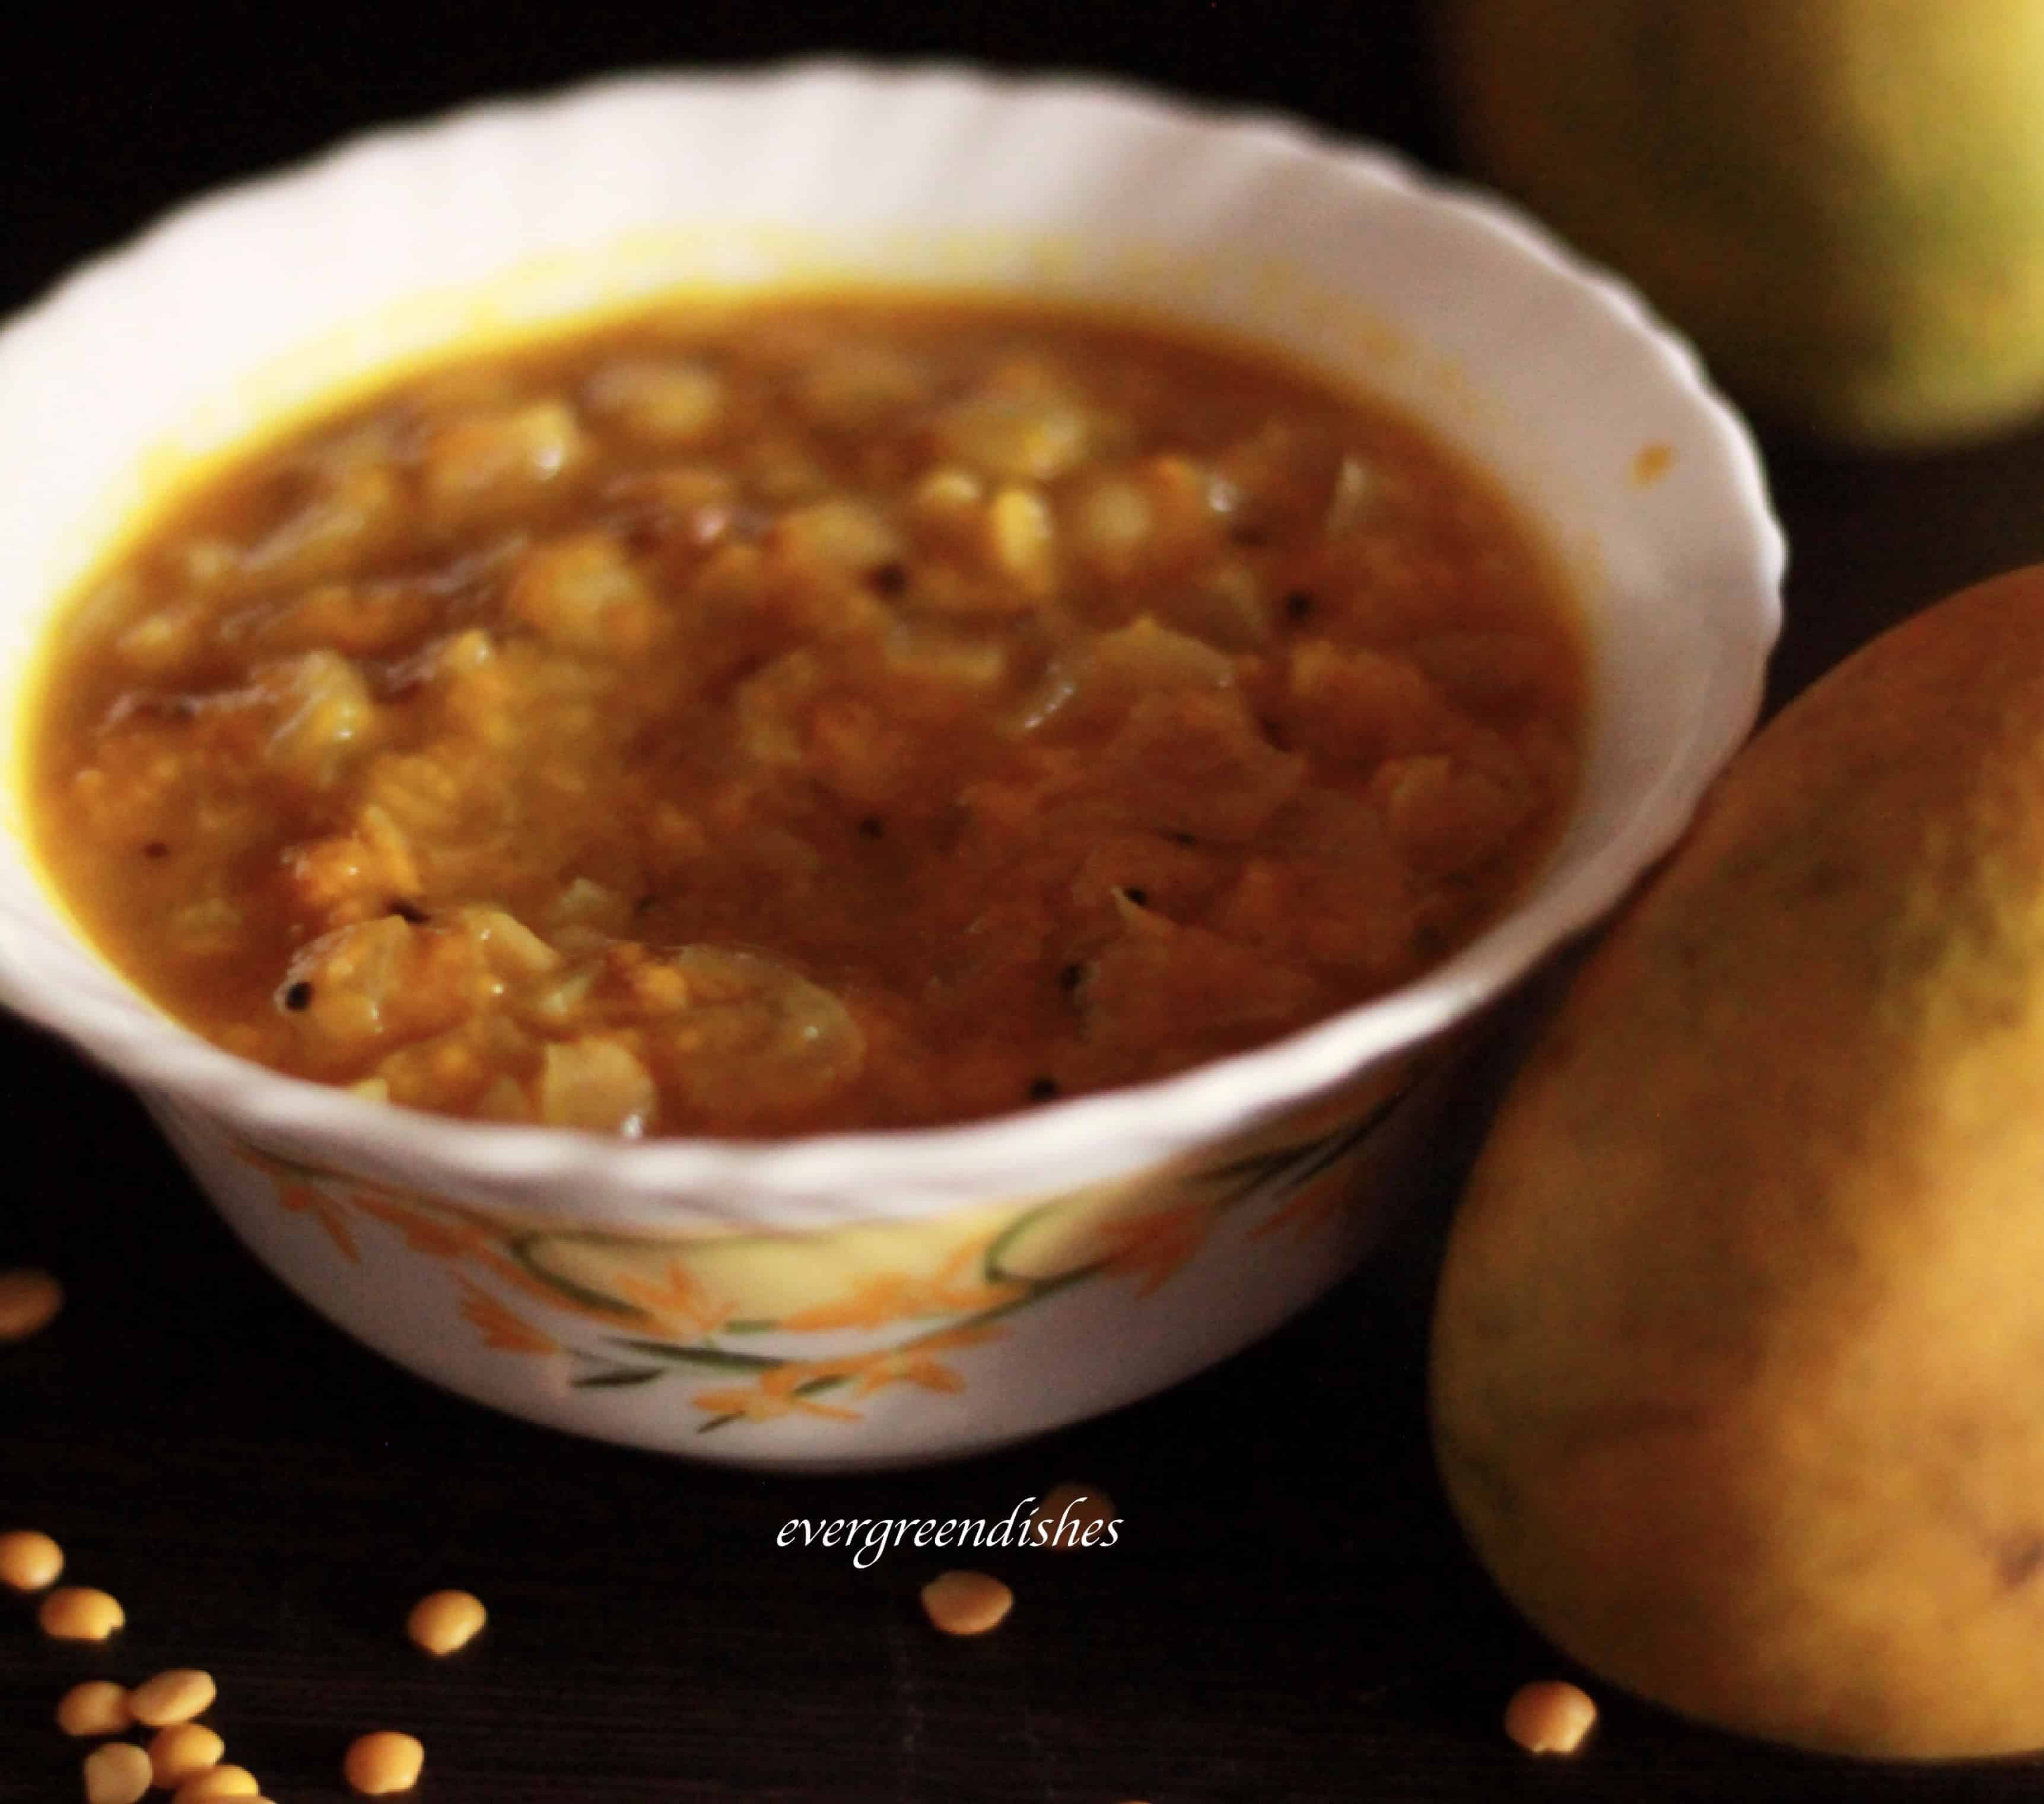
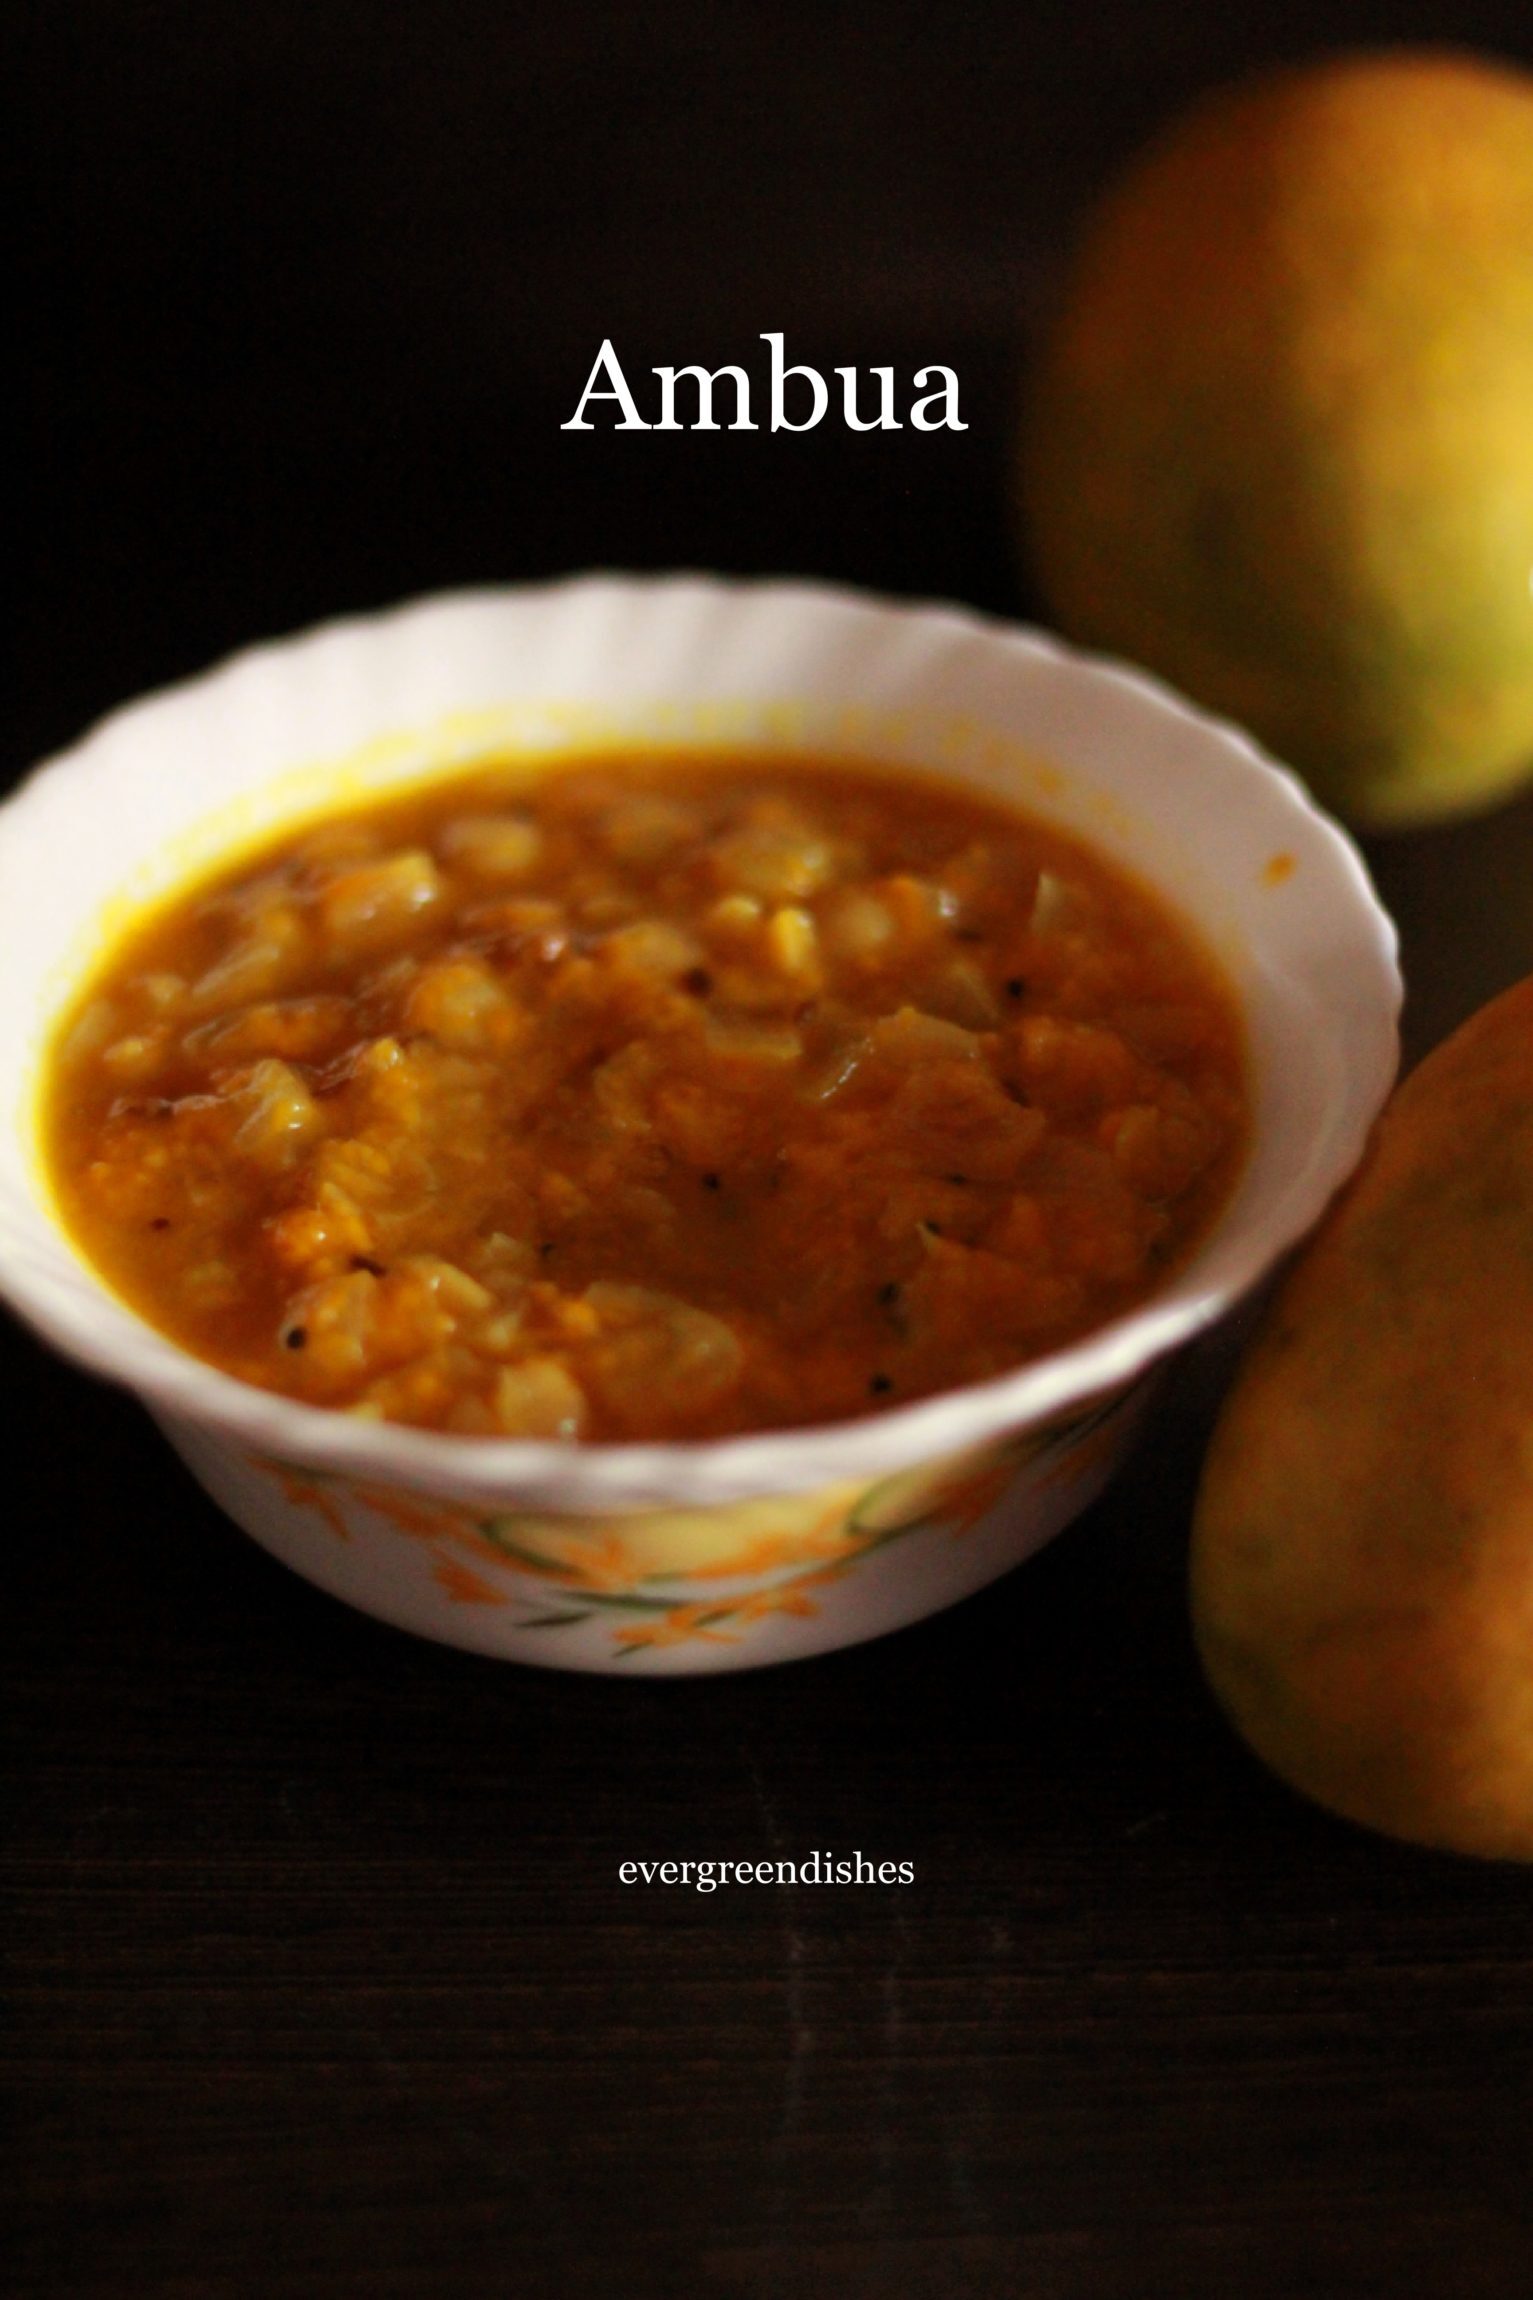
It’s the season of mangoes and here is another tasty dish, Ambua. It is a delicious sweet and sour dish from the Kangra district of Himachal Pradesh. It pairs well with hot steamed rice.
It’s that time of the month when we learn and enjoy cooking a new dish from regional cuisine. Shhhhh Cooking Secretly Challenge group has reached the beautiful land of Himachal Pradesh now. Like any other state, they have a simple meal of lentils, vegetable, flat bread and rice on a daily basis. The food is similar to the other states of North India but here, non -vegetarian food is preferred. Thick and rich gravy with aromatic spices is used in abundance as the base of many dishes. Some of the specialities of Himachal include Manee, Madira, Pateer, Chouck, Bhagjery and chutney of til.
My partner for this month is Mayuri Patel of mayuris-jkoni.com, she is an enthusiastic person who loves to try new dishes. She has a wide range of food delicacies and bakes from India and Kenya. Do check her blog. The two secret ingredients given to me where mango and ginger, thankyou Mayuri, thoroughly enjoyed making this dish.
Ambua is a delicious sweet and sour dish from the Kangra district of Himachal Pradesh. We really enjoyed this dish. I checked in through various recipes, but no ginger was used. I have used ginger here, thus using it is optional.
ambua mango dish / himachal cuisine
Ambua
Ingredients:
3 mangoes
1 tablespoon arhar dal
asafoetida
1/2 teaspoon chilly powder
1/2 teaspoon mustard seeds
1/2 teaspoon turmeric powder
1/4 teaspoon methi
1 inch ginger grated (optional)
3 cloves garlic
1 small onion
1 tablespoon mustard oil
Method:
Peel mangoes and pressure cook with dal along with a glass of water.
Allow to cool and squeeze the pulp.
Heat oil in a pan, add mustard seeds, as it splutters, put asafoetida and methi, after a few seconds add ginger and garlic. Saute and then put the onion pieces. Let cook for sometime until it is pink and translucent.
Add the mixture of mango pulp and dal to it. Put salt. Let cook for 15 minutes.
Serve hot with rice or any flatbread.
ambua mango dish/ himachal cuisine
Evergreendishesdev
Ambua
Ambua is a sweet and sour dish from Himachal Pradesh. It tastes good with hot steamed rice.
Wash and peel the skin of mango. Put it in a bowl along with arhar dal. Add one cup water and cook it in the pressure cooker.
Once the pressure releases, let cool, mash the mangoes and extract the pulp.
Take oil in a pan. Make the seasoning, add the mustard seeds, as it crackles put asafoetida and turmeric powder. Next, put the methi seeds and then throw in the ginger and garlic. Saute for a few seconds.
Add the mashed mixture to it. Put salt and simmer for fifteen minutes.
Serve hot with rice or chapati.
If you have liked this post, do leave a comment. The little words of appreciation are big boosters for any blogger.
If you ever recreate this dish, do tag me on Instagram @foodiejayashree, would love to see your creation.
Chutneys are an integral part of cooking in most South Indian families. They make good accompaniments with lunch. They are also needed for breakfast dishes as idli and dosa. Red onionchutney is delicious and pairs up well with any kind of dosa.
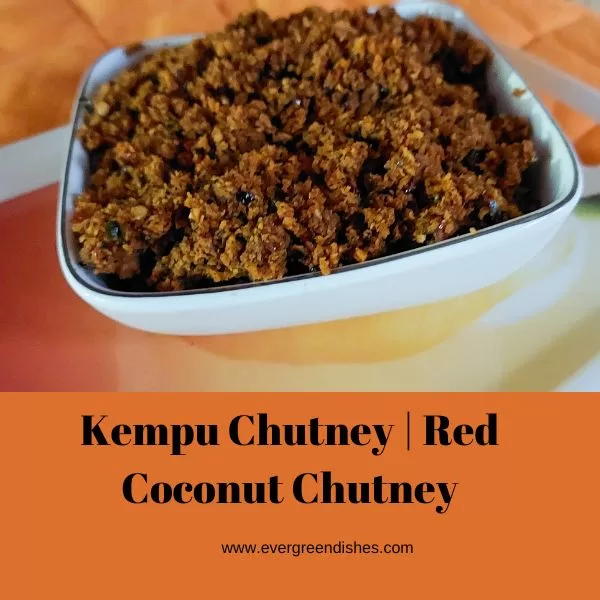
Red coconut chutney makes a good accompaniment with hot steamed rice topped with a dollop of ghee. It pairs well with idli and dosa too. This chutney is often made in South Canara region.
Today, I am presenting to you a tasty chutney which is ideal accompaniment with rice. This is also from mangalore cuisine. This, coconut chutney using dry red chilly is simply divine, one of the simple pleasures of life I can say. Use it with steaming hot rice with a dollop of ghee, rasam and papads for a satisfying meal.
Here, coconut is roasted and then used, thus it stays good for sometime. The best part of red coconut chutney recipe is you can use slightly odd smelling coconuts, which tend to remain in the refrigerator for some time. I think many women can relate to this fact. During the festive days, we offer coconut and they get accomodated.
Take a pan and roast the methi seeds till light brown in colour. Put it aside on a plate.
Add a little oil and roast the dry chillies. Put them beside the methi seeds.
In the same pan put the coconut gratings . You can add a few curry leaves, it gives a good aroma. Roast it on a low flame for sometime. You need to keep stirring with a long handle, otherwise it will get burnt. Let cool.
Grind all these ingredients together along with a little jaggery, tamarind pulp and salt.
Remove the chutney and put it in a bowl.
Make seasoning in a small pan. Take oil and heat it, add mustard seeds, as they crackle add asafoetida and turmeric powder. Add to the chutney and mix well. Serve with rice.
Notes
This chutney can also be used with chapati, idli or dosa.
Coconut oil may be used for the authentic taste.
3.5.3208
Evergreendishesdev
Coconut chutney with dry red chilly
A tasty accompaniment with hot steamed rice and a dollop of ghee.
Take a pan and roast the methi seeds till light brown in colour. Put it aside on a plate.
Add a little oil and roast the dry chillies. Put them beside the methi seeds.
In the same pan put the coconut gratings . You can add a few curry leaves, it gives a good aroma. Roast it on a low flame for sometime. You need to keep stirring with a long handle, otherwise it will get burnt. Let cool.
Grind all these ingredients together along with a little jaggery, tamarind pulp and salt.
Remove the chutney and put it in a bowl.
Make seasoning in a small pan. Take oil and heat it, add mustard seeds, as they crackle add asafoetida and turmeric powder. Add to the chutney and mix well. Serve with rice.
Notes
This chutney can also be used with chapati, idli or dosa.
About the event :
This is one of the first posts I wrote. Today, on 10/9/23 I have changed the pictures and also added the pin it image. Sending this to the fortnightly event, Foodies Redoing Old Post _109. The next time you have excess coconut at home, do not forget to try this one.
If you ever make kempu chutney or any of my other dishes, do take a picture and tag @foodiejayashree on Instagram or @evergreendishes on Facebook or Twitter. I will be glad to see your creation and share it further. Let’s be connected, do follow on social media platforms. Until next time, let’s stay connected. Subscribe to get all updates and an e-book for free. Check out my e-books on Amazon. Happy Cooking !
Sauted Green Apple is tasty and a quick one to make. You can eat it just like that or serve it over a dessert.
Green apples are yet another kind of apples that we love binging on. The Granny Smith variety are the usual ones that we find here.They are crisp and tart , ideal to be used in cooking. These sauted green apples are just too good, beleive me !
Green apples are highly nutritious. They are rich in anti oxidants and help lower blood sugar. They steady the heart beat and are an excellent source of potassium.
Green apples are ideal to be used in salads. They can be cooked and used with oats or a topping. Here is another kind, Sauteed Green Apple, do give a try, you can eat it anytime, either for breakfast or lunch. Put it over a pancake or a bowl of oats with a few nuts. This dish is healthy eating, vegetarian, paleo and gluten free.
sauted green apple
Sauteed Green apple
Recipe Type: Side dish
Cuisine: Continental
Author: Jayashree
Prep time:
Cook time:
Total time:
Serves: 4
Sweet and spice,all things fine, this is a perfect combo for a lunch or dinner.
Ingredients
Green apples 2
butter 1tbsp
demerera sugar 2tbsp
cinnamon powder 1/4tsp
Instructions
Wash and cut the apples into slices.
Put butter in the pan and melt it. Add the apple slices and toss them.
Allow to cook for a few minutes until they are tender.
Add the demerera sugar and cinnamon powder. Give a stir. After a minute or two, remove from flame.
Notes
You can use it for pancake or top it with vanilla ice cream.
3.5.3208
Ingredients :
Green apples 2
butter 1tbsp
demeretra sugar 2tbsp
cinnamon powder 1/4tsp
Method:
Wash and cut the apples into slices.
Put butter in the pan and melt it. Add the apple slices and toss them.
Allow to cook for a few minutes until they are tender.
Add the demerera sugar and cinnamon powder. Give a stir. After a minute or two, remove from flame.
Evergreendishesdev
Sautéed Green Apple
Sautéed Green Apple is a quick and tasty dish to whip.Serve it anytime and as you like it.
Put butter in the pan and melt it. Add the apple slices and toss them.
Allow to cook for a few minutes until they are tender.
Add the demerara sugar and cinnamon powder. Give a stir. After a minute or two, remove from flame.
If you ever make this recipe, do take a picture and tag @foodiejayashree on Instagram or @evergreendishes on Facebook or Twitter. I will be glad to see your creation and share it further.
Subscribe to get all updates and an e-book for free. Check out my e-books on Amazon. Happy Cooking !
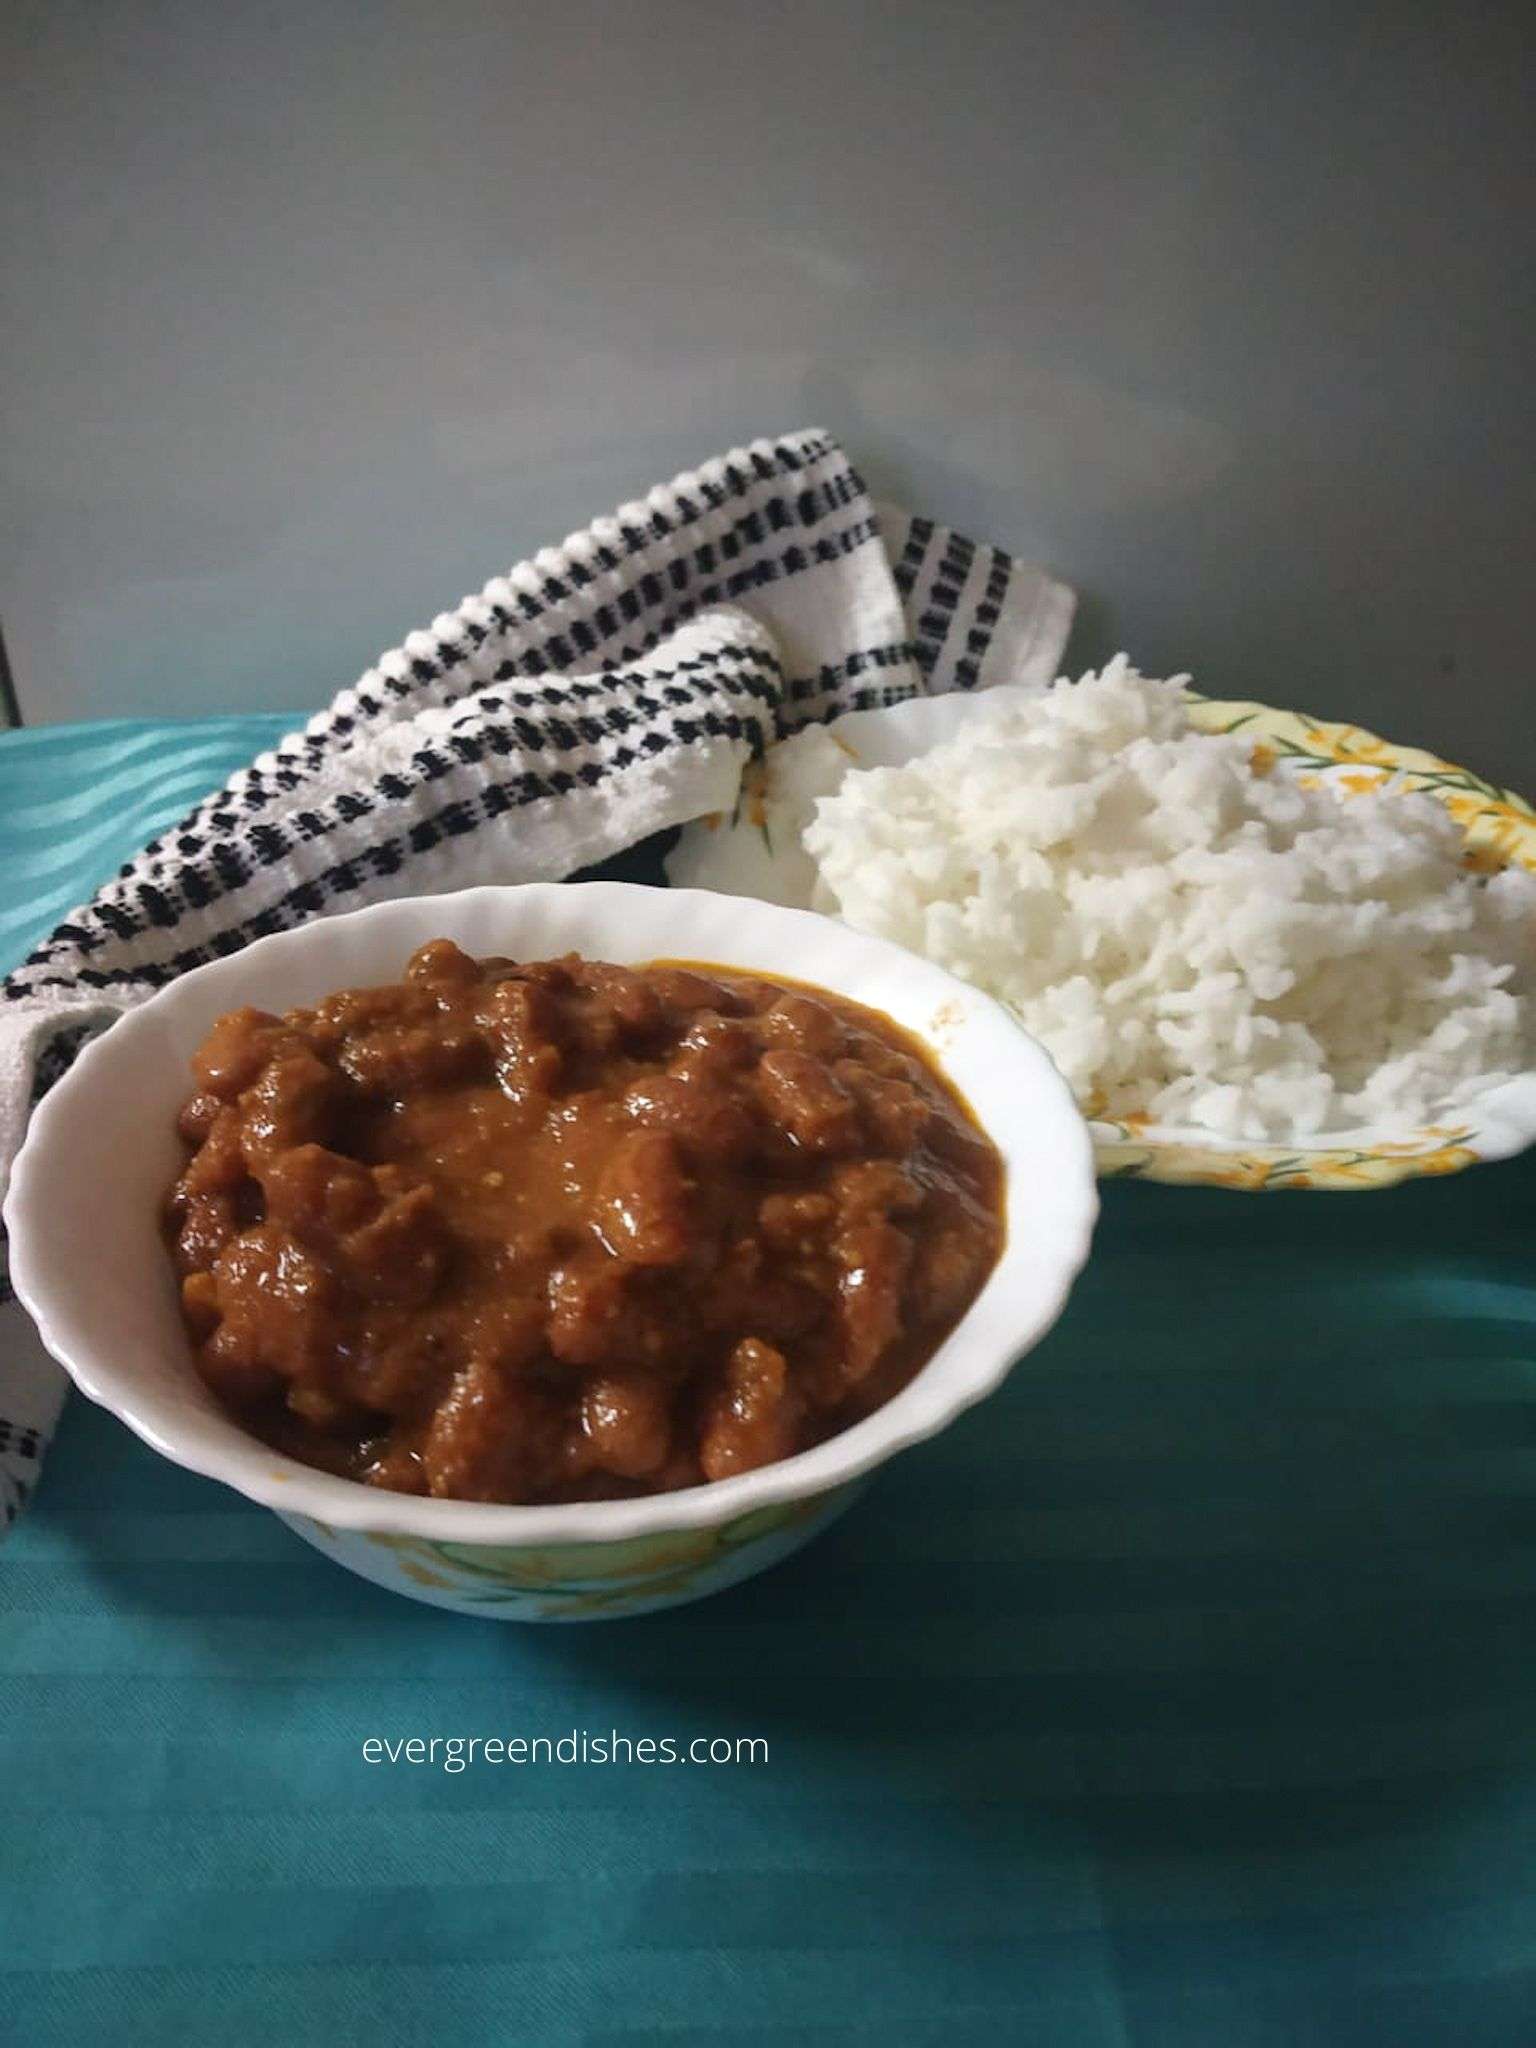
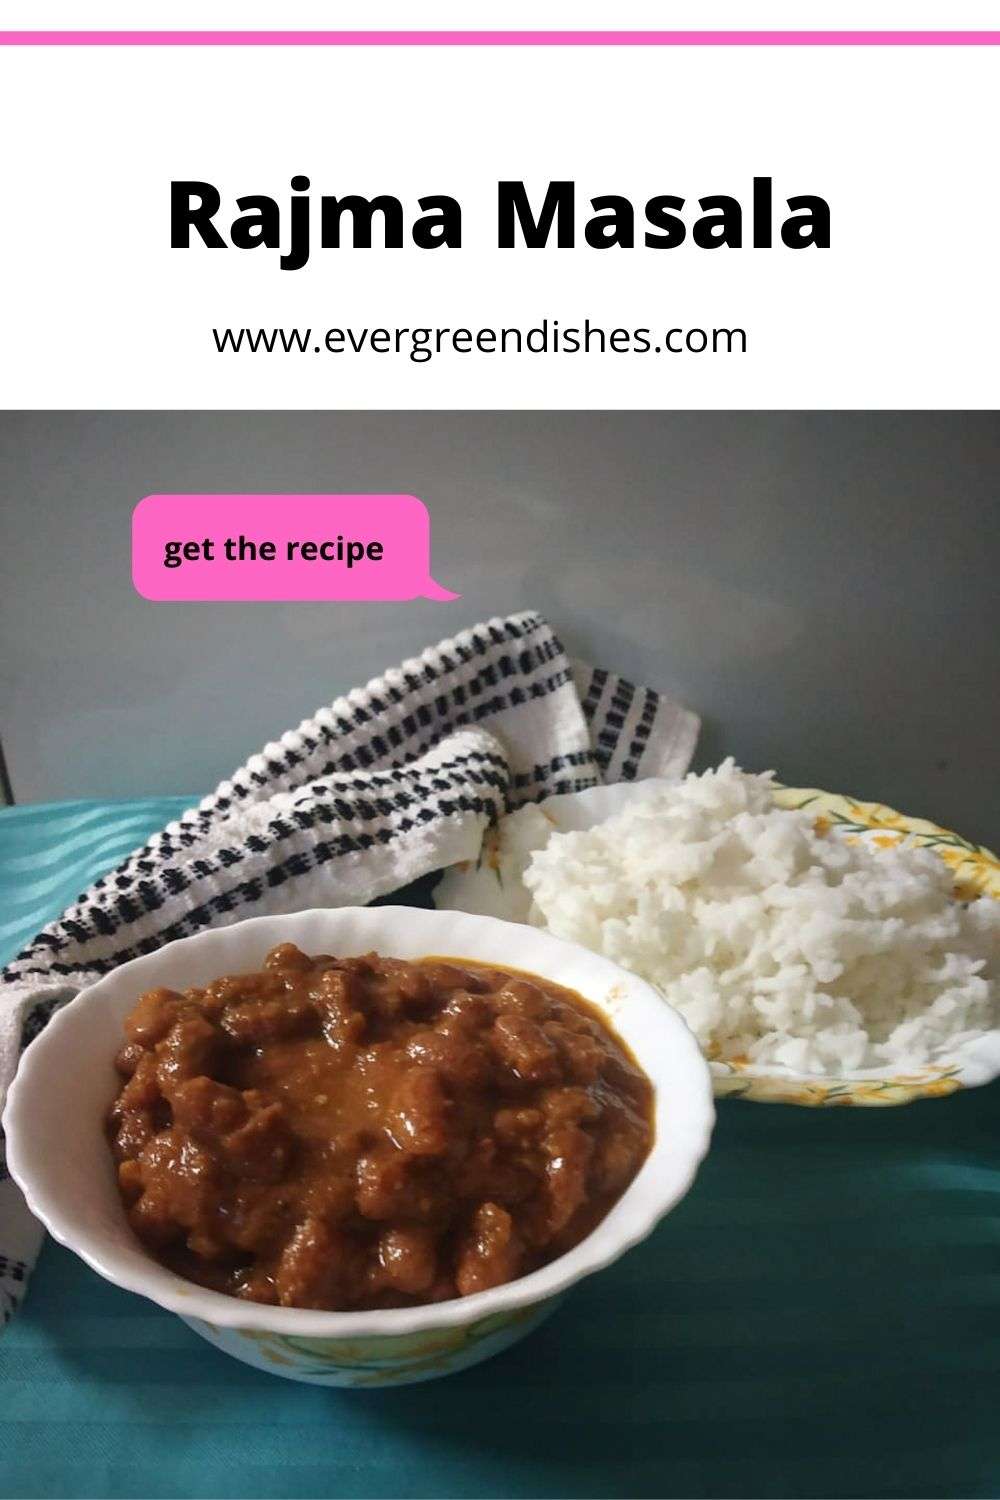
Rajma Masala is a delicious side dish from North Indian cuisine. It is a comfort food for them.
Rajma is one of the most loved pulses in the northern states. It is served with rice or any kind of Indian flat bread. Chawal Rajma is a very popular dish.The long bean is kidney shaped, hence it is known as Kidney bean. It is a rich in nutrients and highly recommended for the vegetarians. More information is here.
Cooking the kidney bean properly is a necessary, otherwise, it cannot be eaten and may cause stomach disorder too. I remember, a few years back, I advented to cooking this one. A newbie at this, it was a total disaster. The kidney beans, though cooked, were still hard. I stopped cooking for sometime. Now, again, it has made a comeback and the cooking the right way. The kidney bean, needs to be cooked for nearly half an hour in the pressure cooker, at least ten to twelve whistles. Let it cool by itself. Later, check and if they are not tender, cook them again for some more time.
Here, I am sharing two methods of making rajma masala. Follow whichever you prefer.
rajma masala
Ingredients :
1/4 kg Rajma
3 tomato
2 onion
1 inch ginger
4 cloves garlic
2 green chilli
1/2 teaspoon cumin
1 bay leaf
1 red chilli
1/2 teaspoon turmeric powder
1/2 teaspoon dhania powder
1/2 teaspoon cumin powder
amchur powder
2 teaspoon chilli powder
1 teaspoon garam masala
salt to taste
2 teaspoon oil
Method :
Pre requisites:
Rajma need to be soaked overnight.
Put tomatoes in hot water. Peel the skin.
Cut onions into chunks.
First method to prepare:
Drain the water from the soaked kidney bean, put fresh water to it and cook in a pressure cooker for fifteen whistles.
Grind tomato, onion, ginger, garlic and chilli to a paste.
The kidney beans need to be really soft, otherwise it will not taste good.
Heat oil, Put cumin, red chilly and bay leaf to it. As it sizzles, add the tomato mix puree and saute for a while.
The oil should leave the sides , then add the spice powders.
Add turmeric powder and salt. Let boil, make it to a gravy consistency by adding adequate quantity of water.
Add the cooked rajma to it.
Simmer on a low flame for sometime.
Rajma masala is ready to serve.
Serve hot with any flat bread or rice.
Alternate Method :
Grind tomato, onion, ginger, garlic and green chilli to a paste.
Take oil in a pressure pan, add cumin seed as it sizzles throw in the red chilli and bay leaf to it. Put the tomato onion paste to it. Saute it for sometime. Let the oil leave the sides.
Put turmeric powder, dhania powder, cumin powder, garam masala, red chilli powder and amchur powder to it. Saute it for sometime.
Drain the water from the soaked rajma. Rinse it in water.
Put the washed rajma to it along with salt and five cups of water. Close the lid. Put the whistle and allow it to cook for eight whistles.
Let the pressure release by itself. Check the consistency, if needed boil it for sometime.
Garnish with fresh coriander leaves. Rajma in pressure cooker is ready to serve.
Rajma Masala is a delicious accompaniment from North Indian cuisine. It pairs well with any kind of flat bread or hot steamed rice. Rajma chawal is a popular food in North India.
Drain the water from the soaked kidney bean, put fresh water to it and cook in a pressure cooker for fifteen whistles.
Grind tomato, onion, ginger, garlic and chilli to a paste.
The kidney beans need to be really soft, otherwise it will not taste good.
Heat oil, Put cumin, red chilly and bay leaf to it. As it sizzles, add the tomato mix puree and saute for a while.
The oil should leave the sides , then add the spice powders.
Add turmeric powder and salt. Let boil, make it to a gravy consistency by adding adequate quantity of water.
Add the cooked rajma to it.
Simmer on a low flame for sometime.
Rajma masala is ready to serve.
Serve hot with any flat bread or rice.
Alternate Method :
Grind tomato, onion, ginger, garlic and green chilli to a paste.
Take oil in a pressure pan, add cumin seed as it sizzles throw in the red chilli and bay leaf to it. Put the tomato onion paste to it. Saute it for sometime. Let the oil leave the sides.
Put turmeric powder, dhania powder, cumin powder, garam masala, red chilli powder and amchur powder to it. Saute it for sometime.
Drain the water from the soaked rajma. Rinse it in water.
Put the washed rajma to it along with salt and five cups of water. Close the lid. Put the whistle and allow it to cook for eight whistles.
Let the pressure release by itself. Check the consistency, if needed boil it for sometime.
Garnish with fresh coriander leaves. Rajma in pressure cooker is ready to serve.
Notes
To check the rajma if they are cooked properly, it should easily smudge between two fingers.
Pin it for later :
rajma masala
If you ever make Rajma Masala recipe in yoour kitchen, take a picture and tag @foodiejayashree on Instagram or @evergreendishes on Facebook. Subscribe to get all updates in your inbox and an e-book for free!