Tag: vegan

  • Sprouted Moong Salad

    Sprouted Moong Salad

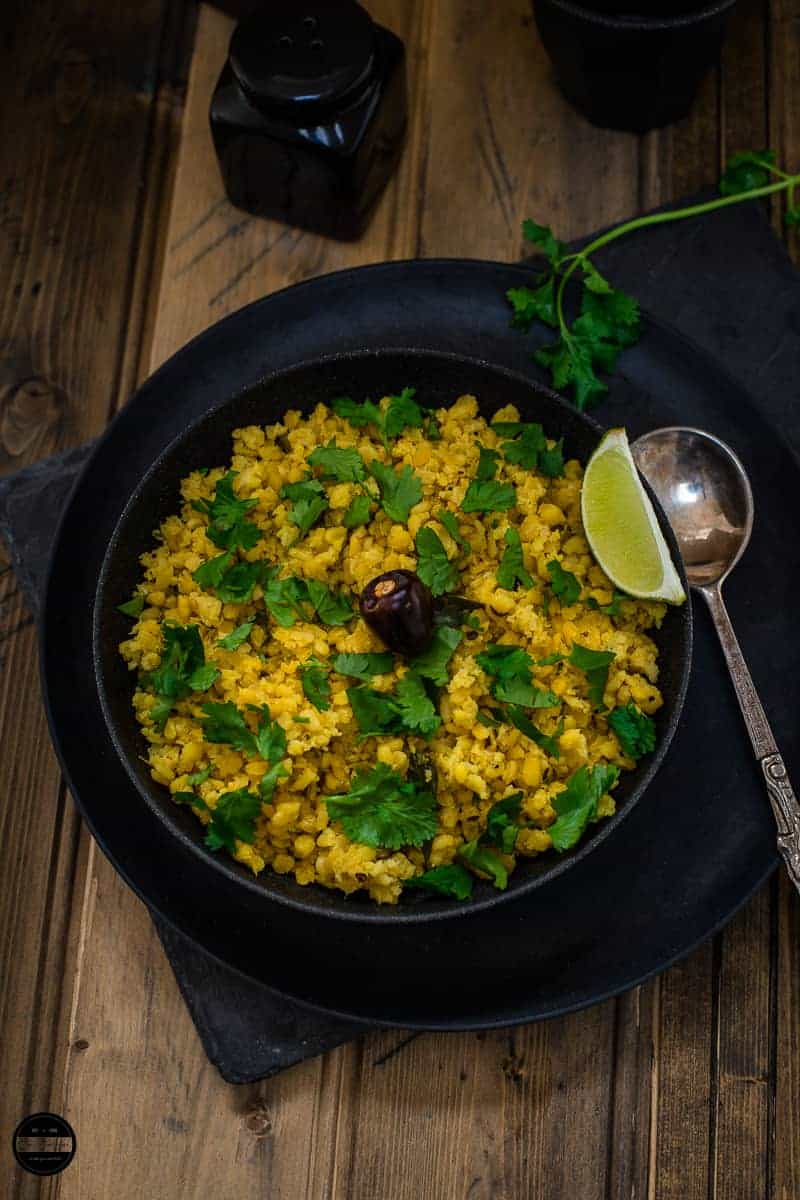
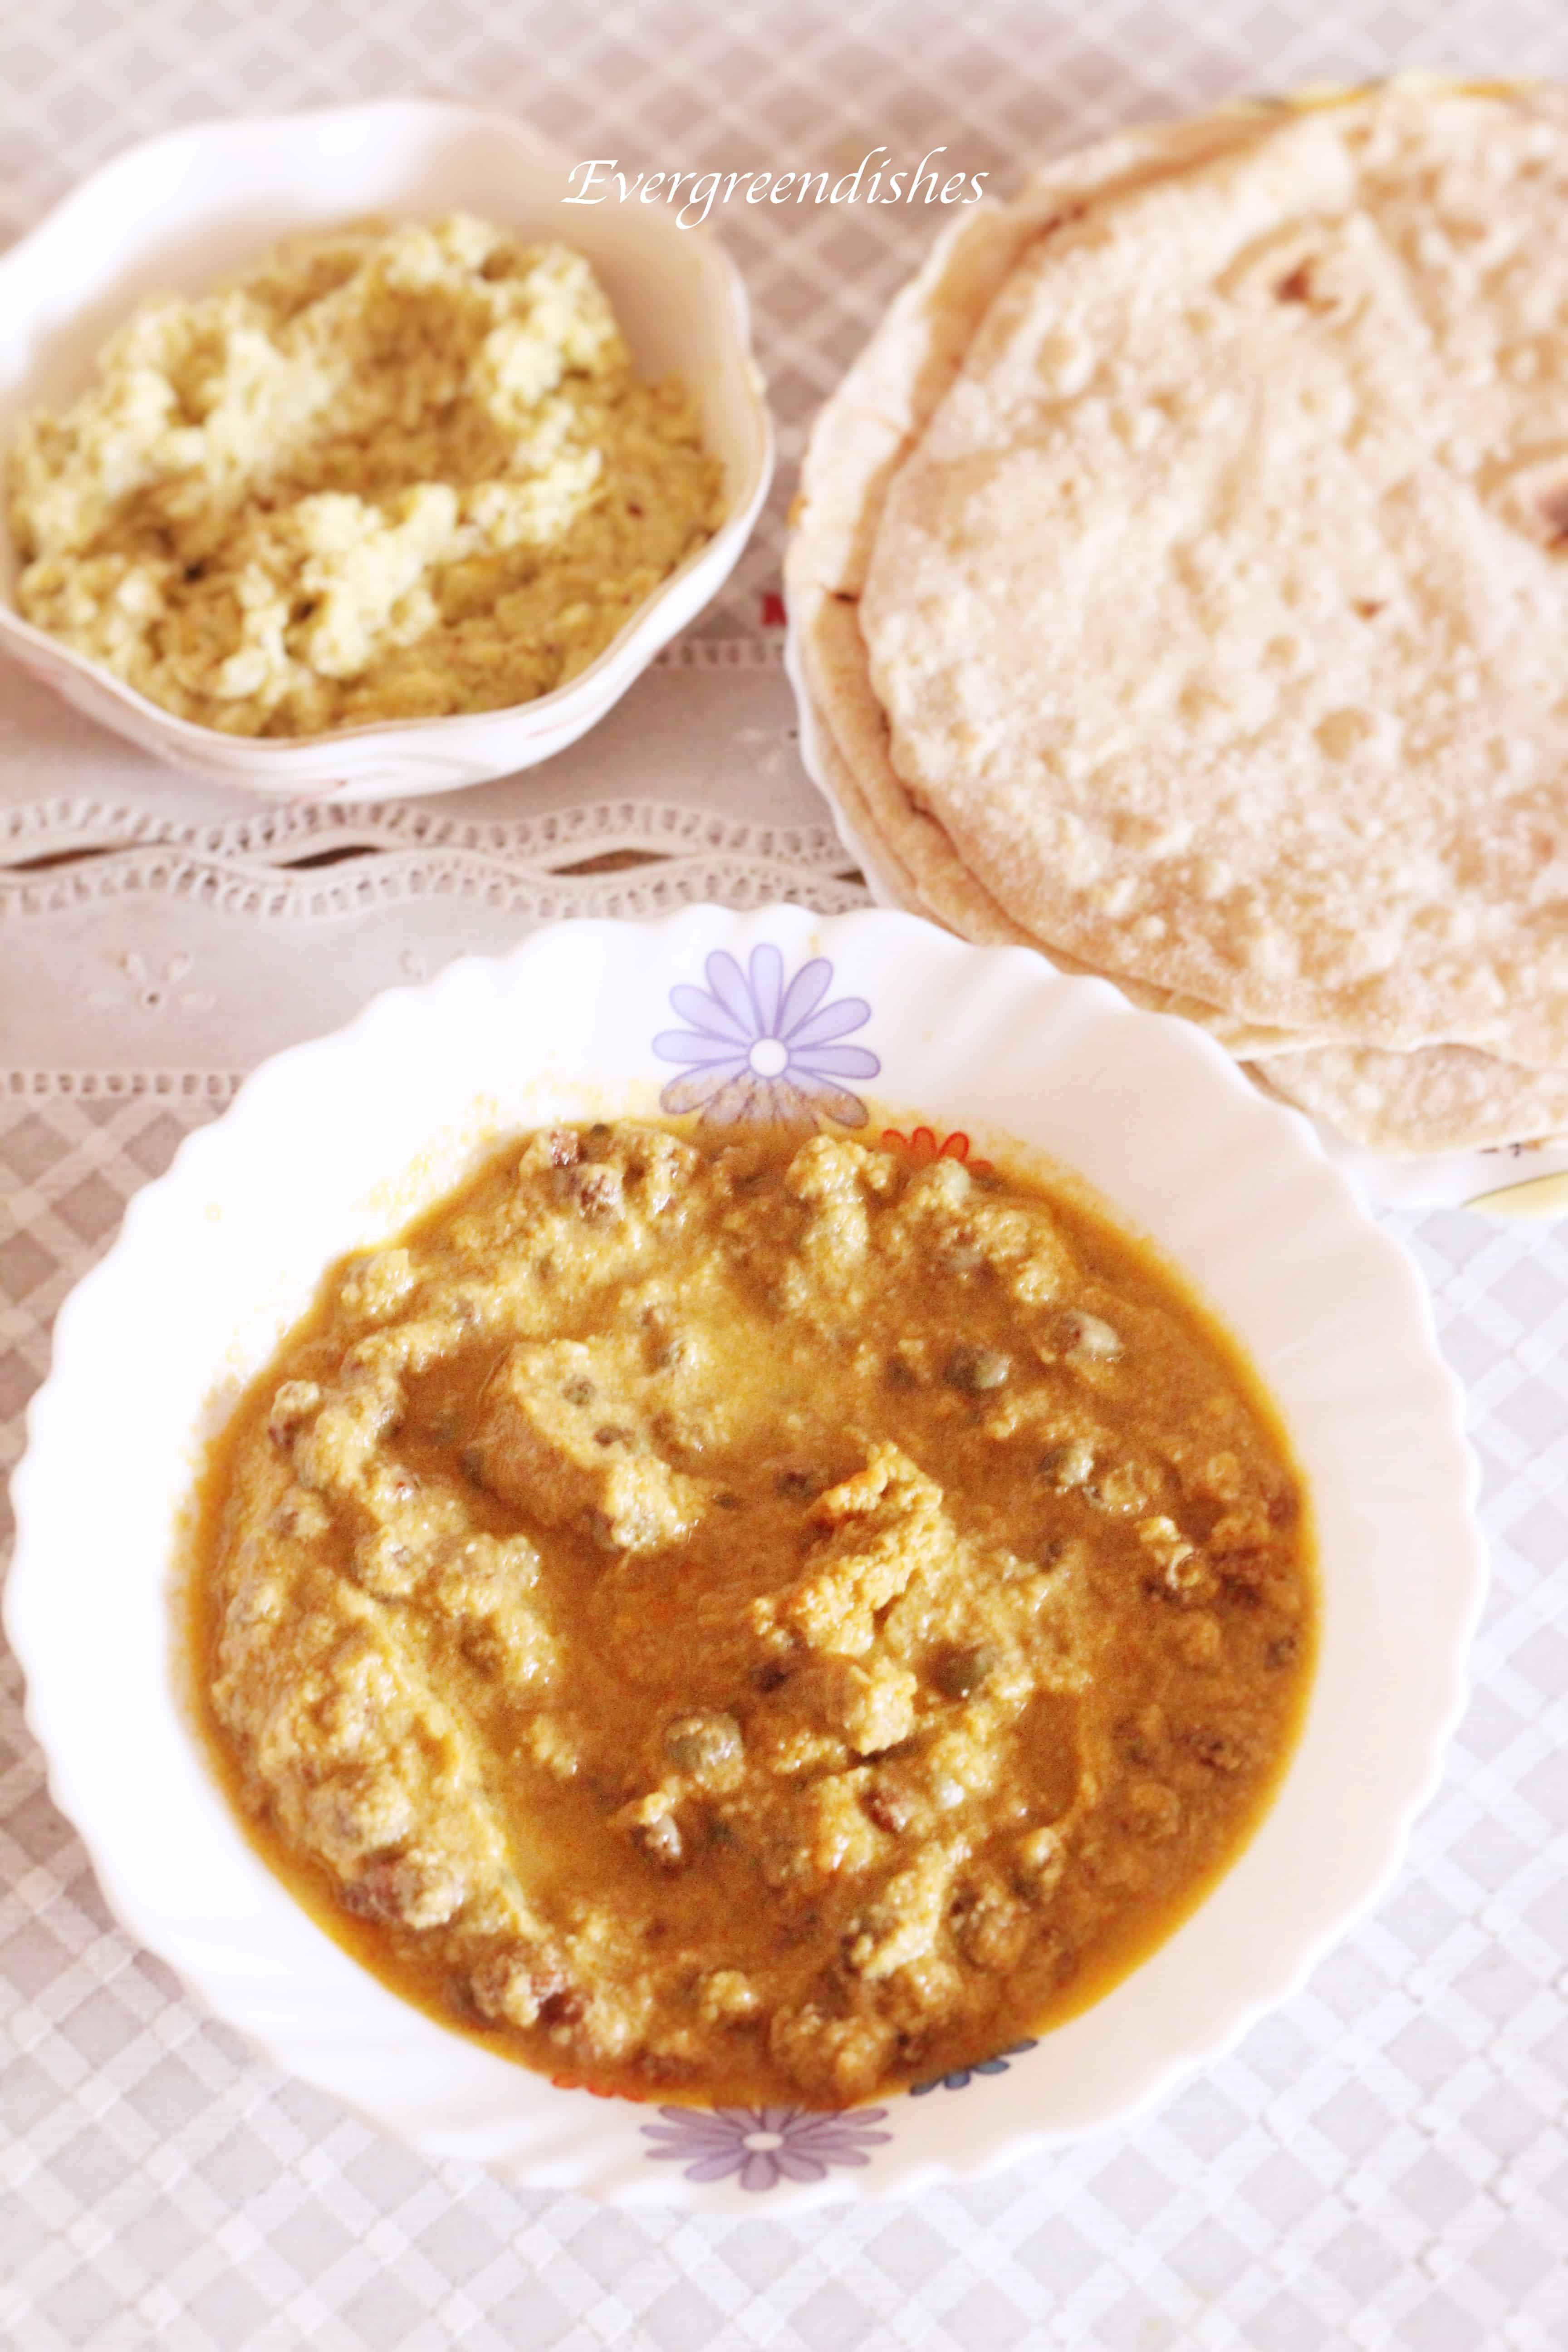
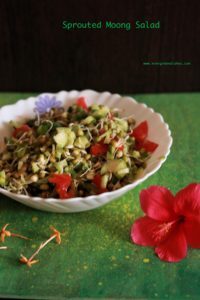
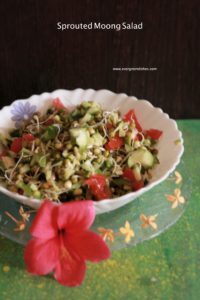
    Sprouted Moong salad is an easy to make, tasty and healthy snack to serve for people of all age group. It is ideal as a side dish with any meal, pairs well with chapati or phulka too. It is ideal to eat as a snack too.

    sprouted moong salad
    sprouted moong salad

    What are sprouts?

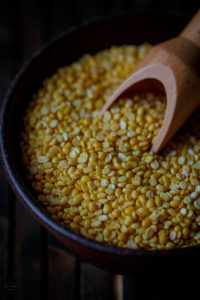
    Sprouts are seeds that have germinated and become tiny plants.

    How to make sprouts ?

    I had written a post earlier, do take a look at it.

    Can it eaten be raw?

    Yes, it can be eaten raw. In fact, we like it that way only. I never boil or steam moong sprouts for salads. They are sweet and easily chewable. But, I make sure I am putting in the fresh ingredients, a few days old, stored in the refrigerator will never taste good. It needs to be cooked. But, there has been a controversy, saying that, raw sprouts may contain harmful bacteria. The reason raw sprouts are risky is because they need to be grown in warm, humid conditions in which harmful bacteria such as E Coli and Salmonella also happen to thrive. There are chances of food poisoning taking place.

    How to prevent food poisoning?

    Store them in refrigerator at temperature below 8 degree Centigrade. Wash hands before using sprouts. Avoid eating sprouts with a strong smell or slimy appearance. If you are buying sprouts from stores, go for chilled ones.

    What are the benefits of using sprouts?

    Sprouts are rich in nutrients and low in calorie. The sprouting process helps to increase protein content. They also contain lower level of antinutrientsm making it easier for your body to absorb all the nutrients they contain. They contain higher amount of insoluble fiber, which eases digestion and may help reduce constipation. The sprouts also help to control the blood sugar level.

    My other salad recipes are : Kidney Bean and Corn Salad, Two Way Crunchy Salad, Watermelon and Cucumber Salad

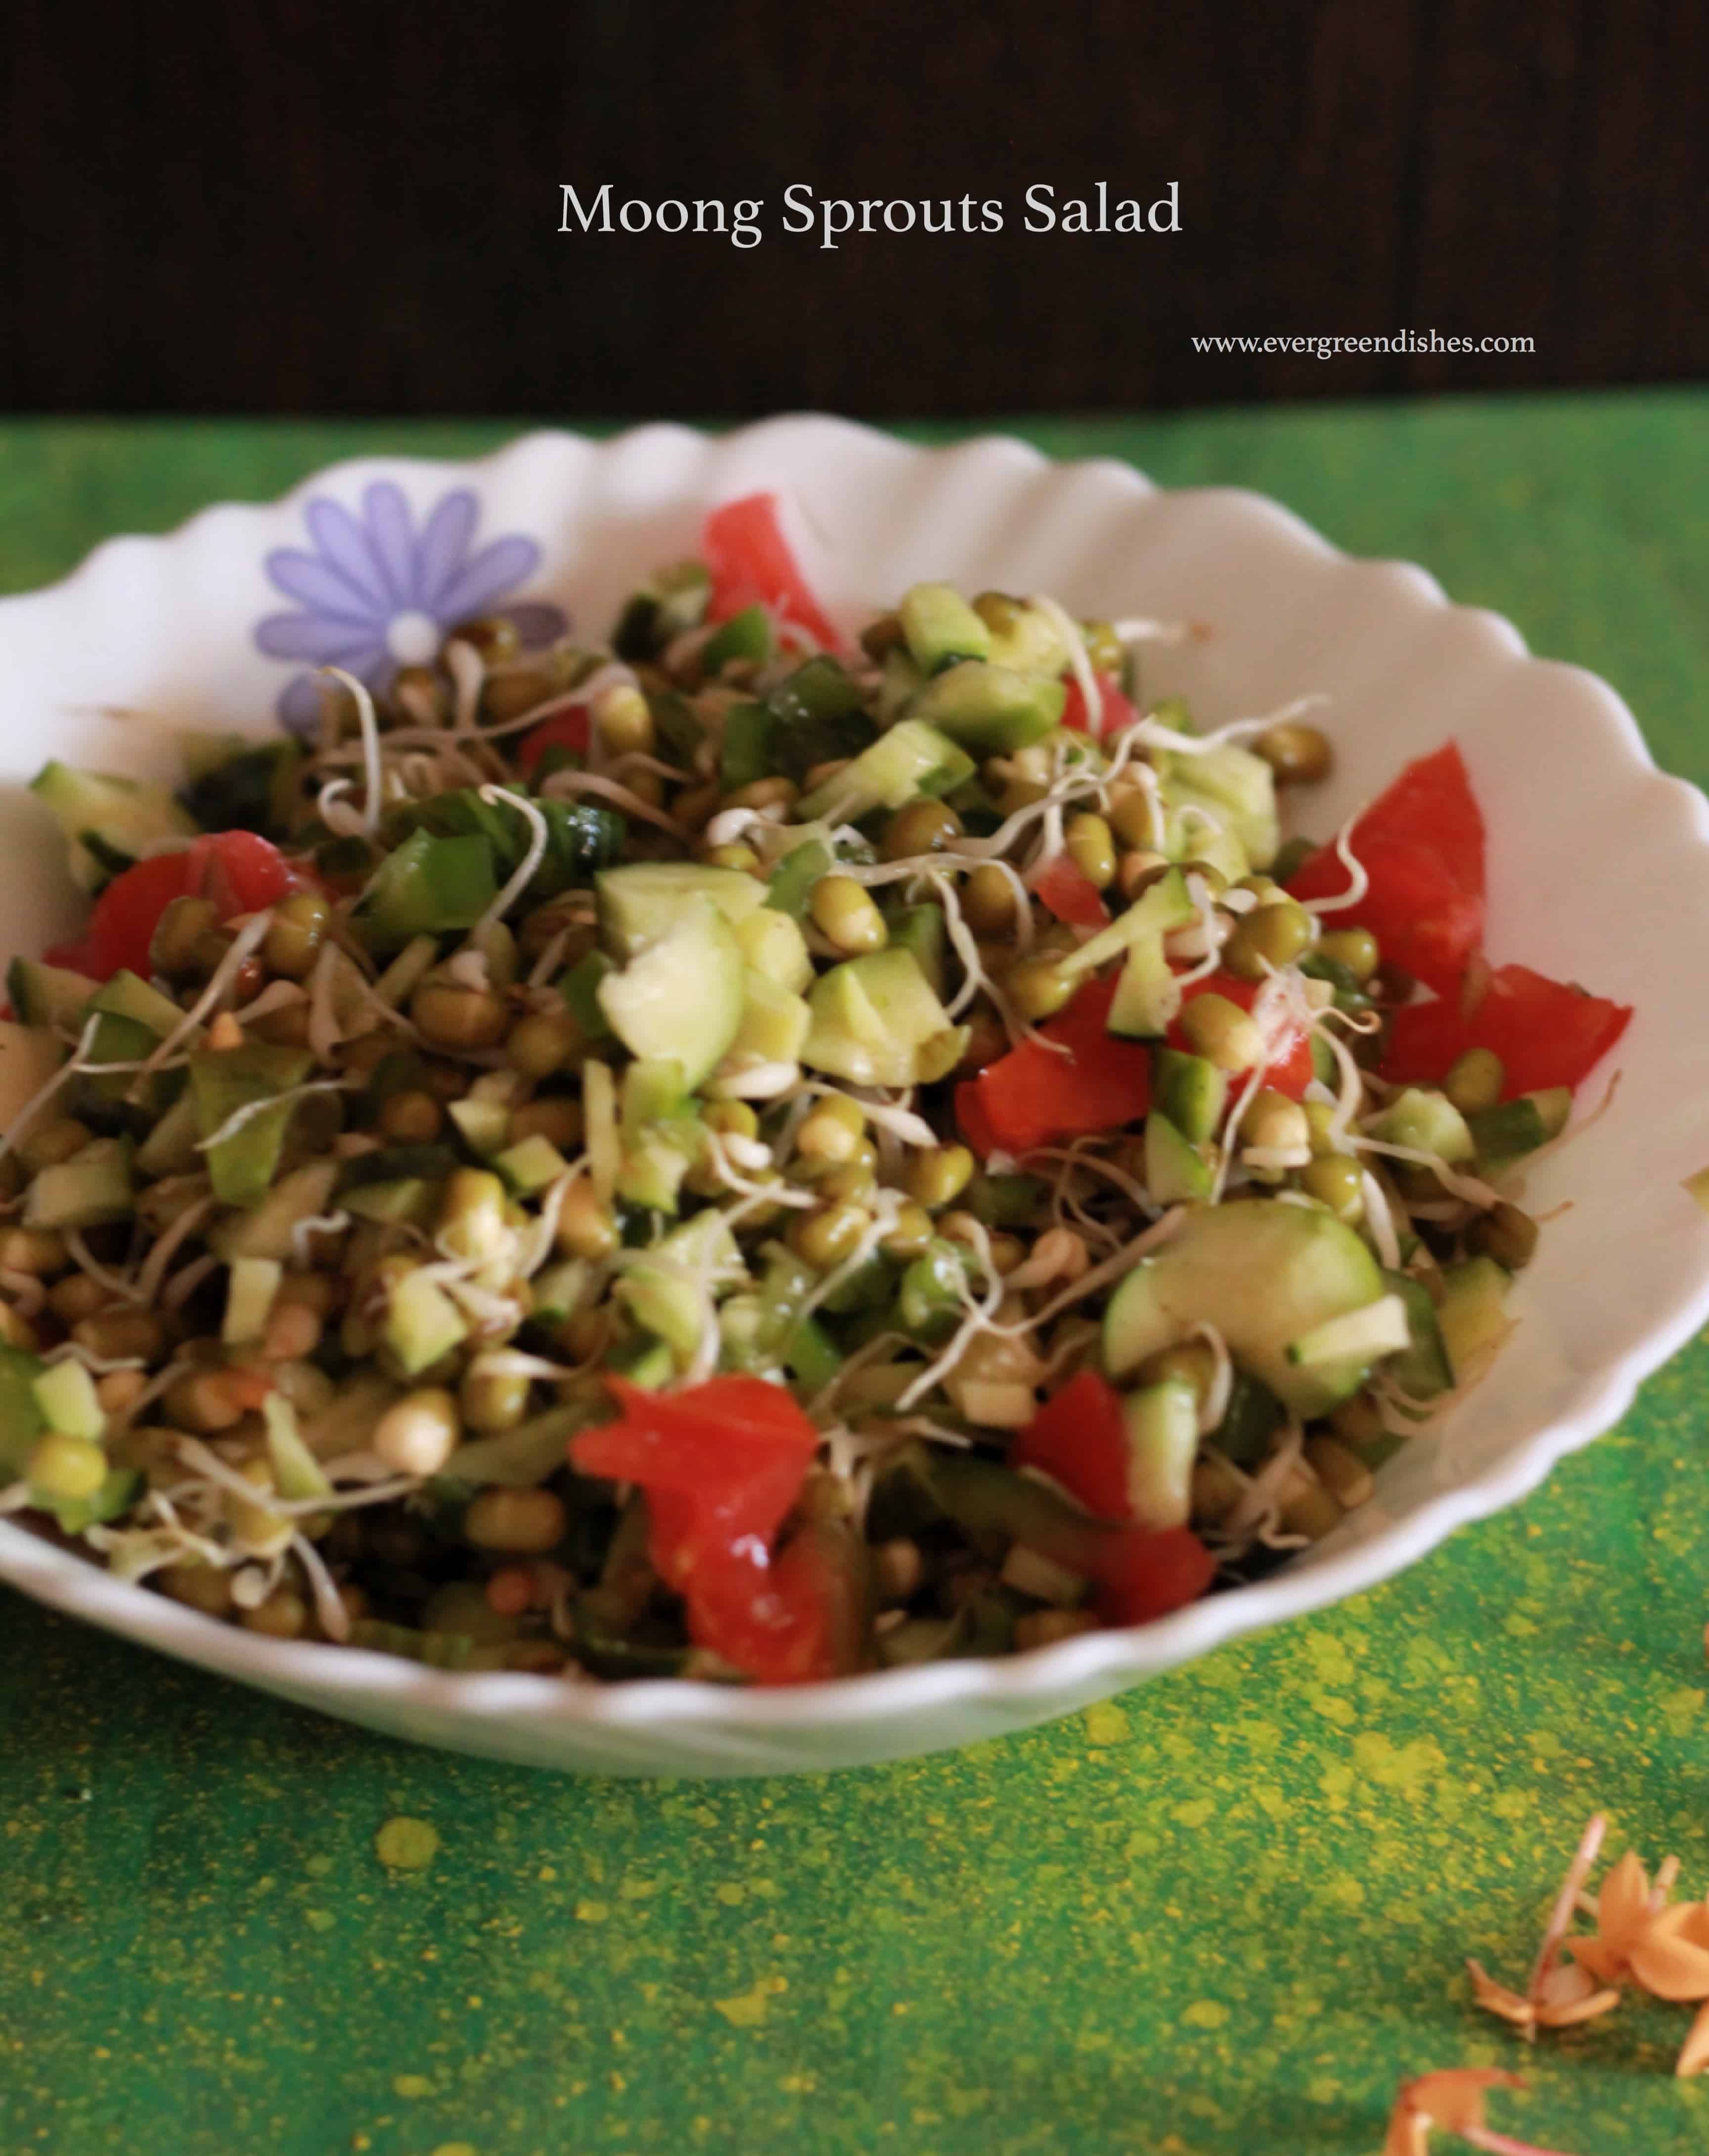
    Let’s get to Sprouted Moong Salad

    Ingredients:

    • 2 cup moong sprouts
    • 1 cup cucumber
    • 1 capsicum
    • 1 tomato
    • 2 green chilly
    • 1/4 teaspoon chat masala
    • salt to taste
    • 2 teaspoon olive oil
    • 1 tablespoon chopped coriander
    • 1/2 lemon

    Method:

    1. Cut the veggies finely, do not cut the chilly into small pieces, it may be hot.
    2. Take a bowl, add the ingredients, mix. Add lime juice and chopped coriander to it.

    Take a tip:

    • Onion may be added, but we prefer without it.

    This glass bowl from Borosil is ideal for mixing salad or evebn to make puddings. It is made from high quality borosilicate glass, can with stand high temperatures and can be used both in microwave and oven. I love this product which I have since many years.


    sprouted moong salad
    Evergreendishesdev

    Sprouted Moong Salad

    Sprouted moong salad makes a good snack to binge in the evenings. It is ideal to serve as a side dish in any menu too. 
    Course: healthy snacks, salads
    Cuisine: Indian

    Ingredients
      

    • 2 cup moong sprouts
    • 1 cup cucumber
    • 1 capsicum
    • 1 tomato
    • 2 green chilly (optional)
    • 1/4 teaspoon chat masala
    • salt to taste
    • 2 teaspoon olive oil
    • 1 tablespoon chopped coriander
    • 1/2 lemon

    Method
     

    1. Cut cucumber, capsicum and tomato into small pieces.
    2. Add the sprouts and all the veggies in a bowl.
    3. Put salt, chat masala, olive oil, give a mix. Finally, add lemon juice to it. 

    Notes

    Onions may be added. 

    Pin it for later :

    sprouted moong salad
    sprouted moong salad

    This is my entry to  My Legume Love affair #122 fondly called as MLLA – an event which celebrates the glory of pulses/ legumes. It was started by Susan of The Well Seasoned Cook of  and been hosting by Lisa of Lisa’s Kitchen. The MLLA #122 is hosted by my friend and co-blogger Renu Agarwal Dongre of  Cook With Renu

    If you ever recreate this salad, do tag @foodiejayashree on Instagram or @evergreendishes on Twitter, I will be happy to see and share your work further.

    Do follow Evergreendishes on Facebook and be the first one to be notified.

    I hope you have got our e-book of handy hints by now !

    Dmoz Directory

  • Vegetable Manchow Soup | veg manchow soup recipe

    Vegetable Manchow Soup | veg manchow soup recipe

    Vegetable Manchow Soup | veg manchow soup recipe Manchow soup is an Indo Chinese dish that is tasty, filling and loaded with veggies and noodles.  It is ideal for cold winter nights.

    With cold wind blowing and most of us falling sick, soups come to the rescue. They are ideal for the season and filling. Moreover, it is loaded with veggies and noodles that taste good .

    I often make this as it has the goodness of both noodles and vegetables. Anything with noodles, is always welcome. Pair it with chinese fried rice and gobi manchurian to have a simple yet comfy chinese meal.

    Other soup recipes on the blog are : Spicy Chipotle Chilli Corn Soup, Healthy Tomato Soup, Sweet Corn Vegetable Soup,

    veg manchow soup
    Veg manchow soup

    Ingredients:

    • 15 beans
    • 1 carrot
    • 1/2 cup shredded cabbage
    • 1 capsicum
    • 1/2 cup spring spring onion
    • 1 onion
    • 2 teaspoon olive oil
    • 1 inch ginger
    • 3 cloves garlic
    • 1 green chilly
    • 2 teaspoon soy sauce
    • 1 teaspoon vinegar
    • 1/2 teaspoon pepper powder
    • 1 tablespoon corn flour
    • 4 cups water
    • salt to taste
    • 1 cup noodles
    • oil for frying

    Method:

    1. Cut the veggies finely. Hold them closely while you chop or better still, put them in a food processor.
    2. Take oil in a pan, add the onions, saute for a second, then add the beans, after sometime put the carrot and cabbage.
    3. Let cook for sometime.
    4. Make a paste of gren chilly, ginger and garlic, put it innthe broth. Saute for sometime.
    5. Put the vinegar and soya sauce to it.
    6. Mix cornflour with little water, make a smooth paste of it. Add it to the broth.
    7. Simmer for sometime.
    8. In the meantime, dry roast the noodles in another pan on a low flame for five to seven minutes. It should be golden in colour. Alternatively, deep fry them.
    9. Once the soup is ready, put it in bowl and top with noodles.

    Take a tip:

    1. Noodles are deep fried in restaurants I have tried to give a healthy touch here.
    2. Noodles may be avoided. Just serve without the topping.
    3. Mushroom may be used.

    vegetable manchow soup

    veg manchow soup
    Evergreendishesdev

    Vegetable Manchow Soup | veg manchow soup recipe

    5 from 1 vote
    Veg Manchow is a flavoursome and filling soup for the winter days. It has the goodness of both veggies and noodles in it. 
    Prep Time 15 minutes
    Cook Time 20 minutes
    Total Time 35 minutes
    Course: dinner ideas
    Cuisine: Indo-Chinese

    Ingredients
      

    • 15 beans
    • 1 carrot
    • 1/2 cup shredded cabbage
    • 1/2 cup spring onion
    • 1 onion
    • 2 teaspoon olive oil
    • 1 inch ginger
    • 3 cloves garlic
    • 2 teaspoon soy sauce
    • 1 teaspoon vinegar
    • 2 teaspoon corn flour
    • 4 cup water
    • salt
    • 1 cup noodles
    • 1 green chilly
    • 1/2 teaspoon pepper powder
    • oil for frying

    Method
     

    1. Cut the veggies finely. Hold them closely while you chop or better still, put them in a food processor.
    2. Take oil in a pan, add the onions, saute for a second, then add the beans, after sometime put the carrot and cabbage. Let cook for sometime.
    3. Make a paste of green chilly, ginger and garlic, add it. Saute for sometime. Put the vinegar and soya sauce to it.
    4. Mix cornflour with little water, make a smooth paste of it. Add it to the broth.  Sprinkle pepper powder. Simmer for sometime.
    5. In the meantime, dry roast the noodles in another pan on a low flame for five to seven minutes. It should be golden in colour. Alternatively, you can deep fry them. 
    6. Once the soup is ready, put it in bowl and top with noodles.

    This post is part of Healthy Wellthy Cuisine with the theme Soupy Tales. Here are the other recipes by co-bloggers :

    Pin it for later:

    veg manchow soup

    If you have liked this post, do share it further. Follow evergreendishes on Facebook, Twitter, Instagram and Pinterest

    If you have not yet subscribed, do it and be informed of all new posts. Get an e-book for free!

  • How to make jowar dosa

    How to make jowar dosa

    Jowar dosa | healthy recipe | south indian cooking || breakfast recipe

    Jowar dosa is a healthy twist to the usual one. It is tasty and can be made both crispy and soft. Serve it with chutney and potato sabzi for a good breakfast. Jowar is the Indian name for Sorghum. It is also known as Indian millet, Great millet, Durra and milo. In India, the other names by which it is known are jola, chholam or jonna.

    Dosa is one of the favourites of South Indian. A dosa batter in the refrigerator really saves our day ! It is on the weekly menu, and not to mention the many variety that they prepare. Rice is one of the essential ingredients in it, but now different versions are being made. We are more conscious of what we consume, thus dosa with millets has made their way in most kitchens.

    Jowar dosa is a healthy twist to the regular one and I am loving it. The taste is not similar but I can vouch that there is not much difference too. Infact, we are loving this variety of millets dosa. It is ideal for breakfast, evening snack or dinner. It is vegan and glutenfree.

    What are millets? 

    Millets are coarse grains and a repository of high fibre, protein, mineral and vitamins. They are widely grown as cereal crops for fodder and human food. Some millets are fox tail, sorghum, pearl millet, little millet, proso millet and barnyard millet. 

    Can one make the same quantity of batter as the regular dosa?

    I prefer not to make as the taste varies once the batter gets sour. The regular dosa tastes good.It is better to make these in lesser quantity as for a single use. 

    A few other dosa variety that I often prepare Neer Dosa, Rava Dosa,

    You can pair them with coconut chutney, green chutney or  Red Onion chutney 

    Jowar dosa
    Jowar dosa

    Here whole grains of jowar are used, they need to be soaked for a longer time. It is advisable to soak before you go to bed at night, but the urad dal, soak it for two hours only. Grind them to a batter and allow to ferment. Thus, pre-planning is essential.

    Make a small quantity and preferably finish the batter on the same day. If it remains, finish it the next day, I am doubtful how good it tastes as the usual dosa batter that we use.

    Since millet is used here, unlike the regular dosa, these need to be cooked on both sides.

    Jowar Dosa

    Ingredients:                       

     (Measurement used 1 cup = 150 ml)

    • 1 cup jowar
    • 1 cup rice
    • 1 cup urad dal
    • 1 teaspoon fenugreek
    • water for soaking
    • salt
    • oil for roasting

    Method:

    1. Wash and soak the jowar in water for six to eight hours.
    2. Soak rice separately with methi in it.
    3. Soak urad dal for two hours.
    4. Grind the jowar at first, add rice to it later and let them blend.
    5. After sometime, put urad dal to it. Put some water to the batter if needed. I preferably use the soaked water.
    6. Grind all of them to a smooth batter.
    7. Remove the batter in a wide bowl.
    8. Allow it to ferment for seven to eight hours.
    9. Add salt to the batter, mix it.
    10. Take some batter in another bowl.
    11. Heat a skillet.
    12. Take a spoonful of batter, pour it on the skillet and spread it inside out. A thin crepe can be made.
    13. Drizzle oil, once it roasted, turn it to the other side.
    14. Serve hot with chutney. Potato sabzi too tastes good.
    making of jowar dosa
    making of jowar dosa

    Pin it for later: 

    Jowar dosa
    Jowar dosa


    Jowar dosa
    Evergreendishesdev

    Jowar Dosa

    Jowar dosa is tasty and healthy twist to the usual dosa. It can be served for breakfast, lunch, evening snack or dinner. 
    Prep Time 15 minutes
    Cook Time 30 minutes
    Fermentation time 6 hours
    Total Time 45 minutes
    Servings: 20 dosas
    Course: Breakfast, evening snacks, glutenfree
    Cuisine: karnataka, south india

    Ingredients
      

    • 1 cup jowar 1 cup = 150 ml
    • 1 cup raw rice
    • 1 cup urad dal
    • 1 teaspoon methi
    • water for grinding
    • salt
    • oil for roasting

    Method
     

    1. Wash and soak the jowar in water for eight hours.
    2. Soak rice separately with methi in it.
    3. Soak urad dal for two hours.
    4. While grinding, at first, put only the jowar in the machine. After sometime, put rice. Add some water. Then later, add urad dal. Grind all of them together to a smooth batter. 
    5. Remove the batter in a big bowl, allow to ferment for six to eight hours.
    6. Add salt to it.
    7. Mix the batter and take some in a small bowl. Heat a skillet, pour a ladle full of batter and spread it inside out to a thin crepe. Drizzle some oil.
    8. Allow to cook. Flip it to the other side. After two minutes, remove and serve.

    Notes

    • Make a small quantity of batter and finish it within a day or two. 

    This post is part of the theme #TimeForDoasatHW at Healthy Wellthy Cuisines group. Here are the other dosa varieties by co-bloggers

    If you have liked this post, do share it further.  Do pin it for future reference.

    If you ever make this recipe, do take a picture and tag me @foodiejayashree on Instagram, I will be glad to see your creation.

    Follow evergreendishes on Facebook, Twitter, Pinterest and Instagram, let’s be connected.

    Subscribe to get all updates and a book of handy hints for free!

    Check out my e-books

  • Drumstick Leaves Dal with Coconut | Guest Post Series

    Drumstick Leaves Dal with Coconut | Guest Post Series

    Drumstick leaves are healthy and make a good combination in dal. Try this delicious dal for a comfort and quick meal.
    It’s a guest post today and I have Lathiya Shanmugasundaram of Lathiskitchen. Welcome Lathiya to blogspace. Blogging has made me interact with many different indivduals around the globe, Lathiya is one among them, glad to know her in this blogging journey. She has moringa leaf dal for us, I have heard so much about it, do need to search for it in my place.
    Without much ado, it’s over to Lathiya.
    Thank you for having me on your space. Here I present you the healthy, easy and delicious Drumstick Leaves Dal with Coconut.
    Drumstick leaves are packed with lots of nutrients. It’s said that drumstick leaves have anti carcinogenic properties and it is a must to include in your diet. If you haven’t start using it in your meal plan yet, this is the time to start from this dal curry.
    Making this dal is not so complicated. You can make this dal within 30 minutes. The only time consuming part in making this dal is cleaning the drumstick leaves. It’s a tedious job of cleaning drumstick leaves. You have to be careful not to include the sticks and only leaf should be used. I used to clean the drumstick leaves a day before making this dal. So it takes just less than 30 minutes when I make this dal.

    drumstick leaves dal with coconut
    drumstick leaves dal with coconut

    Ingredients 
    • Drumstick leaves – 1 cup tightly packed
    • Dal – 1/4 cup
    • Coconut – 1/4 cup grated
    • Jeera seeds –  1/2 tsp
    • Turmeric powder – 1/4 tsp
    • Red chili powder – 3/4 tsp
    • Shallots – 3 or 4 thinly sliced
    • Mustard seeds – 1/4 tsp
    • Ghee / Coconut oil – 1 tsp
    • Salt – as required
    Method
    1. Clean and wash the drumstick leaves. Keep aside.
    2. Cook dal in pressure cooker till mushy. Keep aside.
    3. Grind coconut with jeera seeds to smooth paste. Keep aside.
    4. Heat 1/2 tsp of oil in a pan. Sauté the drumstick leaves for a minute.
    5. Add the cooked dal in sautéed drumstick leaves. Add little water to cook the drumstick leaves.
    6. Add turmeric powder and red chili powder.
    7. Let it boil in medium flame. Do not over cook the drumstick leaves.
    8. Add the grounded coconut to the dal and drumstick leaves mix with required water. Add required salt.
    9. When the raw smell of coconut goes, remove the pan from the heat.
    10. In another pan, add remaining 1/2 tsp of  ghee or oil. When it is hot, add mustard seeds.
    11. When it crackle, add sliced shallots and sauté till golden .
    12. Add it to the dal. Serve along with hot rice.

    drumstick leaves dal with coconut

    Ingredients
      

    • 1 cup drumstick leaves tightly packed
    • 1/4 cup dal
    • 1/4 cup coconut grated
    • 1/2 teaspoon jeera
    • 1/4 teaspoon turmeric powder
    • 3/4 teaspoon red chilli powder
    • 3 or 4 shallots thinly sliced
    • 1/4 teaspoon mustard
    • 1 teaspoon ghee/coconut oil
    • salt as required

    Method
     

    1. Cook dal in pressure cooker till mushy. Keep aside.
    2. Grind coconut with jeera seeds to smooth paste. Keep aside.
    3. Heat 1/2 tsp of oil in a pan. Sauté the drumstick leaves for a minute.
    4. Add the cooked dal in sautéed drumstick leaves. Add little water to cook the drumstick leaves. Add turmeric powder and red chili powder. Let it boil in medium flame. Do not over cook the drumstick leaves.
    5. Add the grounded coconut to the dal and drumstick leaves mix with required water. Add required salt. When the raw smell of coconut goes, remove the pan from the heat.
    6. In another pan, add remaining 1/2 tsp of ghee or oil. When it is hot, add mustard seeds. When it crackle, add sliced shallots and sauté till golden .
    7. Add it to the dal. Serve along with hot rice.

    About the author :   Lathiya Shanmugasundaram is the person behind lathiskitchen.org.She was born and brought up in India but now settled in US. She is the mother of two super active kids. She has both Malyali and Tamil recipes on her blog.

    Do connect with  Lathiya on social media

    If you have liked this post, do leave a comment and save it. Subscribe to get a book of handyhints for free.


  • Zucchini Paratha / Thepla | Guest Post Series

    Zucchini Paratha / Thepla | Guest Post Series

    Zucchini Paratha is a tasty and healthy flat bread. It is ideal to treat fussy kids. This is another variety of thepla which  is ideal for lunch, breakfast or one can even pack it in the box.  (more…)

  • Mug/ Mag Ni Chutti Daal |Gujarati cuisine| guest post

    Mug/ Mag Ni Chutti Daal |Gujarati cuisine| guest post

    Mug/Mag Ni Chutti Daal is a popular dish from Gujarati cuisine. It is dry sabzi of moong dal which pairs well with rice and kadhi.

    It’s a new week with a new face on my blog. Today, I have my other good friend Jagruti sharing her recipe here. Jagruti, Sapana and myself are three like minded person running a group on facebook since a few months and thus our interactions are on daily basis.

    Jagruti is an excellent cook who can play easily with many cuisines. She is another vegetarian blogger. I love her photography skills. She is a passionate blogger who strives hard to keep herself updated. Do take a look at her blog www.jcookingodyssey.com

    Over to Jagruti:

    How to make Mug ni chutti daal | Mug ni chutti daal is a simple, delicious and homely Gujarati side dish that can be served in a daily Gujarati meal. This daal requires just a handful of ingredients that are easily available in the Indian kitchens. This dish makes a perfect protein-rich dish without using any expensive ingredients.

    BTW Chutti translates Sukhi in Hindi and Dry in English.

    Mug ni chutti daal is a dry preparation of huskless yellow moong daal with basic spices but made without onion and garlic. Usually, this daal is served with Gujarati Kadhi and plain boiled rice. These three dishes go so well when mixed together. Whenever my husband tries this combination together, he describes this as ‘ Pudding’ 🙂

    We Gujarati try to eat a well-balanced meal every day and when we prepare a thali, we make sure that we cook everything making sure that in the one meal, all flavours and nutrients can be found. So for protein, we make at least two dishes, and whenever there is kadhi on the menu, Mug Ni Chutti daal, automatically becomes a side dish in the thali.

    This post is dedicated to all you Gujarati food lovers out there and my lovely friend Jayashree’s readers!

    Hey guys

    How are you all?

    When one passionate foodie meets another passionate foodie, what would you do? You become best pals, don’t you agree? Mine and Jaya’s friendship is not even a year old, but it seems like we know each other for years. I met Jayashree virtually on Facebook through one of the group. We became very close friends since we created our facebook group ‘Desi Bloggers Connect’. She is a dedicated and enthusiastic food blogger who creates delicious, tasty yet easy to prepare recipes. I love all her Karnataka specialities and can’t wait to try them in my own kitchen.

    I was so delighted and honoured when Jayashree request for the guest post and that when I decided to share this delicious and healthy Gujarati daal recipe. A really tasty and protein packed dish that is perfectly suitable for vegan too, also it is made without onion and garlic thus this recipe can be prepared during fasting season when such ingredients onion and garlic are prohibited.

    Thank you Jayashree for giving me this honour to share my recipe with your readers, hope they like it and make it in their own kitchens. Please shoot with any questions and inquiries regarding this recipe

    Let’s look at the recipe

    Mug ni chutti-guest post
    Mug ni chutti daal- guest post

    Mug/Mag Ni Chutti Daal – Gujarati Dry Moong Daal


    Ingredients

    • 1 cup yellow moong daal ( Mug Ni Daal )
    • 2 Tbsp. oil
    • 1/2 tsp. Mustard seeds
    • 1/2 tsp. Cumin seeds
    • Pinch hing
    • 1 red dry chilli
    • 1 tsp. red chilli powder
    • 1/2 tsp. turmeric powder
    • 1/2 tsp. green chilli and ginger minced
    • Lemon juice
    • Fresh coriander leaves to garnish

    Method:-

    1. Clean, wash and soak moong daal in cold water for half an hour.
    2. Discard the water.
    3. Once you are ready to cook the daal, heat oil in a thick bottom pan or kadai.
    4. Add mustard and cumin seeds, once they crackle add hing and dry red chilli.
    5. Then add soaked daal, and minced chilli ginger.
    6. Mix well, then add red chilli powder, turmeric and salt.
    7. Once again mix well.
    8. Add sufficient water to cook daal perfectly.
    9. Don’t add too much water in the beginning, if you need then add later.
    10. Cover the pan with the lid and cook the daal on a low heat.
    11. Daal should not be mushy but cooked well and each daal should be separate.
    12. Once the daal is cooked add lemon juice and mix.
    13. Turn off the heat and garnish the daal with the coriander leaves.
    14. Serve hot with Gujarati Kadhi and Rice in a typical everyday Gujarati thali.Enjoy!

    A few other Gujarati dishes on the blog: Tricolour Dhokla, Methi Khakra, Mamra ladoo

    Jagruti

    Mug ni daal

    Mug ni chutti daal is a dry lentil based accompaniment from Gujarati cuisine. It is one of the essentials in their daily menu.
    Prep Time 15 minutes
    Cook Time 20 minutes
    Total Time 35 minutes
    Servings: 6
    Course: lunch ideas
    Cuisine: Gujarati

    Ingredients
      

    • 1 cup moong dal
    • 2 tablespoon oil
    • 1/2 teaspoon cumin
    • 1/2 teaspoon mustard
    • 1 teaspoon chilly powder
    • 1 red chilly
    • 1/2 teaspoon ginger and green chilly minced
    • lemon juice
    • fresh coriander to garnish

    Method
     

    1. Clean, wash and soak moong daal in cold water for half an hour.Discard the water. Once you are ready to cook the daal, heat oil in a thick bottom pan or kadai.
    2. Add mustard and cumin seeds, once they crackle add hing and dry red chilli. Then add soaked daal, and minced chilli ginger. Mix well, then add red chilli powder, turmeric and salt. Once again mix well. 
    3. Add sufficient water to cook daal perfectly. Don’t add too much water in the beginning, if you need then add later. Cover the pan with the lid and cook the daal on a low heat. Daal should not be mushy but cooked well and each daal should be separate. Once the daal is cooked add lemon juice and mix. Turn off the heat and garnish the daal with the coriander leaves. Serve hot with Gujarati Kadhi and Rice in a typical everyday Gujarati thali.

    yellow-moong-daal-guest-post
    yellow-moong-daal-guest-post

    Mug-ni-chutti-daal-guestpost
    Mug-ni-chutti-daal-guestpost

    About the author:

    She is the owner of Jagruti Cooking Odyssey, a blog of pure vegetarian dishes. She has cooked on IndianTV channels and printed in UK magazines, previously winning the top prize. She loves cooking different cuisines. Follow Jagruti on Facebook, Twitter, Instagram and Pinterest

    Let’s be connected, follow us on facebook, twitter, pinterest and instagram.

    Subscribe to get all updates in your inbox and an e-book for free!

  • Spring onion and corn pulao

    Spring onion and corn pulao

    Jump to Recipe Print Recipe

    Spring onion and corn pulao is a mildly fragrant rice dish and makes a delicious meal.

    Rice is one of the daily essentials without which we cannot survive. Rice dishes just give more glamour and taste to the usual food, they are loved by all, especially the children who are so fussy to eat good food.

    Spring onion and corn pulao is mildly fragrant and makes a good meal. It is vegan and gluten free. It is ideal for weekend menu or one can pack it in lunch box.

    spring onion pulao
    spring onion pulao

    Spring Onion and Corn Pulao

    Ingredients:   Measurement used: 1 cup=250ml

    • 1 cup rice
    • 1 cup spring onion chopped
    • 1 onion
    • 1/2 cup sweet corn kernels
    • 1 teaspoon ghee
    • 1 tablespoon oil
    • 2 cloves
    • 2 cardamom
    • 1/2 teaspoon saunf
    • 1/2 teaspoon shajeera
    • 1 bay leaf
    • 1 green chilly
    • 1/2 cup coriander leaves
    • a few mint leaves
    • 2 cloves garlic
    • 1/2 inch ginger
    • water
    • salt to taste

    Method:

    1. Cut the spring onion finely, separate the greens and bulbs.
    2. Wash the greens by soaking in water.
    3. Wash the rice and soak in water for fifteen to twenty minutes.
    4. Cut the onion and put the corn kernels in water and set them aside.
    5. Grind the coriander, mint, green chilly, ginger and garlic to a paste.
    6. Take ghee in a pan, saute the spring onion for two minutes. Remove it and keep it aside.
    7. Add oil, put the saunf and shajeera to it. Allow it to splutter, throw in the other spices cardamom, clove and bay leaf. Now put the onions into it. Saute for sometime.
    8. Add the corn kernels to it.
    9. Put the paste into it and saute for sometime.
    10. Now, add the rice to it. Saute for a minute.
    11. Add water to it. Put salt to it.
    12. Close the lid and cook it for one whistle.
    13. Once the pressure releases, remove it and put the saute green into it and mix it gently.
    14. Spring onion and corn pulao is ready to serve.

    Take a tip:

    The amount of water depends on the kind of rice used. I have used in the ratio of 1: 2

    spring onion and corn pulao
    spring onion and corn pulao

    A few other rice dishes from the blog: Jeera Rice, Spanish Rice

    spring onion and corn pulao
    Evergreendishesdev

    Spring Onion and Corn Pulao

    Spring onion and corn pulao is a mildly fragrant and delicious dish to serve anytime. 
    Prep Time 10 minutes
    Cook Time 20 minutes
    10 minutes
    Total Time 30 minutes
    Servings: 4 people
    Course: lunch box, lunch ideas, Main Course, rice variety
    Cuisine: Indian, north indian

    Ingredients
      

    • 1 cup rice
    • 1 cup spring onion (green) finely cut
    • 1 onion
    • 1/2 cup sweet corn kernels
    • 1 teaspoon ghee (clarified butter)
    • 1 tablespoon oil
    • 2 cloves
    • 2 cardamom
    • 1/2 teaspoon fennel seed
    • 1/2 teaspoon black cumin
    • 1 bay leaf
    • water
    • salt
    To grind
    • 1 cup coriander
    • 8-10 mint leaves
    • 1 green chilly
    • 1/2 inch ginger
    • 2 cloves garlic

    Method
     

    1. Take the greens of the spring onion, cut them finely and put in water. Rinse and put it aside. 
    2. Soak the rice for 15-20 minutes.
    3. Cut the onion and put the corn kernels in water. 
    4. Grind the ingredients under the section “to grind”
    5. Take ghee in a pan and saute the spring onion leaves for two minutes. Put it aside.
    6. Add oil in the pressure cooker, put the fennel seeds and black cumin, once it splutters put the cardamom, clove and bay leaf. Put the onion and saute for sometime. 
    7. Add the corn kernels to it. Let cook for a minute.
    8. Now, add the ground paste to it and saute for sometime.
    9. Put the rice and saute for sometime.
    10. Add water and salt. Give a stir. Close the lid and let cook for one whistle.
    11. Once the pressure releases, remove the lid and gently mix the sauted spring onion to it. 
    12. Spring onion and corn pulao is ready to serve.

    If you ever make this dish, take a photo and share it with me. I would like to see your creation. Tag @foodiejayashree on Instagram on follow us on facebook.

    You can save these pictures on pinterest for your reference.


    Subscribe to get all updates in your inbox and a book of handyhints for free!

  • Aloo Matar / Potato Pea Curry

    Aloo Matar / Potato Pea Curry

    Aloo matar/ potato pea curry  is a classic  North Indian accompaniment. Chunks of boiled potato and green peas are immersed and cooked in a delicious gravy laden with spices, it makes a tasty accompaniment with any Indian flat bread as roti, nan, chapathi or phulka.

    Potato is a versatile vegetable and easy to prepare. It helps to prepare tasty dishes that is loved by all.

    Aloo Matar can be served  during breakfast, lunch or dinner. It is ideal to pack in lunch box too. It is vegan and gluten free.

    My other North Indian curry on the blog

    Restaurant Style Veg Hariyali, Tuvar Lilva Masala Curry, Matar Paneer

    aloo matar potato pea curry
    aloo matar potato pea curry

    Aloo Matar, Potato Pea Curry

    Measurment used : 1 cup =200 ml

    Ingredients:

    • 4 potatoes boiled
    • 1 cup green peas
    • 2 onions
    • 3 tomatoes
    • 1 tablespoon melon seeds
    • 1 tablespoon oil
    • 1/2 teaspoon cumin
    • 1 teaspoon ginger garlic paste
    • 1/2 teaspoon turmeric powder
    • 2 teaspoon coriander powder
    • 3/4 teaspoon garam masala powder
    • 1 teaspoon chilly powder
    • salt to taste
    • 1/4 teaspoon kasuri methi ( dried fenugreek leaves)

    Method:

    1. Blanch the tomatoes.
    2. Soak the melon seeds in water.
    3. Peel the skin and cut into cubes.
    4. Make a puree of the tomatoes.
    5. Make a puree of the soaked melon seeds.
    6. Boil the green peas, if using frozen peas, put them in hot water.
    7. Take oil in a pan, add cumin, as it splutters, add onion to it.
    8. Saute it for sometime.
    9. Add the puree and continue to saute for three minutes. Add turmeric powder, garam masala and coriander powder to it. Let cook for sometime.
    10.  Put the melon paste to it.
    11. Add water accordingly to get the consistency of the gravy.
    12. Peel the skin of potatoes and cut into cubes. Put potato pieces and boiled peas to the gravy.
    13. Crush kasuri methi with fingers and sprinkle over it.
    14. Cook for three minutes.
    15. Serve with hot phulkas.

    Take a tip:

    • Having boiled potatoes in the refrigerator eases quicking.
    • Kasuri methi is readily available in the market. You can make it at home also. Take a bunch of fresh fresh fenugreek leaves, cut the stalk, wash the leaves by rinsing a couple of times in water and put it dry. After sometime, put the fenugreek leaves in a microwave safe bowl and mixcrowave for two or three minutes. Fresh kasuri methi is ready. You can also dry the leaves in sunlight.

    Aloo matar| Potato and peas curry
    Aloo Matar | Potato and peas curry

    Evergreendishesdev

    Aloo Matar Potato Pea Curry

    5 from 2 votes
    Aloo matar is a delicious north indian side dish served with any Indian flat bread as roti, nan or phulka.
    Prep Time 10 minutes
    Cook Time 20 minutes
    Total Time 30 minutes
    Servings: 4 person
    Course: kids favourite, lunch box, lunch ideas, Main Course
    Cuisine: Indian, north indian

    Ingredients
      

    • 4 potato
    • 1 cup green peas 1 cup =200 ml
    • 2 onion finely cut
    • 3 tomato
    • 1 teaspoon ginger garlic paste
    • 1 tablespoon oil
    • 1/2 teaspoon cumin
    • 3/4 teaspoon garam masala powder
    • 1 teaspoon chilly powder
    • 2 teaspoon coriander powder
    • salt to taste
    • 1/2 teaspoon kasuri methi

    Method
     

    1. Boil potatoes in pressure cooker.
    2. Boil peas separately. If using frozen, do not boil for long. Soak melon seeds in hot water for fifteen minutes. 
    3. Blanch tomatoes and make a puree. Make paste of melon seeds. 
    4. Take oil in a pan, add cumin, as it splutters, put onion in it.  Saute for sometime, until it turns light pink in colour. Add ginger garlic paste and let cook for sometime.
    5. Add tomato puree, let cook for two minutes. Add turmeric powder, garam masala, coriander powder and salt to it. Let cook for sometime, add the melon paste and mix it well. 
    6. Adjust the consistency of the curry. 
    7. Peel the potatoes and cut them into cubes. Throw them into the curry along with green peas. Crush the kasur methi with finger and sprinkle over it.Let cook for sometime.
    8. Serve hot with phulkas.

    Notes

    • Having boiled potatoes eases cooking.


    Aloo matar Potato pea curry
    Aloo Matar Potato pea curry

    Pin it for later:

    Aloo Martar
    Aloo matar

    Subscribe to get all updates in your inbox. If you ever recreate this dish, do tag me @foodiejayashree on Instagram, i would love to see your creation.

    Follow evergreendsihes on Facebook and Pinterest

    Sending this to

    CookBlogshare

    Fiesta Friday

  • Nawabi green cutlets

    Nawabi green cutlets

    It’s been sometime I have put any fried snack here. Summer has atlast vanished Now, the weather is good, it’s raining at times but pleasant. Loving this weather and the splendid climate ! Well, it’s hinting me to make some fried snacks to binge. Today, I present to you Nawabi  Green Cutlets. (more…)

  • Tuvar lilva masala curry| Green pigeon peas curry| Togare kalu curry

    Tuvar lilva masala curry| Green pigeon peas curry| Togare kalu curry

    Winter brings its own blessings, fresh vegetables are available. There is no dearth for greens. Green pigeon peas are the fresh form of tuvar dal and is available in winter. Tuvar lilva masala curry is a tasty and easy to make accompaniment that can be paired with chapati or phulka.

    The other names for Tuvar lilva are green pigeon peas and togare kalu

    Tuvar lilva masala curry
    Tuvar lilva masala curry

    The green pigeon peas can be shelled and stored in refrigerator for a few days.

    You can have easy access to our recipes. We are now available on mobile app, you can download it here from the playstore

    https://play.google.com/store/apps/details?id=com.gembox.info.evergreendishes

    Let’s get cooking Tuvar Lilva Masala Curry

    Ingredients:

    • 1 bowl green pigeon peas ( 1 bowl= 200 ml)
    • 2 teaspoon oil
    • 1/2 teaspoon cumin
    • 1/2 teaspoon turmeric powder
    • salt to taste

    Grind to a paste:

    • 2 onion
    • 2 tomato
    • 1/2 inch ginger
    • 3 cloves garlic

    Grind to a paste:

    • 1 bowl coriander leaves
    • 1 green chilly
    • 1tablespoon pumpkin seeds

    Method:

    1. Boil green pigeon peas with a little salt. Alternatively, you can pressure cook.
    2. Soak pumpkin seeds for half an hour in some water.
    3. Blanch the tomatoes. Make a paste of onion, tomato, ginger and garlic.
    4. Make a paste of coriander, green chilly and pumpkin seeds.
    5. Take oil in a pan, add cumin, as it splutters put the onion and tomato puree. Saute it well for a few minutes.
    6. Add the green paste to it. Put salt. Let cook for two minutes.
    7. Now, add the cooked pigeon peas, mix and simmer for sometime.
    8. Tuvar lilva curry is ready to serve.

    Tuvar lilva masala curry
    Tuvar lilva masala curry

    Take a tip:

    • Add more green chilly if you want it spicy.

    Tuvar lilva masala
    Evergreendishesdev

    Tuvar lilva masala curry

    Tuvar lilva masala curry is a tasty accompaniment that can be made during winters.
    Prep Time 10 minutes
    Cook Time 15 minutes
    Total Time 25 minutes
    Servings: 4
    Course: accompaniment, curry, gravy, Side Dish
    Cuisine: Indian, Vegan,

    Ingredients
      

    • 1 cup tuvar lilva 1 cup =200 ml used
    • 2 teaspoon oil
    • 1/2 teaspoon cumin
    • 1/2 teaspoon turmeric powder
    Grind to a paste
    • 2 onion
    • 2 tomato
    • 1 inch ginger
    • 3 cloves garlic
    Grind to a paste
    • 1 green chilly
    • 2 tablespoon coriander
    • 1 tablespoon pumpkin seeds

    Method
     

    1. Boil  tuvar lilva with a little salt. Alternatively, you can pressure cook it.
    2. Soak the pumpkin seeds in water for half an hour.
    3. Blanch the tomatoes, peel the skin and grind all the ingredients together.
    4. Grind pumkin seeds along with coriander and green chilly to a paste. 
    5. Take oil in a pan. Add cumin, as it splutters, put the onion and tomato paste. Saute it for sometime. Put turmeric powder  and mix it well. 
    6. Add the green paste and salt to it. Let cook for sometime.
    7. Then, add the cooked green pigeon peas. Let simmer for five minutes. Green pigeon peas curry is ready to serve.

    Notes

    Add an extra green chilly if you want it spicy.

    Tuvar lilva masala
    Tuvar lilva masala

    Other tuvar liva recipes from my co-bloggers Fresh Toor Curry  Fresh Tuvar Curry

    If you have liked this post, do comment and share it. Follow evergreendishes on Pinterest, Twitter, Facebook and Instagram.