Category: vegan

  • Okra Sambar | Bendekayi Huli | Ladies finger Sambar

    Okra Sambar | Bendekayi Huli | Ladies finger Sambar

    Jump to Recipe

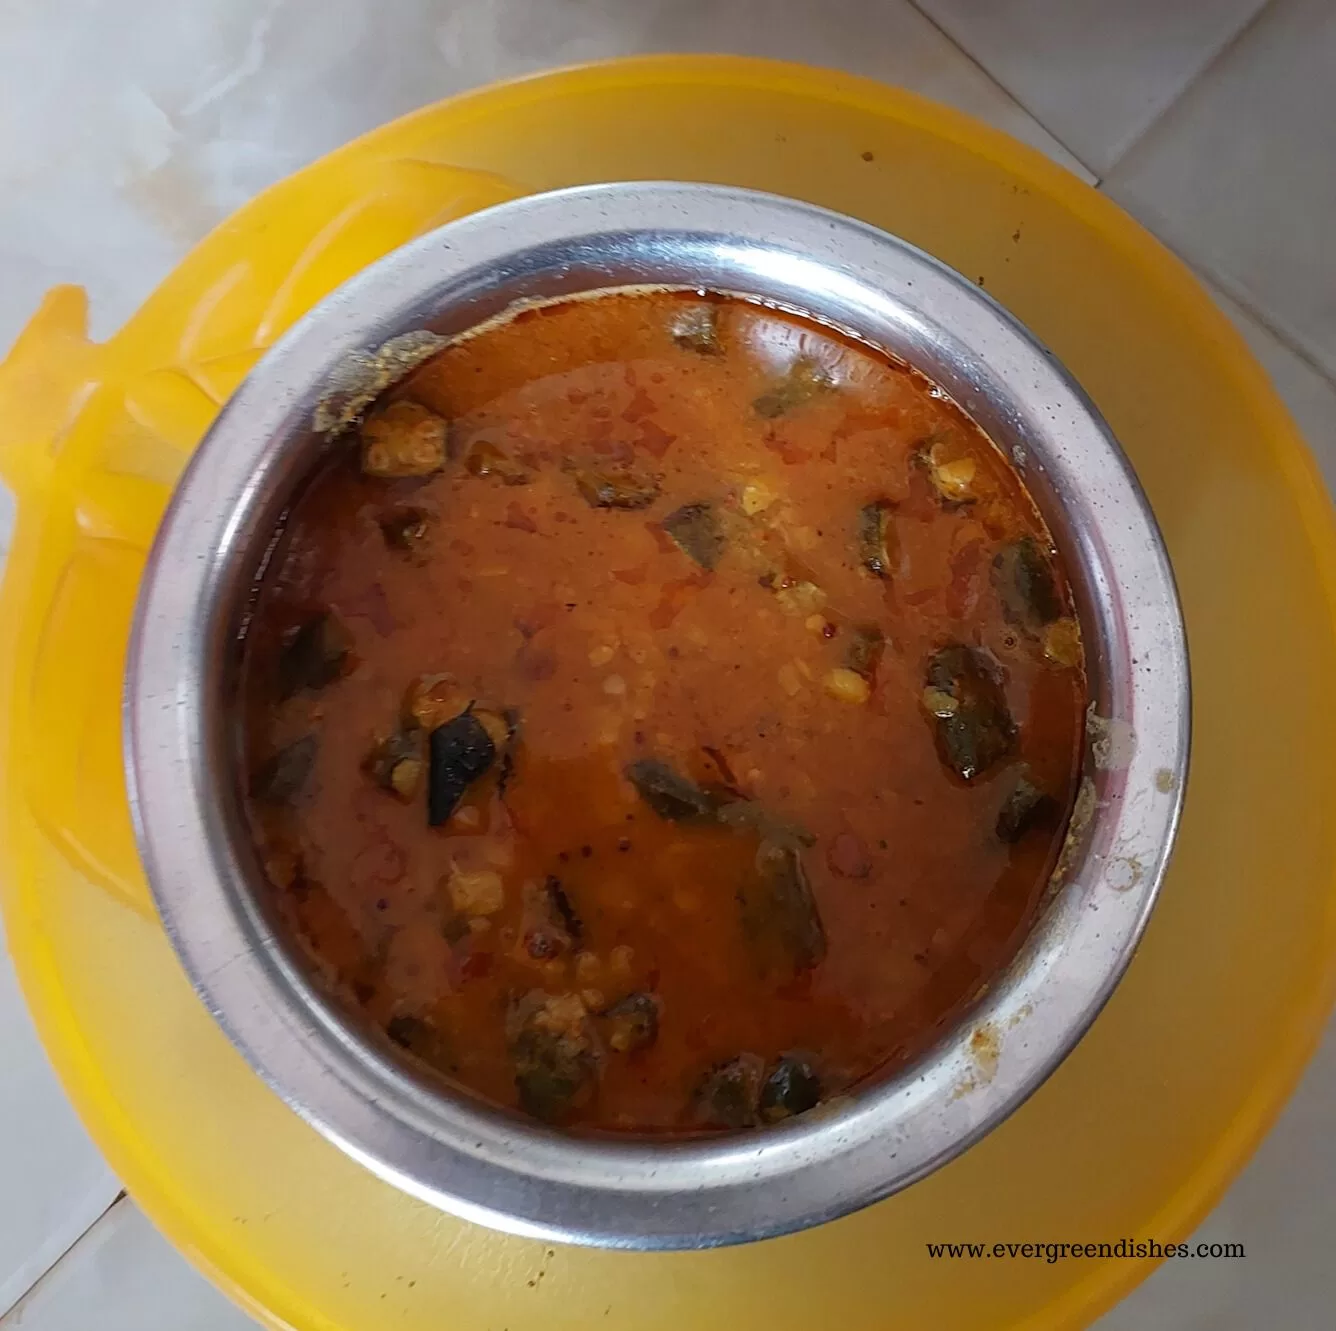
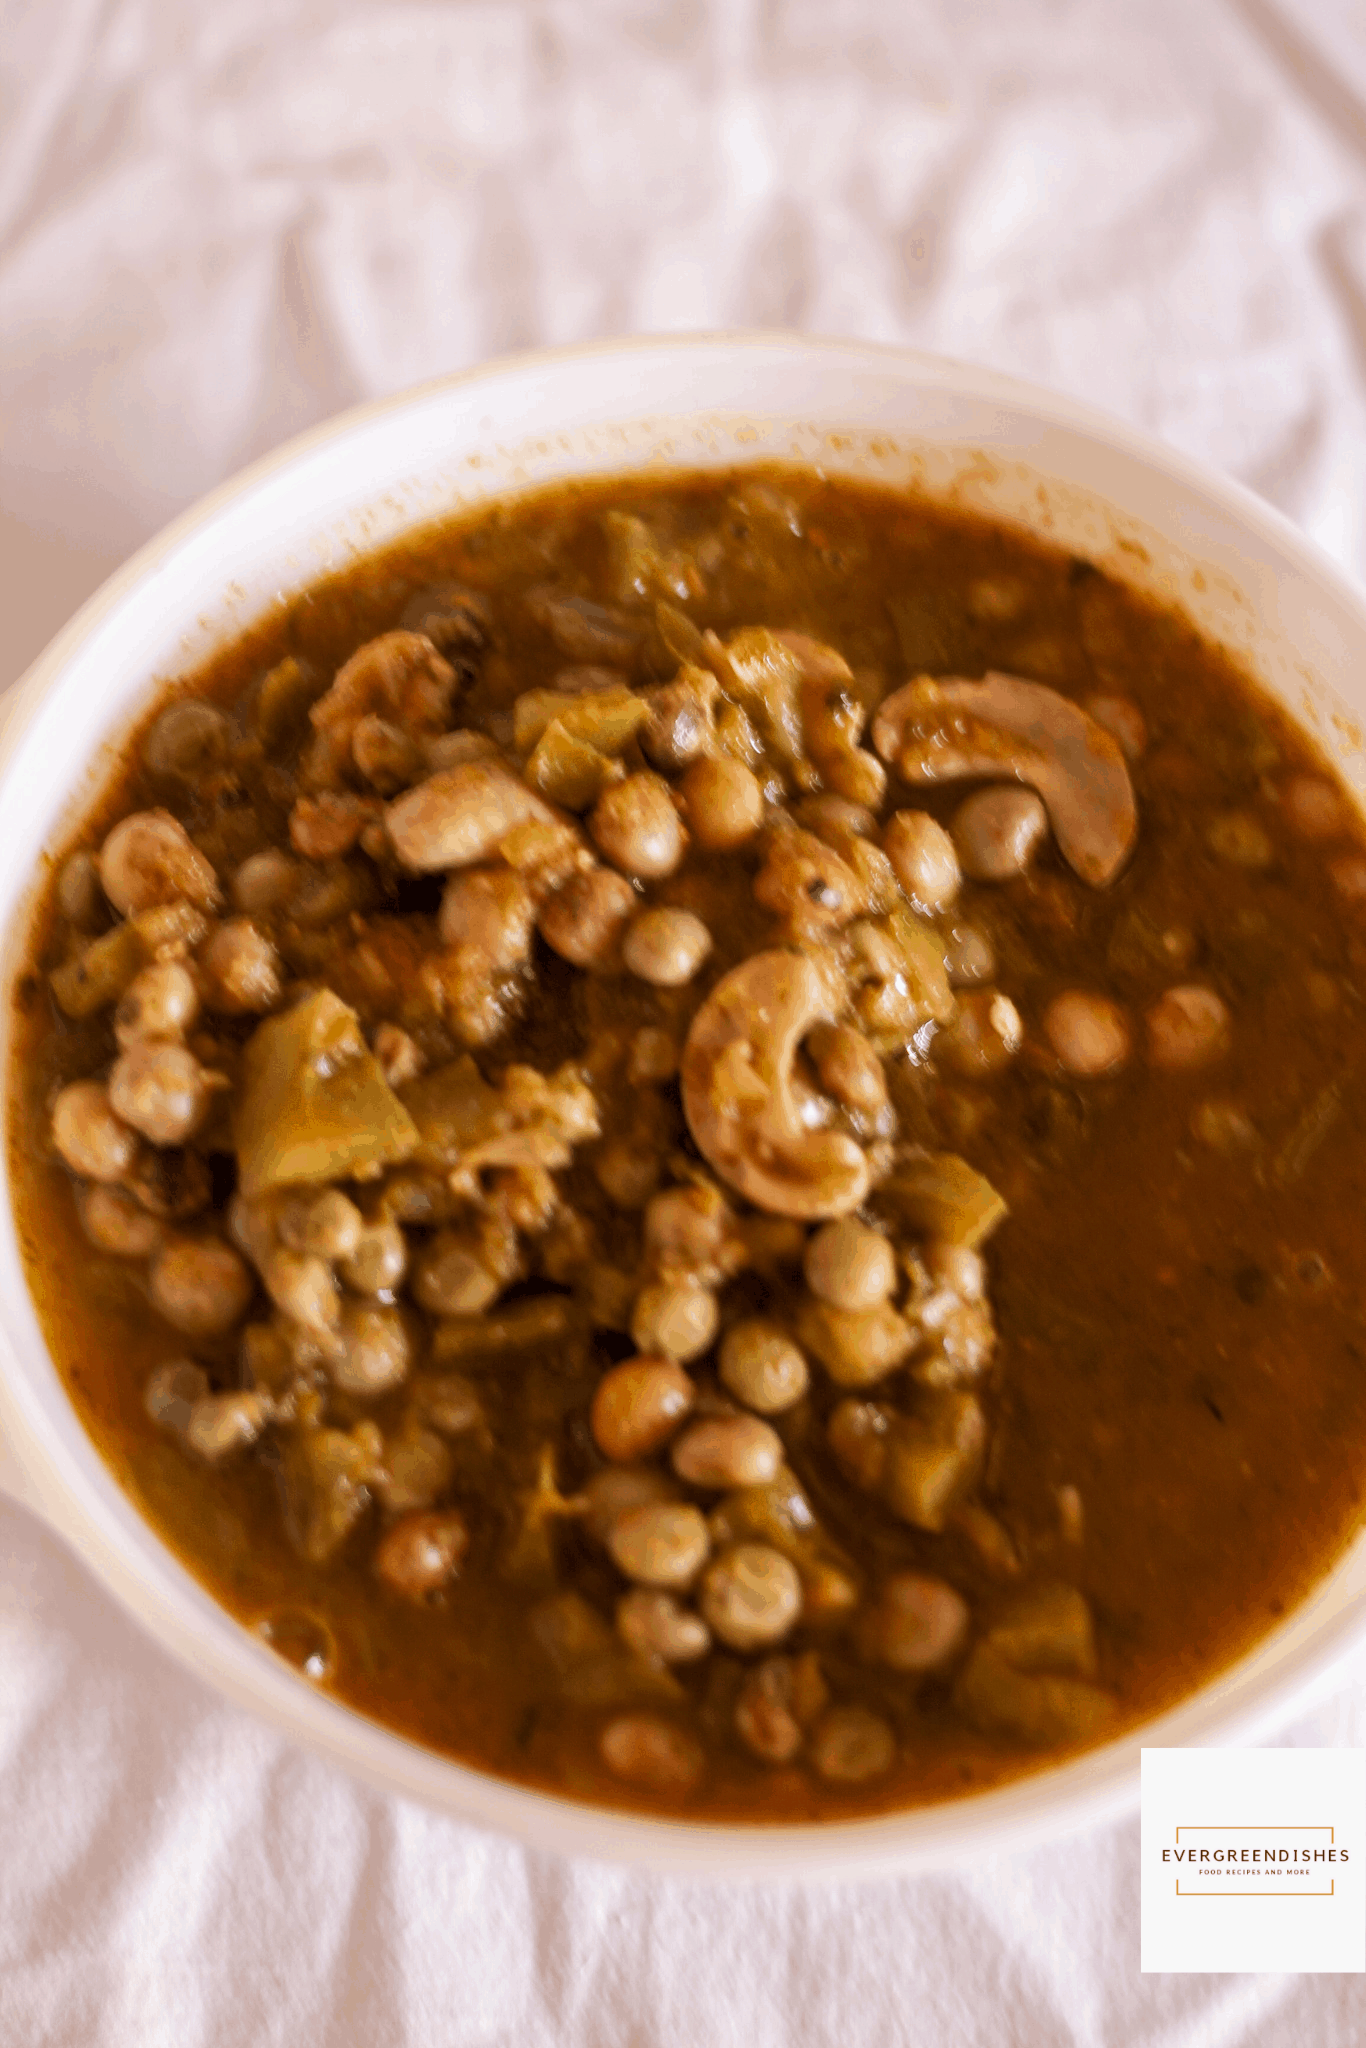
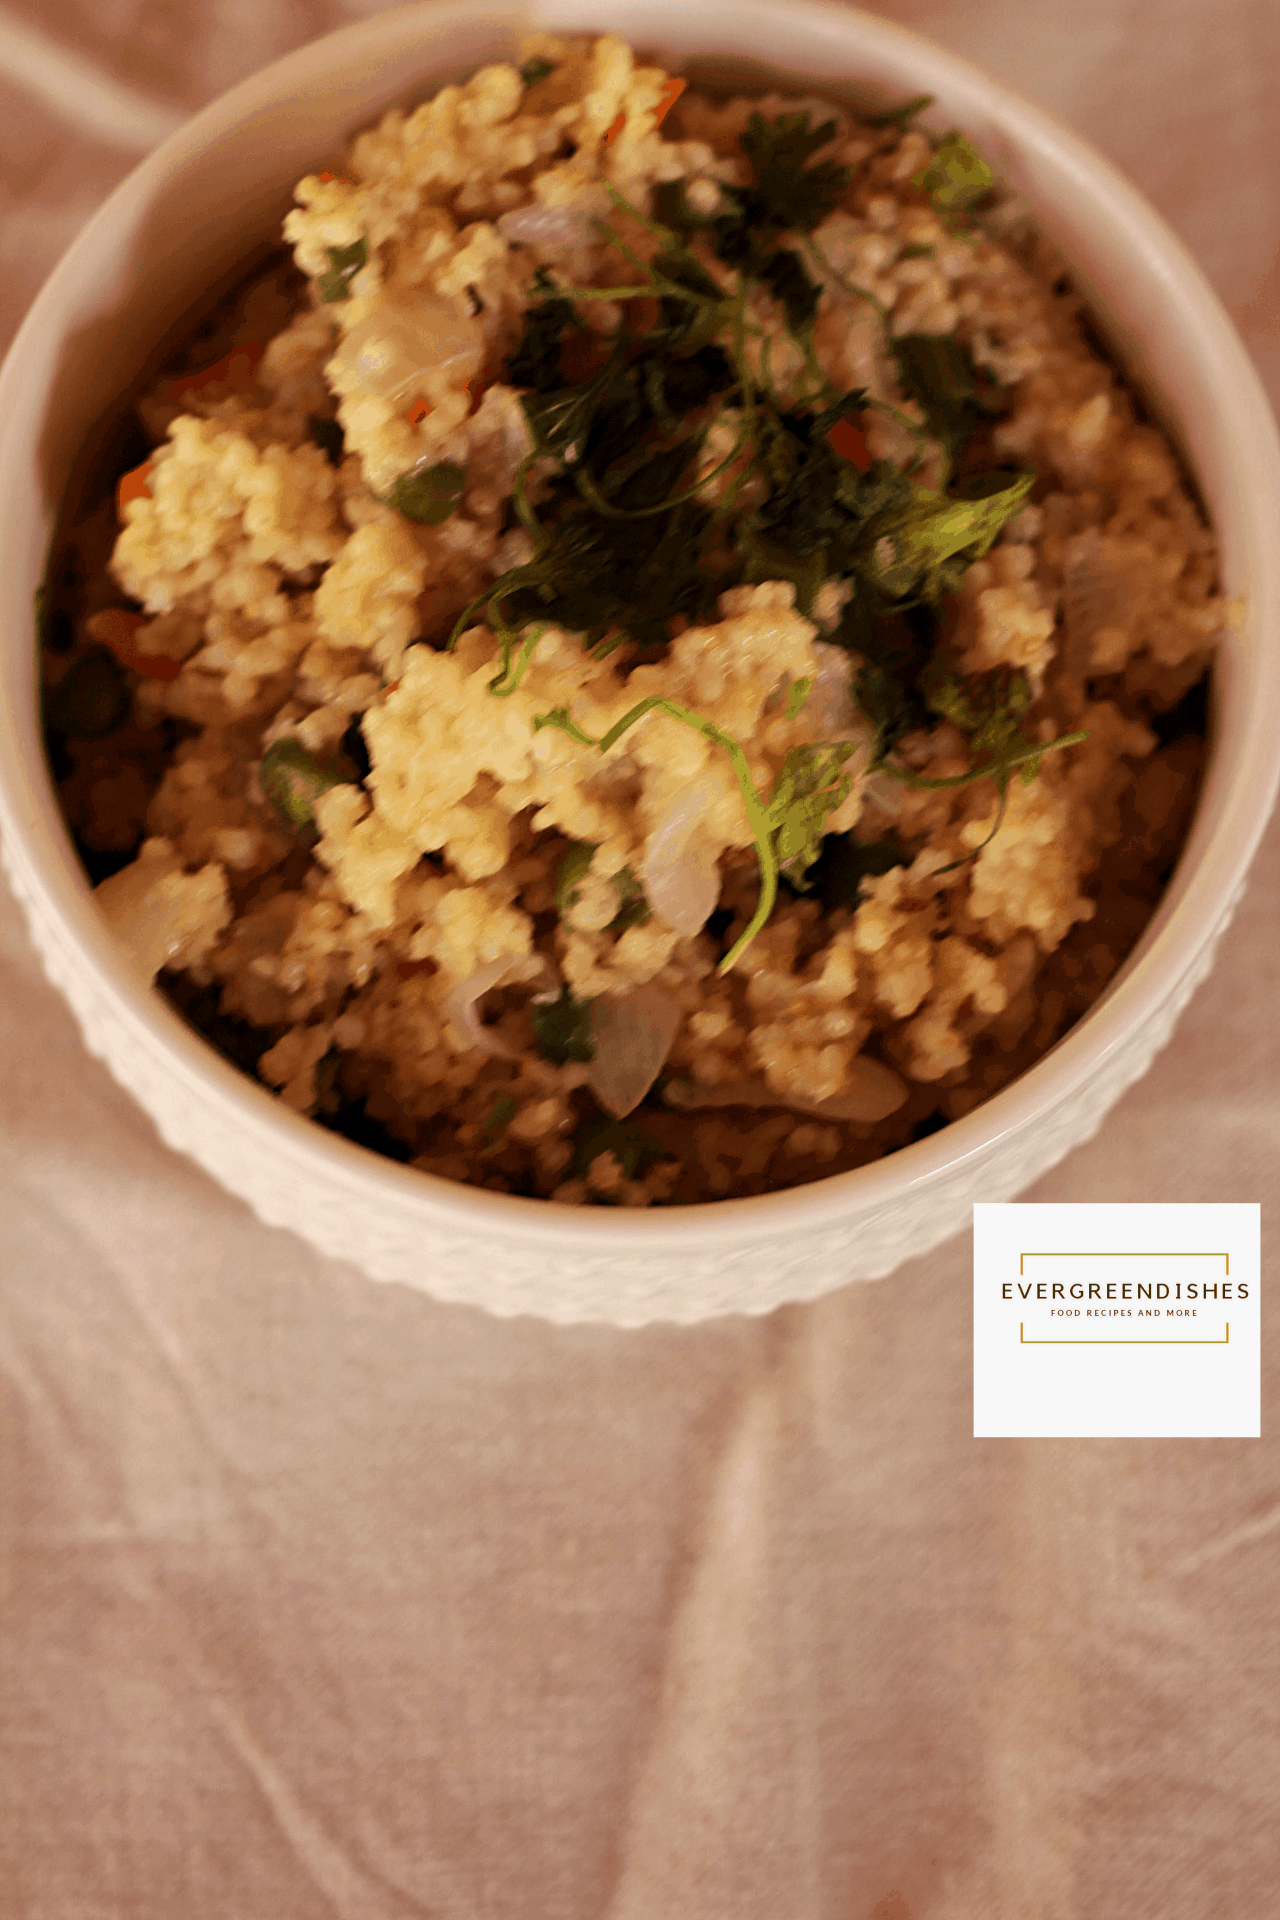
    Okra Sambar is one of the kinds of dish  you can prepare when you need something different and easy, filling that will pair up with steamed rice and a simple stir fry. It is an ideal lunch idea for a busy day.  Okra is commonly called as ladies finger in English speaking countries. The scientific name is Abelmoschus esculentus. 

    Sambar is dense and more nutritious as it has the goodness of lentils and vegetables in it. It can be made in various ways as using varied vegetables or green leaf. Pulses such as horse gram taste good along with vegetables. Today, I am sharing the recipe of Bendekayi Sambar.

    Bendekayi is ideal to make as a crispy  fry. My family loves all kinds of okra fry. This sambar is one of the lesser made items. But, believe me, it is tasty and a winner for those who like ladies finger. 

    Initially, soak the tur dal for sometime and cook it with a pinch of turmeric and oil. I prefer to soak for atleast two hours, it eases the cooking. The bhendi should be washed and dried. There should be no trace of water in it, it turns slimy. 

    bendekayi sambar | ladies finger sambar
    bendekayi sambar

    What goes in the making ?

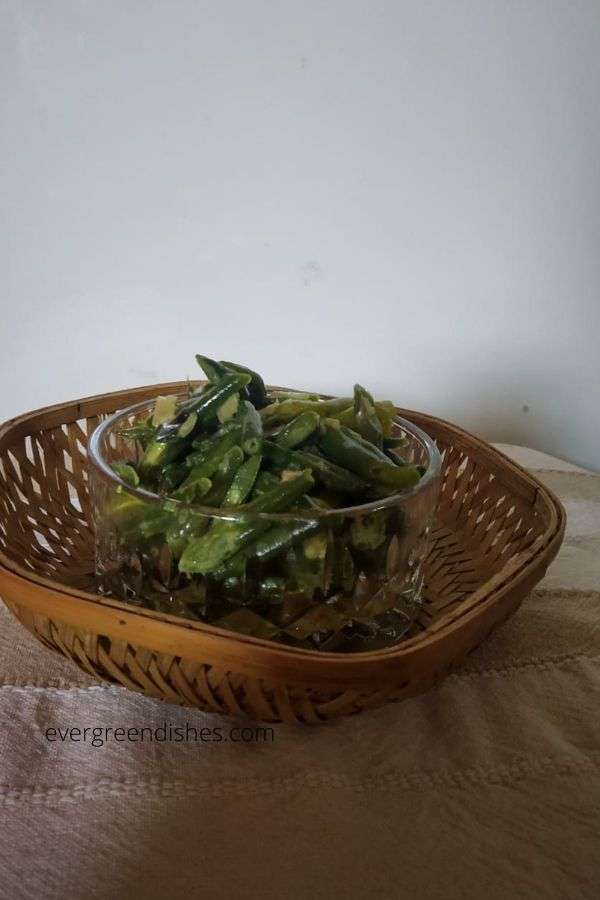
    Choose tender okra. The quality of okra will either elevate or spoil the dish. Wash them and pat them dry. The bhindi should be cut evenly. This will help in proper cooking of the vegetable.

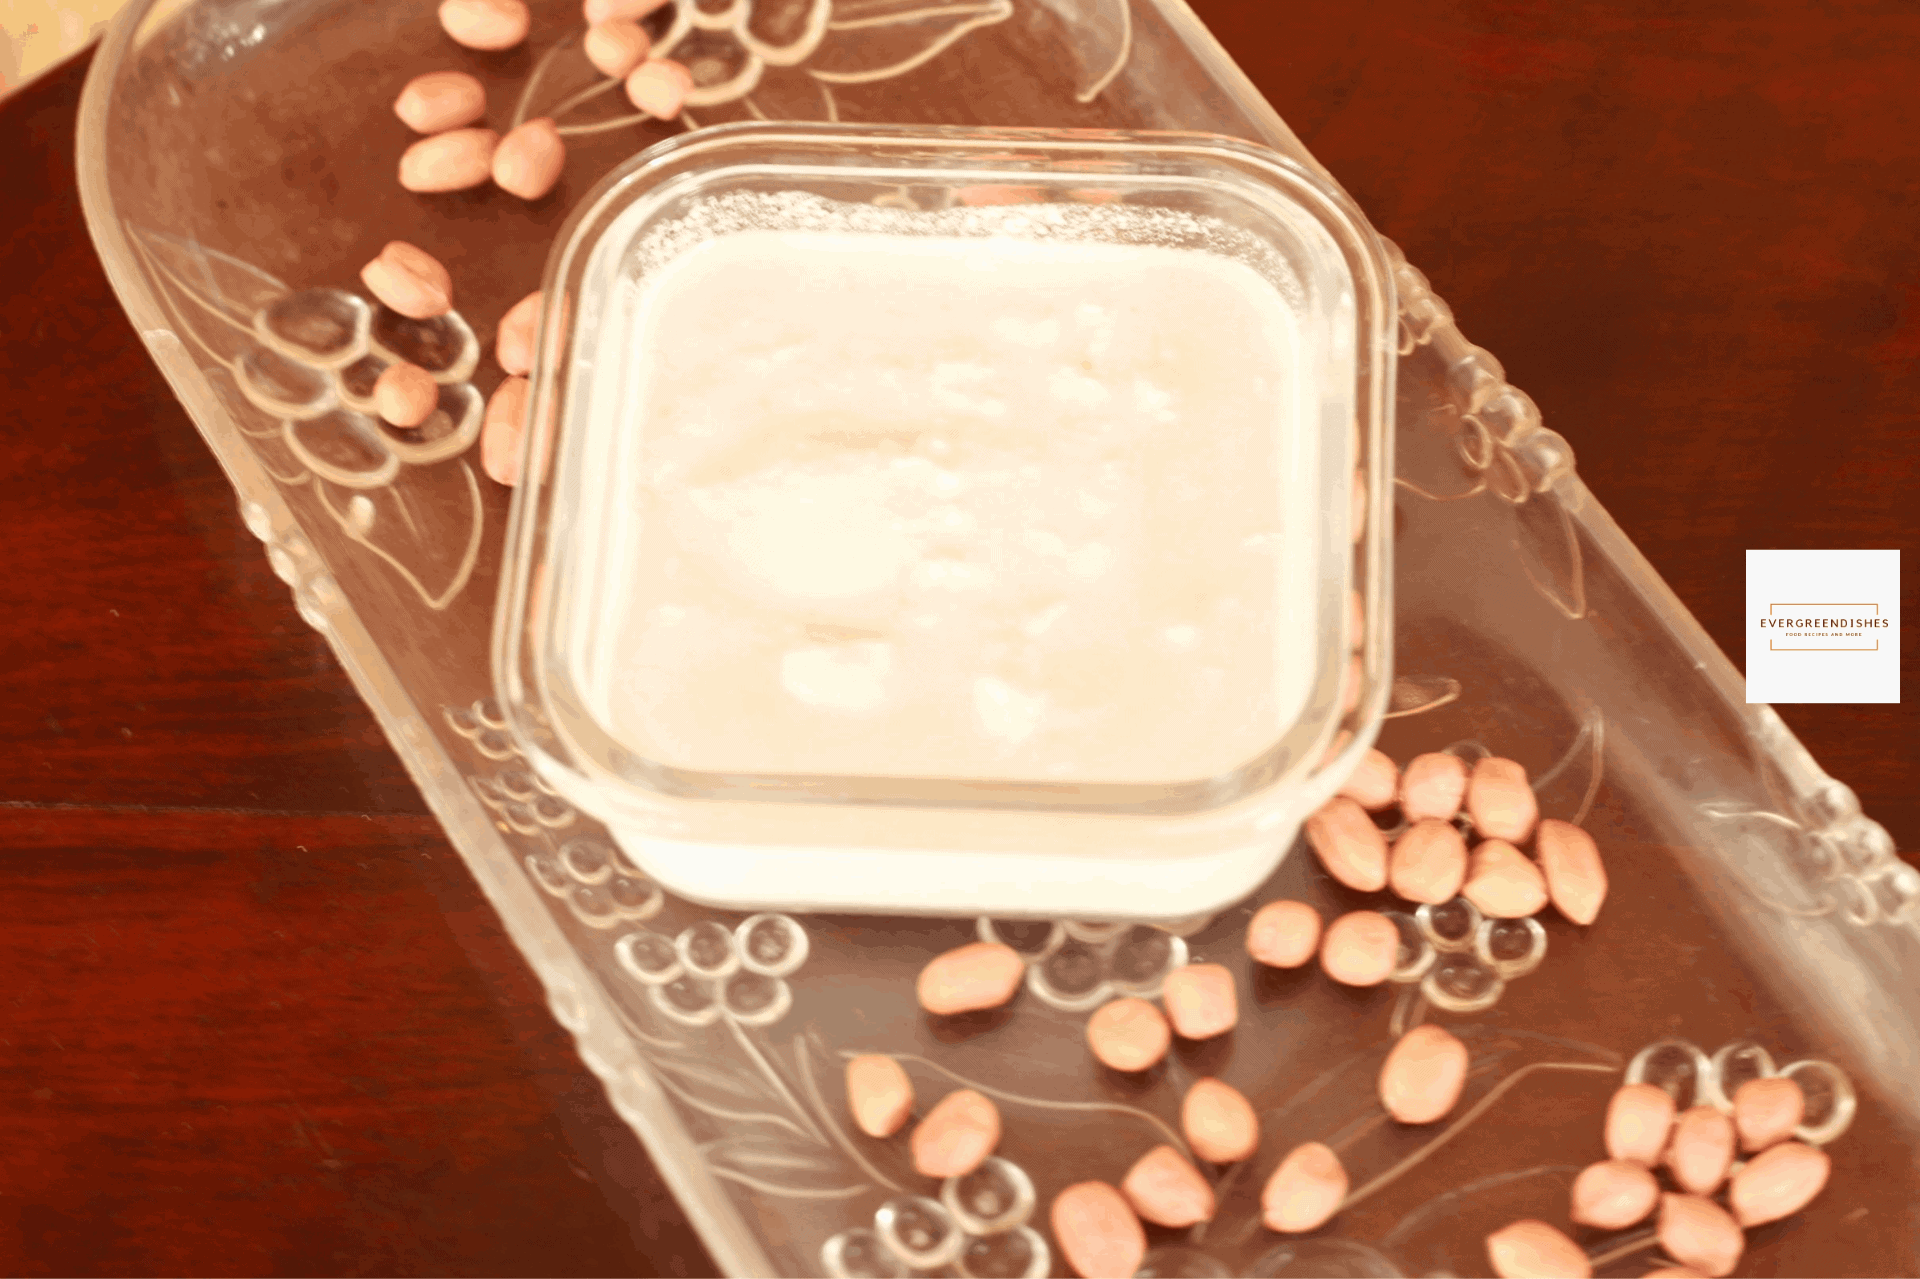
    Tur Dal:  I prefer to soak for atleast two hours. Add a pinch of turmeric and a little oil while cooking it. Cook it for three whistles and allow the pressure to release by itself.

    Sambar powder : I make most of the  spice mix at home. You can use any good brand of sambar powder.

    Tamarind : It needs to be  wash and soaked for at least for fifteen minutes. Alternatively, you can use the tamarind extract which is readily available.

    Chilli powder : Check for spiciness and adjust by adding a little bit of chilli powder. The flavour should be a mix of sweet, spicy and sour.

    A few other recipes with okra are :

    crispy okra fry 2 ways
    2 ways of making okra fry


    Okra with tomatoes / bhindi tamatar ki sabzi
    okra with tomatoes / bhindi tamatar ki sabzi


    Bharli bhendi /stuffed okra
    Bharli bhendi / stuffed okra


    Print Recipe
    okra sambar
    Evergreendishesdev

    Bendekayi Sambar

    Ladies finger sambar makes a good and easy lunch menu. Pair it with hot steamed rice along with a stir fry for a good meal.
    Prep Time 10 minutes
    Cook Time 20 minutes
    10 minutes
    Total Time 45 minutes
    Servings: 4 people
    Course: lunch ideas, Main Course
    Cuisine: karnataka

    Ingredients
      

    • ½ cup tur dal
    • ½ teaspoon oil
    • ¼ teaspoon turmeric powder
    • 2 cup water
    • 1 teaspoon oil
    • ¼ kg tender okra
    • Marble size ball of tamarind
    • 2 teaspoon sambar powder
    • 2 tablespoon oil
    • ½ teaspoon mustard
    • ¼ teaspoon asafoetida
    • ¼ teaspoon turmeric powder
    • ¼ teaspoon fenugreek powder
    • A few curry leaves

    Equipment

    • 1 pan
    • 1 ladle
    • 1 lid
    • 1 pressure cooker with pan

    Method
     

    1. Initially, begin the prep work by soaking the tur dal in water for ateast half an hour.
    2. Cut the washed okra into one inch pieces.
    3. Cook the lentil with a pinch of turmeric powder and oil.
    4. Saute the okra pieces in a teaspoon of oil for a couple of minutes. They should be cooked with a tinge on the edges. Put them aside.
    5. In a pan, add oil. Put mustard, asafoetida and turmeric powder. As it crackles, put the okra pieces to it and let it cook for a minute.
    6. Mix the lentil with a ladle, pour it into the pan. Put salt. Allow to cook for sometime.
    7. Extract the pulp from the tamarind.
    8. Put the tamarind extract along with sambar powder. Cook for two minutes, allow the flavours to blend on a low flame.
    9. Okra Sambar is ready to serve.

    Notes

    Choose a tender lady finger. Cut them into appropriate sizes.
    A little bit of jaggery lends a good taste.
    Add a little bit of chilli powder if needed. The sambar should be flavoursome, a balance of sour, spicy, hot and a little sweetness if needed.

    Pin it for later :

    bendekayi sambar
    bendekayi sambar

    If you  ever make  Okra Sambar , take a picture and share it by tagging @foodiejayashree on Instagram and @evergreendishes on Facebook.  Subscribe to get all updates and an e-book for free.

  • Srilankan Green Bean Curry

    Srilankan Green Bean Curry

    Srilankan Green Bean Curry is a tasty side dish cooked in coconut milk. It makes a good accompaniment with chapathi or steamed rice. 

    It is a new month and I have a new cuisine on my blog today. It is now to the Srilankan cuisine. Sri Lanka, as we all know is a small country to the south of India. It has a mixed culture traditions.  

    srilankan green bean curry


    About SriLankan cuisine :


    There is a lot to explore in the SriLankan food. I am naive but did a lot of research before I could plunge into cooking it. It is mainly a non-vegetarian cuisine but one can find good vegetarian food too. It is a land of coconut and cinnamon. I think coconut milk or coconut is extensively used. It gives a good taste to the food too. Being a South Indian, I can vouch for the taste it imparts to the dish.

    Ceylon cinnamon is sweetish in taste and gives a good flavour to the dishes. I have used it  and it is more aromatic than the usual one which we use. Pandan leaves are extensively used in many dishes. Although, Srilankan cuisine looks so familiar to us, it is not exactly the same. The spice mix too is different, the food is more spicy than the Indian cuisine as pepper and cinnamon are abundantly used. But, the bottom line is Indian cuisine is quite similar to it. An Indian in Ceylon will be happy with the food that he get there. 

    Srilankan cuisine has many kind of rice based dishes and hoppers . It is mostly served with a coconut milk based curry. I am yet to explore this cuisine, for now I have tried two side dishes, both were good. 

    About the event :

    Narmadha of Nams Corner suggested Sri Lankan cuisine for the month of August. Thanks to Narmadha, I would not have explored this cuisine. She has many dishes on her blog, I have bookmarked her kallu dodol recipe to make it soon.  I was paired with Preethi, she gave me currry leaf and green chilli, I have made this dish. I gave Preethi, mustard seeds and fennel, she has made flavoursome spice mix used in Srilankan cuisine.

    I have adapted the recipe from here.


    shhh cooking secretly


    About the green bean stir fry:

    When I was looking for the dishes to prepare, I had so many in mind. Finally, I decided to make Beans Stir Fry as my family loves the  humble vegetable. The ingredients needed are easily available and the cooking is done quickly if you outsource the coconut milk. Here, I made fresh coconut milk for the dish.. It paired well with chapathi. Let us look at the recipe beans curry in coconut milk


    What goes in Srilankan Green Bean Curry ?

    • Beans : Cut them into two inch long pieces with a diagonal at the end. You will need 150 grams of beans.
    • Coconut milk : You need the thick coconut milk. To extract coconut milk, soak one cup of fresh  grated coconut in hot water for half an hour. Later, grind it and sieve the mixture. The mixture can be pounded again and extracted. The second  extract can be used for any other dish. This is the thick coconut milk. Alternatively, you can use store bought coconut milk. 
    • Onion: Cut it into small pieces.
    • Oil : Any cooking oil will do.
    • Green Chilli
    • Turmeric powder 
    • Salt 
    • Water
    Print Recipe
    a bowl of srilankan green bean curry
    Evergreendishesdev

    Srilankan Green Bean Curry

    Srilankan green bean curry is a tasty side dish cooked in coconut milk. It makes a good accompaniment with chapathi or steamed rice.
    Prep Time 20 minutes
    Cook Time 15 minutes
    Total Time 35 minutes
    Servings: 4 people
    Course: dinner ideas, lunch
    Cuisine: srilanka cuisine

    Ingredients
      

    • 100 ml thick coconut milk (
    • 2 teaspoon oil
    • 1 onion
    • 3 green chilli
    • a few curry leaves
    • 1/4 teaspoon turmeric powder
    • 150 grams beans
    • 75 ml water +100 ml
    • salt

    Equipment

    • 1 pan
    • 1 knife
    • 1 chopping board
    • 2 bowls
    • 1 serving spoon
    • 1 lid cover

    Method
     

    1. To extract coconut milk, soak one cup of fresh  grated coconut in hot water for half an hour. Later, grind it and sieve the mixture. This is the thick coconut milk.
    2. Cut the onion into small pieces.
    3. Cut the beans into two inch long pieces.
    4. Heat oil in a pan, add onion pieces to it. Saute it for some time until it turns pink in colour
    5. Add green chilli and curry leaves to it.
    6. Add the beans, give a stir. Allow to cook for sometime.
    7. Put turmeric powder, salt and water in it.
    8. After two minutes, put the coconut milk.
    9. Cover and cook for two minutes.
    10. Green beans curry is ready to serve.

    Notes

    If you are extracting at home, use only the thick coconut milk. Repeat it second time and use it for any other dish. The milk can be stored in the refrigerator for a day.
    The beans are cut long with a diagonal at the end. 

    Pin it for later : 

    a bowl of srilankan green bean stir fry
    Srilankan green bean stir fry

    If you ever make Srilankan Green Bean Curry, do take a picture and share with me by tagging @foodiejayashree on Instagram or @evergreendishes on Facebook. Subscribe to get all updates and an e-book for free.

  • Amaranth leaves Stir Fry | Rajgiri Soppu Palya

    Amaranth leaves Stir Fry | Rajgiri Soppu Palya

    Jump to Recipe Print Recipe

    Amaranth leaves stir fry is a simple, tasty and healthy side dish from Karnataka. It is ideal to serve with chapathi or jowar roti. 

    Amaranth leaves are not so popular as spinach. It is regularly used in daily cooking by one sect of people here. While the other section have a dislike and few have never used it. 

    In Kannada, it is called as Dantina Palya or Harive Soppu . It is commonly known as Chaulai or Rajgira. The leaves are green or red  with a moderate stem depending on the region they are grown. One needs to include more of it as it is a good source of Vitamin A, C and K.  It is also rich in fiber, iron, magnesium and. phosphorous. It is often given to lactating mothers. It is versatile to use, one can use it in stir fry, dal and stew. Cook it with tur dal and it turns out a good accompaniment with steamed rice. Use a good quantity of fresh leaves to make a delectable chutney. In North India, it is made as a saag. 

    Today, I am sharing a healthy stir fry using amaranth leaves. I have hardly shared any stir fry with greens here. You can use either the red or the green coloured leaves for this stir fry. You may add a few cloves of garlic if you like along with onion. Fresh coconut can also be added to it. Amaranth leaves stir fry, spicy chutney, a mixed dal  and chapathi make a good meal. 

    Amaranth leaves stir fry
    Amaranth leaves stir fry

    What goes in the stir fry ?

    Amaranth leaves :Separate the amaranth  leaves from the stalk. You may use the stalk if it is tender. It will eventually get cooked. You can use either the red amaranth or the regular one. The green leaf vegetable reduces considerably on cooking. 

    Onion : Cut them into medium size pieces. 

    Oil : You can use any oil ideal for cooking. 

    Mustard seed : Any south indian cooking starts with a dash of mustard seeds. The spluttering also indicates the temperature of the oil is right for cooking.

    Asafoetida : Just a small pinch of asafoetida, lends a good aroma to the dish.

    Turmeric powder : It has anti-bacterial properties. 

    Chilli powder: The quantity of chilli powder depends on how much spicy it is.

    Fresh Coconut : South Indian cooking is incomplete without the addition of fresh grated coconut. It is optional, serve it just like that. I have it sans coconut.

    How to wash green leafy vegetables? 

    The question often arises if we should wash and then cut the leafy vegetables or the other way round. Very often, it is suggested to first wash them thoroughly  and then cut the leaves as the nutrients are lost in the process. However, most of us tend to cut the green leaf and then wash it.


    Amaranth leaves stir fry
    Evergreendishesdev

    Amaranth leaves Stir Fry | Rajgiri Soppu Palya

    Amaranth leaves stir fry is a simple, tasty and healthy sidde dish. It is ideal to pair with jowar roti or chapathi.
    Prep Time 10 minutes
    Cook Time 10 minutes
    Total Time 20 minutes
    Course: dinner, lunch ideas
    Cuisine: Indian, karnataka

    Ingredients
      

    • 1 tablespoon oil
    • 1/2 teaspoon mustard seed
    • 1/4 teaspoon turmeric powder
    • a pinch of asafoetida
    • 1 big onion
    • 2 bunch rajgiri soppu / amaranth leaves
    • salt to taste

    Method
     

    1. Separate the leaves from the stalk. Cut them and wash a couple of times in water to remove the grime.
    2. Cut the onion.
    3. Take oil in a pan, add mustard seeds. As it splutters, sprinkle a little asafoetida and turmeric powder. Tip in the onions. Saute for sometime.
    4. In the meantime, remove the amaranth leaves and put them in a colander.
    5. Once the onion is pink in colour, put the amaranth leaves and salt. Mix and let cook for two minutes.
    6. Once the water has evaporated, add chilli powder
    7. Fresh grated coconut may be added. Amaranth leaves stir fry is ready to serve.

    Notes

    1. Two cloves of garlic may be added along with onion.
    2. It can be garnished with fresh grated coconut.

    Pin it for later: 

    Amaranth leaves stir fry is a simple, tasty and healthy side dish from Karnataka. It pairs well with  chapathi or jowar roti. Give a try to this version of amaranth leaves stir fry. Check out the post to know the other names for this green leaf.  #healthycooking #sidedish
    Amaranth leaves stir fry

    If you ever make this recipe,  do take a picture and tag @foodiejayashree on Instagram or @evergreendishes on Facebook or Twitter. I will be glad to see your creation and share it further.   

    Subscribe to get all updates and an e-book for free. Check out my e-books on Amazon.  Happy Cooking !

  • Aloo Mangodi Ki Sabzi | Potato and Dried  lentil nuggets stir fry

    Aloo Mangodi Ki Sabzi | Potato and Dried lentil nuggets stir fry

    Jump to Recipe Print Recipe

    Aloo Mangodi ki Sabzi is a popular Rajasthani dish. It is ideal to pair with steamed rice or chapati. It is a semi-dry side dish made using dried nuggets and potato. 

    What is Mangodi ?


    Mangodi is a dried lentil nugget used in dry lands of Rajasthan. It is usually made of moong or urad dal. The people of Rajasthan make these and store them at home. They use them regularly in cooking sabzis and other dishes. They make a good replacement when vegetables are not easily available during summer.

    The lentil is soaked for a couple of hours, it is then made into a paste, seasoned with some spices and it is spread on a sheet in the sun for a couple of days. They are stored and used as and when required.

    The first time I had mangodi ki sabzi was  at a Rajasthani city like entertainment place made here. Later, it was during my Jaipur trip I found it commonly in the thali meals.  A few months back, while shopping online, I found these ready made mangodis  and bought a packet of them to try at home.

    How to use Mangodi ?

    Mangodi can be used in stir fry, curries and pulaos. It is ideal to use in curries along with other vegetables. Here, mangodi is fried in oil to a golden colour. Later, it is cooked along with the potato pieces. They may be crushed and added. As the one I have are small in size, I just added them.

    Alu Mangodi Ki
    Alu Mangodu ki sabzi

    What goes in the Aloo Mangodi Sabzi ?

    • Potato : It is one of the the essentials in making the sabzi.
    • Mangodi : Mangodi is available in the super market. It is ideal to store a packet ot it as it is useful when we do not have any vegetables
    • Onion
    • Oil : Any neutral oil is ideal.
    • Ginger garlic paste : It can be made in a small quantity using the small jar.
    • Cumin 
    • Chilli powder: If the chilli powder is too spicy, be mindful while using it.
    • Coriander powder: You can use a good quality one from the market. Store it in a tight container.
    • Salt 

    Can I make mangodi at home?

    Yes, you can make it during the summer time. It is a regular affair in Rajasthan to make it during summer.  Moong dal is soaked overnight. It is then made into a paste with very little water. To the batter, salt is added and well beaten for sometime. It is then put as small droplets on a tray and dried in the sun for two or three days. It is then stored and used as required.


    Print Recipe

    Aloo Mangodi ki Sabji

    Aloo Mangodi ki sabzi is a popular side dish from Rajasthani cuisine.
    Prep Time 15 minutes
    Cook Time 15 minutes
    Total Time 30 minutes
    Course: Breakfast, dinner, lunch
    Cuisine: Indian, rajasthani,

    Ingredients
      

    • 4 potatoes
    • 2 onions
    • 1/2 cup mangodi
    • 2 tablespoon oil
    • 1/2 teaspoon cumin
    • 1/2 teaspoon ginger garlic paste
    • 1 teaspoon chilli powder
    • 1.5 teaspoon coriander powder
    • salt to taste

    Method
     

    1. Wash, peel the skin and cut the potato into cubes.
    2. Cut onions and keep them aside.
    3. Make a paste of ginger and garlic.
    4. Take oil in a pan, add mangodi and shallow fry them Once they are golden in colour, remove and put them aside.
    5. Now, add cumin, as it splutters put onion to it. Saute for a few seconds. Put the ginger garlic paste to it and continue to saute for sometime.
    6. Add potato pieces and fried mangodi pieces to it. Let cook for sometime. You may add salt at this stage.
    7. Once the potato pieces are cooked, add chillo powder and coriander powder to it.
    8. Finally, garnish with coriander leaves .
    9. Aloo Mangodi Sabji is ready to serve.

    Pin it for later:

    Aloo Mangodi ki Sabzi is a popular side dish from Rajasthani cuisine. It is a semi-dry preparation ideal to pair with chapathi.
    Aloo Mangodi ki Sabzi


    If you ever make this Aloo Mangodi ki Sabzi,  do take a picture and tag @foodiejayashree on Instagram or @evergreendishes on Facebook or Twitter. I will be glad to see your creation and share it further. Let’s be connected, do follow on social media platforms. Until next time, let’s stay connected.  Subscribe to get all updates and an e-book for free. Check out my e-books on Amazon.  Happy Cooking !

  • Chana dal chutney | how to make bengal gram chutney

    Chana dal chutney | how to make bengal gram chutney

    Jump to Recipe Print Recipe

    Chana Dal chutney makes a good accompaniment with idli, dosa, gundapongal and even hot, steamed rice. Bengal gram chutney is easy to prepare. A few ingredients from the pantry, a little of your time and your chutney is ready.

    What is chutney ?

    Chutney is an integral part of lunch/ thali  in Indian cuisine. It is one of the essentials in any South Indian home as the breakfast mainly comprises of idli and dosa. Chutney is an accompaniment made by roasting chilli, coconut, along with lentil or vegetables and a few other substances with a seasoning over it.  It is spicy and makes a good accompaniment with any meal.

    Different kind of chutney

    Different varieties of chutney are prepared as the need for different dishes arises each day. Making a chutney is less cumbersome. It make a good accompaniment with hot steamed rice and a dollop of ghee. Using peels of vegetables to make a chutney  conserves the waste. One is not deprived of the nutrients that are usually lost by throwing in garbage. I have shared orange peel chutney and ridge gourd chutney earlier.

    The other chutney variety shared earlier are raw tomato chutney, sonth chutney,  green chutney,  gongura chutney, mint chutney

    Today, I am sharing a chutney made using Chana Dal. Bengal gram chutney pairs well with idli, dosa or gundapongal. One can use it with hot steamed rice too. It is quite common in many parts of Karnataka to eat chutney and rice.


    bengal gram chutney
    bengal gram chutney

    Bengal gram chutney recipe:

    Ingredients:

    • 1+1  teaspoon oil
    • 4 red chilli
    • 2 tablespoon bengal gram
    • a few curry leaves
    • 1 table spoon coconut
    • 1onion
    • 1 tomato
    • little coriander
    • tamarind
    • salt

    For seasoning:

    • 1 teaspoon oil
    • 1/2 teaspoon mustard seed
    • a little asafoetida
    • a little turmeric powder

    Method:

    • Take a little oil in a pan, roast bengal gram, put it aside. Next add  red chilli and curry leaves, once they are crisp, put them aside.
    • Add a little oil, saute the onion. Once they are translucent, add tomato to it. Once it is soft, add coriander to it. Saute for a minute, let it cool.
    • At first, grind the lentil and green chilli. Now, put the cooked onion and tomato and pulse.
    • Finally, add salt and tamarind to it, give a final pulse.
    • Put the chutney in a bowl.
    • Make seasoning, pour it over the chutney and serve.

      About the group:

      This post is part of Shhh Secret Cooking Group. Priya Vijayakrishnan suggested the theme.as Chutney.  I liked her kunukku paniyaram and bookmarked it to try. She is also my partner for this month and the secret ingredients given are curry leaves and tamarind. I gave urad dal and turmeric, she has made raw mango chutney, known as mango thogayal.

    shhh cooking secretly

    Bengal gram chutney

    Bengal gram chutney is tasty and makes a good accompaniment with rice, idly or dosa.

    Ingredients
      

    • 1 +1 teaspoon oil
    • 4 red chilli
    • 2 tablespoon bengal gram
    • a few curry leaves
    • 1 table spoon coconut
    • 1 onion
    • 1 to mato
    • little coriander
    • tamarind
    • salt
    • For seasoning:
    • 1 teaspoon oil
    • 1/2 teaspoon mustard seed
    • a little asafoetida
    • a little turmeric powder

    Method
     

    1. Take a little oil in a pan, roast bengal gram, put it aside. Next add  red chilli and curry leaves, once they are crisp, put them aside.
    2. Add a little oil, saute the onion. Once they are translucent, add tomato to it. Once it is soft, add coriander to it. Saute for a minute, let it cool.
    3. At first, grind the lentil and green chilli. Now, put the cooked onion and tomato and pulse.
    4. Finally, add salt and tamarind to it, give a final pulse.
    5. Put the chutney in a bowl.
    6. Make seasoning, pour it over the chutney and serve.

    Pin Chana Dal Chutney to your food board:

    Bengal gram chutney is another kind of chutney using lentil, red chilli and coconut. It is ideal to use with idli, dosa or steamed rice.
    Bengal gram chutney


  • Tuvar and Capsicum Masala

    Tuvar and Capsicum Masala

    Jump to Recipe Print Recipe

    Tuvar and Capsicum Masala is a winter treat, ideal to pair with chapati or phulka. It is vegan and gluten-free. It makes a good side dish for lunch, brunch or dinner.

    Tuvar lilva or fresh pigeon peas in a winter crop, it is commonly used in Gujarati households to make a variety of dishes. I love using it to make a curry. I also make a kachori but it has not made to the blog yet.

    Tuvar lilva is the fresh form which is later dried to make lentil we consume daily to make dal.

    Today, before I proceed further I want to discuss the difference between vegan and vegetarian.

    What is Vegan diet?

    Vegan is a type of vegetarian diet which  excludes dairy products, eggs, meat and any other animal derived ingredient. These include gelatin, honey, casein, pepsin, carnine, whey, carmine   Thus vegans use substitutes as almond milk, soy milk .

    Difference between vegetarian and vegans

    Vegetarians and vegans differ in their beliefs regarding the use of animal products. Vegetarians consume animal- derived products such as milk and curd but vegans avoid them totally. They use other form of substitutes.

    What are the different kind of milk substitutes for vegans.

    The most widely used non-dairy milks are hazelnut, cashew, soy, almond, oat and even hemp. Different kind of nuts can be used by soaking overnight, blending and straining. These are good substitutes to use in cooking also.


    tuvar and capsicum masala
    tuvar and capsicum masala

    Let’s  get to the recipe of Tuvar and Capsicum Masala

    Ingredients:
    • 1 cup tuvar
    • 8 cashew
    • 1 tablespoon oil
    • 1/2 teaspoon cumin
    • 1 capsicum
    • salt to taste
    • little kasuri methi


    Onion Paste:
    • 1 onion


    Masala paste:
    • 3 tomato
    • 4 cloves garlic
    • 5 green chilli
    • 1/2 bunch coriander
    • 2 cloves
    • 2 cardamom

    Method:

    • Boil tuvar along with cashew pieces. A pinch of salt may be added to it.
    • Make onion paste and keep it aside.
    • Blanch the tomatoes. Once it is cool, make a paste with the listed ingredients under “Masala Paste”.
    • Cut capsicum into small pieces.
    • Take oil in a pan, add cumin. As it splutters, put the onion paste. Saute it for a minute, now throw in the capsicum pieces. Continue to saute for sometime.
    • Now, add the masala paste to it and saute it. Let cook for sometime.
    • Add the cooked tuvar  along with the water in it.
    • Add salt. Adjust the consistency of the gravy.
    • Finally, sprinkle kasuri methi to it. Let the flavours imbibe for two minutes.
    • Tuvar and capsicum masala is ready to serve.

    Take a tip:

    • Boil the cashew with tuvar, it gives a good taste to the curry. The bland taste of tuvar is changed.
    • Kasuri methi is dried fenugreek leaves, available in any super market. It gives a good aroma to the dish.
    • Reduce the number of green chilli if you want it less spicy.
    • Smaller and dark coloured capsicum are spicy while the larger and light coloured are perfect for using in curries.

    Tuvar and Capsicum Masala

    uvar and capsicum masala makes a tasty side dish with chapati or phulka. It is vegan and gluten-free.

    Ingredients
      

    • 1 cup tuvar
    • 8 cashew
    • 1 tablespoon oil
    • 1/2 teaspoon cumin
    • 1 capsicum
    • salt to taste
    • little kasuri methi
    • Onion Paste:
    • 1 onion
    • Masala paste:
    • 3 to mato
    • 4 cloves garlic
    • 5 green chilli
    • 1/2 bunch coriander
    • 2 cloves
    • 2 cardamom

    Method
     

    1. Boil tuvar along with cashew pieces. A pinch of salt may be added to it.
    2. Make onion paste and keep it aside.
    3. Blanch the tomatoes. Once it is cool, make a paste with the listed ingredients under “Masala Paste”.
    4. Cut capsicum into small pieces.
    5. Take oil in a pan, add cumin. As it splutters, put the onion paste. Saute it for a minute, now throw in the capsicum pieces. Continue to saute for sometime.
    6. Now, add the masala paste to it and saute it. Let cook for sometime.
    7. Add the cooked tuvar  along with the water in it.
    8. Add salt. Adjust the consistency of the gravy.
    9. Finally, sprinkle kasuri methi to it. Let the flavours imbibe for two minutes.
    10. Tuvar and capsicum masala is ready to serve.

    Pin it for later:

    Tuvar and capsicum masala makes a good accompaniment with any Indian flat bread. It is vegan and gluten free.
    Tuvar and Capsicum Masala

    About the event :

    Sending this to Veganuary month at Foodies+Bloggers Community on Facebook.  A few more vegan recipes from my blogger friends.


    If you ever make this recipe, take a picture and share it by tagging @foodiejayashree on Instagram or @evergreendishes on Facebook. I will be glad to see and share your creation further.
    Check out my e-books on Amazon. Do not miss any post, subscribe to get all updates and an e-book for free !

  • Vegetable Pulav Recipe

    Vegetable Pulav Recipe

    Vegetable  Pulav is flavoursome and ideal for weekend lunch. The freshness of mint and coconut gives a good taste to this variety of pulao. 

    Usually Sundays call for something different and I end up making a variety of pulav. These folks come leisurely for breakfast on Sunday, have a good breakfast and never hungry till late afternoon.

    Pulav / Pulao is filling, tasty and usually loved by children. Being a one pot meal, it is easy to prepare. It can be paired with a curry or any yoghurt based salad.

    I have earlier shared many different kinds of rice This one is different in the ingredients used for the masala. The coconut and the freshness of mint gives a good taste to it.

    How do I  cook pulav? 

    Pulav can be cooked in instant pot, pressure cooker or even directly in a thick bottom pan.

    Which method of cooking pulav is the best?

    In todays busy world, instant pot is a saver. But, if you do not have one, you can cook it directly on a moderate heat. Pressure cooker may be used but I find that the pulav is slightly smudgy.

    What are the other kind of pulav recipes that I can make?

    The other kind of pulav are mint pulav, kadai pulav, soya chunks pulav, vegetable pulao and tri-coloured pulao 

    Veg Pulav

    Vegetable  Pulav Recipe

    Ingredients:

    • 1 cup basmati
    • 2 onion
    • vegetables (beans, carrot, capsicum)
    • 2 tbsp oil
    • 1/2 teaspoon cumin
    • 1 bay leaf
    • water
    • salt

    To be ground to a paste:

    • 20 mint leaves
    • 2 green chilli
    • 1 tablespoon fresh coconut
    • 2 cardamom
    • 3 clove
    • 5 pepper corns
    • 4 cloves of garlic

    Method:

    1. Rinse the rice and keep it aside for fifteen minutes.
    2. Cut the vegetables into small pieces.
    3. Grind the ingredients mentioned together for paste.
    4. Take oil in a pressure pan. Add cumin and bay leaf to it. Once it splutters, put the onion to it. Saute for sometime.
    5. Add beans, saute it. After a minute, throw in the carrot pieces. Later, add capsicum to it and continue to saute.
    6. Put the ground paste and saute for three minutes.
    7. Add rice to it and saute for a minute.
    8. Put water and salt, give a stir.
    9. Close a lid and allow to cook on low flame.
    10. Once it done, fluff it slowly and serve after ten minutes with any curry or salad.

    Take a tip:

    • You can use other vegetables and green peas. I have not used here.
    • The spiciness was moderate, use more green chillies if needed.


    Veg pulav

    Veg Pulav is flavoursome and ideal for weekend lunch. Pair it with any yoghurt based salad.
    Prep Time 10 minutes
    Cook Time 15 minutes
    10 minutes
    Total Time 35 minutes
    Course: dinner, lunch ideas, Main Course
    Cuisine: Indian

    Ingredients
      

    • 1 cup basmati
    • 2 onion
    • vegetables beans, carrot, capsicum
    • 2 tbsp oil
    • 1/2 teaspoon cumin
    • 1 bay leaf
    • water
    • salt
    • To be ground to a paste:
    • 20 mint leaves
    • 2 green chilli
    • 1 tablespoon fresh coconut
    • 2 cardamom
    • 3 clove
    • 5 pepper corns
    • 4 cloves of garlic

    Method
     

    1. Rinse the rice and keep it aside for fifteen minutes.
    2. Cut the vegetables into small pieces.
    3. Grind the ingredients mentioned together for paste.
    4. Take oil in a pressure pan. Add cumin and bay leaf to it. Once it splutters, put the onion to it. Saute for sometime.
    5. Add beans, saute it. After a minute, throw in the carrot pieces. Later, add capsicum to it and continue to saute.
    6. Put the ground paste and saute for three minutes.
    7. Add rice to it and saute for a minute.
    8. Put water and salt, give a stir.
    9. Close a lid and allow to cook on low flame.
    10. Once it done, fluff it slowly and serve after ten minutes with any curry or salad.

    Notes

    You can use other vegetables and green peas. I have not used here.
    The spiciness was moderate, use more green chillies if needed. 

    Veg Pulao is flavoursome and ideal for weekend lunch. The freshness of mint and coconut gives a good taste to this variety of pulao. 
    veg pulav

    If you ever make any of these recipes, take a picture and share it by tagging @foodiejayashree on Instagram or @evergreendishes on Facebook. I will be glad to see and share your creation further.
    Check out my e-books on Amazon. Do not miss any post, subscribe to get all updates and an e-book for free !

  • Millet Pulao / Foxtail millet Pulao

    Millet Pulao / Foxtail millet Pulao

    Jump to Recipe Print Recipe

    Millet Pulao / Foxtail millet pulao is healthy, filling and tasty. It is ideal to serve for lunch or dinner.

    Foxtail millet is widely used in India and Asian countries. It is known as Navane in Kannada, korralu  or korra in Telugu, Kangni in Hindi, kang in Gujarati and Marathi,  Kaon Dana in Bengali and Kavalai in Tamil.

    It is an annual grass with slim and vertical leaves.The small seeds are covered with a thin, papery hull. It is removed by threshing. This is the highest grown millet in Asia and second widely used.

    Millets are ideal for all those who are conscious about their eating habits, it keeps a check on the weight.  It is diabetic friendly as it helps to regulate blood sugar levels. It is gluten-free. It is also good against heart ailments.

    Since I am using millets regularly, here is a millets pulao recipe that you can make for lunch or dinner. It is vegan and gluten-free.

    millet pulao / foxtail millet pulao
    Foxtail millet pulao is healthy and tasty.

    Children are used to eating the regular food, including millets required me to change it into something spicy for lunch, so I thought of making pulao with it.

    Ingredients:

    measurement used : 1 cup =150 ml

    • 1 cup foxtail millet
    • 1/2 cup mixed vegetable
    • 1 tablespoon oil
    • 1/2 teaspoon cumin
    • 1 bay leaf
    • 2 cardamom
    • 3 clove
    • 1/2 teaspoon ginger garlic paste
    • salt
    • 1/2 teaspoon chilli powder
    • 3 cup water

    Method:

    1. Clean, wash and soak the millet for half an hour.
    2. Chop and cut the vegetables.
    3. Take oil in a pan, add cumin, as it splutters, put the spices. Then put onion to it. Saute it for sometime. Add ginger-garlic paste to it and contiue to saute for sometime. The raw smell should go.
    4. Now, add the veggies to it. Mix them together.
    5. After sometime, put the soaked millet to it.
    6. Add water, chilli powder and salt to it. Stir it. Let it cook on a medium flame.
    7. Keep it covered for ten minutes.
    8. Serve with any curry or yoghurt based salad.

    millet pulao / foxtail millet pulao

    Millet Pulao / Foxtail Millet Pulao

    5 from 6 votes
    Millet Pulao is filling, packed with nutrients and tasty.
    Course: dinner, lunch
    Cuisine: karnataka, South Indian

    Ingredients
      

    • 1 cup foxtail millet
    • 1/2 cup mixed vegetable
    • 1 tablespoon oil
    • 1/2 teaspoon cumin
    • 1 bay leaf
    • 2 cardamom
    • 3 clove
    • 1/2 teaspoon ginger garlic paste
    • salt
    • 1/2 tsp chilli powder
    • 3 cup water

    Method
     

    1. Clean, wash and soak the millet for half an hour.
    2. Chop and cut the vegetables.
    3. Take oil in a pan, add cumin, as it splutters, put the spices. Then put onion to it. Saute it for sometime. Add ginger-garlic paste to it and contiue to saute for sometime. The raw smell should go.
    4. Now, add the veggies to it. Mix them together.
    5. After sometime, put the soaked millet to it.
    6. Add water and salt to it. Stir it. Let it cook on a medium, flame.
    7. Keep it covered for sometime.
    8. Serve with any curry or yoghurt based salad.

    Narmadha makes a foxtail sweet porridge ideal for children.Priya makes a sweet dish with this   Thinal Sarkarai Pongal while Kalyani, makes a spicy version Thinai Khara Pongal.

    Pin it for later :

    Millet pulao / Foxtail Millet Pulao is filling, packed with nutrients and tasty. It is ideal to serve for lunch or dinner.
    Millet Pulao / Foxtail Millet Pulao

    If you have liked this Foxtail Millet Pulao recipe, do share it with your family and friends. If you ever make it, take a picture and share it by tagging @foodiejayashree on Instagram or @evergreendishes on Facebook or Twitter.

  • Kala Chana Salad | Black Chickpea Salad | Kala Chana Chaat

    Kala Chana Salad | Black Chickpea Salad | Kala Chana Chaat

    Jump to Recipe Print Recipe

    Kala Chana Salad is a tasty and healthy salad. It is an easy to make snack for the evenings. It is vegan and gluten-free.

    Some days are a bit dull, we feel bored to cook but need something tasty on the platter. This salad comes handy, it can be assembled with just a handful of ingredients. It is ideal to serve as a light snack too.

    Nutrition:

    Kala Chana is rich in proteins and fibre. It also contains carbohydrates, vitamins like B6, C, folate and minerals such as magnesium, iron, copper and phosphorous.

    Benefits of Kala Chana

    1. It is a good source of proteins for vegetarians.
    2. It is diabetic friendly. It helps to keep the blood sugar levels balanced throughout the day.
    3. It helps in weight loss. Roasted chana provides a good amount of fibre and protein. It keeps satiated for a longer period.
    4. The iron content in it helps to prevent anaemia and boosts the energy levels.
    5. The fibre helps in reducing the constipation disorders.

    Uses :

    1. It can be used in numerous ways, as for breakfast, with chapati  to make delicious dhaba style kala chana or  a simple, no onion garlic sundal for fasting days.

    About the event:

    Sending this to theme”Salads” at Shhhh Secretly Cooking Challenge. It is a monthly event, theme is suggested by a member, members are paired and work with the secret ingredients given. The theme was suggested by Kalyani, a talented blogger. I loved her  Barley Summer Salad and Onion Sesame Pull Apart Bread . I was paired with an old friend and wonderful blogger Shobana Vijay, she gave me black chickpea and lemon juice as the secret ingredients and I have prepared this one. We enjoyed this salad, it makes a good snack too. I had given Shobha, salt and raw mango as the ingredients and she made the healthy  Sprouted Moth Salad. I loved her recently published  chocolate almond cake, looks so delicious.

    shhh cooking secretly

    Kala  Chana Salad / Black Chick Pea Salad

    Ingredients:

    • 1 bowl black chana
    • 1 onion
    • 1 tomato
    • 1 cucumber
    • salt to taste
    • 1/2 lemon
    • 1/2 teaspoon pepper powder

    Method:

    1. Wash and soak them overnight.
    2. Next day, discard the water, wash and cook with fresh water in a pressure cooker. Let the pressure release by itself.
    3. Cut onion, tomato and cucumber finely.
    4. Drain the water and keep it aside.
    5. In a wide bowl put the boiled chana. Add the vegetables, salt and pepper powder.
    6. Add lemon juice.
    7. Garnish with fresh chopped coriander.

    Kala Chana Salad

    Black Chana Salad is tasty and healthy, ideal to serve as a snack also.

    Ingredients
      

    • 1 bowl black chana
    • 1 onion
    • 1 to mato
    • 1 cucumber
    • salt to taste
    • 1/2 lemon
    • 1/2 teaspoon pepper powder

    Method
     

    1. Wash and soak them overnight.
    2. Next day, discard the water, wash and cook with fresh water in a pressure cooker. Let the pressure release by itself.
    3. Cut onion, tomato and cucumber finely.
    4. Drain the water and keep it aside.
    5. In a wide bowl put the boiled chana. Add the vegetables, salt and pepper powder.
    6. Add lemon juice.
    7. Garnish with fresh chopped coriander.

    Notes

    • The boiled water can be used in soups. 

    Pin it for later :

    Kala Chana Salad is a tasty and healthy salad. It is an easy to make snack for the evenings. Give a try to this recipe.
    Black Chana Salad / Chick pea salad

    If you have liked this post, do share it with your family and friends. If you ever make this, take a picture and share it by tagging @foodiejayashree on Instagram or @evergreendishes on Facebook or Twitter.

    Let’s be connected, the follow buttons are on the side bar. Subscribe to get all updates and an e-book for free!

  • Peanut Curd / Vegan Curd

    Peanut Curd / Vegan Curd

    Jump to Recipe Print Recipe

    Peanut Curd is a vegan curd made using peanuts. It is tasty and ideal to use regularly.

    Many people are adopting veganism, it is refraining from eating or using any animal product. It is a kind of vegetarian diet that excludes meat, eggs, dairy products and all other animal derived ingredients.  Alternative products used by vegans are almond milk, soy milk, cashew milk, peanut and rice milk. Today, more and more people are adopting vegan diet.

    I am neither a vegan nor have changed myself into one. When I saw this peanut curd posted by friend Poornima, I wanted to try it. It was the first time I heard about it and I really wanted to see how it tasted.

    peanut curd
    peanut curd

    Peanut curd is different in taste but surprisingly looks like our own kind. It has the nutty taste in it and those who like peanuts will surely like it.

    It involves the soaking, grinding, boiling, sieving and setting of curd. Let us look into it in depth.

    peanut curd
    peanut curd


    About the event:

    Sending this to our fortnightly event “Go Nits For Nuts” at Healthy Wellthy Cuisines, the theme is Peanuts, it was suggested by me. The other peanut recipes by my co-bloggers are


    Peanut Curd

    Ingredients:

    • 1 cup peanut
    • 2 cup water
    •  pro-biotic powder / vegan curd / regular curd for non-vegans

    Method:

    1. Wash and soak the peanut for atleast six hours.
    2. Remove the water, wash it. Put it in a jar along with water and grind it to a fine paste.
    3. Remove it in a thick bottom bowl. Add a glass of water and bring it to a boil it on a medium flame.  Keep stirring it. Once it begins to boil, put it aside to cool.
    4. Filter it through a muslin cloth.
    5. Put a little curd and keep it to set in a warm place.
    6. Peanut curd will be ready in a few hours.

    Take a tip:

    • Vegans should  use pro-biotic powder or vegan curd that you have.
    • Even green chillies with crown can be used to set it.
    • If you are allergic to peanuts, kindly do not try this recipe.

    Peanut Curd

    Peanut Curd is a vegan curd made using peanuts. It is ideal for those who do not eat any animal produce.
    Prep Time 10 minutes
    Cook Time 15 minutes
    Setting time 4 hours
    Course: vegan
    Cuisine: international

    Ingredients
      

    • 1 cup peanut
    • 2 cup water
    • a little vegan curd / pro-biotic powder / a little curd for non-vegans

    Method
     

    1. Wash and soak the peanut for atleast six hours.
    2. Remove the water, wash it. Put it in a jar along with water and grind it to a fine paste.
    3. Remove it in a thick bottom bowl. Add a glass of water and bring it to a boil it on a medium flame.  Keep stirring it. Once it begins to boil, put it aside to cool.
    4. Filter it through a muslin cloth.
    5. Put a little curd and keep it to set in a warm place.
    6. Peanut curd will be ready in a few hours.

    Notes

    • If you are a vegan use  pro-biotic powder or vegan curd that you have.
    • Even green chillies with crown are used to set, but I have not tried it. 
    • If you are allergic to peanuts, do not try this recipe. 

    This curd is ideal substitute to the normal curd. I used it in curds rice too.

    Well, if you have liked this post, do share it further.

    Pin it for later:

    Peanut Curd is a vegan curd made using peanuts. It is tasty and ideal to use regularly.
    Peanut Curd

    If you have liked this post, do share it with your family and friends. If you ever make this, take a picture and share it by tagging @foodiejayashree on Instagram or @evergreendishes on Facebook or Twitter.

    Let’s be connected, the follow buttons are on the side bar. Subscribe to get all updates and an e-book for free!