Category: vegan

  • Moongdal payasam, mangalore style

    Moongdal payasam, mangalore style

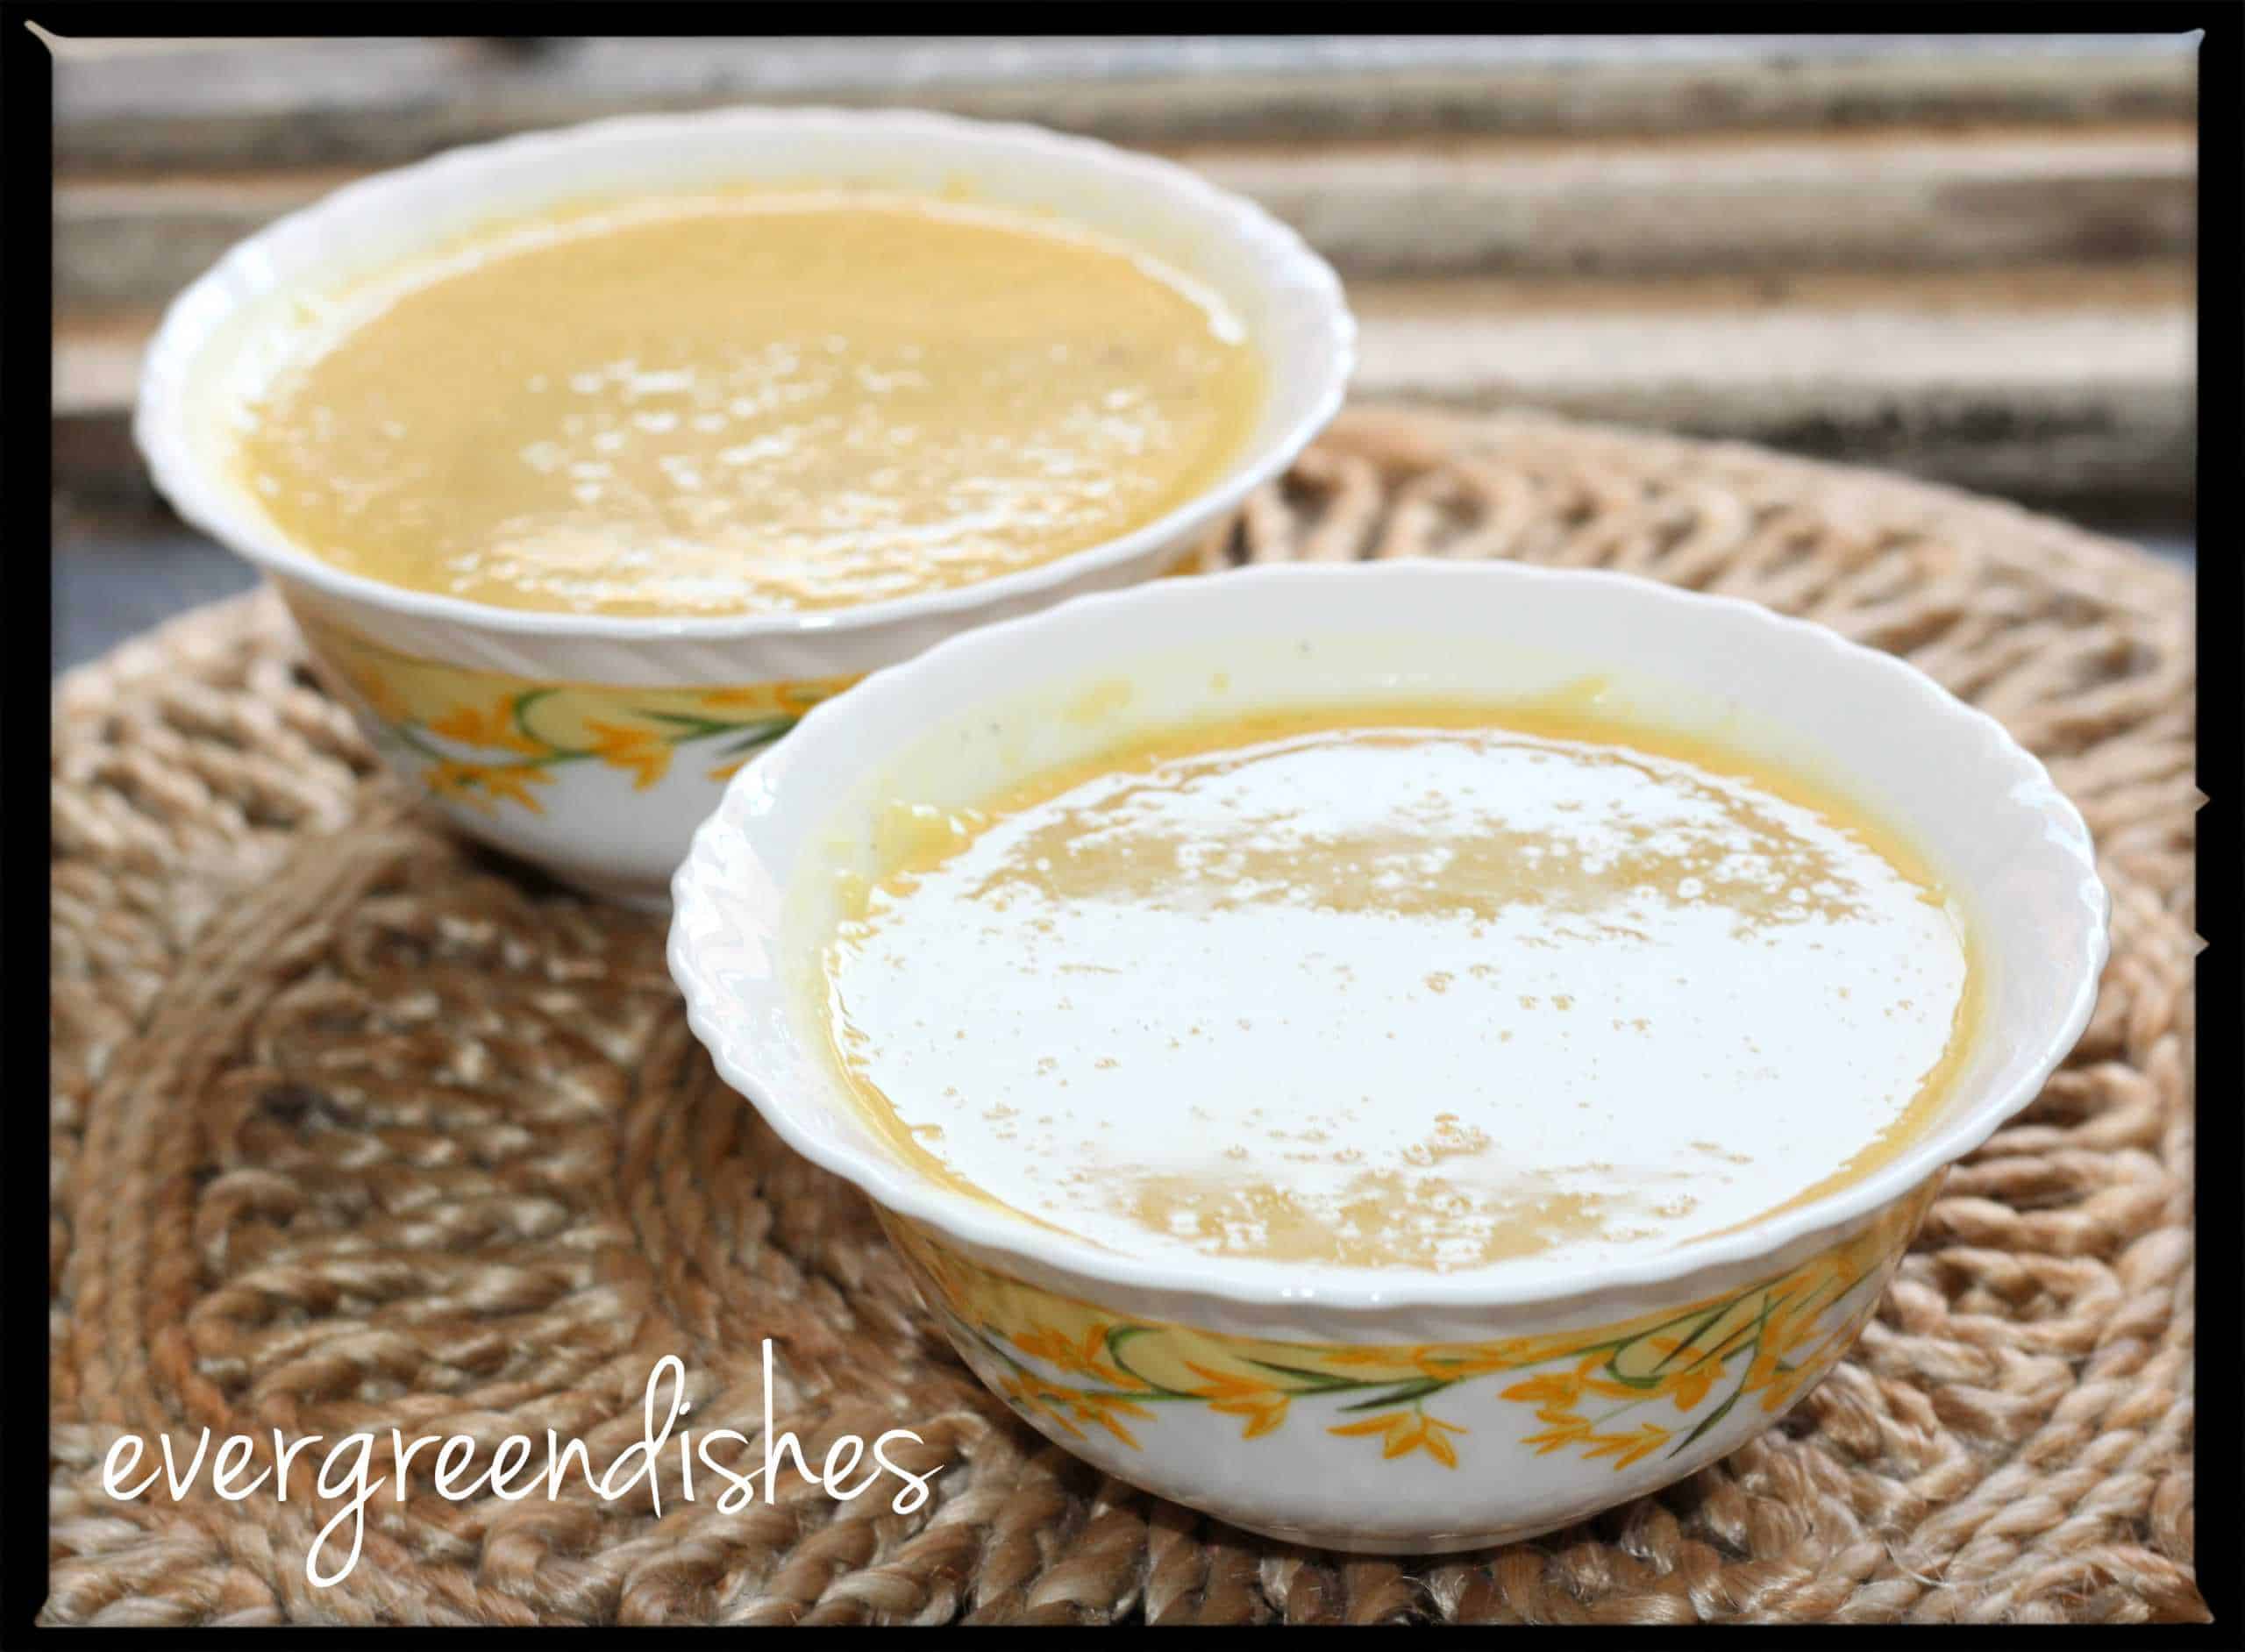
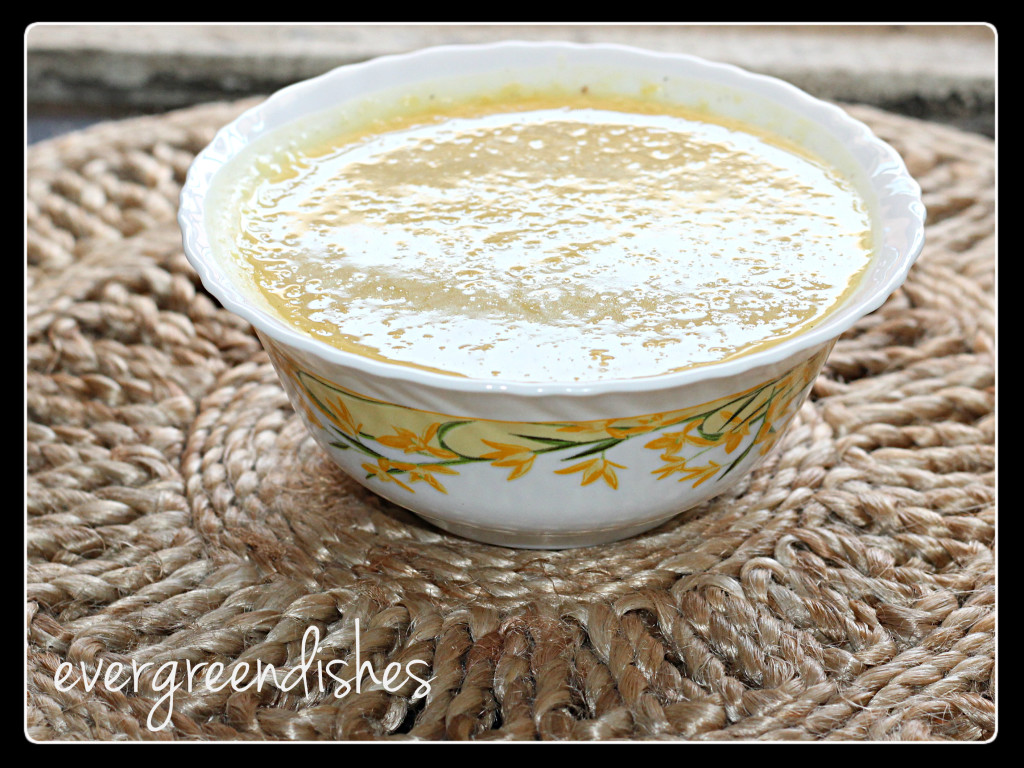
    Moongdal payasam is a tasty sweet which has a cooling effect on the body. Thus, with summer at its peak, you can enjoy this delicacy. Moreover, with Ugadi round the corner, it may be in the wish list.

    Each  state have adapted their own method of cooking. The North  Karnataka  recipe I had written long time back. You can check it here.Today, I am presenting to you Mangalorean style or Udupi style ( South Canara) style of this payasam.

    Coconut milk is used here. I have grinded cashews with a little coconut and mixed it.  Thus it is both vegan and gluten free food.

    With Ugadi approaching, I am planning to write a few good posts and finally make a collection of recipes too from bloggers for you. Please do keep watching this space.

    moongdal payasa
    moongdal payasa


    Moongdal payasam, mangalore style
    Recipe Type: Sweets
    Cuisine: Udupi
    Author: Jayashree
    Cook time:
    Total time:
    Serves: 4
    A tasty and cool dish to beat the heat
    Ingredients
    • Moongdal 1cup
    • ghee 2tsp
    • coconut milk 2 cup
    • jaggery 1cup
    • grated coconut 1tbsp
    • cashew 6
    • cardamom 4
    Instructions
    1. Wash the moongdal and keep it aside. Take a thick bottom pan,add the ghee and roast the moong dal. Add water and cook it. Alternately, you can put it in the pressure cooker at this stage.
    2. But, this does not require much time, so I prefer to cook by the direct method. Once it is cooked, add the coconut milk and stir well. Add the jaggery. Grind the coconut with cashew and cardamom. Add this to it. Boil for a minute. Remove from fire. Moongdal payasam is ready
    Notes
    You can avoid adding the extra coconut. Cashews can be garnished over also.


    moongdal payasa
    moongdal payasa

    Ingredients :

    Moongdal 1cup
    ghee 2tsp
    coconut milk 2 cup
    jaggery 1cup
    grated coconut 1tbsp
    cashew 6
    cardamom 4

    Method :

    Wash the moongdal and keep it aside. Take a thick bottom pan,add the ghee and roast the moong dal. Add water and cook it. Alternately, you can put it in the pressure cooker at this stage.
    But, this does not require much time, so I prefer to cook by the direct method. Once it is cooked, add the coconut milk and stir well. Add the jaggery. Grind the coconut with cashew and cardamom. Add this to it. Boil for a minute. Remove from fire. Moongdal payasam is ready.


    If you ever make this recipe, take a picture and share it by tagging @foodiejayashree on Instagram or @evergreendishes on Facebook. I will be glad to see and share your creation further.
    Check out my e-books on Amazon. Do not miss any post, subscribe to get all updates and an e-book for free !


  • Healthy kidney bean salad

    Healthy kidney bean salad

    Kidney bean salad is a tasty, healthy and easy to make snack. It is packed with nutrition and ideal protein supplement for vegetarians. 

    Kidney bean aka rajma is a wonderful source of nutrition. It is one of the essentials in North India.They are widely used in gravy based dishes. But today, I have an interesting recipe here, Kidney bean salad, easy to make and healthy too.

    The kidney beans are dark red coloured and shaped like kidney. They are rich in molybdneun, folate,fiber, potassium, manganese, phosphorous, protein and vitamin B.

    They help prevent cholestrol. They provide fat free protein. They help in reducing the level of blood sugar, thus it is highly recommended for these patients. Being heart friendly, these also , give  folate to the body.  Like all legumes, it is rich in both kinds of fiber.It is considered to help in improving memory.

    Salads of legumes are packed with nutrition. They should be used more often in our daily diet. The first time I came across this kidney bean salad was  in the  book by cooking magnet, Tarla Dalal, loved the idea of making a salad of these. But the recipe here, is slightly different from the original and mine.

    Looking for more salad ideas ? Try this watermelon rind salad or sprouted moong salad  

    A similar salad can be read here.

    Over to the Kidney Bean Salad Recipe

    Kidney bean salad
    Recipe Type: Salad
    Author: Jayashree
    Prep time:
    Cook time:
    Total time:
    Serves: 3
    A healthy salad to brunch on.
    Ingredients
    • Kidney beans cooked 1cup, 100grams
    • onion 1 chopped finely
    • tomato 2 chopped finely
    • cilantro


    For the dressing :

    • olive oil 1tsp
    • salt to taste
    • chilli powder 1/4tsp
    • pepper powder 1/2tsp
    • chat masala 1/4tsp
    • lime juice 1tsp
    Instructions
    1. Take a wide bowl and add the boiled kidney beans. Add the onion and tomatoes.
    2. Mix the ingredients “for The dressing” in a bowl.
    3. Pour it over the veggies and chill in refrigerator.
    4. Serve with a garnishing of cilantro.
    Notes
    To cook the kidney beans, soak them overnight in water. Next day, discard the water, wash and put fresh water to it. Put in the pressure cooker and cook for at least eight whistles. Allow the pressure to release by itself.The kidney beans should be tender when touched with fingers.Otherwise, cook them again.
    healthy kidney bean salad

    Healthy Kidney Bean Salad

    Kidney bean salad makes a good snack to binge on. It should be consumed regularly by vegetarians. 
    Prep Time 10 minutes
    Course: healthy snacks, Salad
    Cuisine: international

    Ingredients
      

    • 1 cup kidney beans cooked
    • 1 onion finely chopped
    • 2 tomato finely chopped
    • cilantro
    For the dressing:
    • 1 teaspoon olive oil
    • 1/4 teaspoon chilli powder
    • 1/2 teaspoon pepper powder
    • 1/4 teaspoon chat masala
    • 1 teaspoon lime juice
    • salt to taste

    Method
     

    1. Take a wide bowl. Add the boiled kidney beans. Put the onion and tomato pieces to it.
    2. Mix the ingredients, “For the dressing” in a bowl.
    3. Pour it over the beans, chill and serve.

    Notes

    Soak the kidney bean in water for eight hours. Drain the water, wash under running water and cook in the pressure cooker for a couple of whistles. They should be soft to eat. Do not remove until the pressure is released by itself. 

    About the event :

    This is an old post which I have redone with better pictures and text. Sending this Foodies_Redoing Oldpost29, which is a fortnightly event. Our old posts which were written long back are getting a fresh touch now, thanks to Renu Agarwal Dongre.


    Pin it for later:

    healthy kidney beans salad

    If you have liked this post, do share it with your family and friends. If you ever make this, take a picture and share it by tagging @foodiejayashree on Instagram or @evergreendishes on Facebook or Twitter.

    Let’s be connected, the follow buttons are on the side bar. Subscribe to get all updates and an e-book for free!


  • Ragi idli /Finger millet idli

    Ragi idli /Finger millet idli

    Ragi Idli / Finger Millet Idli is a healthy twist to the usual variety that is made. It is ideal for breakfast. This is a fermented idli.

    Everyday, it is a dilemma to choose a menu that is liked by all at home. More so, in the days when we are thinking of healthy eating. As we ring into the new year, I plan to bring in more healthy  recipes for you. .Today on the eve of new year, I bring to you all,Ragi idli or finger millet idli , a twist to the usual stuff.

    Ragi is a  multi grain which is highly nutritive in value.It consists of amino acids such as iso leucene, leucene, methionine and phenylanine. It is rich in calcium and potassium.

    My other kind of idli recipes can be read here :


    Benefits of Ragi

    It is a super food which is found to help to reduce diabetes  mellitus. With many people suffering from this disease, this diet is highly recommended. It helps in maintaining the insulin level..

    It  helps in reducing cholestrol. It helps  in weight loss and controlling obesity. The food takes longer time to digest, hence the calories consumed are much lesser.

    It has a cooling effect on the body. Thus, it is an ideal food during summer. Ragi malt is usually taken in the mornings during these months. Ragi halbai is a sweet that is not to to be missed. Ragi Thalipeeth is ideal for weekend lunch or breakfast.

    Now, with so many benefits, let us take a look at the recipe of making Ragi Idli or Finger millet Idli. It is vegan and gluten free. It is ideal for breakfast. It can be served for dinner too.

    What goes in the Ragi Idli / Finger Millet Idli ?

    • Urad dal : We need two ingredients to make it and one of them is urad dal. It is the primary ingredient to make idli, isn’t it ? I prefer to use the split urad dal. It is soaked for three hours
    • Ragi flour: Use good quality ragi flour. I prefer to bring in small quantity and buy fresh ones again. Sieve the flour before using it.
    • Water: It is needed for soaking and grinding the batter. Add water in small quantities.
    • Salt to taste
    Ragi Idli / Finger Millet Idli
    Ragi Idli / Finger Millet Idli


    Idli Cooker:

    Idli Cooker is essential to make idli. It comes with a steamer and a set of plates in which idlis are cooked. Wash the plates. Water is put in the steamer. The batter is poured in the pockets and it is allowed to cook for ten to fifteen minutes. Alternatively, you can use the pressure cooker without the whistle to steam.

    Making idli is common in most household and along with it are the variations one can try. Why not invest in a good idli maker ?


    About the event:

    Sending this to Foodies_Redoing Old Post 27. This is an old post which I have updated with better pictures. Every fortnight, we edit an old post with better pictures and text.

    Ragi Idli

    Ragi idli is tasty and a healthy twist to the usual one.
    Prep Time 2 hours
    Cook Time 30 minutes
    Resting time 7 hours

    Ingredients
      

    • Urad dal 1 cup
    • Ragi flour 3 cups
    • water for grinding and soaking
    • salt to taste

    Method
     

    1. Wash and soak urad dal in water for three hours. Grind it to a smooth batter by adding little  amount of water.
    2. Renove the batter in a bowl. Mix the ragi flour and salt to it.  Keep it in a warm place for eight hours to ferment. Ideally, it is good to keep overnight.
    3. Next day, take the idli stand and wash the plates. Add a spoonful of batter in each mould. Heat the pressure cooker or the idli cooker and keep them to steam on a medium flame for fifteen to twenty minutes. Once done, remove from heat and serve  with coconut chutney.

    Notes

    Add water in small quantities. 
    Sieve the ragi flour before using it.


    Thank you for being  a reader of this blog . Wishing You A Very Happy  New Year ! May the days ahead be filled with immense joy and prosperity!

    Pin it for later:

    Ragi Idli / Finger millet idli

    If you have liked this recipe, do share it with your family members and friends. All comments motivate me to write more. If you ever make this dish, take a picture and tag @foodiejayashree on Instagram or @evergreendishes on Facebook. It is always good to see your creations.

    Let’s be connected. Subscribe to get all updates and an e-book for free !


  • Beans Stir fry / Beans Palya

    Beans Stir fry / Beans Palya

    Jump to Recipe Print Recipe

    Beans, popularly known as French beans or just by the name of ring beans is a key ingredient in South Indian cooking. It makes a good combo with other veggies such as carrot, peas, capsicum and potato and can be used in various dishes as gravies, pulav or snacks. But, have you tried this simple g bean stir fry? I am sure, many are not aware of this , do give a try. Bean stir fry is a healthy and easy alternative to quick cooking. It can be used as an accompaniment with chapati or rice. Beans palya makes a good accompaniment in South Indian cooking.

    Beans Stir Fry / Beans Palya Recipe

    Ingredients:

    • 1/2 kg beans
    • 1/2 teaspoon mustard seeds
    • 1/4 teaspoon asafoetida
    • 1 teaspoon bengal gram
    • 1 teaspoon urad dal
    • 4 green chilly
    • curry leaves a few
    • coriander for garnishing
    • fresh coconut
    • 2 teaspoon oil
      salt to taste
    • fresh coconut
    • coriander leaves

    Equipments : chopping board,knife, wok, spatula

    Method:

    1. Remove the ends and the strings of the beans Chop them finely.
    2. Wash it in tap water and keep aside.
    3. Take a wok, add the oil and heat on a low flame. Add mustard seeds, as it crackles add the bengal gram and urad dal, leave it for a while, then add the green chilly ,turmeric powder, asafoetida and curry leaves.
    4. Add the chopped green beans along with salt and sprinkle a little water. Allow to cook till tender.
    5. Add grated coconut and fresh coriander leaves to it. Green bean stir fry is ready to serve.

    Take a tip:

    • Addition of coconut enhances the taste. During summer, keep it in the refrigerator.
    • A few dry red chilly may be added in the seasoning instead of green chilli. Alternatively, you can add red chilli powder after the beans is tenderly cooked.
    • You may use onion along with it. The traditional recipe does not use it.
    • In one kind of recipe, coconut and chilli powder are ground and added.


    Beans Stir Fry

    Beans stir fry is a tasty side dish from South India.

    Ingredients
      

    • 1/2 kg beans
    • 1/2 teaspoon mustard seeds
    • 1/4 teaspoon asafoetida
    • 1 teaspoon bengal gram
    • 1 teaspoon urad dal
    • 4 green chilly
    • curry leaves a few
    • coriander for garnishing
    • fresh coconut
    • 2 teaspoon oil
    • salt to taste

    Equipment

    • cooking pan, serving spoon, bowl

    Method
     

    1. Chop the beans finely . Wash it in cold water and keep aside.
    2. Take a wok, add the oil and heat on a low flame. Add mustard seeds, as it crackles add the bengal gram and urad dal, leave it for a while, then add the green chilly ,turmeric powder, asafoetida and curry leaves. Add the chopped green beans along with salt and sprinkle a little water.
    3. Allow to cook till tender. Add grated coconut and fresh coriander leaves to it. Green bean stir fry is ready to serve.

    About the event :

    Sending this to Foodies_Redoing Old Post_166. It is a fortnightly event, an old post is worked by editing the post with better pictures or more relevant content. Here, I have changed the picture on this day Dec 7th, 2025.

    If you ever make Beans Stir Fry in your kitchen, take a picture and tag @foodiejayashree on Instagram or @evergreendishes on Facebook. Subscribe to get all updates in your inbox and an e-book for free!


  • Easy Cauliflower stir fry

    Easy Cauliflower stir fry

    Cauloflower Stir Fry is an easy to make, tasty side dish from North Indian cuisine.

    Cauliflower, popularly known as gobi,  can be used in a wide range of dishes. It is extensively used in curries, stirfry and starters. It is one of the veggies liked by kids today.

    This vegetable needs to be cleaned properly as it is the home to many tiny worms. Keep the florets immersed in hot water to which salt and turmeric is added.


    Various kind of dishes can be made using cauliflower. Cauliflower stir fry is easy to prepare and tasty.  It goes well with chapatis and phulkas. The other cauliflower dishes posted are : Gobi Manchurian is one of the preferred snacks at home.

    cauliflower stir fry
    cauliflower stir fry

    Cauliflower Stir Fry Recipe

    Ingredients:

    • 1 small cauliflower
    • 2 onion
    • 1/2 bunch coriander
    • 1 inch ginger
    • 2 green chilly
    • 1/2 tsp cumin
    • 1/4 tsp turmeric powder
    • 2 tsp  oil
    • salt to taste

    Pre- requisites :

    • Take small florets of cauliflower and boil till tender with a pinch of salt and turmeric powder.
    • Chop onion finely.
    • Grind coriander, ginger and green chilly to a paste.

    Method:

    • Take a pan and add the oil. Add cumin, after a second, add the onions and turmeric powder to it. Saute for a while.
    • Add the ground paste and salt to it. Mix well.
    • Drain the water and add the florets. Mix well.
    • Let the flavours blend together.
    • Cauliflower stir fry is ready to serve.
    • Serve with chapati or phulka.

    cauliflower stir fry

    Cauliflower Stir Fry

    5 from 2 votes
    Cauliflower Stir Fry is an easy to make, tasty side dish. It pairs well with chapathi or phulka.
    Prep Time 10 minutes
    Cook Time 10 minutes
    Total Time 20 minutes
    Course: dinner, lunch
    Cuisine: north indian

    Ingredients
      

    • 1 small cauliflower
    • 2 onion
    • 1/2 bunch coriander
    • 1 inch ginger
    • 2 green chilly
    • 1/2 tsp cumin
    • 1/4 tsp turmeric powder
    • 2 tsp oil
    • salt to taste

    Equipment

    • 1 pan
    • 1 ladle
    • 2 bowls

    Method
     

    Pre- requisites :
    1. Take small florets of cauliflower and boil till tender with a pinch of salt and turmeric powder.
    2. Chop onion finely.
    3. Grind coriander, ginger and green chilly to a paste.
    Method:
    1. Take a pan and add the oil. Add cumin, after a second, add the onions and turmeric powder to it. Saute for a while.
    2. Add the ground paste and salt to it. Mix well.
    3. Drain the water and add the florets. Mix well.
    4. Let the flavours blend together.
    5. Cauliflower stir fry is ready to serve.
    6. Serve with chapati or phulka.

    About the event:

    Sending this to Foodies_Redoing Old Post 80, a fortnightly event. I have made this stir fry since I have put it here. I like to make this simple stir fry with chapathi. Now, I have put better pictures here, the recipe remains the same.

    Pin it for later:

    cauliflower stir fry
    cauliflower stir fry


    If you ever make this stir fry, take a picture and share with @foodiejayashree on Instagram or @evergreendishes on Facebook. Subscribe to get all updates and an e-book for free!


  • Alu Methi | no onion garlic recipe

    Alu Methi | no onion garlic recipe

    Alu Methi is a popular accompaniment that tastes good with any Indian flat bread. It is lightly tossed with spices in a seasoning of fenugreek leaves.
    I make this dish quiet often; primarily for three reasons, it is easy to make, liked by my family and ideal for those days of no onion -garlic. Yes,it is sans these two ingredients.

    My other potato dishes : Alu Jeera, Potato Bonda

    alu methi
    alu methi

    INGREDIENTS:

    • 4 Potatoes
    • 2 clusters fenugreek leaves
    • 1 1/2  teaspoon coriander powder
    • 1/2 teaspoon cumin
    • 1 teaspoon chilli powder
    • 2 green chilli
    • 1 tablespoon oil
    • 1/4 teaspoon mustard seed
    • 1/4 teaspoon asafoetida
    • 1/4 teaspoon turmeric powder
    • salt to taste
    alu methi
    alu methi


    PROCEDURE :

    Boil the potatoes in a pressure cooker. When cool, peel the skin and cut them into cubes. Keep aside. Make seasoning, when the mustard seeds crackle, add cumin, asafoetida and green chilly by splitting into two pieces. Add fenugreek leaves. Let cook, saute and add the coriander powder, salt and red chilly powder. Now add the potato  cubes and mix well. Alu Methi is ready to serve.Tastes good with phulka or chapatis.

    A few similar kind of recipes from my blogging friends

    alu methi
    Evergreendishesdev

    Alu Methi

    Alu Methi is a popula, vegan, no onion garlic accompaniment. It pairs well with any Indian flat bread.
    Course: dinner, lunch
    Cuisine: north indian

    Ingredients
      

    • 4 Potatoes
    • 2 clusters fenugreek leaves
    • 1 1/2 teaspoon coriander powder
    • 1/2 teaspoon cumin
    • 1 teaspoon chilli powder
    • 2 green chilli
    • 1 tablespoon oil
    • 1/4 teaspoon mustard seed
    • 1/4 teaspoon asafoetida

    Notes

    Boil the potatoes in a pressure cooker. When cool, peel the skin and cut them into cubes. Keep aside. Make seasoning, when the mustard seeds crackle, add cumin, asafoetida and green chilly by splitting into two pieces. Add fenugreek leaves. Let cook, saute and add the coriander powder, salt and red chilly powder. Now add the potato  cubes and mix well. Alu Methi is ready to serve.Tastes good with phulka or chapatis.

        Let’s be connected and do share if you have liked it !


  • Stuffed Cucumber | Traditional recipes of Karnataka

    Stuffed Cucumber | Traditional recipes of Karnataka

    Stuffed cucumber is a traditional dish from Karnataka in South India.  It is served with jowar roti or chapati. 

    Today, various kinds of stuffed vegetables are prepared. South Indian cooking differs from its counterpart in many aspects. Here, brinjal, ridge gourd, cucumber and bittergourd are usually used in the preparation. Today, we take a look at the southern style of stuffed cooking. I am using cucumbers. 

    Ironically, cucumber is used mainly in a salad in many parts of the world. Thus, here it tastes different. It is tender and tastes good with the spice mixture. Give a try to this forgotten recipe of Karnataka.

    I would like to inform, cucumber used are the small variety. The have a smooth surface and the skin is not peeled. The cucumber has to be washed well and dried before cutting them for the below recipe. I do not recommend the use of tender ones here. You can use the large ones; they will be more ideal for filling the mixture. The large ones are usually used in making stir fry or masala bhat in our region. Sometimes, it is also used in majjige huli too.

    The making of stuffed cucumber involves three stages :

    1. Cutting the vegetable
    2. Preparing the filling
    3. Stuffing the paste into it
    4. Cooking

    The vegetable should be cut into medium sized of 1 inch. Then, you have to make an incision on each piece. The filling is made and then filled into these cut vegetable pieces. They are later cooked in a pan.

    stuffed cucumber
    stuffed cucumber

    Let us get to the recipe of Stuffed Cucumber:

    Ingredients:

    • 1/2 kg cucumber
    • 1 cup fresh grated coconut
    • 3 tablespoon coriander seeds
    • 1 tablespoon bengal gram
    • 1 tablespoon urad dal
    • 3 dry chilly
    • 2 green chilly
    • handful coriander leaves
    • 1 teaspoon cumin seeds
    • salt to taste
    • 3 tablespoon oil
    • 1/4 teaspoon asafoetida
    • 1/4 teaspoon turmeric powder
    • 1/4 teaspoon mustard seeds

    METHOD:

    • Wash the cucumber, pat dry  and cut them into two or three pieces.
    • Make an incision on four sides on each of them, you will be filling the paste in it later. Keep them aside.
    TO MAKE STUFFING:
    • Dry roast the bengal gram and urad dal and keep aside.
    • Roast the coriander seeds with a little oil. Do not burn them.
    • Roast the red chilly with a little oil.
    • Now ,grind the roasted  ingredients along with green chilly, coriander, and cumin to a fine paste.

    TO FILL THE STUFFING:

    Gently, take a piece of cucumber, and put some filling in it. Take care, as they tend to break easily. Repeat for all pieces.

    TO PREPARE:

    Take a pan and make the seasoning. Slowly, add the stuffed veggie into it. Close it with a plate of water. This eases the cooking process. Keep stirring in between. When tender, remove into a serving bowl. Stuffed cucumber is ready to be served.

    About the event:

    Sending the Stuffed Cucumber Recipe to Shhh Secretly Cooking Challenge. It is a group which I have been associated since a long time. A theme is decided, and the members are paired. The partners, accordingly agree to discuss and provide two secret ingredients. The dish is later shared in the group and the ingredients are guessed by other members.

    My partner Archana has given me bengal gram and oil as the secret ingredients. I have shared this post which has been redone thoroughly with the group. Archana has prepared Stuffed Capsicum for the challenge.

    The other stuffed recipes on the blog are :

    Stuffed Brinjal 

    stuffed cucumber
    Evergreendishesdev

    Stuffed Cucumber

    Stuffed cucumber is a traditional dish from Karnataka. It is tasty and is usually served with chapati or jowar roti. 
    Prep Time 15 minutes
    Cook Time 30 minutes
    Total Time 45 minutes
    Servings: 4 people
    Course: dry sabzi, lunch ideas, stuffed recipes, traditional recipes, vegan
    Cuisine: Indian, karnataka

    Ingredients
      

    • 1/2 kilogram cucumber
    • 1 cup fresh grated coconut
    • 3 tablespoon coriander seeds
    • 1 tablespoon bengal gram
    • 1 tablespoon urad dal
    • 3 red chilly dry
    • 2 green chilly
    • 1/2 cup coriander
    • 1 teaspoon cumin
    • salt to taste
    • 3 tablespoon oil
    • 1/4 teaspoon mustard seeds
    • 1/4 teaspoon asafoetida
    • 1/4 teaspoon turmeric powder

    Method
     

    1. Wash the cucumber, pat dry  and cut them into two or three pieces.
    2. Make an incision on four sides on each of them, you will be filling the paste in it later. Keep them aside.
    To make the stuffing
    1. Dry roast the bengal gram and urad dal and keep aside.
    2. Roast the coriander seeds with a little oil, do not burn them. 
    3. Now, roast the red chilly with a little oil.
    4. Grind the roasted ingredients along with green chilly, coriander and cumin to a fine paste.
    To fill the stuffing:
    1. Slowly, take a piece in the hand . Take a little of the filling and stuff it using both the hands. Take care, as they tend to break easily. Repeat for all pieces.
    To prepare the veggie
    1. Take a pan and make the seasoning. Slowly, add the stuffed veggie into it. Close it with a plate of water. This eases cooking. Keep stirring in between. When tender, remove into a serving bowl. Stuffed cucumber is ready to be served.

    If you ever make Stuffed Cucumber in your kitchen, take a photo and share with me by tagging @foodiejayashree on Instagram and @evergreendishes on Facebook.

    Pin it for later:

    stuffed cucumber
    stuffed cucumber
  • Moong dal salad | koshambir recipe

    Moong dal salad | koshambir recipe

    Moong dal salad is a healthy salad to serve in any meal. It is usually made during festivals and ceremonies in South India. It is commonly known as hesaru bele kosambri. 

    Salads form an important part of our diet. Here I have used moong dal to make it. This version is called as moong dal salad or koshambir and is made during festivals and functions. It is served to ladies during haldi kumkum. One can make it as an accompaniment with rice or chapati.

    In South India, it is customary to have a salad, chutney, gojju and palya (stir fry ) along with dal and rasam during festivals and ceremonies. Sweets and savoury snacks as ambode are the main attraction. Salads are usually made of either moong dal or bengal gram. Here is the moong dal salad recipe for you which we frequently make at home. 

    INGREDIENTS:

    • 1 cup moong dal
    • 1 teaspoon bengal gram
    • 1 big cucumber
    • 2 teaspoon oil for seasoning
    • 1/4 teaspoon mustard seeds
    • a pinch of asafoetida
    • a few curry leaves
    • 2 green chilly
    • 1 cup fresh coconut
    • salt to taste
    • 1/2 lemon
    moong dal salad
    moong dal salad

    METHOD :

    • Soak moong dal and gram dal in water for half an hour.
    • Remove the skin of big cucumber and cut it into small pieces.
    • Drain the water from the dal and put it in a colander for ten minutes.
    • Later, put in a bowl and add cucumber, salt  and grated coconut to it.
    • Make seasoning and add to it.
    • Add a dash of lime juice to it.
    • Serve as an accompaniment or binge as a snack.

    Tips :

    Cucumber used is the long variety. Remove the edges and rub well in circular motion. Then peel the skin. Use the seeds if they are tender. Otherwise, discard them. 

    Here are a few of my festive recipes

    Lemon rice, Beans stir fry, Masala Bhath, Shenga holige, Appi payasa, Cabbage pakoda

    moong dal salad
    Evergreendishesdev

    Moongdal salad koshambir recipe

    5 from 4 votes
    Moong dal salad is usually prepared during festivities in South India. It is tasty to have as a light snack.
    Prep Time 30 minutes
    Cook Time 10 minutes
    Total Time 40 minutes
    Servings: 4 people
    Course: Salad
    Cuisine: Indian

    Ingredients
      

    • 1 cup moong dal
    • 1 teaspoon bengal gram
    • 1 big cucumber
    • 2 teaspoon oil
    • 1/4 teaspoon mustard
    • a pinch of asafoetida
    • 1/8 teaspoon turmeric powder
    • 2 green chilly
    • a few curry leaves
    • salt to taste
    • 1/2 lemon
    • 1 cup fresh grated coconut

    Method
     

    1. Wash both the dals and soak them in water for half an hour.
    2. Drain the water and put in a colander.
    3. Peel the skin of the cucumber and cut into small pieces.
    4. Take a small pan and make the seasoning. Put the oil and the mustard seeds. as it crackles, put the green chilly, asafoetida, turmeric powder and curry leaves.Keep it aside.
    5. Put the dal and cucumber in a bowl. Add salt and coconit to it. Put the seasoning and mix it. Finally, add lime juice to it.


    Check the video: 


    Added to the following Link Party

    Natasha in Oz, Merry Monday Link Party,Lou Lou Girls Fabulous Party, Treasure Box Tuesday, In and Out of the Kitchen Link Party

    If you have liked this post, do share it further. If you ever make this recipe tag @foodiejayashree on Instagram.

    Subscribe to get all updates in your inbox.

    Pin it for later : 

    moong dal salad or koshambir as it is called garnished with fresh coconut
    moong dal salad
  • Cabbage Pakoda | No Onion Garlic Recipe

    Cabbage Pakoda | No Onion Garlic Recipe

    cabbage pakoda | no onion garlic recipe|  cabbage pakoda recipe  | vegan | festive treat | south indian food

    Jump to RecipePrint Recipe

    Cabbage pakoda  are crispy and tasty. They are ideal with a hot cup of tea. It is vegan, no onion garlic  dish. It is ideal to serve with a festive platter.

    A typical South Indian platter consists of a payasam, chutney, pickle, two kind of stir fry, dal made with green leaf or sambar, rasam, sweet such as holige with a dollop of ghee,  or any other kind, lemon rice and fritters as bhajiya along with papad. The meal ends with curds rice.

    Cabbage pakodas are crispy and tasty. They are vegan and may be made as gluten-free by opting out asafoetida. You may also use a gluten-free asafoetida..

    To make good pakodas, use a cabbage that is green in colour. Shred the cabbage finely. You may add a little bit of cumin or ajwain. They not only lend a good flavour but also aid in digestion.

    cabbage pakoda
    platter of cabbage pakoda

    Cabbage Pakoda Recipe :

    Ingredients :

      • 1 small cabbage
      • 1 cup gram flour
      • 1 tablespoon rice flour
      • 1/4 teaspoon asafoetida
    • 1/4 teaspoon turmeric powder
    • salt to taste
    • 1/2 bunch coriander leaves

    Method :

    • Cut the cabbage finely into long slender shredding. Immerse in cold water and put it in a colander.
    • Take a wide bowl, add the cabbage and salt and keep it  aside for ten to fifteen minutes.
    •  Later, add gram flour, rice flour, chilli powder, asafoetida, finely cut coriander and mix well.
    • Heat oil in a pan, put them as pakodas and deep fry till brown in colour. Remove them on a tissue paper.
    • Crispy and tasty  cabbage pakoda fries  are ready to binge.

    Take a tip :

    • To make it gluten-free, do not add asafoetida or use gluten-free asafoetida.
    • Fresh cabbage shreds well. Finely cut vegetables give a good texture to the pakoda.
    • A few cut green chillies pieces enhances the taste and gives extra spiciness.
    • Crush a little bit of ajwain with fingers and tip in the batter. It lends a good taste and also aids in digsetion.

    Other festive treats for the season

    Evergreendishesdev

    Cabbage pakoda fries

    5 from 1 vote
    Cabbage pakoda fries are tasty and ideal to prepare during festive days.
    Prep Time 20 minutes
    Cook Time 20 minutes
    Total Time 40 minutes
    Servings: 6 people
    Course: Side Dish, Snack
    Cuisine: Indian

    Ingredients
      

    • 1 small cabbage
    • 1 cup gram flour (besan)
    • 1 tablespoon rice flour
    • 2 teaspoon chilly powder
    • 1/4 teaspoon asafoetida
    • 1/4 teaspoon turmeric powder
    • salt to taste
    • 1/2 bunch coriander leaves
    • oil for frying

    Method
     

    1. Chop the cabbage into fine shreddings.
    2. Put it in water and keep aside for sometime.
    3. After sometime remove the cabbage from the water and put it in a colander for sometime.
    4. Now, put it in a bowl and add salt to it. Keep it aside for fifteen minutes.
    5. Now, add chilly powder, turmeric powder and asafoetida to it. Mix it. Add gram flour and rice flour. Mix well. 
    6. Heat oil in a pan. Take small ball of the mixture and slowly let some into the pan. Put around eight to ten (depends on the size of the frying pan)
    7. Deep fry on moderate heat. After sometime, turn it to the other side. Once it is done, remove them on a plate with tissue paper.
    8. Repeat for the rest of the batter.

    cabbage pakoda
    cabbage pakoda

    About the event :

    An old post got  a makeover, sending this to Foodies_Redoing Old Post No 174. Participating after a long time, an old post got updated on 24/4/2026.

    Subscribe to get an e-book of handyhints for free !If you have liked this post, do share it with your family and friends. If you ever make this, take a picture and share it by tagging @foodiejayashree on Instagram or @evergreendishes on Facebook or Twitter.

    Pin it for later :

    cabbage pakoda
    cabbage pakoda

  • Vada pav | Desi burger | Wada Pav recipe

    Vada pav | Desi burger | Wada Pav recipe

    Vada pav is a famous street food  of Mumbai and is commonly known as the desi burger. It is tasty and serves as a good snack  with a cup of hot tea or coffee.

    Growing up, this was not common. But soon, as fast food joints started, we enjoyed them regularly. Later, one day I thought of recreating them at home and it was liked by all. Dinner is loved and memorable when we have a good menu as Vada Pav. This is the Classic Vada Pave recipe.  It is one of the favourite snacks at home. Read on further to know more about the other varieties of vada pav.

    Vada Pav Recipe

    Ingredients that you need :

    • 10 pav buns (outsourced )
    • butter
    • tomato ketchup

    For the vada  (dumpling) :

    • 6 potatoes boiled
    •  2 onions finely cut
    • 1/2 teaspoon garam masala powder 
    • 1 teaspoon chilli powder 
    •  1 tablespoon coriander leaves finely cut
    • 1/2 teaspoon amchur powder 
    • salt to taste

    For the batter :

    • 1 bowl gram flour 
    • 1 tablespoon rice flour 
    • 1 teaspoon chilli powder
    • 1/2 teaspoon cumin seeds 
    • salt to taste
    • a pinch of soda bi carbonate
    • oil for frying

    For the green chutney :

    • 1 bunch coriander leaves 
    • 30 mint leaves 
    • 6 green chillies 
    • 4 cloves garlic 
    • salt to taste

    Vada Pav / Wada Pav


    Method:

    To make the green chutney:

    Grind all the ingredients together sans water. Remove it in a bowl.

    To make the vadas :

    Mash the potatoes, add the onions, garam masala, chilli powder ,salt, amchur powder and coriander leaves and mix well. Mix the ingredients of the batter with a little water. It should be of semi thick consistency.  Make small balls of the filling, keep aside. Heat oil in a kadai.Take a ball, dip it in the batter and slowly let a few of them in the oil. Fry till a  dark hue engulfs them. Remove on an absorbent paper. 

    To make the vada pav :

    Cut the pav bun into halves . Heat a skillet, smear some butter on it and  roast it slightly. Apply tomato ketchup on one half and the green chutney on the other half. Take ,a fried dumpling, press it between palms and keep it between the two halves. Warm it on the skillet for a few seconds with  a little ghee. Serve hot. 


    Take a tip: 

    • The vadas can be made sans onion too. You may use green chilli and ginger paste instead of chilli powder. It is a Jain Vada Pav.
    • Place an aloo tikki in  it and you have Aloo Tikki Vada Pav.
    • For the Masala Vada Pav, make a spicy red chutney with a few cloves of garlic. Smear it on the other side instead of ketchup. 
    • To make Corn Vada Pav, make corn tikkis and place them in between. 
    • To make Schezwan Vada Pav, smear schezwan sauce instead of green chutney. Sprinkle some spice mix over it. 
    • To make Cheese Vada Pav, keep a slice of cheese in between along with the aloo vada. 


    About the event :

    This is an old post which has been redone with better pictures and informative text. Sending this to Foodies Redoing Old Post_70, a fortnightly event.  It was started by Renu Agarwal and since then, it’s come a long way.


    Vada Pav

    Vada Pav is a popular street food from Mumbai. It is now famous all over India and popular as Desi Burger.
    Course: evening snacks
    Cuisine: Indian

    Ingredients
      

    • 10 pav buns
    • butter
    • tomato ketchup
    • For the vada dumpling :
    • 6 potatoes boiled
    • 2 onions finely cut
    • 1/2 teaspoon garam masala powder
    • 1 teaspoon chilli powder
    • 1 tablespoon coriander leaves finely cut
    • 1/2 teaspoon amchur powder
    • salt to taste
    • For the batter :
    • 1 bowl gram flour
    • 1 tablespoon rice flour
    • 1 teaspoon chilli powder
    • 1/2 teaspoon cumin seeds
    • salt to taste
    • a pinch of soda bi carbonate
    • oil for frying
    • For the green chutney :
    • 1 bunch coriander leaves
    • 30 mint leaves
    • 6 green chillies
    • 4 cloves garlic
    • salt to taste
    • mouth watering

    Method
     

    1. To make the green chutney:
    2. Grind all the ingredients together sans water. Remove it in a bowl.
    3. To make the vadas :
    4. Mash the potatoes, add the onions, garam masala, chilli powder ,salt, amchur powder and coriander leaves and mix well. Mix the ingredients of the batter with a little water. It should be of semi thick consistency.  Make small balls of the filling, keep aside. Heat oil in a kadai.Take a ball, dip it in the batter and slowly let a few of them in the oil. Fry till a  dark hue engulfs them. Remove on an absorbent paper.
    5. To make the vada pav :
    6. Cut the pav bun into halves . Heat a skillet, smear some butter on it and  roast it slightly. Apply tomato ketchup on one half and the green chutney on the other half. Take ,a fried dumpling, press it between palms and keep it between the two halves. Heat it on the skillet for a few seconds. Serve hot.

    Notes

    Take a tip: 

    • The vadas can be made sans onion too. You may use green chilli and ginger paste instead of chilli powder. It is a Jain Vada Pav.
    • Place an aloo tikki in  it and you have Aloo Tikki Vada Pav.
    • For the Masala Vada Pav, make a spicy red chutney with a few cloves of garlic. Smear it on the other side instead of ketchup. 
    • To make Corn Vada Pav, make corn tikkis and place them in between. 
    • To make Schezwan Vada Pav, smear schezwan sauce instead of green chutney. Sprinkle some spice mix over it. 
    • To make Cheese Vada Pav, keep a slice of cheese in between along with the aloo vada. 
     

    If you have liked this post, do share it with your family and friends. If you ever make this, take a picture and share it by tagging @foodiejayashree on Instagram or @evergreendishes on Facebook or Twitter.

    Let’s be connected, the follow buttons are on the side bar. Subscribe to get all updates and an e-book for free.


    Pin Vada Pav to a snacks board on Pinterest:


    Vada Pav / Wada Pav