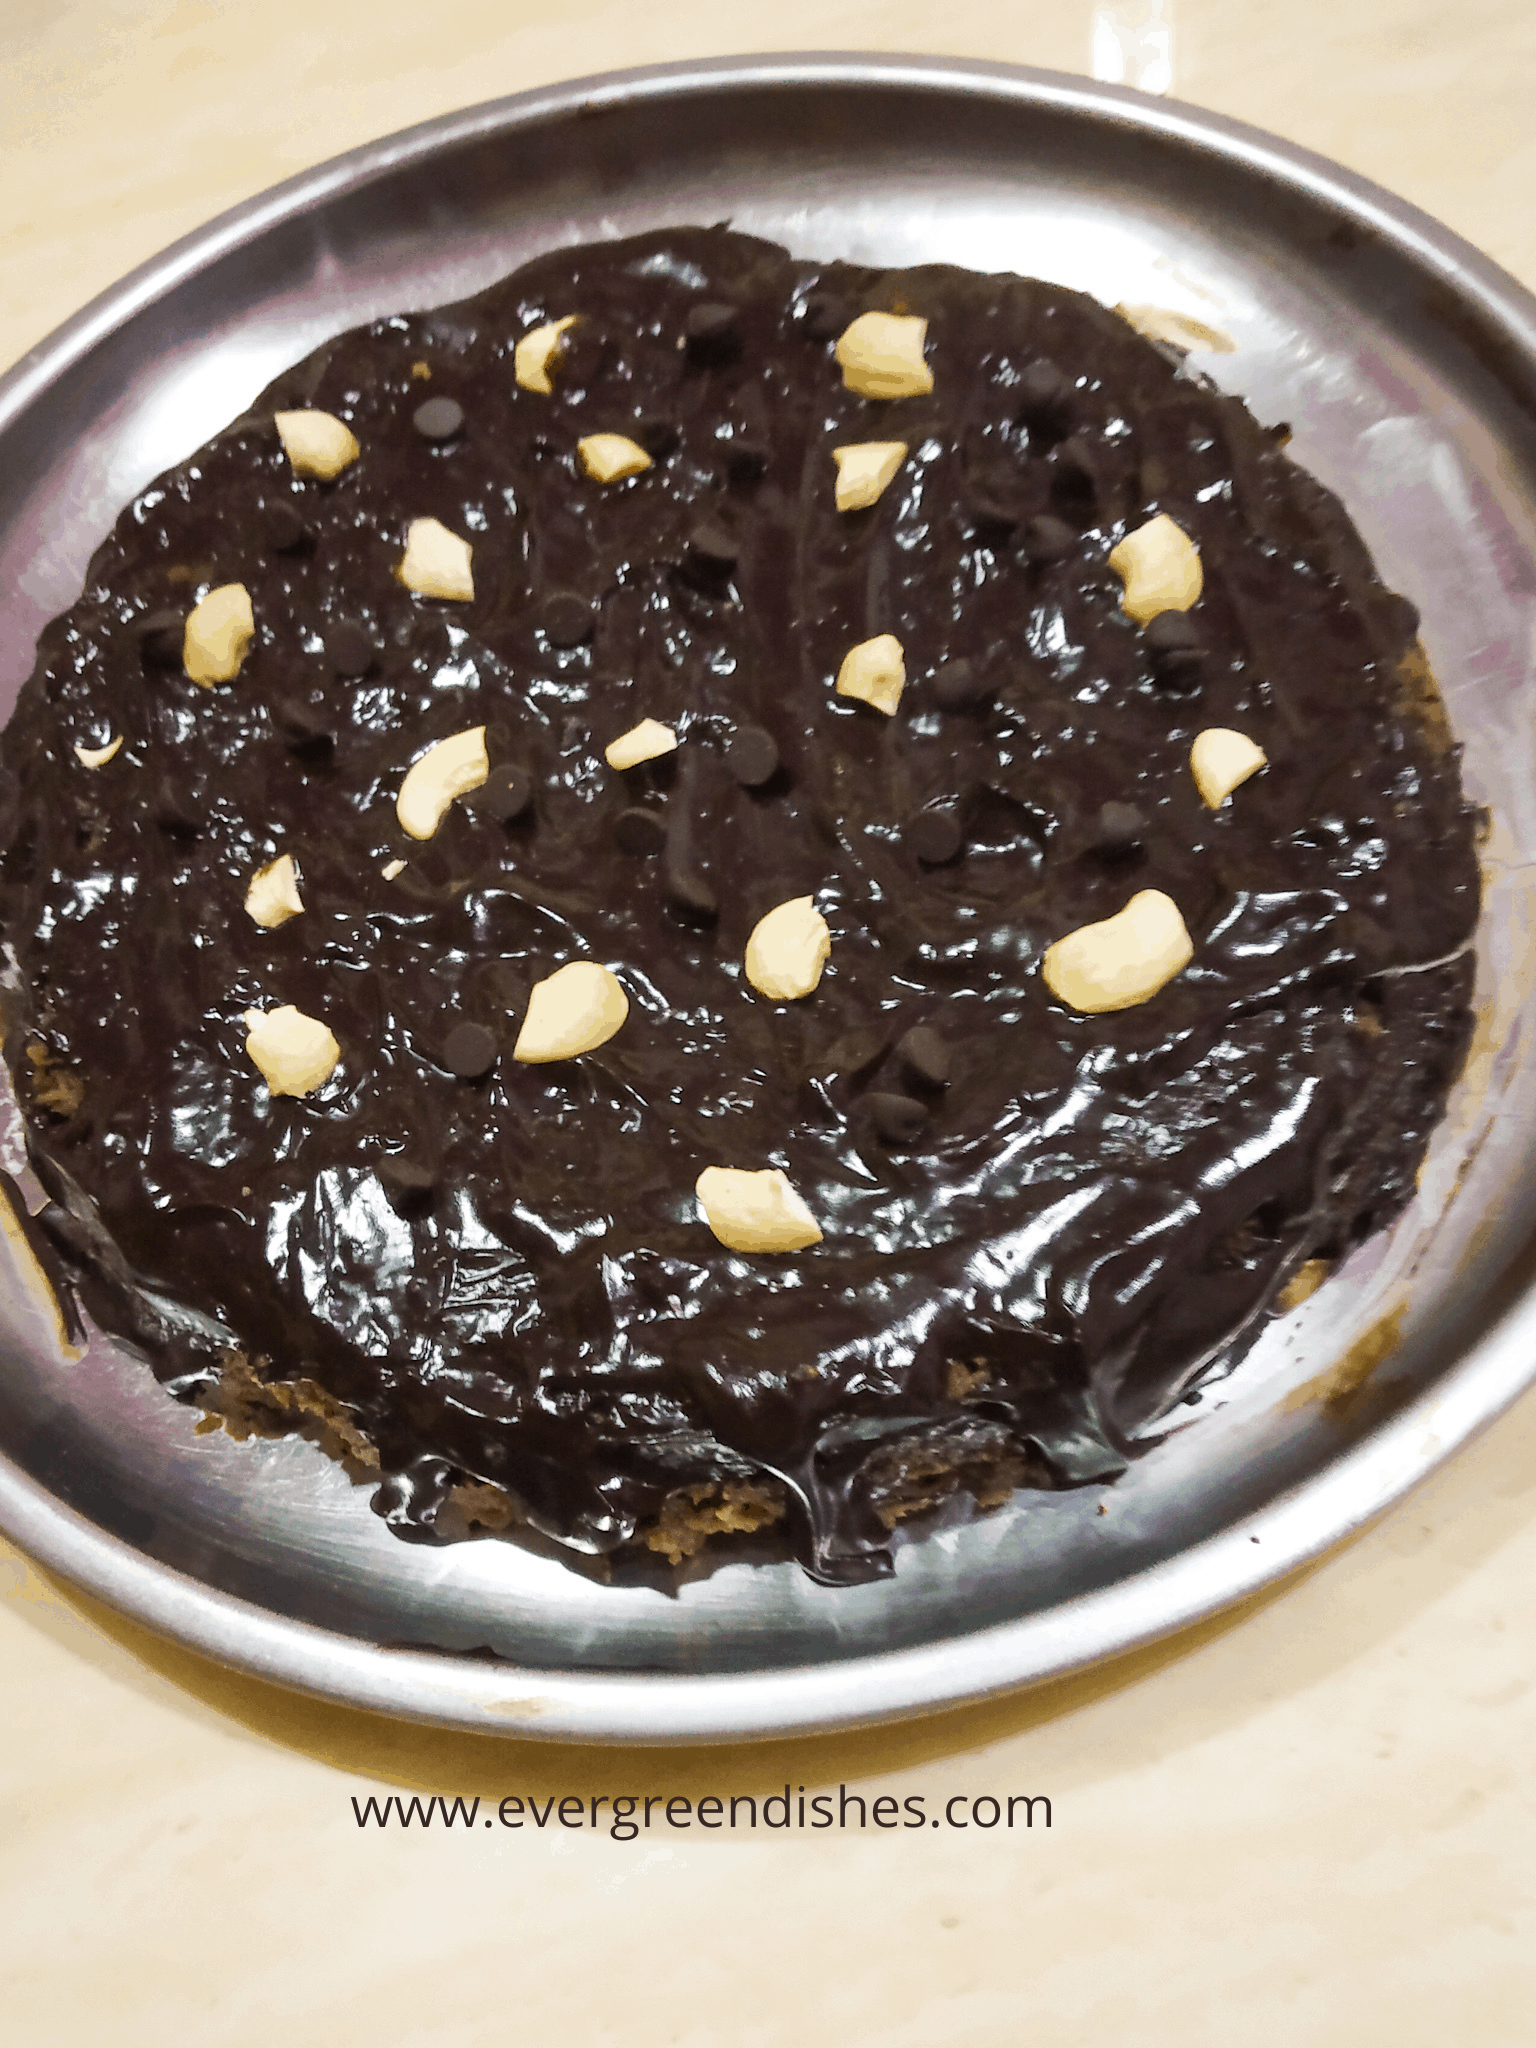
Chocolate cake is soft and moist, it is absolutely delicious. The ganache tastes good with it.
Cakes are loved by all, we just need an occasion to bake it, isn’t it? Our favourite cake is the chocolate cake. As I had never made a cake using coconut oil, thought of making one. Now, this was the first time I used it, both mother and daughter, were anguish with the results. Wondering, how it turned out? It was tasty and loved by all.
Now, I have another chocolate cake here ! Life is a good learning experience, we do not understand, until it really matters.
Chocolate cake can be made by using either the cocoa powder or the dark chocolate. Here, I have used dark chocolate.

About the event:
Sending this to Shhh Secretly Cooking group event, a monthly event, we are paired as partners and cook on a pre-scheduled theme. The partners exchange secret ingredients and cook accordingly. The secret ingredients are guessed later by other members. The theme was suggested by Mayuri Patel, who runs the group. She has a wide range of dishes on her blog, love her desserts especially. I loved her chocolate truffles, they look so delish.
My partner was Aruna, a talented blogger. She blogs at Vasus Veg Kitchen. She has many healthy dishes from regional cuisines. I loved her bengali style vegetable chops. I told Aruna I wished to make a cake with coconut oil and she agreed. She gave me coconut oil and walnuts as the secret ingredients. The ingredients that I gave were choco chips and vanilla essence and she prepared this delicious looking Chocolate and Custard Jelly Cake.
A few other cakes that I have shared earlier are Zebra Cake, delicious Mocha Banana Cake
Chocolate Cake
Ingredients:
- 1/4 cup coconut oil
- 2 tsp instant coffee powder
- 1/2 teaspoon vanilla extract
- 1 teaspoon lemon juice
- 1cup castor sugar
- 1/2 cup dark chocolate
- 1/2 cup milk
- 1 cup + 2 tsp maida
- 1/2 tsp baking powder
- 1/4 tsp baking soda
- 5 walnuts
For the ganache :
- 1 cup fresh cream
- 2 cup dark chocolate
- 2 teaspoon butter
For garnishing :
- cashew pieces
- choco chips
Method:
- Take oil in a bowl.
- Mix coffee powder in quarter glass of water.
- Grate chocolate.
- Put coffee mixture, chocolate gratings, vanilla extract and lemon juice to the oil.
- Put some milk and mix it well.
- Sieve maida, baking powder and soda together.
- Mix them together. Add little milk if needed, the batter should be of medium consistency.
- Break walnut into pieces and put them in.
- Pre-heat the microwave oven for two minutes.
- Grease a tin.
- Pour the batter.
- Microwave it for five minutes on High, reduce the temperature, and again put it for three minutes. Once it is done, check, the inserted tooth pick should come out clean.
- Keep it in the microwave for sometime.
- Spread the ganache with a knife. Recipe for ganache is below.
- Decorate with cashew pieces and choco chips.
To make the ganache :
Take cream in a pan, warm it. Add the chocolate and butter, cook it for three minutes. Chocolate ganache is ready. Keep it in the refrigerator for sometime.
Ingredients
Method
- Take oil in a bowl.
- Mix coffee powder in quarter glass of water.
- Grate chocolate.
- Put coffee mixture, chocolate gratings, vanilla extract and lemon juice to the oil.
- Put some milk and mix it well.
- Sieve maida, baking powder and soda together.
- Mix them together. Add little milk if needed, the batter should be of medium consistency. Break the walnuts and put them into it.
- Pre-heat the microwave oven for two minutes.
- Grease a tin.
- Pour the batter.
- Microwave it for five minutes on High, reduce the temperature, and again put it for three minutes. Once it is done, check, the inserted tooth pick should come out clean.
- Keep it in the microwave for sometime.
- Spread the ganache with a knife. Recipe for ganache is below.
- Decorate with cashew pieces and choco chips.
- To make the ganache :
- Take cream in a pan, warm it. Add the chocolate and butter, cook it for three minutes. Chocolate ganache is ready. Keep it in the refrigerator for sometime.
Notes
- Any other oil may be used.

If you have liked this post, do share it with your family and friends. If you ever make this, take a picture and share it by tagging @foodiejayashree on Instagram or @evergreendishes on Facebook or Twitter.


 Ingredients: