Author: Evergreendishesdev

  • Chaler Payesh / Bengali Rice Kheer

    Chaler Payesh / Bengali Rice Kheer

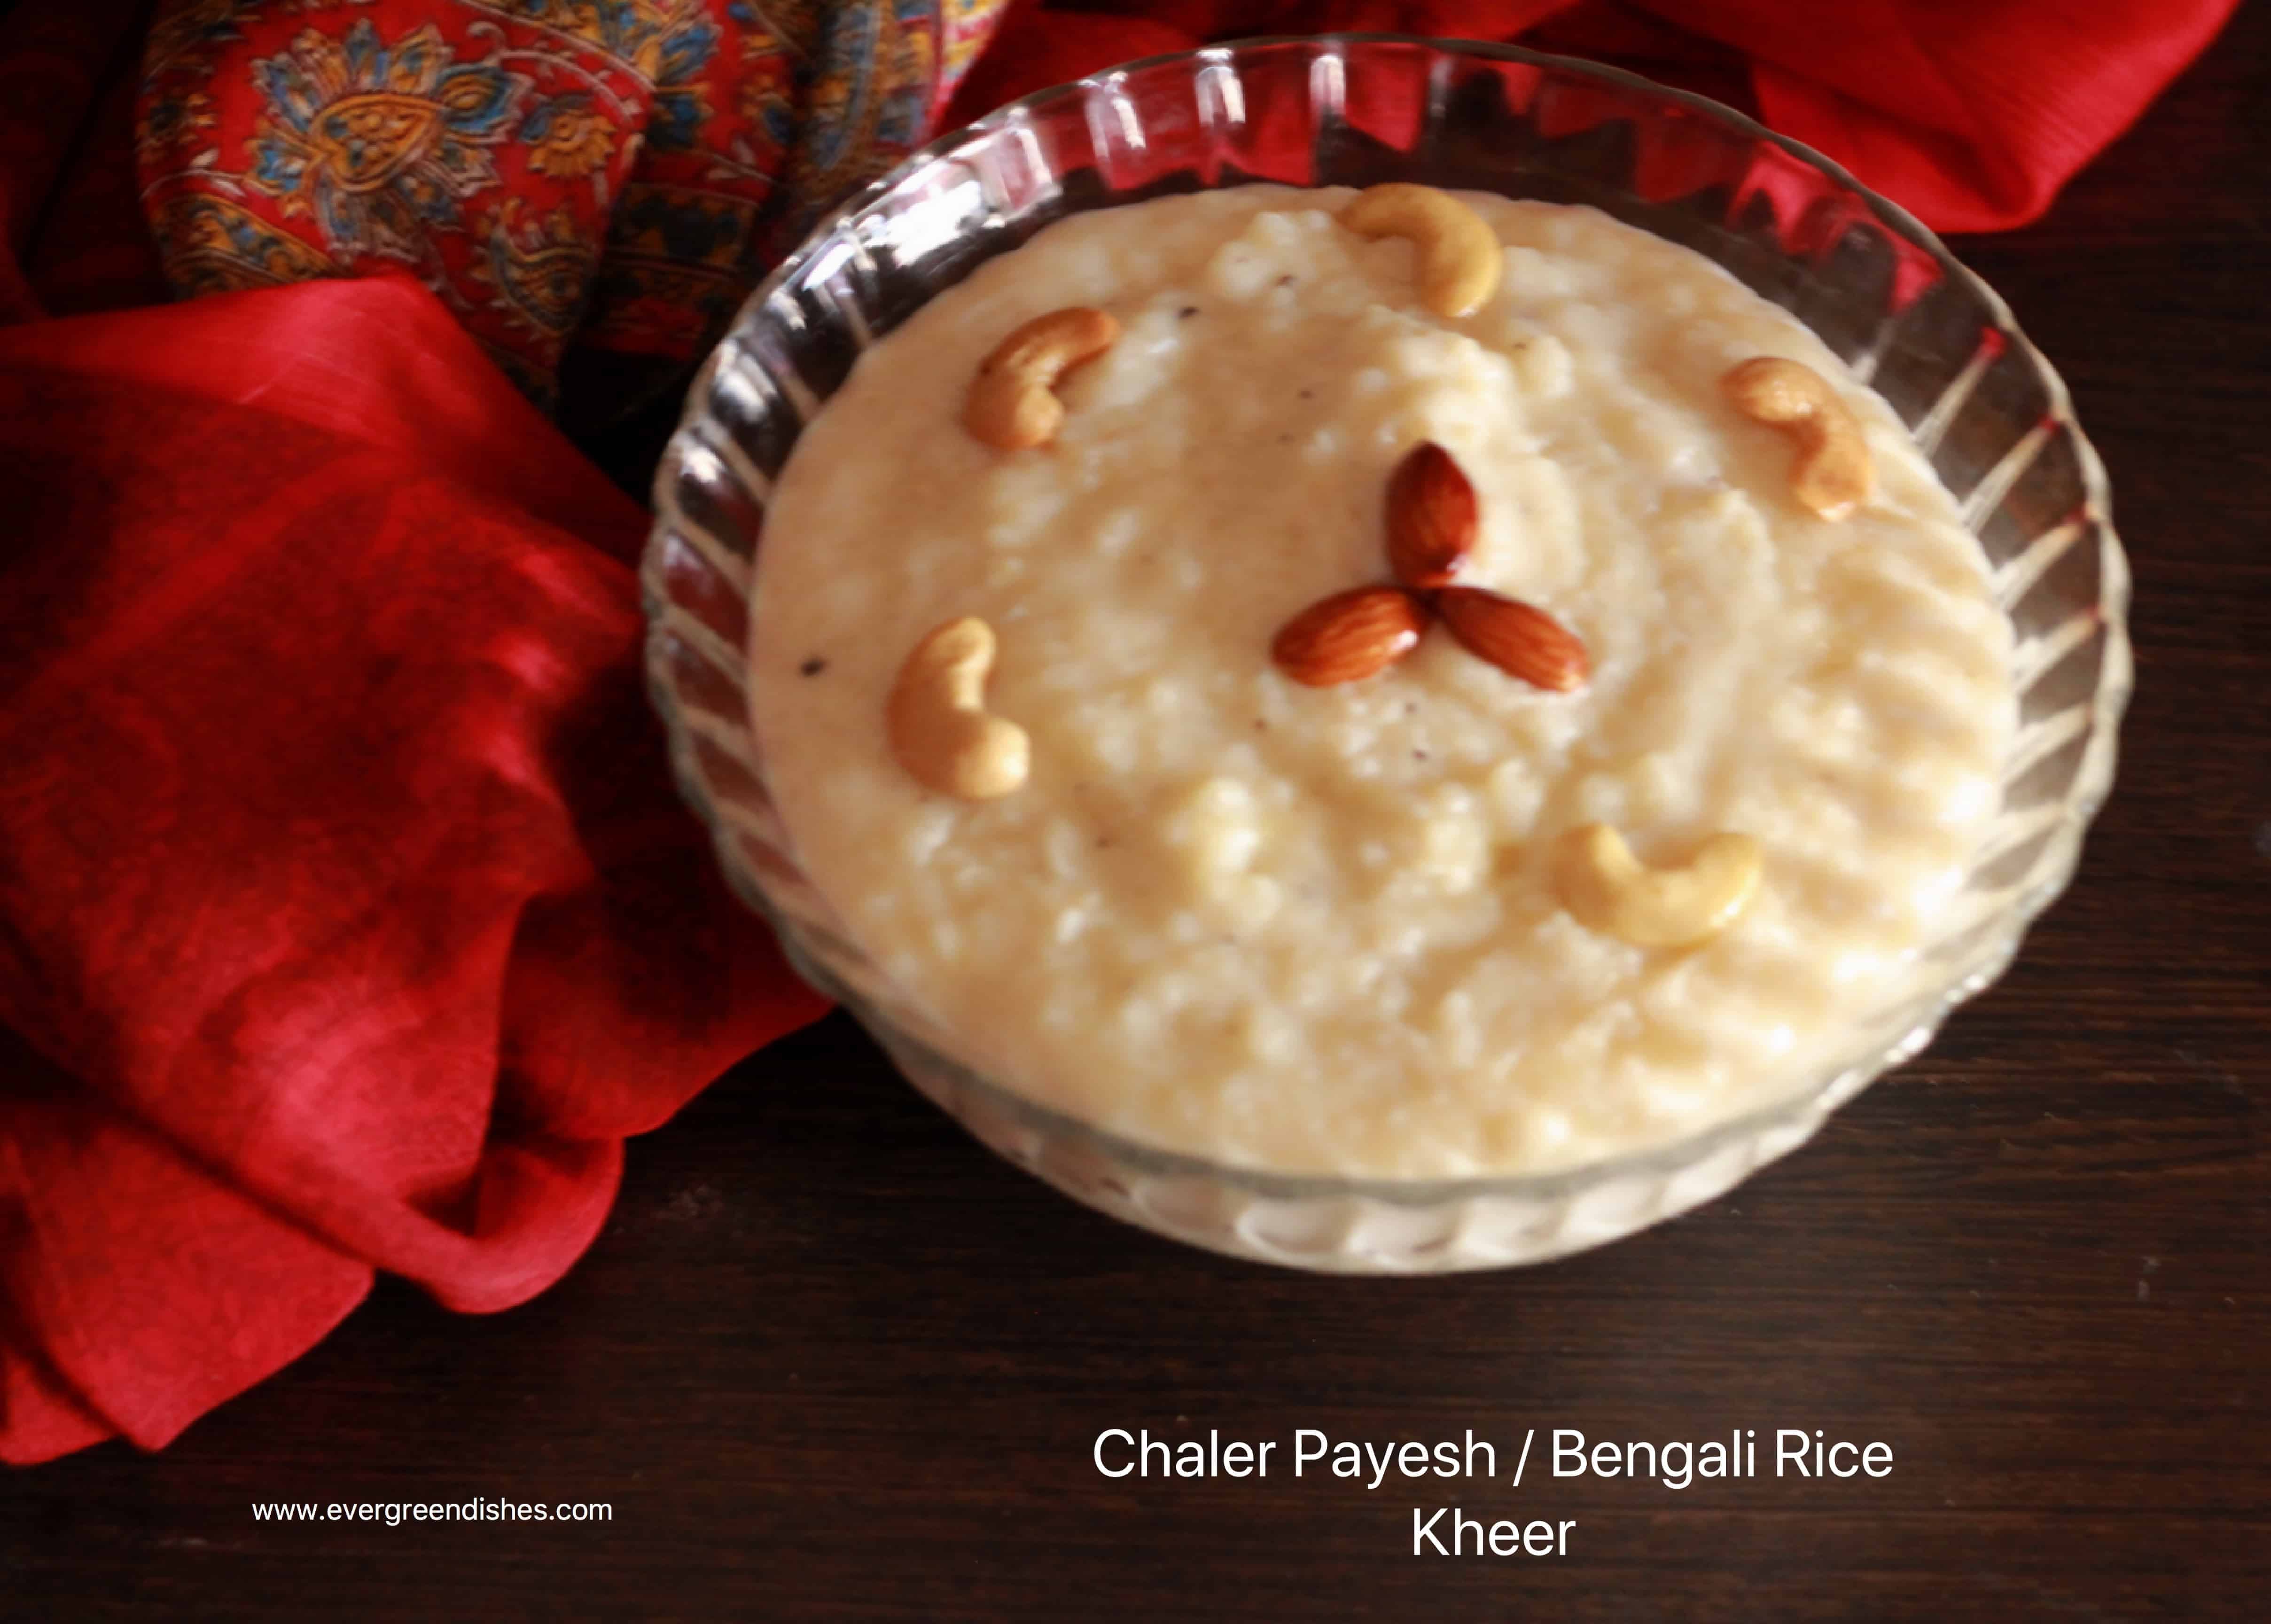
    Chaler Payesh is a traditional rice kheer recipe of Bengali cuisine. It is one of the favourites of the Bong community and is usually prepared during ceremonies and festivals. The kheer is creamy, rich, aromatic and melt in the mouth.

    Kheer usually refers to the sweet prepared by boiling milk and rice. Each region has its own variety of kheer and today I have the Bengali version here.

    Usually Gobindobhog variety of rice is used in preparing Chaler Payesh. If you do not have it, use basmati rice. Bay leaf is added  to the milk while it is cooked, it gives a good aroma. Rich milk is boiled and simmered in soaked rice grains on a low flame, it is then sweetened with sugar and garnished with dry fruits.

    About Bengali cuisine :

    Bengali cuisine is the food served in the state of Bengal. It mainly consists of west Bengal, Tripura and Assam. It is known for the different flavours and the varied desserts.  It is one of the popular cuisines relished for the variety of sabzi too. The Bengali cuisine can be divided into four types of food as charbe, chosya, lehya, and peya. Charbe is the food chewd as rice and fish. Choosya is the food that is thin and usually sucked. Condiments as pickles are usually licked and belong to the category of Lehya. Peya are the ones as milk and tea.  (Source: Wikipedia)

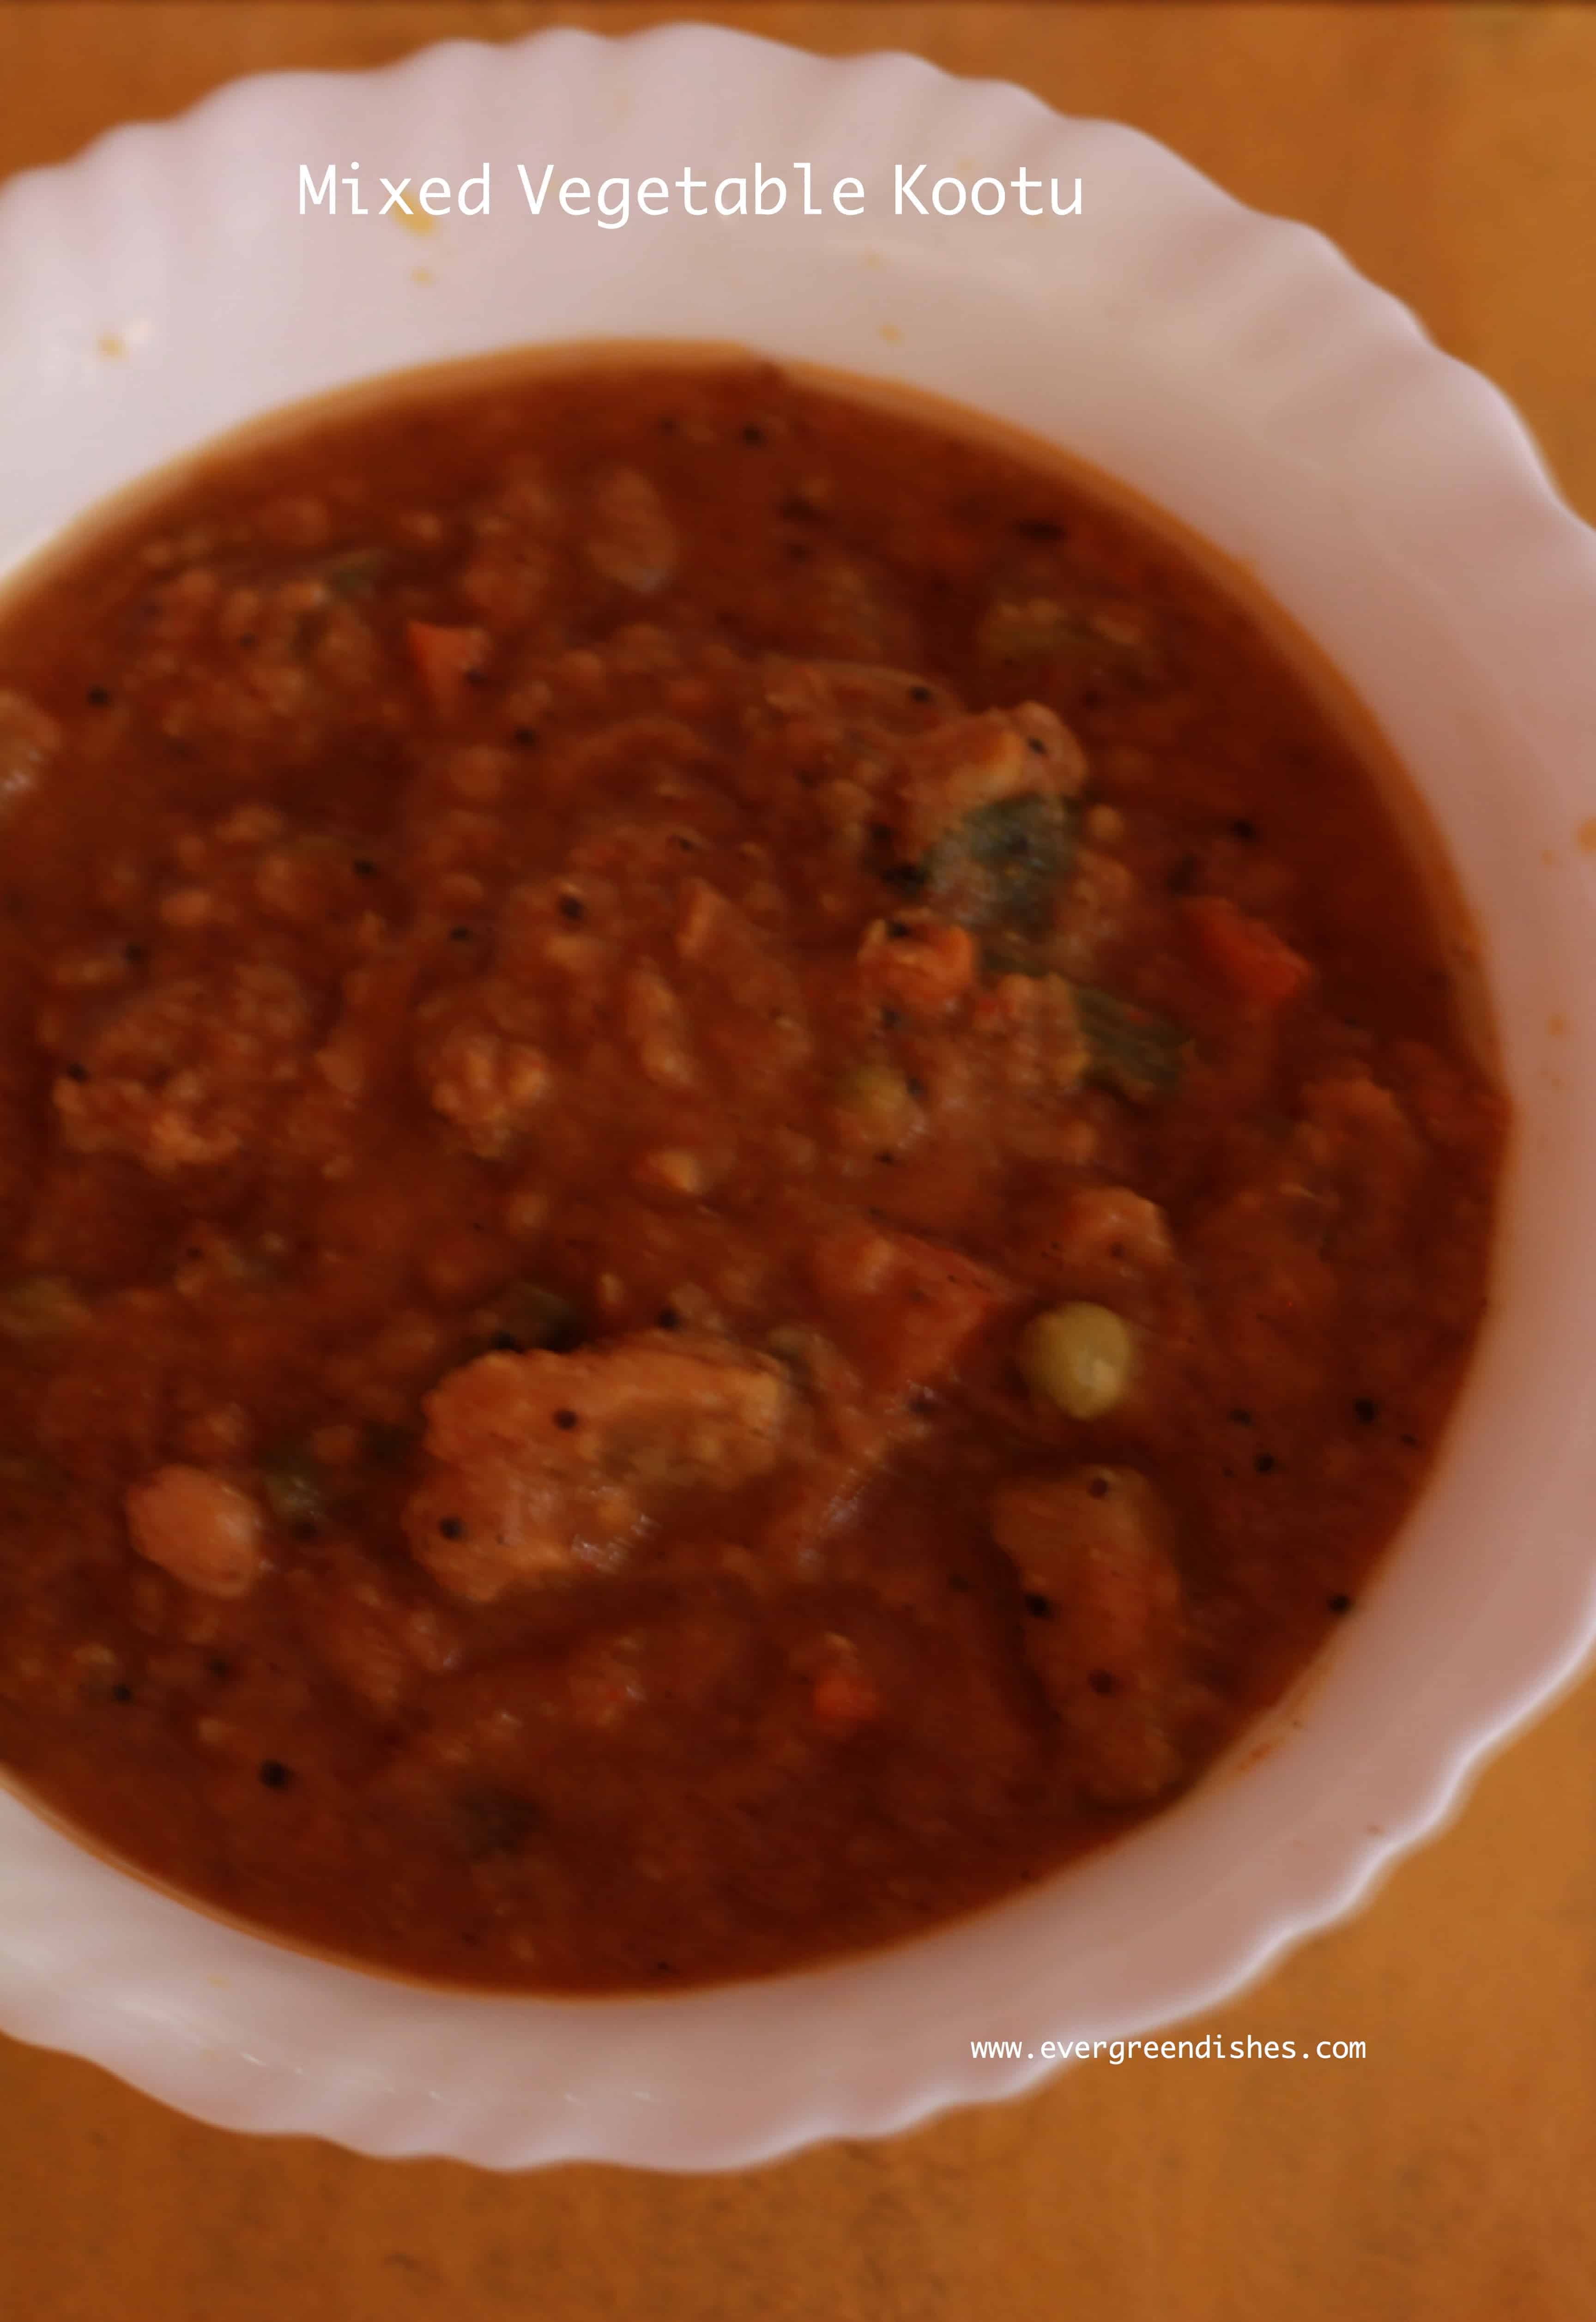
    A few Bengali dishes on blog:Mixed Vegetable, Bandhakopir Torkari, Ghugni Chaat, Komala Payasam

    Other festive sweets : Khaja, ABC halwa, Shenga Holige

    chaler payesh /bengali rice kheer
    chaler payesh / bengali rice kheer

    Chaler Payesh / Bengali Rice Kheer

    Ingredients:

    • 4 cups (1 litre) milk
    • 4 tablespoon gobindobhog or basmati rice
    • 1 bay leaf
    • 1/2 cup sugar
    • 2 teaspoon  + 1 teaspoon ghee
    • cashew
    • almond
    • 1/2 teaspoon cardamom powder

    Method:

    1. Wash the rice and soak in water for fifteen minutes.
    2. Put the milk in a thick bottom pan and keep it to boil. Put bay leaf in it.
    3. Once it boils, discard the water from the rice, smear it with ghee and put in the milk.
    4. Let cook on a low flame. Keep stirring in between.
    5. Once the rice is fully cooked and soft, add sugar. Cook for three minutes.
    6. Add cardamom powder and remove from flame.
    7. Roast the nuts in ghee and garnish it.
    chaler payesh
    chaler payesh
    chaler payesh /bengali rice kheer
    Evergreendishesdev

    Chaler Payesh / Bengali Rice Kheer

    Chaler Payesh is a popular, delicious and  creamy dessert from Bong community. Gobindobhog rice is cooked in milk and sweetened with sugar and garnished with dry fruits. 
    Prep Time 15 minutes
    Cook Time 30 minutes
    Total Time 45 minutes
    Servings: 6 people
    Course: Dessert, traditional sweets
    Cuisine: Bengali, Indian

    Ingredients
      

    • 4 cups milk
    • 4 tablespoon gobindobhog or basmati rice
    • 1 bay leaf
    • 1/2 cup sugar
    • 2 +1 teaspoon ghee
    • cashew
    • almond
    • 1/2 teaspoon cardamom powder

    Method
     

    1. Wash the rice and soak in water for fifteen minutes.
    2. Put the milk in a thick bottom pan and keep it to boil. Put bay leaf in it. 
    3. Once it boils, discard the water from the rice, smear it with ghee and put in the milk.
    4. Let cook on a low flame. Keep stirring in between.
    5. Once the rice is fully cooked and soft, add sugar. Cook for three minutes.
    6. Add cardamom powder and remove from flame.
    7. Roast the nuts in ghee and garnish it.

    Notes

    • Gobindobhog rice is usually used here, if it is not available use basmati rice.
    • Soak the rice for atleast fifteen minutes. 

    This post is part of 54 Healthy Wealthy Cuisines where the theme is “Mishti Dussehra at HW”

    Other Bengali dishes by co-bloggers

    If you have liked this post, do share it further. Follow evergreendishes on Twitter, Pinterest, Instagram and Facebook

    Pin it for later:

    a bowl of chaler payesh garnished with nuts
    Chaler Payesh | Bengali Rice Kheer

    If you ever make Chaler Payesh, do take a picture and share with me by tagging @foodiejayashree on Instagram or @evergreendishes on Facebook. Subscribe to get all updates and an e-book for free.

  • Chocolate Chia Seed Pudding

    Chocolate Chia Seed Pudding

    Chocolate chia seed pudding is a tasty, easy to make, high fiber, protein packed ideal for breakfast. It can be made in fifteen minutes with a little preparation.  (more…)

  • Ulli Theeyal / Kerala Shallot Curry

    Ulli Theeyal / Kerala Shallot Curry

    Ulli theeyal/ kerala shallot curry is a tasty accompaniment with hot steamed rice. It is often prepared in daily cooking in Kerala cuisine.

    Kerala is a state in the south western region of India, a beautiful state and a tourists pride. As one enters the state, palm lined beaches and backwaters, a network of canals and estates of spices, tea and coffee are witnessed and mesmerising. It is called as “Gods Own Country” and  ” Land of Spices”

    But the recent devastation has taken a toll of the life of most people. It was one of the severe floods that the state has witnessed in last hundred years.  Many people lost their lives while some are left homeless and still struggling. My heart goes out to these poor souls.

    Shhhhh Secretly Challenge group has now reached Kerala where we are paired and given two ingredients to prepare dish of a particular selected state. I was paired with Vidya Narayan who blogs at Masala Chilli and she gave me shallots and tamarind as the secret ingredients. Do visit her blog www.masalachilli.com for delicious dishes.

    The recipe that I have chosen to prepare is the Ulli Theeyal, a kerala style onion curry. It is tasty and pairs well with hot steamed rice. A mixture of spices are roasted and powdered, the shallots are cooked in seasoning and then tamarind pulp is added to it along with the spice mix.

    As every cuisine, Kerala cuisine too is unique, different and tasty. Fresh grated coconut is one of the essentials in their cooking. Spices as cumin and pepper are regularly. Vegetables of many kind are consumed. Shallots are commonly used in this cuisine. The oil generally used is coconut oil. Now, let’s get cooking Ulli Theeyal

    ulli theeyal
    ulli theeyal

    Ulli Theeyal / Kerala Shallot Curry

    Ingredients:

    For the curry: 
    • 300 grams shallots
    • 4 cloves garlic
    • 2 tablespoon coconut oil
    • 1/2 teaspoon mustard seeds
    • 1/2 teaspoon chilli powder
    • small lemon ball sized tamarind
    • salt
    For the paste:
    • 1/2 cup fresh coconut
    • 1 tablespoon coriander seeds
    • 1/2 teaspoon cumin seeds
    • 4 dry red chilly
    • 1/4 teaspoon fenugreek seeds
    • 2 tablespoon coconut oil
    • 1/2 teaspoon mustard seeds
    For the tempering:
    • 1 teaspoon coconut oil
    • 1/4 teaspoon mustard seeds
    • curry leaves
    • 2 dry red chilly

    Method:

    1. Remove the skin of the shallots.
    2. Soak tamarind in water.
    3. Dry roast the spices for a few minutes, put them aside, then dry roast the coconut until it is golden in colour and you get a good aroma.
    4. Let cool. Grind all ingredients to a paste with water.
    5. Take oil in a pan, add the mustard seeds, as it crackles put turmeric powder and the shallots. Let cook for four to five minutes.
    6. Extract the pulp from the soaked tamarind.
    7. Add the pulp to the shallots, let cook for ten minutes.
    8. Put the ground paste and salt to it. Let cook for two minutes.
    9. Make seasoning, heat coconut oil, add the mustard seeds, as it cracles put the dry red chilly and curry leaves. Pour it over the curry.
    10. Ulli Theeyal is ready to serve.

    Take a tip:

    1. I have not made it very spicy, add two more dry chilly while roasting if you want.
    2. Shallots can be easily peeled by putting in water.
    3. Oil may be added while roasting the ingredients but I have not used.
    4. Use coconut oil for a good taste of the dish.


    making of ulli theeyal
    making of ulli theeyal
    ulli theeyal
    Evergreendishesdev

    Ulli Theeyal / Kerala Shallot Curry

    Ulli Theeyal is a spicy curry of shallots cooked in paste of roasted coconut and other spices along with tamarind extract. It pairs well with hot steamed rice. 
    Prep Time 10 minutes
    Cook Time 20 minutes
    Total Time 30 minutes
    Servings: 6 people
    Course: dinner, lunch, lunch ideas, Side Dish
    Cuisine: kerala, south india

    Ingredients
      

    For the curry
    • 300 grams shallots/ small onions
    • 4 cloves garlic
    • 2 tablespoon coconut oil
    • 1/2 teaspoon mustard seeds
    • 1/2 teaspoon chilli powder
    • tamarind small lemon size ball
    • salt to taste
    For the paste
    • 1/2 cup fresh coconut
    • 1 tablespoon coriander seeds
    • 1/2 teaspoon cumin
    • 4 dry red chilli
    • 1/4 teaspoon fenugreek seeds
    For the tempering
    • 2 teaspoon coconut oil
    • 1/4 teaspoon mustard
    • 2 dry red chilli
    • a few curry leaves

    Method
     

    1. Remove the skin of shallots.
    2. Soak tamarind in water.
    3. Dry roast the spices for a few minutes. Put them aside.
    4. Dry roast the coconut until light brown in colour. 
    5. When cool, grind the ingredients to a paste. 
    6. Heat oil in a pan, add mustard seeds, as it crackles put the shallots and garlic cloves in it. Let cook for sometime. 
    7. Extract tamarind pulp.
    8. Put the pulp to it, let cook for ten minutes.
    9. Add the ground masala, chilly powder and salt to it. Let cook for sometime.
    10. In a small pan, make the tempering. Heat oil, add mustard seeds, as it crackles, thrown in red chilly and curry leaves. Pour it over ulli theeyal curry. 

    Notes

    Take a tip:
    1. I have not made it very spicy, add two more dry chilly while roasting if you want. 
    2. Shallots can be easily peeled by putting in water. 
    3. Oil may be added while roasting the ingredients but I have not used. 
    4. Use coconut oil for a good taste of the dish. 
     

    If you have liked this post, do pin it for your reference. If you ever recreate this dish, do share it on Instagram, tag @foodiejayashree, it will be nice to see your creation.

    Have you subscribed to get all updates and an e-book for free?

    Follow Evergreendishes on Facebook, Twitter, G+, Instagram and Pinterest


    shhhhh secret cooking challenge
    shhhhh secret cooking challenge
  • Ragi Halbai / Finger Millet Fudge

    Ragi Halbai / Finger Millet Fudge

    Jump to Recipe Print Recipe

    Ragi Halbai or Finger millet fudge is a tasty, soft, chewy fudge made of finger millet, coconut and jaggery. It is a healthy sweet.  It is a dish from South Canara region of Karnataka. Here, the whole grain of finger millet is used by soaking and then grinding and cooking it.

    The use of millets is more so now than ever as the benefits one reap is abundant. It is nutritious and high in fibre. I prefer using ragi at home since it is liked by all.  Do check these breakfast recipes Ragi Idli, Ragi Thalipeeth, Ragi Khichu

    South Canara cuisine is delicious and coconut is one of the main ingredients in their cooking. The coconut used is fresh one and it is usually ground to a paste and used in most dishes.

    With many festive days ahead, you can try this recipe soon.

    What is Ragi ?

    Ragi is popularly known as Finger millet or Nachni. Finger millet or Elusine Coracana is an annual herbaceous plant widely grown as a cereal crop in the arid and semi -arid areas in Africa and Asia.  It came to India around 2000 BC and since then its been consumed in different ways.

    Nutrients in Ragi

    Ragi is a whole grain that is gluten free and staple in South India. It is rich in fiber that helps with weight loss and diabete. It is packed with calcium, good carbs amino acids and Vitamin D. The nutrition per 100 grams is as below: ( Source: Wikipedia)

    • Protein 7.6 g
    • Fat 1.5 g
    • Carbs 88g
    • Calcium 370 mg
    • Vitamin A 0.48 mg
    • Thiamine 0.33 mg
    • Riboflavin 0.11 mg
    • Niacin 1.2 mg
    • Fiber 3g

    Benefits of Ragi :

    1. Rich in calcium – It is one of the best non- dairy sources of calcium when compared to other grains. Dr. Anju Sood, a nutrionist from Bangalore says, ” It is extremely beneficial for growing kids and can be given in the form of porridge”
    2. Help in controlling diabetes: The grains seed coat is abundant in polyphenol and dietary fibre. The low glycemic index lessens food cravings and helps maintain blood sugar.
    3. Relax the body: The regular usage of finger millet has found to help stress  related disorders as insomnia, depression and anxiety.
    4. Helps in weight loss: The high of dietary fibre helps one to keep full for a long time, thus the cravings are less.
    5. Battles anemia: It is rich source of natural iron and thus a boon for anaemic patients. Once it is sprouted, the Vitamin C level increases and leads to easy absorption of iron into the bloodstreams.
    6. Reverts skin ageing: methionine and lysine present in it  make tge skin tissue less prone to wrinkles and sagging.
    ragi halbai

    Now, getting on to the recipe without further ado:

    Ragi Halbai / Finger Millet Fudge

    Ingredients:

    • 1 cup ragi
    • 1 cup jaggery
    • 1 cup fresh coconut
    • 2 tablespoon ghee
    • 2.5 cup water
    • 1/2 teaspoon cardamom powder
    • a few cashew

    Method:

    1. Soak  ragi for five hours.
    2. Grate the coconut.
    3. Discard the water, grind the ragi to a fine paste along with coconut by adding little water.
    4. Strain the liquid through a sieve, press the residue  with a spoon Grind it again with some water. I used one and half cup of water to grind.
    5. Grease a plate with a little ghee.
    6. Take the jaggery and melt it with a cup of water. Filter it to remove impurities.
    7. Put the melted jaggery and the strained puree in a thick bottom pan. Let it cook. Add some ghee, keep stirring, otherwise it will stick to the bottom of the pan.
    8. Put the remaining  ghee, once it thickens to a mass and leaves the side, put cardamom powder, mix and pour it over the greased plate.
    9. Cut it into squares.  Decorate with roasted cashews. Ragi Halbai is ready to serve.

    Pre- requirements:

    Ragi are small red grains, one needs to clean it properly as tiny specks of impurities are seen. It is usually soaked in water and then the water is slowly discarded. The grains are then put to dry and used.


    Evergreendishesdev

    Ragi Halbai / Finger Millet Fudge

    5 from 7 votes
    Ragi halbai is a twist to the usual one that is prepared using rice. It is tasty and healthy. Finger millet, coconut and jaggery are cooked together to form a delicious fudge. 
    Prep Time 5 hours
    Cook Time 20 minutes
    Total Time 5 hours 20 minutes
    Servings: 15 pieces
    Course: festive treats, healthy snacks, traditional sweets
    Cuisine: dakshina kannada, karnataka

    Ingredients
      

    • 1 cup ragi
    • 1 cup jaggery
    • 1 cup fresh coconut
    • 2 tablespoon ghee
    • 2.5 cup water
    • 1/2 teaspoon cardamom powder
    • a few cashew for topping

    Method
     

    1. Soak ragi for five hours.
    2. Grate the coconut.
    3. Discard the water, grind ragi and coconut to a fine paste by adding little water.
    4. Strain the liquid through a sieve, press the residue with the back of a spoon to extract the liquid. Grind it again with some water, and again strain it. I used one and half cup of water for grinding. 
    5. Smear some ghee on a plate. 
    6. Take the jaggery and melt it with a cup of water. Strain to remove impurities. 
    7. Now, put the jaggery and the strained mixture in a pan and lett it cook. Add some ghee to it. Keep stirring, otherwise, it will stick to the pan. 
    8. Add the remaining ghee, once it foerms a mass and leaves the side, put cardamom powder, mix and spread it over the greased plate. 
    9. Cut it into squares, decorate with roasted cashews. 

    Notes

    • Ragi needs to be cleaned well before using. Small impurities are present that can damage organs of the body, thus it is highly recommended to clean it properly before using. 
    • It is usually rinsed in water and gently the water is displaced, the impurities are seen lying at the bottom. 
    • While grinding, check the amount of water that you are utilising, it is important you use the recommended amount.
    • While  cooking, keep stirring the liquid. 

    If you have liked this post, do share it further.

    ragi halbai

    This post is part of the #HWCuisine with Ragi as the theme. Here are the other Ragi recipes by my co-bloggers

    About the event :

    Sending this post to Foodies_Redoing Old Post_113. It is a fortnightly event where we work on an old post either by changing the picture, text, formatting or anything else related to the post. Here, I have changed the pictures.This is an old post which I had written in 2018, now I have changed it with better pictures.


    If you ever make this ragi halbai  or any of my other dishes,  do take a picture and tag @foodiejayashree on Instagram or @evergreendishes on Facebook or Twitter. I will be glad to see your creation and share it further. Let’s be connected, do follow on social media platforms. Until next time, let’s stay connected.  Subscribe to get all updates and an e-book for free. Check out my e-books on Amazon.  Happy Cooking !

  • Zucchini Paratha / Thepla | Guest Post Series

    Zucchini Paratha / Thepla | Guest Post Series

    Zucchini Paratha is a tasty and healthy flat bread. It is ideal to treat fussy kids. This is another variety of thepla which  is ideal for lunch, breakfast or one can even pack it in the box.  (more…)

  • Krackjack Sev Puri / Fun Activity

    Krackjack Sev Puri / Fun Activity

    Krackjack Sev Puri is a fun activity for kids. With a couple of holidays around, children are soon bored. Get them to do this snack, they will enjoy doing and relishing it.

    Krackjack biscuits are product of Parle. I have used the salted crackers here.

    Since I have put it as a fun activity for kids, I would like to inform that children under five years cannot do this. Kids over five need to have all vegetables boiled and cut. Do not allow the children to use sharp instruments without adult supervision.

    The author is not responsible for any accidents happened thereafter.


    krackjack sev puri
    krackjack sev puri

    Krackjack Sev Puri

    Ingredients:
    • 15 salted biscuits
    • 2 boiled potatoes
    • 1 onion finely cut
    • 1/2 teaspoon chilly powder
    • 1/2 teaspoon chat masala
    • 1 teaspoon tomato ketchup
    • 1 tomato finely cut
    • 1/4 cup small sev
    Method:
    1. Take the boiled potato, mash it, add onion and all other ingredients ( except sev and tomato) to it. Mix well. Keep it aside.
    2. Arrange the krackjack biscuits in two plates, take some potato mixture, flatten it between palms, put it on one biscuit, repeat for the others.
    3. Top with tomato piece and sev. Serve immediately.


    Other easy recipes for kids to get involved: Choco Marie,

    krackjack sev puri
    Evergreendishesdev

    Krackjack Sev Puri

    Krackjack sev puri is a quick snack to make with salted crackers. Arranging and topping makes a fun activity for children during holidays. 
    Prep Time 15 minutes
    Total Time 15 minutes
    Servings: 2 people
    Course: chats, evening snacks, kids favourite
    Cuisine: Indian

    Ingredients
      

    • 15 salted biscuits
    • 2 boiled potatoes
    • 1 onion finely cut
    • 1/2 teaspoon chilly powder
    • 1/2 teaspoon chat masala
    • 1 teaspoon tomato ketchup
    • 1 tomato finely cut
    • 1/4 cup small sev

    Method
     

    1. Take the boiled potato, mash it, add onion and all other ingredients ( except sev and tomato) to it. Mix well. Keep it aside.
    2. Arrange the krackjack biscuits in two plates, take some potato mixture, flatten it between palms, put it on one biscuit, repeat for the others.
    3. Top with tomato piece and sev. Serve immediately.

    Notes

    • Give chopped and boiled vegetables for small children. 
    • It is risky to allow children to chop veggies by themself. 


    If you ever make this, do share your creation with us. Tag @foodiejayashree on Instagram or @evergreendishes on Twitter.

    Do leave a comment below, it motivates me to write more.

    Follow evergreendishes on  social media : Facebook, Twitter, Pinterest, Instagram, G+

    Subscribe to get a book of handy hints for free!

  • Neer Dosa | How to make neer dosa| South Canara

    Neer Dosa | How to make neer dosa| South Canara

    Neer dosa is a popular crepe from South Canara region  of Karnataka. It is soft, fluffy, lacy, tasty and makes one of the finest breakfast ever. Serve it with vegetable stew and a variety of chutney for a yummy weekend breakfast.

    South India is famous for the variety of dosa galore one can endlessly enjoy. Masala dosa, rava dosa, onion uttapam, neer dosa, adai, benne dosa, set dosa are some of them. South Canara was  the region of the present day Dakshina Kannada and Udupi of Karnataka.

    What is Neer Dosa?

    Neer Dosa is another variety of dosa from Karnataka. It is popular in South Kanara region. It is made using only rice, no lentil is used here. Fresh coconut is used, but one can avoid it. Neer means “water” in Kannada. The batter is made as thin as water, thus the name.

    If the batter is thin, can we make it into a crepe?

    Yes, you can make it. Heat a skillet. Take a ladle full of batter, hold the handle of the skillet in one hand and pour the batter with the other. Once you pour the batter, just turn it around and the batter spreads.

    Can anyone make it?

    It does need a little practice, but you can make it. Use a non-stick skillet for best results.

    neer dosa
    neer dosa

    My other South Canara recipes on the blog: Moongdal payasam, Sweet Potato Kheer, Rice Porridge

    What goes in Neer Dosa ?

    • Rice : Raw rice is the main ingredient. Use the regular sona masuri rice. Wash it well and soak for eight hours.
    • Fresh coconut : The other ingredient essential in making neer dosa is fresh coconut. The fresh grated coconut gives a good taste to it.
    • Water : It is needed for grinding and adjusting the consistency of the batter.
    • Oil: You may use any oil but I insist on using coconut oil. It lends a good flavour.
    • Salt: Adjust accordingly.


    How to make the perfect Neer Dosa ?

    The consistency of the batter should be thin. The handle of the skillet is held in one hand and the batter is poured and immediately it is turned around. This helps in getting the required shape. Drizzle oil and cover it with a lid. Once it is done, slowly remove it from the edges. Fold it into a quarter and serve hot with chutney or stew. For best results, I suggest you to use a non-stick dosa tawa.

    Can I store the remaining batter ?

    Keep the remaining batter in the refigerator and use it the next day. Throw away the water which is settled on top. Adjust the consistency and make it.


    neer dosa
    Evergreendishesdev

    Neer Dosa

    Neer Dosa is a popular crepe from South Canara region of Karnataka. 
    Prep Time 15 minutes
    Cook Time 30 minutes
    Total Time 45 minutes
    Servings: 12 crepes
    Course: Breakfast
    Cuisine: dakshina kannada, karnataka, mangalore

    Ingredients
      

    • 1 cup raw rice
    • 1/2 cup fresh coconut
    • water
    • salt
    • oil

    Method
     

    1. Grate the coconut.
    2. Grind the rice with little water, add coconut to it.
    3. Remove the batter in a wide bowl. Add salt to it.
    4. Heat a skillet, take some batter in another bowl, add water to it.
    5. Take a ladleful of batter, hold the handle of skillet in one hand, pour it over and immediately turn it around. Drizzle some oil around it.
    6. Close a lid and let it cook on medium flame. Once it is cooked, slowly scrape it from the side and fold it. Serve hot with chutney or stew.

    Notes

    • Adding of coconut is optional, but it gives a good taste.
    neer dosa
    neer dosa


    If you have liked this post, subscribe to get a book of handy hints for free!

    Follow evergreendishes on other social media, Facebook, twitter and @foodiejayashree on  instagram

    If you ever recreate this dish tag @foodiejayashree on instagram, or @evergreendishes on twitter. I will be glad to see your work.


  • Ragi Khichu / Guest Post Series

    Ragi Khichu / Guest Post Series

    Ragi Khichu is a simple snack prepared from ragi/nachani/finger millet flour cooked in water with simple spices.

    It’s been almost a month since I had a guest blogger on Evergreendishes. Today, I have Archana Potdar of The Mad Scientists Kitchen  with us. She is a versatile blogger who cooks simple, tasty and healthy recipes.

    It was through one of the face book groups that I first met Archana. She is a lively lady and we were soon friends. I have seen her posting many millet recipes and thus requested to post one with finger millet or ragi. Welcome Archana, indeed happy to have you here.

    We all know the goodness of these millets, it is so nice of her to share a wonderful recipe with us. Thankyou so much Archana, I am sure your recipe will be liked by all.

    She has many more recipes such as Ragi Porridge, Ragi Pudding, Bajra ki Khichdi, Bajra and carrot cake to name a few, do visit her blog. And now for the Khichu recipe, it’s over to Archana below:

    Hello all,

    Humble thanks to Jayashree for this pleasure of writing a guest post for her a dedicated blogger, this is indeed a great honour for me.

    The virtual world is strange place where you can meet people from all around the world, share common passions, and become good friends. I am sure you have heard of many such stories. Well I met Jayashree in one of the blogging forums and have become good friends with her.  Jayashree has written books do check her books on South Indian Breakfast she has more but I can remember only this one right now.My tryst with millets began  early on but gained strength

    My tryst with millets started early but gained strength with hubby’s health issues.We had to reset and restart our lifestyle and food habits. Being food lovers, we love nothing better than spending our time and money on good food. Lead eating outside home, it is now, we realise how much that has harmed us! Hubby’s sugar, cholesterol and other parameters had skyrocketed.

    With this background and the fact that we get bored with the same old food I have started experimenting with millets. I am trying to use the different millets to make regular everyday food like bajra khichidi etc. With regular use of these millets, exercise and mindful eating, we have blood reports that are within the standard limits. My sceptical   husband now credits me with his weight loss and better reports, makes all the expected noises about millets on his plate but eats it!  What more does a satisfied food blogger want??

    So today I will like to share Khichu more specifically Ragi Khichu as my guest post as Jayashree wanted me to write any dish with Ragi!

    Ragi Khichu is a simple snack prepared from ragi/nachani/finger millet flour cooked in water with simple spices.

    Khichu or Kichiyu is a traditional Gujarati snack. It is dough made from rice flour used to make papad. Papad made from this dough is known as Khichiya Papad. I have also seen wheat flour Khichu. So why not Ragi or Nachni?  Not that I am the first one to think of it but, since I am trying to add more millets in our diet I considered trying Ragi Kichyu.

    The name khichu is derived from the ductile nature of the dough. Since the dough is tasty, it is consumed as a Farsan (a snack) or as a side dish. Khichu is easy to make and is easily digestible. So in case you are looking for a great snack that is low in calories but rich in iron, protein, fibre, and calcium then look no further than Nachni Khichu.

    As I have said, traditionally, Khichu is made from rice flour. The flour is cooked in water with jeera/cumin seeds and an alkaline salt is known as Papad Khar and then steamed. Khichu is served with groundnut oil and chilli powder.

    Ragi Khichu| Millet Recipes| Snack Recipes

    Ingredients:

    • 1/2 cup ragi /nachni flour
    • 1/2 cup of curd, fresh
    • 1 cup of water
    • salt to taste
    • 1 tsp jeera/cumin seeds
    • 1 tsp red chilli powder
    • 1 green chilli, finely chopped
    • a pinch of hing/asafoetida
    • 1 pinch baking soda (I did not use)
    • Dhania/ coriander leaves finely chopped

    To Serve:

    • 2 tsp oil (I did not use)

     Method:

    • In a non-stick pan, add the curd, water, salt, jeera, chilli powder, baking powder (if using) and green chillies.
    • Mix all the ingredients well and bring to a rolling boil.
    • Once the mixture boils add the ragi flour and stir well as you add the flour.
    • Stir continuously and get rid of all lumps.
    • Psst, the easier way is to get the pot off the flame to add the flour gradually and mix well breaking the lumps, only be quick.  Maybe next time I will take kiddos suggestion and use the immersion mixer.
    • Cook covered on low flame for about 5-10 until the mixture leaves the side of the pan.
    • Add coriander leaves, drizzle the oil if using and dish up immediately.
    Ragi Khichu Guest Post Series
    Ragi Khichu Guest Post Series

    A few other Ragi recipes on the blog : Ragi Thalipeeth, Ragi Idli

    Ragi Khichu Guest Post Series

    Ragi Khichu

    Course: Breakfast, lunch
    Cuisine: Indian

    Ingredients
      

    • 1/2 cup ragi / nachni flour
    • 1/2 cup fresh curd
    • 1 cup water
    • salt to taste
    • 1 teaspoon jeera
    • 1 teaspoon chilly powder
    • 1 green chilly finely chopped
    • a pinch of asafoetida
    • 1 pinch baking soda ( I have not used)
    • coriander leaves finely chopped
    To serve
    • 2 teaspoon oil ( I did not use)

    Method
     

    1. In a non- stick pan, add the curd, water, salt, jeera, chilli powder, baking powder (if using ) and green chillies. 
    2. Mix all the ingredients and bring to a rolling boil. 
    3. Once the mixture boils, add the ragi flour and stir well as you add the flour. 
    4. Stir continuously and get rid of all the lumps. The easier way is to get the pot off the flame to add the flour gradually and mix well breaking the lumps, only be quick. Maybe next time I will take kiddos suggestion and use the immersion mixer.
    5. Cook covered on low flame for about 5-10 until the mixture leaves the side of the pan.
    6. Add coriander leaves, drizzle the oil if using and dish up immediately.

    Pin it for later:

    Ragi Khichu - guest post
    Ragi Khichu – guest post

    About the author:

    Archana Potdar is a working mother, happily married  with two daughters. She started  food blogging as a tribute to two greatest influencers of her life, her mom and mother in law who were great cooks. But now, she gives a healthy touch to all her recipes. She loves to travel, trek and listen to old Hindi songs. Her dreams are to trek the Himalayas ( and hope she does it very soon) Do visit her blog www.themadscientistkitchen.com 

    Follow Archana on TwitterFacebook 

    If you have liked this post do share it further.

    If you ever recreate this dish do tag us on Instagram @foodiejayashree

    If you have not subscribed yet, do sign up. More tasty recipes coming on blog, stay tuned.

    Do follow us on Facebook, Twitter, Pinterest, Instagram

  • Mixed Vegetable Kootu | South Indian Kootu

    Mixed Vegetable Kootu | South Indian Kootu

    Kootu is a tasty lentil curry with mixed vegetables cooked in a blend of spices. It is moderately thick in consistency than sambar. It is usually prepared during festivals and ceremonies. (more…)

  • Quick Open Sandwich

    Quick Open Sandwich

    This  open sandwich is tasty and easy to prepare. The topping can be made ahead, ideal as evening snack or for a light dinner. (more…)