Use fresh curds.
Feel free to use sugar.
Any other nuts such as almonds may be used instead of hazelnut.
Pin it for later:
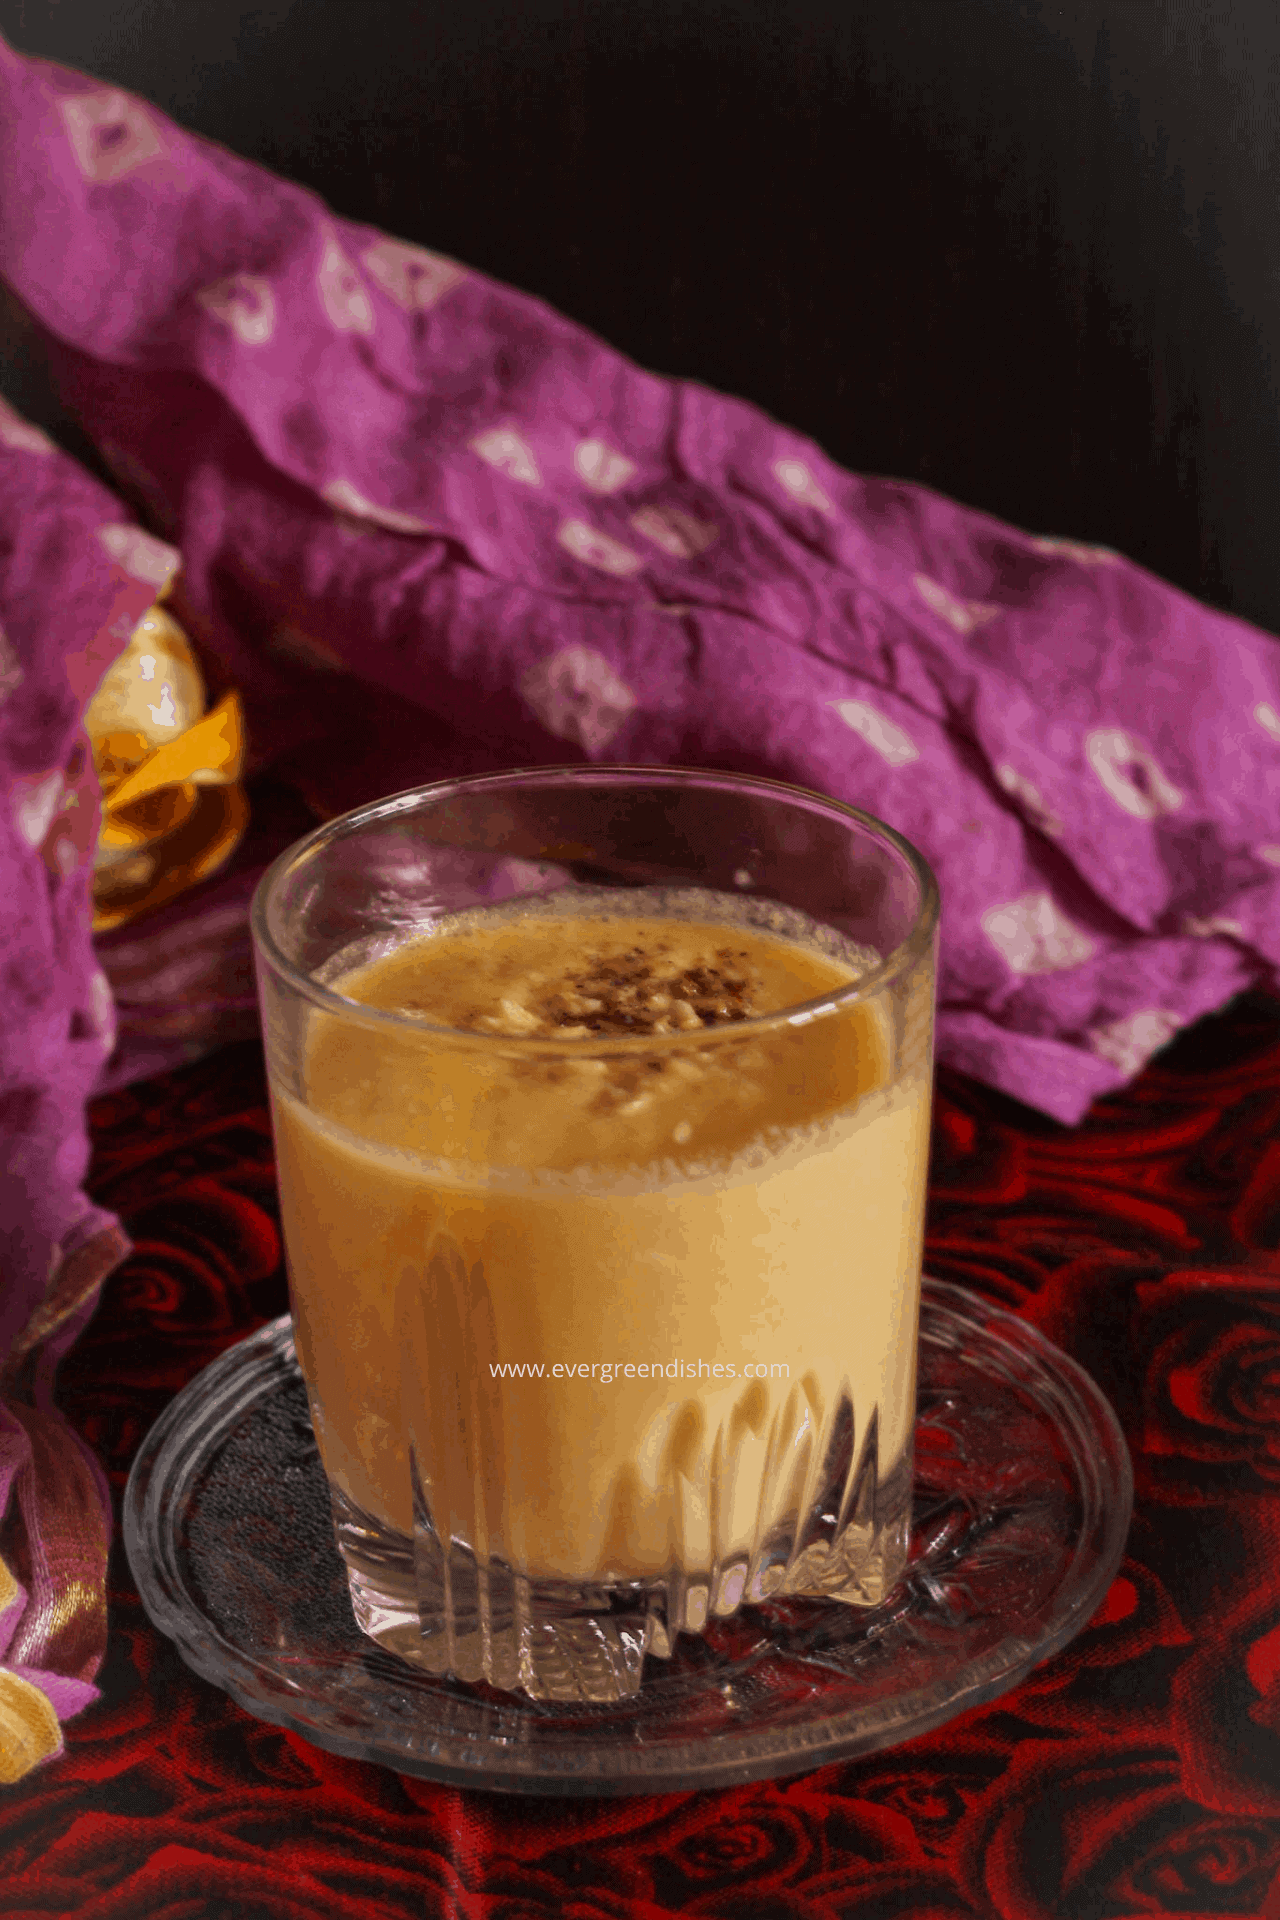
muskmelon lassi
If you have liked this post, do share it further with your family members and friends. If you ever recreate this recipe, take a picture and tag @foodiejayashree on Instagram. Do check out my e-books on Amazon.
Subscribe to get all updates in your inbox and an e-book for free !
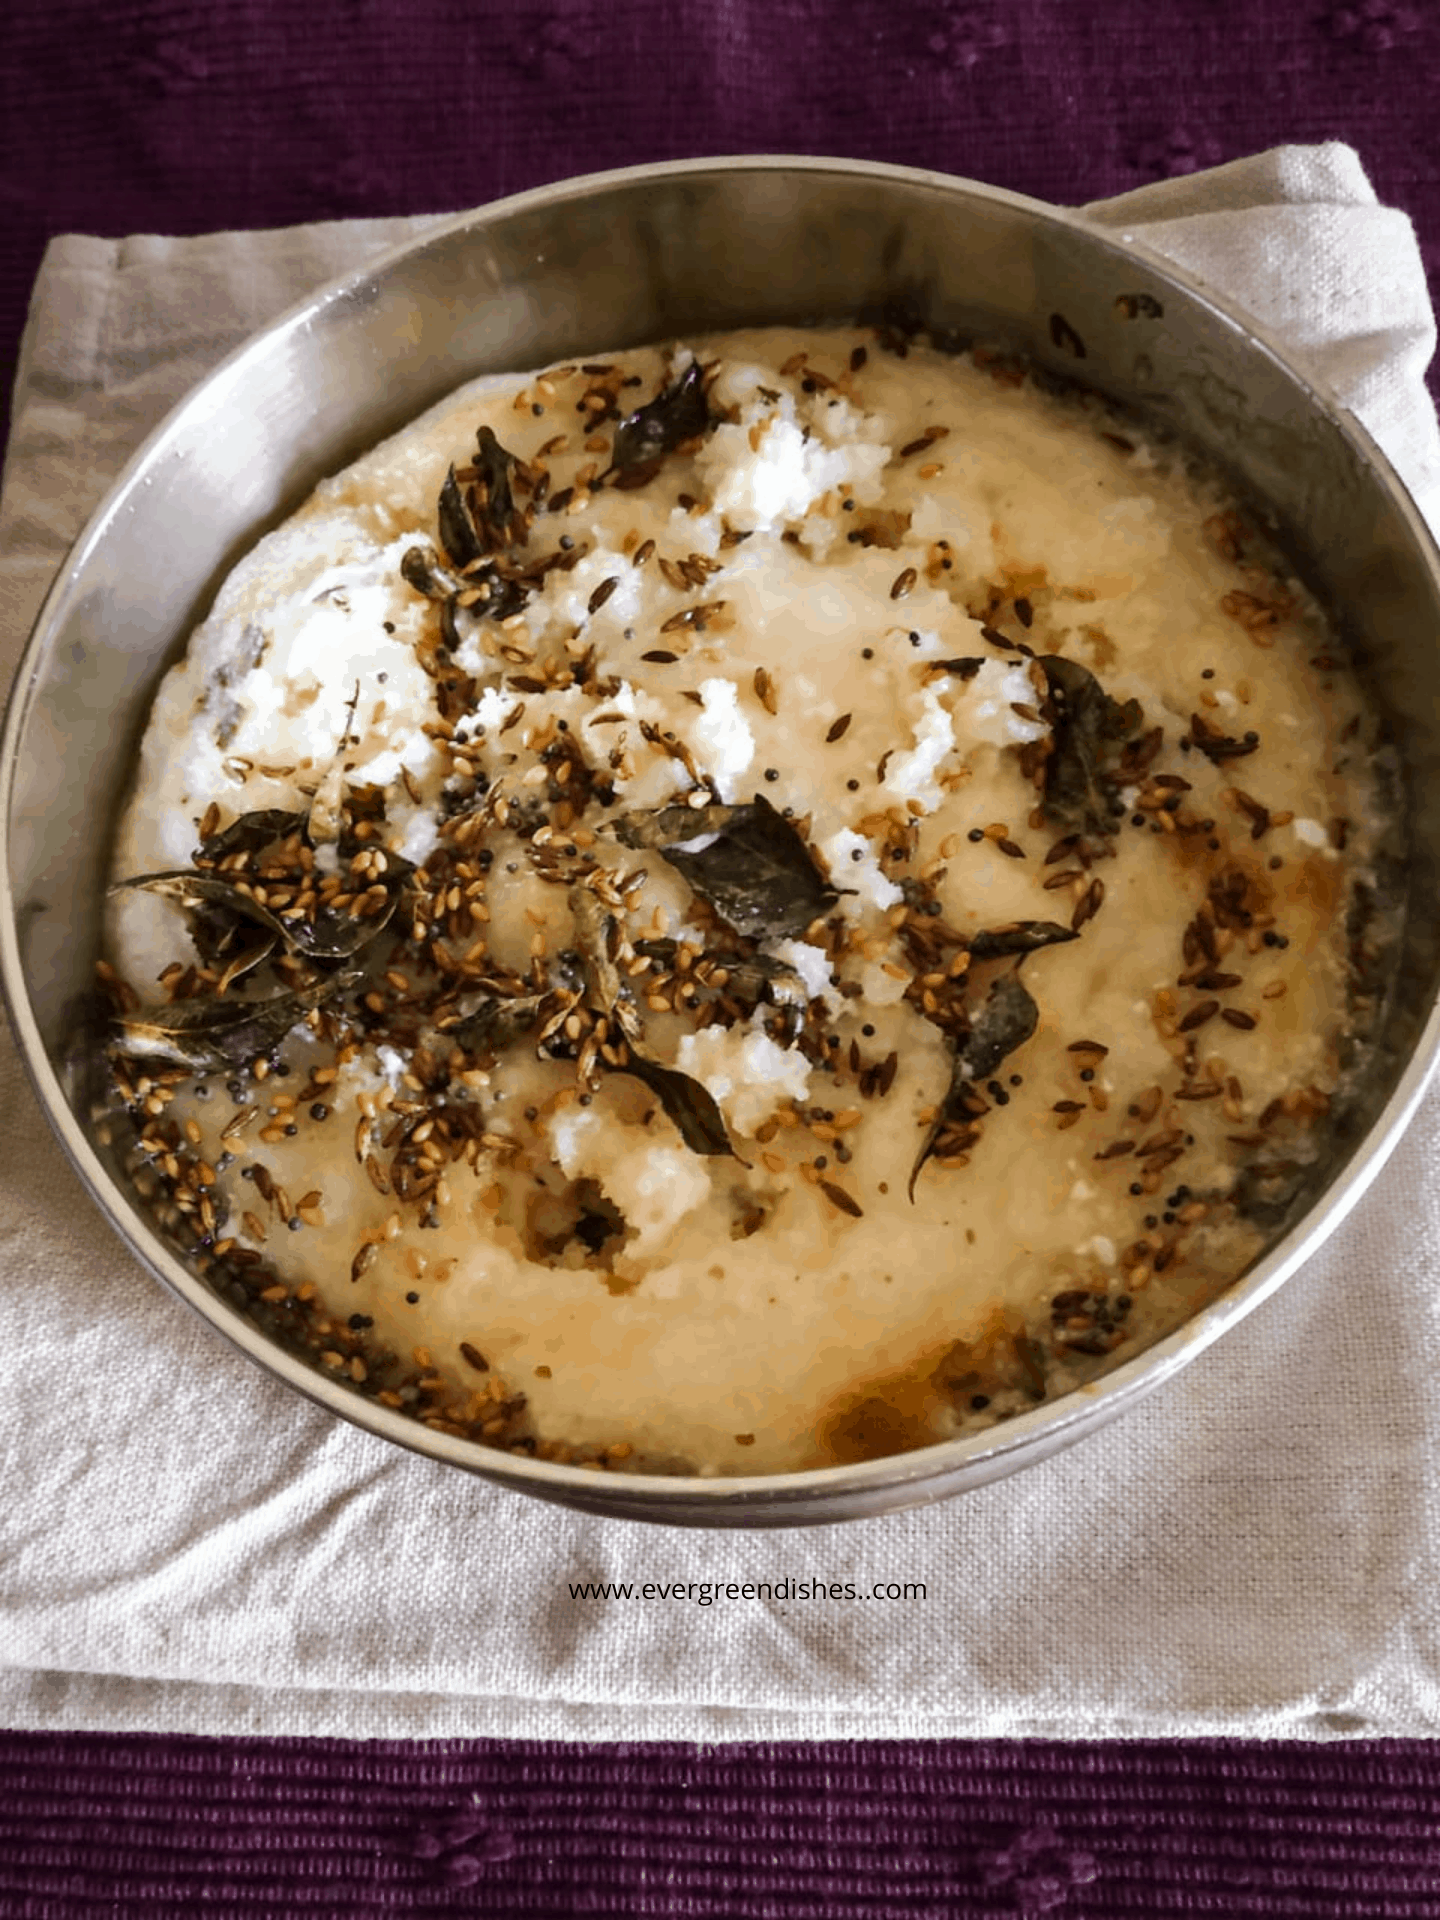
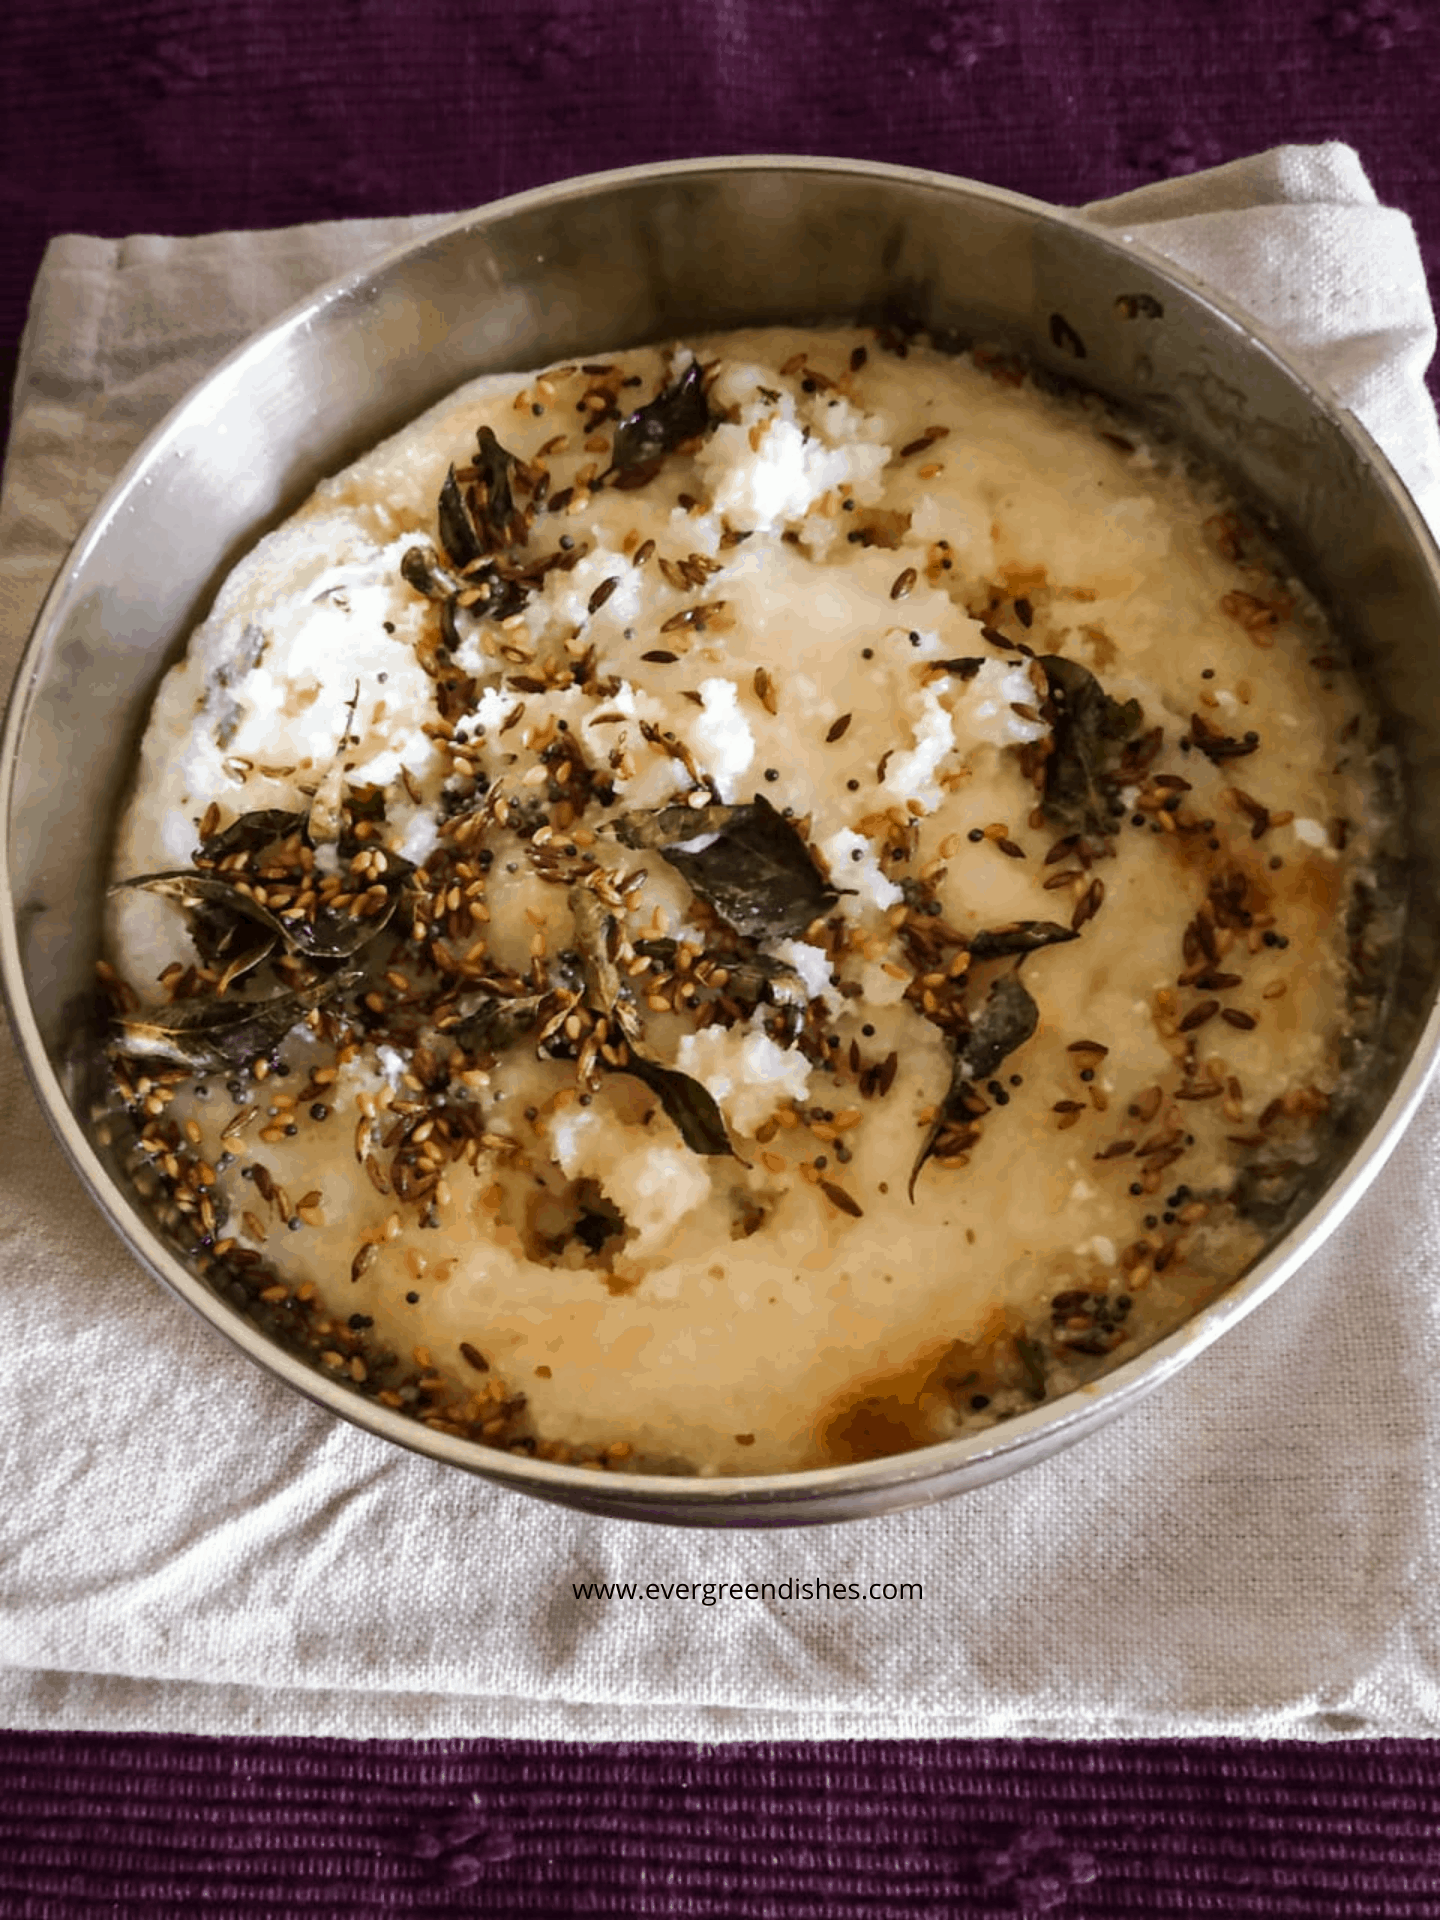
Rava Dhokla is a healthy snack from Gujarati cuisine. It is ideal to serve for breakfast or as after school snack. It is soft, fluffy and gets ready in 30 minutes.
Rava Dhokla recipe is a no mess, straight forward recipe. You take the right ingredients and follow the procedure, you are done with best snack. Some people must be knowing my love for dhoklas, they are not only healthy but tasty. I love the fermented version, but these instant recipes are time saviour. They do not need elaborate preparations.
The recipe for rava dhokla makes use of fine semolina. Do use the same, the coarse variety does not give good results. As it is made instantly, we need to use sour curd. But, make sure the curd is good. Some sour curd give bad odour, do not use it. It not only spoils the dish, it may upset the tummy also. Another aspect is the baking soda. I prefer using baking soda, one can also substitute with eno fruit salt.
Once the seasoning is made, I prefer adding a little buttermilk (regular) to it. I mix and pour this mixture once the dhokla is cut into pieces.
Let’s get to the recipe of Rava Dhokla:
Ingredients:
1 cup fine semolina
1 cup sour curd
1 teaspoon green chilli ginger paste
1 tablespoon fresh coriander
salt
1/3 cup water
1/2 teaspoon baking soda
For the seasoning:
2 teaspoon oil
1/4 teaspoon mustard seed
1/2 teaspoon cumin
1 teaspoon sesame
1 green chilli
curry leaves
Method:
Make paste of ginger and green chilli.
In a wide bowl, add semolina. Put curds to it. Add ginger-chilli paste, finely cut coriander and salt to it. Mix with some water. The consistency should be thick. Keep it aside for fifteen minutes.
Put water in the steamer, grease the tin.
Add baking soda to it. Mix and pour into the container.
Keep it in the steamer for 10 -12 minutes.
Once it is done, insert a knife and check it. If the knife comes out clean, it is done.
Make seasoning.
Cut the dhokla into squares after sometime. Pour the seasoning and serve it.
Take a tip:
Fine semolina is used here.
Sour curd should be preferably a day old that is kept outside.
Keep it aside for 15 minutes.
Eno may be used instead of baking soda.
A tablespoon of buttermilk may be added into the seasoning before putting over the dhokla.
In a wide bowl, add semolina. Put curds to it. Add ginger-chilli paste, finely cut coriander and salt to it. Mix with some water. The consistency should be moderately thick. Keep it aside for fifteen minutes.
Put water in the steamer, grease the tin.
Add baking soda to it. Mix and pour into the container.
Keep it in the steamer for 10 -12 minutes.
Once it is done, insert a knife and check it. If the knife comes out clean, it is done.
Make seasoning.
Cut the dhokla into squares after sometime. Pour the seasoning and serve it.
Notes
Fine semolina is used here.
Sour curd should be preferably a day old that is kept outside.
Keep it aside for 15 minutes.
Eno may be used instead of baking soda.
A tablespoon of buttermilk may be added into the seasoning before putting over the dhokla.
Pin it for later:
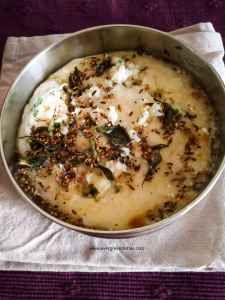
Rava Dhokla
Watch the video:
If you have liked this post, do share it with your family and friends. If you ever make this, take a picture and share it by tagging @foodiejayashree on Instagram or @evergreendishes on Facebook or Twitter.
Subscribe to get an e-book for free and all updates in your inbox!
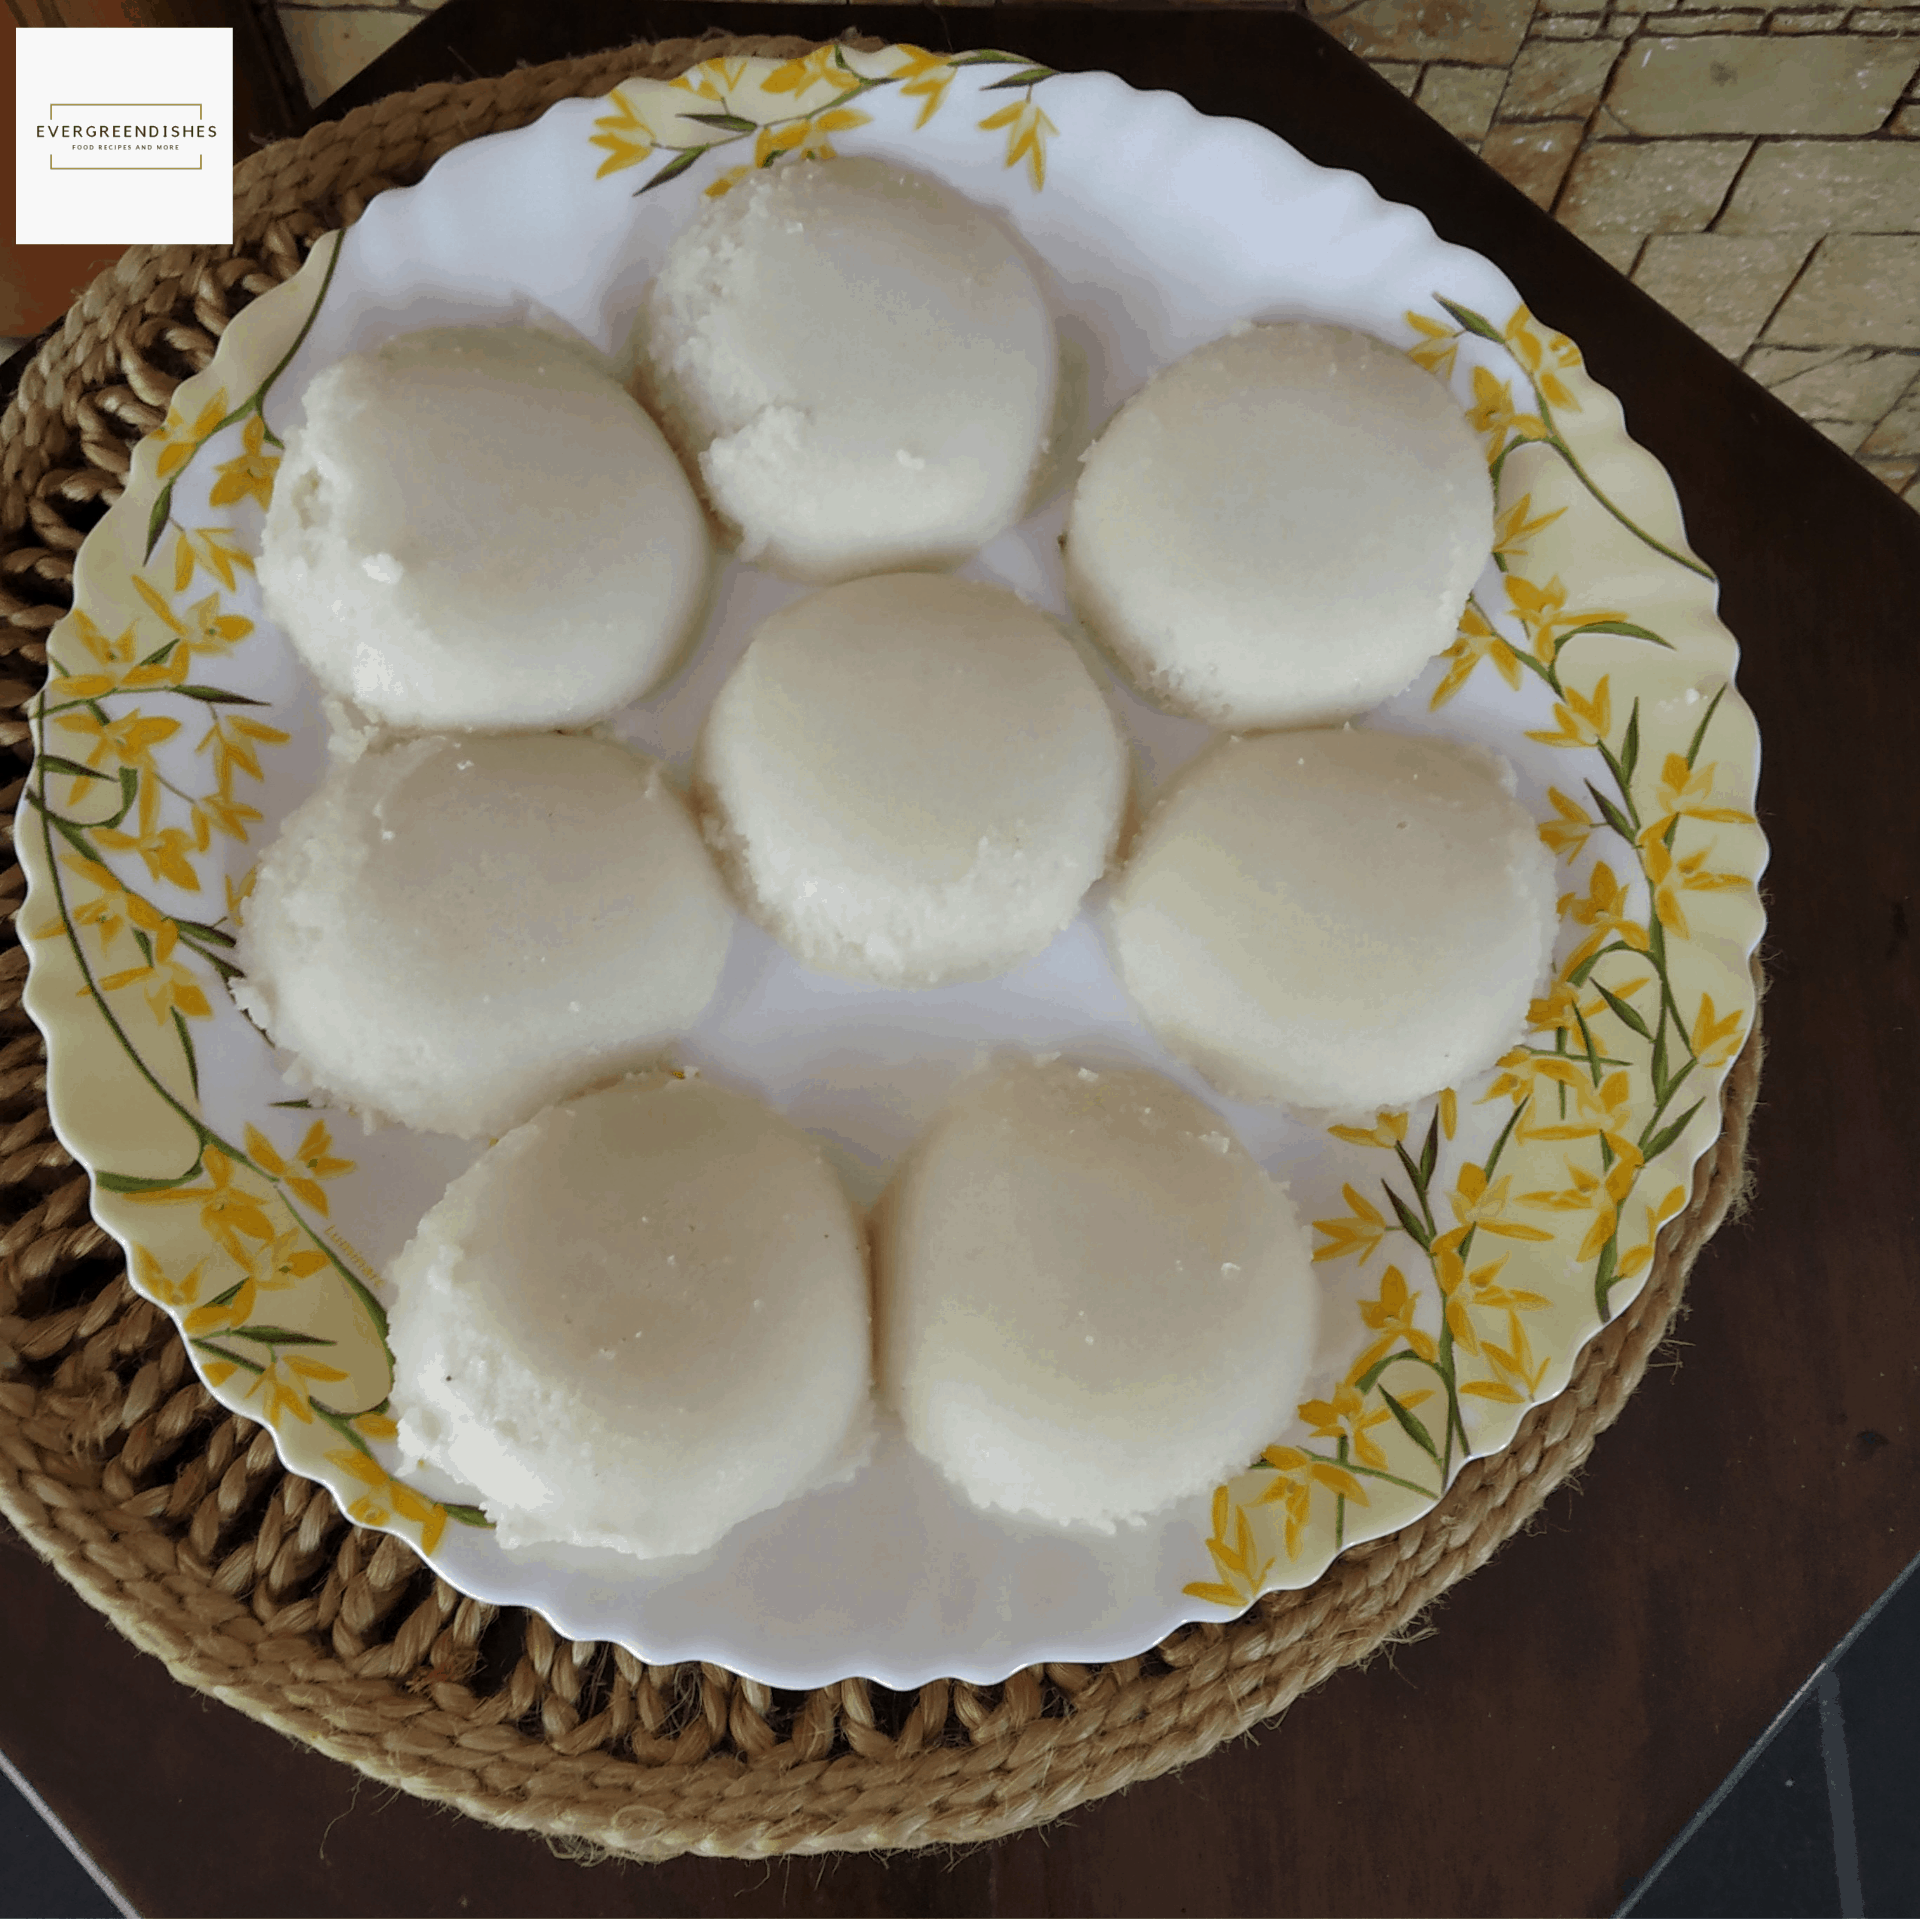
Poha Idli is another easy breakfast recipe to prepare for the busy mornings. They are soft, bright smiling white and delicious. Serve with coconut chutney. Poha Idli is easy to prepare as no soaking, grinding and fermentation is required.
Idli is the ideal breakfast for busy mornings. But, grinding the batter needs time and patience. Instant idlis as Rawa Idli and Ragi Idli always come to my rescue. But, when you want to make something different, give a try to this Poha Idli. Poha is flattened rice commonly used in South Indian households. This is easy poha idli recipe is ideal for all.
Poha and South Indians:
South Indians love using poha in their daily routine. It is so commonly used, chiwda is usually present in the kitchen shelves. Tangy beaten rice is tasty and usually served for breakfast. And not to mention, on the fasting days, it is a no cook food eaten by most people.
About the event:
Breakfast is the most important meal of the day and #BreakfastSeries is the theme at Healthy Wellthy Cuisines this fortnight. It is suggested by Preethi Prasad, an awesome blogger. Her Srilankan Curry Powder sounds flavoursome, I want to make it soon. Here are the other recipes from co-bloggers:
Add curd and idli rawa to it. Put salt and mix it. Keep it aside for twenty minutes.
Heat a idli cooker. Add soda to the batter, mix it and immediately put it in the moulds.
Cook it on moderate heat for twenty to twenty-five minutes.
Once they are done, turn off and keep it aside for sometime. Remove and serve with coconut chutney.
Take a note:
Poha Idli requires time as the flattened rice needs to be cooked. It is not ready in a jiffy as 1-2-3. Once they are cooked, leave them for sometime. They are too soft.
I used the thin variety of flattened rice. You can use any variety.
Evergreendishesdev
Poha Idli
Poha Idli is another kind of instant idli. They are soft and delicious.
Add curd and idli rawa to it. Put salt and mix it. Keep it aside for twenty minutes.
Heat a idli cooker. Add soda to the batter, mix it and immediately put it in the moulds. Adjust the consistency, by adding water.
Cook it on moderate heat for twenty to twenty-five minutes.
Once they are done, turn off and keep it aside for sometime. Remove and serve with coconut chutney.
Notes
It requires time as the flattened rice needs to be cooked. It is not ready in a jiffy as 1-2-3. Once they are cooked, leave them for sometime and later remove and serve.
Pin it for later:
Poha idli
If you have liked this post, do share it with your family and friends. If you ever make this, take a picture and share it by tagging @foodiejayashree on Instagram or @evergreendishes on Facebook or Twitter.
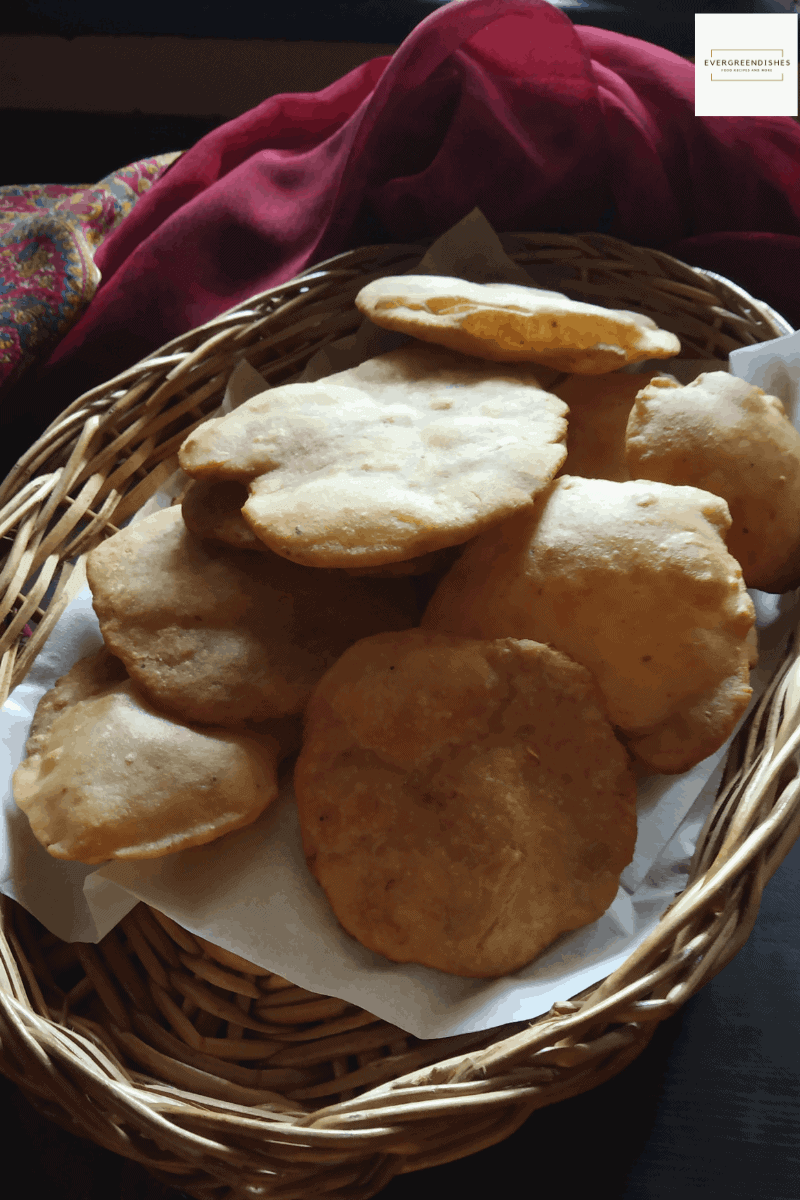
Mangalore buns/ Banana Puri is a famous breakfast in the coastal Karnataka region. It is mildly sweet, soft and fluffy like a bun.
Mangalore bun / banana puri is an amazing dish , it has the texture of a bun but it is deep-fried like a puri. Ripe bananas are used to mix in it and the dough is allowed to rest for sometime. Thus, it is a leavened bread. It can be eaten by itself but it is also served with chutney or potato sagu. The mildly sweet puri pairs well with them. It is popular in the regions of Mangalore and Udupi and served for breakfast or as a snack in the evenings.
About the Udupi cuisine:
Udupi is a popular tourist and pilgrimage place in Karnataka. It is famous for the Krishna temple and the Kanakana Kindi. It is also known for its cuisine. Udupi cuisine is one of the cuisines that you find in South India. Mostly vegetables such as pumpkin, ash gourd and lentils are used in the daily cooking. Rice is the staple food and rasam is the soul food of most people. A variety of chutneys and tambli is often made as an accompaniment. The hallmark of their cooking is the use of fresh coconut and coconut oil in almost all the dishes, it elevates the taste of the dish. Dosa and Idli are commonly prepared and one must see the many variety that are made here. Sweets that are commonly made are a variety of payasams, halbai and fudges.
Mangalore Bun / Banana Puri
Ingredients:
1 big ripe banana
2 tablespoon sugar
1/2 teaspoon cumin powder
a little salt
1/8 teaspoon baking soda
2 tablespoon sour yoghurt
1.5 cup wheat flour
1 teaspoon ghee
oil for deep frying
Method:
In a bowl, mash the banana with a fork or potato masher. Add yoghurt, sugar, baking soda, ghee and salt to it. Mix them well.Add wheat flour with a tablespoon, one spoon at a time. The dough should be soft and pliable. Knead it well. Cover it with a thin, damp cloth and keep it in a warm place for five hours or preferably overnight.
Take the dough and knead it, make them into small balls. Take a ball, dust it with flour and roll it into a disc of 3 inch. Make a couple of them.
Heat oil in a pan, check by dropping a small piece of the dough. If it rises to the surface, the oil is ready to deep fry. Slowly, put two of the discs and deep fry.
Once they are golden, remove them with a slotted spoon and repeat for the rest of the dough.
Serve hot as it is or with coconut chutney.
Take a tip:
Usually, maida is used to make this bun. You can also use both, the wheat flour and maida in equal quantities.
Cumin may also be used instead of cumin powder. Toast them a little and put, it will give good fragrance.
Ripe bananas make the puris soft and give a good texture to it. You may blend it in a mixie.
Make sure you remove the excess water from the damp cloth.
If you are planning to make it in the evening as a snack, mix the dough in the morning. If you are planning to make it for breakfast, keep it overnight.
About the event:
The theme for this month at Shhhhh Secretly Cooking group is ” Udupi Cuisine” and the theme is suggested by me. Thanks to Mayuri Patel and Renu Agarwal for giving me this opportunity. I was paired with Preethi Prasad. The ingredients given to me were salt and ghee and I have made these mangalore buns, it was in my to-do list since a long time. I gave Preethi, coconut oil and fenugreek seed, she made the aromatic rasam powder.
shhhhh secret cooking challenge
Mangalore Buns
Mangalore buns is a leavened, mildly sweet flatbread from Udupi cuisine. It is ideal for breakfast or as a snack in the evening.
In a bowl, mash the banana with a fork or potato masher. Add yoghurt, sugar, baking soda, ghee and salt to it. Mix them well.Add wheat flour with a tablespoon, one spoon at a time. The dough should be soft and pliable. Knead it well. Cover it with a thin, damp cloth and keep it in a warm place for five hours or preferably overnight.
Take the dough and knead it, make it small balls. Take a ball, dust it with flour and roll it into a disc of 3 inch. Make a couple of them.
Heat oil in a pan, check by dropping a small piece of the dough. If it rises to the surface, the oil is ready to deep fry. Slowly, put two of the discs and deep fry.
Once they are golden, remove them with a slotted spoon and repeat for the rest of the dough.
Serve hot as it is or with coconut chutney.
Notes
Usually, maida is used to make this bun. You can also use both, the wheat flour and maida in equal quantities. Cumin may also be used instead of cumin powder. Toast them a little and put, it will give good fragrance. Ripe bananas make the puris soft and give a good texture to it. You may blend it in a mixie. Make sure you remove the excess water from the damp cloth. If you are planning to make it in the evening as a snack, mix the dough in the morning. If you are planning to make it for breakfast, keep it overnight.
Pin it for later :
Mangalore Buns / Banana Puri
If you have liked this post, do share it with your family and friends. If you ever make this, take a picture and share it by tagging @foodiejayashree on Instagram or @evergreendishes on Facebook or Twitter.
Let’s be connected, the follow buttons are on the side bar. Subscribe to get all updates and an e-book for free!
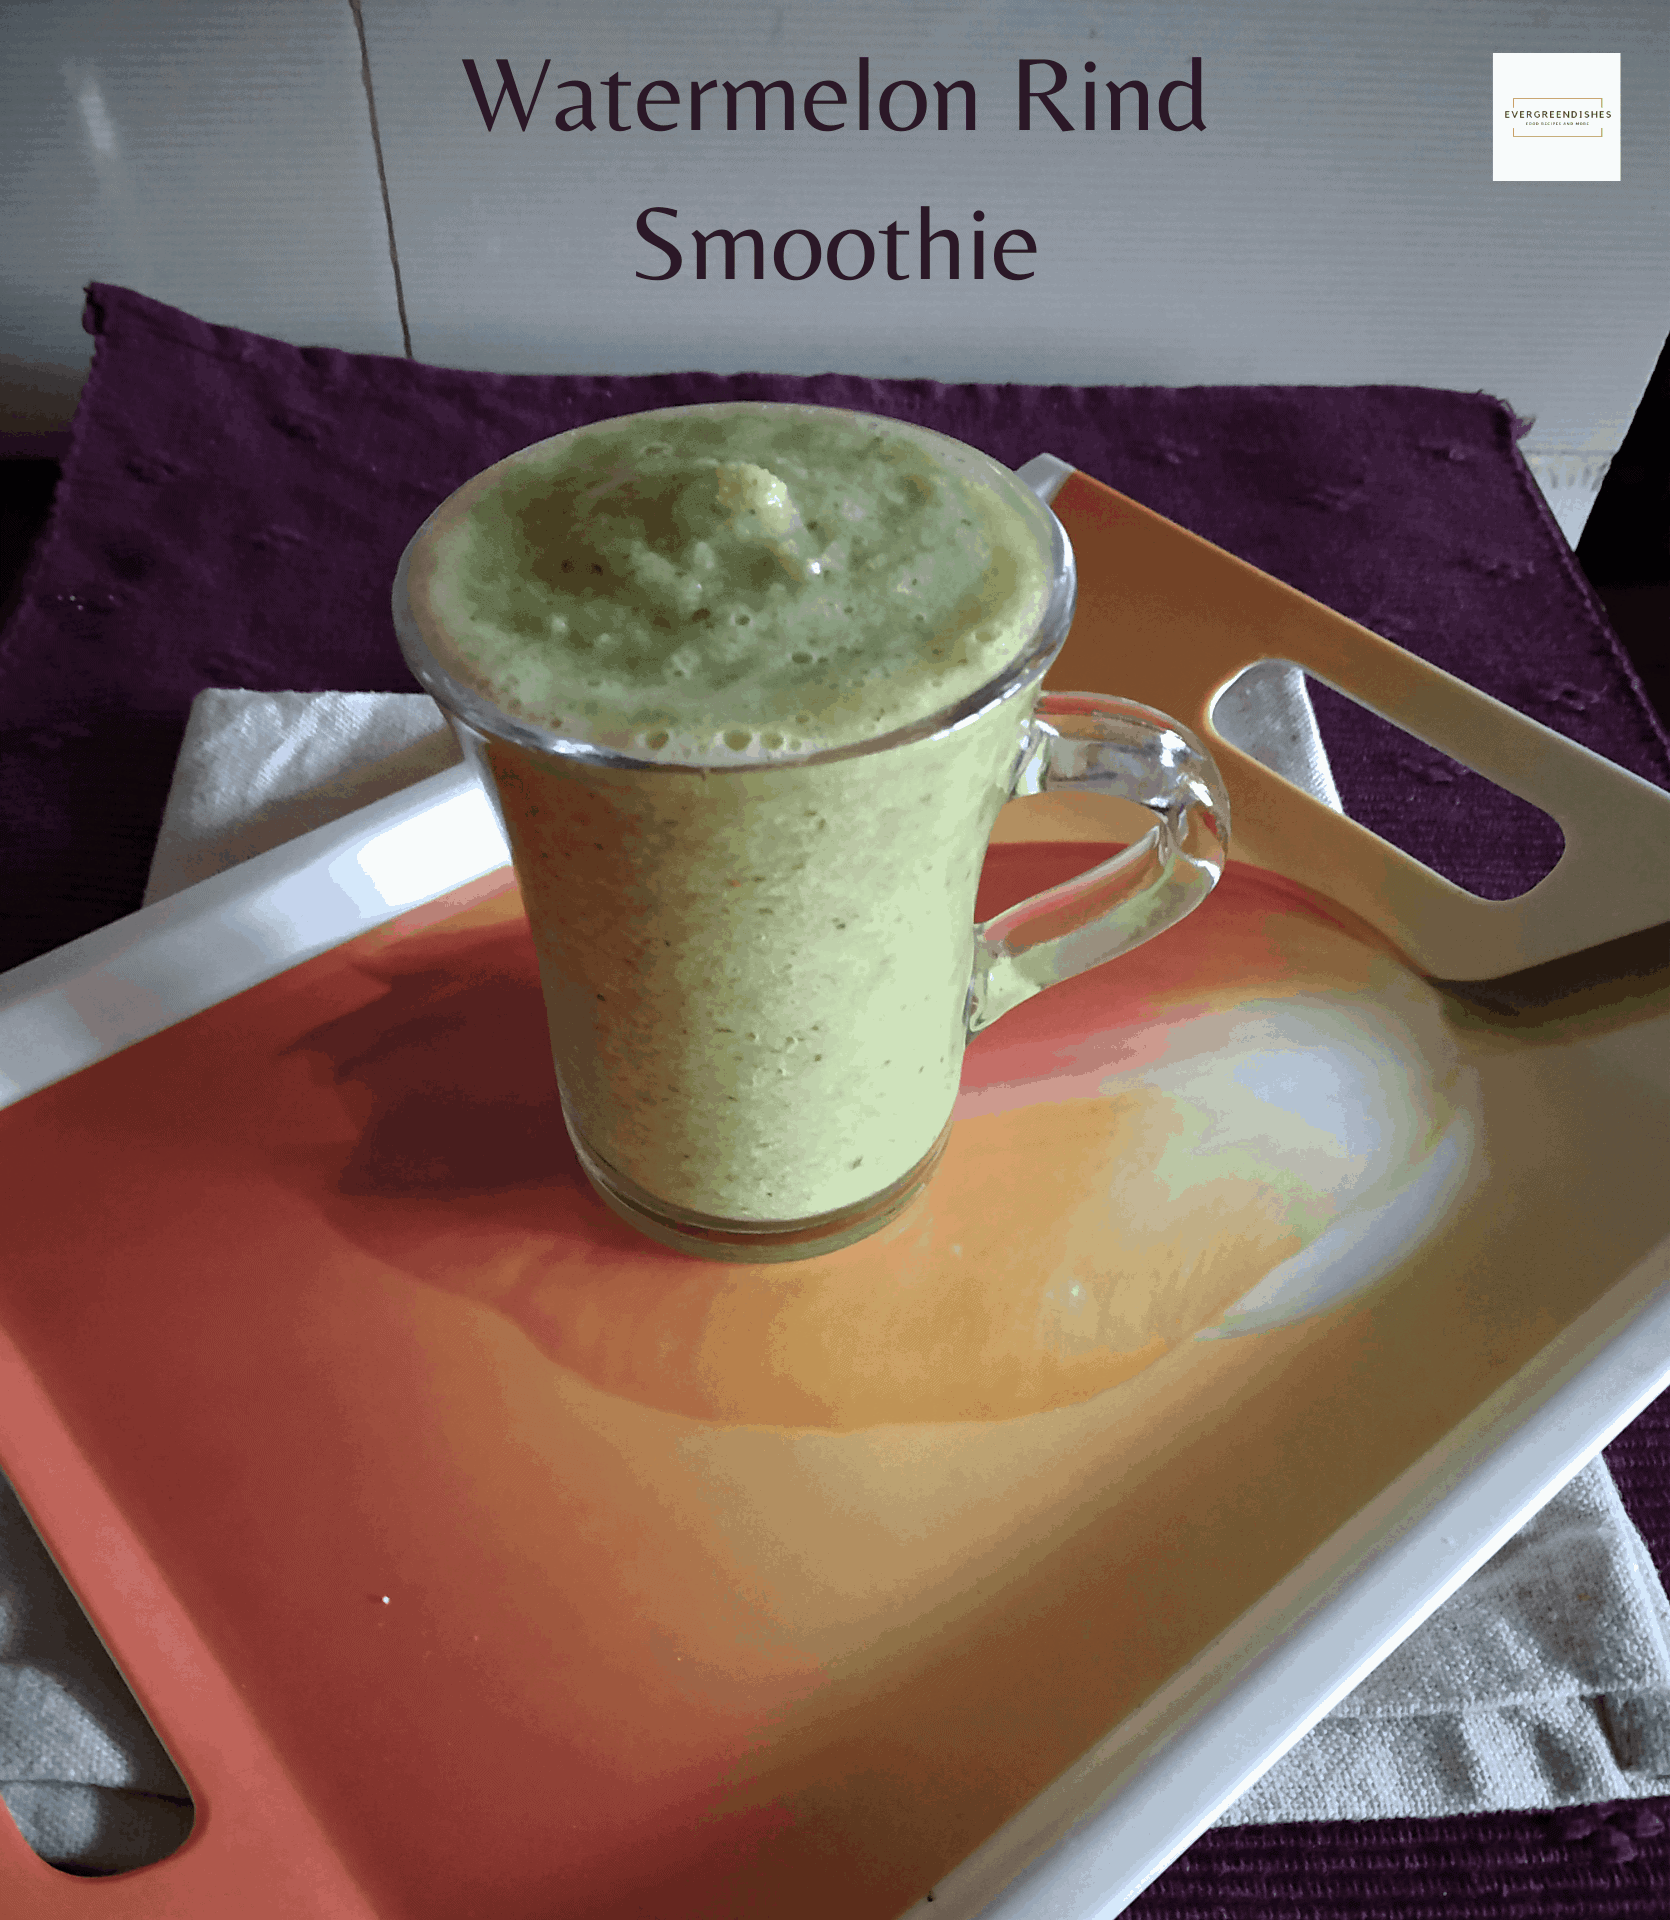
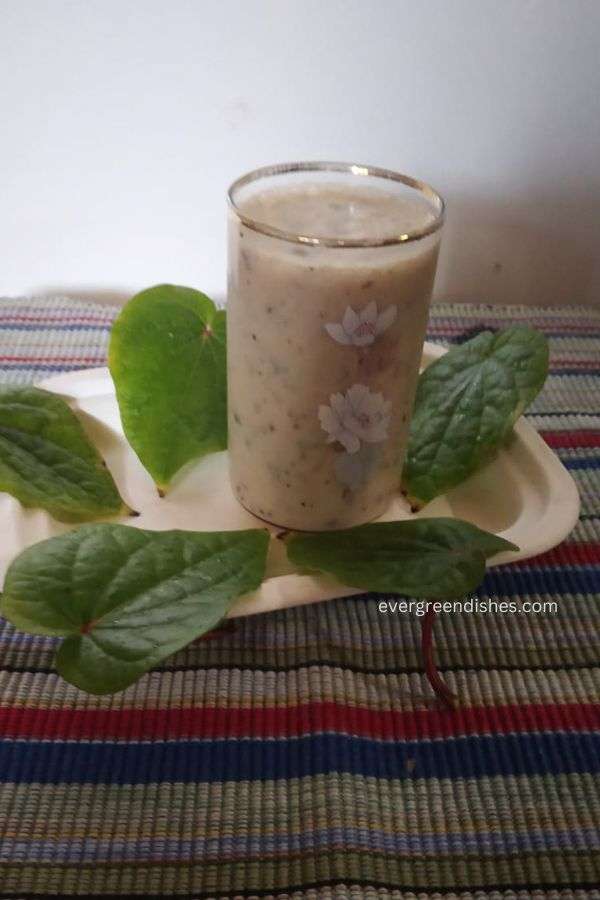
Watermelon Rind Smoothie is tasty and healthy drink. It makes use of the summer fruit and vegetables. It is vegan and gluten-free with no added sugar.
Sometimes, a taste acquainted lasts for a long time. These days, I am looking for ways to add the watermelon rind in my diet. Earlier, I had made a salad and today I tried making this smoothie and believe me, it’s really good.
Smoothies are the ideal choice for those who are calorie conscious. It is believed that they are filling and naturally keeps one going for a longer time with little food.
Watermelon Rind Smoothie has only three ingredients and no added sugar. It is naturally sweet. It is vegan and gluten-free. Do give a try to this and let me know how it was.
Watermelon Rind Smoothie
Watermelon rind is the white part of the fruit that is usually discarded. Scrape it slowly with a knife and later cut into pieces.
The best way to use it is to separate the rind and keep it refrigerated.
Watermelon Rind Smoothie is a simple recipe that makes use of all the summer fruits and vegetables.
Ingredients :
1 cup watermelon rind
1 cup cucumber pieces
1 cup grapes
water as needed
Method:
Cut the rind into small pieces.
Put them in a blender and pulse it.
Add little water, pulse it again.
Pour it in a glass and serve.
A few other ways to use the rind from my co-bloggers. Mayuri uses the rind to make a tasty salad.
while Seema makes a tasty thogayal that is served with any dish. Priya uses it make a different kind of dosa.
Evergreendishesdev
Watermelon Rind Smoothie
Watermelon Rind Smoothie is a tasty and healthy drink.
If you have liked this post, do share it with your family and friends. If you ever make this, take a picture and share it by tagging @foodiejayashree on Instagram or @evergreendishes on Facebook or Twitter.
Let’s be connected, the follow buttons are on the side bar. Subscribe to get all updates and an e-book for free.
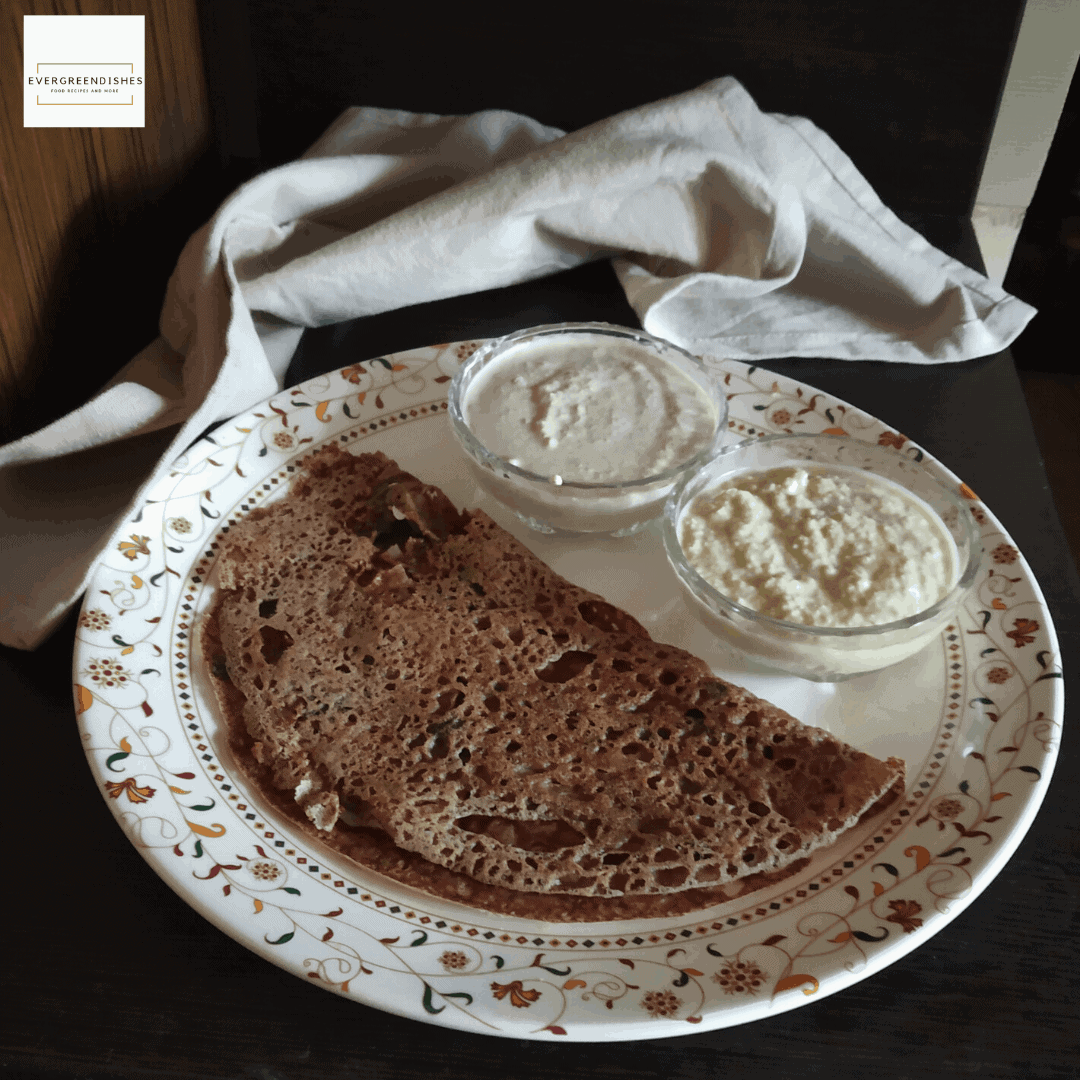
Instant ragi dosa is tasty, healthy, easy to make and ideal to serve either for breakfast or as a snack. It is vegan and gluten-free.
Millets are the new age food. Many people are now aware of the benefits and including them regularly in their diet.
What is a millet ?
Millet is a small cereal that belongs to the grass family, Poaceae. It was first grown in Africa, soon spread to Asia. Different varieties of millets are grown in the world.
What are the benefits of millet?
Millet is rich in nutrients. It is rich in dietary fibre and contains minerals as calcium, magnesium, phosphorous, selenium as well as vitamins like folate, pantothenic acid, riboflavin, Vitamin B6, C, E and K. The high fibre content found in it helps to reduce bad cholesterol (LDL) while boosting good cholesterol(HDL). The phosphorous content helps the body to repair itself and also in the formation of cells. The iron and folate helps prevent anaemia by maintaining adequate hemoglobin levels. The millets are usually prepared from the whole meal, the nutrients are retained in the food that is consumed.
What are the different kind of millet ?
The different type of millets are jowar, foxtail millet, finger millet, pearl millet, barnyard millet, kodo millet, little millet, proso millet.
What is finger millet ?
Finger millet or Ragi as it is commonly known as, is an important cop grown and consumed in India. It is rich in minerals, calcium, dietary fibre and anti-oxidants. Ragi mudde is the staple food of many people. It is also used in making sweets and other dishes. I regularly make Ragi Idli and Ragi Thalipeeth.
Instant Ragi Dosa
What goes in the instant Ragi Dosa?
Ragi flour : Ragi flour is the main ingredient to make ragi dosa. Use good and fresh ragi flour. A flour which does not smell good is not worth wasting any time.
salt to taste
Onion: Chop it finely. I love to use vegetable cutter, it is so handy and useful to chop onion. No tears, no mess.
Coriander : Use fresh coriander
Water as needed to make the batter. Once you mix the batter, keep it aside for ten minutes.
oil to drizzle
Green chillies may be added.
Cumin may be added.
Are there any variation to this ragi dosa ?
Add half a cup of rice flour and mix it to a dosa batter consistency. Make it like the usual dosa.
About the event:
In the month of April, the theme at Shhhhh Secretly Cooking Challenge is Millets, it was suggested by Aruna Saras Chandra, a wonderful blogger at Vasus Veg Kitchen. I liked her bread gulab jamun, it is a quick-fix sweet that you can make. I love cooking with millets and jumped the bandwagon. My partner was Narmadha from Nams Corner, she gave me oil and coriander as the secret ingredients and I decided to make this Instant Ragi Dosa. I gave her salt and sugar and the outcome is the delicious Foxtail Millet Sweet Pongal,
Instant Ragi Dosa comes as a rescue, you can make it easily and it is a straight forward recipe.
Instant Ragi Dosa / Finger Millet Dosa
Instant ragi dosa is crispy, tasty and easy to make. It is vegan and gluten-free.
Add salt, chopped onion, coriander to it. Mix them.
Add water and mix the batter without any lumps. Let the consistency be thin as rawa dosa batter.
Keep it aside for ten minutes.
Heat a skillet. Take a ladleful of batter and pour it from outside to inside like a rawa dosa.
Drizzle oil, let it cook for sometime.
Once the dosa is done, you can easily remove it, the edges come off.
Fold it and serve immediately.
Notes
Green chillies may be added.
Cumin may be added.
Adding of onion is optional.
Keep the batter aside for ten minutes.
Instant Ragi Dosa | Finger Millet Dosa
If you have liked this post, do share it with your family and friends. If you ever make this, take a picture and share it by tagging @foodiejayashree on Instagram or @evergreendishes on Facebook or Twitter.
Let’s be connected, the follow buttons are on the side bar. Subscribe to get all updates and an e-book for free.
(Disclosure : As an Amazon Associate, I will get a small commission for qualifying purchases without no addition cost to you.)
Wheat and Oats Pancake is a quick, easy to make breakfast. It is healthy and ideal to serve for children.
Pancakes are American originated, soon spread to other parts and India also. They are filling and quick, can be made in different variations. It is a distant relative of Indian crepe, Set Dosa.
Today, I am sharing with you Wheat and Oats Pancake.
What is Pancake?
Pancake is round cake like, prepared from a starch-based batter. It may contain eggs, milk and butter and cooked on a hot griddle. It is spread all over the world and comes in different shapes and structure. It is believed that pancakes are one of the earliest cereal food eaten in pre-historic societies.
What are the different types of pancakes?
In England, pancakes are think like crepes while in America they are small, circular discs, made using a leavening agent that gives a spongy texture to it. Today, one can find different varieties of pancake.
Which recipe is shared today?
The recipe that I am sharing is Wheat and Oats Pancake. It is a good way to include oats.
Wheat and Oats Pancake
Ingredients: Measurement used : 1 cup = 240 ml
1 cup wheat flour
1/2 cup instant oats
1 cup milk
2 teaspoon baking powder
2 tablespoon sugar
3 tablespoon curd
1 tablespoon oil
a pinch of salt
raisins
honey to serve
Method:
Mix these ingredients: milk, curd, oil, sugar and salt.
In another bowl, mix wheat flour, oats and baking powder.
Put it into the milk mixture and mix well.
Add raisins in it.
Heat a skillet, drizzle some oil and pour a ladleful of batter.
Close it and let cook for a minute.
Flip it over to the other side.
Once it is cooked, remove and repeat for the rest of the batter.
Serve with honey or maple syrup.
About the event:
This is part of the Shhhhh Secretly Cooking Challenge managed by Mayuri. It’s a new challenge henceforth and for the current mont it is “Pancakes”. I was paired with Priya Mahesh of Pickledroute, that contains both recipes and travelogues. Do check her blog. She gave me oats and curds as the secret ingredient. The ingredients that I gave Priya were idli rice and black chana and she has prepared a healthy sprouts pancake. The theme was suggested by Archana Potdar, who is a good cook. She suggested us to go out of our comfort and make creative recipes. Do check her Japanese pancake , it looks amazing.
Evergreendishesdev
Wheat and Oats Pancake
Wheat and Oats Pancake is a healthy, tasty and easy to serve breakfast.
Mix these ingredients: milk, curd, oil, sugar and salt.
In another bowl, mix wheat flour, oats and baking powder.
Put it into the milk mixture and mix well.
Add raisins in it.
Heat a skillet, drizzle some oil and pour a ladleful of batter.
Close it and let cook for a minute.
Flip it over to the other side.
Once it is cooked, remove and repeat for the rest of the batter.
Serve with honey or maple syrup.
Notes
Other kind of nuts may be used.
Choco chips may also be used.
Pin it for later:
Wheat and Oats Pancake.
Making pancakes was interesting and I made it seeing from here. Earlier I had made potato pancakes and they were tasty too. It’s time to try all the pancake recipes that I wanted to since ages.
If you ever make this recipe, take a picture and share it with @foodiejayashree on Instagram or @evergreendishes on Facebook.
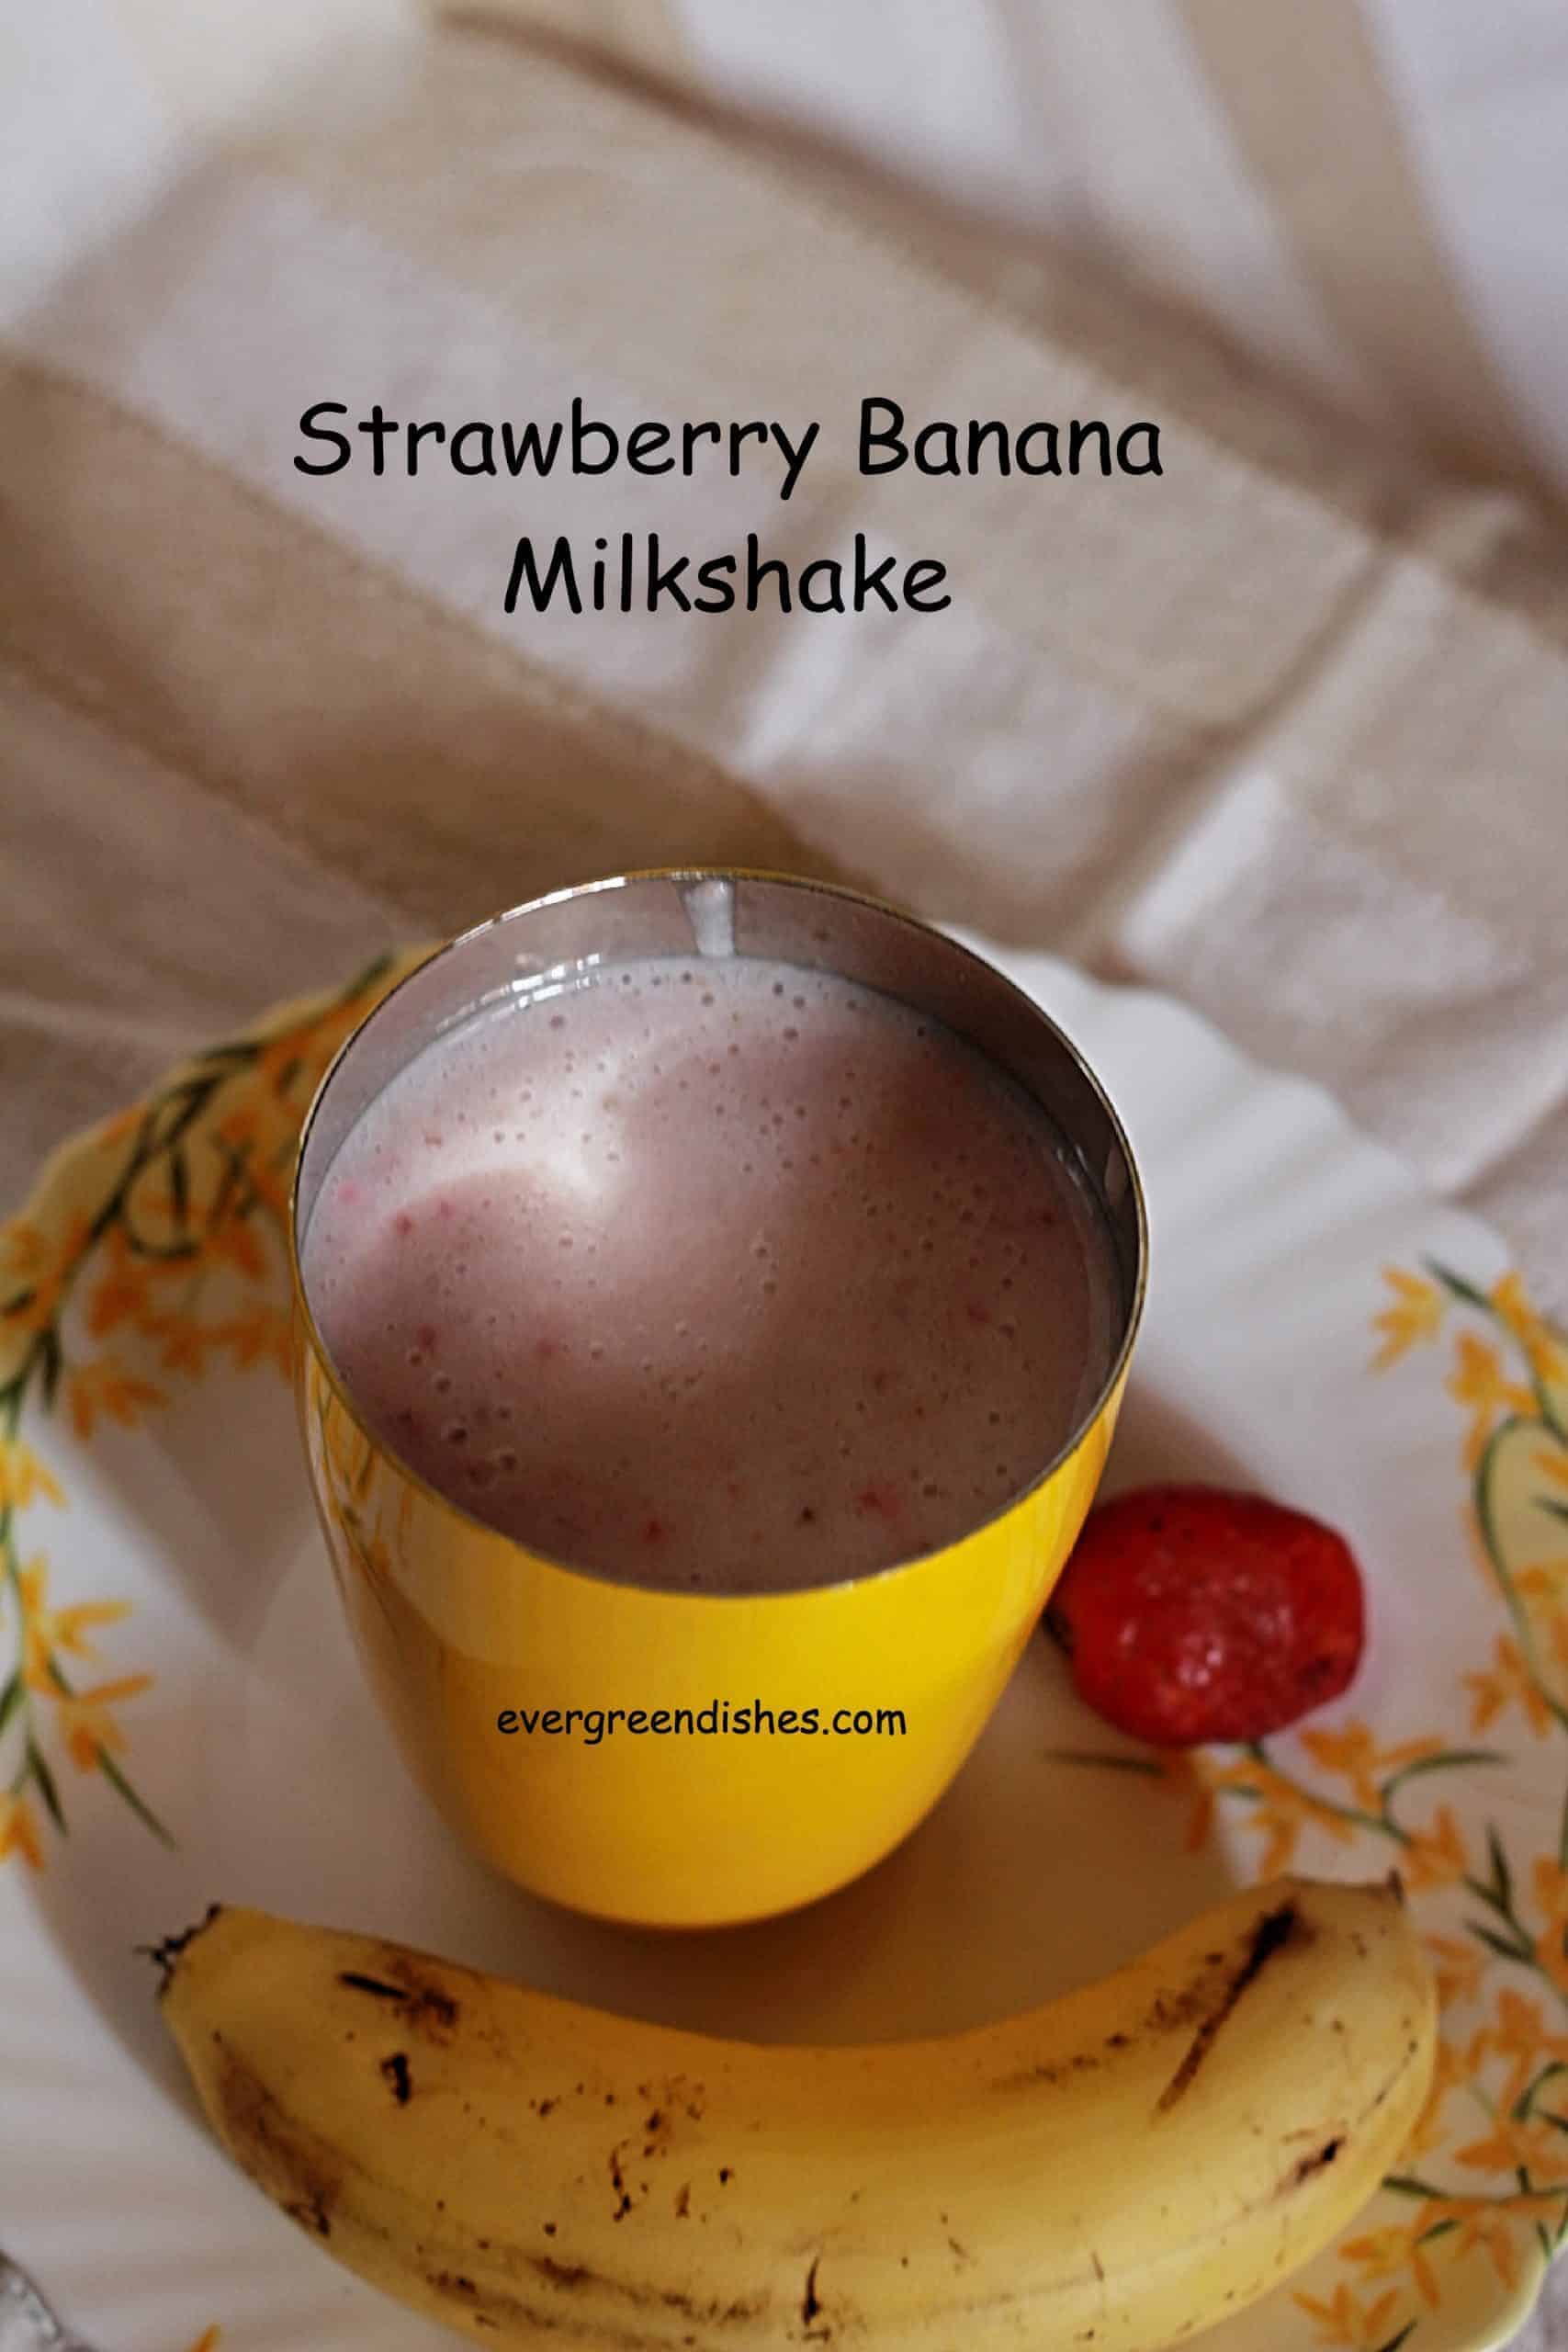
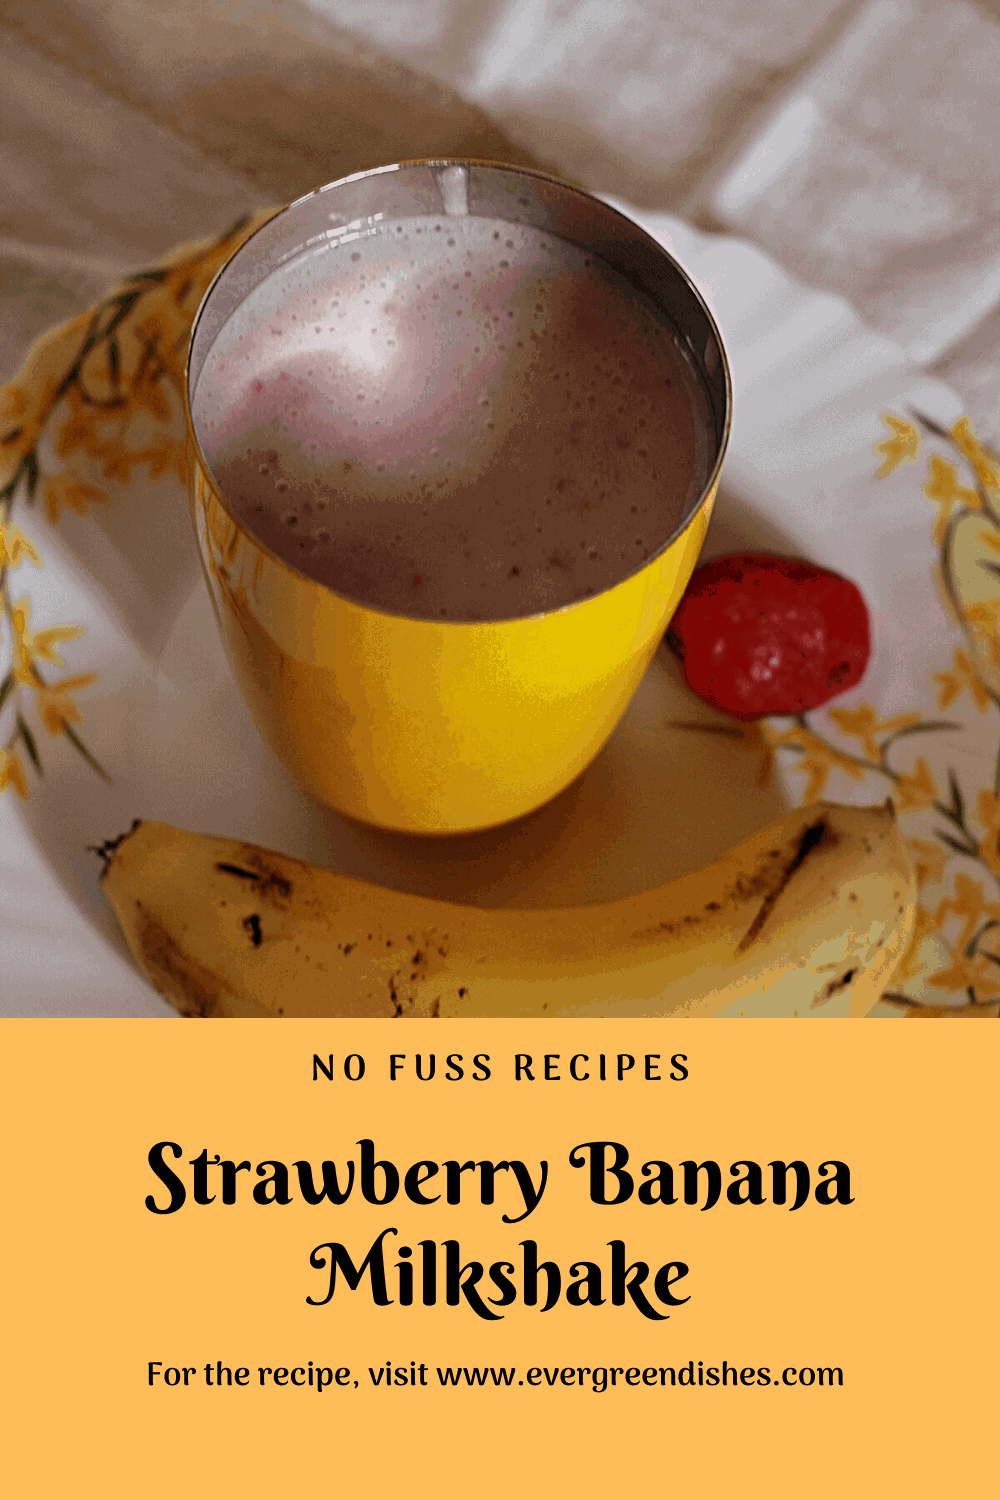
Strawberry Banana Milkshake is creamy, tasty and filling. It is ideal to serve along with breakfast.
Milkshakes are one of my family’s favourite, every season is good for it. Here is another delicious drink to whip for breakfast. The addition of banana makes it wholesome and filling.
Banana is a healthy fruit with many nutrients. Banana in all stages ( firm to ripe) is good and the ripe ones are more sweeter. Once the fruit is slightly over ripe, it is hardly eaten by anyone at home. I put it in the freezer and use it to make milkshake.
It’s the season of strawberries and I love to make the best use of it. Strawberry Banana milkshake is creamy, tasty and filling. It is ideal to serve along with breakfast. Children might like to relish in the evening after coming back home.
Milkshakes made with fresh fruits taste awesome but putting the fruit pieces in freezer gives a good texture to it.
This has no added sugar in it, thus it is a healthy recipe and ideal for weight watchers.
Ingredients:
1 cup cold milk
1 banana
4 strawberry
Method:
Cut the banana. Wash the strawberry. Put them in the blender along with milk and swirl for thirty seconds. Banana milk shake is ready to use.
Take a tip:
A scoop of vanilla or strawberry ice cream may be added but I do not add.
Sugar may be added if serving it for children.
Honey may be added.
To make it vegan, use almond milk.
Freezing strawberry and banana gives a frothy texture to the milkshake.
Cut the banana. Wash the strawberry. Put them in the blender along with milk and swirl for thirty seconds. Banana milk shake is ready to use.
Notes
A scoop of ice cream may be added.
Add sugar if serving for children.
Honey may be added.
Freezing banana and strawberry gives a frothy texture to the milkshake.
Pin
What are the ways you use strawberries in cooking? Do let me know in the comments section.
If you have liked this recipe, do share it with your family and friends. If you ever make this recipe, do take a picture and tag me @foodiejayashree on Instagram or @evergreendishes on Facebook, I will share it further.
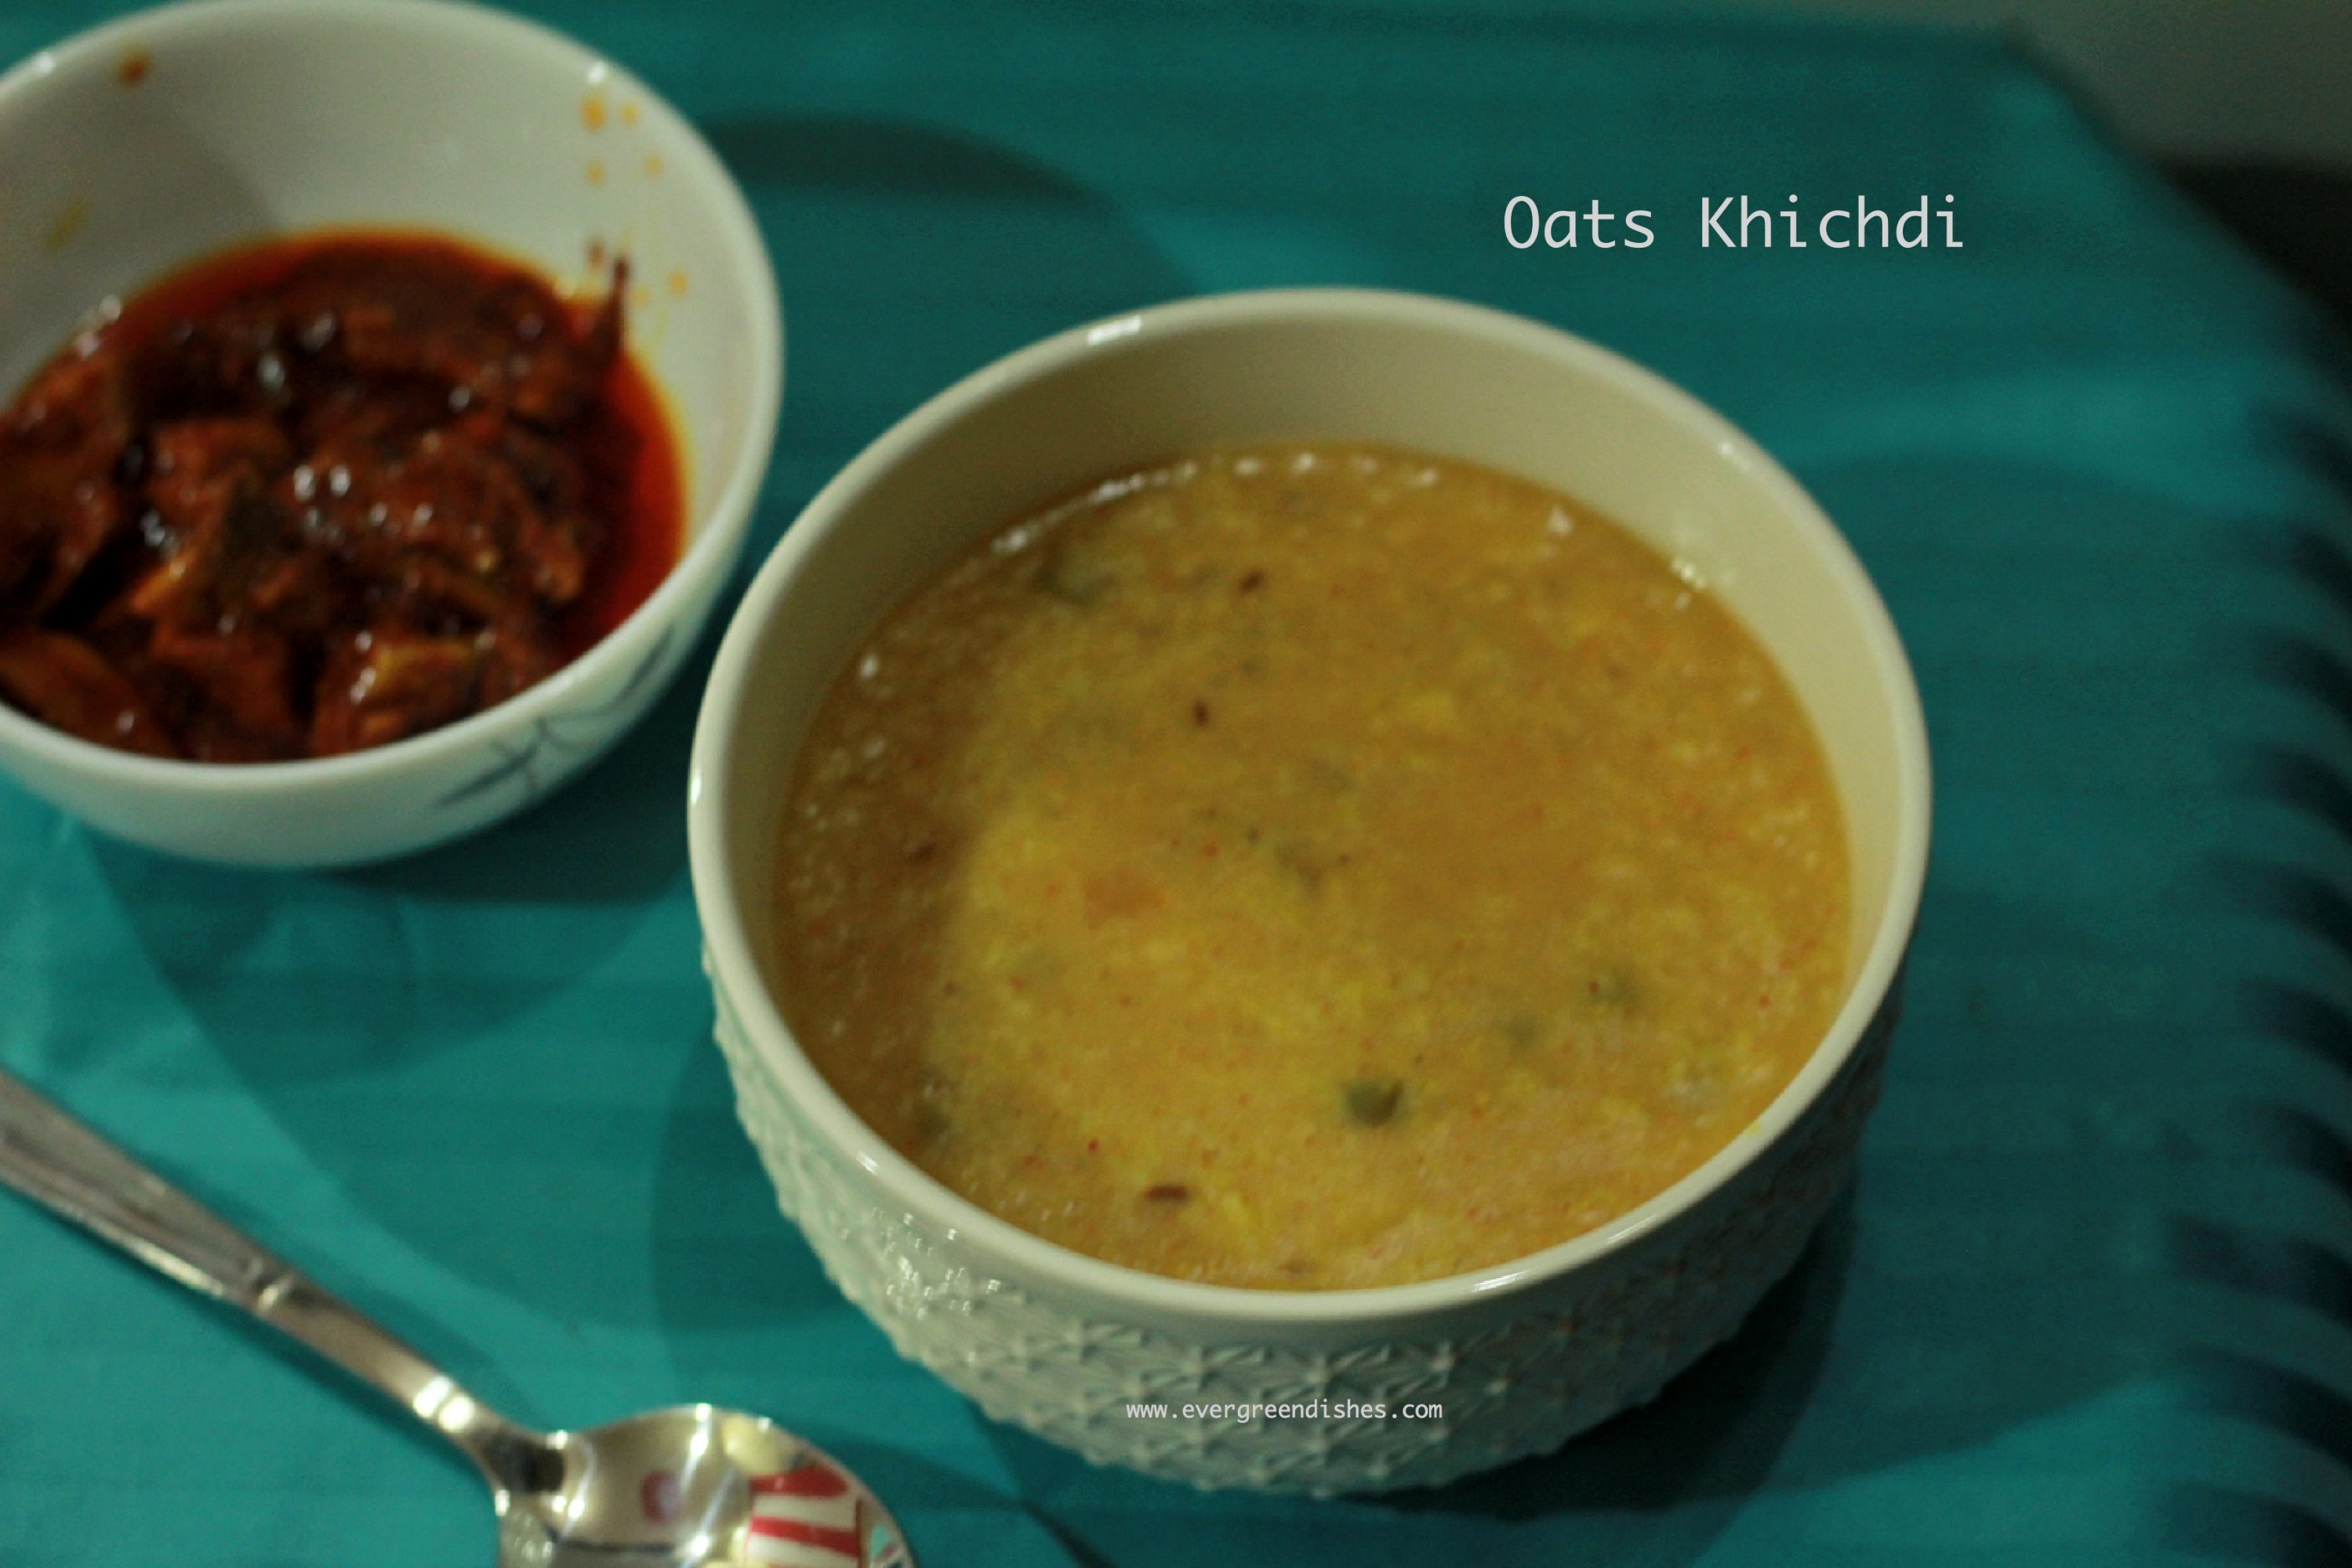
Oats Khichdi is a flavoursome, nutrition packed dish ideal to serve for breakfast, brunch or dinner.
One cannot deny the need of a good breakfast, it should be healthy, filling and tasty. Every morning it is a dilemma, what needs to be prepared, isn’t it? You can use oats a couple of times in a week to prepare variety of dishes.
I used the Zerobeli Oats to make porridge and it was awesome. It is rich in fiber and protein, gluten free and ISO certified. Moreover, it cooks very easily and is creamy. It needs no topping such as nuts.
I use oats to make a variety of dishes, it is versatile in use and the taste is liked at home, thus I can easily make it anytime of the day.
I often make different varieties of khichdi at home and now thought of making it with oats. I used vegetables in it along with some masala powder, the result it was a filling and tasty meal.
Have you tried making khichdi with oats? Khichdi is quite similar to the savoury pongal that is made in South India. Give a try to it, a few papad and pickle makes a good accompaniment with it.
The New Year, New Beginnings and Goals
Today is the first day of 2020 and I want to make it an awesome one. I do not make big resolutions but something, which I can relate and stick to. I plan to eat healthy food in the coming days and thus oats will be my companion along with salads and fruits.
oats khichdi
Ingredients:
1/2 cup moong dal
1 cup oats
1 cup mixed vegetables ( I used beans, carrot, peas )
1 onion
4-5 cup water
1 tablespoon oil and ghee
1/2 teaspoon cumin
1 inch ginger
1 green chilly
1/2 teaspoon turmeric powder
1/4 teaspoon asafoetida
1/2 teaspoon chilly powder
1/2 teaspoon pepper powder
Method:
Wash and soak the moong dal for at least one hour, this helps in proper cooking of the lentil.
Chop the onion.
Take oil and ghee in a pressure pan, add cumin. As it splutters, put grated ginger and green chilly along with some asafoetida. Add onion and saute it for sometime, put the vegetables into it. Saute for two minutes. Put turmeric powder and chilli powder to it.
Now add moong dal to it and saute for a minute.
Add oats and mix well for a minute.
Put water and salt to it and stir thoroughly.
Close the lid and cook it until two whistles.
Once the pressure releases, mix it and serve hot.
Take a tip:
Soaking of lentil helps in cooking the lentil properly.
Soaking for longer time too is not recommended, it becomes slimy.
Evergreendishesdev
Oats Khichdi
Oats Khichdi is an easy to make, one pot breakfast dish. It is filling, tasty and healthy.
Wash and soak the moong dal for at least one hour, this helps in proper cooking of the lentil.
Chop the onion
Take oil and ghee in a pressure pan, add cumin. As it splutters, put grated ginger and green chilly along with some asafoetida. Add onion and saute it for sometime, put the vegetables into it. Saute for two minutes.
Put turmeric powder and chilli powder to it.Now add moong dal to it and saute for a minute. Add oats and mix it well for a minute. Put water,salt and pepper powder to it and stir thoroughly.Close the lid and cook it until two whistles. Once the pressure releases, mix it and serve hot.
Do check out the Zerobeli products now. You can either buy from their website on on Amazon.
Disclaimer: This is a brand collaboration with Zerobeli. I received products from Zerobeli to test and review them. All inputs given are my own.
Wishing all a fabulous year 2020 ahead ! May the new year be the beginning of many good things.
Pin it for later:
oats khichdi
Let’s be connected. If you ever make this dish, take a picture and tag @foodiejayashree on Instagram or @evergreendishes on Facebook
Subscribe to get all updates and a book of handy hints for free !
Banana Betel Milkshake is tasty and healthy. It is ideal for breakfast or as a refreshing summer drink.
Betel leaves holds a great value in India since ancient times. It is used since 400B.C. Betel leaves are used in auspicious functions as an offering to the Lord. They are also given to guests as a token of respect along with betel nut during ceremonies.
It is a practice to chew paan especially after a heavy meal. This dates back to the ages; chewing of paan is associated with digestion, betel leaf is smeared with slate lime and arecanut powder is added to it. Betel leaves are used as antiseptic, breath freshener and stimultant while arecanut is aphrodasiac.
While betel leaf and areca nut powder are the main ingredients in paan, many vibrant varieties are made and relished today. It is a trend to have with chocolate topping or with a smoky touch. Some use katechu, while a few add sweeteners and gulkand to it.
Pros and Cons of Betel Leaf
The use of betel leaf aids in the treatment of headache, cuts, abrasions and injuries, itching mastitis and constipation. But one needs to be aware of its downside too and be careful in regular consumption. According to CDC, using of betel leaf, areca nut and betel quid usage causes an increased risk of developing white and reddened lesions in the mouth that may lead to cancer.
While we do make recipes with betel, it is not a regular feature at home. I rarely buy betel leaves on a daily basis. With this being said, today I present to you Banana Betel Milkshake
Banana Betel Milkshake
Ingredients:
1 cup milk
1 banana
2 betel leaves
1/2 teaspoon honey
1 teaspoon soaked chia seed
Method:
Wash the betel leaf and remove the stalk and strands.
Cut the banana.
Blend milk along with banana and betel leaf. Add honey, give a swirl.
Pour in glass, top with chia seed and serve.
Take a tip:
Sugar may be added instead of sugar.
Adding of chia seed is optional.
Use the green coloured betel leaf and it is good to use tender leaves.
You can alternately make only paan milkshake, blend betel leaf and a spoon of gulkand along with milk.
This post was first published on 13/9/22. On 17/9/22, I have changed the picture of it. Sending this to Foodies_Redoing Old Post 85. It is a fortnightly event, we work on old posts which need a new look either by changing the pictures or the text. Here I have changed the picture only.
Wash the betel leaves, remove the stalk and strand.
Cut the banana.
Blend them along with milk.
Add honey and swirl it once again.
Pour in glass, top with chia seed and serve.
Notes
Sugar may be used instead of honey.
Using of chia seed is optional.
One can make Paan Milkshake, use betel leaves and gulkand along with milk.
It is best served chilled, thus use cold milk.
If you have liked this post, do share it with your family and friends. If you ever make it, take a picture and share it with me by tagging @foodiejayashree on Instagram or @evergreendishes on Facebook, I will share it further.
Subscribe to get all updates and a book of handy hints for free !