Category: breakfast time

  • Instant Ragi Idli

    Instant Ragi Idli

    finger millet idli | instant ragi idli |millet recipes | breakfast recipes | healthy recipes
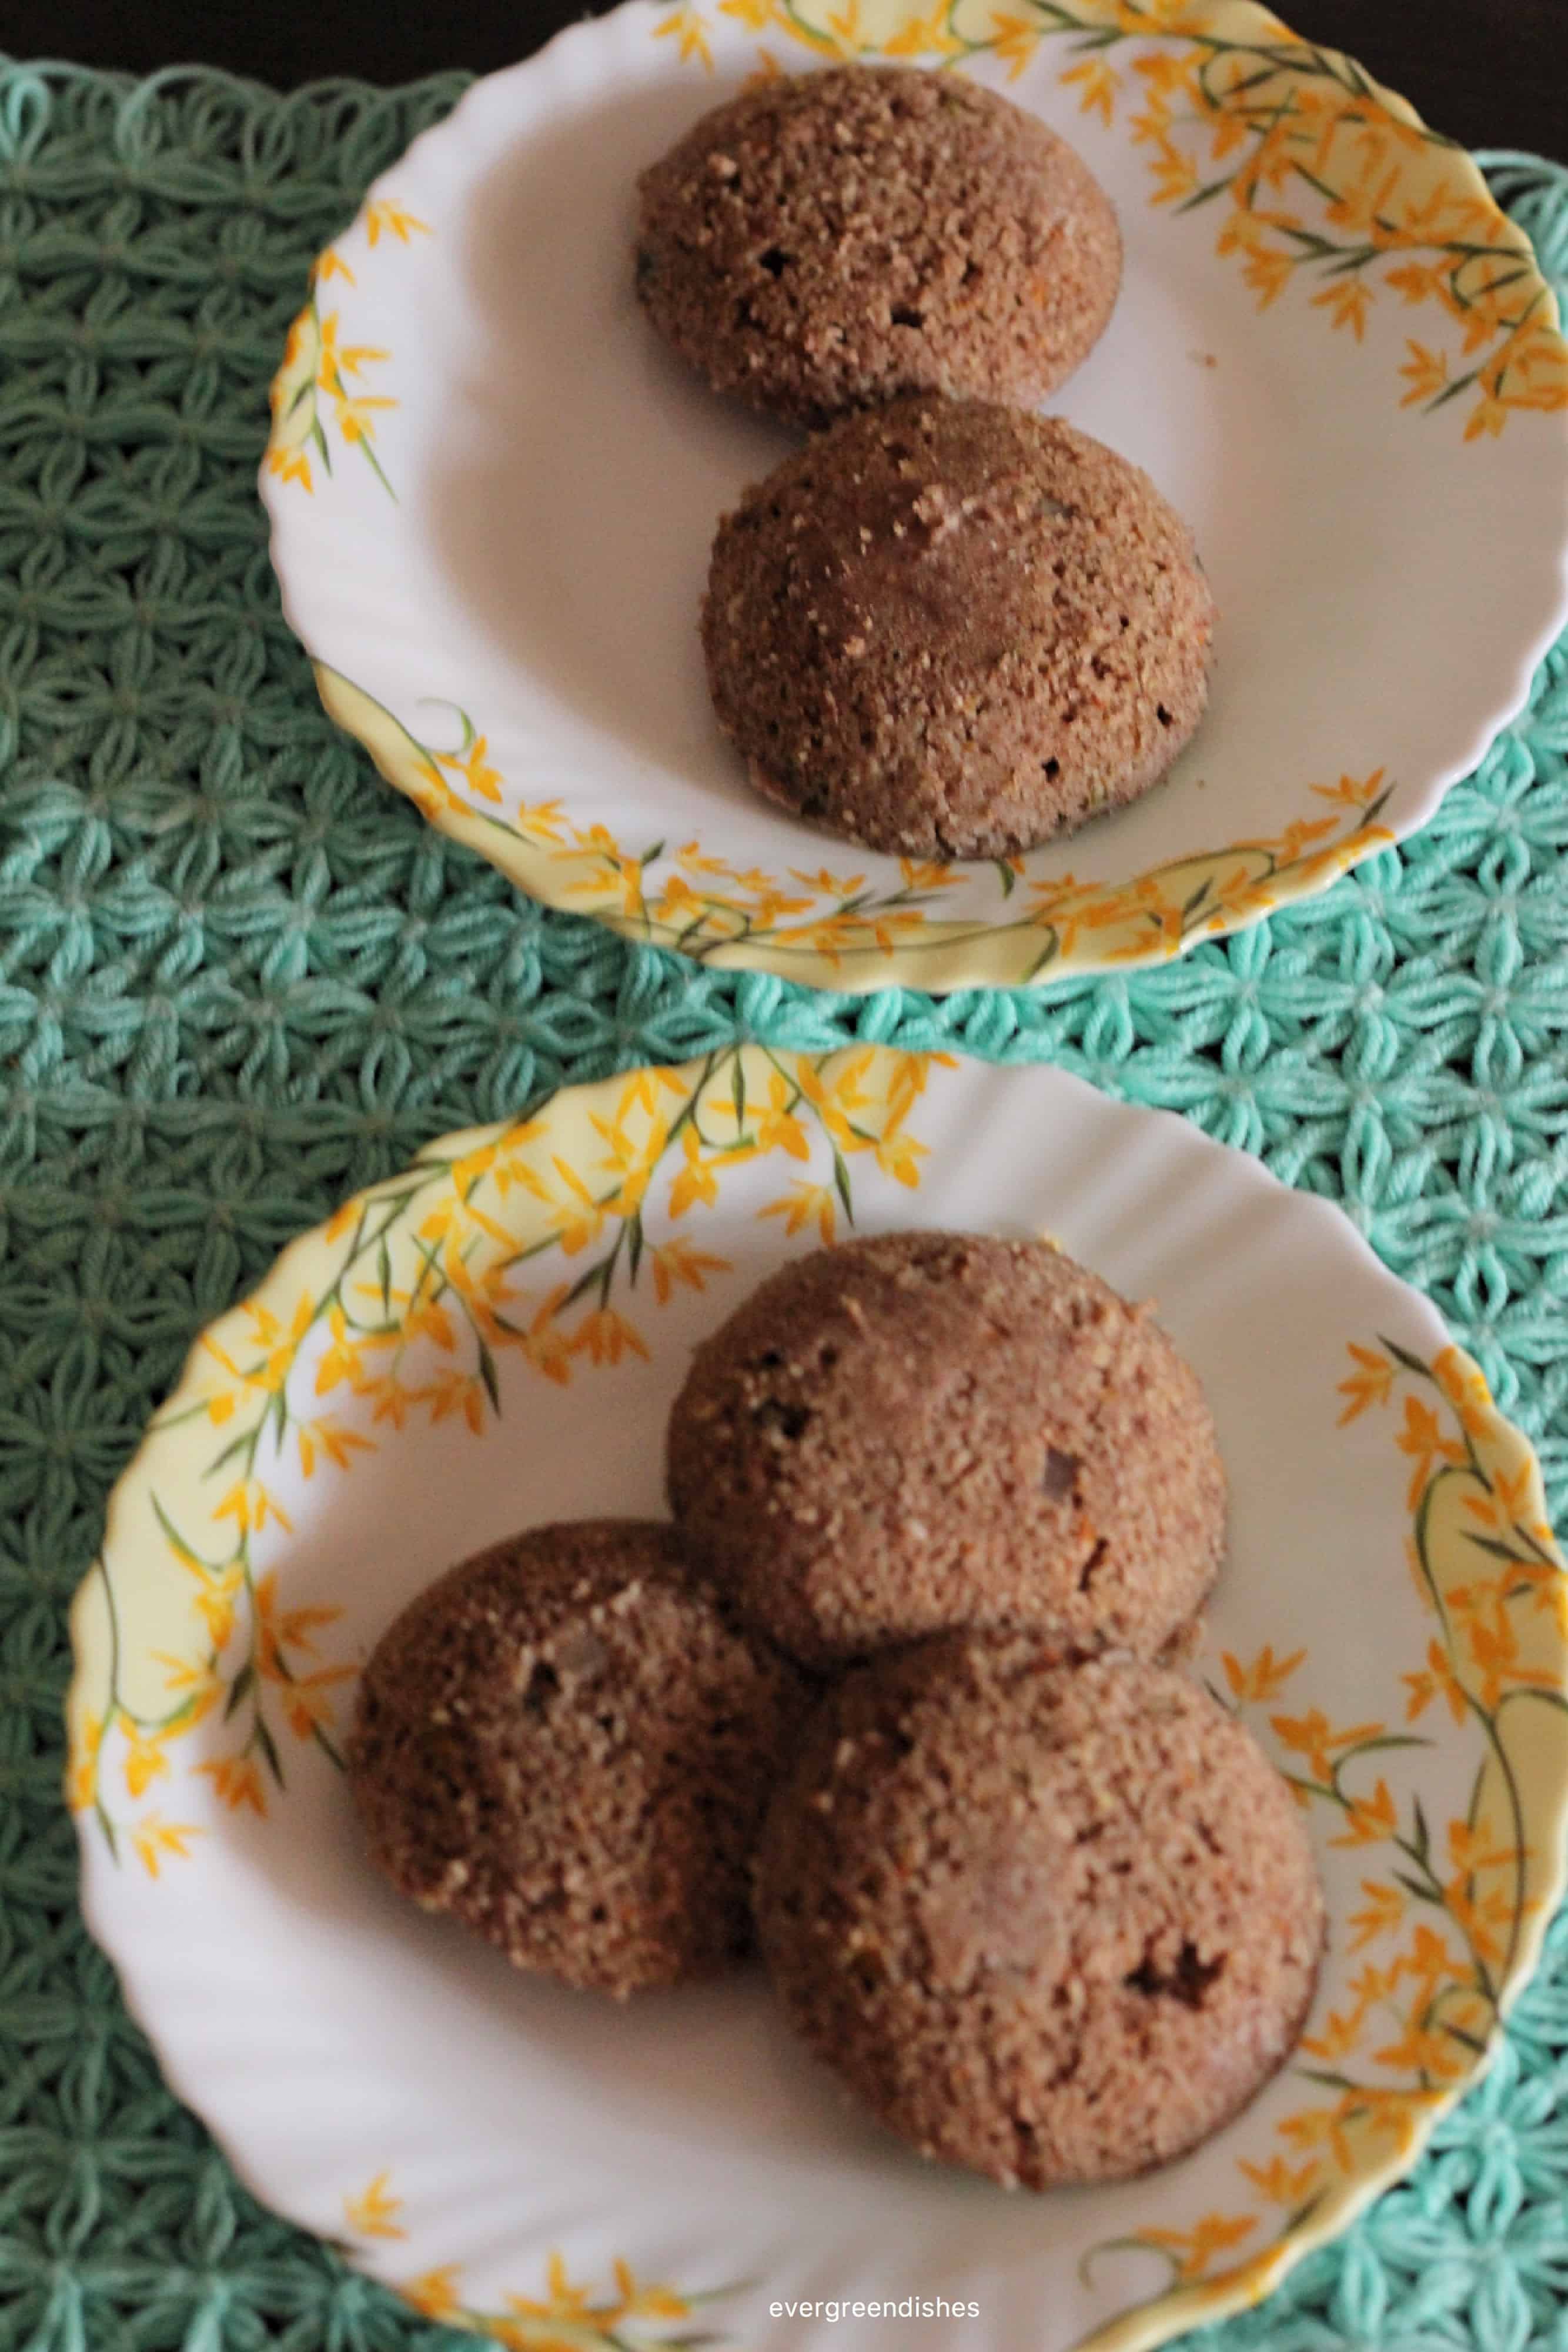
    Jump to Recipe

    Instant Ragi Idli is tasty, healthy and easy to make. It is a good option for breakfast, evening snack or dinner. You can serve it for people with diabetics.

    The summer is at it’s peak, nothing is more soothing than a glass of cold water. One needs to eat simple food that is tasty and nourishing for the body. Idli is ideal during summer. Here is another version of Idli.

    Ragi or finger millet is regularly used at home these days. It is gluten free and good source of protein. It is rich in calcium, good carbohydrates and proteins. It helps to control diabetes and blood sugar. It is ideal for weight watchers. It helps in controlling anxiety and depression.

    Moreover, it is ideal food for summer. It has cooling properties which helps the body to combat stress. A few other idli recipes that I have shared earlier :Chennai Idli, Sago Idli,

    I had earlier shared the fermented version of ragi idli. But, I find this to be more simple and handy. One hardly require ten minutes for all the preparation, keep it aside for half an hour and later put it in the mould and steam.

    A few pointers before I proceed to the recipe. Curds or yoghurt must be sour. Addition of veggies is optional, you can make without it. Once the baking soda is added, immediately put it in the moulds and keep it to steam.

    instant ragi idli
    instant ragi idli

    Ragi Flour : Always use fresh flour. The best way to keep a track of all the groceries is to bring them in a required quantity. For a family of four, one kilogram of ragi atta is sufficient. There is no need to buy two kilograms and keep as a reserve for the future. We tend to use different ingredients on a rotational basis.

    Semolina : The semolina used here is bombay rawa. 

    Sour curd ; The curd should be sour but should not have a foul smell. It 

    Vegetables ; Vegetables used here are onion, carrot, green chilli and coriander. You may use green peas and capsicum. Using of onion is                            optional. 

    Baking Soda : As the idli is an instant version, baking soda is essential. You can use eno instead. 

    Water : It is needed to bring in the desired consistency.  You also need water for steaming.

    Seasoning : All the ingredients of seasoning are needed. You may add a few curry leaves. Cashews give a good taste.
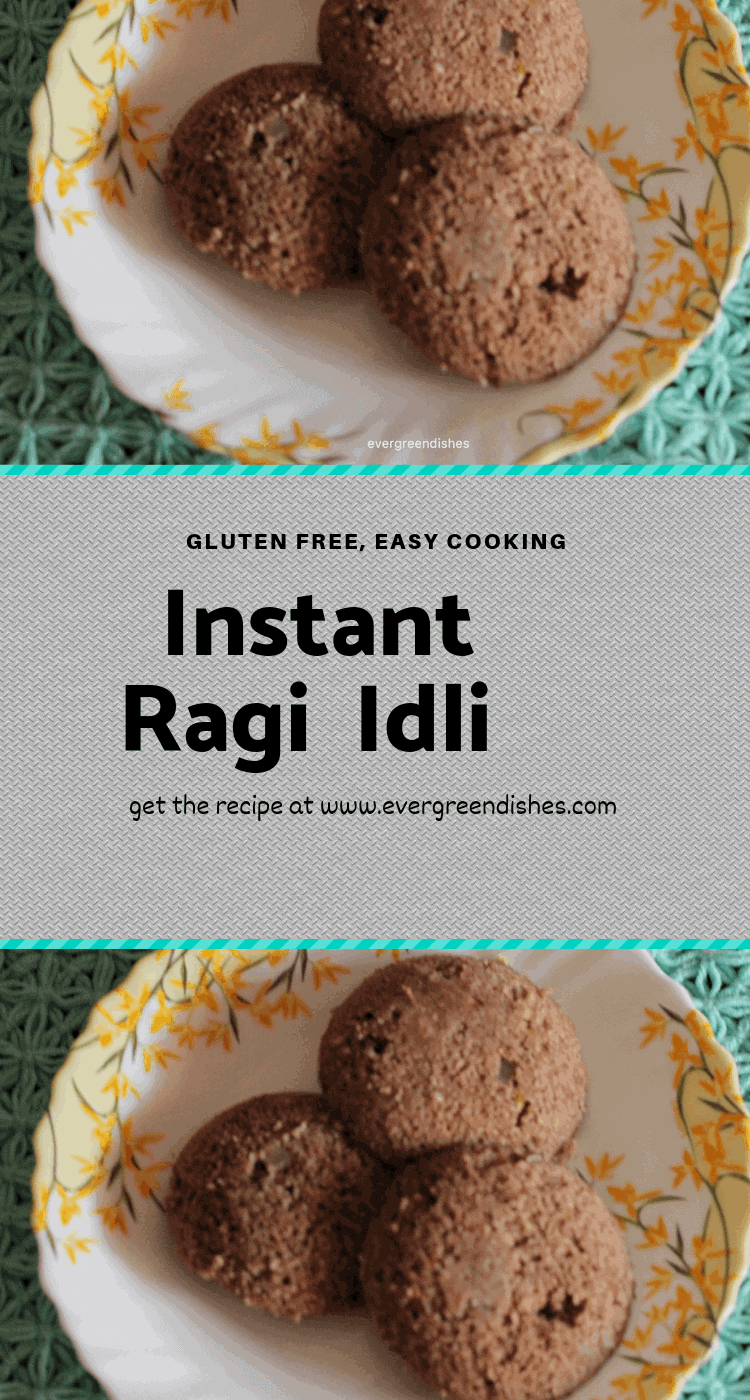


    instant ragi idli
    Evergreendishesdev

    Instant Ragi Idli

    5 from 4 votes
    Instant ragi idli is tasty, healthy and easy to make breakfast option for the busy mornings. One can make it for evening snack or dinner too.
    Prep Time 10 minutes
    Cook Time 20 minutes
    Resting time 30 minutes
    Servings: 20 idli
    Course: Breakfast, dinner ideas, evening snacks
    Cuisine: South Indian

    Ingredients
      

    • 1 cup finger miller flour
    • 1 cup sour curd
    • 1 carrot
    • 1 onion
    • fresh coriander
    • salt
    • 1 tablespoon oil
    • 1/2 teaspoon mustard
    • 1/4 teaspoon asafoetida
    For seasoning
    • 1 tablespoon mustard seed
    • 1/4 teaspoon asafoetida
    • 1/4 teaspoon turmeric powder
    • 1/2 teaspoon cumin
    • 4 cashewnut

    Method
     

    1. Take a wide bowl, add ragi flour and semolina to it. Put salt and curd to it. Mix it well, keep the batter aside for half an hour.
    2. Chop the onion finely and grate the carrot.
    3. Make seasoning, take oil in a small pan, add mustard seeds, as it crackles, put cumin, cashew pieces, broken chilli, a few curry leaves, pour it over the batter.Add veggies and chopped coriander. Adjust the consistency by adding some water.
    4. Put water in the idli pan and heat in on a low flame.Meanwhile, put the soda powder to the batter, mix it and put it to the moulds.
    5. Steam it for fifteen minutes on moderate flame., then on low heat for five to ten minutes. Check if it is done. Switch off. Unmould after sometime.Serve with coconut chutney.

    Notes

    • Sour curds is mandatory. 
    • Addition of veggies is optional.
    • Once the baking soda is added, immediately put it in moulds and steam it.
    • Eno may be used instead of baking soda.
    • Serve hot. 

    This post is part of the Healthy Wellthy Cuisines with the theme “Steamed Dishes”, do check out the other recipes by co-bloggers:

    If you have liked this post, pin it for later. Do share with your family and friends. If you ever make it, take a picture and tag us on Facebook or @foodiejayashree on Instagram, we would be happy to see your creation.

    Pin it for later

    instant ragi idli
    instant ragi idli

    Do subscribe to get a book of handyhints for free !

    Are you passionate about writing? Do start a blog and pen your thoughts Choose A2 Hosting as I have done. They are easily approachable and reliable.


  • How to make masala paratha

    How to make masala paratha

    Masala Paratha is a different kind of stuffed flatbread. It is spicy and ideal for lunch or dinner.

    Parathas are tasty and loved by all. They are ideal as breakfast, lunch, dinner or even brunch. They need no much accompaniments and most of all, the younger generation loves them.

    Which is your favourite paratha? I have earlier shared Methi Paratha, mint paratha and the last one was potato and pea paratha. My children are happy when I make them, it’s a win-win situation for me.

    Masala parathas are spicy and different. They are ideal for lunch or dinner.
    masala paratha

    Masala Paratha is spicy and different from the usual ones. The filling is a powder that is prepared and the making of it, I will be showing you now. I have put a step by step collage of the making, it will help in clearly understanding. These parathas are made in square shape unlike others.

    Let’s get cooking Masala Paratha:

    Ingredients:

    For the dough :

    • 2 cup wheat flour
    • 2 teaspoon ghee
    • salt to taste
    • water

    For the filling:

    • 1 teaspoon fennel seed
    • 1 teaspoon carom seed
    • 1 teaspoon chilli powder
    • salt to taste
    • 1 teaspoon garam masala

    Other ingredients:

    • coriander leaves chopped
    • oil for roasting
    • flour for dusting

    Method:

    1. Take the flour in a bowl, add ghee and salt. Rub it well. Add water and knead to a stiff dough. Keep it covered for sometime.
    2. Grind the fennel seed, rub the carom seed between palm and mix it. Add chilli powder, garam masala and salt to it. This is the filling.
    3. Take a ball of dough, roll it into a thin circle, take a spoonful of the prepared stuffing, put it in the centre and spread it, take care, do not take it to the edges. Put some chopped coriander over it.
    4. Now, put one side and then the other. Check the picture below which I have put. Then roll it more than half and the other side covers it.
    5. Roll this into a square shaped paratha.
    6. Smear oil and turn to the other side, cook until golden spots are visible.
    7. Serve hot with pickle.

    Step-by-step making of masala paratha

    Masala Paratha
    making of masala paratha


    Do check out my e-book, “Breadbasket” on Amazon. It consists of many varieties of dosas and flat breads.


    Evergreendishesdev

    Masala Paratha

    Masala Paratha is a blend of flavours, it is spicy and ideal for a quick breakfast.
    Prep Time 10 minutes
    Cook Time 20 minutes
    Resting time 10 minutes
    Total Time 30 minutes
    Servings: 8 parathas
    Course: Breakfast, dinner, lunch
    Cuisine: north indian

    Ingredients
      

    For the dough
    • 2 cup wheat flour
    • 2 teaspoon ghee
    • salt
    • water
    For the stuffing
    • 1 teaspoon carom seed
    • 1 teaspoon fennel
    • 1 teapoon chilli powder
    • 1 teaspoon pepper powder
    • 1 teaspoon garam masala
    • salt
    Other Ingredients
    • coriander leaves finely chopped
    • wheat flour for dusting
    • oil for roasting

    Method
     

    1. Take the flour in a bowl, add ghee and salt. Rub it well. Add water and knead to a stiff dough. Keep it covered for sometime.
    2. Grind the fennel seed, rub the carom seed between palm and mix it. Add chilli powder, garam masala and salt to it. This is the filling.
    3. Take a ball of dough, roll it into a thin circle, take a spoonful of the prepared stuffing, put it in the centre and spread it, take care, do not take it to the edges. Put some chopped coriander over it.
    4. Now, put one side and then the other. Check the collage that I have shared earlier. Then roll it more than half and the other side covers it.
    5. Roll this into a square shaped paratha.
    6. Smear oil and turn to the other side, cook until golden spots are visible.
    7. Serve hot with pickle, green chutney or curd.

    If you have liked this post, do share it with your family members and friends. If you ever make it, do take a picture of one and tag me @foodiejayashree on Instagram

    Pin it for later:

    If you have liked this post, do share it with your family and friends. If you ever make this, take a picture and share it by tagging @foodiejayashree on Instagram or @evergreendishes on Facebook or Twitter.

    Let’s be connected, the follow buttons are on the side bar. Subscribe to get all updates and an e-book for free.


  • Aloo Puri | Masala Puri

    Aloo Puri | Masala Puri

    aloo puri
    aloo puri

    Aloo puri is tasty, deep fried flatbread that can be made easily. A little prior preparation and tasty breakfast is ready. Potato, mixed with a few other spices and deep fried to puri makes a delectable snack. It needs no accompaniment as such though pickle tastes good. 

    Children love puri and this aloo puri is one of the favourites. It is ideal to carry as travel food. No elaborate dishes are needed to be packed.


    Ingredients:

    • 2 cups wheat flour
    • 2 boiled potatoes
    • salt to taste
    • 2 teaspoon chilly powder
    • 1 teaspoon carom seed
    • water for kneading
    • oil for frying

    Method :

    To make the dough:

    Take the flour in a wide bowl. Mash the potatoes and put it. Add salt, ajwain and chilly powder. Mix to a crumbly texture. Add little water and make a firm dough.

    To make the puris :

    Take a small ball of the dough and roll it into a circle of four inches diameter. Heat the oil in a pan. Once the oil is heated, slowly add the puri and fry on moderate it. Turn it to the other side with the ladle, remove on a tissue paper. Serve hot.

    Evergreendishesdev

    Aloo Puri

    Aloo Puri is a delectable, deep fried flatbread. It is ideal for breakfast, serve it with pickle, it tastes delicious.
    Prep Time 10 minutes
    Cook Time 20 minutes
    Total Time 30 minutes
    Servings: 4 people
    Course: Breakfast
    Cuisine: South Indian

    Ingredients
      

    • 2 cup wheat flour
    • 2 boiled potato
    • 2 teaspoon chilli powder
    • 1 teaspoon carom seed
    • water for kneading
    • oil for frying

    Method
     

    1. 2 cups wheat flour 
      2 boiled potatoes 
      salt to taste
      2 teaspoon chilly powder 
      1 teaspoon ajwain
      water for kneading
      oil for frying
      Method :
      To make the dough:
      Take the flour in a wide bowl. Mash the potatoes and put it. Add salt, ajwain and chilly powder. Mix to a crumbly texture. Add little water and make a firm dough.
      To make the puris :
      Take a small ball of the dough and roll it into a circle of four inches diameter. Heat the oil in a pan. Once the oil is heated, slowly add the puri and fry on moderate it. Turn it to the other side with the ladle, remove on a tissue paper. Serve hot.
       
      WP Recipe Maker #6662remove
      – 2 cup wheat flour
      – 2 boiled potato
      – chilli powder
      – salt
       
        
    To make the dough
    1. Take the flour in a wide bowl.
    2. Mash the potato, put it along with the flour. Add salt, carom seed and chilli powder.
    3. Mix it to a crumbly mixture. 
    4. Add little water and mix to a stiff dough. 
    5. Keep it aside for five minutes.
    To make the aloo puris
    1. Take a small ball of the dough and roll it into a circle of four inch diameter.
    2. Heat oil in a pan, once the oil is heated slowly add the puri and fry on moderate heat.
    3. Flip it to the other side with the ladle, once it is done, remove on a tissue paper. 
    4. Serve with any pickle.

    Pin it for later:

    aloo puri
    aloo puri

    If you ever make this dish, take a picture and share with me @foodiejayashree on Instagram

    Let’s be social: Facebook, Twitter, Pinterest and Instagram

    I am sending this post to #BM97 for the Kids Special with the theme “Travel Food” co-hosted by Renu.

    BMLogo

    Check out the Blogging Marathon page for the other Blogging Marathoners doing this BM#97

    Subscribe to get all updates and a book of handy hints for free

    book of handyhints
    book of handyhint

    Until next time, be happy and cheerful. Do try these recipes and let me know if you liked them.

  • Cantaloupe Carrot and Beetroot smoothie

    Cantaloupe Carrot and Beetroot smoothie

    Cantaloupe Carrot and Beetroot Smoothie is a nutrient  rich, vibrant, ten-minute recipe.

    Smoothie is filling and low on fat, ideal for those who are looking for a low fat diet or healthy and filling food to have as breakfast.

    Cantaloupe, Carrot and Beetroot smoothie is tasty and vibrant in colour. The cantaloupe gives a good flavour to it.

    I have recently joined the Bloggers Swap Challenge group and we are paired in groups. The pair has to prepare a dish from the other persons blog, a nice way to explore and cook from our co-bloggers blog.

    I had to create a dish from Nayna Kanabar’s blog www.simplysensationalfood.com Soon, I did hop to her blog. Nayna has a good collection of dishes from salads to desserts, do check them out. She has also got two books published. Among all the recipes what caught my attention were her smoothies. She has a wide range of different variations  and I  loved this Purple Carrot, Melon and Beetroot Smoothie the most. I did follow the recipe with a slight variation.  I  used the regular carrots instead of the purple ones and it was awesome.

    cantaloupe, carrot and beetroot smoothie
    cantaloupe, carrot and beetroot smoothie

    Ingredients:

    • 2 cups cantaloupe
    • 1 cup carrot
    • 1/2 cup beet
    • 1 cup water
    • 1 teaspoon honey
    • 1 tablespoon lemon juice
    • 1/2 teaspoon nutmeg powder

    Method:

    1. Put the cut fruit and veggie in a blender and swirl for one minute. Add honey, nutmeg powder powder and lemon juice and again swirl once more.
    2. Pour in glasses and serve.

    A few other smoothie recipes  from my blog are here  Cucumber Smoothie, Pear Smoothie, Muskmelon Smoothie


    cantaloupe, carrot and beetroot smoothie
    Evergreendishesdev

    Cantaloupe, Carrot and Beetroot Smoothie

    Cantaloupe, carrot and beetroot smoothie is tasty, rich in antioxidants and vitamins.
    Prep Time 5 minutes
    Servings: 2 glasses
    Course: Breakfast
    Cuisine: international

    Ingredients
      

    • 2 cup cantaloupe
    • 1 cup carrot
    • 1/2 cup beet
    • 1 cup water
    • 1 teaspoon honey
    • 1 tablespoon lemon juice
    • 1/2 teaspoon nutmeg powder
    • ice cubes

    Method
     

    1. Put the cut fruit and veggie in a blender and swirl for one minute. Add honey, nutmeg powder and lemon juice and again swirl once more.
    2. Pour in glasses and serve.

    Pin it for later:

    cantaloupe, carrot and beetroot smoothie
    cantaloupe, carrot and beetroot smoothie

    Do check out the other delicious recipes from this month’s Recipe Swap!

    Recipe Swap Recipes

    If you have liked this recipe, do leave a comment. If you ever create this in your kitchen, take a picture and share it with @foodiejayashree on Instagram. I will be glad to see it.

    Follow evergreendishes on Twitter, Facebook, Pinterest and Instagram

    Subscribe to get all updates in your inbox and a book of handyhints for free !


  • Kiwi Kesari

    Kiwi Kesari

    Rawa kesari or Sheera as we often call in South India makes a good winter treat. Today, I have a fusion sweet, sheera with kiwi in it. A bowl of piping hot kiwi kesari  was one of the favourites of my daughter a few years back.

    This is the 3rd post  of BM#96 with the theme “Winter Warmers” The other two posts were Badam Milk and Hot Chocolate Milk

    Now, here’s the recipe for Kiwi Kesari

    Ingredients:              Measurement used:1 cup =250 ml
    1 cup semolina
    1/2 cup  ghee
    2 kiwi
    1 cup sugar
    6 almonds
    6 cashew
    1/2 teaspoon cardamom powder
    2 cup water

    Method:
    1 Peel the skin of kiwi, cut into big chunks and make pulp of it. Keep it aside.
    2 Take a pan, add a spoon of ghee and roast the semolina along with the dry fruits. It should be golden in colour.
    3 Remove the semolina in a bowl.
    4 Add water in the pan. Put sugar and ghee to it. Once the water boils, slowly add the roasted semolina to it. Keep stirring otherwise lumps will be formed.
    5 Once it slightly thickens, add puree to it. Let cook for sometime. Finally, add cardamom powder and remove from flame.

    Kiwi Kesari
    Kiwi Kesari

    Kiwi Kesari
    Evergreendishesdev

    Kiwi Kesari

    Kiwi Kesari is a twist to the usual kesari that we make. It is ideal to serve for breakfast, lunch or dinner. 
    Prep Time 10 minutes
    Cook Time 10 minutes
    Total Time 20 minutes
    Servings: 4 people
    Course: Breakfast, sweets, winter recipe
    Cuisine: fusion, Indian

    Ingredients
      

    • 1 cup semolina
    • 2 tablespoon ghee
    • 2 kiwi
    • 1 cup sugar
    • 6 almond
    • 6 cashew
    • 1/2 teaspoon cardamom powder
    • 2 cup water

    Method
     

    1. Peel the skin of kiwi, cut into big chunks and make a puree of it. Keep it aside.
    2. Take a pan, add a spoon of ghee and roast the semolina along with the dry fruits. Let it be golden in colour. Put it in a bowl.
    3. Add water in the pan. Put sugar and ghee to it. Once the water boils, slowly add the roasted semolina to it, keep stirring, otherwise lumps will be formed.
    4. Once it slightly thickens, add the puree to it. Let cook for sometime. Finally, add cardamom powder and remove from flame. 

    Notes

    • Dry fruits may be roasted in ghee and added later to the dish. 
    • Ghee quantity may be reduced to 1/3 cup if desired.

    Kiwi Kesari
    Kiwi Kesari

    Sending this post to Srivalli’s Kids Delight Event, guest hosted by PJ with the theme “Winter Warmers”

    BMLogo

    Check out the Blogging Marathon page for the other Blogging Marathoners doing this BM#96

    If you have liked this post, do share it further. If you ever recreate this dish, take a picture and share on instagram by tagging @foodiejayashree with the #evergreendishes. I will be glad to see and share it.

    Follow us on Facebook, Twitter, Instagram and Pinterest.

  • Grilled Vegetable Sandwich | easy breakfast recipe

    Grilled Vegetable Sandwich | easy breakfast recipe

    Grilled Vegetable Sandwich is tasty and filling. It can be packed in lunch box or served for breakfast. It makes a good choice with a cup of hot tea for evening snack.Sandwich are ideal for breakfast, evening snack or to pack  in a lunch box.

    We often have sandwich for dinner along with soup. Thus, a different filling is what I create. The Open Sandwich is the favourite at home. In the mornings  I usually prefer to make a No Cook Sandwich as I usually have another dish ready. Today, I have Grilled Vegetable Sandwich.

    grilled vegetable sandwich
    grilled vegetable sandwich

    Grilled Vegetable Sandwich Recipe

    Ingredients:

    • 8 slices bread
    • 2 tablespoon butter
    • a little salt
    • 1/4 teaspoon pepper powder
    • 1/2 cup mint chutney (check tips below)
    • 2 cucumber
    • 1 onion
    • 1 tomato
    • 1 capsicum
    • chaat masala
    • cheese

    Method:

    1. Cut the cucumber and tomato  into thin circles.
    2. Cut the onion and capsicum finely.
    3. Mix the butter with salt and pepper powder
    4. Take four slices of bread, apply some butter over it.
    5. Now generously put green chutney on two slices.
    6. Keep a few cucumber pieces along with tomato.
    7. Put some onion and capsicum pieces over it.
    8. Sprinkle some chaat masala and put some cheese over it.
    9. Keep the other two slices of bread (smeared only with buttter) over it.
    10. Grill it in the toaster.
    11. Once it is done, remove and serve hot.
    12. Repeat for the other four slices.

    Take a tip:

    • To make the mint chutney, I used fresh cooconut, mint leaves and green chilly. Saute the green chilly and mint leaves in a little oil. Then grind along with coconut and salt by adding little water. This chutney pairs well with chapati also.
    • Cheese may be avoided.

    grilled vegetable sandwich
    grilled vegetable sandwich


    grilled vegetable sandwich
    Evergreendishesdev

    Grilled Vegetable Sandwich

    Grilled Vegetable Sandwich is a  quick and fuss free breakfast or evening snack. You can even pack it in the lunch box. 
    Prep Time 10 minutes
    Cook Time 10 minutes
    Total Time 20 minutes
    Servings: 2 people
    Course: Breakfast, evening snacks
    Cuisine: fusion, Indian

    Ingredients
      

    • 8 slices bread
    • 2 tablespoon butter
    • salt to taste
    • 1/4 teaspoon pepper powder
    • 1/2 cup mint chutney
    • 2 cucumber
    • 1 onion
    • 1 tomato
    • 1 capsicum
    • chaat masala
    • grated cheese

    Method
     

    1. Cut the cucumber and tomato  into thin circles. Cut the onion and capsicum finely.
    2. Mix the butter with salt and pepper.
    3. Take four slices of bread, apply some cheese over it. 
    4. Now, generously put green chutney over it. 
    5. Keep a few slices of cucumber and tomato. 
    6. Put some onion and capsicum pieces over it. 
    7. sprinkle some chat masal and put some grated cheese over it.
    8. Cover them with the other two slices that were smeared with butter.
    9. Grill it in the toaster. 
    10. Once it is done, remove and serve hot. 

    Notes

    • To make the green chutney, I have used mint leaves, fresh coconut, green chilly and salt. Roast the mint leaves and green chilly in little oil. Grind them along with coconut and salt by adding little water.
    • Avoid cheese if you are calorie conscious.

    Grilled vegetable sandwich
    Grilled vegetable sandwich is tasty, filling and easy to prepare. It is ideal to serve for breakfast.

    I am sending this post to Sandwich theme at Healthy Wellthy Cuisine. Here are more sandwich recipe from my team mates.

    If you have liked this post, do share it further and leave a comment. Follow us on Facebook, Twitter, Pinterest and Instagram.If you ever make this recipe, take a picture and share it by tagging @foodiejayashree on Instagram or @evergreendishes on Facebook. I will be glad to see and share your creation further.
    Check out my e-books on Amazon. Do not miss any post. Subscribe to get all updates and an e-book for free !


  • How to make jowar dosa

    How to make jowar dosa

    Jowar dosa | healthy recipe | south indian cooking || breakfast recipe

    Jowar dosa is a healthy twist to the usual one. It is tasty and can be made both crispy and soft. Serve it with chutney and potato sabzi for a good breakfast. Jowar is the Indian name for Sorghum. It is also known as Indian millet, Great millet, Durra and milo. In India, the other names by which it is known are jola, chholam or jonna.

    Dosa is one of the favourites of South Indian. A dosa batter in the refrigerator really saves our day ! It is on the weekly menu, and not to mention the many variety that they prepare. Rice is one of the essential ingredients in it, but now different versions are being made. We are more conscious of what we consume, thus dosa with millets has made their way in most kitchens.

    Jowar dosa is a healthy twist to the regular one and I am loving it. The taste is not similar but I can vouch that there is not much difference too. Infact, we are loving this variety of millets dosa. It is ideal for breakfast, evening snack or dinner. It is vegan and glutenfree.

    What are millets? 

    Millets are coarse grains and a repository of high fibre, protein, mineral and vitamins. They are widely grown as cereal crops for fodder and human food. Some millets are fox tail, sorghum, pearl millet, little millet, proso millet and barnyard millet. 

    Can one make the same quantity of batter as the regular dosa?

    I prefer not to make as the taste varies once the batter gets sour. The regular dosa tastes good.It is better to make these in lesser quantity as for a single use. 

    A few other dosa variety that I often prepare Neer Dosa, Rava Dosa,

    You can pair them with coconut chutney, green chutney or  Red Onion chutney 

    Jowar dosa
    Jowar dosa

    Here whole grains of jowar are used, they need to be soaked for a longer time. It is advisable to soak before you go to bed at night, but the urad dal, soak it for two hours only. Grind them to a batter and allow to ferment. Thus, pre-planning is essential.

    Make a small quantity and preferably finish the batter on the same day. If it remains, finish it the next day, I am doubtful how good it tastes as the usual dosa batter that we use.

    Since millet is used here, unlike the regular dosa, these need to be cooked on both sides.

    Jowar Dosa

    Ingredients:                       

     (Measurement used 1 cup = 150 ml)

    • 1 cup jowar
    • 1 cup rice
    • 1 cup urad dal
    • 1 teaspoon fenugreek
    • water for soaking
    • salt
    • oil for roasting

    Method:

    1. Wash and soak the jowar in water for six to eight hours.
    2. Soak rice separately with methi in it.
    3. Soak urad dal for two hours.
    4. Grind the jowar at first, add rice to it later and let them blend.
    5. After sometime, put urad dal to it. Put some water to the batter if needed. I preferably use the soaked water.
    6. Grind all of them to a smooth batter.
    7. Remove the batter in a wide bowl.
    8. Allow it to ferment for seven to eight hours.
    9. Add salt to the batter, mix it.
    10. Take some batter in another bowl.
    11. Heat a skillet.
    12. Take a spoonful of batter, pour it on the skillet and spread it inside out. A thin crepe can be made.
    13. Drizzle oil, once it roasted, turn it to the other side.
    14. Serve hot with chutney. Potato sabzi too tastes good.
    making of jowar dosa
    making of jowar dosa

    Pin it for later: 

    Jowar dosa
    Jowar dosa


    Jowar dosa
    Evergreendishesdev

    Jowar Dosa

    Jowar dosa is tasty and healthy twist to the usual dosa. It can be served for breakfast, lunch, evening snack or dinner. 
    Prep Time 15 minutes
    Cook Time 30 minutes
    Fermentation time 6 hours
    Total Time 45 minutes
    Servings: 20 dosas
    Course: Breakfast, evening snacks, glutenfree
    Cuisine: karnataka, south india

    Ingredients
      

    • 1 cup jowar 1 cup = 150 ml
    • 1 cup raw rice
    • 1 cup urad dal
    • 1 teaspoon methi
    • water for grinding
    • salt
    • oil for roasting

    Method
     

    1. Wash and soak the jowar in water for eight hours.
    2. Soak rice separately with methi in it.
    3. Soak urad dal for two hours.
    4. While grinding, at first, put only the jowar in the machine. After sometime, put rice. Add some water. Then later, add urad dal. Grind all of them together to a smooth batter. 
    5. Remove the batter in a big bowl, allow to ferment for six to eight hours.
    6. Add salt to it.
    7. Mix the batter and take some in a small bowl. Heat a skillet, pour a ladle full of batter and spread it inside out to a thin crepe. Drizzle some oil.
    8. Allow to cook. Flip it to the other side. After two minutes, remove and serve.

    Notes

    • Make a small quantity of batter and finish it within a day or two. 

    This post is part of the theme #TimeForDoasatHW at Healthy Wellthy Cuisines group. Here are the other dosa varieties by co-bloggers

    If you have liked this post, do share it further.  Do pin it for future reference.

    If you ever make this recipe, do take a picture and tag me @foodiejayashree on Instagram, I will be glad to see your creation.

    Follow evergreendishes on Facebook, Twitter, Pinterest and Instagram, let’s be connected.

    Subscribe to get all updates and a book of handy hints for free!

    Check out my e-books

  • Chocolate Chia Seed Pudding

    Chocolate Chia Seed Pudding

    Chocolate chia seed pudding is a tasty, easy to make, high fiber, protein packed ideal for breakfast. It can be made in fifteen minutes with a little preparation.  (more…)

  • Neer Dosa | How to make neer dosa| South Canara

    Neer Dosa | How to make neer dosa| South Canara

    Neer dosa is a popular crepe from South Canara region  of Karnataka. It is soft, fluffy, lacy, tasty and makes one of the finest breakfast ever. Serve it with vegetable stew and a variety of chutney for a yummy weekend breakfast.

    South India is famous for the variety of dosa galore one can endlessly enjoy. Masala dosa, rava dosa, onion uttapam, neer dosa, adai, benne dosa, set dosa are some of them. South Canara was  the region of the present day Dakshina Kannada and Udupi of Karnataka.

    What is Neer Dosa?

    Neer Dosa is another variety of dosa from Karnataka. It is popular in South Kanara region. It is made using only rice, no lentil is used here. Fresh coconut is used, but one can avoid it. Neer means “water” in Kannada. The batter is made as thin as water, thus the name.

    If the batter is thin, can we make it into a crepe?

    Yes, you can make it. Heat a skillet. Take a ladle full of batter, hold the handle of the skillet in one hand and pour the batter with the other. Once you pour the batter, just turn it around and the batter spreads.

    Can anyone make it?

    It does need a little practice, but you can make it. Use a non-stick skillet for best results.

    neer dosa
    neer dosa

    My other South Canara recipes on the blog: Moongdal payasam, Sweet Potato Kheer, Rice Porridge

    What goes in Neer Dosa ?

    • Rice : Raw rice is the main ingredient. Use the regular sona masuri rice. Wash it well and soak for eight hours.
    • Fresh coconut : The other ingredient essential in making neer dosa is fresh coconut. The fresh grated coconut gives a good taste to it.
    • Water : It is needed for grinding and adjusting the consistency of the batter.
    • Oil: You may use any oil but I insist on using coconut oil. It lends a good flavour.
    • Salt: Adjust accordingly.


    How to make the perfect Neer Dosa ?

    The consistency of the batter should be thin. The handle of the skillet is held in one hand and the batter is poured and immediately it is turned around. This helps in getting the required shape. Drizzle oil and cover it with a lid. Once it is done, slowly remove it from the edges. Fold it into a quarter and serve hot with chutney or stew. For best results, I suggest you to use a non-stick dosa tawa.

    Can I store the remaining batter ?

    Keep the remaining batter in the refigerator and use it the next day. Throw away the water which is settled on top. Adjust the consistency and make it.


    neer dosa
    Evergreendishesdev

    Neer Dosa

    Neer Dosa is a popular crepe from South Canara region of Karnataka. 
    Prep Time 15 minutes
    Cook Time 30 minutes
    Total Time 45 minutes
    Servings: 12 crepes
    Course: Breakfast
    Cuisine: dakshina kannada, karnataka, mangalore

    Ingredients
      

    • 1 cup raw rice
    • 1/2 cup fresh coconut
    • water
    • salt
    • oil

    Method
     

    1. Grate the coconut.
    2. Grind the rice with little water, add coconut to it.
    3. Remove the batter in a wide bowl. Add salt to it.
    4. Heat a skillet, take some batter in another bowl, add water to it.
    5. Take a ladleful of batter, hold the handle of skillet in one hand, pour it over and immediately turn it around. Drizzle some oil around it.
    6. Close a lid and let it cook on medium flame. Once it is cooked, slowly scrape it from the side and fold it. Serve hot with chutney or stew.

    Notes

    • Adding of coconut is optional, but it gives a good taste.

    neer dosa
    neer dosa


    If you have liked this post, subscribe to get a book of handy hints for free!

    Follow evergreendishes on other social media, Facebook, twitter and @foodiejayashree on  instagram

    If you ever recreate this dish tag @foodiejayashree on instagram, or @evergreendishes on twitter. I will be glad to see your work.


  • Ragi Khichu / Guest Post Series

    Ragi Khichu / Guest Post Series

    Ragi Khichu is a simple snack prepared from ragi/nachani/finger millet flour cooked in water with simple spices.

    It’s been almost a month since I had a guest blogger on Evergreendishes. Today, I have Archana Potdar of The Mad Scientists Kitchen  with us. She is a versatile blogger who cooks simple, tasty and healthy recipes.

    It was through one of the face book groups that I first met Archana. She is a lively lady and we were soon friends. I have seen her posting many millet recipes and thus requested to post one with finger millet or ragi. Welcome Archana, indeed happy to have you here.

    We all know the goodness of these millets, it is so nice of her to share a wonderful recipe with us. Thankyou so much Archana, I am sure your recipe will be liked by all.

    She has many more recipes such as Ragi Porridge, Ragi Pudding, Bajra ki Khichdi, Bajra and carrot cake to name a few, do visit her blog. And now for the Khichu recipe, it’s over to Archana below:

    Hello all,

    Humble thanks to Jayashree for this pleasure of writing a guest post for her a dedicated blogger, this is indeed a great honour for me.

    The virtual world is strange place where you can meet people from all around the world, share common passions, and become good friends. I am sure you have heard of many such stories. Well I met Jayashree in one of the blogging forums and have become good friends with her.  Jayashree has written books do check her books on South Indian Breakfast she has more but I can remember only this one right now.My tryst with millets began  early on but gained strength

    My tryst with millets started early but gained strength with hubby’s health issues.We had to reset and restart our lifestyle and food habits. Being food lovers, we love nothing better than spending our time and money on good food. Lead eating outside home, it is now, we realise how much that has harmed us! Hubby’s sugar, cholesterol and other parameters had skyrocketed.

    With this background and the fact that we get bored with the same old food I have started experimenting with millets. I am trying to use the different millets to make regular everyday food like bajra khichidi etc. With regular use of these millets, exercise and mindful eating, we have blood reports that are within the standard limits. My sceptical   husband now credits me with his weight loss and better reports, makes all the expected noises about millets on his plate but eats it!  What more does a satisfied food blogger want??

    So today I will like to share Khichu more specifically Ragi Khichu as my guest post as Jayashree wanted me to write any dish with Ragi!

    Ragi Khichu is a simple snack prepared from ragi/nachani/finger millet flour cooked in water with simple spices.

    Khichu or Kichiyu is a traditional Gujarati snack. It is dough made from rice flour used to make papad. Papad made from this dough is known as Khichiya Papad. I have also seen wheat flour Khichu. So why not Ragi or Nachni?  Not that I am the first one to think of it but, since I am trying to add more millets in our diet I considered trying Ragi Kichyu.

    The name khichu is derived from the ductile nature of the dough. Since the dough is tasty, it is consumed as a Farsan (a snack) or as a side dish. Khichu is easy to make and is easily digestible. So in case you are looking for a great snack that is low in calories but rich in iron, protein, fibre, and calcium then look no further than Nachni Khichu.

    As I have said, traditionally, Khichu is made from rice flour. The flour is cooked in water with jeera/cumin seeds and an alkaline salt is known as Papad Khar and then steamed. Khichu is served with groundnut oil and chilli powder.

    Ragi Khichu| Millet Recipes| Snack Recipes

    Ingredients:

    • 1/2 cup ragi /nachni flour
    • 1/2 cup of curd, fresh
    • 1 cup of water
    • salt to taste
    • 1 tsp jeera/cumin seeds
    • 1 tsp red chilli powder
    • 1 green chilli, finely chopped
    • a pinch of hing/asafoetida
    • 1 pinch baking soda (I did not use)
    • Dhania/ coriander leaves finely chopped

    To Serve:

    • 2 tsp oil (I did not use)

     Method:

    • In a non-stick pan, add the curd, water, salt, jeera, chilli powder, baking powder (if using) and green chillies.
    • Mix all the ingredients well and bring to a rolling boil.
    • Once the mixture boils add the ragi flour and stir well as you add the flour.
    • Stir continuously and get rid of all lumps.
    • Psst, the easier way is to get the pot off the flame to add the flour gradually and mix well breaking the lumps, only be quick.  Maybe next time I will take kiddos suggestion and use the immersion mixer.
    • Cook covered on low flame for about 5-10 until the mixture leaves the side of the pan.
    • Add coriander leaves, drizzle the oil if using and dish up immediately.

    Ragi Khichu Guest Post Series
    Ragi Khichu Guest Post Series

    A few other Ragi recipes on the blog : Ragi Thalipeeth, Ragi Idli

    Ragi Khichu Guest Post Series

    Ragi Khichu

    Course: Breakfast, lunch
    Cuisine: Indian

    Ingredients
      

    • 1/2 cup ragi / nachni flour
    • 1/2 cup fresh curd
    • 1 cup water
    • salt to taste
    • 1 teaspoon jeera
    • 1 teaspoon chilly powder
    • 1 green chilly finely chopped
    • a pinch of asafoetida
    • 1 pinch baking soda ( I have not used)
    • coriander leaves finely chopped
    To serve
    • 2 teaspoon oil ( I did not use)

    Method
     

    1. In a non- stick pan, add the curd, water, salt, jeera, chilli powder, baking powder (if using ) and green chillies. 
    2. Mix all the ingredients and bring to a rolling boil. 
    3. Once the mixture boils, add the ragi flour and stir well as you add the flour. 
    4. Stir continuously and get rid of all the lumps. The easier way is to get the pot off the flame to add the flour gradually and mix well breaking the lumps, only be quick. Maybe next time I will take kiddos suggestion and use the immersion mixer.
    5. Cook covered on low flame for about 5-10 until the mixture leaves the side of the pan.
    6. Add coriander leaves, drizzle the oil if using and dish up immediately.

    Pin it for later:

    Ragi Khichu - guest post
    Ragi Khichu – guest post

    About the author:

    Archana Potdar is a working mother, happily married  with two daughters. She started  food blogging as a tribute to two greatest influencers of her life, her mom and mother in law who were great cooks. But now, she gives a healthy touch to all her recipes. She loves to travel, trek and listen to old Hindi songs. Her dreams are to trek the Himalayas ( and hope she does it very soon) Do visit her blog www.themadscientistkitchen.com 

    Follow Archana on TwitterFacebook 

    If you have liked this post do share it further.

    If you ever recreate this dish do tag us on Instagram @foodiejayashree

    If you have not subscribed yet, do sign up. More tasty recipes coming on blog, stay tuned.

    Do follow us on Facebook, Twitter, Pinterest, Instagram