Category: healthy recipes

  • How to make the perfect Idli and Dosa Batter

    How to make the perfect Idli and Dosa Batter

    ( Disclosure : As an Amazon Associate, I will get a small commission for qualifying purchases without no addition cost to you.)

    How to make the perfect Idli and Dosa Batter | Idli and Dosa batter recipe | healthy homemade batter 
     Make the perfect idli and dosa batter and store in the refrigerator for a hassle free morning ahead.

    An  idli and dosa batter in the refrigerator saves the day. It eases the morning dilemma and makes a filling breakfast for all. It is welcome on the busy days, when errands are many and time consuming. Idli and Dosa is a popular breakfast in South India. It is preferred in many households as it is soft and easy to digest. The fermenting  process breaks the nutrients and helps in proper absorption. Making the batter at home requires a little time and effort but it is worthwhile. 

    Today, most people buy a packet of batter and use it.  However, there is nothing like the homemade one. The batter made at home is according to the best known method with the purest ingredients that you get in the market without any preservatives. There is no scope for the deterioration in the quality of the batter. The yield you get is comparatively more than that you get in the market. Moreover, you are making a fresh batch of batter whenever you need it. You are in control of the ingredients you use and the quantity of batter you prepare. Thus the nutrition and taste are much better of the homemade batter.


    TIPS FOR A GOOD BATTER


    Keep in mind to use good quality ingredients. Use newly produced urad dal/

    Consistency of the idli batter is very important. It should neither be too thick nor thin. If the batter is too thin, the idlis will not be fluffy. If the batter is too thick, the idlis will turn out hard. The consistency should be thick but of pouring consistency.

    The question often arises when should the salt be added? Should it be added before fermentation or after the fermentation process ? Every person has his own views on this matter. Most of us use iodized salt and it hinders the fermentation process .I always add salt to the fermented batter and it works fine for me.

    Another point of consideration, urad dal is available in two forms as whole and broken. Many people prefer to use whole urad dal as the yield of batter is higher. But, in a few cases, I have seen them to be infested with black pests. I prefer to use the half broken urad dal.

    Rice is another important ingredient in the preparation of idli and dosa batter. If a recipe says only rice, use the regular sona masuri rice. You can also par boiled rice or ration rice. Do not use basmati rice or any other variety.

    Appliance :

    The  new mixer grinder is ideal choice of many as it comes as a multi-purpose appliance for batter, chutney, smoothie and juice. It is sturdy and can be used hands free, the unique locking system holds the ingredients properly. Tabletop Wet  Grinder is the other appliance which you can use to make idli and batter. It makes a good investment if you are making the batter regularly at home. The tabletop grinder is ideal for indian cooking.It gives a smooth batter and the quantity is much more. It saves time too. Today, the tabletop grinders have varied other features as atta kneader, spice mix drum and coconut scrapper. It can be useful appliance in the kitchen. I always make batter in the tabletop grinder though I feel a bit cumbersome at times. I love the texture of dosa and gundapongal made by this battter.

    Fermentation time:

    The time required for fermenting depends on the season. The ideal temperature for fermentation is between 25 degree Celsius to 32 degree Celsius.  During winter, the process is slow and needs twelve hours. During summer, the batter rises quickly in six to eight hours. It then turns sour if kept outside for a longer period.
    Today, I am sharing the recipe of Idli and Dosa Batter
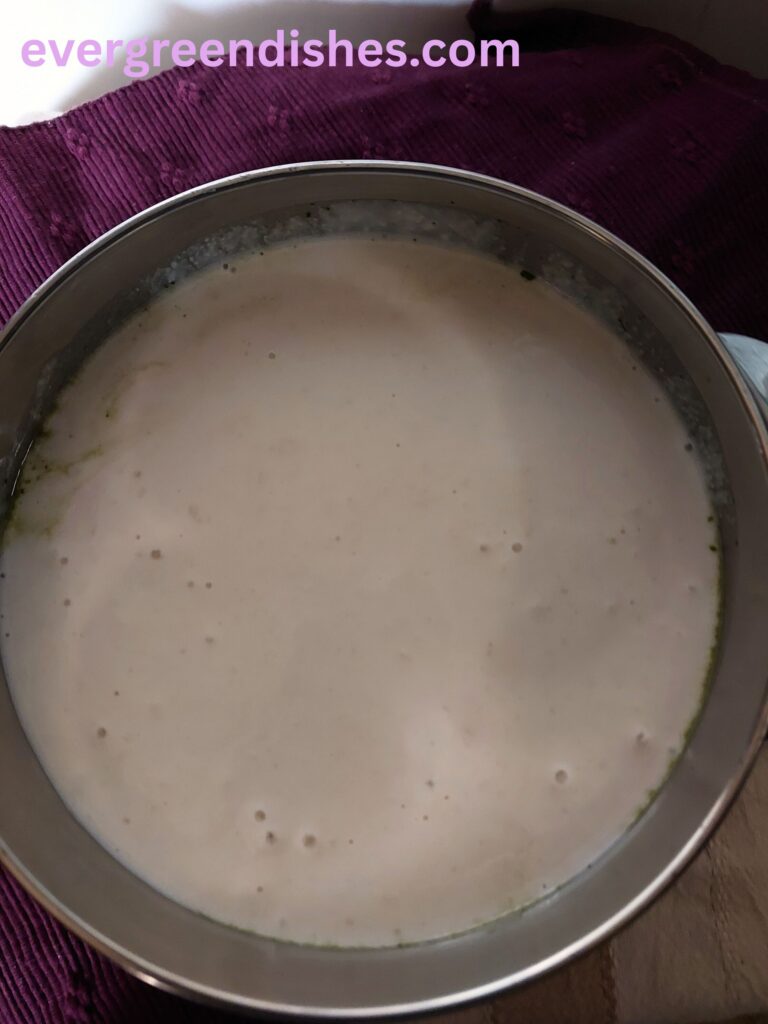
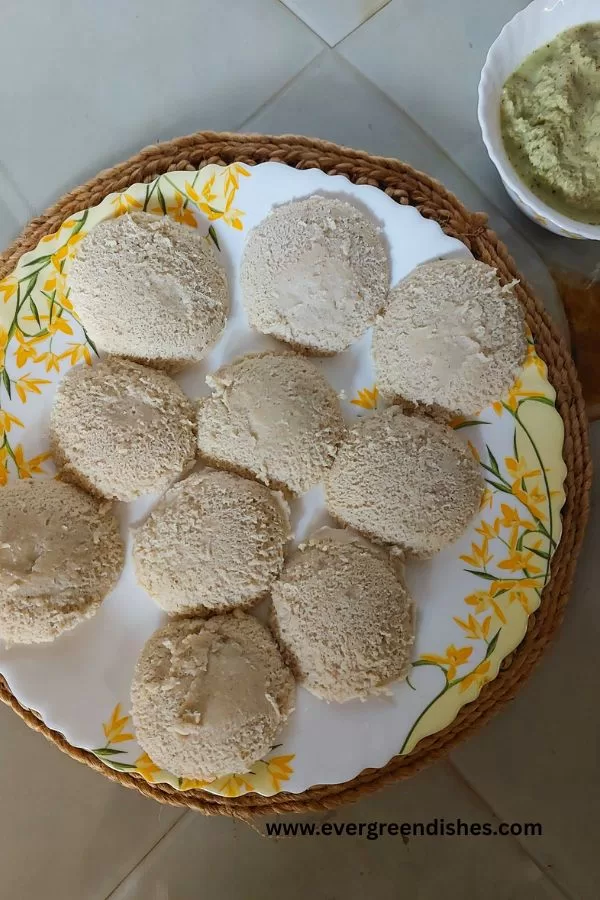
    Idli Batter


    1) Idli batter using rice and urad dal.

    The idlis  made of rice and urad dal are soft and spongy. Parboiled rice is the essential ingredient here. Do not skip on it. You can use only parboiled rice but I found addition of a little sona masuri rice worked better.

    Ingredients:

    1 cup urad dal
    2 cup par boiled rice
    1 cup sona masoori rice
    ½ teaspoon fenugreek seed
    water for soaking and grinding
    salt as required

    Method:

    • Wash urad dal and soak it in water for four hours.
    • Wash the par boiled rice and soak it in hot water for six hours.
    • Wash the sona masoori rice and soak it in water for six hours. Put fenugreek seeds in it.
    • Grind both the varieties of rice together to a slightly coarse texture. Remove the batter in a bowl.
    • Grind urad dal to a fine paste.
    • Mix both of them together in a wide bowl. Keep the batter in a warm place to ferment for at least eight hours.
    • Next day, add salt to the batter and mix it in a clock-wise direction.

    Take the required quantity and keep the remaining in the refrigerator.

    2) Idli Batter using Idli Rawa

    Idli batter made using idli rawa is mostly made as it is easier. The idli rawa is easily available in the market.

    Ingredients :

    • 1 cup urad dal
    • 2 cup idli rawa
    • Water for grinding and soaking
    • Salt

    Method:

    • Wash urad dal and soak it for four hours.
    • Idli rawa can be soaked for half an hour.
    • Grind the urad dal to a fine paste with some water.
    • Once it is smooth, remove it in a wide bowl. The bowl should be a large one as the batter will rise on fermenting.
    • Mix the soaked semolina to it.
    • Keep it in a warm place. Ensure that it is kept properly as the batter rises on fermentation.
    • The next day, add salt to the batter and mix it well.

    Take the required quantity and keep the rest in the refrigerator.
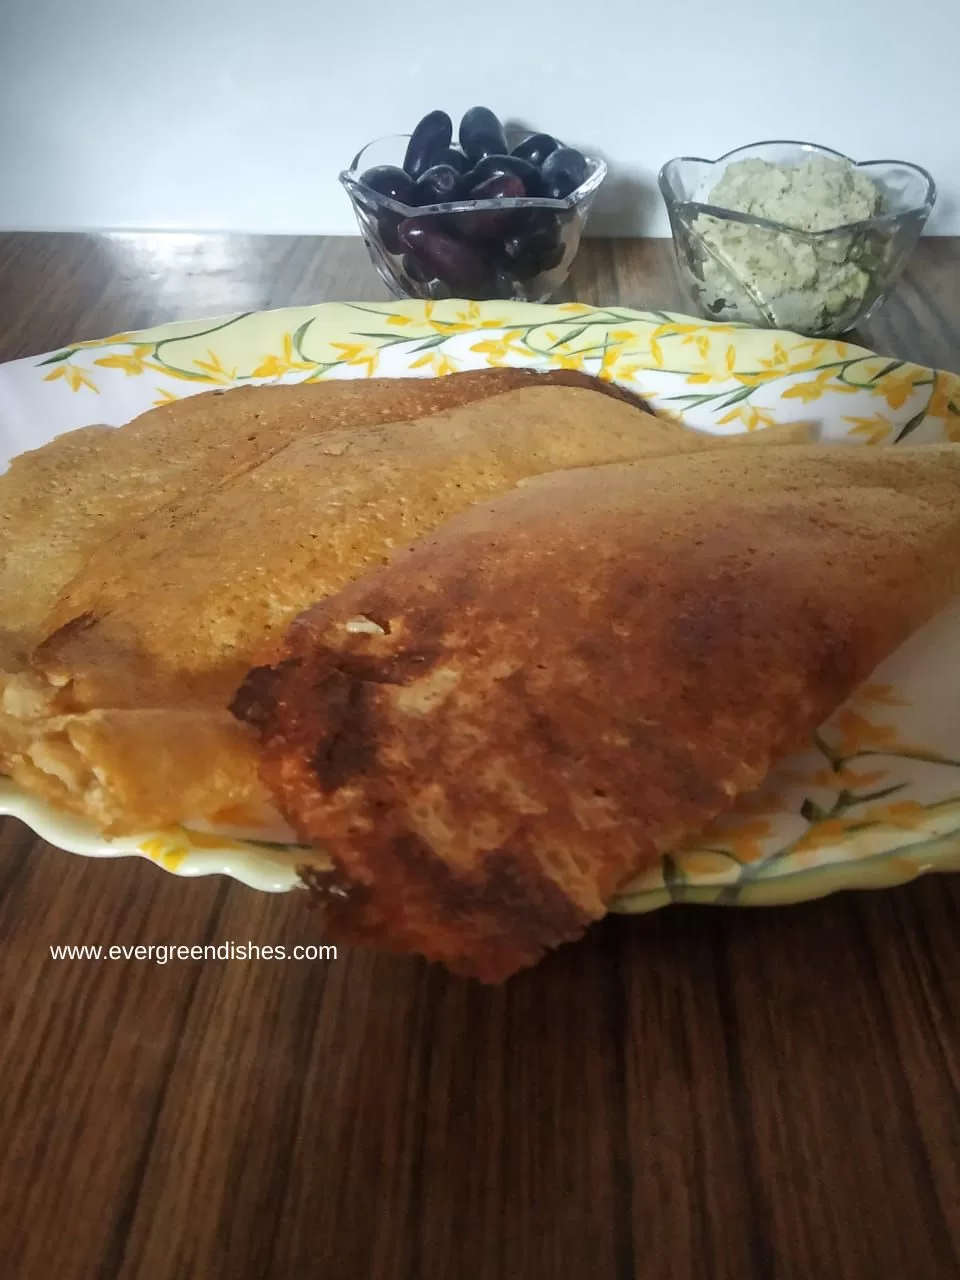
    Dosa Batter
    A bowl of fermented dosa batter

    Dosa Batter

    Dosa batter can be used to make various recipes. You can make regular dosa, set dosa, gundapongal and uttapam. 

    Ingredients:

    • 4 cup raw rice
    • 1 cup urad dal
    • 1 teaspoon fenugreek

    ½ cup flattened rice (poha)

    Method :

    • Rinse the rice and soak it for six hours in sufficient quantity of water. Add fenugreek seeds to it.
    • In another bowl, wash urad dal and soak it for six hours.
    • Soak flattened rice for half an hour.
    • Grind the rice with some water. Remove it in a wide bowl.
    • Grind urad dal to a fine paste.Add poha to it and give a swirl Mix it with the rice batter.Cover and keep it in a warm place. Ensure that the vessel in which you have poured the batter is large enough as the batter rises on fermentation.
    • Next day, add salt and mix it well.

    Take the required quantity of batter and keep the rest in the refrigerator. This helps in preventing the batter from turning sour.

    Take a tip:


    • The batter needs to be of thick consistency to make set dosa. The dosa turns soft and spongy. But, make sure to cook it well on both sides with a lid closed over it.
    • To make thin crepes, the batter should not be of thick consistency. Add a little water and adjust it.
    • To make gundapongal, the batter needs to be of moderate consistency.

      I hope the post helps you to make a good idli and dosa batter at home.  Do you buy the batter or make it at home ? Do let me know in the comments below.  If you have any doubts, do  feel free to write below. Do not forget to follow @foodiejayashree on Instagram and @evergreendishes on Facebook. 


      ( Disclosure : As an Amazon Associate, I will get a small commission for qualifying purchases without no addition cost to you.)


  • Jowar Flour Idli | Jolada Idli | Sorghum Idli

    Jowar Flour Idli | Jolada Idli | Sorghum Idli

    Jump to Recipe

    Jowar flour idli is a healthy twist to the usual one we often make. They are ideal for people of all age group, healthier and keeps going for a longer period of time.

    Eating healthy food is a choice we need to make it often. Do we break the norm or just once in a while? Yes, we are spoilt for choices and ultimately the decision rests in us. Balancing is the key, and as home makers we need to include millets and other related items in our cooking.

    jowar flour idli

    Idli is considered as healthy breakfast. I have shared many different variety of idli recipes  as Sago Idli, Ragi Idli, Rawa Idli, Instant Ragi Idli and Chennai Idli. Today, I am sharing idlis made with jowar flour.

    Jowar flour is the main ingredient. Use fresh jowar flour. Anything stored for a few days, are soon attacked by pests or molds due to the climatic conditions. We need to keep a check on all the ingredients stored at home.

    Urad dal is the other ingredient which we use to make these idlis. It is soaked for two hours and then made into a batter.

    Water is needed for soaking and grinding the batter. We also need it for steaming the idly in the idly cooker.

    Salt is essential in cooking, there is no taste to the food without it.

    As usual, making of idly involves five steps:

    1. Soaking
    2. Grinding
    3. Mixing
    4. Fermentation
    5. Steaming

    Urad dal needs to be soaked for atleast two hours. Rinse it well, put water and keep it aside. Later, grind to a fine batter. Jowar flour is mixed well in the batter, be careful as lumps are easily formed. Adjust the consistency of the batter. Put it in a wide bowl and keep it in a warm place to ferment. The time of fermentation depends on the season.

    Once the batter is fermented, add salt to it. Heat the idli steamer and put the batter to two-third of the capacity in each of the moulds. Steam it for fifteen minutes. Check if it is properly done and then turn off the stove.

    As the idli is made with millet and not the usual rice, it tends to get sour easily. I suggest that you make a small quantity and use it on the same day. Do not keep it outside for a long time.

    Ingredients:

    • 1 cup urad dal
    • 2 cup jowar flour
    • salt to taste
    • water for soaking and grinding

    About the event :

    Sending this to Shhh Secretly Cooking Challenge. It is a monthly event. The theme for the month of August was Fermented Foods. I was paired with Preethi and she has made Savoury Chia Seed Pudding. The secret ingredients were cucumber and chia seed. Do check out the recipe on her blog.

    I wanted to make jowar flour and she gave the ingredients accordingly.

    Print Recipe

    jowar flour idli
    Evergreendishesdev

    Jowar Flour Idli

    Jowar Flour Idli is healthy, tasty and ideal for people of all ages. Serve it with chutney and sambar for a filling breakfast.
    Prep Time 20 minutes
    Cook Time 20 minutes
    8 hours
    Total Time 8 hours 40 minutes
    Course: Breakfast
    Cuisine: South Indian

    Ingredients
      

    • 1 cup urad dal
    • 2 cup jowar flour
    • salt to taste
    • water for soaking and grinding

    Method
     

    1. Wash urad dal. Soak it in water for two hours.
    2. Grind urad dal to a fine batter.
    3. Remove the batter in a wide bowl. Mix two cups of jowar flour to it. See that no lumps are formed as you mix. Adjust the consistency of the batter by adding water to it.
    4. Keep it covered in a warm place.
    5. Next day, add salt to it and mix well.
    6. Take the idly cooker. Put the batter in the idly mold and steam it for fifteen minutes.
    7. Serve with chutney and sambar.

    Notes

    Jowar flour can be made fresh by pounding in small quantity.
    You can use the ready jowar flour. 
    Do not keep it outside for a long time, the taste of the idli turns sour.
    Make a small quantity of batter, do not keep it for the next day to use.

    Pin it for later:

    jowar flour idli
    jowar flour idli

    If you ever make Jowar Flour Idli in your kitchen, take a photo and share with me by tagging @foodiejayashree on Instagram and @evergreendishes on Facebook.

  • Sprouted Moong Methi Stir Fry

    Sprouted Moong Methi Stir Fry

    Sprouted Moong Methi Stir Fry is a tasty, healthy, easy to prepare side dish from Konkani cuisine. It is  a good  way to  include sprouted fenugreek, which is a slightly difficult to consume by itself. You can serve it as an accompaniment with chapathi or along with rice and rasam.

    Sprouting duration varies for both.  Moong sprouts in a day while fenugreek needs more time. Soak them separately for six to eight hours, put them in a colander, once the water is drained and semi-dry, tie them in a thin  muslin cloth and keep them in a warm place. Check them the next day and store them in a container in refigerator. Alternatively, you can keep in a closed container with a tight lid.

    I have shared in detail here regarding the making of sprouts. Do check the post. The other recipes with moong which we often relish is the salad, it is ideal as a snack too.

    The stir fry is called as Sukke in Konkani households and the recipe is adopted from  Healthy Cooking with Mitha. We know each other through a facebook group and remember reading and trying her recipe then. We liked it and it has been a regular feature.The bitterness of the fenugreek is neglible and adds a good taste to the moong stir fry. You can also check out the earlier shared menthe gojju  


      What goes in the sprouted moong methi stir fry ?

    • sprouted green gram : Planning is essential here. We need to soak and sprout them a day prior.
    • sprouted fenugreek seed: Make it two days prior, as sometimes it needs a little longer time.
    • oil: The preferred oil is coconut oil for this recipe but you can use any other oil.
    • mustard seed : for seasoning
    • tamarind paste: You can add a little bit of tamarind extract if you do not have the tamarind paste.
    • coconut: Do not skip it for this recipe.
    • salt: As per the taste
    • chilli powder: For the hot and spicy taste.
    • curry leaves : A few leaves are needed

    Pre-requisites :

    You need to have the sprouted moong and fenugreek ready. To make the sprouts, read the above paragraph, it is mentioned in detail. 1 cup of green gram yields three cups of sprouted moong while 1/4 cup of fenugreek yields a cup of sprouted fenugreek.

    Take adequate precaution while sprouting. Keeping them for a longer may turn them sticky. Weather conditions too play an important role.

    1. Why should you make sprouted moong methi stir fry ?
    1. It is easy to prepare if you have the sprouted grains.
    2. A good way to include fenugreek in your diet.
    3. It is vegan and gluten-free.
    4. It is a no onion garlic recipe.
    5. It makes a good accompaniment with any meal.

    Evergreendishesdev

    Sprouted Moong Methi Stir Fry

    5 from 10 votes
    Sprouted Moong Methi Stir Fry is a tasty, healthy, easy to make accompaniment.
    Course: dinner, lunch
    Cuisine: karnataka

    Ingredients
      

    • 3 cup sprouted green gram moong
    • 1 cup sprouted fenugreek seed menthe
    • 2 teaspoon coconut oil
    • 1/2 teaspoon mustard
    • a few curry leaves
    • 3 cups water
    • 1 tablespoon tamarind paste
    • 2 teaspoon chilli powder
    • salt to taste
    • 1/4 cup fresh grated coconut

    Method
     

    1. Take oil in a pan, add mustard seeds. As it splutters, put curry leaves and the sprouted green gram. Also add the sprouted fenugreek seed. Put some water to it and allow to cook for sometime.
    2. Once it is cooked, add salt to it.
    3. Now, put the tamarind paste and chilli powder to it.
    4. Finally, put grated coconut to it, heat for a minute and keep it aside.
    5. Serve with any meal as an accompaniment.

    Notes

    You need to have the sprouted moong and fenugreek ready. To make the sprouts, read the above paragraph, it is mentioned in detail. 1 cup of green gram yields three cups of sprouted moong while 1/4 cup of fenugreek yields a cup of sprouted fenugreek.
    Take adequate precaution while sprouting. Keeping tied for a longer time may turn them sticky. Weather conditions too play an important role.

    About the event:

    Sending this to Cooking with Sprouts theme for the month of January 2024 at Shhh Secretly Cooking Challenge. The theme was suggested by yours truly. I was paired with Kalyani Sri of sizzling tastebuds, a blog with varied kind of recipes.  Kalyani has prepared Sprouts Dosa with Jowar, a filling breakfast to kickstart a busy day with chana sprrouts and spinach, the secret ingredients given by me. Inturn, I have made moong methi sprouts stir fry with the secret ingredients, chilli powder and methi sprouts.

    shhh cooking secretly
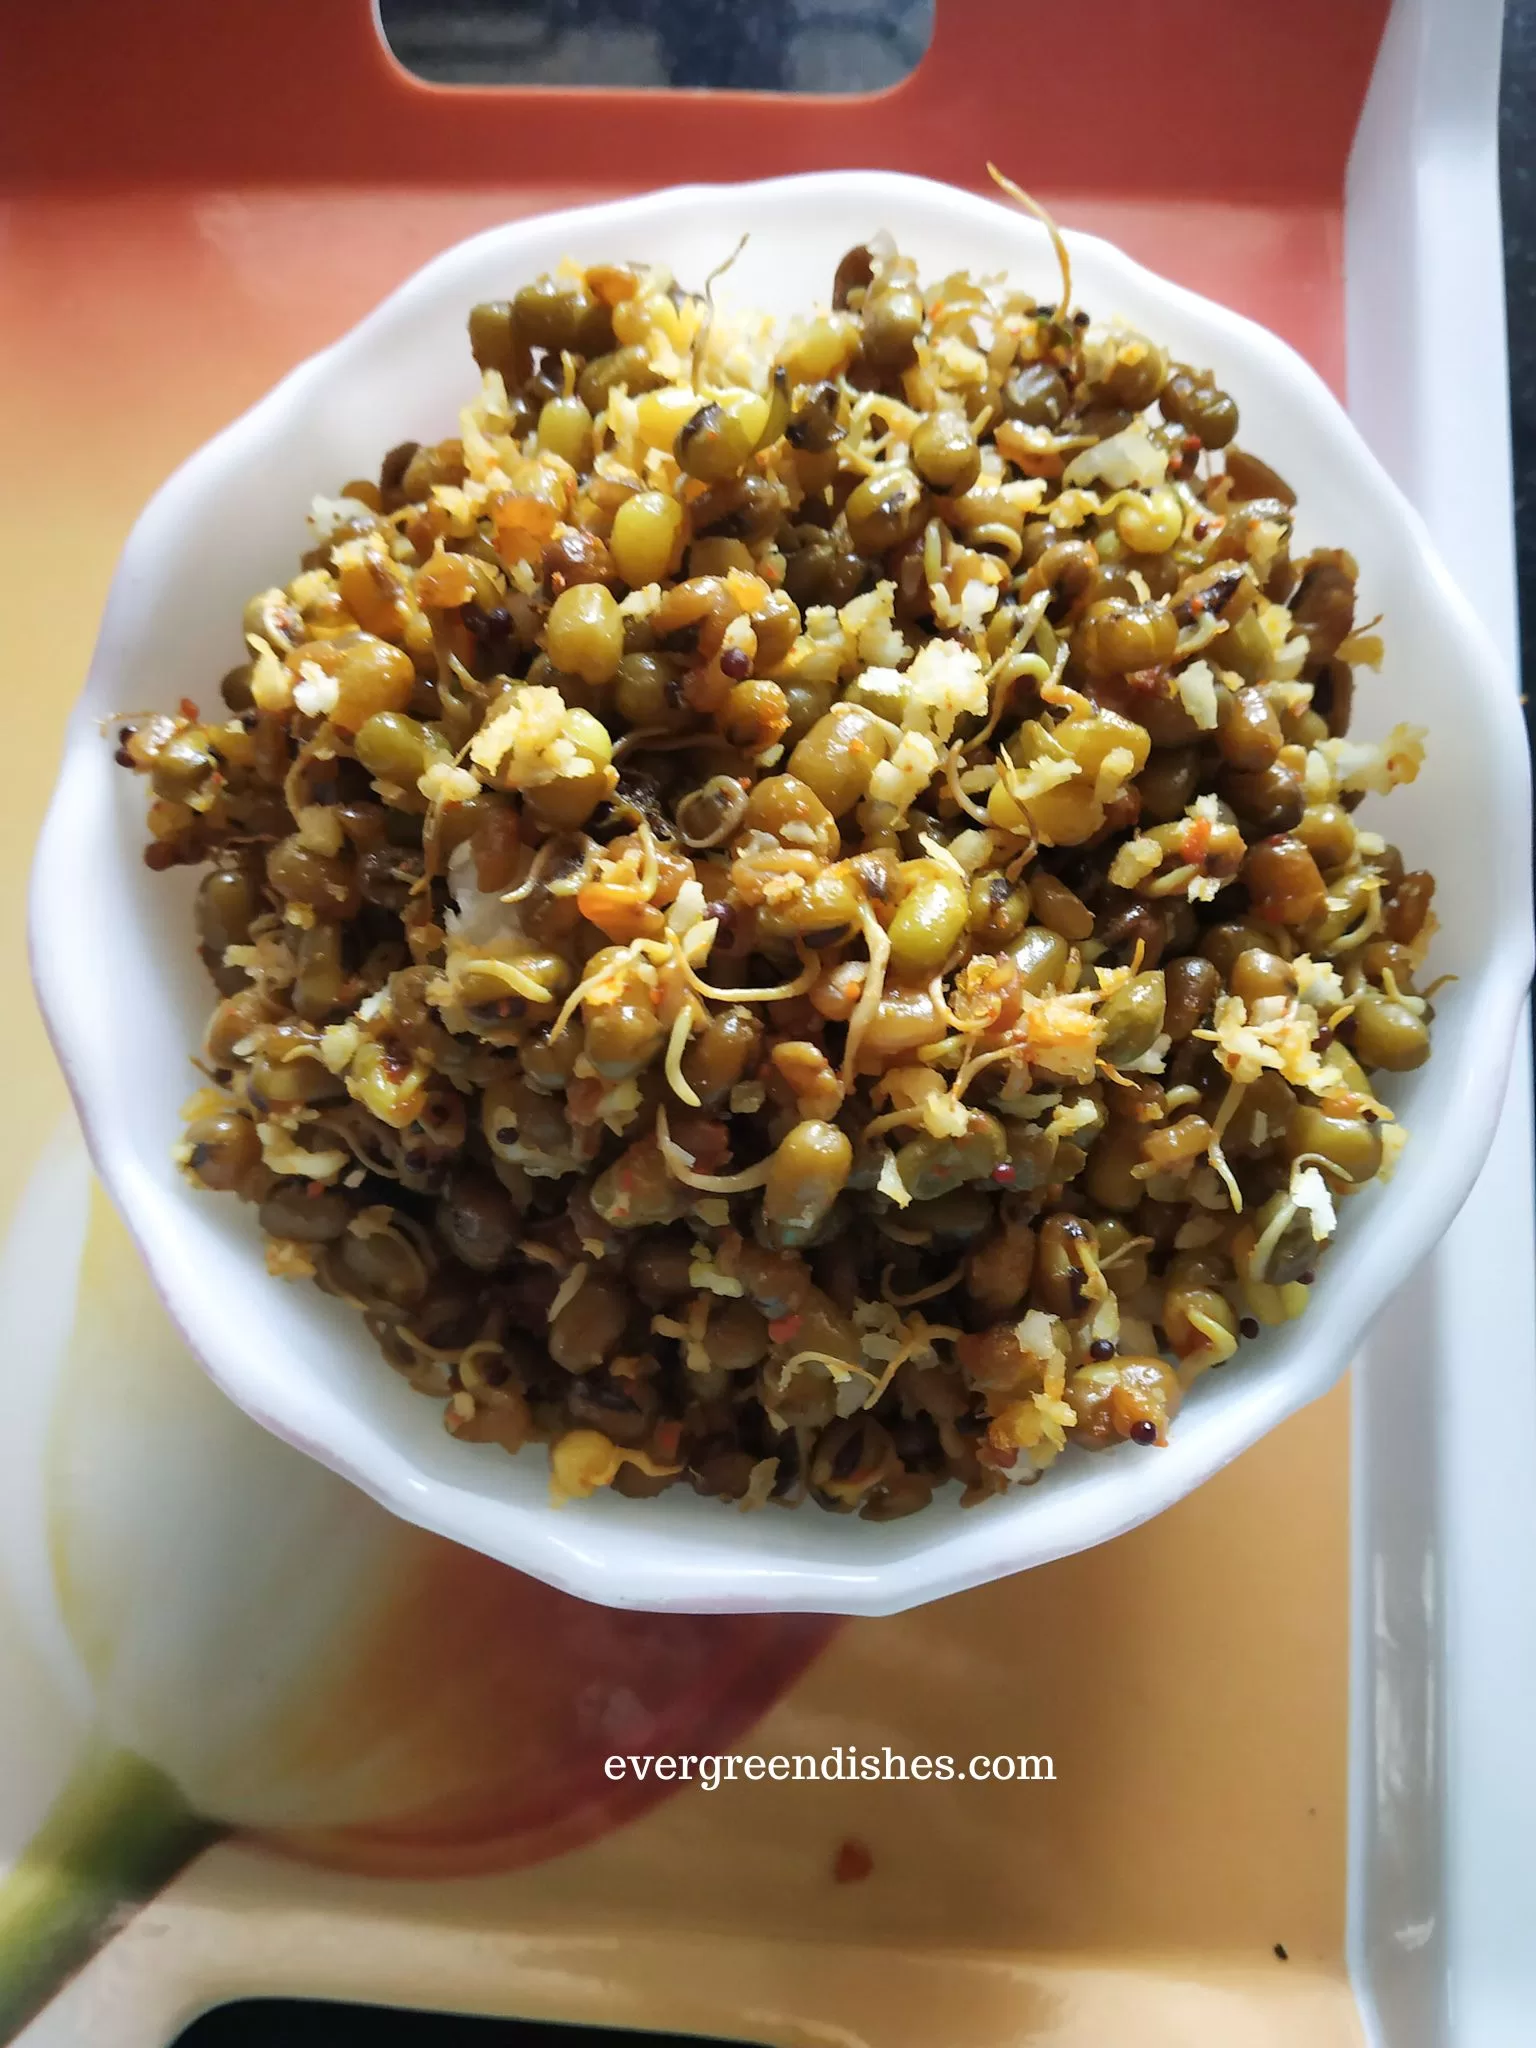
If you  make  Sprouted Moong Methi Stir Fry, take a picture and share it by tagging @foodiejayashree on Instagram and @evergreendishes on Facebook.  Subscribe to get all updates and an e-book for free.

    sprouted moong methi stir fry
    sprouted moong methi stir fry

  • Stuffed Dates Recipe  | Healthy Dessert

    Stuffed Dates Recipe | Healthy Dessert

    Jump to Recipe

    Stuffed Dates are the new trendy dessert you find at parties or get-together. They are easy to create, look good, healthy to serve  and make a good snack to binge anytime.

    Dates are a good source of nutrition.They are packed with Vitamin A, B1, B2, B3,B5, C, anti-oxidants  and many other nutrients as potassium, calcium, iron, manganese, sodium, zinc. If you are not eating them regularly, make them a part of your diet.

    It helps to fight anemia.. It boosts overall energy of the body. It helps in promoting cardio-vascular health. These are a few benefits of including dates in your diet. 

    Stuffed Dates originated in the Levant region  of Middle East. They are tasty, packed with nutrients, bite sized, can be varied and tasty. They are made in a couple of ways. They are slitted, seed is removed and stuffed with peanut butter, almond butter or cream cheese along with other ingredients.  Here, my version is a little different, it has banana. I have used the ripe banana and desiccated coconut for stuffed dates recipe. The other ingredients are nuts along with cocoa powder which lend a good taste. 

    stuffed dates

    Why should I make stuffed dates ?

    • If you are looking for something creative or different kind of dessert.
    • It is ideal as a party snack.
    • The fillings can be made in different varieties.
    • It is an healthy snack.

    What kind of dates should I use ? 

    You can use any variety of dates. I have used zahidi dates here.


    Print Recipe
    stuffed dates
    Evergreendishesdev

    Stuffed Dates

    5 from 9 votes
    Stuffed Dates are the new, trendy desserts. They are tasty and ideal to serve as a snack.
    Prep Time 15 minutes
    Freezing 30 minutes
    Total Time 45 minutes
    Course: Dessert, Snack
    Cuisine: middle east

    Ingredients
      

    • 15 Dates
    • 1 ripe banana
    • 1/4 cup + 2 tablespoon desiccated coconut
    • 4 cashew
    • 10 raisins
    • 1/2 teaspoon cocoa powder

    Method
     

    1. Make an incision and remove the seed from the dates.
    2. In a small bowl, put the banana and mash it with a spoon.
    3. Set aside some desiccated coconut for Add desiccated coconut, cashew pieces, rains and cocoa powder. Mix it well.
    4. Take a small portion of the stuffing and stuff in the dates. Roll it in the grated coconut andd keep it aside.
    5. Repeat the filling and rolling for all the dates.
    6. Freeze them for two hours.
    7. Stuffed Dates is ready to serve.

    About the event :  

    Sending this to “Healthy Desserts” at Shhh Secretly Cooking Challenge. For the monthof October, Rafeeda AR of bigsweettooth suggested us to make a healthy dessert. This meant we could use only natural sweeteners as dates, honey etc. or sugar in a minimal quantity. Rafeeda has made this delightful dry fruit kheer ideal for the festive days. 

    I was paired with Radha Rajagopalan. After pondering for sometime, I decided to make stuffed dates. Radha has used seasonal fruits to make apple date sugar halwa

    shhh cooking secretly

    The other dates recipes shared earlier are :

    Dates Burfi
    Dates Burfi
    dates payasam
    Dates Payasam

    If you ever make Stuffed Dates recipe  in your kitchen, take a picture and tag @foodiejayashree on Instagram or @evergreendishes on Facebook.  Until next time, Happy Cooking ! Wishing one and all a very happy Deepawali. May the festival of lights bring in joy, peace and prosperity. 

    Pin it for later : 

    stuffed dates
    stuffed dates
  • Oats Dosa | recipes with oats

    Oats Dosa | recipes with oats

    Jump to Recipe Print Recipe Oats Dosa is a tasty and healthy dosa. It is ideal to serve for breakfast. After the oats idli recipe, here is the oats dosa recipe. It is an easy to make breakfast as the batter needs little or no fermentation. Once, the ingredients are soaked for a couple of hours, the batter is prepared and then made into thin crepes. You can serve with coconut chutney or any curry you like. Being a South Indian, idli and dosa are often prepared at home. The other kind of dosa recipes shared earlier are : Ragi Dosa, Rawa Dosa, Masala Dosa. Some unique kind of dosa to look for are watermelon rind dosa,  quinoa dosa, masoor dal dosa. Oats is versatile to use. It can be used in the preparation of many kind of dishes.  Here, it makes a good replacement for rice which is normally used. The other kind of oats recipes are oats idli, oats khichdi, oats peanut ladoo

    Why should you make oats dosa ?

    • Oats dosa is easy to prepare. You can soak it overnight, grind it early in the morning and keep aside for an hour. It can be made instantly too.
    • The dosa has goodness of oats and lentils in it. It is good source of proteins and fiber. It is filling and easy to prepare as it needs no fermentation.
    • Oats dosa for weight loss. It has no rice in it. Moreover, you can prepare them with a meagre quantity of oil.
    • Oats dosa for people with diabetes.
    • Oats dosa for all the oats lovers out there. When you are bored of the porridge, make this one.
    oats dosa
    Oats dosa

    Oats Dosa Recipe

    Ingredients :

    To soak :

    • 1 cup oats
    • 1/4 cup urad dal
    • 1/4 cup masoor dal
    • 1/4 cup bengal gram
    • 1/4 cup moong dal
    • 1 teaspoon fenugreek
    • water

      To make dosa:

    • prepared batter
    • salt
    • oil

      Method :

    • Take the lentils, rinse them in water and soak. Add oats to it and keep it covered for five hours or overnight.
    • Grind them together to a batter.
    • Add salt to it and keep it aside for one hour.
    • Heat a skillet, take a ladleful of batter, pour it and spread in concentric circle.Put some oil over it. Allow it to cook for sometime.
    • Once it is golden in colour, flip it and cook on the other  side. Oats dosa is ready to serve. You can use any chutney with

    Take a tip :

    • You can add two dry red chilli and half teaspoon of cumin while grinding the batter.
    • The dosa can be made instantly but I prefer to keep it aside for an hour. It gives a good taste and in the meantime, I prepare chutney and other dishes.
    • Ghee may be used along with oil to drizzle over the dosa.

    Oats Dosa

    Oats Dosa is made using oats and lentils. It is an easy to make, tasty and filling breakfast. Serve it with any kind of chutney.

    Ingredients
      

    • To soak :
    • 1 cup oats
    • 1/4 cup urad dal
    • 1/4 cup masoor dal
    • 1/4 cup bengal gram
    • 1/4 cup moong dal
    • 1 teaspoon fenugreek
    • water
    • To make dosa:
    • prepared batter
    • salt
    • oil

    Equipment

    • 2 bowls
    • 1 skillet
    • 1 ladle
    • 1 spatula
    • 1 small bowl
    • 1 small spoon
    • 1 plate

    Method
     

    1. Take the lentils, rinse them in water and soak. Add oats to it and keep it covered for five hours or overnight.
    2. Grind them together to a batter.
    3. Add salt to it and keep it aside for one hour.
    4. Heat a skillet, take a ladleful of batter, pour it and spread in concentric circle.Put some oil over it. Allow it to cook for sometime.
    5. Once it is golden in colour, flip it and cook on the other  side. Oats dosa is ready to serve. You can use any chutney with

    Notes

    You can add two dry red chilli and half teaspoon of cumin while grinding the batter. 
    The dosa can be made instantly but I prefer to keep it aside for an hour. It gives a good taste and in the meantime, I prepare chutney and other dishes. 
    Ghee may be used along with oil to drizzle over the dosa. 
      A few other recipes with oats are : Strawberry, Apple and Oats Crumble by Maria, Baked Oatmeal Cups by Seema, Banana Peanut butter Smoothie by Mayuri

     Pin it for later :

    oats dosa
    oats dosa
    If you ever make Oats Dosa in your kitchen, take a picture and tag @foodiejayashree on Instagram or @evergreendishes on Facebook. Subscribe to get all updates in your inbox and an e-book for free! Until next time, happy cooking ! 
  • How to make Oats Idli

    How to make Oats Idli

    Oats Idli is a healthy choice for the busy mornings. It is easy to prepare and tastes good too.

    Idli is one of the food items at home. It is usually for breakfast but at times I prepare it for dinner too. There is a need of change in the menu and different versions of idli come to our rescue. Oats Idli is ideal to serve for breakfast, brunch or a quick dinner. A simple chutney pairs well with it.

    Oats contains quality proteins, carbohydrates and fibre along with other nutrients which helps to carry on our daily activities. Oats Idli is a tasty, protein rich  breakfast. It is easy to prepare as it needs no fermentation. It is a healthy twist to the semolina idli which is commonly made in South India. Give a try to this oats idli, I am sure you will not be disappointed.

    A few facts about oats :

    1. Oats is a  winter crop. It needs cool season to grow.  It is planted during summer, germinate during winter and the oats begin during the spring.
    2.  The use of oats dates back to thousands of years. It was first introduced in North America in 1602.
    3. The oats are of two kinds : husked and naked.
    4. The cereal have high protein content and rich in antioxidants and beta glucan.
    5. Apart from using as a quick breakfast, it is used as livestock feed. It is also used in industries. The starch is used as an adhesive. It is commonly used in the manufacture of beauty products.


    The other recipes which you can make for the busy mornings are Oats Khichdi, Pesarattu and Aloo Palak Paratha.

    Oats Idli
    Oats idli

    Oats Idli Recipe

    Ingredients:

    • 1.5 tbsp oil
    • 1/2 teaspoon mustard
    • 1/4 teaspoon asafoetida
    • 1/4 teaspoon turmeric powder
    • 1/2 teaspoon bengal gram
    • 1//2 teaspoon urad dal
    • 2 green chillies
    • 1/2 inch ginger
    • 1/2 cup semolina
    • 1 cup oats
    • 1 cup sour curd
    • 2 tablespoon grated carrot
    • 1 tablespoon fresh coriander
    • salt to taste
    • 1/2  teaspoon soda


    Pre-requisites:

    • Grind the oats to a powder.
    • Make a paste of green chilli and ginger.
    • Keep all the ingredients ready.

    Method :

    1. Take oil in a pan, add mustard seeds. As it crackles, put asafoetida and turmeric. Throw in the green chilli-ginger paste along with a few curry leaves.
    2. Add the semolina, roast it for two minutes.
    3. Now, put the powdered oats to it and continue to roast it for a minute.
    4. Let it cool for sometime.
    5. Put the grated carrot, chopped coriander and curds. Mix it. Add salt.
    6. Time to get the idli steamer ready. Put water in the steamer, grease the mould plate if you are used to it. I, usually, wash the moulds under running water, put it aside for sometime  and use them.
    7. Add baking soda to the batter, mix it thoroughly and put it in the moulds.
    8. Now, steam it for twelve minutes on moderate heat.
    9. Once the oats idli is done, allow them to cool for a while. Remove them and serve with coconut chutney.

    Take a tip :

    1. Use a day old curd which is kept outside.
    2. Instead of baking soda, you may use a teaspoon of eno powder.


    About the event :

    Sending this to Protein rich Vegetarian  Breakfast Dishes at Shhh Secretly Cooking Challenge. For the month of February, Renu Agarwal asked us to make Protein rich dishes for the busy day ahead. I liked her Tofu Scramble a good substitute for  the egg burji .

    Here we are paired as partners and the partners decide on the secret ingredients. My partner was Preethi Tandon Sridhar. PreeWe exchanged the ingredients as per our convenience. Since, I wanted to make oats idli, I asked my partner Preethi Tandon Shridhar to give the ingredients accordingly. Preethi has made Peas Paratha, a good choice for the season. I shared the ingredients accordingly as milk and amchoor powder.


    Evergreendishesdev

    Oats Idli

    5 from 16 votes
    Oats Idli is a tasty, easy to make, protein rich breakfast.
    Prep Time 15 minutes
    Cook Time 15 minutes
    Total Time 30 minutes
    Servings: 12 idli
    Course: Breakfast
    Cuisine: karnataka

    Ingredients
      

    • 1.5 tbsp oil
    • 1/2 teaspoon mustard
    • 1/4 teaspoon asafoetida
    • 1/4 teaspoon turmeric powder
    • 1/2 teaspoon bengal gram
    • 1//2 teaspoon urad dal
    • 2 green chillies
    • 1/2 inch ginger
    • 1/2 cup semolina
    • 1 cup oats
    • 1 cup sour curd
    • 2 tablespoon grated carrot
    • 1 tablespoon fresh coriander
    • salt to taste
    • 1/2 teaspoon soda

    Equipment

    • 3 small bowls
    • 1 big bowl
    • 1 ladle
    • 1 idli maker / pressure cooker
    • set of idli plates

    Method
     

    1. Grind the oats to a powder.
    2. Make a paste of green chilli and ginger.
    3. Keep all the ingredients ready.
    4. Method :
    5. Take oil in a pan, add mustard seeds. As it crackles, put asafoetida and turmeric. Throw in the green chilli-ginger paste along with a few curry leaves.
    6. Add the semolina, roast it for two minutes.
    7. Now, put the powdered oats to it and continue to roast it for a minute.
    8. Let it cool for sometime.
    9. Put the grated carrot, chopped coriander and curds. Mix it. Add salt.
    10. Time to get the idli steamer ready. Put water in the steamer, grease the mould plate if you are used to it. I, usually, wash the moulds under running water, put it aside for sometime  and use them.
    11. Add baking soda to the batter, mix it thoroughly and put it in the moulds.
    12. Now, steam it for twelve minutes on moderate heat.
    13. Once the oats idli is done, allow them to cool for a while. Remove them and serve with coconut chutney.

    Notes

    Use a day old curd which is kept outside.
    Instead of baking soda, you may use a teaspoon of eno powder.

    Oats Idli
    Oats idli

    If you ever make Oats Idli in your kitchen, take a picture and tag @foodiejayashree on Instagram or @evergreendishes on Facebook. Subscribe to get all updates in your inbox and an e-book for free! Until next time, happy cooking ! 

  • Oats Peanut Laddo | easy snack recipe

    Oats Peanut Laddo | easy snack recipe

    Jump to Recipe

    Oats Peanut Laddo is a tasty, healthy and an easy to make snack. If you are looking for ways to include oats for your family, this laddo recipe is for you.

    Welcome one and all to my little world. Life had been busy and I was on an hiatus for sometime. I am back here with a few good recipes for you. 

    Laddo is a round shaped Indian sweets often made in most regions of India. Varied kind of laddos arre prepared during festive season. 

    Our eating habits are ever changing.  Oats Peanut Laddo is one of the sweet snacks I prepare often these days. The ease of making and the good taste has made it a favourite snack. Moreover, when healthy eating can be easily implemented, it  should  be a part of your lifestyle. Oats Peanut Laddo needs  few ingredients which are easily available in the kitchen, no added nuts and makes use of  jaggery. It is ready in twenty minutes. 

    The ingredients used in making the laddos  are : 

    Oats- You can use any kind of oats. Healthy eating is a choice, so I find ways to include it in our diet. 

    Peanut- Dry roast and remove the skin. Rub it with the palm, once it cools. You can make it ahead and store. 

    Jaggery- The amount of jaggery used is moderate. You may use more quantity if you have a sweet tooth. 

    Cardamom – Cardamom powder gives a good fragrance to sweets. 

    Ghee- I have used a little gheee, it eases the preparation of balls. If you can manage, you can do without it. 

    Oats Peanut Laddo

    Ingredients: 

    • 1 cup oats
    • 1 cup peanut
    • 3/4 cup jaggery
    • 3 cardamom
    • 1 teaspoon ghee 

    Method : 

    1. Dry roast oats until golden and you get a good aroma.
    2. Dry roast the peanuts, the dark specks on it indicate they are done well. Let it cool. Peel the skin.
    3. Grind peanuts, add oats and give a swirl. Finally, add jaggery and cardamom powder to it and grind together.
    4. Remove in a bowl. Add a spoon of melted ghee , mix and make balls of it.
    5. Oats Peanut Laddo is ready to serve. 

    Take a tip:

    1. Store in a clean, air-tight container. It stays good for a week. 
    2. The peanut roasted should be moderate. Once cool, they become crunchy. If they are well roasted, the skin sheds easily. 
    3. Grate the jaggery or break into small pieces, it is easier to grind. 
    4. Addition of ghee is optional but recommended. It makes rolling of lad
    5. I have used regular cooking oats. 

    I love making recipes with oats, have shared a few savoury ones too. The other oats recipes shared earlier : 1) Oats and Wheat Pancake 2) Oats Khichdi 3) Ladoo 4) Oats Dhokla 

    Oats Peanut Ladoo

    Oats Peanut Ladoo iis a tasty, healthy, easy to snack.

    Ingredients
      

    • 1 cup oats
    • 1 cup peanut
    • 3/4 cup jaggery
    • 3 cardamom
    • 1 teaspoon ghee

    Method
     

    1. Dry roast oats until golden and you get a good aroma.
    2. Dry roast the peanuts, the dark specks on it indicate they are done well. Let it cool. Peel the skin.
    3. Grind peanuts, add oats and give a swirl. Finally, add jaggery and cardamom powder to it and grind together.
    4. Remove in a bowl. Add a spoon of melted ghee , mix and make balls of it.
    5. Oats Peanut Ladoo is ready to serve.
    6. Take a tip:
    7. Store in a clean, air-tight container. It stays good for a week.

    Notes

    Store in a clean, air-tight container. It stays good for a week. 
    The peanut roasted should be moderate. Once cool, they become crunchy. If they are well roasted, the skin sheds easily. 
    Grate the jaggery or break into small pieces, it is easier to grind. 
    I have used regular cooking oats. 

    Pin it for later : 

    oats peanut laddo
    oats peanut laddo

    If you ever make Oats and Peanut Laddo  recipe, take a picture and share it by tagging @foodiejayashree or @evergreendishes on Instagram or Facebook respectively. Subscribe to get an e-book and all updates for free. 

  • Homemade Granola on Stovetop

    Homemade Granola on Stovetop

    Jump to Recipe Print Recipe

    Granola on stovetop is an easy to make recipe with ingredients easily available at home. It is vegan, gluten-free, soy free snack you can enjoy anytime,  Eat it with milk or yoghurt topped with fruits. 

    Granola can be customised as per one’s  need, use different variety of nuts and dates. I have used almonds, raisins and melon seeds. If you want to make it nut free avoid nuts and substitute with any other ingredient as choco chips, coconut pieces or seeds.  Different sweeteners  may be used as  maple or brown sugar. 

    This homemade granola can be had as it is or with milk or yoghurt and fruit pieces too. It is healthy and filling. Moreover, you are in control of the ingredients that you use.

    This recipe is ideal for those who wish to make on stovetop instead of the oven. You may like to check a few other healthy recipes as muesli bar, oats ladoo, dry fruit ladoo


    homemade granola on stovetop
    homemade granola on stovetop

    Ingredients:

    • 2.5 cup oats ( I prefer using the quick oats)
    • 1/4 cup almonds
    • 1/2 cup melon seeds
    • 4 teaspoon honey
    • 2 teaspoon coconut oil
    • 1/4 cup raisins


    Method: 

    • Cut the almond into slivers.
    • Take a pan, add all the ingredients and roast on a low flame for five minutes.
    • Add the raisins, continue to toss for sometime.
    • Keep tossing in between as it gets burnt easily.
    • Once it is crisp, remove from flame. Keep it aside.
    • Store in an air-tight container.

    Take a tip:

    • I prefer using quick oats.
    • Pecans, walnuts, cashew may be used.
    • You can add dried berries also.
    • Maple syrup or brown sugar may be used. 
    • Keep roasting on a low flame. If you do not toss in between, it will get burnt easily. 
    homemade granola on stovetop
    Evergreendishesdev

    Homemade Granola on Stovetop

    Granola makes a good and easy to serve breakfast or snack option. It can be served with milk or as a topping with fruits or desserts.
    Prep Time 10 minutes
    Cook Time 10 minutes
    Total Time 20 minutes
    Course: Breakfast
    Cuisine: international

    Ingredients
      

    • 2.5 cup oats
    • 1/4 cup almonds
    • 1/2 cup melon seeds
    • 4 teaspoon honey
    • 2 teaspoon coconut oil
    • 1/4 cup raisins

    Method
     

    1. Cut the almond into slivers.
    2. Take a pan, add all the ingredients and roast on a low flame for five minutes.
    3. Add the raisins, continue to toss for sometime.
    4. Keep tossing in between as it gets burnt easily.
    5. Once it is crisp, remove from flame. Keep it aside.
    6. Store in an air-tight container.

    Notes

    • I prefer using quick oats.
    • Pecans, walnuts, cashew may be used.
    • You can add dried berries also.
    • Maple syrup or brown sugar may be used. 
    • Keep roasting on a low flame. If you do not toss in between, it will get burnt easily. 
    Homemade Granola is tasty and healthy.It is easy to make and has no added sugar in it. Give a ty to this version of granola made on stove top.
    homemade granola on stovetop


    If you ever make these  Homemade Granola on Stovetop,  do take a picture and tag @foodiejayashree on Instagram or @evergreendishes on Facebook or Twitter. I will be glad to see your creation and share it further. Let’s be connected, do follow on social media platforms. Until next time, let’s stay connected.  Subscribe to get all updates and an e-book for free. Check out my e-books on Amazon.  Happy Cooking !

  • Multi Millet Dhokla | How to make multi-millet dhokla

    Multi Millet Dhokla | How to make multi-millet dhokla

    Multi millet dhokla is soft, spongy and tasty. It is ideal to serve as an evening snack or breakfast. It is a healthy twist to the usual dhokla. 

    With the awareness of the benefits of millets, each one is trying to include them in every possible. These days, I make jowar roti at least once a week. Ragi dosa is loved by all and I make it regularly at home. Ragi idli is healthy and ideal for quick breakfast. 

    The love for dhokla is never ending. Although I love the fermented ones, I still make these instant dhokla also. They are a quick fix, ready in thirty minutes and most of the times, my dinner is sorted. Earlier, I have shared are  corn dhokla, oats dhokla and rava dhokla

    Multi millet flour is easily available in super markets. It is a good way to get the benefit of various millets. Here, is a multi-millet thalipeeth ideal for breakfast. 


    multi millet dhokla
    multi millet dhokla

    Ingredients for Multi- Millet Dhokla 

    • 1 cup millet flour
    • 1 cup gram flour
    • 1 cup curds
    • salt
    • ginger green chilli paste
    • water 

    For seasoning:

    • 2 teaspoon oil
    • 1/2 teaspoon mustard seed
    • asafoetida
    • 1 green chilli 
    • 1 teaspoon curd with 1 tablespoon water

    The method of making the dhokla is shown in the video clearly. 


    1. In a bowl, add millet flour and gram flour. Take curds and  mix it. Add a little water if needed.
    2. Put salt and ginger- green chilli paste to it. Keep it aside for ten minutes.
    3. Set the steamer ready. Grease a plate. Add eno fruit salt to it, mix pour into the plate and put it in the steamer.
    4. Initially, keep on medium flame, after sometime, put it on a low flame. On checking, the inserted knife should come out clean.
    5. After sometime, cut it.Make the seasoning, pour it over it along with some buttermilk.
    multi millet dhokla
    Evergreendishesdev

    Multi millet dhokla

    Multi millet dhokla is soft, spongy, savoury snack ready in an hour. It is healthy twist to the usual dhokla.
    Prep Time 10 minutes
    Cook Time 20 minutes
    Resting time 10 minutes
    Total Time 40 minutes
    Course: breakfast, lunch, snack, dinner
    Cuisine: Gujarati

    Ingredients
      

    • Ingredients:
    • 1 cup millet flour
    • 1 cup gram flour
    • 1 cup curds
    • salt
    • ginger green chilli paste
    • water
    • 1/2 teaspoon eno fruit salt
    • For seasoning:
    • 2 teaspoon oil
    • 1/2 teaspoon mustard seed
    • asafoetida
    • 1 green chilli
    • 1 teaspoon curd with 1 tablespoon water

    Method
     

    1. In a bowl, add millet flour and gram flour. Take curds and  mix it. Add a little water if needed.
    2. Put salt and ginger- green chilli paste to it. Keep it aside for ten minutes.
    3. Set the steamer ready. Grease a plate. Add eno fruit salt to it, mix pour into the plate and put it in the steamer.
    4. Initially, keep on medium flame, after sometime, put it on a low flame. On checking, the inserted knife should come out clean.
    5. After sometime, cut it.Make the seasoning, pour it over it along with some buttermilk.

    Pin it for later: 

    Multi millet dhokla is a healthy twist to the usual one. It is ideal to serve as a snack or breakfast dish.
    multi millet dhokla

    If you ever make this multi millet dhokla recipe or any of my other dishes,  do take a picture and tag @foodiejayashree on Instagram or @evergreendishes on Facebook or Twitter. I will be glad to see your creation and share it further. Let’s be connected, do follow on social media platforms. Until next time, let’s stay connected.  Subscribe to get all updates and an e-book for free. Check out my e-books on Amazon.  Happy Cooking !

  • Lemon Rasam / Nimbehannina Saru

    Lemon Rasam / Nimbehannina Saru

    Jump to Recipe Print Recipe

    Lemon Rasam  is another kind of rasam made during monsoon days. The citrusy flavour with the aroma of fresh herbs is tasty and soothing. It is a healthy and comfort food for many people. The ease and simplicity of the recipe makes it a go to recipe. 

    Rasam, as we all know is a lentil based, soup like dish tempered with spices. It is popular in South India and pairs well with hot, steamed rice. Sometimes, it is the simplest of the food like this,  gives immense comfort. I remember, after eating out for a week during our trips, it was simple, home cooked food we longed the most. The rasam varieties shared earlier are drumstick rasam, mysore rasam, andhra rasam

    Lemon Rasam is  a simple yet flavoursome dish, it makes a good accompaniment with hot steamed rice. One can use it as a soup too. . There is hardly any rasam powder used, no tamarind and no garlic too.  If you have not tried it yet, do give a try,  The herbs and lemon give a good taste to it. Every household has its own lemon rasam recipe. Some use moong dal instead of tur dal while others do not add any pepper. However, ,the basic ingredients of tomato, ginger, coriander, green chillies and lemon remain the same. 

    lemon rasam
    lemon rasam

    About the  event: 

    It’s raining  and we at Shhh Secretly Cooking Challenge have a host of monsoon recipes. The theme was suggested by Shobha Keshwani. She is a wonderful blogger who showcases many kinds of recipes on her blog. I want to try her Adraki Aloo.   Coincidentally, she is my partner too for the challenge. She has given me ghee and asafoetida and I have made this recipe. I had given her ginger and pepper and she has made a unique Drumstick soup

    shhh cooking secretly

    Let’s get to the  Lemon Rasam Recipe: 

    Ingredients:

    • 4 cups water
    • 2 tomatoes
    • 1 inch ginger
    • 3 green chilli
    • 1/2 teaspoon turmeric powder
    • a few curry leaves
    • 1/4 cup coriander leaves
    • 1/2 cup tur dal
    • 1 lemon
    • salt to taste


    For tempering:


    • 1 teaspoon ghee
    • 1/2teaspoon mustard seed
    • 1/2 teaspoon cumin
    • 1/4 teaspoon asafoetida
    • 1 red chilly
    • a few curry leaves
    • 1/2 teaspoon pepper powder


    Method:

    1. Wash the tur dal and cook it in a pressure cooker with a little turmeric powder. It should be soft and well cooked. 
    2. Take water in a pan, add tomato pieces, grated ginger, slit green chilli, turmeric powder, coriander and curry leaves to it. Boil them for sometime. The tomatoes should be well cooked. 
    3. Mash the dal well with the back of the ladle. Add it to the boiled broth along with salt.
    4. Make seasoning. In a small pan, take ghee, add mustard seeds. As they splutter put asafoetida and turmeric powder, throw in the red chilly, a few curry leaves and pepper powder. Put the tempering into the rasam. 
    5. Once it boils,  put lemon juice to it and remove from stove. 
    6. Lemon rasam is ready to serve. 

    Take a tip: 

    • Do not skip adding ginger, green chilli, coriander and curry leaves.
    • Use fresh coriander. Chop it finely.
    • Quantity of green chilli may be adjusted. 
    • Rasam can be used as a soup on a cold winter night. 

    Video Recipe is here : 


    lemon rasam
    Evergreendishesdev

    Lemon Rasam

    Lemon rasam is another variety of rasam. It is tasty and makes a good food during monsoon.
    Prep Time 10 minutes
    Cook Time 20 minutes
    Total Time 30 minutes
    Course: lunch ideas, Main Course
    Cuisine: karnataka, South Indian

    Ingredients
      

    • 4 cups water
    • 2 to matoes
    • 1 inch ginger
    • 3 green chilli
    • 1/2 teaspoon turmeric powder
    • a few curry leaves
    • 1/4 cup coriander leaves
    • 1/2 cup tur dal
    • 1 lemon
    • salt to taste
    • For tempering:
    • 1 teaspoon ghee
    • 1/4 teaspoon mustard seed
    • 1/4 teaspoon asafoetida
    • 1 red chilly
    • a few curry leaves
    • 1/2 teaspoon pepper powder

    Equipment

    • pressure cooker
    • pan
    • ladle

    Method
     

    1. Wash the tur dal and cook it in a pressure cooker with a little turmeric powder. It should be soft and well cooked.
    2. Take water in a pan, add tomato pieces, grated ginger, slit green chilli, turmeric powder, coriander and curry leaves to it. Boil them for sometime. The tomatoes should be well cooked.
    3. Mash the dal well with the back of the ladle. Add it to the boiled broth along with some salt.
    4. Make seasoning. In a small pan, take ghee, add mustard seeds. As they splutter put asafoetida and turmeric powder, throw in the red chilly, a few curry leaves and pepper powder. Put the tempering into the rasam.
    5. Once it boils,  put lemon juice to it and remove from stove.
    6. Lemon rasam is ready to serve.

    Notes

    • Do not skip adding ginger, coriander, curry leaves and green chilli. They give a good flavour to it. 
    • Use fresh coriander leaves and chop them finely. Remove the grime by putting in water.
    • Quantity of green chilli can be adjusted as per preference. 
    • You can use it as a soup on a cold winter night. 
    Lemon rasam/ nimbehannina saaru is a comfort food during monsoon and winter season. It is ideal to serve for a quick lunch or dinner.
    lemon rasam / nimbehannina saaru

    If you ever make this Lemon Rasam   recipe or any of my other dishes,  do take a picture and tag @foodiejayashree on Instagram or @evergreendishes on Facebook or Twitter. I will be glad to see your creation and share it further. Let’s be connected, do follow on social media platforms. Until next time, let’s stay connected.  Subscribe to get all updates and an e-book for free. Check out my e-books on Amazon.  Happy Cooking !