Category: south indian

  • How to make drumstick rasam |Nuggekayi saaru

    How to make drumstick rasam |Nuggekayi saaru

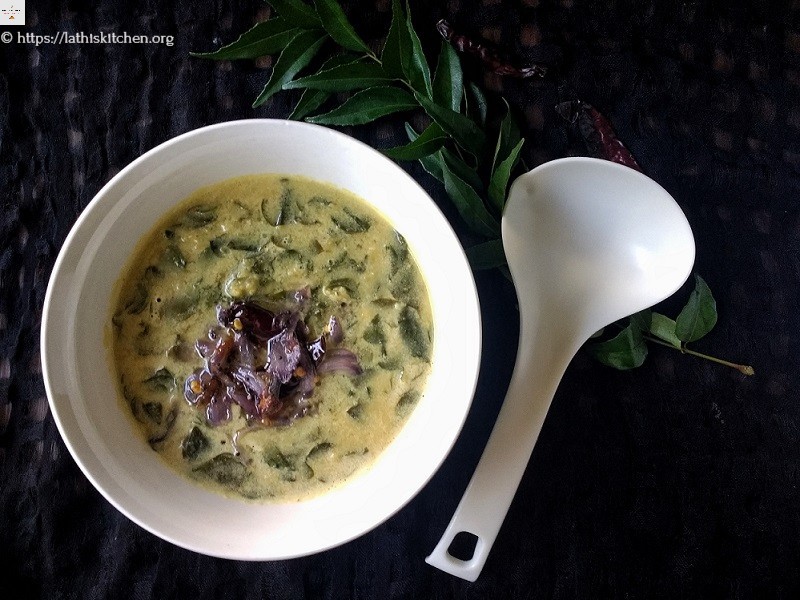
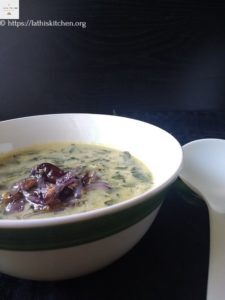
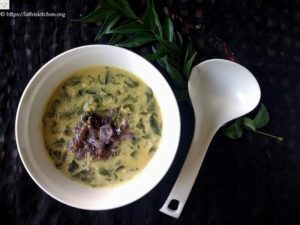
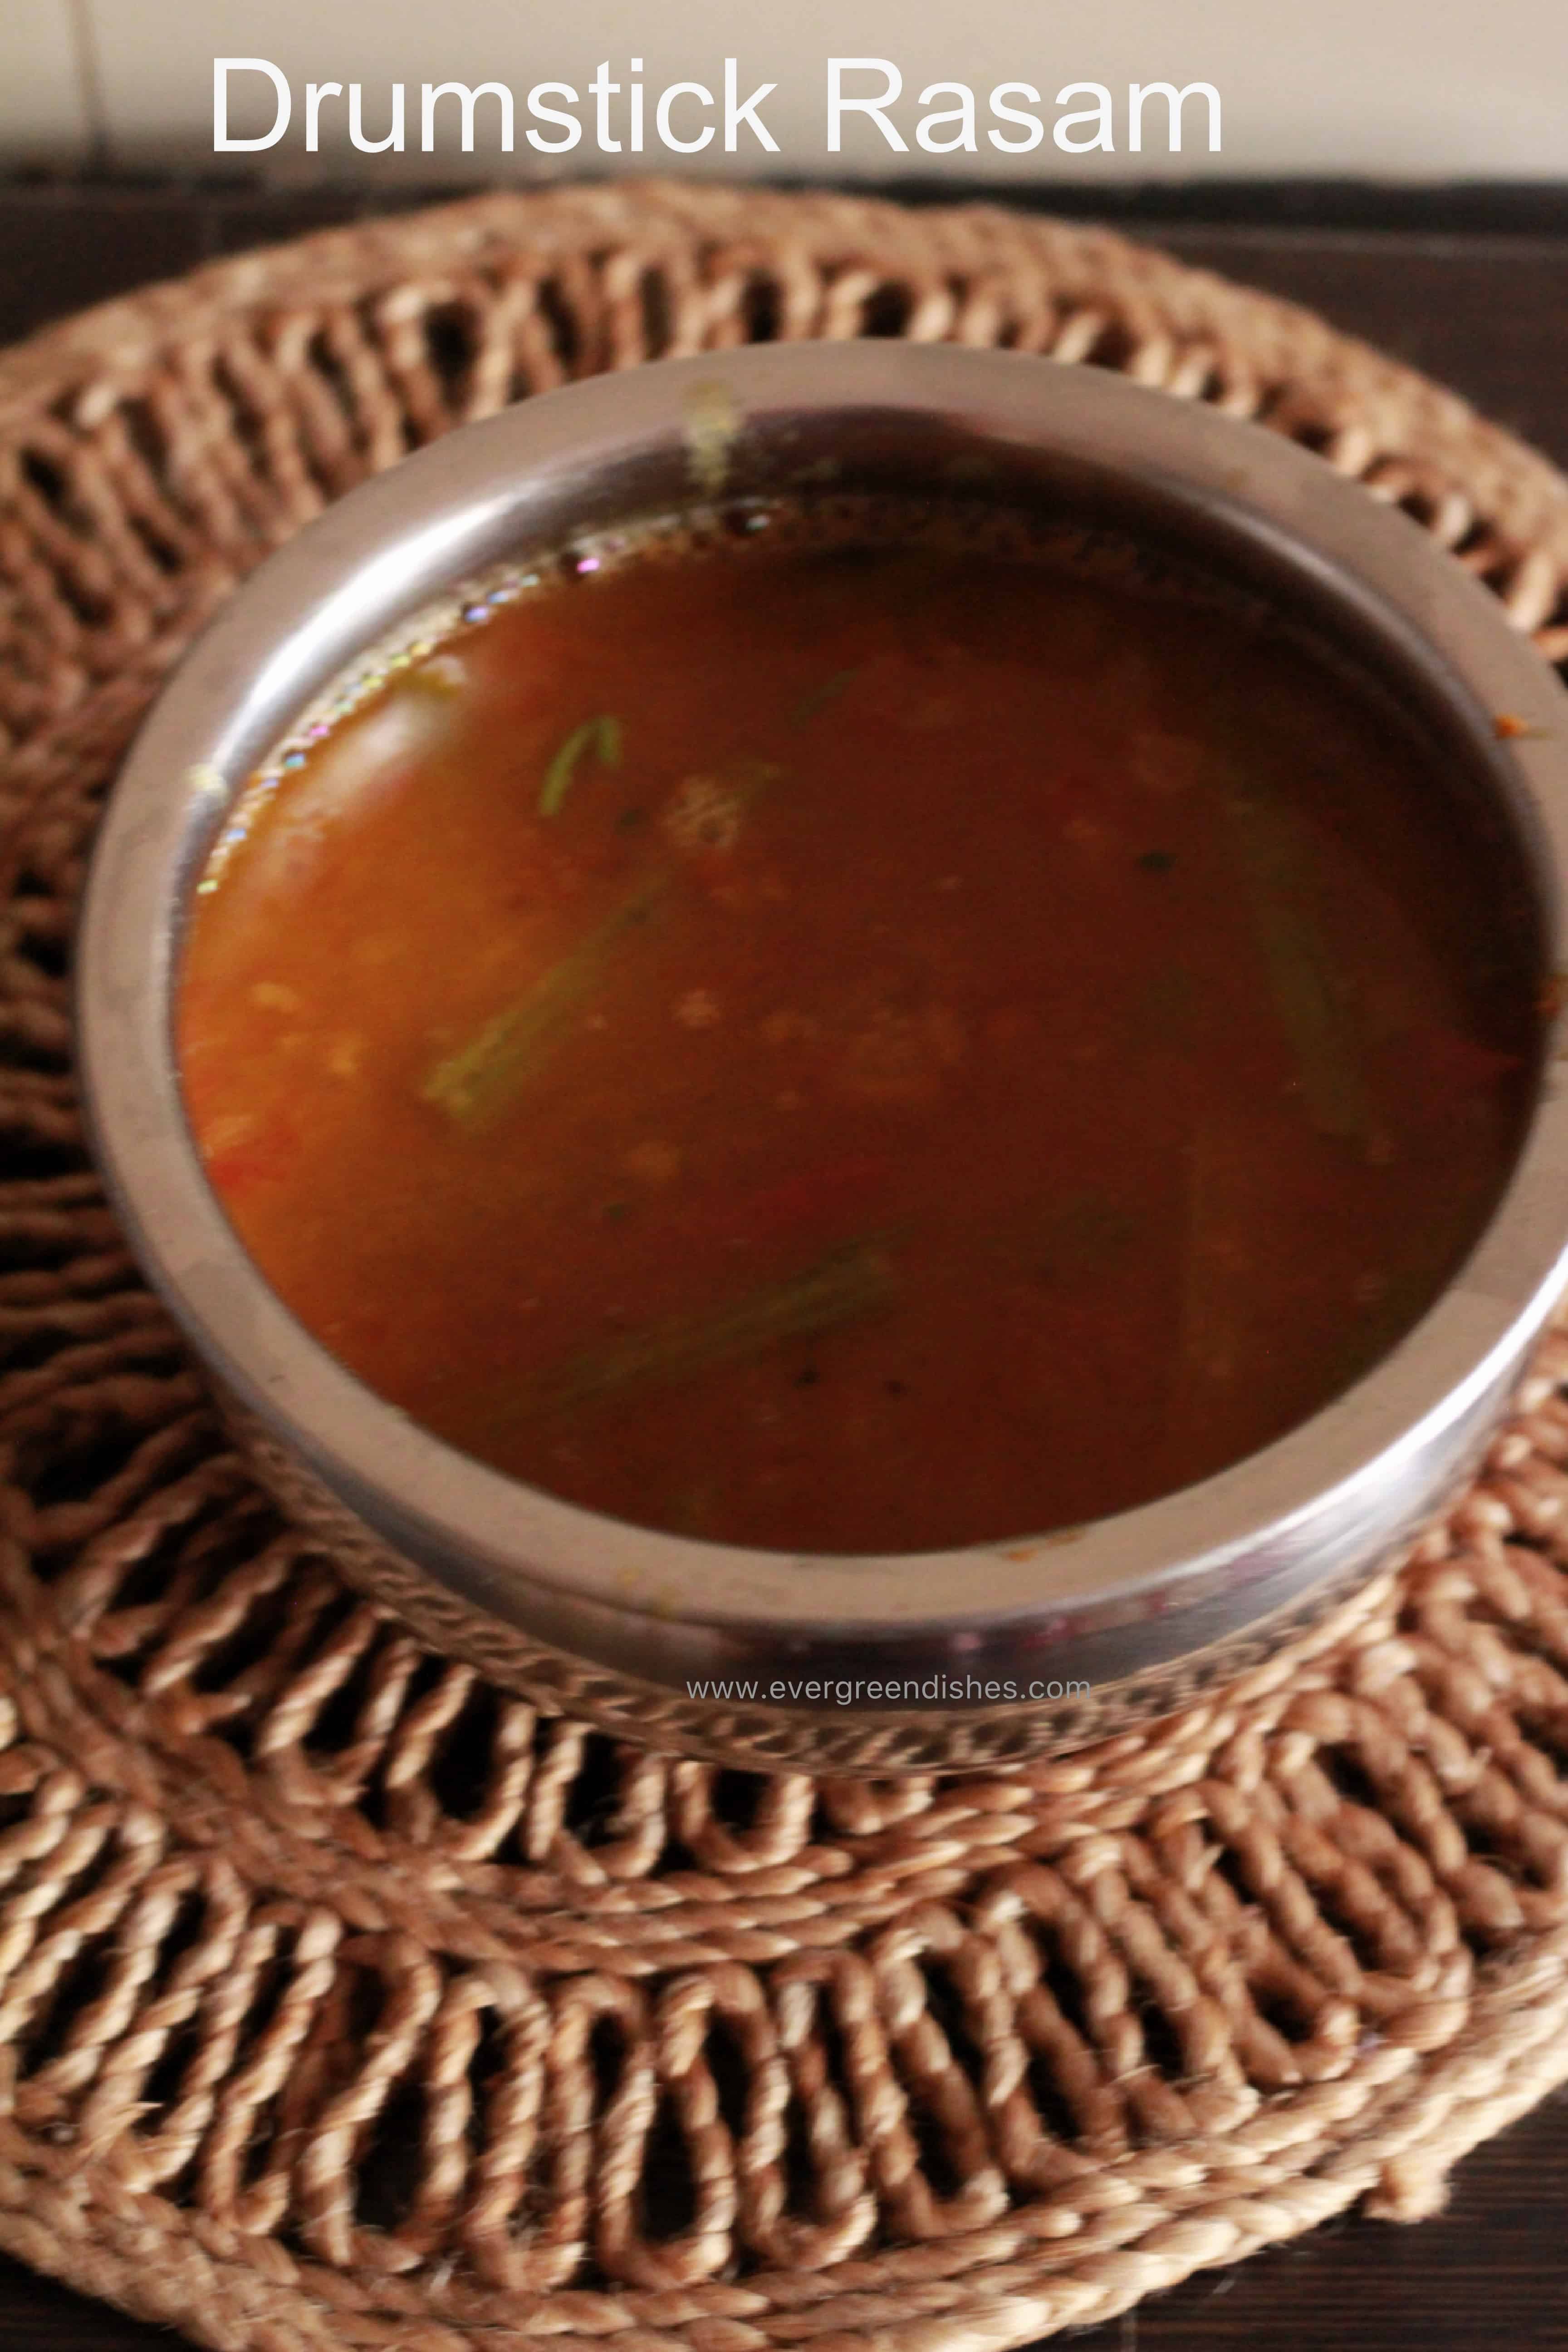
    Drum stick rasam is a tasty and lesser known accompaniment served with steamed rice in South India. The taste and smell of drum stick is good and it is spicy, sour and sweet in taste. 

    Benefits of using drum stick:

    I have seen that drumstick is not used in many households, some do not use as per tradition while a few detest it. But drumstick can be used in various ways, it is usually used in sambar. A stir fry made along with tomatoes tastes good. The leaves of drumstick are used in dal and considered healthy.

    Did you know using drumstick has numerous benefits? It regulates blood sugar level and boosts immunity. They are excellent source of Vitamin B. It helps in purifying blood. It also helps in boosying the overall immunity of the system. Thus, regular usage has many benefits.


    drumstick rasam
    drumstick rasam

    Rasam is called as Saaru in Karnataka and Chaaru in Andhra Pradesh. Drumstick rasam is more popular as Murungakai Rasam in Tamilnadu and Mulakkada Charu in Andhra Pradesh.  It is a comfort food for South Indians. The scientific name for drumstick is Moringa Oleifera.  It is slender, cylindrical pods popular as moringa,  nuggekayi, murungakkai.

    Are you a rasam lover ? Here are a few rasam recipes which will tantalize your taste buds.

     
    ajwain leaf rasam

    lemon rasam
    lemon rasam

    How to make Drumstick Rasam

    Ingredients:

    • 4 drumsticks
    • 1 small cup tur dal  (1 cup= 50 ml)
    • 2 tomato
    • 2 teaspoon ghee
    • 1/4 teaspoon mustard seeds
    • 1/4 teaspoon asafoetida
    • 1/4 teaspoon turmeric powder
    • lemon size ball of tamarind
    • 2 teaspoon rasam powder
    • a small piece jaggery
    • water

    Method: 

    • Soak tamarind in water.
    • Wash tur dal, add water and and some turmeric powder to it. Cook it in the pressure cooker. 
    • Cut the drumstick in five or six pieces, two inch in length. Cook them in a pan with some water. 
    • Cut the tomato into small pieces.
    • Take ghee in a pan, add mustard seed, as it splutters, put asafoetida and turmeric powder, throw in the tomato pieces. Add salt and some water. Let cook.
    • Extract pulp from the soaked tamarind.
    • Stir the tomatoes, add tamarind pulp, jaggery, curry leaves and rasam powder. Let boil. 
    • Take the cooked tur dal, mix it well. It should be well cooked. Put the tur dal to it, cooked drum stick and water. Let it cook on a low flame.
    • Once it boils, garnish with fresh coriander. It is ready to serve.
    Drumstick rasam
    Drumstick rasam
    drumstick rasam

    Drumstick Rasam

    5 from 7 votes
    Course: lunch
    Cuisine: Indian, karnataka

    Ingredients
      

    • 4 drumstick
    • 1 cup tur dal 1 cup =50 ml
    • 2 tomato
    • 2 teaspoon ghee
    • 1/2 teaspoon mustard seed
    • 1/4 teaspoon turmeric powder
    • 1/4 teaspoon asafoetida
    • salt to taste
    • lemon ball size tamarind
    • jaggery a small piece
    • 2 teaspoon rasam powder
    • curry leaves
    • water

    Method
     

    1. Soak the tamarind in water.
    2. Wash the tur dal and cook it in the pressure cooker with a little turmeric powder.
    3. Cut the drum stick into two inch pieces. Cook them in a pan with some water.
    4. Cut the tomato into small pieces.
    5. In a pan, add ghee and make the seasoning. Add mustard seeds, as it splutters, put asafoetida and turmeric powder, throw in the tomato with salt and some water. Let cook.
    6. Extract the pulp from the tamarind.
    7. Once the tomato are cooked, add tamarind pulp, rasam powder and curry leaves to it. Let boil. 
    8. Add cooked tur da and boiled drumstick to it. Put water, letcook on a low flame. 
    9. Once it boils, garnish with coriander leaves. Drumstick rasam is ready to serve.
    Drumstick Rasam / Nuggekayi Saaru
    Drumstick Rasam / Nuggekayi Saru


  • Drumstick Leaves Dal with Coconut | Guest Post Series

    Drumstick Leaves Dal with Coconut | Guest Post Series

    Drumstick leaves are healthy and make a good combination in dal. Try this delicious dal for a comfort and quick meal.
    It’s a guest post today and I have Lathiya Shanmugasundaram of Lathiskitchen. Welcome Lathiya to blogspace. Blogging has made me interact with many different indivduals around the globe, Lathiya is one among them, glad to know her in this blogging journey. She has moringa leaf dal for us, I have heard so much about it, do need to search for it in my place.
    Without much ado, it’s over to Lathiya.
    Thank you for having me on your space. Here I present you the healthy, easy and delicious Drumstick Leaves Dal with Coconut.
    Drumstick leaves are packed with lots of nutrients. It’s said that drumstick leaves have anti carcinogenic properties and it is a must to include in your diet. If you haven’t start using it in your meal plan yet, this is the time to start from this dal curry.
    Making this dal is not so complicated. You can make this dal within 30 minutes. The only time consuming part in making this dal is cleaning the drumstick leaves. It’s a tedious job of cleaning drumstick leaves. You have to be careful not to include the sticks and only leaf should be used. I used to clean the drumstick leaves a day before making this dal. So it takes just less than 30 minutes when I make this dal.

    drumstick leaves dal with coconut
    drumstick leaves dal with coconut

    Ingredients 
    • Drumstick leaves – 1 cup tightly packed
    • Dal – 1/4 cup
    • Coconut – 1/4 cup grated
    • Jeera seeds –  1/2 tsp
    • Turmeric powder – 1/4 tsp
    • Red chili powder – 3/4 tsp
    • Shallots – 3 or 4 thinly sliced
    • Mustard seeds – 1/4 tsp
    • Ghee / Coconut oil – 1 tsp
    • Salt – as required
    Method
    1. Clean and wash the drumstick leaves. Keep aside.
    2. Cook dal in pressure cooker till mushy. Keep aside.
    3. Grind coconut with jeera seeds to smooth paste. Keep aside.
    4. Heat 1/2 tsp of oil in a pan. Sauté the drumstick leaves for a minute.
    5. Add the cooked dal in sautéed drumstick leaves. Add little water to cook the drumstick leaves.
    6. Add turmeric powder and red chili powder.
    7. Let it boil in medium flame. Do not over cook the drumstick leaves.
    8. Add the grounded coconut to the dal and drumstick leaves mix with required water. Add required salt.
    9. When the raw smell of coconut goes, remove the pan from the heat.
    10. In another pan, add remaining 1/2 tsp of  ghee or oil. When it is hot, add mustard seeds.
    11. When it crackle, add sliced shallots and sauté till golden .
    12. Add it to the dal. Serve along with hot rice.

    drumstick leaves dal with coconut

    Ingredients
      

    • 1 cup drumstick leaves tightly packed
    • 1/4 cup dal
    • 1/4 cup coconut grated
    • 1/2 teaspoon jeera
    • 1/4 teaspoon turmeric powder
    • 3/4 teaspoon red chilli powder
    • 3 or 4 shallots thinly sliced
    • 1/4 teaspoon mustard
    • 1 teaspoon ghee/coconut oil
    • salt as required

    Method
     

    1. Cook dal in pressure cooker till mushy. Keep aside.
    2. Grind coconut with jeera seeds to smooth paste. Keep aside.
    3. Heat 1/2 tsp of oil in a pan. Sauté the drumstick leaves for a minute.
    4. Add the cooked dal in sautéed drumstick leaves. Add little water to cook the drumstick leaves. Add turmeric powder and red chili powder. Let it boil in medium flame. Do not over cook the drumstick leaves.
    5. Add the grounded coconut to the dal and drumstick leaves mix with required water. Add required salt. When the raw smell of coconut goes, remove the pan from the heat.
    6. In another pan, add remaining 1/2 tsp of ghee or oil. When it is hot, add mustard seeds. When it crackle, add sliced shallots and sauté till golden .
    7. Add it to the dal. Serve along with hot rice.

    About the author :   Lathiya Shanmugasundaram is the person behind lathiskitchen.org.She was born and brought up in India but now settled in US. She is the mother of two super active kids. She has both Malyali and Tamil recipes on her blog.

    Do connect with  Lathiya on social media

    If you have liked this post, do leave a comment and save it. Subscribe to get a book of handyhints for free.


  • Neer Dosa | How to make neer dosa| South Canara

    Neer Dosa | How to make neer dosa| South Canara

    Neer dosa is a popular crepe from South Canara region  of Karnataka. It is soft, fluffy, lacy, tasty and makes one of the finest breakfast ever. Serve it with vegetable stew and a variety of chutney for a yummy weekend breakfast.

    South India is famous for the variety of dosa galore one can endlessly enjoy. Masala dosa, rava dosa, onion uttapam, neer dosa, adai, benne dosa, set dosa are some of them. South Canara was  the region of the present day Dakshina Kannada and Udupi of Karnataka.

    What is Neer Dosa?

    Neer Dosa is another variety of dosa from Karnataka. It is popular in South Kanara region. It is made using only rice, no lentil is used here. Fresh coconut is used, but one can avoid it. Neer means “water” in Kannada. The batter is made as thin as water, thus the name.

    If the batter is thin, can we make it into a crepe?

    Yes, you can make it. Heat a skillet. Take a ladle full of batter, hold the handle of the skillet in one hand and pour the batter with the other. Once you pour the batter, just turn it around and the batter spreads.

    Can anyone make it?

    It does need a little practice, but you can make it. Use a non-stick skillet for best results.

    neer dosa
    neer dosa

    My other South Canara recipes on the blog: Moongdal payasam, Sweet Potato Kheer, Rice Porridge

    What goes in Neer Dosa ?

    • Rice : Raw rice is the main ingredient. Use the regular sona masuri rice. Wash it well and soak for eight hours.
    • Fresh coconut : The other ingredient essential in making neer dosa is fresh coconut. The fresh grated coconut gives a good taste to it.
    • Water : It is needed for grinding and adjusting the consistency of the batter.
    • Oil: You may use any oil but I insist on using coconut oil. It lends a good flavour.
    • Salt: Adjust accordingly.


    How to make the perfect Neer Dosa ?

    The consistency of the batter should be thin. The handle of the skillet is held in one hand and the batter is poured and immediately it is turned around. This helps in getting the required shape. Drizzle oil and cover it with a lid. Once it is done, slowly remove it from the edges. Fold it into a quarter and serve hot with chutney or stew. For best results, I suggest you to use a non-stick dosa tawa.

    Can I store the remaining batter ?

    Keep the remaining batter in the refigerator and use it the next day. Throw away the water which is settled on top. Adjust the consistency and make it.


    neer dosa
    Evergreendishesdev

    Neer Dosa

    Neer Dosa is a popular crepe from South Canara region of Karnataka. 
    Prep Time 15 minutes
    Cook Time 30 minutes
    Total Time 45 minutes
    Servings: 12 crepes
    Course: Breakfast
    Cuisine: dakshina kannada, karnataka, mangalore

    Ingredients
      

    • 1 cup raw rice
    • 1/2 cup fresh coconut
    • water
    • salt
    • oil

    Method
     

    1. Grate the coconut.
    2. Grind the rice with little water, add coconut to it.
    3. Remove the batter in a wide bowl. Add salt to it.
    4. Heat a skillet, take some batter in another bowl, add water to it.
    5. Take a ladleful of batter, hold the handle of skillet in one hand, pour it over and immediately turn it around. Drizzle some oil around it.
    6. Close a lid and let it cook on medium flame. Once it is cooked, slowly scrape it from the side and fold it. Serve hot with chutney or stew.

    Notes

    • Adding of coconut is optional, but it gives a good taste.

    neer dosa
    neer dosa


    If you have liked this post, subscribe to get a book of handy hints for free!

    Follow evergreendishes on other social media, Facebook, twitter and @foodiejayashree on  instagram

    If you ever recreate this dish tag @foodiejayashree on instagram, or @evergreendishes on twitter. I will be glad to see your work.


  • Mixed Vegetable Kootu | South Indian Kootu

    Mixed Vegetable Kootu | South Indian Kootu

    Kootu is a tasty lentil curry with mixed vegetables cooked in a blend of spices. It is moderately thick in consistency than sambar. It is usually prepared during festivals and ceremonies. (more…)

  • Rava Dosa | how to make instant rava dosa

    Rava Dosa | how to make instant rava dosa

    Rava dosa is an instant, tasty, crispy crepe from South Indian cuisine. Rava is the indian name for semolina. It is also known as Sooji. (more…)

  • Jhunka / Pitla guest post for jcookingodyssey

    Jhunka / Pitla guest post for jcookingodyssey

    Jhunka is a popular and tasty accompaniment from Maharashtrian cuisine. It is served with chapati, jowar roti and rice as well. Thus, it serves dual-purpose when you prepare it. (more…)

  • Cabbage stir fry recipe | cabbage palya

    Cabbage stir fry recipe | cabbage palya

    Cabbage stir fry/ palya  is a simple yet flavourful accompaniment. It tastes good with rice and sambar or rasam.  It can also be served with chapati or roti.

    Cabbage is one of the veggies that I cook on a regular basis. It is flavourful and pairs well with  both rice and  chapati. It can be easily made with a few ingredients. The cabbage stir fry is also called as thoran, palya  and poriyal.

    Let’s know a bit of cabbage:

    It is one of the widely grown vegetables in the world. It is a low calorie, fiber rich leafy vegetable. It is the store house of phyto chemicals.

    Variety:

    Different varieties of cabbage are cultivated such as green, purple, red, savoy, bok-choy and napha cabbage.

    Benefits of using cabbage:

    Cabbage  helps in preventing cancer. It helps in reducing bad cholestrol. It aids in weight loss. It can be eaten both raw and cooked. It is a rich source of fibre. It helps prevent constipation. It boosts mental functions.

    Culinary usage:

    It can be used both in raw and cooked form. It is versatile vegetable which eases our cooking. From salads to stir fry, it is one of the veggies that most people consume. It is one of the key ingredients in Indo- Chinese cooking. Cabbage rice is easy to prepare and  tastes awesome. One can make fried snacks and serve with tea.

    Cabbage stir fry| poriyal |thoran| palya

    Ingredients:

    • 1 medium cabbage
    • 1 tablespoon oil
    • 1/2 teaspoon mustard seeds
    • 1/4 teaspoon turmeric powder
    • 1/4 teaspoon asafoetida
    • 1 teaspoon bengal gram
    • 1 teaspoon urad dal
    • 4 green chilly
    • a few curry leaves
    • salt to taste
    • 1 teaspoon milk
    • coriander for garnishing
    • 1/2 bowl fresh coconut

    Method:

    1. Cut the cabbage as finely as you can. The taste of the stir fry to an extent depends on how we cut it. Put it in water, rinse and put in a colander.
    2. Take oil in a pan, add mustard seeds, as it crackles, put bengal gram and urad dal to it. Let it get a golden colour. Add turmeric powder, asafoetida and green chilly to it.
    3. Add the cabbage to it. Put salt and milk. Milk helps in avoiding the smell cabbage emits at times. Since, no onion is used here that can elevate the taste, I add a little milk. Mix it, close a lid and let cook on slow flame.
    4. Once it tender and cooked, remove the lid and let cook for sometime. Sometimes, cabbage tends to get watery.
    5. Add coconut if using and garnish with fresh coriander.

    Take a tip:

    • Adding of coconut enhances the flavour and it is a typical South Indian style of cooking. I have not added here
    • One can use green peas along with cabbage. Add a handful of it along with cabbage and let it cook.
    • Do cut cabbage  as finely as possible.

    cabbage stir fry
    cabbage stir fry

    About the event:

    Cabbage stir fry recipe was posted in 2018, four years later, I have added one more picture to it.  I have also put the pinterest pic and made a few seo related changes.Sending it to Foodies_Redoing Old Post 76, where we edit out old posts with better pictures, text or both.

    cabbage stir fry | thoran | palya
    Evergreendishesdev

    Cabbage Stir Fry

    Cabbage Stir Fry is a simple and tasty accompaniment for any meal. It tastes good with rice as well as chapati.
    Prep Time 10 minutes
    Cook Time 15 minutes
    Total Time 25 minutes
    Course: lunch box, lunch ideas, Side Dish
    Cuisine: Indian, South Indian

    Ingredients
      

    • 1 medium size cabbage
    • 1 tablespoon oil
    • 1/2 teaspoon mustard seeds
    • 1/4 teaspoon turmeric powder
    • 1/4 teaspoon asafoetida
    • 1 teaspoon bengal gram
    • 1 teaspoon urad dal
    • 4 green chilly cut into pieces
    • few curry leaves
    • coriander for garnishing
    • 1/2 cup fresh coconut optional
    • 1 teaspoon milk
    • salt to taste

    Method
     

    1. Shred the cabbage as finely as you can. Put it in water and keep it aside. Put in a colander.
    2. Make seasoning in a pan, add oil, put the mustard seeds, as it splutters, add bengal and urad dal. Let it turn golden, add turmeric powder, asafoetida, green chilly and curry leaves.
    3. Put the shredded cabbage into it, add salt and milk. Mix and cover with a lid. Let cook on a slow flame.
    4. Once it is cooked, add coconut and heat it.
    5. Garnish with fresh coriander.

    Notes

    • Peas may be added to it.
    • Coconut may be avoided.
    • Adding of milk helps to remove the odour of cabbage that it has.

    cabbage stir fry
    cabbage stir fry

    If you ever make Cabbage Stir Fry recipe, take a picture and tag @foodiejayashree on Instagram or @evergreendishes on Facebook. Subscribe to get all updates in your inbox and an e-book for free!

  • Ragi Thalipeeth / how to make ragi thalipeeth

    Ragi Thalipeeth | Finger Millet Flatbread |  South Indian Recipes | Healthy Breakfast Recipes | Lunch ideas

    Ragi thalipeeth is a tasty and healthy alternative to the usual one. It is vegan and gluten free. It is ideal for weight watchers and people suffering with diabetes.

    Today, everyone is aware of the importance good health and all seem to be conscious of the food that they consume. Millets play an important role as they are low in calories and power packed, helping one to sustain energy for a long time.

    Fingermillet or Ragi is a rich source of proteins and minerals. It contains important amino acids, high amount of calcium and potassium.  It is low in fat and gluten free. It has cooling properties and ideal for summer.

    Ragi mudde is the daily meal of many people in Karnataka. There are many ways in which we can include this super food in our diet. Here is the Ragi Idli that I posted earlier. Today, I am bringing to you,  thalipeeth using ragi flour.

    Thalipeeth is an Indian flat bread made using flour and pressed usually on sheet using hand. It is tasty like a pancake and can be served for breakfast, lunch or dinner.

    Ragi Thalipeeth/ Finger Millet Flatbread

    Ingredients:

    • 1 cup ragi flour
    • 1 cup rice flour
    • 1/2 cup fresh coconut
    • 3 green chilly
    • 1 teaspoon cumin
    • 1 teaspoon sesame
    • 1 tablespoon coriander
    • a few curry leaves
    • salt to taste
    • water
    • oil for roasting

    Equipments : wide bowl, skillet, sheets, spatula, plate

    Method: 

    1. Grind coconut, green chilly and cumin together to a paste.
    2. Finely cut the coriander leaves, wash and keep it aside.
    3. Take a bowl, add the flour and salt. Mix it. Put the paste, coriander leaves, curry leaves, sesame and mix it with a little water to form a stiff dough.
    4. Take a rolling sheet and smear some oil over it. Take a ball of the dough and pat into a thin circle. Smear some oil as you do it.
    5. Heat a skillet. Put the rolled thalipeeth onto it. As it gets cooked, you will be able to remove the sheet.
    6. Flip it to the other side.
    7. Once, it is done, remove and serve with coconut chutney.

    Take a tip:

    • Chopped onions may be added.
    • Grated carrot or fenugreek leaves too can be added.
    • Sheets are available in the market, you can use the brown paper too.

    Pin it for later:

    Ragi thalipeeth
    Ragi thalipeeth

    Evergreendishesdev

    Ragi thalipeeth

    Ragi thalipeeth is tasty and healthy alternative to the usual one. It is vegan and gluten free. It is ideal for weight watchers and people with diabetics.
    Prep Time 10 minutes
    Total Time 10 minutes
    Servings: 6 pieces
    Course: Breakfast, lunch ideas
    Cuisine: South Indian

    Ingredients
      

    • 1 cup ragi flour/ finger miller flour 1 cup =250ml
    • 1 cup rice flour
    • 1/2 cup fresh coconut
    • 3 green chilly
    • 1 teaspoon cumin
    • 1 teaspoon sesame
    • 1 tablespoon coriander finely chopped
    • curry leaves
    • salt to taste
    • water for kneading and grinding

    Method
     

    1. Grind coconut, green chilly and cumin to a fine paste.
    2. Take both the flour in a wide bowl, add salt and mix it. 
    3. Add the paste, sesame, coriander leaves, curry leaves and mix to a stiff dough.
    4. Take a sheet, smear some oil, take a ball of the dough and pat it into a thin circle.
    5. Heat a skillet, put the sheet over it, let cook, remove the sheet, flip it to the other side and let cook for sometime.
    6. Serve hot with coconut chutney.

    Notes

    • Finely cut onions may be added.
    • Carrot and fenugreek leaves may be added.
    • Sheets are available in the market. One can also use the brown paper( with plastic finish)

    Be tuned for more such recipes. Subscribe to get all updates in your inbox.

    If you ever recreate this dish, do link back to this post.  Let the writing be your own, and do tag me @foodiejayashree on Instagram

    Follow evergreendishes on all other social media.

    Facebook, Pinterest, Twitter

    Sending this to Lou Lou Girls, Tickle My Taste Buds Tuesday and also to

    Menu Plan Monday


  • Raw Mango Rice / Mavina kayi chitranna

    Raw Mango Rice / Mavina kayi chitranna

    Raw mango rice / mavina kayi chitranna  is a delicious rice preparation from South India. It is known by different names as mavin kayi chitranna in karnataka , mamidkayi pulihora in Andhra pradesh or mangai sadam in Tamil nadu. (more…)

  • Ash gourd Halwa | Kashi Halwa | Dum root Halwa |

    Ash gourd Halwa | Kashi Halwa | Dum root Halwa |

    Ash gourd halwa is a tasty and popular sweet of South India. It is called by different names as Kashi Halwa, Dum root halwa or Budhgumbala kayi halwa. It is rich in taste with added nuts and ghee.

    Indian sweets are of varied kind. Each state has its own exclusive dishes for every festibvbal. Ash gourd halwa is a popular sweet treat from Karnataka.


    Ash gourd is a healthy vegetable. It is usually used in sambar, yoghurt based dishes as majjige huli and sometimes in stir fry.  Ash gourd halwa is popular in South India and is pre dominantly made during functions and ceremonies. It is popular by the local names.

    My other halwa recipes: Carrot halwa ABC Halwa Beetroot halwa

    Ash gourd halwa / dum root halwa
    Ash gourd halwa / Dum root halwa

    ash gourd halwa / dum root halwa
    ash gourd halwa / dum root halwa

    Let’s get cooking Ash Gourd Halwa

    Ingredients:

    Measurement : 1 cup =250 ml
    • 2 cup grated ash gourd
    • 1 cup sugar
    • 2 tablespoon ghee
    • 5 almonds
    • 8 cashewnuts
    • 1/4 teaspoon cardamom powder

    Method:

    1. Remove the skin of ash gourd and discard the seeds and pith of it.
    2. Grate it. Do not discard the water.
    3. Take a teaspoon of ghee and roast the cashes, put them aside. Cut the almonds and roast them. Put them along with cashew.
    4. Now, add the grated ash gourd and roast it for four to five minutes.
    5. The raw smell of the vegetable should vanish.
    6. Add sugar and ghee to it and roast it on a low flame for fifteen to twenty minutes.
    7. Finally, add cardamom powder and remove from flame.

    Take a tip:

    • The skin of ash gourd is thick and needs to be removed carefully.
    • Increase the quantity of sugar by quarter cup, if you want it to be more sweet.
    • Raisins may be used.

    making of dum root halwa
    making of dum root halwa

    pictures in sequence are : ash gourd, grated ash gourd, sauting of dry fruits ( three pictures), sauting of ash gourd,  condensed form, adding of sugar, adding of ghee.

    (I missed taking the picture of the halwa in the pan )

    Ash gourd halwa / dum root halwa
    Evergreendishesdev

    Ash gourd halwa / Dum root halwa

    5 from 3 votes
    Ash gourd halwa is one of the finest sweets prepared in South India. It is common during ceremonies.
    Prep Time 15 minutes
    Cook Time 20 minutes
    Total Time 35 minutes
    Servings: 6
    Course: indian sweets
    Cuisine: Indian, South Indian

    Ingredients
      

    • 2 cup ash gourd grated
    • 1 cup sugar
    • 2 tablespoon ghee
    • 6 almonds
    • 6 cashew
    • 1/4 teaspoon cardamom powder

    Method
     

    1. Remove the skin and pith of the ash gourd. Grate it
    2. Take a thick bottom pan, add a teaspoon of ghee and roast the cashew and almond separately. Add the grated pumpkin and saute it until the raw smell goes and the water is condensed. 
    3. Put the sugar and ghee to it, mix and cook it on a low flame for fifteen to twenty minutes until it is done. 
    4. Add cardamom powder and remove from flame. Serve after sometime. 

    Notes

    • Use fresh and good quality (firm) pumpkin.
    • Removing the skin is not easy, do it cautiously.
    • Adjust sugar accordingly, this isn’t too sweet.
    • You can use raisins, I usually avoid it. 

    ash gourd halwa /dum root halwa
    ash gourd halwa /dum root halwa

    If you have liked this post, do share it further. All comments keep me going. Subscribe to get updates of new posts and other information.

    If you ever prepare this dish, do tag me @foodiejayashree on Instagram, would love to see your creation.

    Follow evergreendishes on all other social media Twitter, Pinterest, Facebook

    Before bidding good bye, here is a tip from me : It is not dieting but eating in moderation is the key to to be healthy.

    HAPPY COOKING …until next time..!!!