Category: south indian

  • Huli nuchu | Katambli  | Karnataka recipes

    Huli nuchu | Katambli | Karnataka recipes

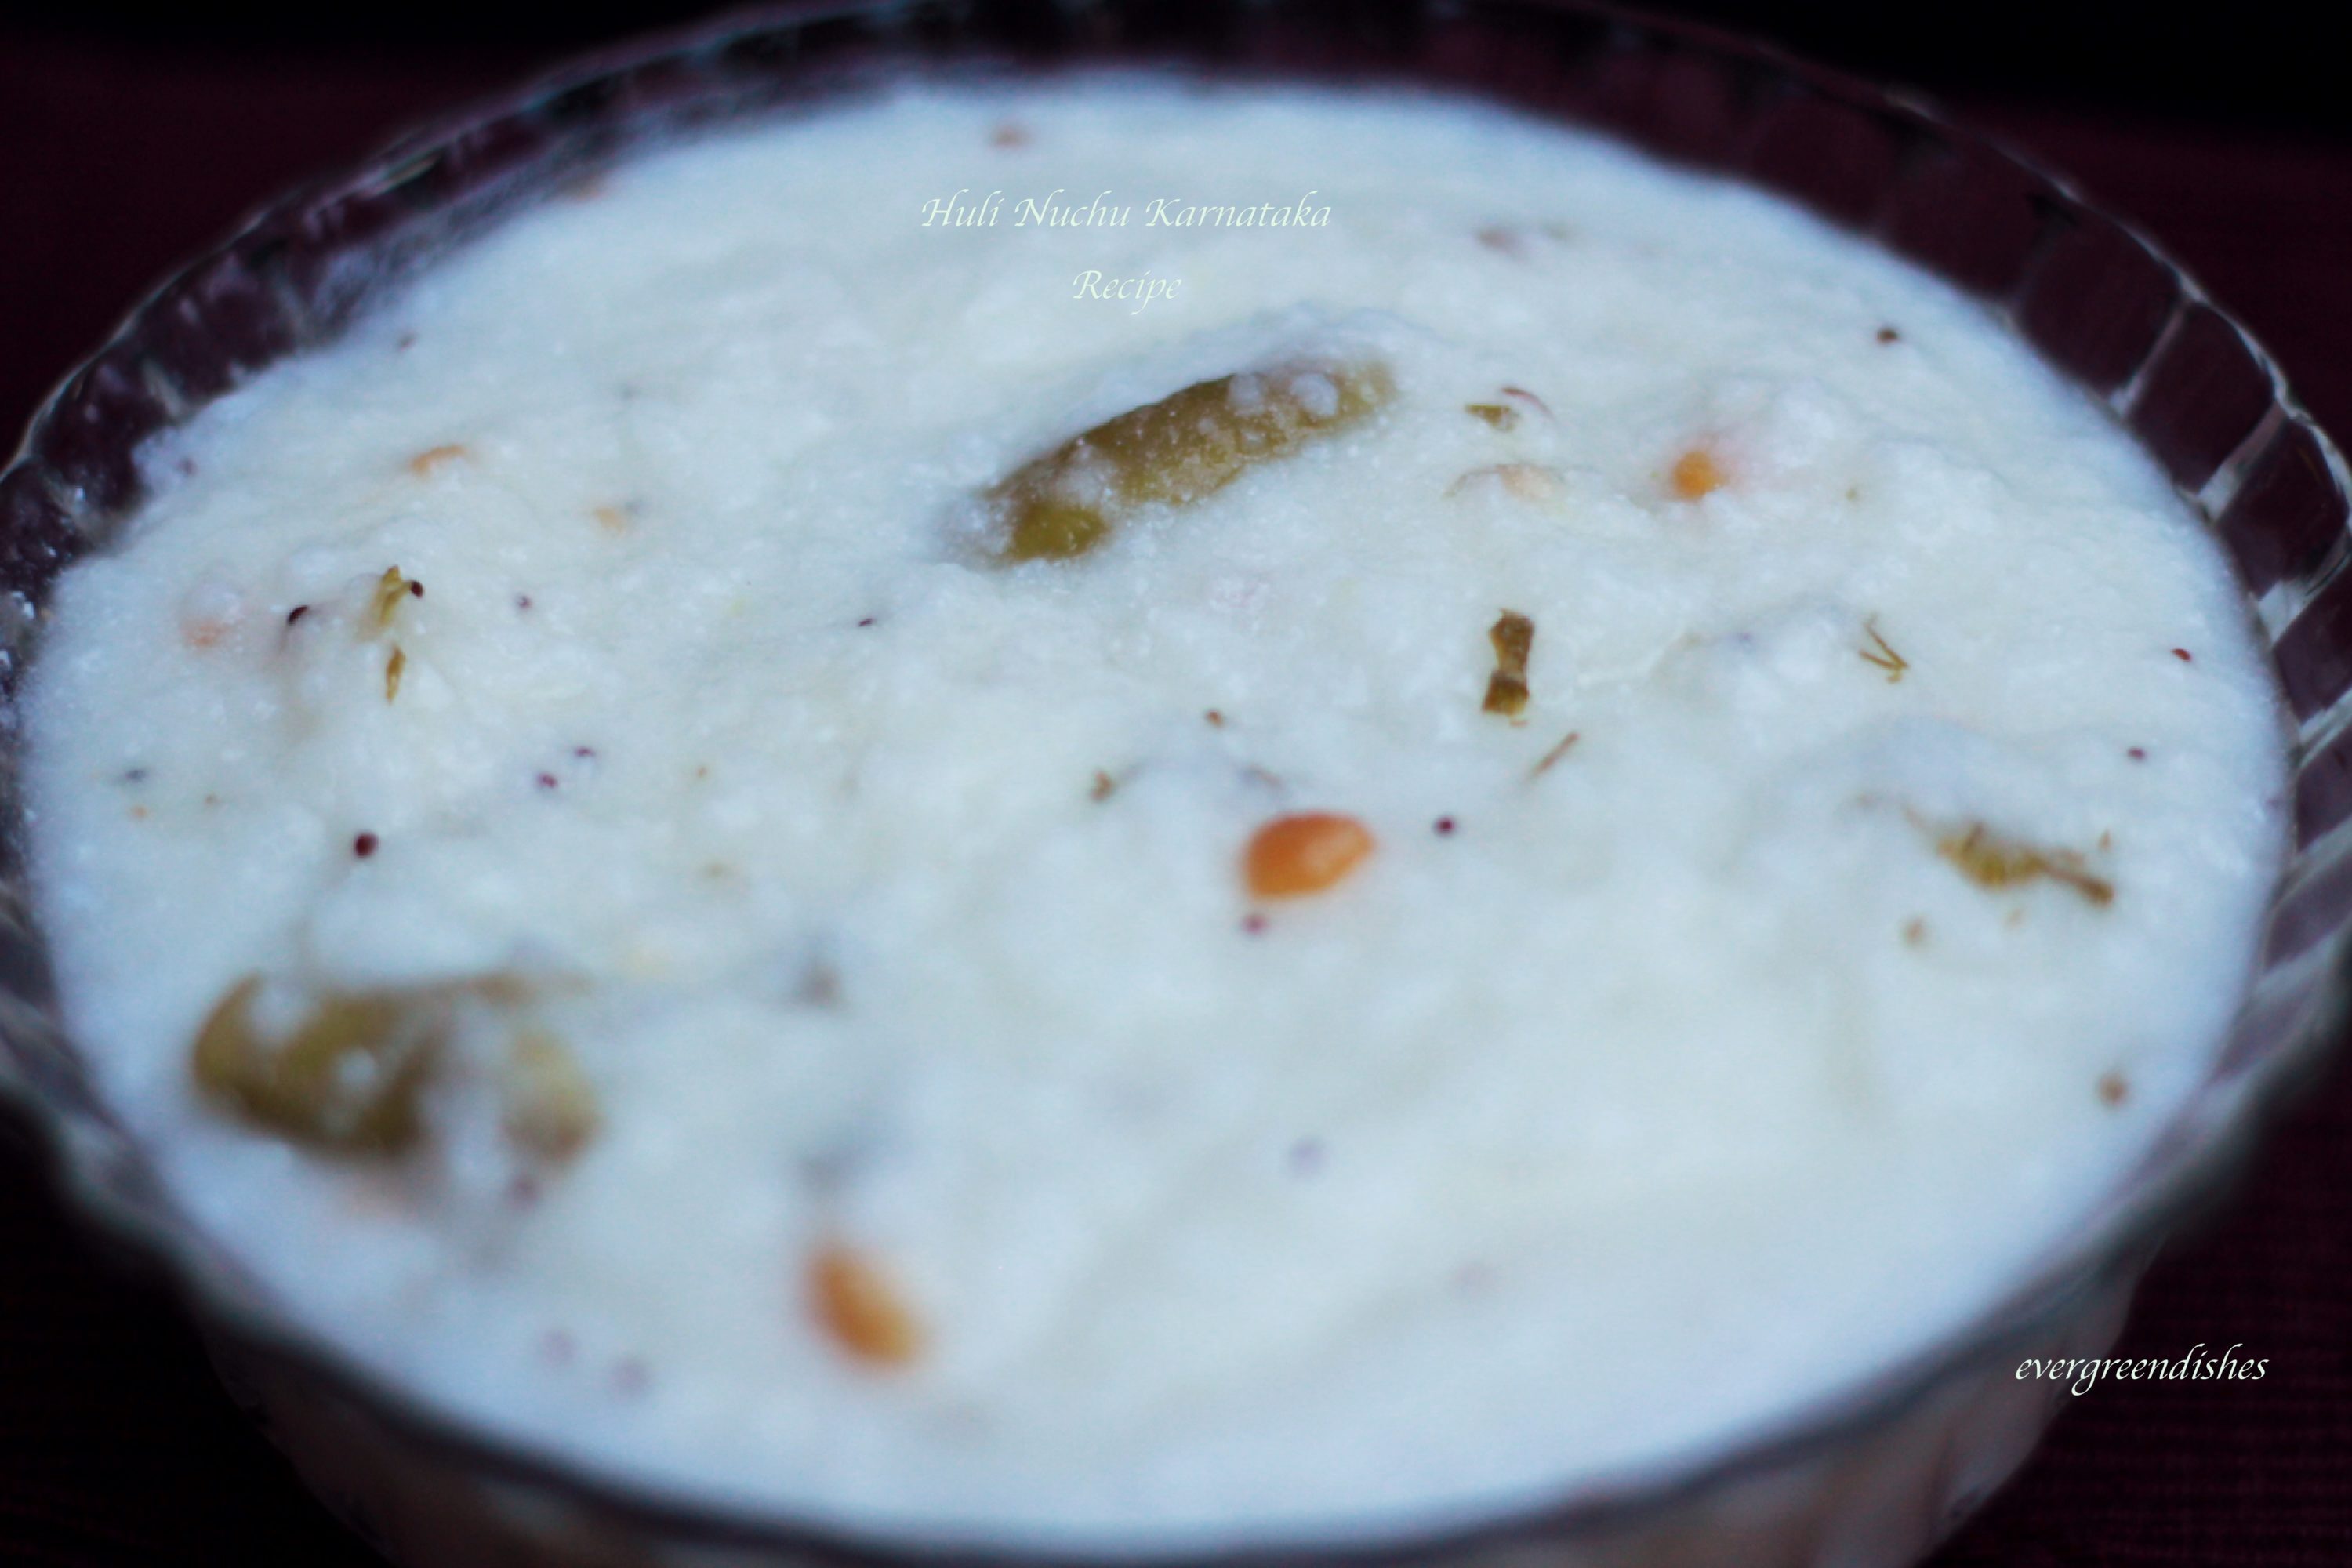
    Huli nuchu or katambli is a traditional food that is made using broken rice and buttermilk. It is a coolant food for summer from Karnataka.

    Some recipes are  cherished since ages, they have stood the test of time and  are worth mentioning.  May be with time,  life is moving super fast these days, some dishes will be soon forgotten and face a silent death with time. Writing it here, for all the kannadiga fans who love these dishes, Huli nuchu or katambli is one such unique dish, it’s one of the heirloom recipes, passed on through generations.

    It makes a good dish for lunch or breakfast. Huli nuchu is a kannada word, where “huli” means “sour” and ” nuchu ” is the term used for broken rice granules. Thus, the broken rice granules are cooked in sour buttermilk.  With the recipe written down here, I hope many will continue to cook and enjoy this rare dish.

    huli nuchu or katambli
    huli nuchu or katambli

    Broken rice granules are cooked in sour buttermilk with  seasoning and spices, it makes a comfort meal by itself. One can serve it for breakfast or lunch. A simple mango pickle tastes good with it.

    One needs a little prior preparation here. Raw rice needs to be washed and dried on a cloth. It is then coarsely grinded in the mixie. You can make this a day earlier and keep it ready.

    How to make the broken rice:

    It is usually available in the market, but one can make it at home also. Take a cup of rice, wash and soak it for two hours. Later, discard the water put it to dry on a cotton cloth in shade. Once, it is partially dry, grind it coarsely in the mixer.

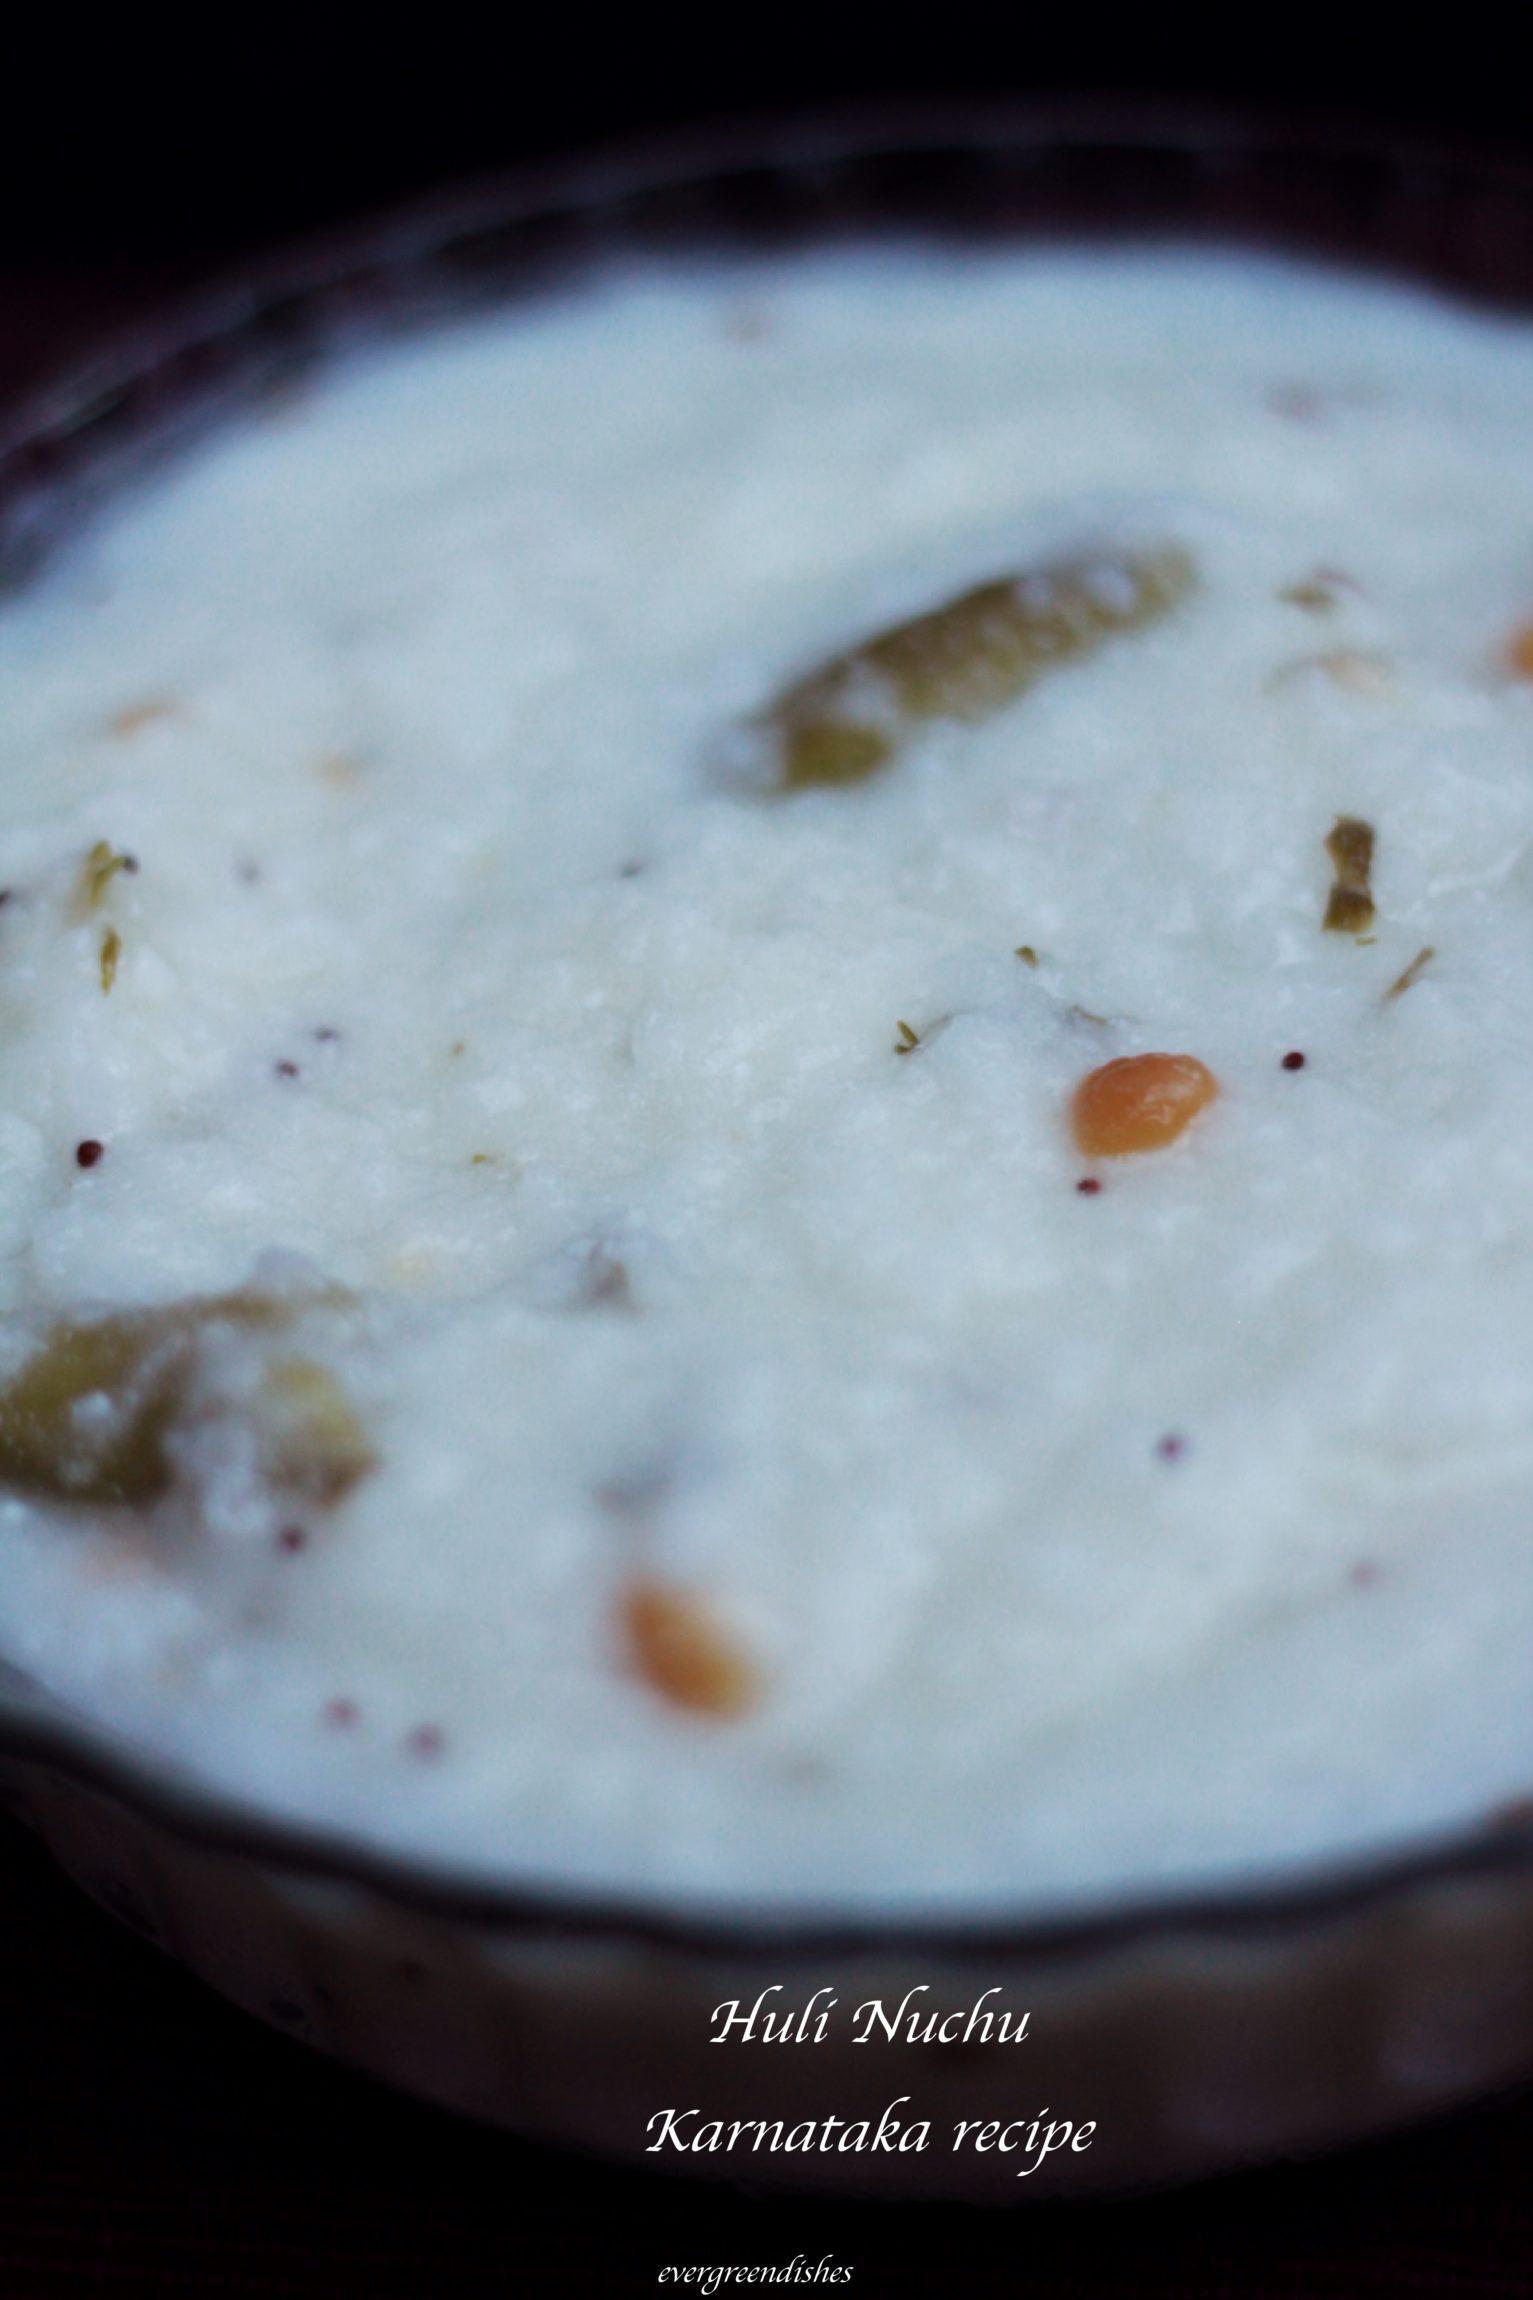
    Huli Nuchu / Katambli recipe

    Ingredients:

    • 1 cup broken rice
    • 2 cup sour curd
    • 4 cup water
    • 2 tablespoon oil
    • 1/2 teaspoon mustard seeds
    • 1/4 teaspoon asafoetida
    • 1 inch ginger cut into small bits
    • 1 teaspoon cumin
    • 1 teaspoon bengal gram
    • 1 teaspoon urad dal
    • 4 green chilly
    • a few curry leaves
    • coriander finely chopped
    • salt to taste

    Method:

    • Whisk the curds and keep it aside.
    • Heat oil in a thick bottom pan, it is good to use a pressure cooker if you do not have a thick bottom vessel. Add mustard seeds, as it crackles, put bengal gram and urad dal to it. Add asafoetida, after a few seconds, put the green chilly and curry leaves to it. Mix water to the curds. Pour it into seasoning, add salt.
    • As it boils, mix the broken rice granules (akki tari) slowly to it. Keep stirring, lumps may be formed here.  Let cook on a slow heat for some time. Keep stirring in between.
    • Add fresh coriander to it.
    • Add more water, if the consistency is thick.
    • The rice granules should be soft, once it is done, remove and serve. Mango pickle tastes good with it.

    Take a tip:

    • Sour curds is essential.
    • Adjust chilly as per your needs.
    • Ginger may be grated and put in the seasoning.
    • Do not skip adding ginger, it gives a good taste to thhe dish.
    • It needs time to prepare this dish.
    huli nuchu or katambli
    huli nuchu or katambli
    huli nuchu
    Evergreendishesdev

    Huli nuchu | Katambli | Karnataka recipe

    5 from 8 votes
    Huli nuchu is one of the heirloom recipes that is prepared by me. Broken rice are simmered in buttermilk with a seasoning for a long time, it makes a tasty meal by itslef. 
    Prep Time 30 minutes
    Cook Time 1 hour
    Total Time 1 hour 30 minutes
    Servings: 6 people

    Ingredients
      

    • 1 cup broken rice, akki tari,
    • 2 cup sour yoghurt
    • 3 cup water
    • 2 tablespoon oil
    • 1/2 teaspoon mustard
    • 1/4 teaspoon asafoetida
    • 1 teaspoon bengal gram
    • 1 teaspoon urad dal
    • 1 inch ginger
    • 4 green chilly
    • a few curry leaves
    • coriander leaves
    • salt to tatse

    Method
     

    1. Whisk the curds, add water to it and keep it aside. 
    2. Heat oil in a thick bottom pan, add mustard seeds, as it crackles, put asafoetida, bengal gram, urad dal, ginger pieces, green chilly and curry leaves. Let cook for a few seconds. Now, add the buttermilk (curds and water mixed) to it. 
    3. Once it boils, slowly add the broken rice to it, keep stirring in between. Add salt and let cook on a slow flame for half an hour. 
    4. Keep stirring in between. Add water if necessary, the consistency should be moderately thick.
    5. Add fresh chopped coriander to it while cooking. It imparts good smell. 

    Notes

    • To make broken rice, wash the raw rice and put it to dry on a cloth. Later, coarsely grind it. 
    • Curds should be sour.
    • Adjust the consistency of water.
    • Grated ginger can be added.

    Pin it for later :

    huli nuchu
    huli nuchu / katambli


    Subscribe to get updates in your inbox and a free e-book ! If you ever recreate this dish, do tag me on Instagram using the @foodiejayashree


  • Split gram murukku

    Split gram murukku

    Indian snacks are so many that each time we can make a different variety, not to mention the various regions that we have. Nipaatu, Chakli, Tengalu and Murukku are popular South Indian snacks that one can find stored in jars.

    Murukku is one such snack that resonates with everyone. Every house must be having their own version that has been passed through generations. Split gram murukku is a tasty and crunchy snack, one would love to have it over again and again. (more…)

  • Til Chikki Recipe  / Sesame Chikki Recipe

    Til Chikki Recipe / Sesame Chikki Recipe

    Sesame Chikki is a crispy, tasty sweet bites made during Makar Sankranti.

    Makar Sankranti is round the corner. It is one of the important festivals celebrated in our country. It follows the Solar cycle and is dedicated to the Sun God. All edibles related to sesame or til are prominent during this season. Til chikki, til laddoo, til pancakes and sankranti ellu are the major sweets along with pongal prepared in all households.

    It is amazing  how the beliefs told in our shastras are similar to the scientific evidences. Sesame keeps the body warm and also gives energy, thus it is consumed during this festival. This is practised since so many years, isn’t it?

    Makar Sankranti falls on January 14, the festival is celebrated for three days. It is a harvest festival. Colourful rangolis are put in front of the house and ladies give bhogi( a kind of charity) of all new produce as sugarcane and vegetables. Here in South India, they prepare Bajra roti with a wide spread of delicacies along with pongal. The food is simply delicious. On the final day, it is Makar sankranti, Ellu and sweet pongal are the usual preparations.

    sesame chikki
    sesame chikki

    What goes into it?

    Sesame seed is the main ingredient here. I have used the white sesame seed. You may add a few nuts if you want.

     Til Chikki Recipe/ Sesame Chikki Recipe

    Ingredients:

    • 3/4 cup sesame (white)
    • 1/2 cup jaggery (grated)
    • 1 1/2 teaspoon ghee
    • a pinch of cardamom (optional)

    Method:

    1. Take a pan and dry roast the sesame on a slow flame for five minutes. It should turn light brown in colour and give a nice aroma. Put it aside.
    2. Grease the back of a plate and keep it aside. You can also do on the platform.
    3. In the same pan, add ghee. When it melts, add jaggery, mix it and keep stirring it on medium heat for three minutes.
    4. Add the roasted sesame to it, mix it well and pour it over the greased plate.
    5. Spread it evenly to 200mm wide.
    6. Cut it into small squares and allow to cool.
    7. Later, remove it and store in a jar.

    My other recipes related to Makar sankranti

    sesame chikki
    Evergreendishesdev

    Til Chikki/ Sesame Chikki

    5 from 4 votes
    Til Chikki or sesame chikki is crunchy and healthy snack to binge on. It is usually prepared during Makar sankranti. 
    Prep Time 10 minutes
    Total Time 10 minutes
    Servings: 20 pieces

    Ingredients
      

    • 3/4 cup sesame
    • 1/2 cup jaggery
    • 1 1/2 teaspoon ghee
    • cardamom powder a pinch

    Method
     

    1. Dry roast the sesame seeds on a low flame for five minutes. It should be light brown in colour and give a good aroma. Put it to cool.
    2. Grease the back of a plate and keep it ready. 
    3. In the same pan, add ghee. When the ghee melts, add jaggery, mix it and allow it to melt. Keep stirring for three minutes.
    4. Put the roasted sesame seeds to it, mix it well and pour it over the the greased plate. Spread it with the the back of the ladle.
    5. Cut into small squares and allow to cool.
    6. Later, store it in an air tight container.

    Notes

    • Jaggery should be finely chopped.
    • Cardamon powder is optional.

    Makar sankranti recipes and related posts from co-bloggers:

    Wishing all my readers a very Happy Makar Sankranti!


  • Gongura chutney/ Pundi chutney / Sorrel leaves cooking

    Gongura leaves are widely used in cooking, the tangy flavour does makes the dishes delicious. Gongura chutney or pundi chutney is commonly prepared in South India.It makes a good accompaniment with jowar roti.

    Varied names of Sorrel

    Different regions call it by different names.The English name is Sorrel or Kenaf. It is popular as  Gongura in Andhra Pradesh, Pundi palya in Karnataka, Pulich keerai in Tamil, Ambaadi In Marathi, Pitwa in Hindi, Kotrum in Jharkhand, Amaari in Chattisgarh, Kotrum in Jharkhand and Mestapat in Bengali.

    Health Benefits of Sorrel leaves

    The sorrel leaves are rich source of iron, vitaminB6, folic acid and anti-oxidants essential for human nutrition. The iron and vitamins present in it help in preventing conditions such as osteoporosis.

    Different culinary uses of Sorrel leaves in India

    Sorrel leaves are used along with lentils to give a flavoursome accompaniment with rice. The chutney is a popular dish churned out of it. It is one of the daily essentials in Andhra cuisine. A variety of pickle is also made using these leaves.

    Ingredients:

    For the  gongura/ sorrel leaves chutney

    • 2 clusters of sorrel leaves
    • 6 green chilly
    • 1 teaspoon methi seeds
    • 2 teaspoon oil
    • a liitle asafoetida
    • salt to taste

    For the seasoning:

    • 2 teaspoon oil
    • 1/4 teaspoon mustard
    • 1/4 teaspoon asafoetida
    • 1/4 teaspoon turmeric powder

    Method:

    1. Separate the leaves from the stalk, wash and put them to dry on a cloth.
    2. Cut the leaves.
    3. Take oil in a pan, roast the methi seeds and the green chilli, put them aside.
    4. In the same oil, add asafoetida and the sorrel leaves along with salt.
    5. Let cook for sometime.
    6. Remove from flame.
    7. When it cools, grind it.
    8. Take a pan and make the seasoning. Add mustard seeds, as it crackles, put asafoetida and turmeric powder. Turn of the gas. Put the chutney in it and mix well.
    9. Gongura chutney is ready to serve.

    Take a tip:

    • Garlic may be added along with green chilly while sautéing.
    • Raw onions are added to the chutney by some people.
    • Chutney stays good for a couple of days if kept in refrigerator.
    • Tastes good with jowar roti along with stuffed brinjal as an accompaniment.
    • It can be mixed with hot steamed rice along with ghee.
    • The leaves are slimy, thus do not chop and wash them.
    Evergreendishesdev

    Gongura/ Pundi/ Sorrel leaves chutney

    Gongura chutney is a popular accompaniment from South India. It makes a good accompaniment with jowar roti. 
    Prep Time 10 minutes
    Cook Time 10 minutes
    Total Time 20 minutes
    Servings: 1 bowl
    Course: accompaniment, chutney,, Side Dish
    Cuisine: Indian, karnataka, southindian

    Ingredients
      

    • 2 cluster sorrel leaves
    • 6 green chilly
    • 1 teaspoon methi
    • 2 teaspoon oil
    • salt to taste
    For the seasoning
    • 2 teaspoon oil
    • 1/2 teaspoon mustard seeds
    • 1/4 teaspoon turmeric powder
    • 1/4 teaspoon asafoetida

    Method
     

    1. Remove the stalk of the sorrel leaves, wash and put it to dry on a cloth. Cut the leaves. 
    2. Take oil in a pan, add fenugreek seeds and green chilly. Roast them, put them aside.
    3. In the same pan, add asafoetida and the sorrel leaves along with salt. 
    4. Let cook until tender. Remove and keep it aside.
    5. When cool, grind the fenugreek and green chilly together. Then add the sorrel leaves to it and blend altogether. 
    6. Make seasoning in another pan. Add mustard seeds to the oil, as it splutters, put asafoetida and turmeric powder. Put chutney to it and mix it well. Gongura chutney is ready to serve.

    Notes

    • You may add garlic along with green chillies while roasting. 
    • Finely cut onion pieces can be put in the seasoning and sauted for sometime. 
    • This chutney tastes good with jowar roti.
    • It can also be served with hot steamed rice along with a dollop of ghee. 
    • This chutney can be stored in refrigerator. Put seasoning and use it.
    Gongura chutney
    Gongura chutney


    Other chutney recipes on the blog

    And here are a few from my co-bloggers Raw mango with garlic Tomato Onion Chutney Lal mirch ki chutney Coconut and flax seed chutney Gur imli ki chutney Mango Kottu 

    If you have liked this post, do comment and share it further. Subscribe to get updates of new posts in your inbox, also a free e-book of handyhints.


  • Seven Cup Burfi how to make seven cup fudge

    Seven Cup Burfi how to make seven cup fudge

    Seven cup burfi is a popular sweet or fudge made in South India. It is called as a seven cup sweet as the measure of all ingredients together is seven cups.It is usually prepared during Diwali.

    seven cup burfi
    seven cup burfi

    Other burfi recipes on the blog: Coconut and Mango Burfi Dates Burfi  Coconut Burfi

    Recipe of Seven Cup Burfi

    Ingredients:

    • 1 cup fresh grated coconut
    • 1 cup gram flour
    • 1 cup milk
    • 1.5 cup ghee
    • 2.5 cup sugar
    • a pinch of salt

    Method:

    1. Grate the coconut, use the finely grated one for this.
    2. Take a thick bottom pan and mix all the ingredients except salt.
    3. Heat it on a low flame, keep stirring, as it will easily get burnt.
    4. Grease a plate with a little ghee.
    5.  Let cook for fifteen to twenty minutes. It becomes a thick porous mass with bubbles all over.
    6. Sprinkle a little salt and mix well.
    7. Spread it on the greased plate.
    8. Make incisions after some time.
    9. Do not remove them immediately.
    10. Store in a tight jar.

    Take a tip:

    • The actual recipe calls for three cups of sugar and one cup of ghee, but I have decreased the sugar and increased with ghee.
    • Use good quality besan to get good results.


    Evergreendishesdev

    Seven Cup Burfi

    Seven Cup Burfi is a sweet preparation made of fresh coconut and gram flour along with a few other ingredients. Make it for the forthcoming festival and enhance the joy.
    Servings: 16 pieces

    Ingredients
      

    • 1 cup fresh grated coconut
    • 1 cup gram flour
    • 1 cup milk
    • 1.5 cup ghee
    • 2.5 cup sugar
    • pinch of salt

    Method
     

    1. Grate the coconut, use only the finely grated one for making this one.
    2. Take a thick bottom pan and mix all the ingredients except salt.
    3. Heat it on a low flame, keep stirring all the while.
    4. Grease a plate with a little ghee.
    5. It takes about fifteen minutes to be ready. It forms a thick porous mass.
    6. Add the salt and mix it.
    7. Pour it on the greased plate. Cut them into pieces.
    8. Do not remove immediately.
    9. Store in a clean jar.

    Notes

    • Adding of salt is optional.
    • Cardamom powder may be used.
    • The actual recipe calls for three cups of sugar and one cup of ghee, but I felt it was too sweet.
    • Use any cup for measurement but ensure you use the same one for all ingredients.


    Wishing all my readers a very Happy Dasara ! May the victory be of the good and truth always. May peace and happiness prevail in this world.

    Do check out my e-books on Amazon. Subscribe to get all updates and a  Book of Handyhints for free! Do watch out for a special post during Diwali! 

    If you have liked this post, do leave a comment or your feedback. 


  • Nippattu| Rice crackers | Karnataka recipe

    Nippattu| Rice crackers | Karnataka recipe

    Nippatu or rice crackers as they may be called are popular snacks prepared during festivities. They can be stored for a long time and can be used with tea or as an evening snack. In Karnataka, nippattu is different from other states. Here is one such kind. (more…)

  • How to make chiwda at home

    How to make chiwda at home

    Chiwda is one of the snacks stored in the kitchen shelves. It is primarily made during Diwali, when a variety of snacks are prepared. Here is my version of Chiwda recipe. It is a tasty, guilt free snack.

    Plain chiwda is usually made by frying flattened rice or poha. It is then mixed with spices and other condiments. But, here we are lucky enough to get the ready, roasted version of it. Thus, a guilt free snack is ready in no time.

    Update : Plain chiwda is available in all outlets as half kilogram and one kilogram packets.

    Snacks in the jar as avalakki, chiwda and  murmura are always seen in the kitchen shelves. Along with it comes other snacks as chakli, nippattu and kodbole which are loved by all but not made often.

    Chiwda makes a good snack with tea. It is ideal to serve with breakfast as an accompaniment. An easy to make, quick snack is more than welcome here. Check out the recipe.

    Can we store chiwda ?

    Yes, chiwda can be stored for a long time. Keep it in a clean, air-tight container.

    Is it a festive snack ?

    Yes, it is mostly made during Diwali.


    chiwda

    What goes in the chiwda ?

    • Chiwda : It is the star ingredient. You can use the store bought chiwda or fry the rice flakes in oil  and use them. Using the store bought is easier and healthier. Just clean it once and use it.
    • Oil : Use good quality oil.
    • Sesame seed : Use the white sesame seed.
    • Cumin : A dash of cumin elevates the taste.
    • Turmeric powder : A dash of turmeric in the seasoning gives a good colour. It also has anti-bacterial properties.
    • Dry coconut : Cut them into thin and small pieces.
    • Curry leaves : Cooking seems to be incomplete without the humble curry leaves.
    • Red chillies : Throw in one or two in the seasoning.
    • Asafoetida: Sprinkle a little bit of asafoetida for that nice aroma.
    • Dry fruits: Cashew pieces and raisins are usually dded. You may add almond pieces too.
    • Ground nut and dalia: For that crunchy taste in between.
    • Chilli powder : To give a spicy taste to the dish.


    chiwda
    Evergreendishesdev

    How to make chiwda

    Chiwda is a delectable snack to binge on. It is usually made during festivals as Diwali and Holi. 
    Prep Time 10 minutes
    Cook Time 19 minutes
    Total Time 29 minutes
    Course: Snack
    Cuisine: Indian

    Ingredients
      

    • 1/2 kilogram plain chiwda
    • 1/2 cup ground nuts
    • 1/2 cup split dahlia
    • 8 cashewnuts
    • 15 raisins
    • 1/4 teaspoon mustard seeds
    • 1/2 teaspoon cumin
    • 1 teaspoon sesame
    • 1 teaspoon chilly powder
    • 1/2 teaspoon sugar
    • salt to taste
    • curry leaves
    • oil for frying and roasting

    Method
     

    1. Take oil in a pan. Deep fry the groundnuts. Remove them and keep aside.
    2. Similarly, fry the split dahlia, cashew nuts, raisins and curry leaves seperately.
    3. Take two tablespoon of that oil and make the seasoning. Add mustard seeds, as it splutters, put cumin and sesame. Add asafoetida and turmeric. A few seconds later, add chilly powder, salt and sugar.
    4. Mix well. Put the fried ingredients into it. Add the plain chiwda and mix well.
    5. Heat it for a few minutes. Tasty chiwda is ready to binge.

    Notes

    To make chiwda, take flattened rice (poha or aval) and deep fry in oil. Do not make it brown in colour.

    About the event :

    An old post was updated today31/8/2025 with better pictures. Sending this to Foodies_Redoing Old Post_159. Here, I have changed both the text and the pictures, a lot of changes has been made in the post. The recipe remains the same.

    Subscribe to get updates of new posts and a book of handy hints for free! If you have liked this recipe, do like, comment and share.

    Pin it for later:

    chiwda recipe
    a bowl of chiwda


  • Crispy Bhindi Fry | okra fry

    Crispy Bhindi Fry | okra fry

    Crispy Bhindi Fry makes a tasty accompaniment with any meal. It is loved by one and all.

    Bhindi is the common name for ladies finger or okra. It is a versatile vegetable which can be turned into crispy fried savouries or as a stir fry. The stuffed okra is simply irresistible. The weather calls for fried food and I ended up frying it, Tasty Bhindi Fry is on the blog today. I like this recipe for it’s simplicity, no extra dressings or garnishing; but yet, it is tasty and loved by all.

    Bhindi fry

    It makes a good accompaniment  with hot steamed rice, a dollop of ghee elevates the taste. The best way is to eat it along with rice and sambar.

    My other bhindi recipes: okra stir fry, stuffed bhindi

    Let’s get over to the recipe of Bhindi Fry

    Ingredients:

    • 1 kg ladys finger/okra/ bhindi
    • salt to taste
    • 3 teaspoon chilli powder
    • oil for frying

    Method:

    1. Wash and dry the okra. Cut them into thin pieces.
    2. Take oil in a pan.
    3. Heat it.
    4. Once it it is hot, slowly put a bowl of it.
    5. Deep fry on medium flame, after sometime, keep it on high for sometime. Keep stirring with a ladle.
    6. Once it is light brown in colour, remove it on a tissue paper.
    7. Put the next batch to fry.
    8. Take the fried ones and put them in a bowl. Add a little salt and chilly powder (1/2 teaspoon). Mix it well.
    9. You need to repeat this step every time.
    10. Store in a air tight container.

    Take a tip:

    • Cut into thin slices.
    • Be careful while frying. Once, it is golden, remove it on a tissue paper. It does not taste good if it gets darker.
    • Add salt and chilly powder accordingly.
    • Close the lid once it is cool.
    Evergreendishesdev

    Bhindi Fry | Okra fry | Ladies finger Fry

    Bhindi fry is a tasty accompaniment that can be used with any meal. 
    Prep Time 15 minutes
    Cook Time 11 minutes
    Total Time 26 minutes
    Servings: 6 people
    Course: Side Dish
    Cuisine: Indian, karnataka, South Indian

    Ingredients
      

    • 1 kilogram bhindi/okra/lady’s finger
    • 3 teaspoon chilly powder
    • salt to taste
    • oil for frying

    Method
     

    1. Wash and pat dry the okra. Cut them into thin pieces.
    2. Heat oil in a pan. 
    3. Once it is heated, add handful of cut pieces slowly into the oil.
    4. Deep fry on medium flame. After a few minutes, fry on high flame for one minute.
    5. Once it is light brown in colour, reduce the flame and remove it on a tissue paper.
    6. Put the next badge of okra pieces to fry.
    7. Put the fried okra in a bowl. Add a little salt and chilly powder to it. Mix it. It is ready to serve.
    8. Repeat for the rest of the cut pieces.

    Notes

    • Cut okra into thin pieces.
    • Add salt and chilly powder accordingly.

    About the event:

    This is an old post which I have redone with  better pictures. Sending it to Foodies_Redoing Old Post 30, a fortnightly event, where we work on a old post. Here I have changed the pictures.

    crispy bhindi fry

    If you have liked this post, do share it with your family and friends. If you ever make this, take a picture and share it by tagging @foodiejayashree on Instagram or @evergreendishes on Facebook or Twitter.

  • Ring Murukku snacks in the jar

    Ring Murukku snacks in the jar

    Ring murukku is another kind of dry snacks. It is from the state of Andhra Pradesh. They are soft but crispy, different from the usual kodbole that we make.

    ring murukku2

    Other snack recipes;

    Kodbole Instant Chakli Poha Chiwda

    Ingredients:

    • 1 cup rice flour
    • 1 tablespoon moong dal
    • 1 cup water
    • salt to taste
    • 1 teaspoon chilli powder
    • asafoetida
    • oil for frying

    Method:

    1. Wash and soak moong dal for half an hour.
    2. Heat one cup of water. Drain the soaked dal and put it in water along with salt.
    3. Once the water, put the rice flour, keep stirring continuously.
    4. When the consistency becomes thick, turn off the gas. Let cool.
    5. Add chilli powder and asafoetida to it. Knead it to a dough.
    6. Take a small ball of the dough and roll into the shape of a ring.
    7. Repeat for a few more balls.
    8. Heat oil in a frying pan.
    9. Once it is hot, put a few murukku (six to seven ) in the oil.
    10. Deep fry on medium flame until golden in colour.
    11. Repeat for the rest of the dough.
    12. Ring Murukku are ready to serve.


    Evergreendishesdev

    Ring Murukku

    5 from 1 vote
    Ring Murukku is another kind of snack that can be made and stored in jars. They are crispy on the outside but soft inside.
    Prep Time 10 minutes
    Cook Time 20 minutes
    Total Time 30 minutes
    Servings: 6 people
    Course: festive treats, kids favourite, Snack, snack in the jar
    Cuisine: Andhra pradesh, Indian

    Ingredients
      

    • 1 cup rice flour
    • 1 tablespoon moong dal
    • 1 cup water
    • salt to taste
    • 1 teaspoon chilli powder
    • asafoetida
    • oil for frying

    Method
     

    1. Wash and soak moong dal in water for thirty minutes.
    2. Heat one cup water. Drain the water from the soaked moong. Put it in water along with salt.
    3. Once it boils, add rice flour and stir continuously, it should come to a thick consistency.
    4. Let cool. Add chilli powder and asafoetida to it and knead well.
    5. Take a small ball of the dough and roll into a ring shape. 
    6. Make a few more rings.
    7. Heat oil in a pan.
    8. Once it is hot, put a few rings (about six or seven) and deep fry on medium flame until golden in  colour.
    9. Remove them on an absorbent paper. 
    10. Repeat for the rest of the dough. Ring murukku are ready to serve.

    Notes

    Make them more circular in shape like a small ring. Mine are not exactly like a ring, could not make them again for the photograph.

    Breakfast is one of the most important meals of the day. Are you struck for ideas in the busy mornings? Do check out this book of mine, “South Indian Breakfast” on Amazon.

    South Indian Breakfast
    South Indian Breakfast

    It is always good to have your feedback. Please do leave a comment below, it really motivates me to write more. If you have liked this post, do share it further.

  • Masale Bhat | Karnataka Recipes

    Masale Bhat | Karnataka Recipes

    Masale Bhat | South indian cooking | rice dishes | masala bhat 

    Masale Bhat is a flavoursome, no onnion garlic rice dish from Karnataka. It is usually prepared  as  part of the festive menu.

    Rice dishes form one of the major attractions in South Indian festivals. Masala Bhath is one such kind which is tasty and can be made with the available ingredients.

    Preparations for Ugadi are on in most of the houses. It is an important festival for the people of South India. It is also celebrated by Sindhis, Marwaris and Manipuris. It falls on  the first day known as Padya in the month of Chaitra of the Hindu calendar. This is considered as the beginning of new year.

    People rise early in the morning, have an oil bath, decorate the house  with mango leaves and pooja is performed. The new panchanga is worshipped and it is customary to make an offering of neem and jaggery mixed with raw mango pieces. It is called as Bevu Bella. It signifies that we should accept both joy and sorrow gleefully.

    Among the sweets, kheer and holige are usually prepared. Today, I am presenting a tasty Masala Bhath to you all. Do read further.

    Here I am using capsicum, potatoes and peas. The potatoes and peas are parboiled. Fresh spice powder adds a good taste, though one can make it ahead and store. I prefer using the freshly made one.


    Masale Bhat is a flavoursome, no onion garlic rice dish from Karnataka. It is usually prepared during festive days as Ugadi and Deepavali.

    The ingredients needed are usually available in all south indian households. The vegetables used here are capsicum, potato and green peas. Do not skip on any of these, it lends a good taste to it.

    Ingredients:

    • 1 cup cooked rice
    • 3 potato
    • 2 capsicum
    • 1 cup green peas
    • 3 teaspoon spice mix
    • 1/2 teaspoon chilli powder
    • salt to taste

    For the seasoning :

    • 3 tablespoon oil
    • 1/2 teaspoon mustard
    • 2 teaspoon bengal gram
    • 2 teaspoon urad dal
    • 1/4 teaspoon asafoetida
    • 1/4 teaspoon turmeric powder
    • a few curry leaves

    For the spice mix:

    • 3 tablespoon  coriander seed
    • 1 tablespoon bengal gram
    • 1 tablespoon urad dal
    • 6 dry red chilli
    • a few curry leaves
    • 2 cloves
    • 15 peppper corn
    • 1 inch cinnamon

    Method :

    1. Cook the rice and keep it aside. The grains of rice  should be separate.
    2. Cut the vegetables.
    3. Put the potatoes to boil, when they are nalf done, add green peas to it.
    4. Make the spice mix by roasting the ingredients separately  under the section,” For the Spice Mix” and grindd them to a powder.
    5. Make seasoning, add mustard seeds, as it crackles put bengal gram urad dal, asafoetida, turmeric powder and capsicum.
    6. Once the capsicum pieces are cooked, put the boiled peas and potato to it.
    7. Add three teaspoon of spice mix, a little chilli powder and salt.
    8. Mix it well, let cook for a minute.
    9. Switch off the gas, put the rice and mix it gently.
    10. You may garnish with fresh coriander.

    Masale Bhat

    Masale Bhat is a flavoursome rice dish from South India. It is usually prepared during festive days.

    Ingredients
      

    • 1 cup cooked rice
    • 3 potato
    • 2 capsicum
    • 1 cup green peas
    • 3 teaspoon spice mix
    • 1/2 teaspoon chilli powder
    • salt to taste
    • For the seasoning :
    • 3 tablespoon oil
    • 1/2 teaspoon mustard
    • 2 teaspoon bengal gram
    • 2 teaspoon urad dal
    • 1/4 teaspoon asafoetida
    • 1/4 teaspoon turmeric powder
    • a few curry leaves
    • For the spice mix:
    • 3 tablespoon coriander seed
    • 1 tablespoon bengal gram
    • 1 tablespoon urad dal
    • 6 dry red chilli
    • a few curry leaves
    • 2 cloves
    • 15 pepper corn
    • 1 inch cinnamon

    Method
     

    1. Cook the rice and keep it aside. The grains of rice  should be separate.
    2. Cut the vegetables.
    3. Put the potatoes to boil, when they are nalf done, add green peas to it.
    4. Make the spice mix by roasting the ingredients separately  under the section,” For the Spice Mix” and grindd them to a powder.
    5. Make seasoning, add mustard seeds, as it crackles put bengal gram urad dal, asafoetida, turmeric powder and capsicum.
    6. Once the capsicum pieces are cooked, put the boiled peas and potato to it.
    7. Add three teaspoon of spice mix, a little chilli powder and salt.
    8. Mix it well, let cook for a minute.
    9. Switch off the gas, put the rice and mix it gently.
    10. You may garnish with fresh coriander.

    Notes

    The rice should be well cooked but the grains must be separate.
    You can keep the spice mix in a clean, airtight container.

    Abot the event :

    Sending this to Foodies _Redoing Old Post 117. An old post got updated with better pictures and the text was modified, the recipe remains the same.

    Pin it :