Tag: accompaniments

  • Restaurant style Veg Hariyali

    Restaurant style Veg Hariyali

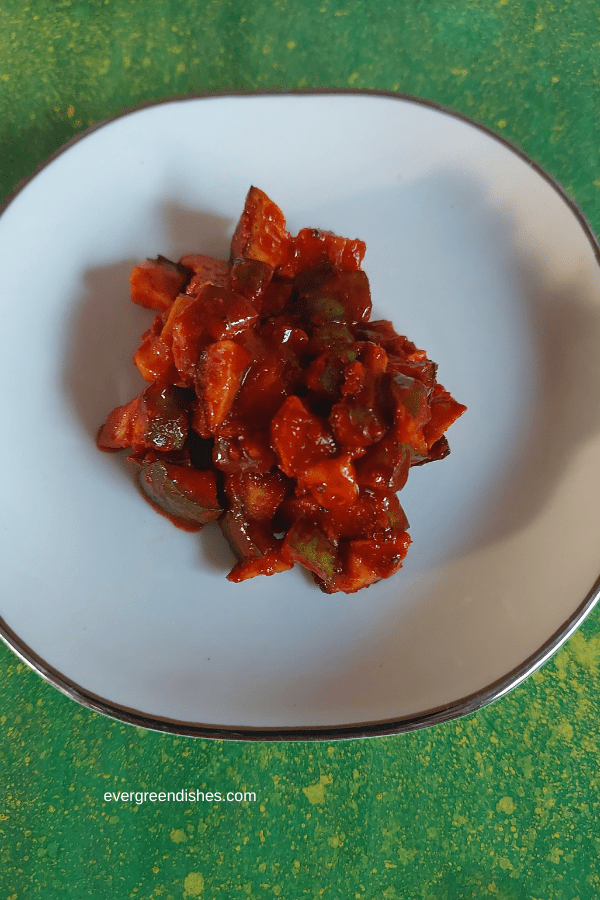
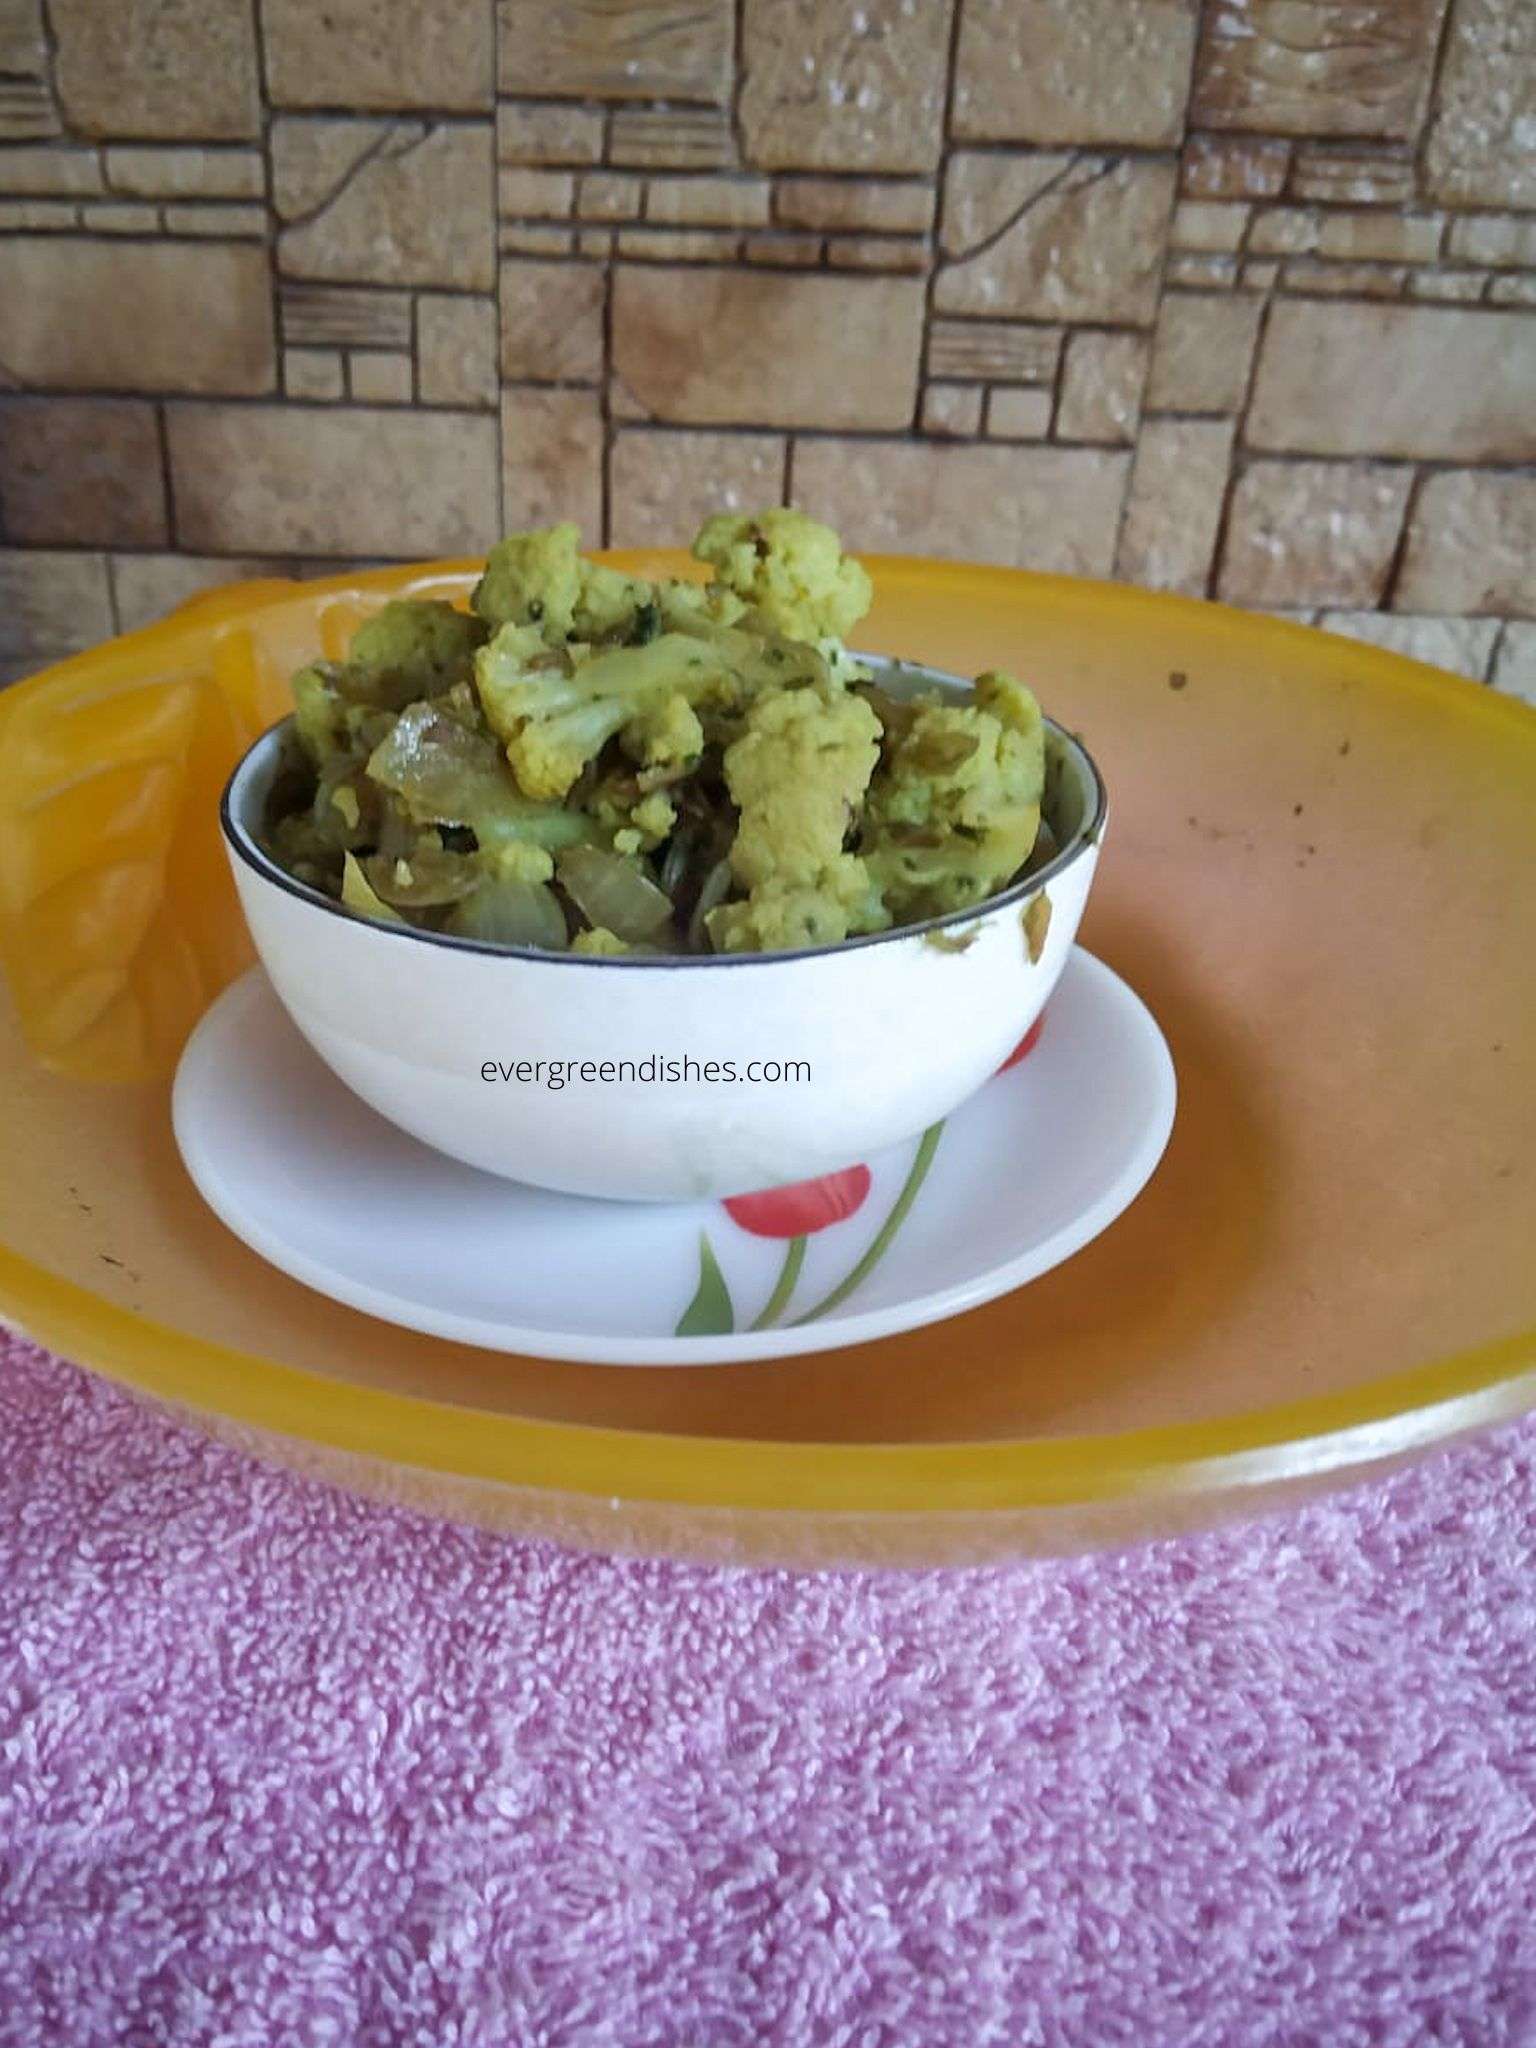
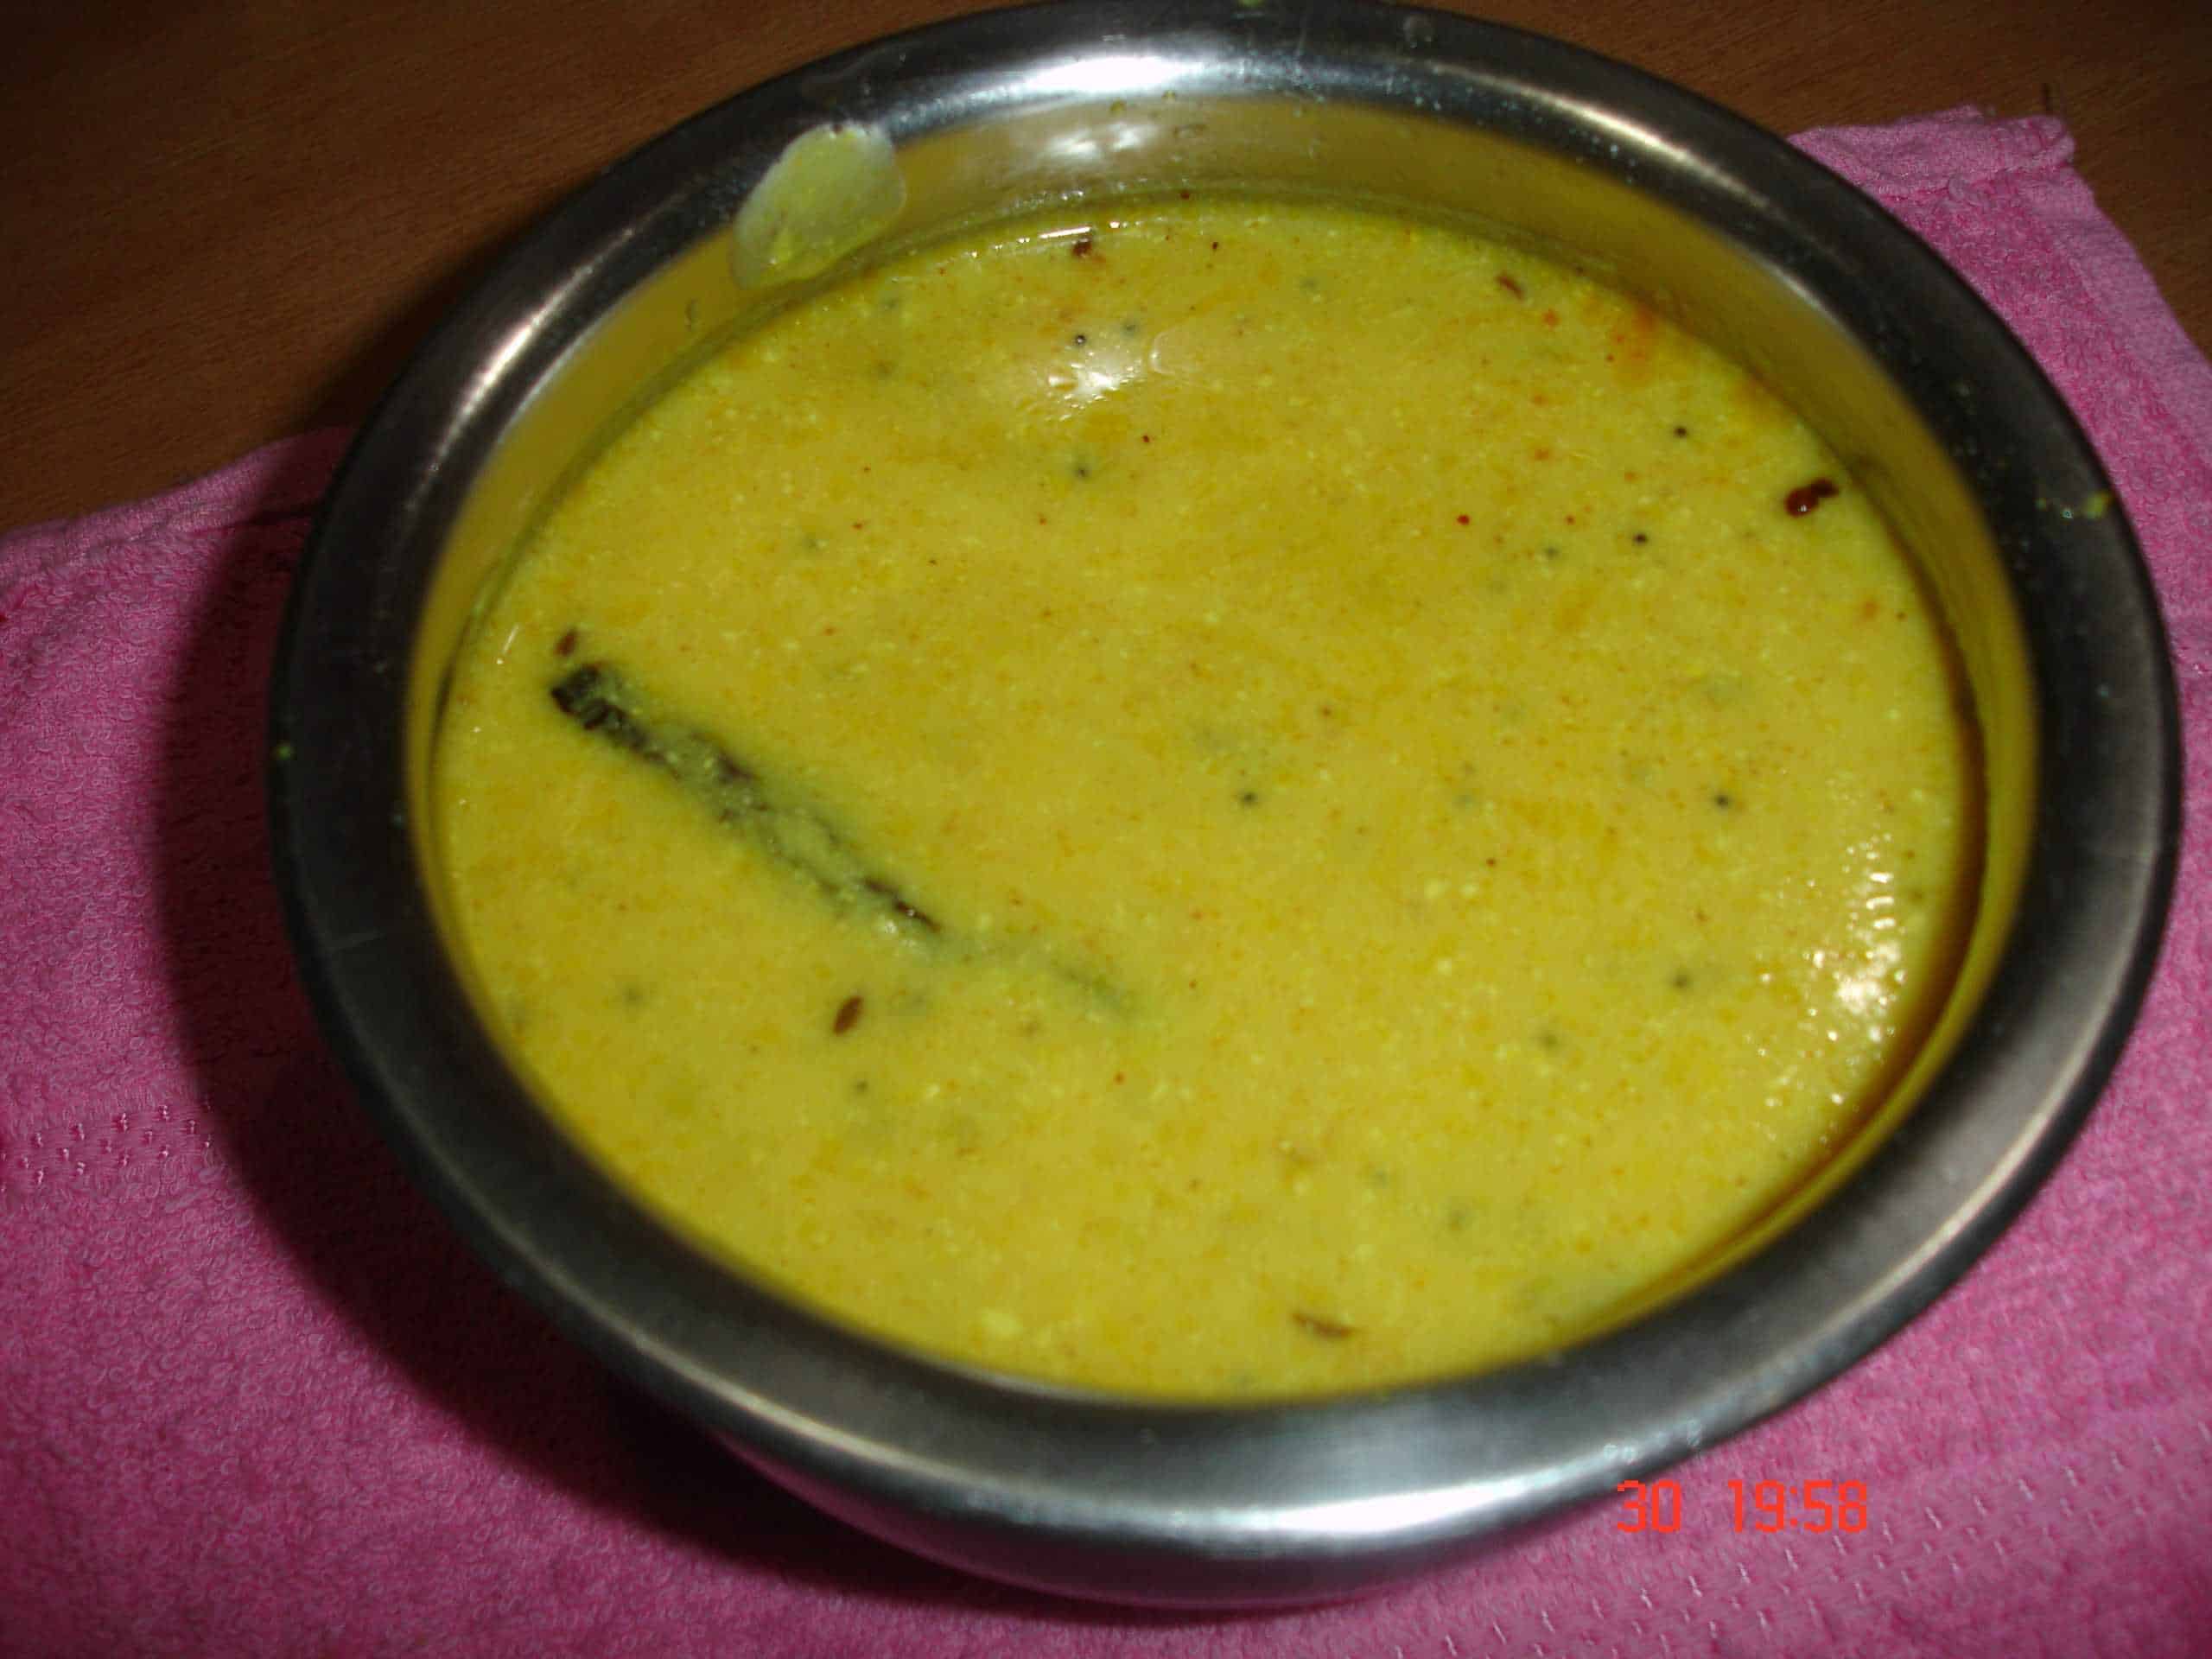
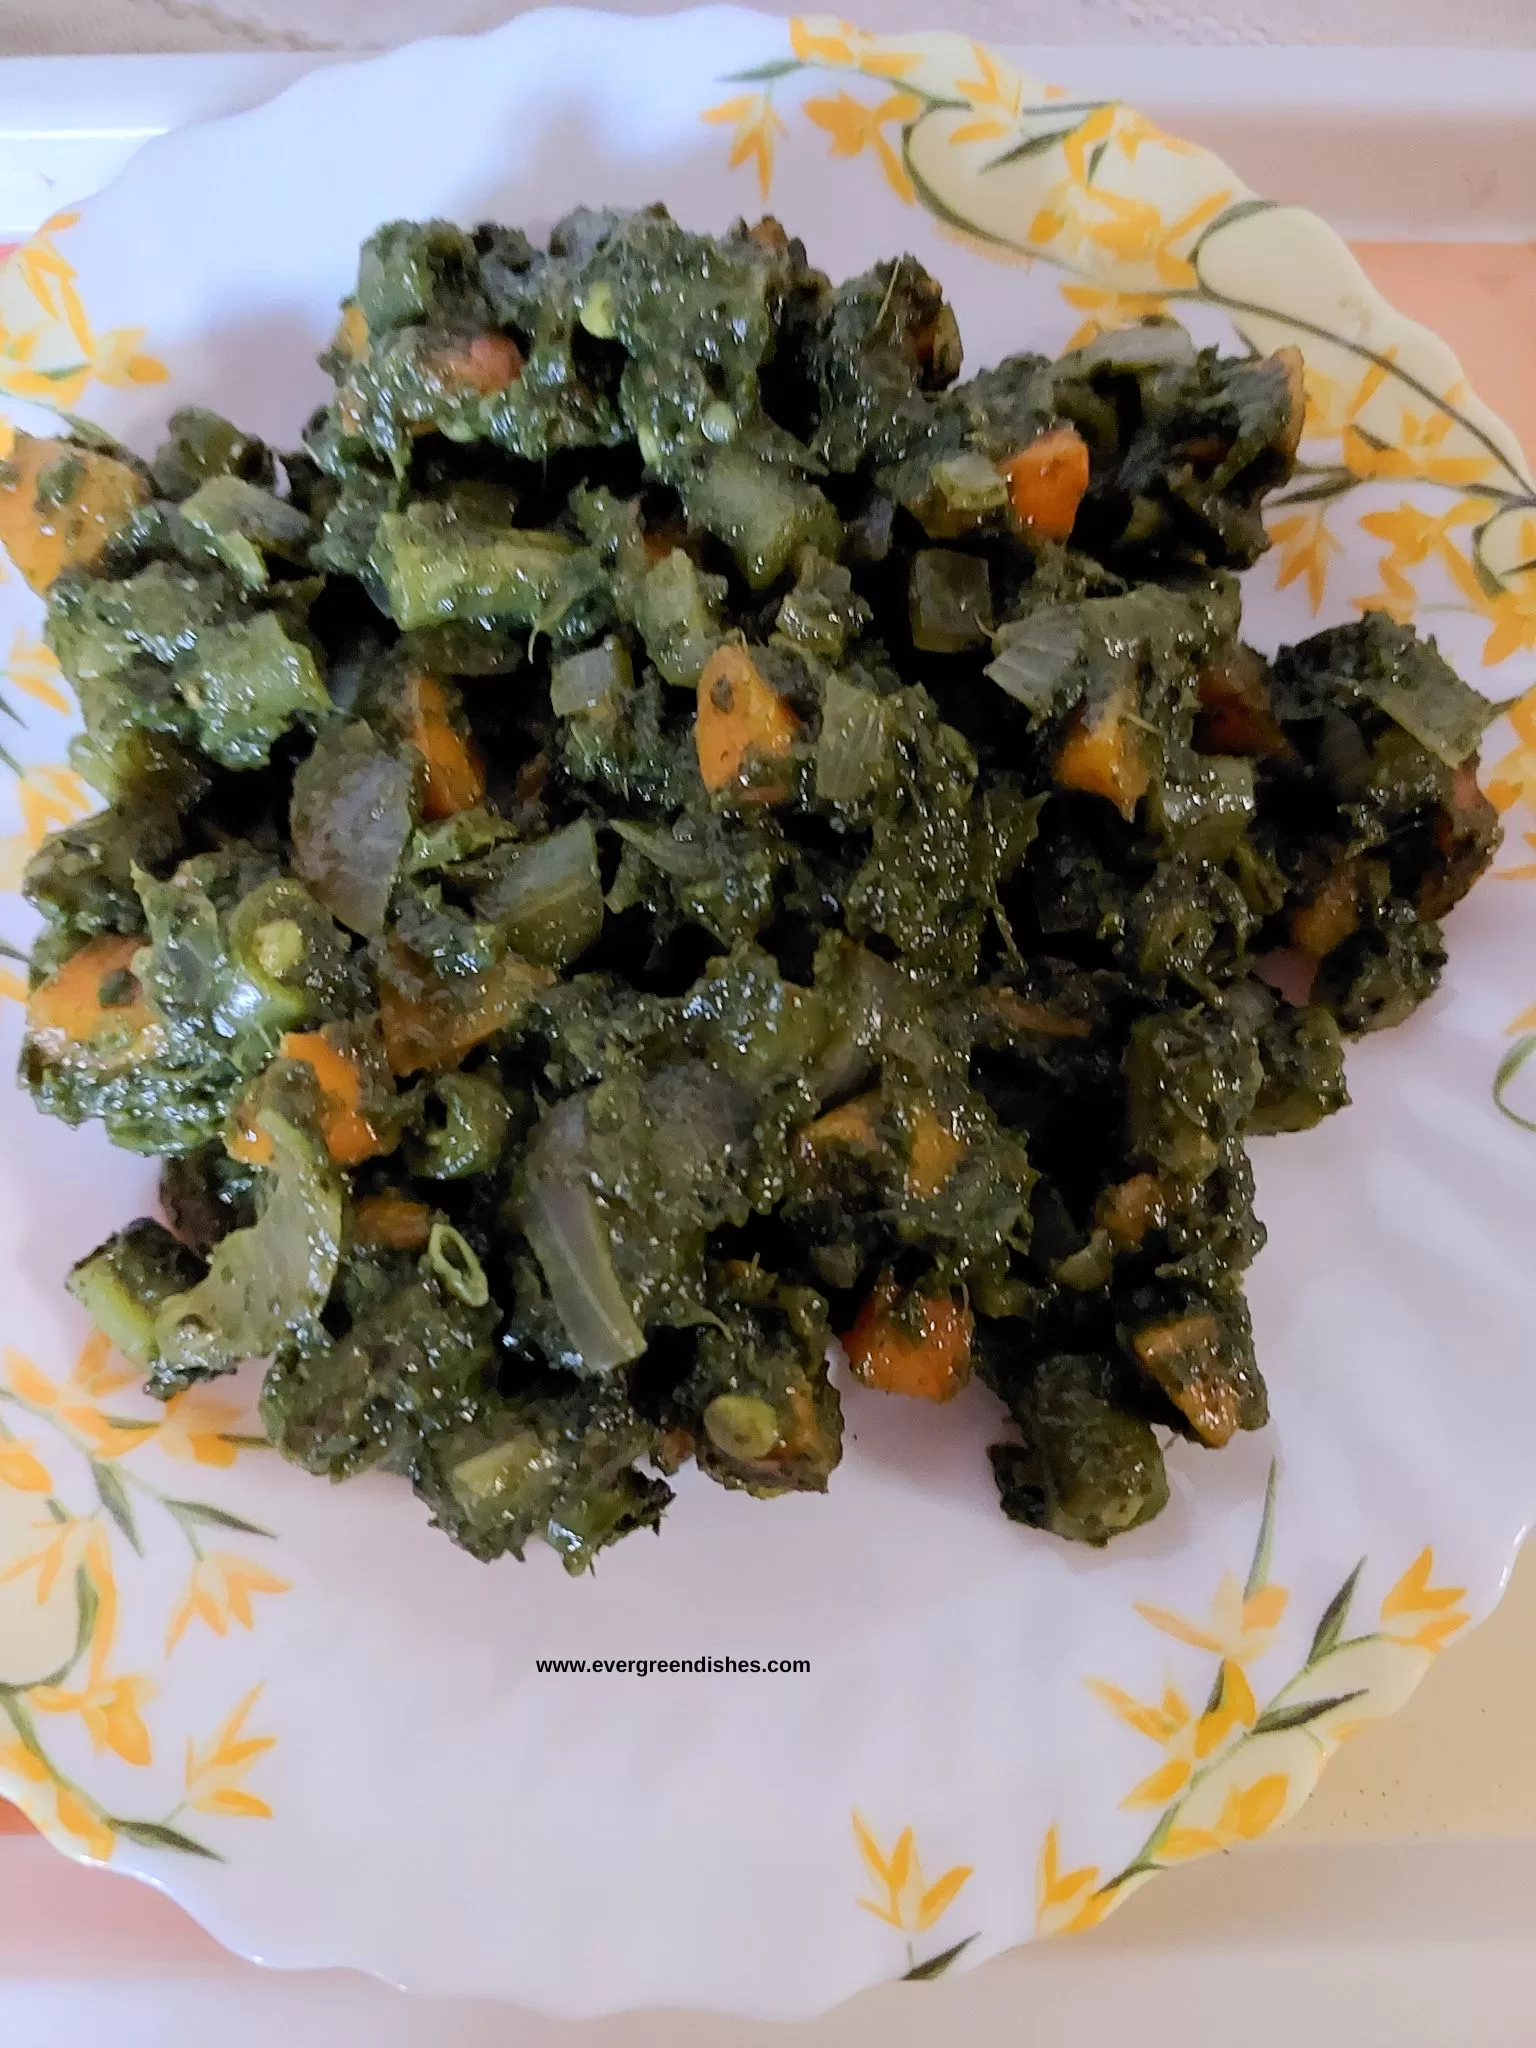
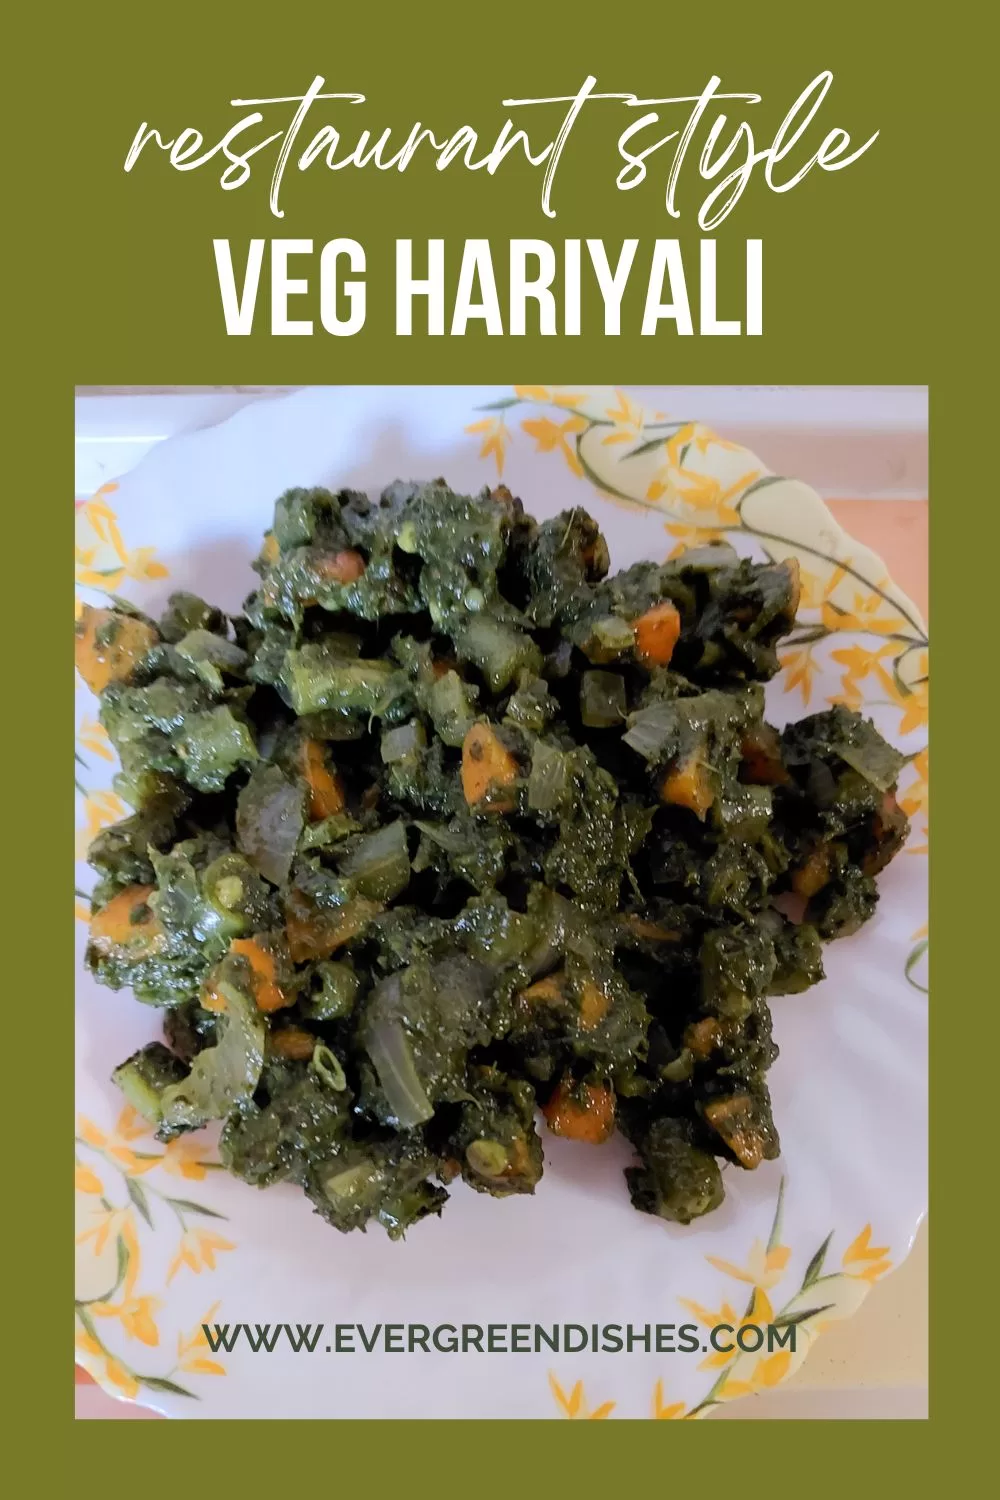
    Veg Hariyali is a tasty accompaniment that goes well with any Indian flat bread. Various vegetables are cooked in spinach puree garnished with some spices.

    “Mamma, what is the curry or sabzi that you have made  along with chapati? ” is the pertinent question that I get each day. Well, accompaniments do enhance the taste of food that we eat. Spinach makes a great accompaniment. Here, is another kind of  side dish that you can make with roti or nan. It is known as  Veg Hariyali.

    Spinach can be used in various dishes. It is healthy and packed with calcium. This accompaniment is made in spinach base along with various vegetables. My other spinach recipes, do check it here:  Five ways to use Spinach

    veg hariyali

    What goes in Veg Hariyali ?

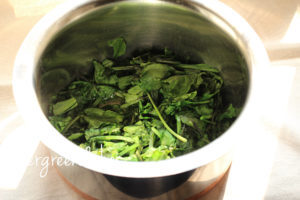
    • Spinach : It is one of the essential ingredient to make veg hariyali. The leaves are seperated from the stalk and blanched.
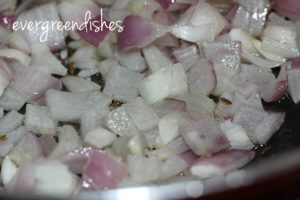
    • Onion
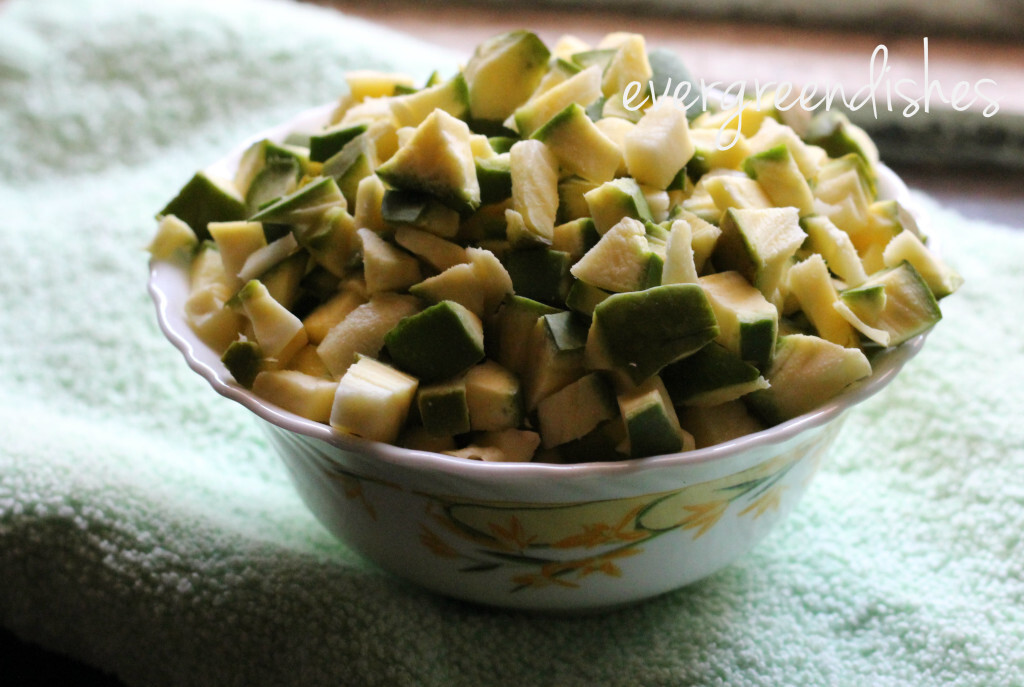
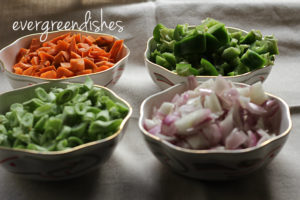
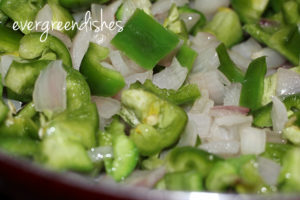
    • Assorted Vegetables : I have used beans, carrot, and capsicum, You may use other vegetables as green peas, sweet corn kernels. The vegetables including onion are cut into big chunks here.
    • Green chilli
    • Ginger : For that good taste
    • Garlic : Lends a good taste but you may avoid it.
    • Pepper powder
    • Pomegranate powder : I usually have it  handy in my pantry.
    • Chaat Masala
    • Chilly powder
    • Milk
    • Salt
    • Oil


    Evergreendishesdev

    Veg Hariyali

    5 from 3 votes
    A tasty accompaniment which goes well with any Indian bread.
    Prep Time 10 minutes
    Cook Time 15 minutes
    Total Time 25 minutes
    Servings: 4 people
    Course: accompaniments, curry, dinner, lunch, Side Dish, vegetable in gravy
    Cuisine: Indian, north indian
    Calories: 150

    Ingredients
      

    • 2 clusters spinach
    • 15 french beans
    • 2 carrots
    • 1 onion
    • 1 capsicum
    • 2 tsp oil
    • 1/2 inch ginger
    • 4 cloves garlic
    • 2 green chilly
    • 1/2 tsp pepper powder
    • 1/2 tsp pomegranate powder
    • 1/2 tsp chaat masala
    • 1/2 tsp chilly powder
    • 1/4 cup milk

    Method
     

    1. Cut the veggies into slightly big chunks.
      veggies
    2. Remove the stalk of spinach and cut it.
      spinach
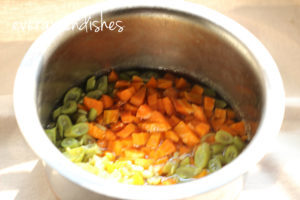
    3. Boil the beans and carrot al dente.
      veggies boiled
    4. Blanch the spinach leaves.
      spinach blanched
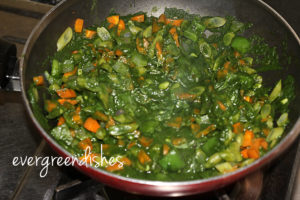
    5. Grind spinach along with ginger, garlic and green chilly to a puree.
    6. Take oil in a pan. Add cumin, as it splutters, put in the onion.
      onions being sauted
    7. Once it turns translucent, add capsicum. Let cook until al dente.
      capsicum to be added
    8. Put the puree. Let cook for sometime.
    9. Add the veggies. 
      Put the veggies
    10. Add the dry spices.
      Throw in the dry spice powders
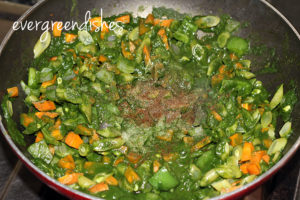
    11. Give a stir, let cook for sometime. Then, add milk to it.
    12. Let cook for a minute. Veg Hariyali is ready to serve.
      Veg Hariyali

    Notes

    Other veggies can be used here.
     

    About the event :

    Sending this to Foodies_Redoing Old Post 118 . It is a fortnightly event, we work on an old post either by editing the text pictures or both. Here, I have changed the pictures. The pin it picture was missing.


    veg hariyali
    veg hariyali

    If you ever make this recipe, do take a picture of it and tag it @foodiejayashree on Instagram or @evergreendishes on Facebook

    Do share it with your family and friends.

    Subscribe to get a book of handyhints for free!


    Subscribe to get a book of handyhints for free!

  • Instant Raw Mango Pickle

    Instant Raw Mango Pickle

    Jump to Recipe

    instant raw mango pickle | easy recipes | vegan recipes | summer special recipes

    Instant Raw Mango Pickle is a simple yet tasty accompaniment. With raw mangoes available, I often make it.

    The best thing about summer is the availability of seasonal fruits as mangoes, watermelon and grapes. I love these fruits, especially mango. It’s also the time when I try my new recipes with these. Here is another version of mango pickle. This instant raw mango pickle is popular in South India. It is not only tasty but can be made quickly with a few ingredients. Use it with curds rice for that gratifying sense of satisfaction.

    Among all the pickles, mango pickle is most popular. Instant variety are a hit as they can be prepared easily  and stored in refrigerator for a couple of days.

    instant raw mango pickle
    instant raw mango pickle

    Instant raw mango pickle

    Recipe Type: Pickles
    Cuisine: south india
    Author: Jayashree
    Prep time:
    Total time:
    Serves: 4
    An easy to make pickle served at all functions in South India

    Ingredients

    • 2 Raw mango
    • 1 teaspoon chilly powder
    • 1/4 teaspoon turmeric powder
    • 1 teaspoon pickle mix
    • 1 teaspoon salt  (adjust accordingly)
    • 1 tablespoon oil
    • 1/4 teaspoon mustard seeds
    • 1/4 teaspoon asafoetida

    Instructions

    1. wash and cut the mango into small pieces.
    2. Add salt, turmeric powder, chilli powder and pickle mix.
    3. Make seasoning by heating oil. Add mustard seeds, as it crackles add asafoetida.
    4. Pour it over the pickle and mix.
    5. Instant raw mango pickle is ready to serve.

    Notes

    Adjust salt and chilly powder according to the taste. Consume within two or three days.


    raw mangoes
    raw mangoes

    Raw mango, wash and wipe it dry.

    mango pieces
    mango pieces

    Raw mango is cut into small pieces. It should be firm and sour to make pickles.

    pickle mix
    pickle mix

    The pickle mix powder can be made and kept in a small air tight bottle. Dry roast two table spoons of mustard seeds and one table spoon of methi seeds seperately. When cool, grind them to a powder and store .

    dry powders
    dry powders

    Turmeric powder, chilli powder, salt and pickle mix


    all spices sprinkled
    all spices sprinkled

    all the spice powders are sprinkled.

    mango pickle with seasoning
    mango pickle with seasoning

    Make the seasoning and put it over it.

    instant raw mango pickle
    instant raw mango pickle

    Instant Raw Mango Pickle is ready.

    Drooling !

    The other variety of pickle is here. Click the link below

    Instant Mango Pickle

    About the event :

    An old post just got updated with a better final picture. Sending this to the Fooodies_Redoing Old Post 103. Here, I have added a few better pictures, the recipe remains the same.

    Print Recipe
    Evergreendishesdev

    Instant Raw Mango Pickle

    Instant Raw Mango Pickle is a tasty accompaniment from South India.
    Prep Time 10 minutes
    Total Time 10 minutes
    Course: accompaniments

    Ingredients
      

    • 2 raw mango
    • 1 teaspoon chilli powder
    • 1 teaspoon salt
    • 1/4 teaspoon turmeric powder
    • 1 teaspoon pickle mix
    • 1 tablespoon oil
    • 1/4 teaspoon mustard seed
    • 1/4 teaspoon asafoetida

    Method
     

    1. Wash and cut the mango into small pieces.
    2. Add salt, turmeric powder, chilli powder and pickle mix.
    3. Make seasoning by heating oil. Add mustard seeds, as it crackles add asafoetida.
    4. Pour it over the pickle and mix.
    5. Instant raw mango pickle is ready to serve.

    Notes

    Adjust salt and chilly powder according to the taste. Consume within two or three days.

    Pin it for later :

    instant raw mango pickle
    instant raw mango pickle


    Subscribe to get a book of handy hints for free !

    book of handyhints
    book of handyhints


  • Instant Mango pickle

    Pickles add taste and zing to the food that we eat. These are loved and consumed by all. Pickles are usually made during summer and stored in earthen jars to consume for the whole year. Thus, as Wikipedia says, pickling is a process of preserving or expanding the life span of food by either anaerobic fermentation in brine or immersion in vinegar. But, there are versions of instant pickles too which stay good for a couple of days. Here is one such kind, “Instant Mango Pickle”. (more…)

  • Kempu Chutney | Red Coconut Chutney

    Kempu Chutney | Red Coconut Chutney

    Red coconut chutney makes a good accompaniment with hot steamed rice topped with a dollop of ghee. It pairs well with idli and dosa too. This chutney is often made in South Canara region.

    Today, I am presenting to you a tasty chutney which is ideal accompaniment with rice. This is also from mangalore cuisine. This, coconut chutney using dry red chilly is simply divine, one of the simple pleasures of life I can say. Use it with steaming hot rice with a dollop of ghee, rasam  and papads for a satisfying  meal.

    Here, coconut is roasted and then used, thus it stays good for sometime. The best part of red coconut chutney recipe is  you can use slightly odd smelling coconuts, which tend to remain in the refrigerator for some time. I think many women can relate to this fact. During the festive days, we offer coconut and they get accomodated.

    My other Mangalorean dishes :

    Now, over to the recipe below :

    Coconut chutney with dry red chilly
    Recipe Type: Chutneys
    Cuisine: Mangalore
    Author: Jayashree
    Prep time:
    Total time:
    Serves: 4
    a tasty accompaniment with hot rice.

    Ingredients

    • 1/2 cup fresh coconut grated
    • 6 dry red chillies
    • 1 teaspoon methi seeds
    • 2 teaspoon tamarind pulp
    • salt to taste
    • a small piece jaggery
    • a few curry leaves
    • oil for roasting
    • For seasoning :
    • 2 teaspoon oil
    • 1/4 teaspoon mustard seed
    • a pinch of asafoetida a pinch
    • 1/4 teaspoon turmeric powder

    Instructions

    1. Take a pan and roast the methi seeds till light brown in colour. Put it aside on a plate.
    2. Add a little oil and roast the dry chillies. Put them beside the methi seeds.
    3. In the same pan put the coconut gratings . You can add a few curry leaves, it gives a good aroma. Roast it on a low flame for sometime. You need to keep stirring with a long handle, otherwise it will get burnt. Let cool.
    4. Grind all these ingredients together along with a little jaggery, tamarind pulp and salt.
    5. Remove the chutney and put it in a bowl.
    6. Make seasoning in a small pan. Take oil and heat it, add mustard seeds, as they crackle add asafoetida and turmeric powder. Add to the chutney and mix well. Serve with rice.

    Notes

    • This chutney can also be used with chapati, idli or dosa.
    • Coconut oil may be used for the authentic taste.
    kempu chutney | red cconut chutney
    Evergreendishesdev

    Coconut chutney with dry red chilly

    A tasty accompaniment with hot steamed rice and a dollop of ghee.
    Prep Time 10 minutes
    Cook Time 10 minutes
    Total Time 20 minutes
    Course: Side Dish
    Cuisine: karnataka, South Canara

    Ingredients
      

    • 1/2 cup fresh coconut grated
    • 6 dry red chillies
    • 1 teaspoon methi seeds
    • 2 teaspoon tamarind pulp
    • salt to taste
    • a small piece jaggery
    • a few curry leaves
    • oil for roasting
    • For seasoning :
    • 2 teaspoon oil
    • 1/4 teaspoon mustard seed
    • a pinch of asafoetida
    • 1/4 teaspoon turmeric powder

    Equipment

    • 1 kadai
    • 1 big spoon
    • 1 mixer with jar and lid
    • 1 small bowl
    • 1 serving spoon

    Method
     

    1. Take a pan and roast the methi seeds till light brown in colour. Put it aside on a plate.
    2. Add a little oil and roast the dry chillies. Put them beside the methi seeds.
    3. In the same pan put the coconut gratings . You can add a few curry leaves, it gives a good aroma. Roast it on a low flame for sometime. You need to keep stirring with a long handle, otherwise it will get burnt. Let cool.
    4. Grind all these ingredients together along with a little jaggery, tamarind pulp and salt.
    5. Remove the chutney and put it in a bowl.
    6. Make seasoning in a small pan. Take oil and heat it, add mustard seeds, as they crackle add asafoetida and turmeric powder. Add to the chutney and mix well. Serve with rice.

    Notes

    This chutney can also be used with chapati, idli or dosa.

    About the event :

    This is one of the first posts I wrote. Today, on 10/9/23 I have changed the pictures and also added the pin it image. Sending this to the fortnightly event, Foodies Redoing Old Post _109. The next time you have excess coconut at home, do not forget to try this one.

    If you ever make kempu chutney or any of my other dishes,  do take a picture and tag @foodiejayashree on Instagram or @evergreendishes on Facebook or Twitter. I will be glad to see your creation and share it further. Let’s be connected, do follow on social media platforms. Until next time, let’s stay connected.  Subscribe to get all updates and an e-book for free. Check out my e-books on Amazon.  Happy Cooking !

  • Spinach chutney / Palak chutney

    Spinach chutney / Palak chutney

    Spinach chutney is  one of the lesser known accompaniment to many. It pairs well with hot steamed rice. It is ideal to serve with chapati or jowar roti too.

    Chutneys form an integral part of the lunch menu in many households, it can be served both with plain rice or the flat breads. Here is one kind of chutney, that is sure to be a crowd pleaser. Spinach chutney is not only healthy but also tasty.

    Spinach is a super food consisting of Vitamin A and K, magnesium,iron , folate and potassium. It helps increase insulin level. lower blood pressure, prevents cancer, good  for asthamatic patients. Being rich in dietary fibre, it helps in preventing constipation. One needs to find ways to incorporate spinach in their diet.

    My other posts of this wonderful spinach can be read here in the post 5 ways to use spinach

    Spinach chutney / Palak chutney

    Spinach Chutney Recipe / Palak Chutney

    Ingredients:
    • spinach leaves of 2 bunch
    • green chilly 3-4
    • methi seeds 1/2 tsp
    • coconut 1/2 bowl
    • tamarind pulp 2tsp
    • salt to taste
    • oil

    Instructions

    1. Remove the stalk of spinach leaves.Chop and put them in water. All the impurities settle down. Put them in a colander.
    2. Take a drop of oil and roast the fenugreek seeds. Put them aside.
    3. Add half teaspoon of oil, add the green chilly and then the spinach leaves and salt . Let cook for a while. Switch off the gas and let cool.
    4. Grind all ingredients together in a mixer.
    5. To serve;
    6. Make seasoning with a little asafoetida anda pinch of turmeric powder. Add it to the prepared chutney and serve.
    Notes
    Adjust the amount of green chilly to your preference.
    About the event:
    This is an old post which I have redone with better pictures. Sending this Foodies_Redoing Old Post 38. It is  a fortnightly event where we work upon an old post.


    Spinach chutney / Palak chutney

    Spinach Chutney / Palak chutney

    Serve this chutney with hot rice and ghee, it tastes yum. It can also be eaten with jowar roti.
    Prep Time 10 minutes
    Cook Time 10 minutes
    Course: chutney,
    Cuisine: karnataka

    Ingredients
      

    • 2 bunch spinach
    • 4-5 green chilly
    • 1/2 teaspoon methi seeds
    • 1/2 bowl coconut
    • 2 teaspoon tamarind pulp
    • salt to taste
    • oil

    Method
     

    1. Remove the stalk of spinach leaves.Chop and put them in water. All the impurities settle down. Put them in a colander.
    2. Take a drop of oil and roast the fenugreek seeds. Put them aside.
    3. Add half teaspoon of oil, add the green chilly and then the spinach leaves and salt . Let cook for a while. Switch off the gas and let cool.
    4. Grind all ingredients together in a mixer.
    5. Make seasoning with a little asafoetida anda pinch of turmeric powder. Add it to the prepared chutney.

    Pin it for later:

    Spinach chutney


    If you ever make any of these recipes, take a picture and share it by tagging @foodiejayashree on Instagram or @evergreendishes on Facebook. I will be glad to see and share your creation further.
    Check out my e-books on Amazon. Do not miss any post, subscribe to get all updates and an e-book for free !


  • Easy Cauliflower stir fry

    Easy Cauliflower stir fry

    Cauloflower Stir Fry is an easy to make, tasty side dish from North Indian cuisine.

    Cauliflower, popularly known as gobi,  can be used in a wide range of dishes. It is extensively used in curries, stirfry and starters. It is one of the veggies liked by kids today.

    This vegetable needs to be cleaned properly as it is the home to many tiny worms. Keep the florets immersed in hot water to which salt and turmeric is added.


    Various kind of dishes can be made using cauliflower. Cauliflower stir fry is easy to prepare and tasty.  It goes well with chapatis and phulkas. The other cauliflower dishes posted are : Gobi Manchurian is one of the preferred snacks at home.

    cauliflower stir fry
    cauliflower stir fry

    Cauliflower Stir Fry Recipe

    Ingredients:

    • 1 small cauliflower
    • 2 onion
    • 1/2 bunch coriander
    • 1 inch ginger
    • 2 green chilly
    • 1/2 tsp cumin
    • 1/4 tsp turmeric powder
    • 2 tsp  oil
    • salt to taste

    Pre- requisites :

    • Take small florets of cauliflower and boil till tender with a pinch of salt and turmeric powder.
    • Chop onion finely.
    • Grind coriander, ginger and green chilly to a paste.

    Method:

    • Take a pan and add the oil. Add cumin, after a second, add the onions and turmeric powder to it. Saute for a while.
    • Add the ground paste and salt to it. Mix well.
    • Drain the water and add the florets. Mix well.
    • Let the flavours blend together.
    • Cauliflower stir fry is ready to serve.
    • Serve with chapati or phulka.

    cauliflower stir fry

    Cauliflower Stir Fry

    5 from 2 votes
    Cauliflower Stir Fry is an easy to make, tasty side dish. It pairs well with chapathi or phulka.
    Prep Time 10 minutes
    Cook Time 10 minutes
    Total Time 20 minutes
    Course: dinner, lunch
    Cuisine: north indian

    Ingredients
      

    • 1 small cauliflower
    • 2 onion
    • 1/2 bunch coriander
    • 1 inch ginger
    • 2 green chilly
    • 1/2 tsp cumin
    • 1/4 tsp turmeric powder
    • 2 tsp oil
    • salt to taste

    Equipment

    • 1 pan
    • 1 ladle
    • 2 bowls

    Method
     

    Pre- requisites :
    1. Take small florets of cauliflower and boil till tender with a pinch of salt and turmeric powder.
    2. Chop onion finely.
    3. Grind coriander, ginger and green chilly to a paste.
    Method:
    1. Take a pan and add the oil. Add cumin, after a second, add the onions and turmeric powder to it. Saute for a while.
    2. Add the ground paste and salt to it. Mix well.
    3. Drain the water and add the florets. Mix well.
    4. Let the flavours blend together.
    5. Cauliflower stir fry is ready to serve.
    6. Serve with chapati or phulka.

    About the event:

    Sending this to Foodies_Redoing Old Post 80, a fortnightly event. I have made this stir fry since I have put it here. I like to make this simple stir fry with chapathi. Now, I have put better pictures here, the recipe remains the same.

    Pin it for later:

    cauliflower stir fry
    cauliflower stir fry


    If you ever make this stir fry, take a picture and share with @foodiejayashree on Instagram or @evergreendishes on Facebook. Subscribe to get all updates and an e-book for free!


  • Andhra rasam | Andhra Style Rasam Recipe

    Andhra rasam | Andhra Style Rasam Recipe

    Jump to Recipe Print Recipe

    Andhra rasam is popular for its exotic taste, the blend of pure spices with garlic makes all the difference.  It is a comfort food with a few papad and pickle.

    Among the various kind of rasam I prepare, this is the favourite of my son. Well, frankly, I do not know, how long he shall relish it, for all things should change.  Here, the whole spices are ground with garlic and used as the basic rasam powder. Tamarind pulp is boiled and later, the cooked dal is mixed to it with adequate amount of water. This post is part of blog hop team Culinary Hoppers with the theme “Regional Cuisine”. My earlier post  is here.

    andhra rasam
    andhra rasam

    Ingredients :

    • Tomato 1
    • Tuvar dal 1 small cup
    • oil 1 tsp
    • mustard seeds 1/2 tsp
    • turmeric powder 1/2 tsp
    • asafoetida a pinch
    • curry leaves a few
    • tamarind a small ball
    • coriander seeds  2 tsp
    • pepper 1 tsp
    • garlic 6 cloves
    • red chilli 2
    • salt to taste
    • water

    Method :

    Pre requisites :

    • Chop the tomato to small pieces.
    • Extract the pulp of tamarind.
    • Dry grind coriander seeds, pepper and garlic in the mixer.
    • Cook the tuvar dal in pressure with adequate amount of water.

    Take a tip :

    • If you want more spicy, grind one red chilly along with the spices.
    • To make it gluten free , avoid using asafoetida.

    Preparation :

    Take a small pan and add oil to it. Make the seasoning and add the tomato pieces to it along with salt and some water. Let cook. Add tamarind pulp to it. Let boil. Then,add the pounded mixture to it. Let the smell of the spices infuse into it. Mash the cooked dal well with the ladle. Put it into the boiling mixture. Add water to the required consistency. Let boil on a slow flame. Andhra rasam is ready to serve. Ideal with hot rice.

    Pin it for later:


    andhra rasam
    andhra rasam
    andhra rasam
    Evergreendishesdev

    Andhra Rasam

    Andhra rasam is another variety of rasam made with a few spices and garlic. It is tasty and can be easily prepared.
    Course: accompaniments
    Cuisine: Andhra pradesh, South Indian

    Ingredients
      

    • 1 small cup Tuvar dal
    • 1 tomato
    • 1 tesp oil
    • 1/2 tsp mustard seeds
    • 1/2 tsp turmeric powder
    • asafoetida a pinch
    • curry leaves a few
    • tamarind a small ball
    • 2 tsp coriander seeds
    • 1 tsp pepper
    • 6 clovesgarlic
    • 2 red chilli 2
    • salt to taste
    • water

    Method
     

    Pre requisites :
    1. Chop the tomato to small pieces.
    2. Extract the pulp of tamarind.
    3. Dry grind coriander seeds, pepper and garlic in the mixer.
    4. Cook the tuvar dal in pressure with adequate amount of water.
    Preparation :
    1. Take a small pan and add oil to it. Make the seasoning and add the tomato pieces to it along with salt and some water. Let cook. Add tamarind pulp to it. Let boil. Then,add the pounded mixture to it. Let the smell of the spices infuse into it. Mash the cooked dal well with the ladle. Put it into the boiling mixture. Add water to the required consistency. Let boil on a slow flame. Andhra rasam is ready to serve. Ideal with hot rice.

    Subscribe to get a book of handy hints and recipes in your inbox. Do share this recipe if you have liked it.  Your comments are much appreciated. If you ever make this recipe, take a picture and tag @foodiejayashree on Instagram or @evergreendishes on Facebook or Twitter. I will be glad to see your creation and share it further. 

    Have a look at the various cuisines here:

  • Rasam delight of good food

    After a few days of eating outside food, there  is no bigger delight than having a simple meal of rice and rasam at home. It is the daily requirement of many people in South India. Rasam, is the accompaniment used with plain rice. It is of thinner consistency when compared to sambar.

    (more…)

  • Alu Methi | no onion garlic recipe

    Alu Methi | no onion garlic recipe

    Alu Methi is a popular accompaniment that tastes good with any Indian flat bread. It is lightly tossed with spices in a seasoning of fenugreek leaves.
    I make this dish quiet often; primarily for three reasons, it is easy to make, liked by my family and ideal for those days of no onion -garlic. Yes,it is sans these two ingredients.

    My other potato dishes : Alu Jeera, Potato Bonda

    alu methi
    alu methi

    INGREDIENTS:

    • 4 Potatoes
    • 2 clusters fenugreek leaves
    • 1 1/2  teaspoon coriander powder
    • 1/2 teaspoon cumin
    • 1 teaspoon chilli powder
    • 2 green chilli
    • 1 tablespoon oil
    • 1/4 teaspoon mustard seed
    • 1/4 teaspoon asafoetida
    • 1/4 teaspoon turmeric powder
    • salt to taste
    alu methi
    alu methi


    PROCEDURE :

    Boil the potatoes in a pressure cooker. When cool, peel the skin and cut them into cubes. Keep aside. Make seasoning, when the mustard seeds crackle, add cumin, asafoetida and green chilly by splitting into two pieces. Add fenugreek leaves. Let cook, saute and add the coriander powder, salt and red chilly powder. Now add the potato  cubes and mix well. Alu Methi is ready to serve.Tastes good with phulka or chapatis.

    A few similar kind of recipes from my blogging friends

    alu methi
    Evergreendishesdev

    Alu Methi

    Alu Methi is a popula, vegan, no onion garlic accompaniment. It pairs well with any Indian flat bread.
    Course: dinner, lunch
    Cuisine: north indian

    Ingredients
      

    • 4 Potatoes
    • 2 clusters fenugreek leaves
    • 1 1/2 teaspoon coriander powder
    • 1/2 teaspoon cumin
    • 1 teaspoon chilli powder
    • 2 green chilli
    • 1 tablespoon oil
    • 1/4 teaspoon mustard seed
    • 1/4 teaspoon asafoetida

    Notes

    Boil the potatoes in a pressure cooker. When cool, peel the skin and cut them into cubes. Keep aside. Make seasoning, when the mustard seeds crackle, add cumin, asafoetida and green chilly by splitting into two pieces. Add fenugreek leaves. Let cook, saute and add the coriander powder, salt and red chilly powder. Now add the potato  cubes and mix well. Alu Methi is ready to serve.Tastes good with phulka or chapatis.

        Let’s be connected and do share if you have liked it !


  • Rajasthani Kadhi

    Rajasthani Kadhi

    Kadhi is a popular accompaniment served with plain rice or jeera rice. It is a yoghurt based dish, usually served along with steamed rice. It is prepared in different kinds in different parts of the country. Today, I am presenting you with the tasty Rajasthani Kadhi.  

    The other Rajasthani recipes shared earlier are : Vegetable Curry, Moong Dal Bada,

    Rajasthani Kadhi
    Rajasthani Kadhi

    INGREDIENTS :

    measurement: 1 cup=250ml

    • 1 cup sour curds (yoghurt)
    • 2 tablespoon gram flour
    • 1/4 teaspoon turmeric powder
    • salt to taste
    • 2.5 cups water
    • 1.5 tablespoon oil
    • 1/2 teaspoon mustard seeds
    • 1/4 teaspoon fenugreek seeds
    • 1/2 teaspoon cumin
    • 1 small bay leaf
    • 1/4 teaspoon chilli powder
    • 1-2 red chillies


    METHOD :

    Whisk the curds, add the salt, turmeric  water and gram flour and mix well. Put it in a thick bottom pan and let simmer Make seasoning by taking oil in a small pan. You can use ghee too.Add mustard seeds, as they splutter add cumin, fenugreek ,asafoetids and bay leaf. Break the  red chillies and put it, let cook for a while. Remove from flame and chilli powder. Add it to the kadhi and keep aside for sometime.

    To make it gluten-free, avoid using asafoetida.

    The recipe is adopted from here.

    Rajasthani Kadhi
    Evergreendishesdev

    Rajasthani Kadhi

    Rajasthani kadhi and steamed rice is a soulful food anytime. Serve it with a few appalams and pickle for a tasty meal
    Prep Time 10 minutes
    Cook Time 10 minutes
    Total Time 20 minutes
    Servings: 4
    Course: Side Dish
    Cuisine: Indian, rajasthani,

    Ingredients
      

    • 1 cup sour curd (yoghurt)
    • 2 tbsp gram flour
    • 1.5 tbsp oil
    • 1/2 tsp mustard seeds
    • 1/4 tsp mustard seeds
    • 1/2 tsp cumin
    • 1-2 red chilly
    • 1/2 tsp turmeric powder
    • salt to taste
    • 1 small bay leaf
    • 1/4 tsp red chilly powder

    Method
     

    1. Whisk the curds with water. Add turmeric powder, gram flour and mix well.
    2. Put it in a thick pan and simmer on low flame. Add salt to it.
    3. Make seasoning, add mustard seeds, as it splutters put fenugreek, cumin, bay leaf and red chilly to it. Remove from flame, put chilly powder to it. Pour it over the kadhi.
    4. Let cook for one minute. Close and keep it for sometime.

    SUBSCRIBE TO GET A FREE E-BOOK

    book pic