Author: Evergreendishesdev

  • Veg fried rice recipe | Vegetable Fried Rice

    Veg fried rice recipe | Vegetable Fried Rice

    Fried rice is a signature dish of the Chinese. It is mainly a non vegetarian dish, but today this version is also popular.  The mild pungent taste  blended well with the vegetables making it a favourite amongst many of us. 

    It is a delicious dish which can be served by itself, filled with robust flavour. It is easy to prepare and gets ready in 30 minutes. It is ideal to serve for lunch, brunch or dinner. 

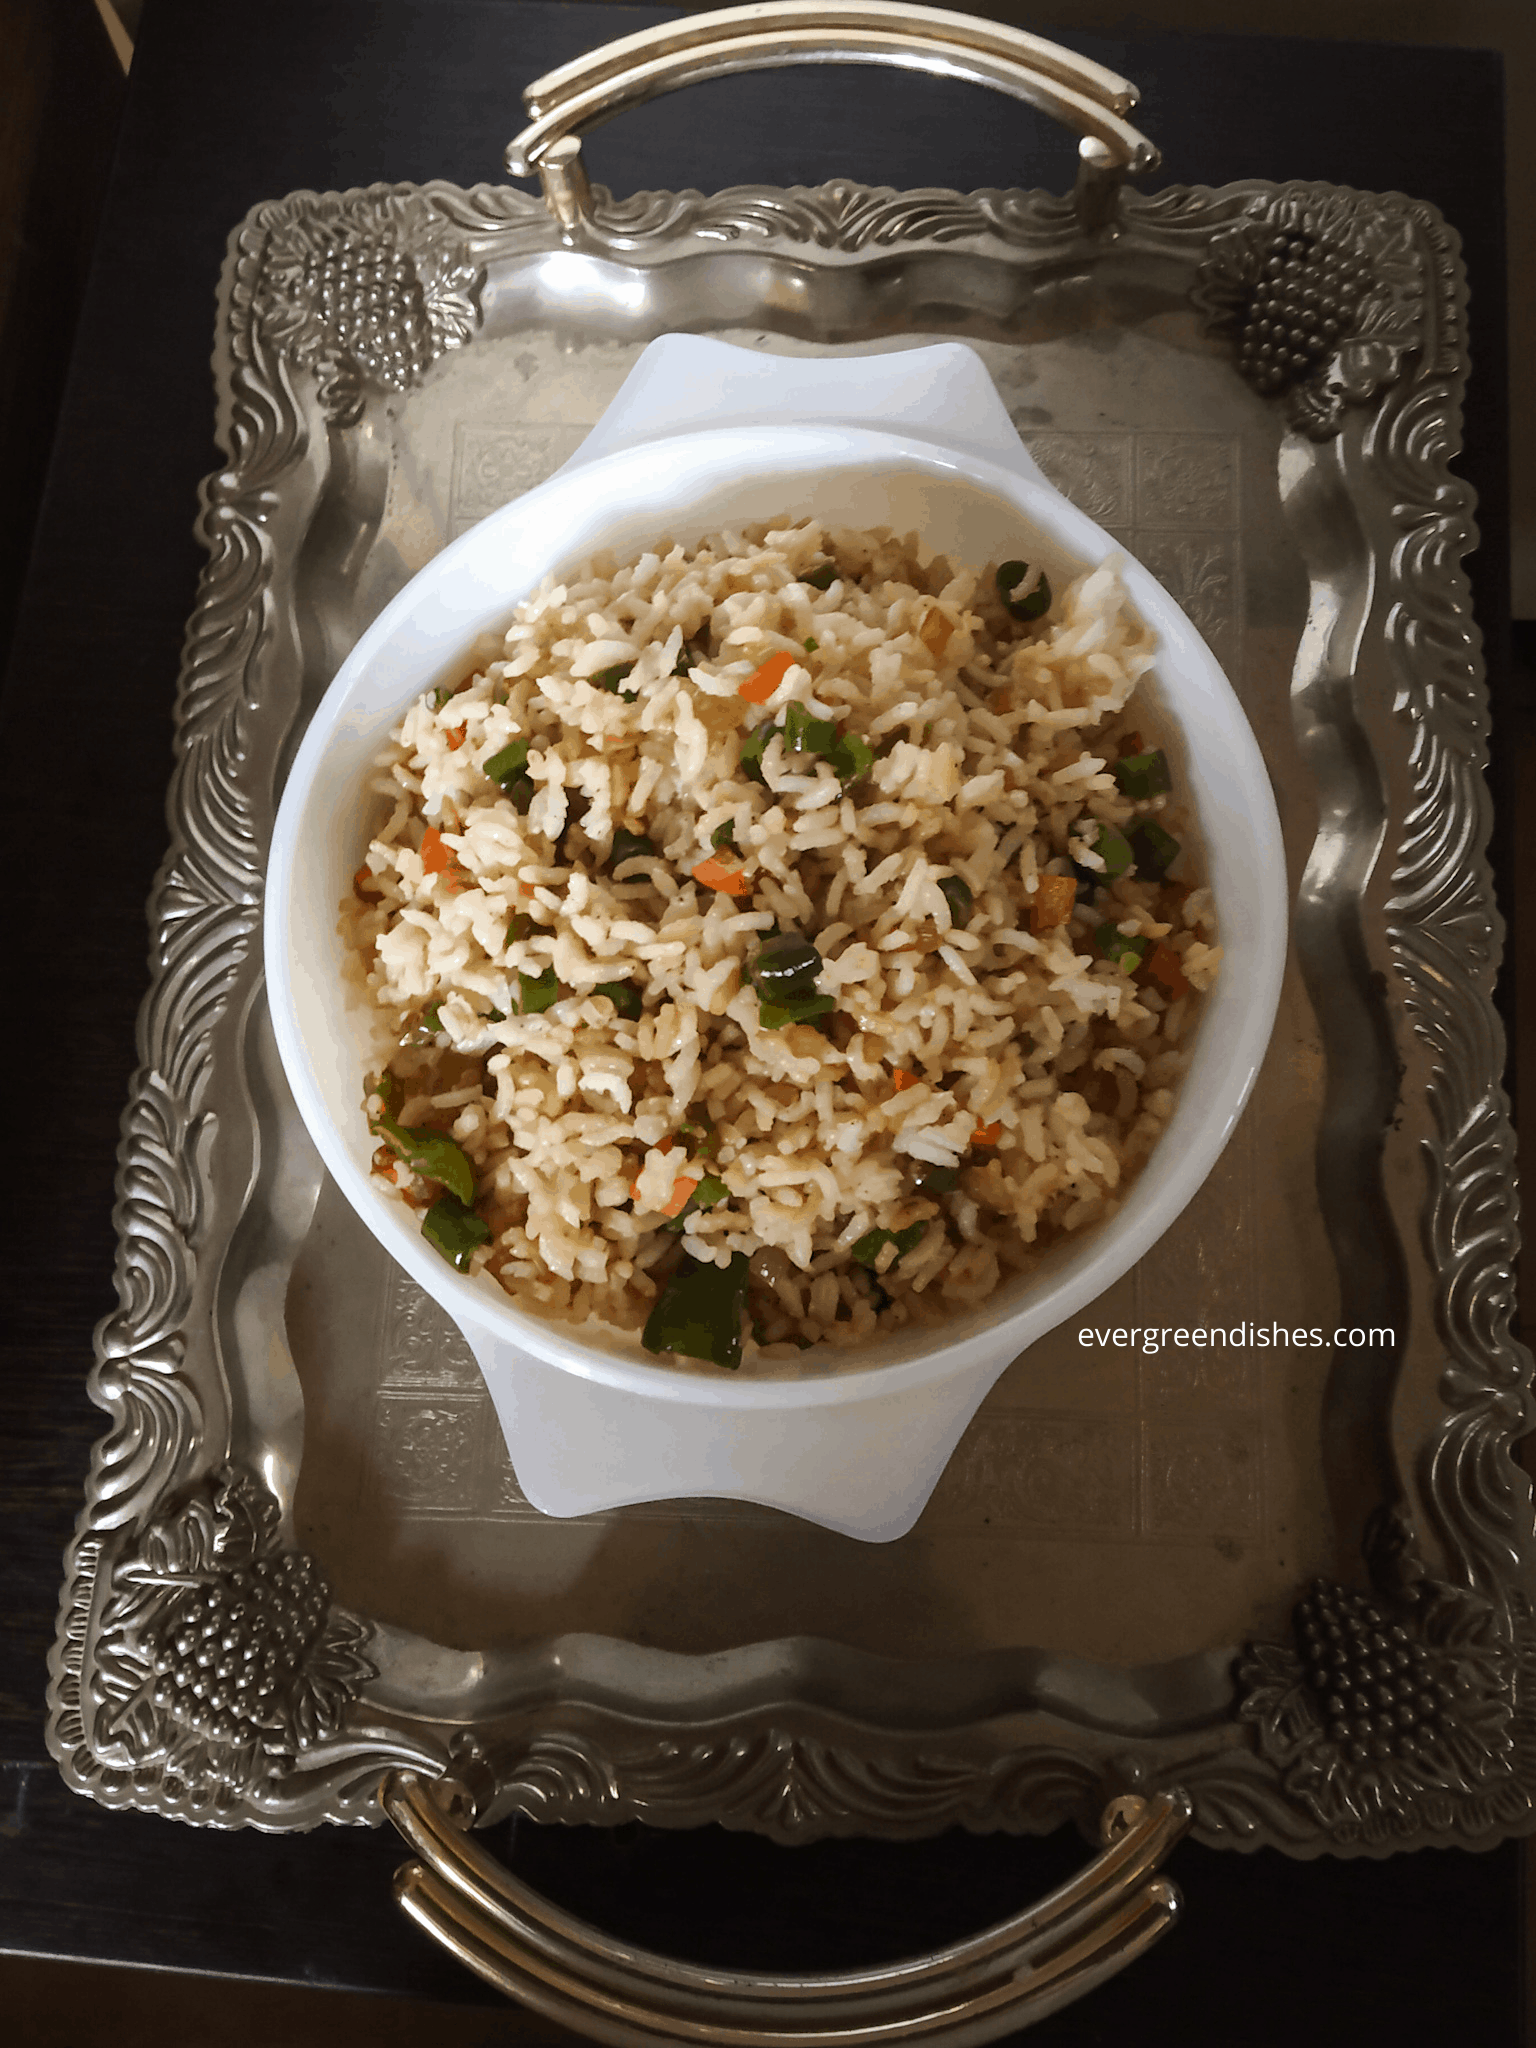
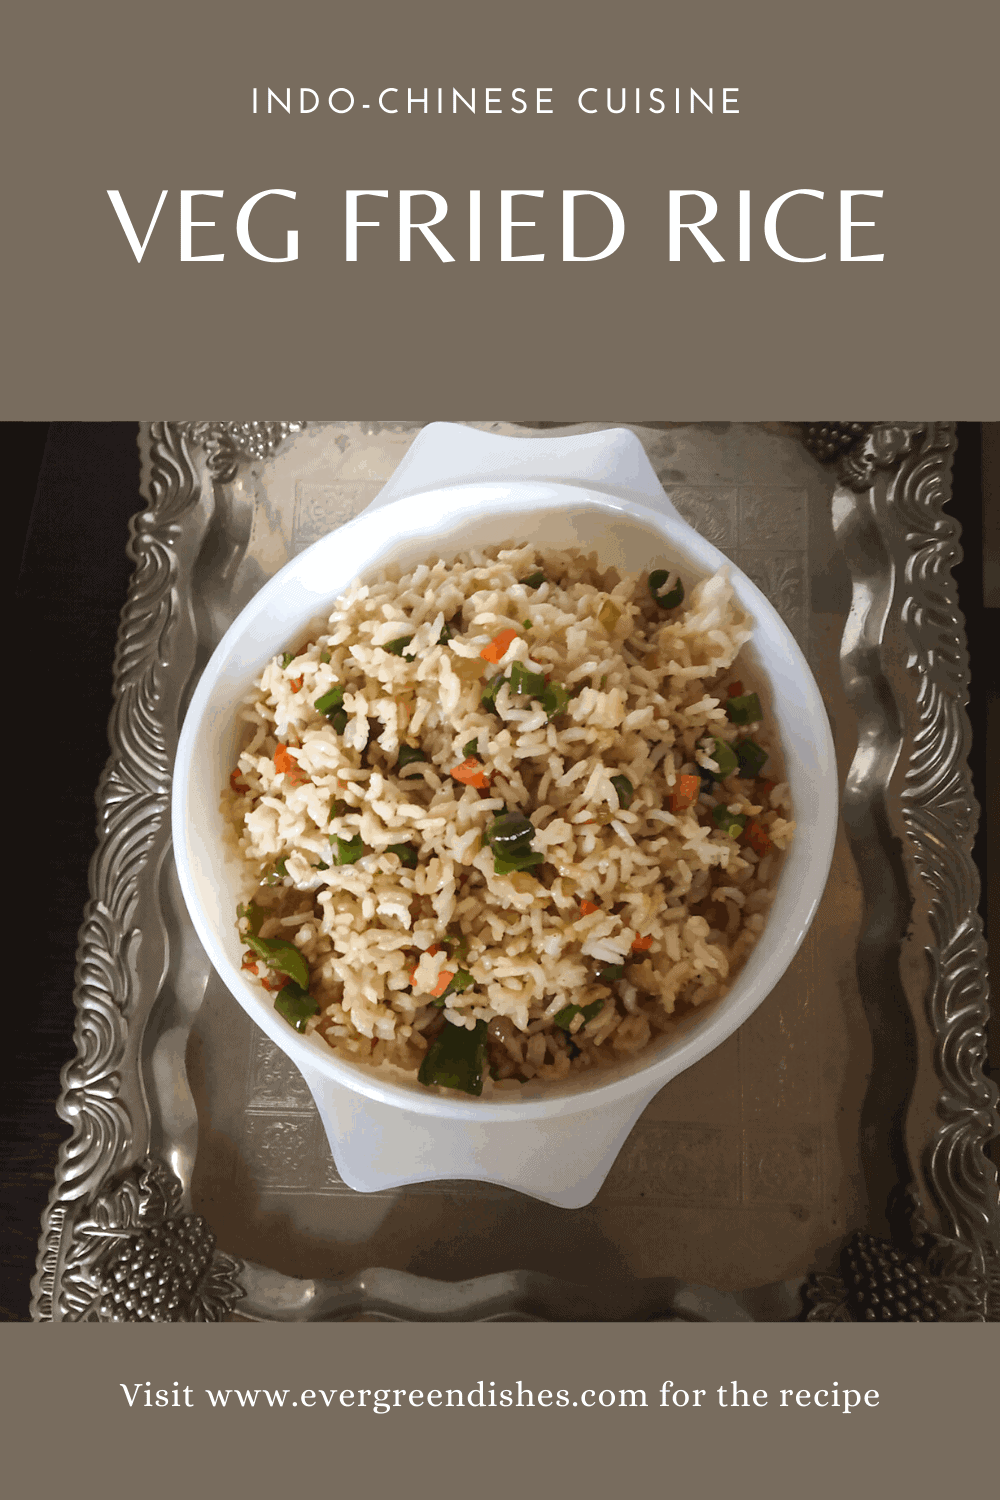
    A well cooked, non-sticky rice adorned with colourful veggies and enhanced with sauce makes it a delicious meal. It needs no accompaniment but Manchurian or gravy based dishes are usually served with it. 


    veg fried rice
    veg fried rice

    Veg Fried Rice Recipe 

    The ingredients that you need are :

    • 2 cups cooked rice
    • 1/2 cup beans cut into thin long strips
    • 1/2 cup carrot cut into thin long strips
    • 1/4 cup peas
    • 1/2 cup capsicum diced
    • 5 garlic crushed
    • 2 onions cut finely
    • 4 tsp soya sauce
    • 2 tsp vinegar
    • salt to taste
    • 2 tbsp oil

    Method :

    Cook the rice with four cups of water. Once the pressure releases, remove the rice and put it aside to cool. The grains of rice should be separate.

     Take oil in a pan, add the crushed garlic and saute for sometime. Put the onions, saute till light pink. Add the veggies, first the beans, then carrots, followed by capsicum and peas.  Cook for five minutes, they need to be a little crisp, not fully cooked.  Add salt to it. Put  soya sauce and vinegar to it. Mix it. Switch of the flame.  Put rice and mix it gently. Veg fried rice is ready to serve.

    Take a tip: 

    • Ajinomoto (MSG)  is usually added to it. I have not added here. I used to add it earlier, but now I have stopped it. 
    • Spring onion may be used. One can use sweet corn kernels too. 
    • Adding of vinegar is optional but it does lend a good taste to it.
    • Make sure the rice is well cooked and grains are separate. 
    Evergreendishesdev

    Veg Fried Rice

    Veg Fried Rice is a flavoursome rice dish from Indo-Chinese cuisine. It is ideal to serve for lunch, brunch or dinner
    Prep Time 15 minutes
    Cook Time 15 minutes
    Cooling time 15 minutes
    Total Time 45 minutes
    Course: brunch, dinner ideas, lunch, lunch box
    Cuisine: Indo-Chinese

    Ingredients
      

    • 2 cups cooked rice
    • 1/2 cup beans cut into thin long strips
    • 1/2 cup carrot cut into thin long strips
    • 1/4 cup peas
    • 1/2 cup capsicum diced
    • 5 garlic crushed
    • 2 onions cut finely
    • 4 tsp soya sauce
    • 2 tsp vinegar
    • salt to taste
    • 2 tbsp oil

    Equipment

    • pan
    • ladle
    • knife
    • spoon

    Method
     

    1. Cook the rice with four cups of water. Once the pressure releases, remove the rice and put it aside to cool. The grains of rice should be separate.
    2. Take oil in a pan, put the crushed onions and saute for sometime. Put the onions, saute till light pink. Add the veggies, beans, carrot, capsicum and peas in the order. Cook for five minutes, they need to be crisp. Add salt to it. Put  soya sauce and vinegar to it. Mix it. Switch of the flame.  Put rice and mix thorughly. Veg Fried Rice   Ready to serve.

    Pin it for later:

    veg fried rice
    veg fried rice

    About the event : 

    This is an old post which I have redone with better pictures and text. Over time, writing style has changed and  pictures  a little better. Sending this to Foodies_Redoing 42, a fortnightly event. 


    If you ever make this recipe, take a picture and share it by tagging @foodiejayashree on Instagram or @evergreendishes on Facebook. I will be glad to see and share your creation further.
    Check out my e-books on Amazon. Do not miss any post, subscribe to get all updates and an e-book for free !

  • Onion Chutney

    Onion chutney makes a tasty accompaniment with many dishes as dosa and chapathi.

    Our food looks awfully dull with the usual  or the not so desirable accompaniments. Tasty side dishes makes the meal interesting and palatable. Here is another kind of chutney with onion that you can prepare with dosa or chapati.

    Onion Chutney Recipe

    Ingredients :

    • fresh grated coconut 1 bowl
    • onions 2
    • green chillies 5
    • coriander leaves  a small quantity
    • salt to taste
    • tamarind pulp 1 tsp
    • dalia split 1 tbsp

    For the seasoning :

    • oil  2 tsp
    • mustard seeds 1/2 tsp
    • asafoetida 1/4 tsp
    • turmeric powder 1/4 tsp
    • a few curry leaves
    • urad dal 1/2 tsp
    onion chutney
    food seems to be at its best

    Method : Take a little oil and roast the green chillies. Grind all the ingredients together with a little water. Remove it in a bowl. Make seasoning and add to it. Here is the other variety of chutney which you can make along with one. Happy cooking. If you  make  Onion Chutney, take a picture and share it by tagging @foodiejayashree on Instagram and @evergreendishes on Facebook.  Subscribe to get all updates and an e-book for free.

  • Okra with tomatoes / Bhindi Tamatar ki Sabzi

    Okra with tomatoes / Bhindi Tamatar ki Sabzi

    Okra with tomatoes/bhindi tamatar ki sabzi makes a good accompaniment with roti or chapati. It is tasty and easy to prepare.

    Okra is called by different names. It is commonly known as bhendi or bhindi. Many are familiar to it as lady’s finger.

    Okra is a popular vegetable which is used in various ways. It is used to make stir fry, dal, sambar, bhindi fry and even chutney. I love making stir fry with it and here is another one, Okra with tomatoes / bhindi tamatar ki sabzi.

    Okra with tomatoes makes a good accompaniment with chapati or roti. It is ideal to pack in the lunch box too, kids will like this, just make sure you chose the best bhindi to make it.

    Okra / bhindi should be soft and dark green in colour. The nip should break easily.

    My other okra recipes that you may like to try : Tasty Bhindi Fry, Delicious Okra Stir Fry, Maharashtrian Bharli Bhendi, Kurkuri Bhendi

    Let’s get to the recipe of Okra with Tomatoes/ Bhindi Tamatar ki Sabzi

    The ingredients that you need are :

    • okra or ladies finger 1/2 kg
    • tomatoes 3
    • onions 2
    • oil 1tbsp
    •  chilli powder 2 tsp
    • amchur powder 1/4 tsp
    •  garam masala powder 1/2 tsp
    • salt to taste
    • cumin 1/2 tsp 
    Okra with tomatoes / bhindi tamatar ki sabzi
    okra with tomatoes / bhindi tamatar ki sabzi

    Method :

    1. Wash and pat dry the okra. Cut into one inch long pieces. Ensure that they are fully dry before you cut.
    2. Cut tomato and onion into small pieces.
    3. Tale a teaspoon of oil in a pan and shallow fry the okra on a low flame, the stickiness should vanish.
    4. Once it is done, put them aside. Add oil, put cumin to it. As the cumin splutters, add onion and saute for sometime. Add tomatoes, let them cook well.
    5. Then add amchur powder, garam masala powder, chilli powder and salt.
    6. Mix well, add the okra pieces to it and simmer for five minutes.
    7. Serve with chapati or roti.

    Pin it for later:

    okra with tomatoes / bhindi tamatar ki sabzi

    This is an old post, which I have redone with better pictures and content. Sending this Foodies_Redoing Old Post 12  where we meet every fortnight with a new look to our old blog post.

    If you have liked this post, do  leave a comment below. It really motivates me to write more. If you ever make this recipe, take a picture and share it on Facebook by tagging @evergreendishes or on Instagram by tagging @foodiejayashree. I will be glad to see your creation and shall share it further.

    Let’s be connected, do follow us: Twitter, Facebook, YouTube

    Do check out my e-books Subscribe to get a book of handy hints for free and all updates in your inbox.


  • Vada pav | Desi burger | Wada Pav recipe

    Vada pav | Desi burger | Wada Pav recipe

    Vada pav is a famous street food  of Mumbai and is commonly known as the desi burger. It is tasty and serves as a good snack  with a cup of hot tea or coffee.

    Growing up, this was not common. But soon, as fast food joints started, we enjoyed them regularly. Later, one day I thought of recreating them at home and it was liked by all. Dinner is loved and memorable when we have a good menu as Vada Pav. This is the Classic Vada Pave recipe.  It is one of the favourite snacks at home. Read on further to know more about the other varieties of vada pav.

    Vada Pav Recipe

    Ingredients that you need :

    • 10 pav buns (outsourced )
    • butter
    • tomato ketchup

    For the vada  (dumpling) :

    • 6 potatoes boiled
    •  2 onions finely cut
    • 1/2 teaspoon garam masala powder 
    • 1 teaspoon chilli powder 
    •  1 tablespoon coriander leaves finely cut
    • 1/2 teaspoon amchur powder 
    • salt to taste

    For the batter :

    • 1 bowl gram flour 
    • 1 tablespoon rice flour 
    • 1 teaspoon chilli powder
    • 1/2 teaspoon cumin seeds 
    • salt to taste
    • a pinch of soda bi carbonate
    • oil for frying

    For the green chutney :

    • 1 bunch coriander leaves 
    • 30 mint leaves 
    • 6 green chillies 
    • 4 cloves garlic 
    • salt to taste
    Vada Pav / Wada Pav


    Method:

    To make the green chutney:

    Grind all the ingredients together sans water. Remove it in a bowl.

    To make the vadas :

    Mash the potatoes, add the onions, garam masala, chilli powder ,salt, amchur powder and coriander leaves and mix well. Mix the ingredients of the batter with a little water. It should be of semi thick consistency.  Make small balls of the filling, keep aside. Heat oil in a kadai.Take a ball, dip it in the batter and slowly let a few of them in the oil. Fry till a  dark hue engulfs them. Remove on an absorbent paper. 

    To make the vada pav :

    Cut the pav bun into halves . Heat a skillet, smear some butter on it and  roast it slightly. Apply tomato ketchup on one half and the green chutney on the other half. Take ,a fried dumpling, press it between palms and keep it between the two halves. Warm it on the skillet for a few seconds with  a little ghee. Serve hot. 


    Take a tip: 

    • The vadas can be made sans onion too. You may use green chilli and ginger paste instead of chilli powder. It is a Jain Vada Pav.
    • Place an aloo tikki in  it and you have Aloo Tikki Vada Pav.
    • For the Masala Vada Pav, make a spicy red chutney with a few cloves of garlic. Smear it on the other side instead of ketchup. 
    • To make Corn Vada Pav, make corn tikkis and place them in between. 
    • To make Schezwan Vada Pav, smear schezwan sauce instead of green chutney. Sprinkle some spice mix over it. 
    • To make Cheese Vada Pav, keep a slice of cheese in between along with the aloo vada. 


    About the event :

    This is an old post which has been redone with better pictures and informative text. Sending this to Foodies Redoing Old Post_70, a fortnightly event.  It was started by Renu Agarwal and since then, it’s come a long way.


    Vada Pav

    Vada Pav is a popular street food from Mumbai. It is now famous all over India and popular as Desi Burger.
    Course: evening snacks
    Cuisine: Indian

    Ingredients
      

    • 10 pav buns
    • butter
    • tomato ketchup
    • For the vada dumpling :
    • 6 potatoes boiled
    • 2 onions finely cut
    • 1/2 teaspoon garam masala powder
    • 1 teaspoon chilli powder
    • 1 tablespoon coriander leaves finely cut
    • 1/2 teaspoon amchur powder
    • salt to taste
    • For the batter :
    • 1 bowl gram flour
    • 1 tablespoon rice flour
    • 1 teaspoon chilli powder
    • 1/2 teaspoon cumin seeds
    • salt to taste
    • a pinch of soda bi carbonate
    • oil for frying
    • For the green chutney :
    • 1 bunch coriander leaves
    • 30 mint leaves
    • 6 green chillies
    • 4 cloves garlic
    • salt to taste
    • mouth watering

    Method
     

    1. To make the green chutney:
    2. Grind all the ingredients together sans water. Remove it in a bowl.
    3. To make the vadas :
    4. Mash the potatoes, add the onions, garam masala, chilli powder ,salt, amchur powder and coriander leaves and mix well. Mix the ingredients of the batter with a little water. It should be of semi thick consistency.  Make small balls of the filling, keep aside. Heat oil in a kadai.Take a ball, dip it in the batter and slowly let a few of them in the oil. Fry till a  dark hue engulfs them. Remove on an absorbent paper.
    5. To make the vada pav :
    6. Cut the pav bun into halves . Heat a skillet, smear some butter on it and  roast it slightly. Apply tomato ketchup on one half and the green chutney on the other half. Take ,a fried dumpling, press it between palms and keep it between the two halves. Heat it on the skillet for a few seconds. Serve hot.

    Notes

    Take a tip: 

    • The vadas can be made sans onion too. You may use green chilli and ginger paste instead of chilli powder. It is a Jain Vada Pav.
    • Place an aloo tikki in  it and you have Aloo Tikki Vada Pav.
    • For the Masala Vada Pav, make a spicy red chutney with a few cloves of garlic. Smear it on the other side instead of ketchup. 
    • To make Corn Vada Pav, make corn tikkis and place them in between. 
    • To make Schezwan Vada Pav, smear schezwan sauce instead of green chutney. Sprinkle some spice mix over it. 
    • To make Cheese Vada Pav, keep a slice of cheese in between along with the aloo vada. 
     

    If you have liked this post, do share it with your family and friends. If you ever make this, take a picture and share it by tagging @foodiejayashree on Instagram or @evergreendishes on Facebook or Twitter.

    Let’s be connected, the follow buttons are on the side bar. Subscribe to get all updates and an e-book for free.


    Pin Vada Pav to a snacks board on Pinterest:


    Vada Pav / Wada Pav


  • Gulkand milkshake

    I really love making milkshakes and keep trying a wide range of them. I feel they are a good alternative to milk for children.  I have been using my Braun blender for all my milkshakes and I am really happy with the results, hence became an affilate of it.

    Gulkand milkshake is with the goodness of rose and naturally healthy. I recommend it to give for kids who are fussy. Well,  the ingredients needed are :

    milk 2 glasses

    gulkand 3 tsp

    vanilla ice cream a scoop

    sugar optional

    Gulkand Milkshake
    Cool


    Blend all the ingredients together and serve chilled.

    [social_share style=”bar” align=”horizontal” heading_align=”inline” facebook=”1″ twitter=”1″ google_plus=”1″ linkedin=”1″ pinterest=”1″ /]


  • Dal with green leaf / Muddipalya

    Dal with green leaf / Muddipalya

    Dal with green leaf / muddipalya is the staple food of many people in South India. It is usually served with steamed rice.

    Dal with green leaf makes a good accompaniment with any meal. Tur dal cooked with green leaf vegetables is healthy and makes one of the cherished  south indian meals. It is popular  as “pappu” in Andhra while in Karnataka it is known as “muddipalya” . Our meals seems to be highlighted by a variety of green leaves as spinach, methi  or many others which are abundantly available. This is the recipe from the state of Karnataka.

    This is one of the daily essentials in many parts of South India. This dal and rasam are usually cooked simultaneously in most households. 

    INGREDIENTS :dal with green leaf/ muddipalya

    • tur dal 1 cup 
    • spinach  1 cluster
    • methi 1 cluster 
    • green chillies 4
    • oil 2 tbsp
    • mustard seeds 1 tsp
    • asafoetida a pinch
    • turmeric powder 1/4 tsp
    • tamarind  a lemon size
    • salt to taste
    • sambar powder 1 tsp
    • mustard seeds 1 tsp
    • asafoetida a pinch
    • turmeric powder 1/4 tsp
    • tamarind  a lemon size
    • salt to taste
    • sambar powder 1 tsp 
    •                      
    • METHOD :Cook tur dal in pressure cooker. Cut the stalk of the green leaves and chop them finely. Put them in salt water for sometime. Heat oil in a kadai and make the seasoning with mustard, asafoetida, turmeric and green chillies. Add the green leaves and salt, mix and let cook for sometime. Then add the cooked dal and mix well. Let boil for sometime. Then, add the tamarind pulp  and sambar powder and allow to  simmer on low flame for five minutes. Serve with hot rice or jowar roti.

      Ingredients
        

      • 1 cup tur dal
      • 1 cluster spinach
      • 1 cluster fenugreek leaf
      • 4 green chilly
      • 2 tablespoon oil
      • 1 teaspoon mustard seeds
      • 1/4 teaspoon asafoetida
      • 1/4 teaspoon turmeric powder
      • lemon ball size tamarind
      • salt to taste
      • 1 teaspoon sambar powder

      Method
       

      1. Cook tur dal in pressure cooker. 
      2. Remove the stalk of the green leaves and cut them finely. Keep them in salt water for sometime.
      3. Heat oil in apan, add the mustard, asafoetida, turmeric, green chilly and salt. Let cook for sometime. 
      4. Add the cooked dal to it. MIx well and let cook on a slow flame for dometime. 
      5. Add the tamarind pulp and sambar powder to it. Mix and simmer for for five minutes. 
      6. Serve with hot steamed rice. 


    About the event:

    This post is part of the event Foodies Redoing Old Post_26, where a group of bloggers work on an old post every fortnight. I have changed both the text and pictures. The old posts were lost with time, this is like giving a breath of fresh air to them. Moreover, there is a sea-change in the way we do our work with time, isn’t it ? Do you want to be a part of it? 


    dal with green leaf / muddipalya

    If you have liked this post, do share it with your family and friends. If you ever make this, take a picture and share it by tagging @foodiejayashree on Instagram or @evergreendishes on Facebook or Twitter.

    Let’s be connected, the follow buttons are on the side bar. Subscribe to get all updates and an e-book for free.


  • Exotic fruit salad / Custard Fruit Salad

    Exotic fruit salad / Custard Fruit Salad

    Custard Fruit Salad is a tasty dessert to serve anytime. It is easy to make and can be made ahead of time. It gives the benefit of a wide range of fruits. Fruits of rarer variety taste good and makes it richer. Addition of nuts makes it exotic.

    exotic fruit salad

    When can you serve fruit salad? 

    Fruit salad can be served after lunch or dinner as dessert. It is ideal as after school snack for children. It makes a good dessert during summer, serve it with any ice cream. It is also ideal during fasting days.

    Does fruit salad stay good in refrigerator?

    Fruit salad stays good if refrigerated for two days. It tastes best when it is made and served chilled. Thus, the best way is to make custard and keep it in a refrigerator. Cut the fruits and keep them in another bowl. Mix the fruits in custard and serve.


    Ingredients :

    • Pear 1
    • Kiwi 3
    • green apple 1
    • lychee  8 ( I do not know of the latest threats of it, beware)
    • orange 1
    • sapota 2
    • grapes 15
    • strawberry 6
    • milk 1/2 litre
    • cornflour 1 tbsp
    • sugar 3 tsp
    • vanilla essence 2 drops
    • cashew nuts 4
    • raisins 8
    • almonds 4
    • honey 2 tbsp


    Method :

    The making of fruit salad  involves 3 steps:

    1. Making of custard
    2. Cutting of fruits and nuts
    3. Mixing of it

    1 Make custard by boiling the milk. Add sugar. Mix the corn flour in  cold milk and keep it aside.  Slowly add it to the boiling milk. Let boil for a few minutes. Allow to cool. Once it is at room temperature, keep it in the refrigerator. 

    2 Wash and cut the pear, green apple and sapota into small pieces. Remove the seeds of lychee and cut into quarters. Peel the orange and make it into segments. Cut strawberries. Cut the dry fruits into small pieces.

    3 Mix all the fruits  into the  bowl of custard. Exotic fruit salad is now ready. Serve chilled, garnish with dry fruits and a dollop of honey.


    Take a tip:

    1. Custard powder is made using corn flour. Thus, I have used corn flour and flavoured with  vanilla essence to it. Alternatively, you can use custard powder also. But as I get down to the basics, I usually like to use cornflour.
    2. You can use any or all of the mentioned fruits. 
    3. If mangoes are available, do use them. It tastes good.
    4. Banana is not used here, you can use it. 

    Video to make custard :

    Pin it for later:

    Exotic Fruit Salad

    This is an old post which I have redone now. It is part of Foodies_Redoing Old Post 11 where we work on a blog post every fortnight. This was one of the earliest posts that I wrote, now both the pictures and the text are changed.

    exotic fruit salad

    Exotic Fruit Salad

    Fruit Salad is a classic dessert to serve anytime. Use rare fruits and top with nuts to make it exotic.
    Prep Time 10 minutes
    Cook Time 10 minutes
    Chilling time 30 minutes
    Total Time 50 minutes
    Course: Dessert

    Ingredients
      

    • 1 pear
    • 3 kiwi
    • 1 green apple
    • 8 lychee
    • 1 orange
    • 2 sapota
    • 15 grapes
    • 6 strawberry
    For the custard
    • 1/2 litre milk
    • 1 tablespoon cornflour
    • 3 teaspoon sugar
    • 2 drops vanilla essence
    For topping
    • honey
    • dry fruits

    Method
     

    Making of Custard
    1. Make custard by boiling the milk. Add sugar. Mix the corn flour in  cold milk and keep it aside.  Slowly add it to the boiling milk. Let boil for a few minutes. Allow to cool. Once it is at room temperature, keep it in the refrigerator. 
    Cutting of fruits
    1. Cut the fruits into small pieces. Chop the dry fruits.
    Mixing of fruits
    1. Once the custard is warm, you can add fruits to it. Chill it. Before serving, top with nuts and a dollop of honey.

    If you ever make this recipe, take a picture and share it by tagging @foodiejayashree on Instagram or @evergreendishes on Facebook. I will be glad to see and share your creation further.
    Check out my e-books on Amazon. Do not miss any post, subscribe to get all updates and an e-book for free !

    Subscribe to get an e-book of handy hints and all updates in your inbox !


  • Dal,the northern style

    Our cooking is influenced from northern states. We adhere their style in daily dishes and thus it seems to have become a part of us. This dish can be served both with rice and chapati .

    INGREDIENTS :

    • tur dal 1 cup
    • tomatoes 3 
    • red chilli powder 1 1/2 tsp 
    • ghee 1tbsp
    • salt
    • cumin 1tsp
    • mustard 1/2 tsp
    • asafoetida 1/4 tsp
    • turmeric powder 1/4 tsp
    dal.the northern style
    an all time favourite

    METHOD :

    Cook the lentil in the pressure cooker. Take a wok and add the ghee. Make the seasoning with cumin,mustard, asafoetida and turmeric powder. Add the tomatoes and salt with some water. allow to cook. Now add the chilli powder and boil for some time. Add the cooked dal to it. Let boil. Serve garnished with coriander .


    Evergreendishesdev

    Dal, north indian

    Dal is one of the essentials of Indian menu. North indian dal is tasty and pairs well with both rice and chapati.
    Prep Time 10 minutes
    Cook Time 20 minutes
    Total Time 30 minutes
    Course: daily cooking, healthy, Main Course
    Cuisine: north indian

    Ingredients
      

    • 1 cup tur dal
    • 3 tomato
    • 1.5 teaspoon red chilli powder
    • 1 tablespoon ghee
    • salt to taste
    • 1/2 teaspoon mustard
    • 1/4 teaspoon asafoetida
    • 1/4 teaspoon turmeric powder

    Method
     

    1. Cook the lentil in the pressure cooker. Take a wok and add the ghee. tomatoes and salt with some water. allow to cook. Now add the chilli powder and boil for 
    2. Take a wok and add the ghee. Make the seasoning with cumin,mustard, asafoetida and turmeric powder. Add the  tomatoes and salt with some water. allow to cook. 
    3. Now add the chilli powder and boil for some time. Add the cooked dal to it. Let boil. Serve garnished with coriander .

    [social_share style=”bar” align=”horizontal” heading_align=”inline” facebook=”1″ twitter=”1″ google_plus=”1″ linkedin=”1″ pinterest=”1″ /]


  • Mango mania

    Just as the mango seasons are coming to an end , I have another recipe that you would love to try.

    Mango Smoothie

    Ingredients :

    Mango pulp 2 bowl

     Coconut milk  1 bowl

    Jaggery  1/2 bowl

    Cardamom powder

    DSC01670

    Method :  Blend the ingredients chill and serve.

    [social_share style=”bar” align=”horizontal” heading_align=”inline” facebook=”1″ twitter=”1″ google_plus=”1″ linkedin=”1″ pinterest=”1″ /]


  • Tri colour pulav | Tiranga Pulao | How to make tri colour pulav

    Tri colour pulav | Tiranga Pulao | How to make tri colour pulav

    Jump to Recipe

    Tri-colour pulav is a three layered rice of varying tastes and colour as the name implifies, gives a satisfying taste when blended together.This dish involves a little bit of work, but its worth it. It is ideal as a weekend menu. 

    Green, white and orange are the three layers that are made, the vegetables are used accordingly. The three colours are the Indian colours denoted in our national flag. The dish is appropriate to make for any national celebration as Independence Day and Republic Day.

    I often convince myself that pulav is the best meal for my children as they eat it without any fuss. My son needs a curry along with it but rest of us are good with a yoghurt based salad. The  pulav recipes that I usually make on holidays are Mint PulaoCorn and Peas Pulao, Spring onion and corn Pulao

    Tri-colour pulav
    Tri-colour pulav

    Tri-Colour Pulav Recipe:

    INGREDIENTS :

    • 1 1/2 cups of basmati rice
    • 3 onions chopped
    • 1/4 cup beans diced
    • 1/4 cup peas
    • 3/4 cup cabbage finely cut
    • 1/2 cup carrot diced

     Grind together for the green layer

    • 2 green chillies
    • 1/2 bunch coriander
    • 1/2 inch ginger
    • 2 cloves garlic

     Make puree for the orange layer :

    • 2 tomatoes
    • 1/2 inch ginger
    • 2 cloves garlic

     Whole spices for the white layer

    • 2 cloves
    • 2 cardamom
    • 1 green chilly
    • 2 sticks of cinnamon


    Method :

    • Cook rice in a rice cooker and keep aside.
    • Boil beans and peas together.
    • Boil carrot seperately and keep aside.
    • Make the paste and the puree with the mentioned ingredients. Keep aside.
    • Take a wok and add some oil with a spoon of ghee in it.  Add a clove and cardamom and saute for a while. then add the onions and saute till light pink.Add beans and peas to it. Then, add the green paste and saute for some time. Turn off the flame, add a portion of the cooked rice to it. Mix salt. Take a wide bowl and pour this into it. The green layer is ready.
    • Again, add the mixture of oil and ghee. Add cumin and the spices. Saute the onions and toss in the cabbage. Stir fry for sometime. Let cool. Again mix a third of the rice with salt. Pour over the green layer. Two layers are ready.
    • Finally, we come to the third layer. Take some oil and add a few spices. Add the onions, saute till pink , then add carrot to it. Now add the puree to it and allow to simmer for sometime. Let cool. Mix the required quantity of rice to it. Slowly, add over the two layers.
    • After a while, you can slowly tilt it to a different plate. Serve the three layers together.  Tri-colour pulav is ready to serve.

    Take a tip:

    • The cooked rice should be separate grains and not mushy.
    • Capsicum may be used for the green layer.
    • Mint can be used along with coriander while grinding.
    • Cabbage can be avoided for the white layer. A few pieces of potato can be put instead.
    • Alternatively, you can make jeera rice for the white layer.
    • A curry or a simple yoghurt salad pairs well with it.

    Related posts:


    Print Recipe
    Tri-colour pulav
    Evergreendishesdev

    Tri-colour Pulav

    Tri-colour pulav is a three layered rice of different flavours. A fusion of different variety, it tastes good and unique.
    Prep Time 20 minutes
    Cook Time 40 minutes
    Total Time 1 hour
    Servings: 6 people
    Course: brunch, dinner, lunch
    Cuisine: Indian

    Ingredients
      

    • For the pulav
    • 1 1/2 cups of basmati rice
    • 3 onions chopped
    • 1/4 cup beans diced
    • 1/4 cup peas
    • 3/4 cup cabbage finely cut
    • 1/2 cup carrot diced
    • Grind together for the green layer
    • 2 green chillies
    • 1/2 bunch coriander
    • 1/2 inch ginger
    • 2 cloves garlic
    • Make puree for the orange layer :
    • 2 to matoes
    • 1/2 inch ginger
    • 2 cloves garlic
    • Whole spices for the white layer
    • 2 cloves
    • 2 crdamom
    • 1 green chilly
    • 2 sticks of cinnamon

    Method
     

    1. Cook rice in a rice cooker and keep aside.
    2. Boil beans and peas together.
    3. Boil carrot seperately and keep aside.
    4. Make the paste and the puree with the mentioned ingredients. Keep aside.
    5. Take a wok and add some oil with a spoon of ghee in it.  Add a clove and cardamom and saute for a while. then add the onions and saute till light pink.Add beans and peas to it. Then, add the green paste and saute for some time. Turn off the flame, add a portion of the cooked rice to it. Mix salt. Take a wide bowl and pour this into it. The green layer is ready.
    6. Again, add the mixture of oil and ghee. Add cumin and the spices. Saute the onions and toss in the cabbage. Stir fry for sometime. Let cool. Again mix a third of the rice with salt. Pour over the green layer. Two layers are ready.
    7. Finally, we come to the third layer. Take some oil and add a few spices. Add thhe onions, saute till pink , then add carrot to it. Now add the puree to it and allow to simmer for sometime. Let cool. Mix the required quantity of rice to it. Slowly, add over the two layers.
    8. After a while, you can slowly tilt it to a different plate. Serve the three layers together.  Tri coloured pulav is ready to serve.

    Notes

    • The cooked rice should be separate and not mushy.
    • Capsicum may be used along with the veggies for the green layer. It has to be sauted with the onion.
    • Cabbage can be avoided for the white layer. A few pieces of potato can be put along with onion while cooking. Alternatively, you can make jeera rice for the white layer without any vegetables.
    • A curry or a yoghurt based salad pairs well with it. 

    This recipe has been featured on Twinkl, as part of their Tri-coloured Theme, “Recipes for Independence Day” blog.


    Pin it for later:

    Tri-colour pulav is a three layered rice of varying tastes and colour as the name implifies, gives a satisfying taste when blended together.This dish involves a little bit of work, but its worth it. It is ideal as an weekend menu. 
    Tri colour pulav

    If you ever make this recipe, take a picture and share it by tagging @foodiejayashree on Instagram or @evergreendishes on Facebook. I will be glad to see and share your creation further.
    Check out my e-books on Amazon. Do not miss any post, subscribe to get all updates and an e-book for free !

    About the event :

    This is an old post which I have redone with better pictures. Sending it to Foodies_Redoing Old Post43, a fortnightly event.