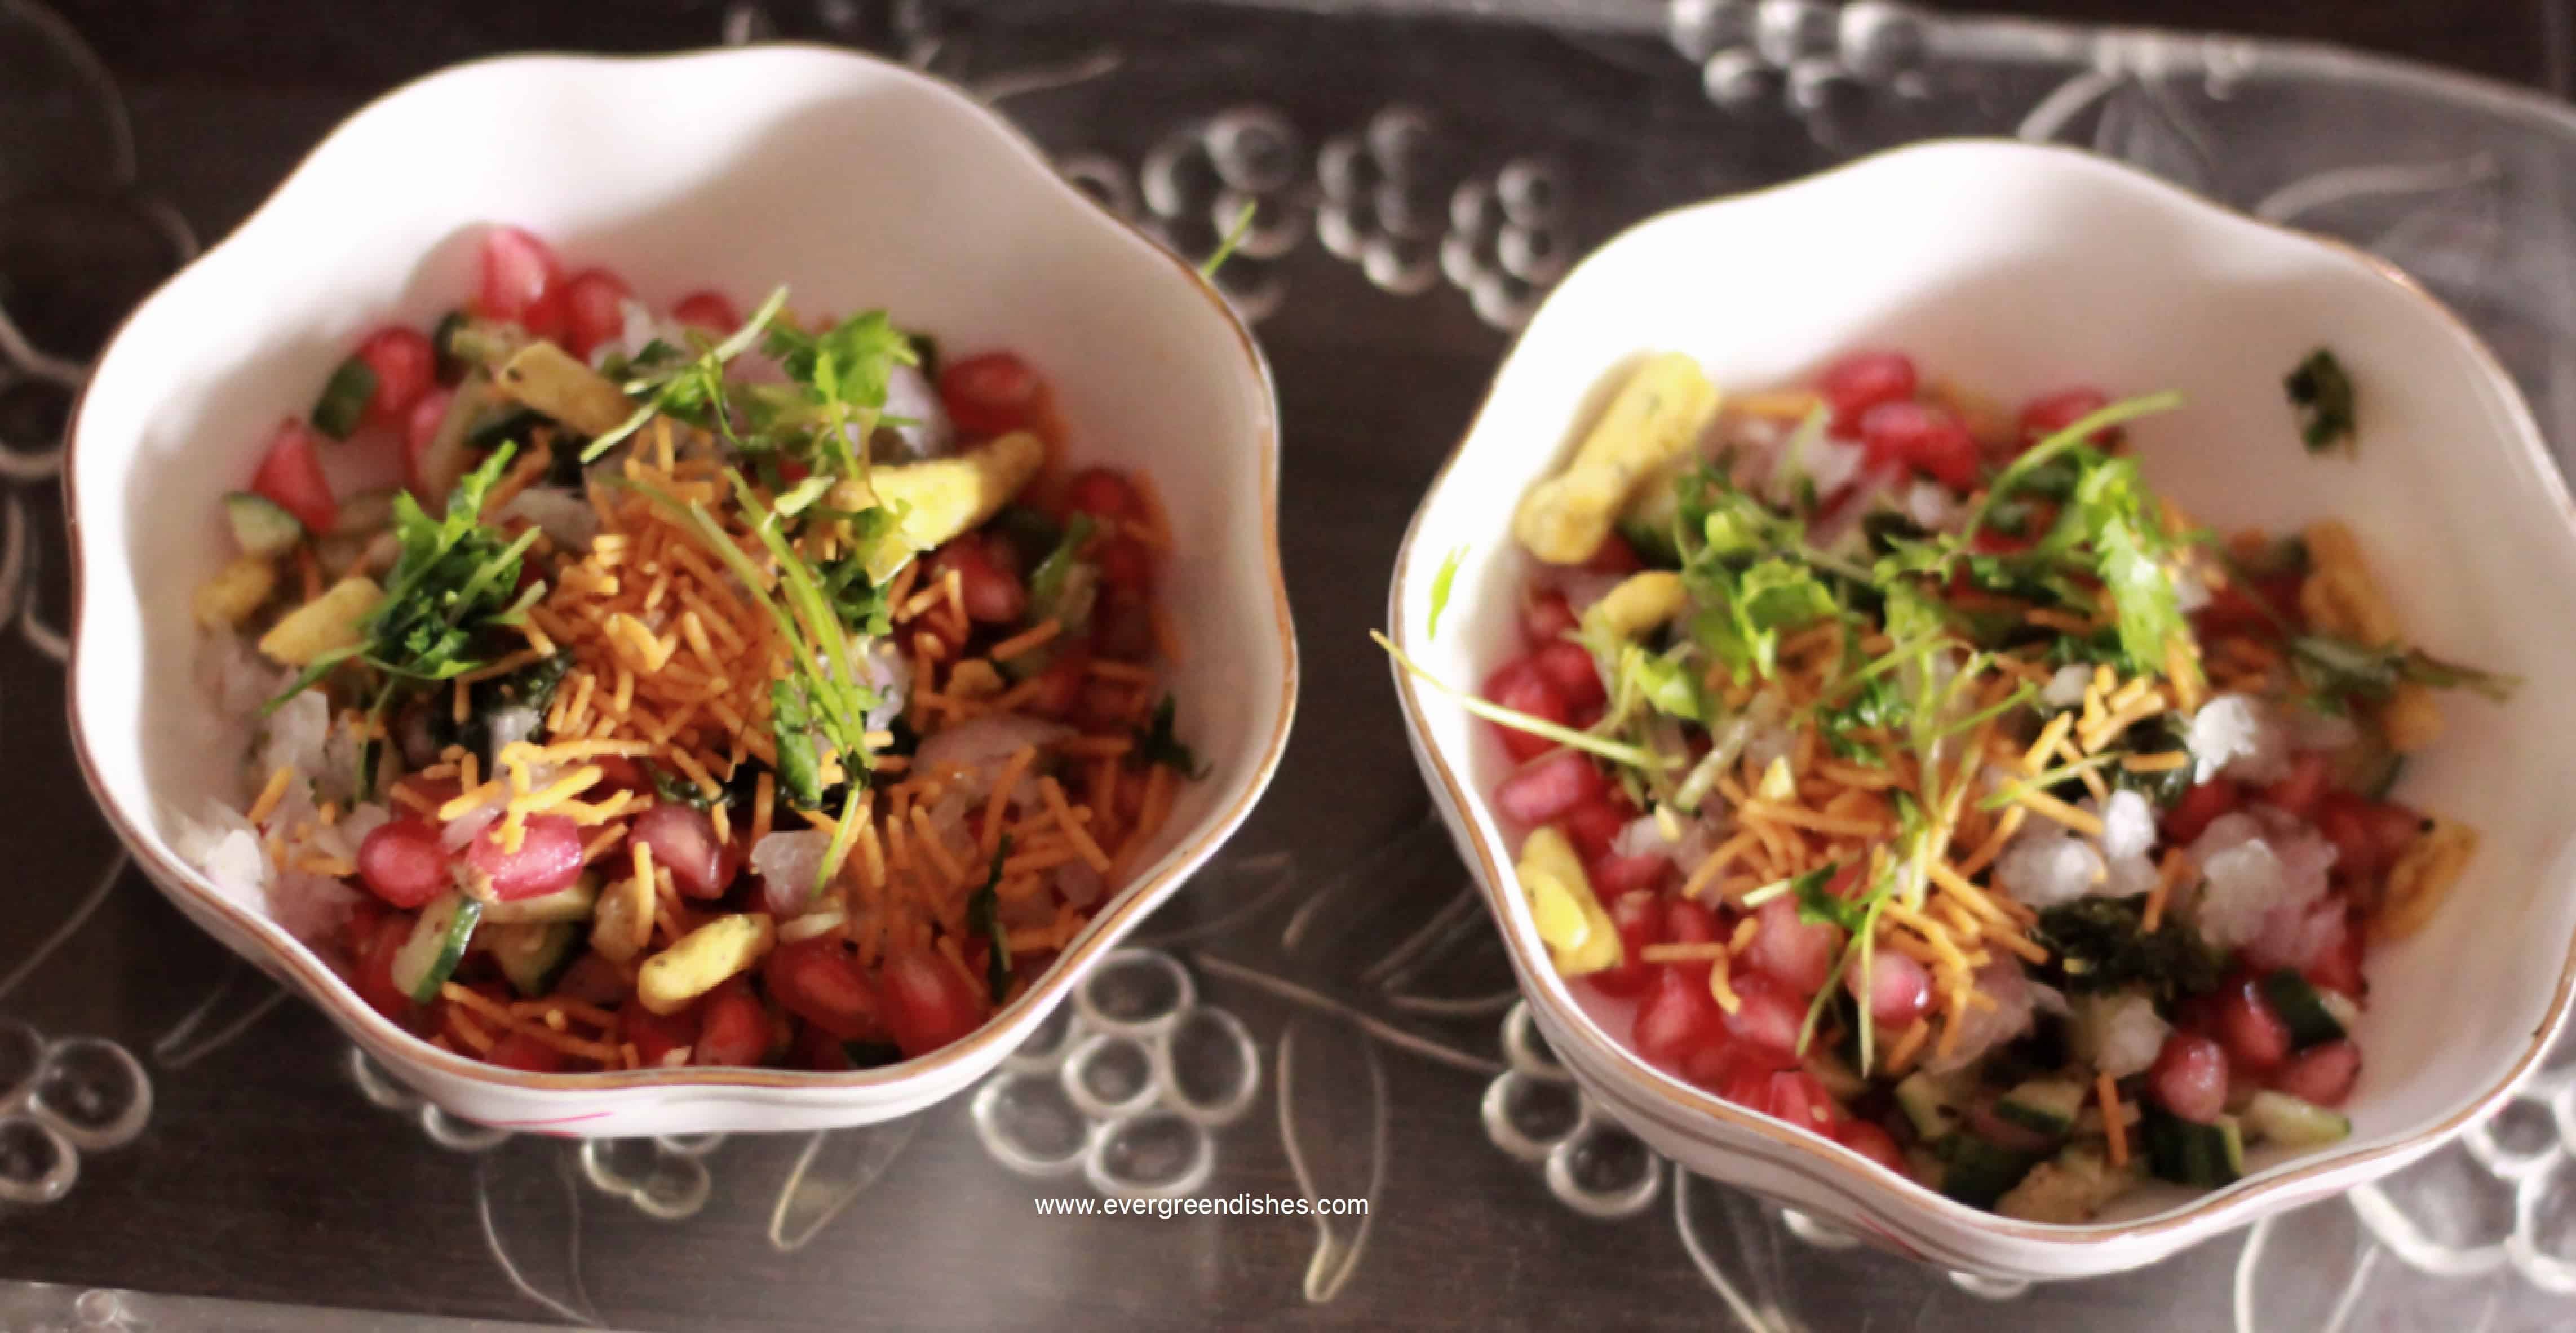
Pomegranate chaat is a tasty and healthy snack to binge in the evenings. It is a healthy twist to the usual chaats that we relish. It is a simple yet tasty enough to fulfil the cravings. (more…)
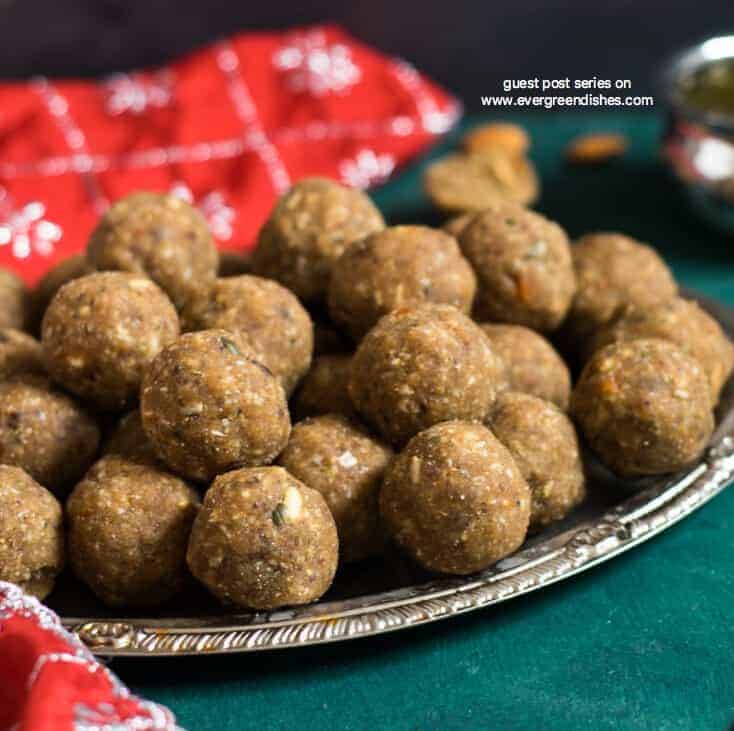
Gaund ke ladoo is a tasty and healthy sweet, ideal to be stored as a snack in the jar during the winter season. It is also known as Gond ke ladoo or Panjiri. This is a guest post from Sapana. (more…)
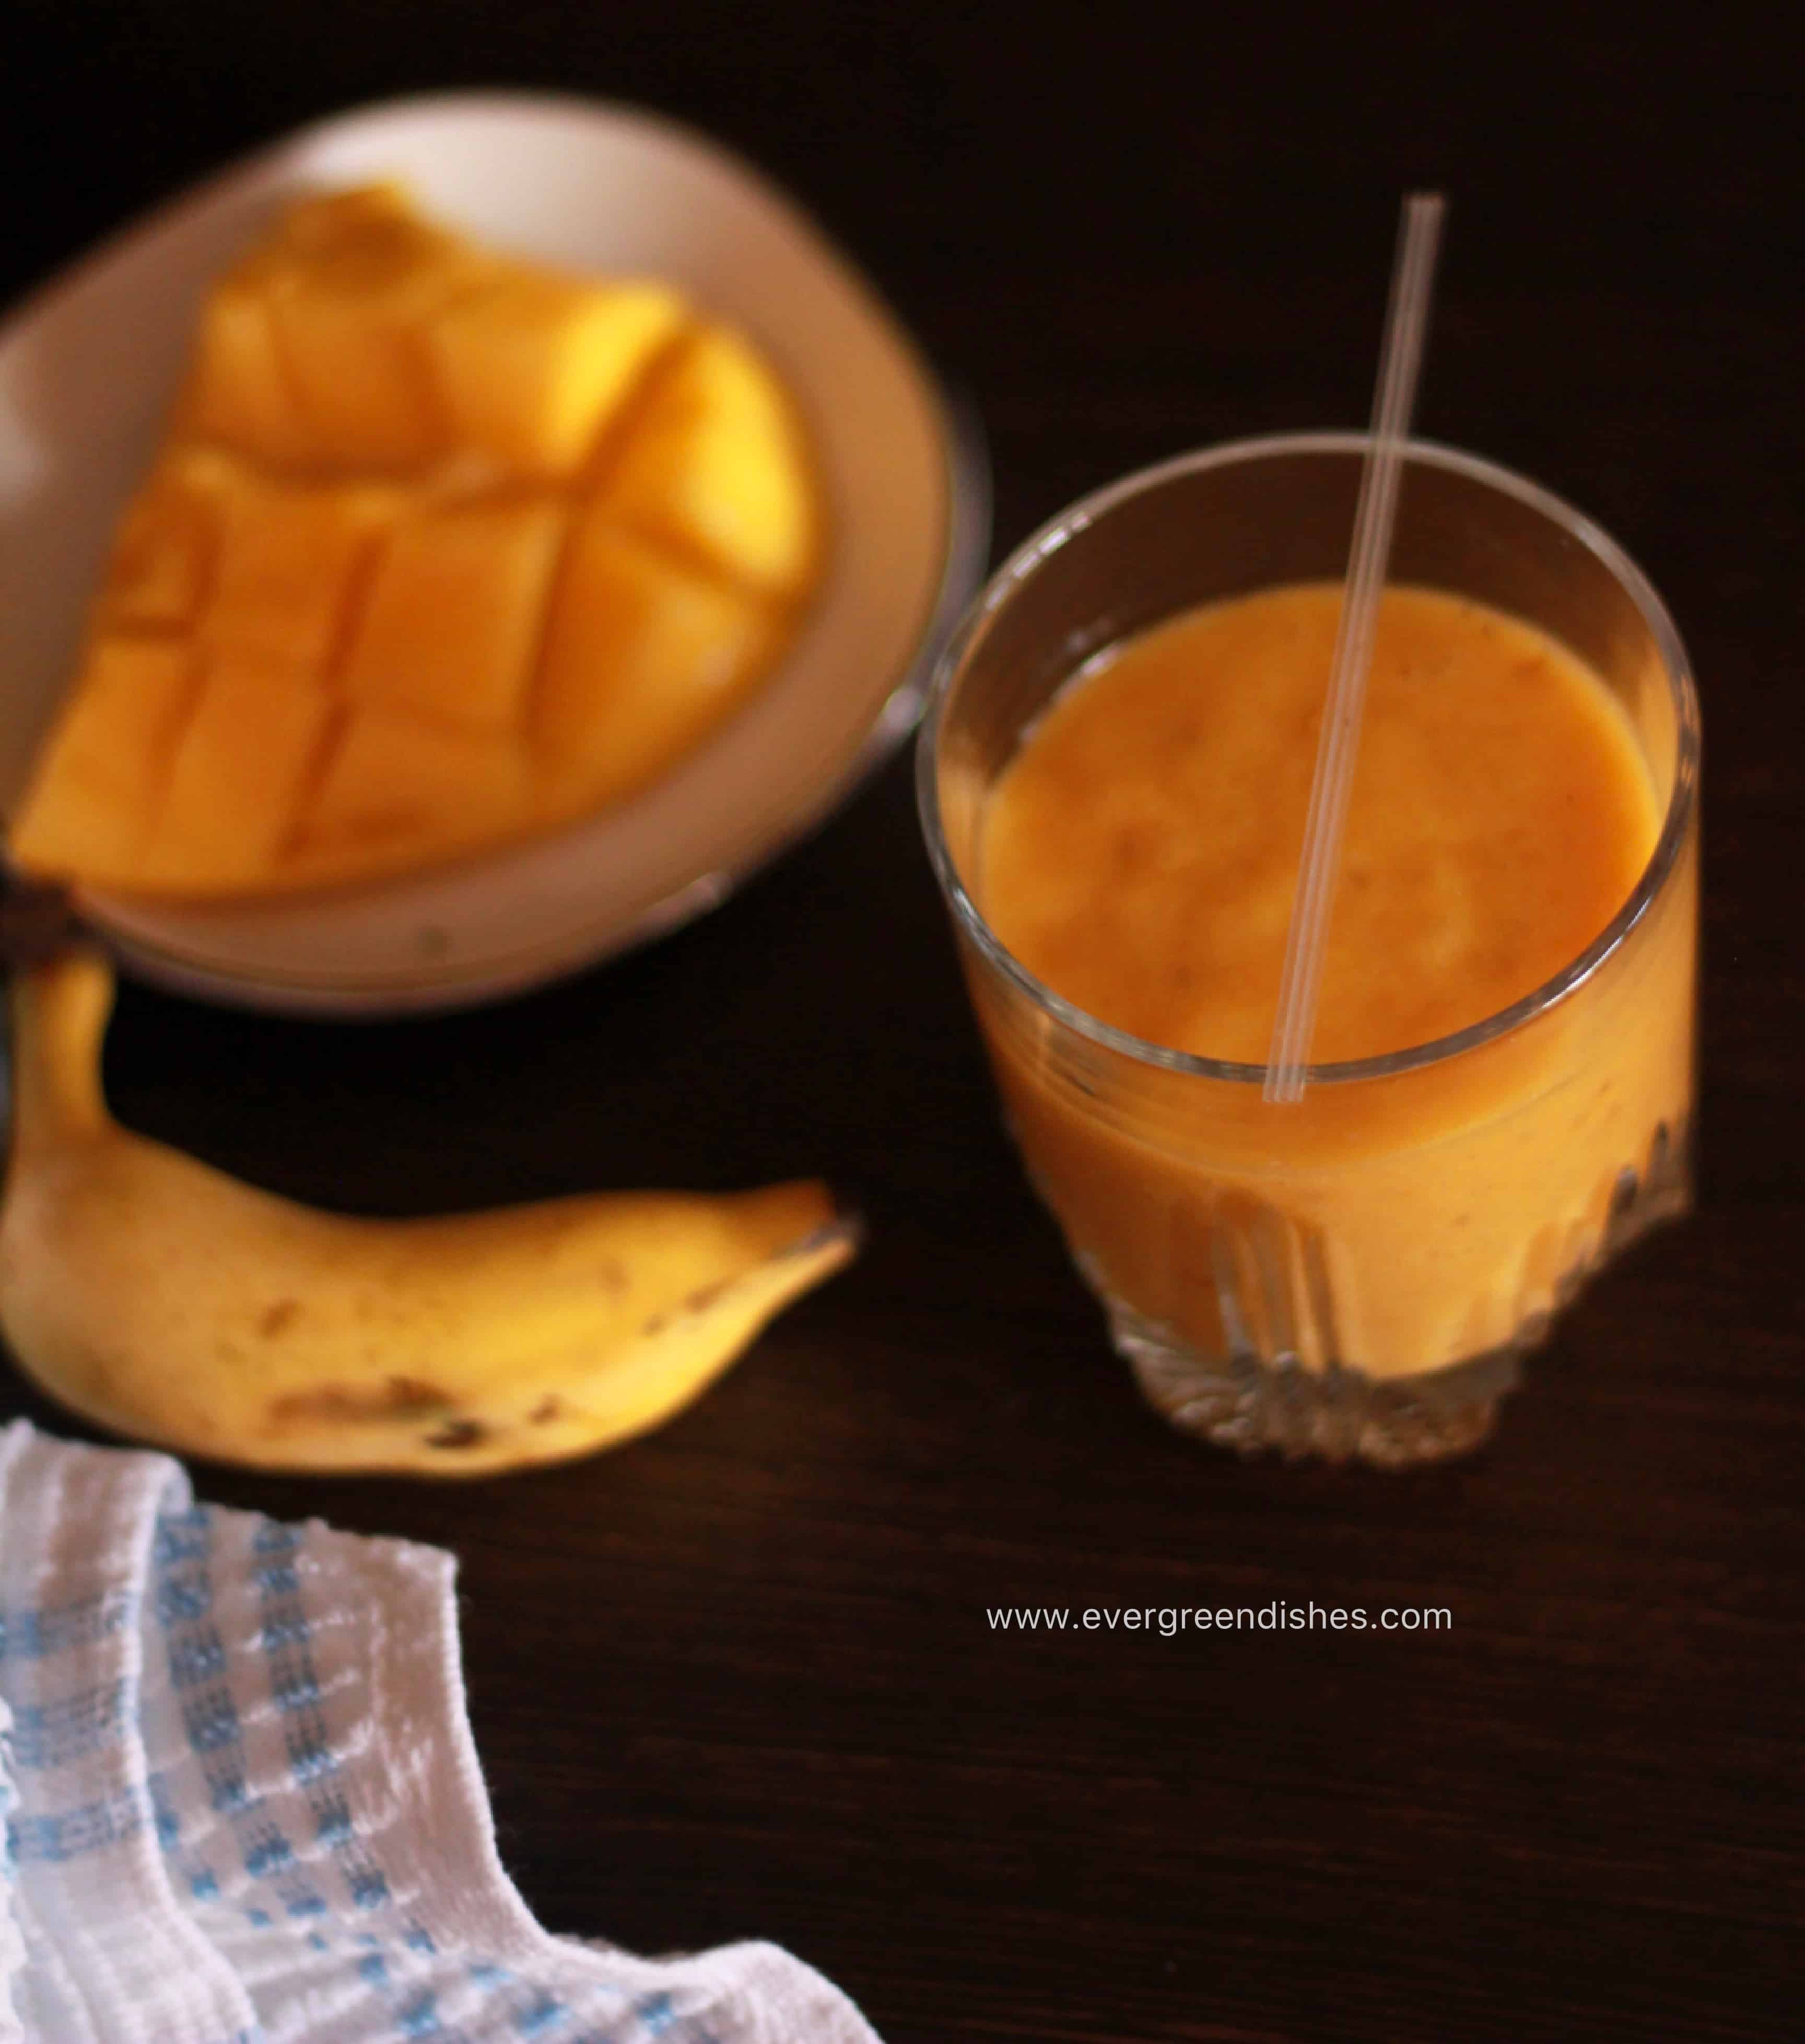
Banana Mango Oat Shake is a n easy to make, tasty and healthy drink to serve the family members. It is filling and provides the nutrients for the body.
Mornings are busy and one needs to search dishes that are not only healthy but easy to prepare. I serve milkshake along with other dish as it is helps to sustain for a longer period during the day.
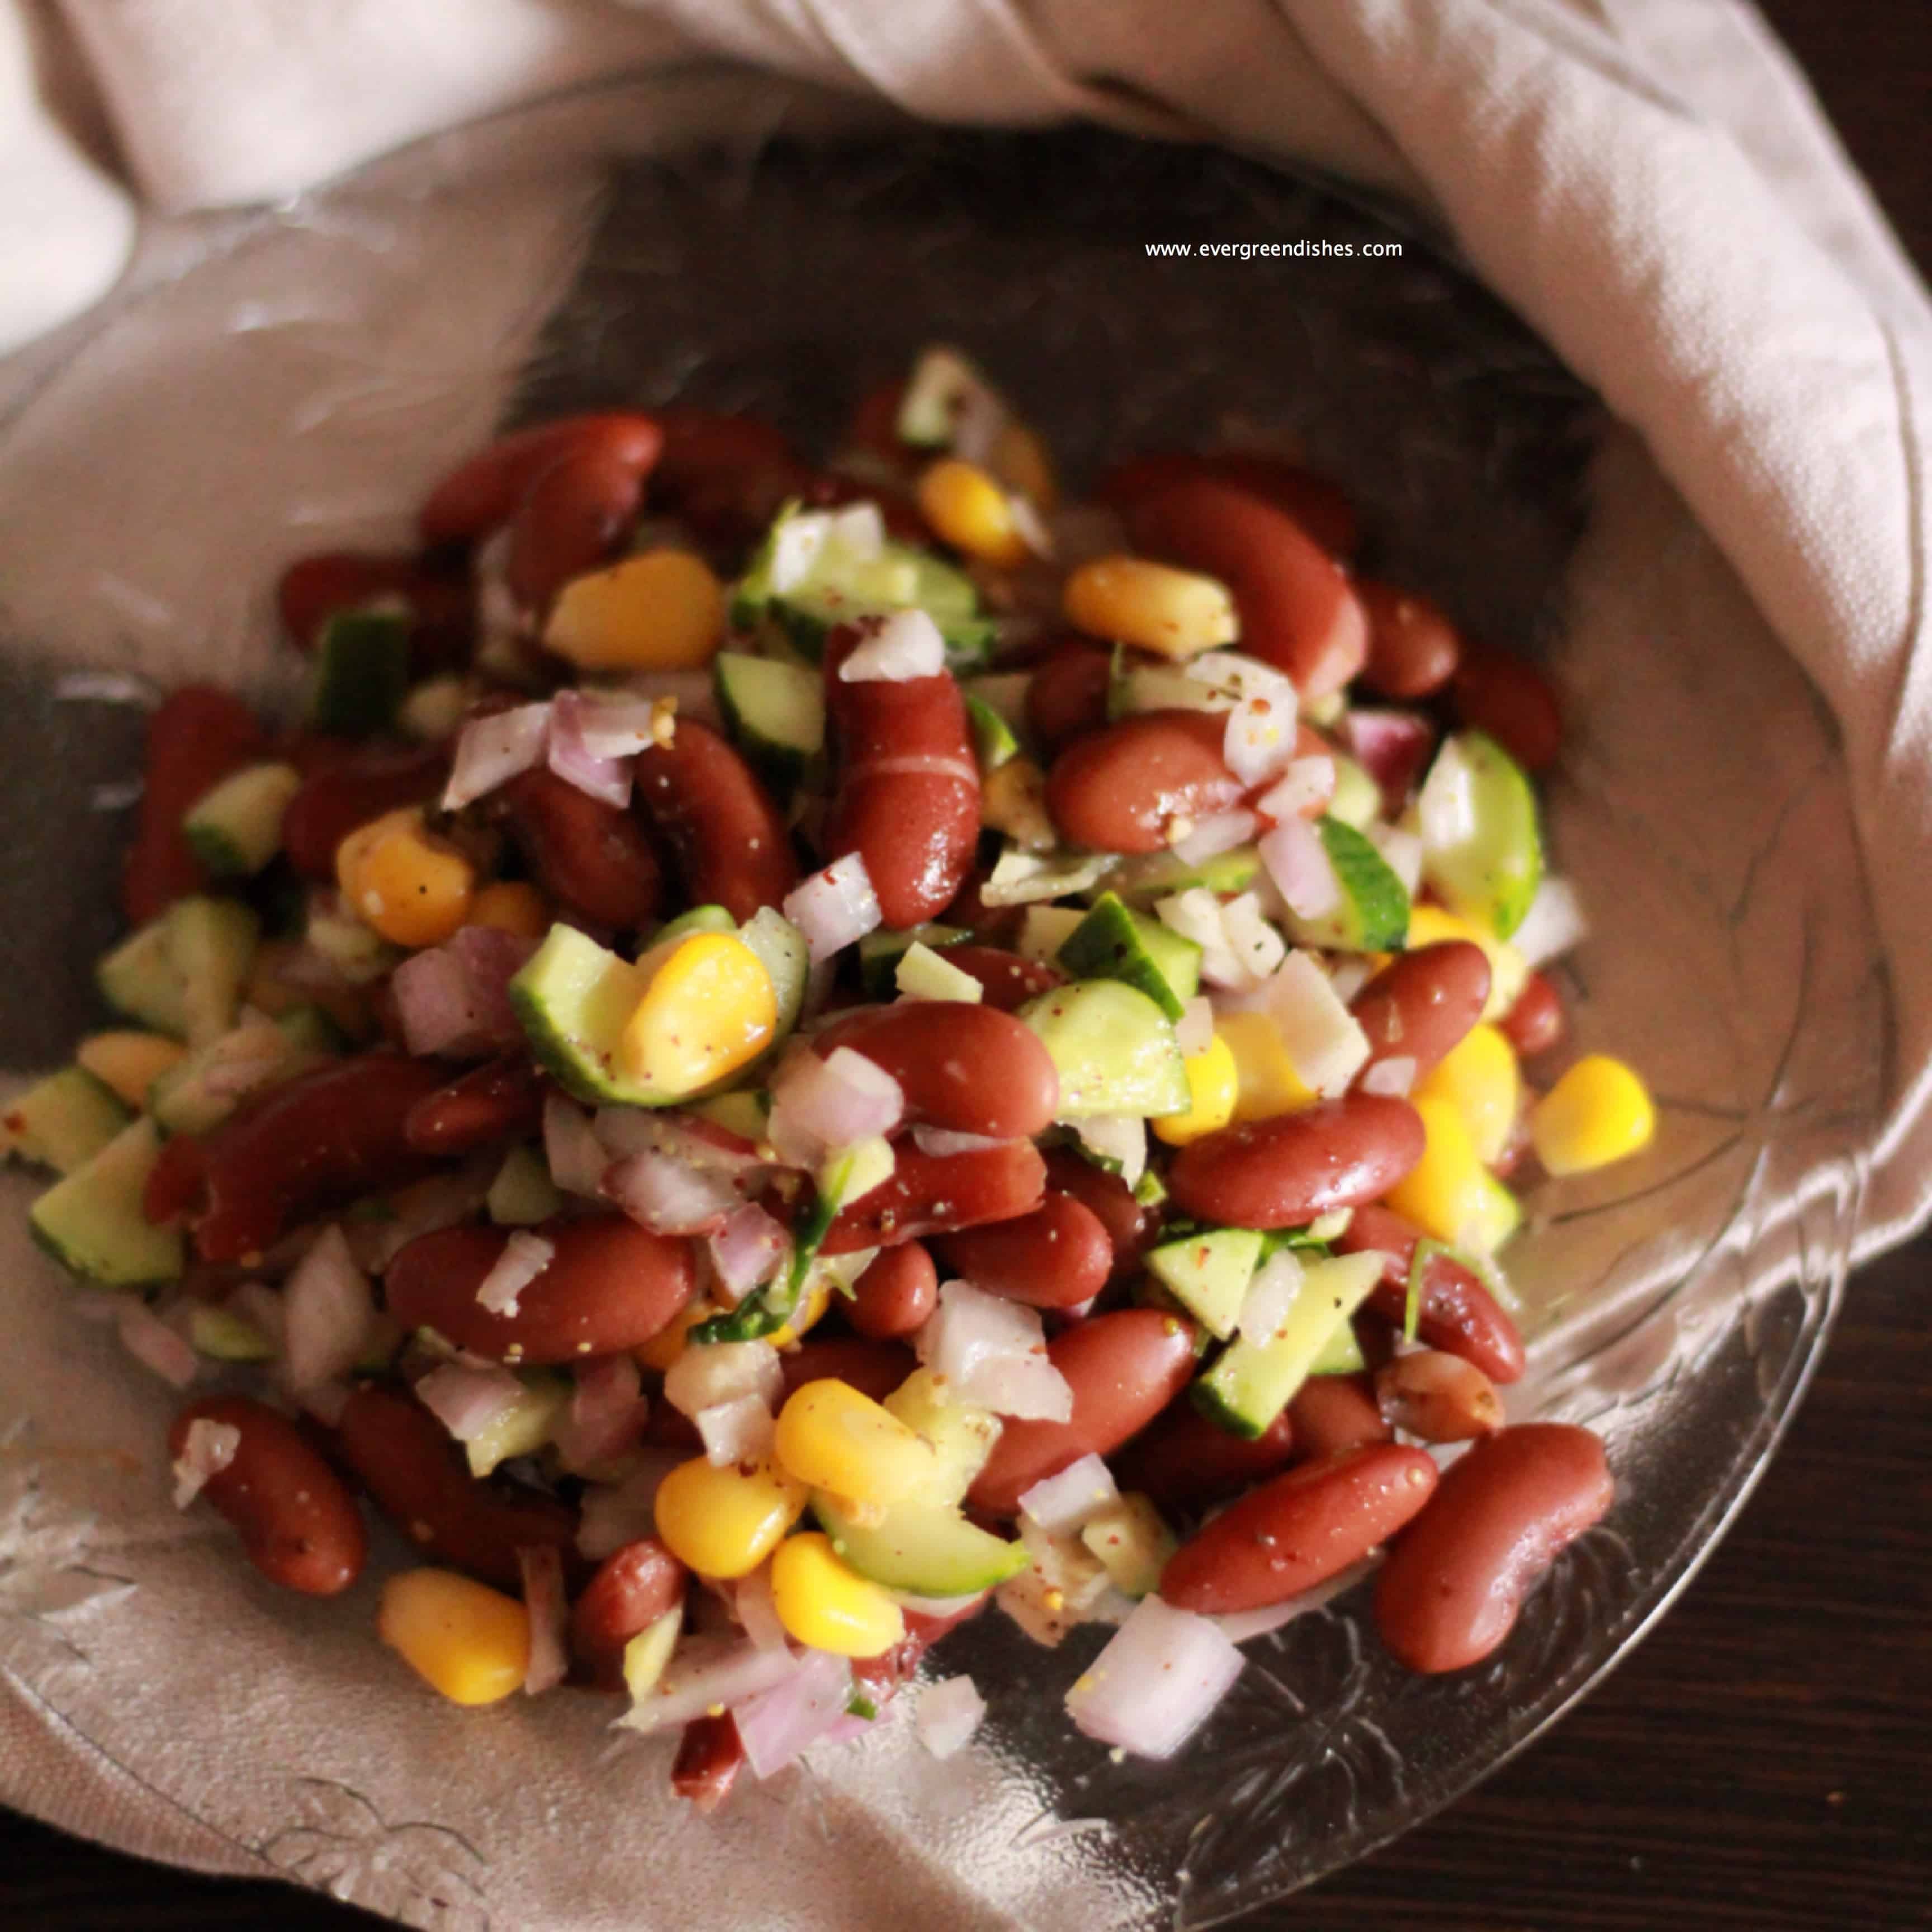
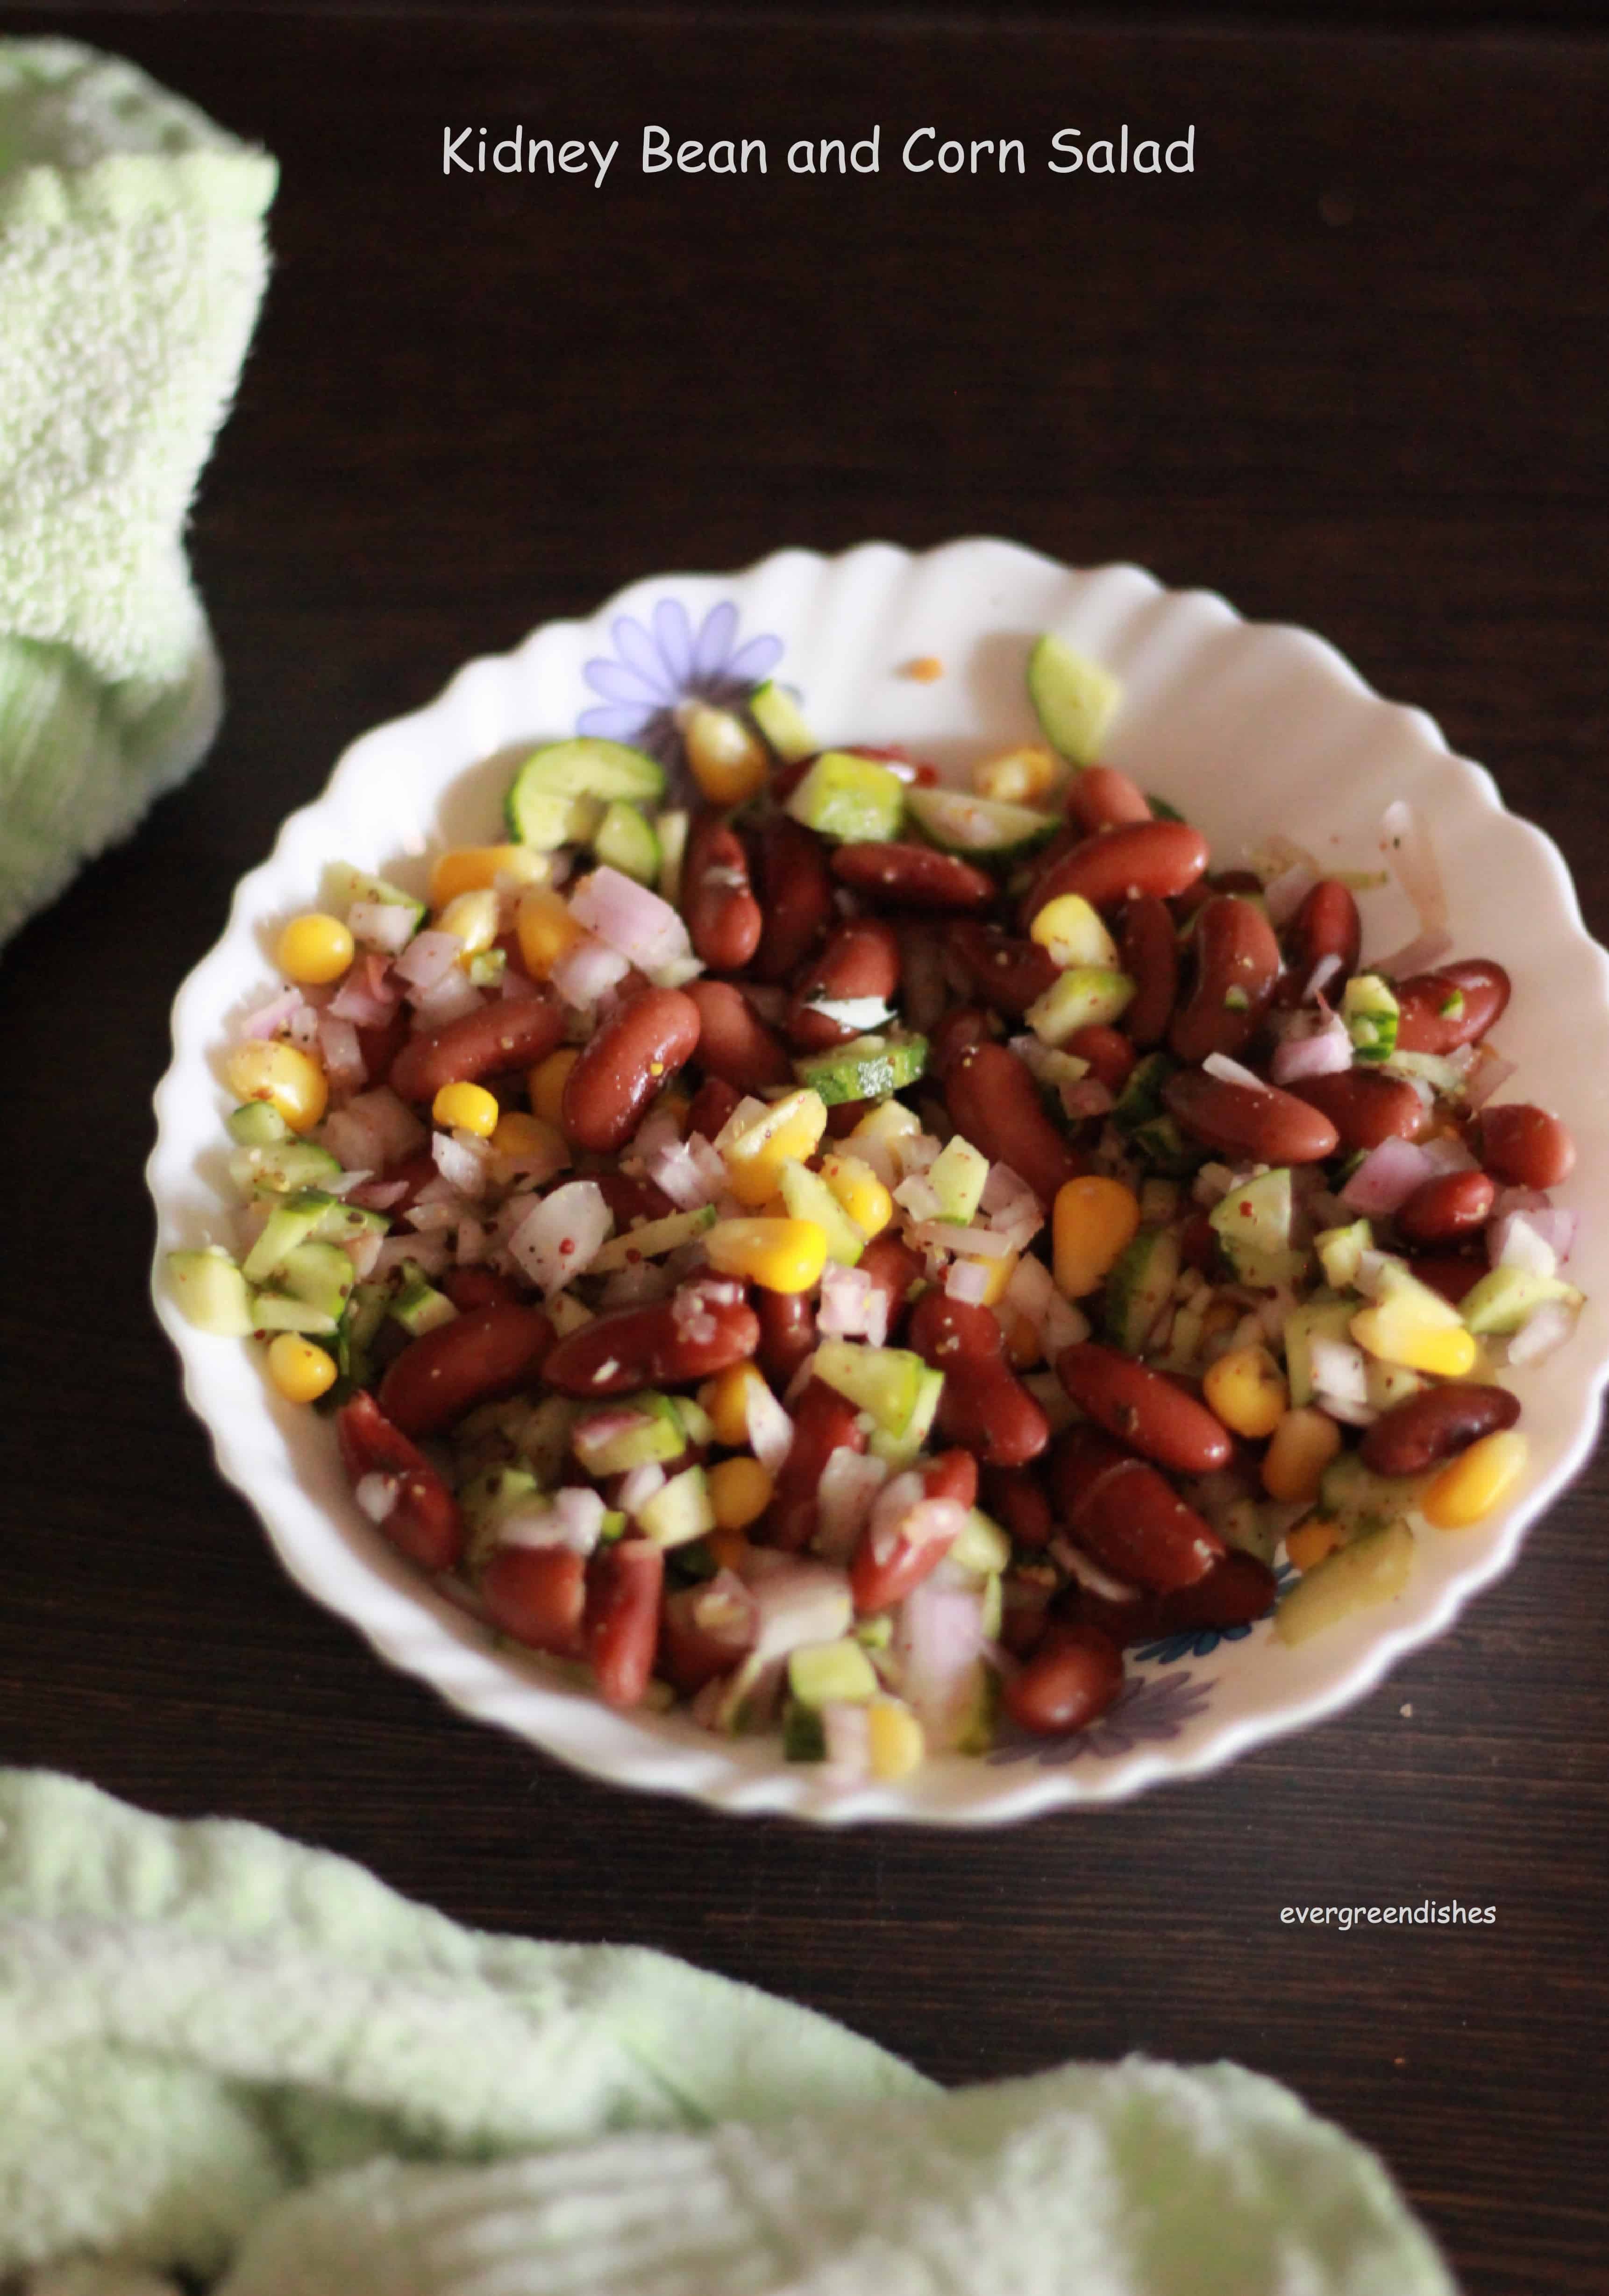
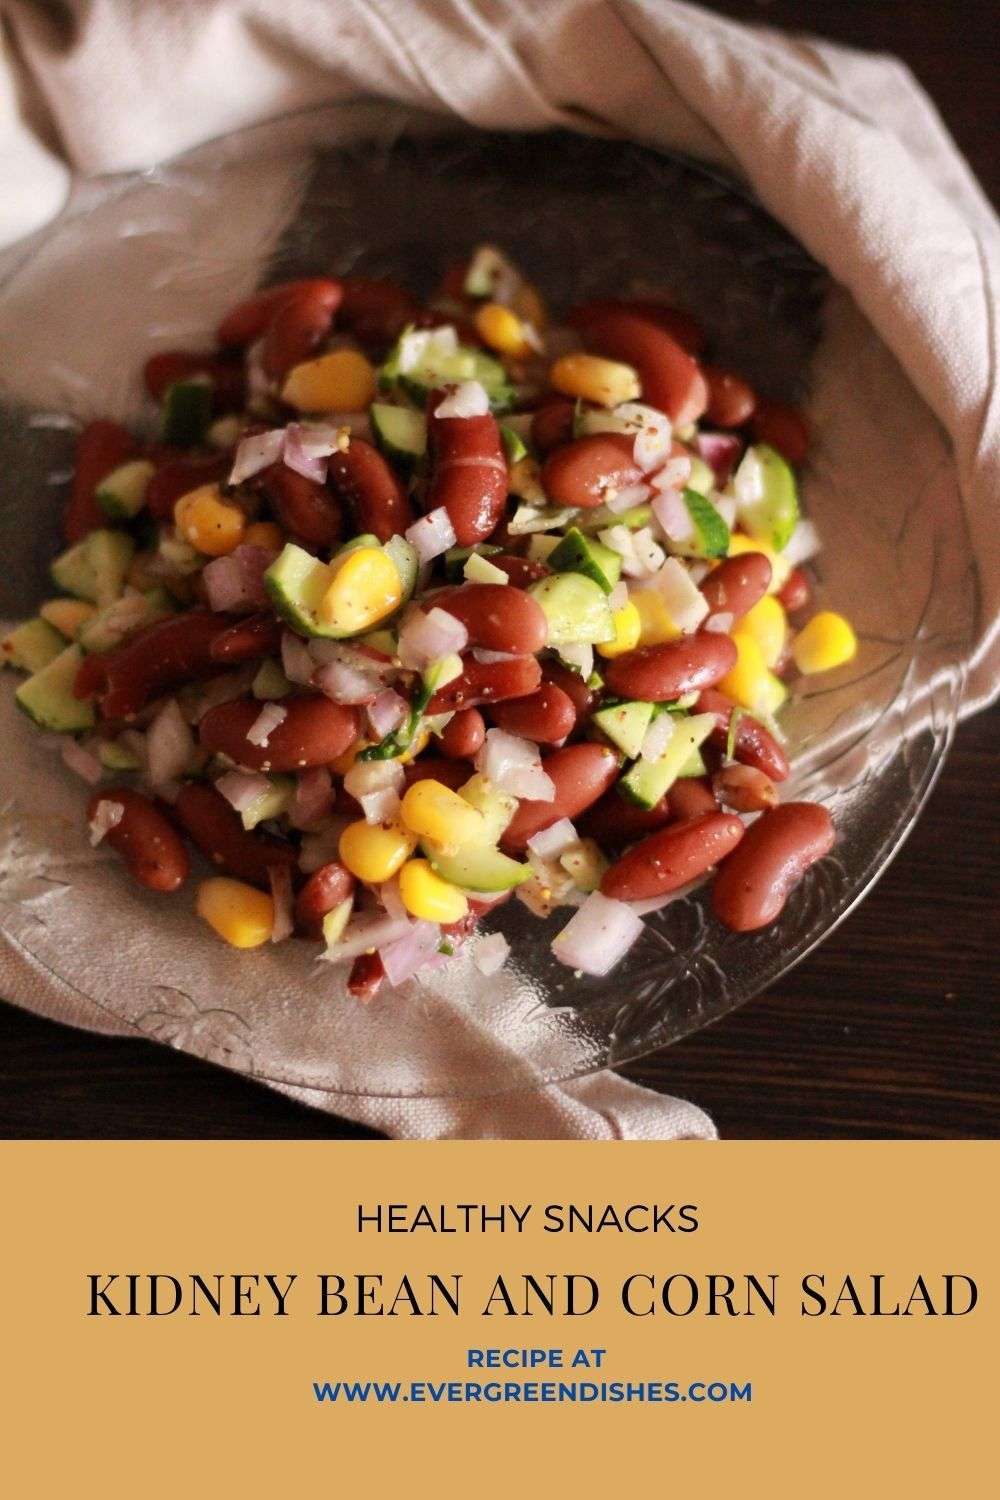
Kidney bean and corn salad is a tasty and nutrition packed snack to binge anytime. Serve it with lunch or as a light snack, it is definitely a crowd pleaser.
Salads form an important part of our diet. They are filling, tasty, easy to prepare and most of all, packed with nutrition and less on calories. It helps in the daily struggle to eat nutrition packed food.
We love this kidney bean salad, it is so tasty and filling. It is good to indulge in healthy eating on a regular basis.
Legumes are the seeds or fruits of a family of plants called Fabaceae. Legumes are the essential food in any vegetarian diet. They are a significant source of proteins, dietary fiber, vitamin B and dietary minerals. The well known legumes are clover, alfalfa, peas, beans, chickpeas, lentils, lupia bean, soybean, peanuts and tamarind.
Today, I have chosen kidney beans as the star ingredient here. Kidney bean is popular as Rajma in our country. Rajma Chawal is one of the cherished food of the North Indians, a gravy in which kidney beans are cooked.
Kidney beans are rich source of protein, carbohydrates and dietary fiber. It help in building the bones and keeping the heart healthy. It helps in weight reduction and improves metabolism. It strengthens the digestive system and improves the metabolism.
One cup (256 grams) of cooked kidney beans contains roughly 215 calories. It has 13.4 grams of protein and 13.6 grams of fiber. The folate is 23% of the RDI (Recommended Daily Intake), mangane is 22% of RDI, Vitamin K is 48% while Thiamine is 30% of RDI. Source : www.healthline.com
kidney bean and corn salad
Evergreendishesdev
Kidney Bean and Corn Salad
5 from 3 votes
Kidney bean and corn salad is a tasty and healthy snack to binge anytime.
Soak black beans overnight or for seven to eight hours.
Method:
Cook the black beans in pressure cooker for seven to eight whistles. Remove it only after the pressure releases by itself.
Cut onions finely. Cut cucumber into small chunks.
Put the corn kernels in hot water.
Take the beans and put them in a bowl. The water may be used later. Add other veggies to it.
In a small bowl, mix all the ingredients for the seasoning, and put it over it.
Gently mix and serve.
Notes
Kidney beans need to be well cooked. They should be soft when you touch between fingers, pressure cook it again if not done properly.
Canned beans may be used.
I have used frozen corn here.
kidney bean and corn salad
Sending this to My Legume Love Affair #120 hosted by Jagruti of JCookingOdyssey. popular as MLLA, this event which spotlights on Legumes was started in 2008 by Susan of The Well Seasoned Cook. Currently, it is run by Lisa of Lisa’s Kitchen.
If you have liked this post, do leave a comment. It motivates me to write more.
If you ever make this recipe, do take a photo of your creation and tag me on Instagram @foodiejayashree or @evergreendishes on Facebook. Subscribe to get all updates and an e-book for free.
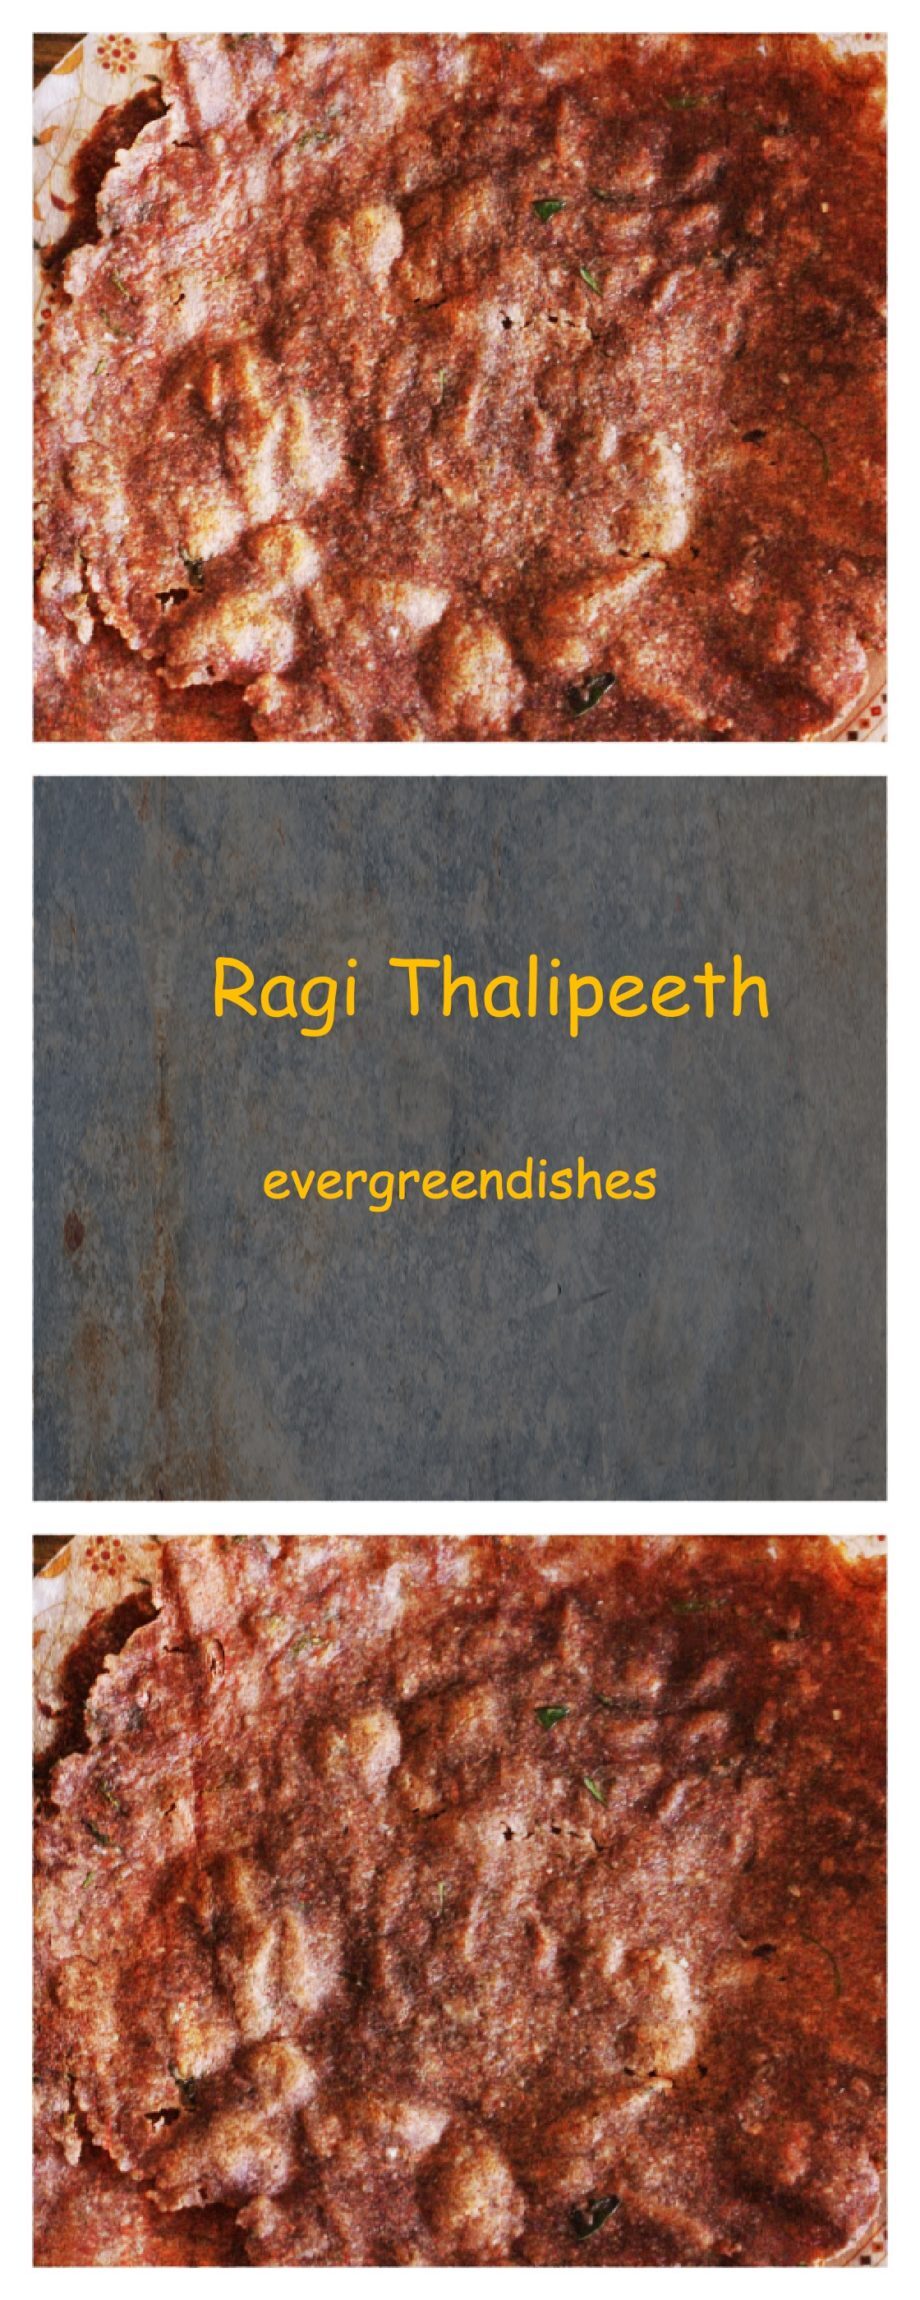
Ragi Thalipeeth | Finger Millet Flatbread | South Indian Recipes | Healthy Breakfast Recipes | Lunch ideas
Ragi thalipeeth is a tasty and healthy alternative to the usual one. It is vegan and gluten free. It is ideal for weight watchers and people suffering with diabetes.
Today, everyone is aware of the importance good health and all seem to be conscious of the food that they consume. Millets play an important role as they are low in calories and power packed, helping one to sustain energy for a long time.
Fingermillet or Ragi is a rich source of proteins and minerals. It contains important amino acids, high amount of calcium and potassium. It is low in fat and gluten free. It has cooling properties and ideal for summer.
Ragi mudde is the daily meal of many people in Karnataka. There are many ways in which we can include this super food in our diet. Here is the Ragi Idli that I posted earlier. Today, I am bringing to you, thalipeeth using ragi flour.
Thalipeeth is an Indian flat bread made using flour and pressed usually on sheet using hand. It is tasty like a pancake and can be served for breakfast, lunch or dinner.
Grind coconut, green chilly and cumin together to a paste.
Finely cut the coriander leaves, wash and keep it aside.
Take a bowl, add the flour and salt. Mix it. Put the paste, coriander leaves, curry leaves, sesame and mix it with a little water to form a stiff dough.
Take a rolling sheet and smear some oil over it. Take a ball of the dough and pat into a thin circle. Smear some oil as you do it.
Heat a skillet. Put the rolled thalipeeth onto it. As it gets cooked, you will be able to remove the sheet.
Flip it to the other side.
Once, it is done, remove and serve with coconut chutney.
Take a tip:
Chopped onions may be added.
Grated carrot or fenugreek leaves too can be added.
Sheets are available in the market, you can use the brown paper too.
Pin it for later:
Ragi thalipeeth
Evergreendishesdev
Ragi thalipeeth
Ragi thalipeeth is tasty and healthy alternative to the usual one. It is vegan and gluten free. It is ideal for weight watchers and people with diabetics.
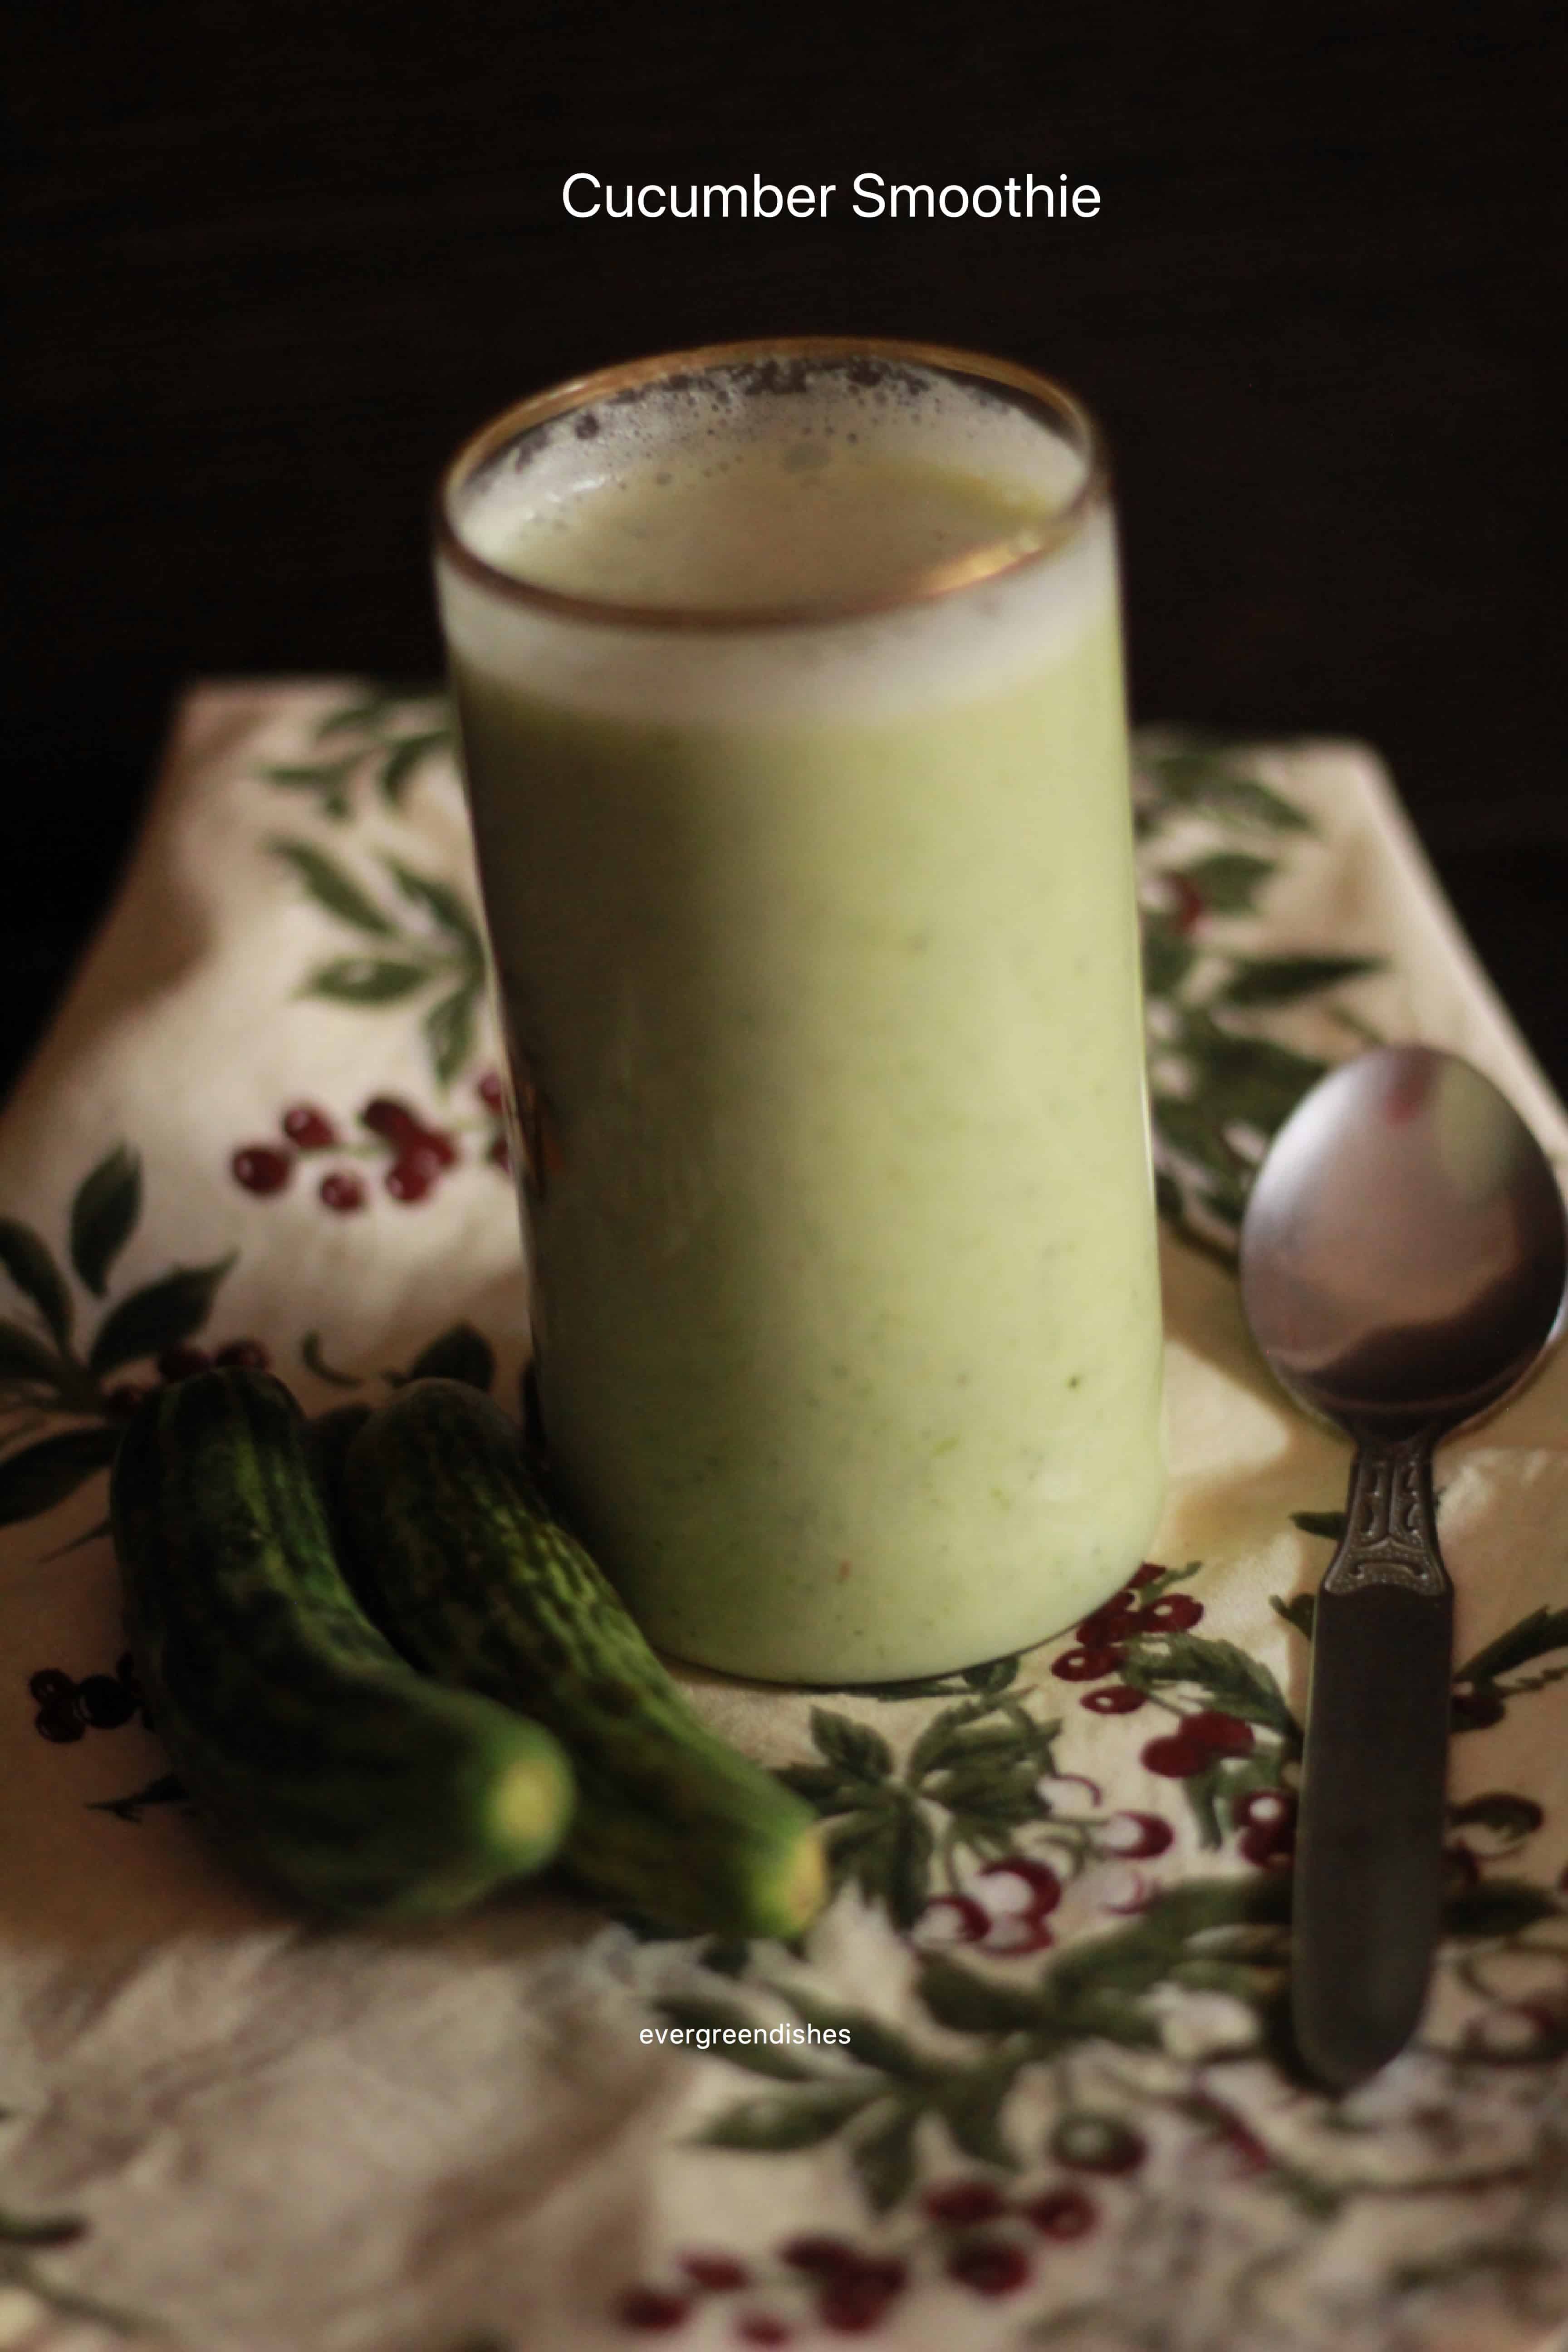
I am on the look out for better break fast option these days and by far this has been the tastiest one, Cucumber Smoothie. It’s ideal for summer and hardly takes a couple of minutes to whip it. (more…)
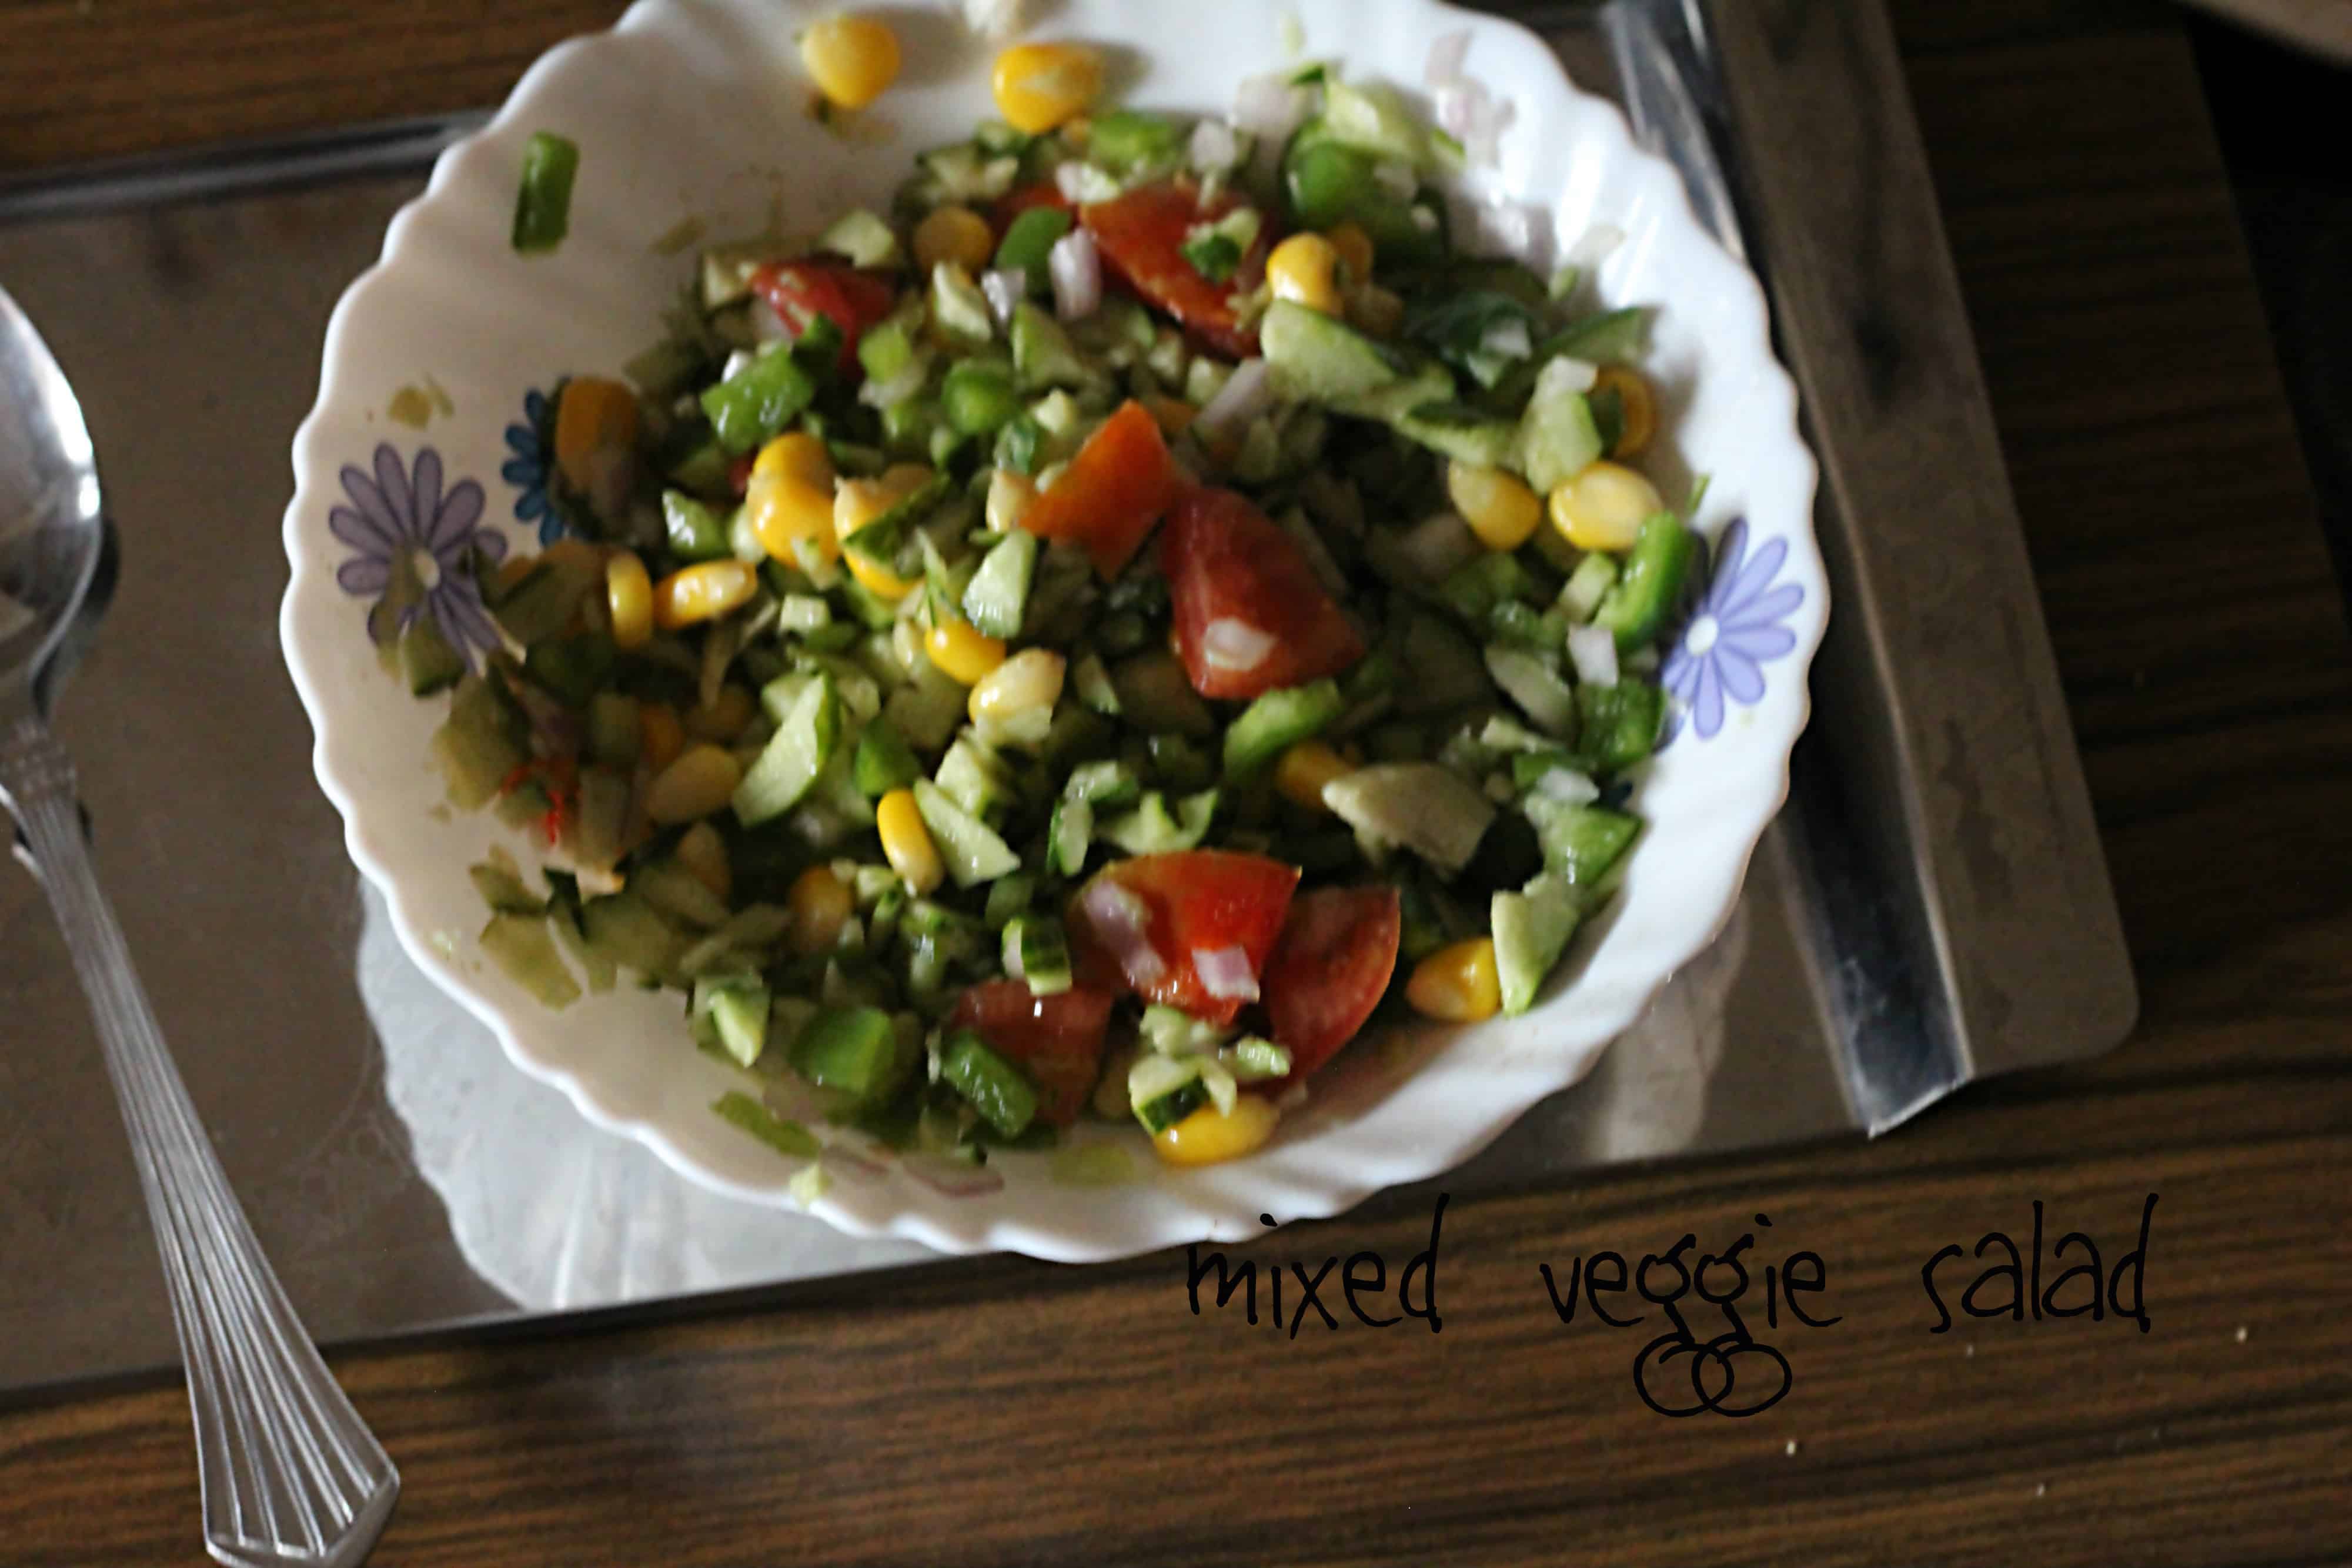
Mixed Vegetable salad is a tasty and refreshing salad. It is ideal as a snack or as an accompaniment with any meal.
Today, salads form an important part of our diet more so than ever. We are more mindful of what we eat, though cannot cut down at all times. The alarming rise of death rates, obesity and risk to life style diseases are some of the factors that have made us to change for good.
Salads are highly nutritious and less in calories. They are filling and tasty. Here is one such salad that I love to binge on.
mixed vegetable salad
Mixed Vegetable salad
Ingredients:
4 cucumber
1 onion
1 tomato
1 capsicum
1 cup sweet corn kernels
For the seasoning:
2 teaspoon olive oil
1/2 teaspoon pepper powder
1 teaspoon lemon juice
salt to taste
Method:
Wash all the vegetables (except the onions).
Cut the cucumber into small pieces.
Dice the tomato and capsicum into small cubes.
Cut the onion finely.
Put the corn kernels in hot water for sometime, drain the water and put in a colander after sometime.
Mix all the veggies in a bowl.
Mix the pepper powder and salt in lemon juice. Add olive oil to it. Mix and pour it over the salad.
Chill and serve.
Take a tip:
You can add carrots, I have not added here.
Add walnuts and raisins if you are giving it to children.
If you have liked this post, do share it further. Appreciate all your comments, it really motivates me to write more. Follow evergreendishes on all other social media.
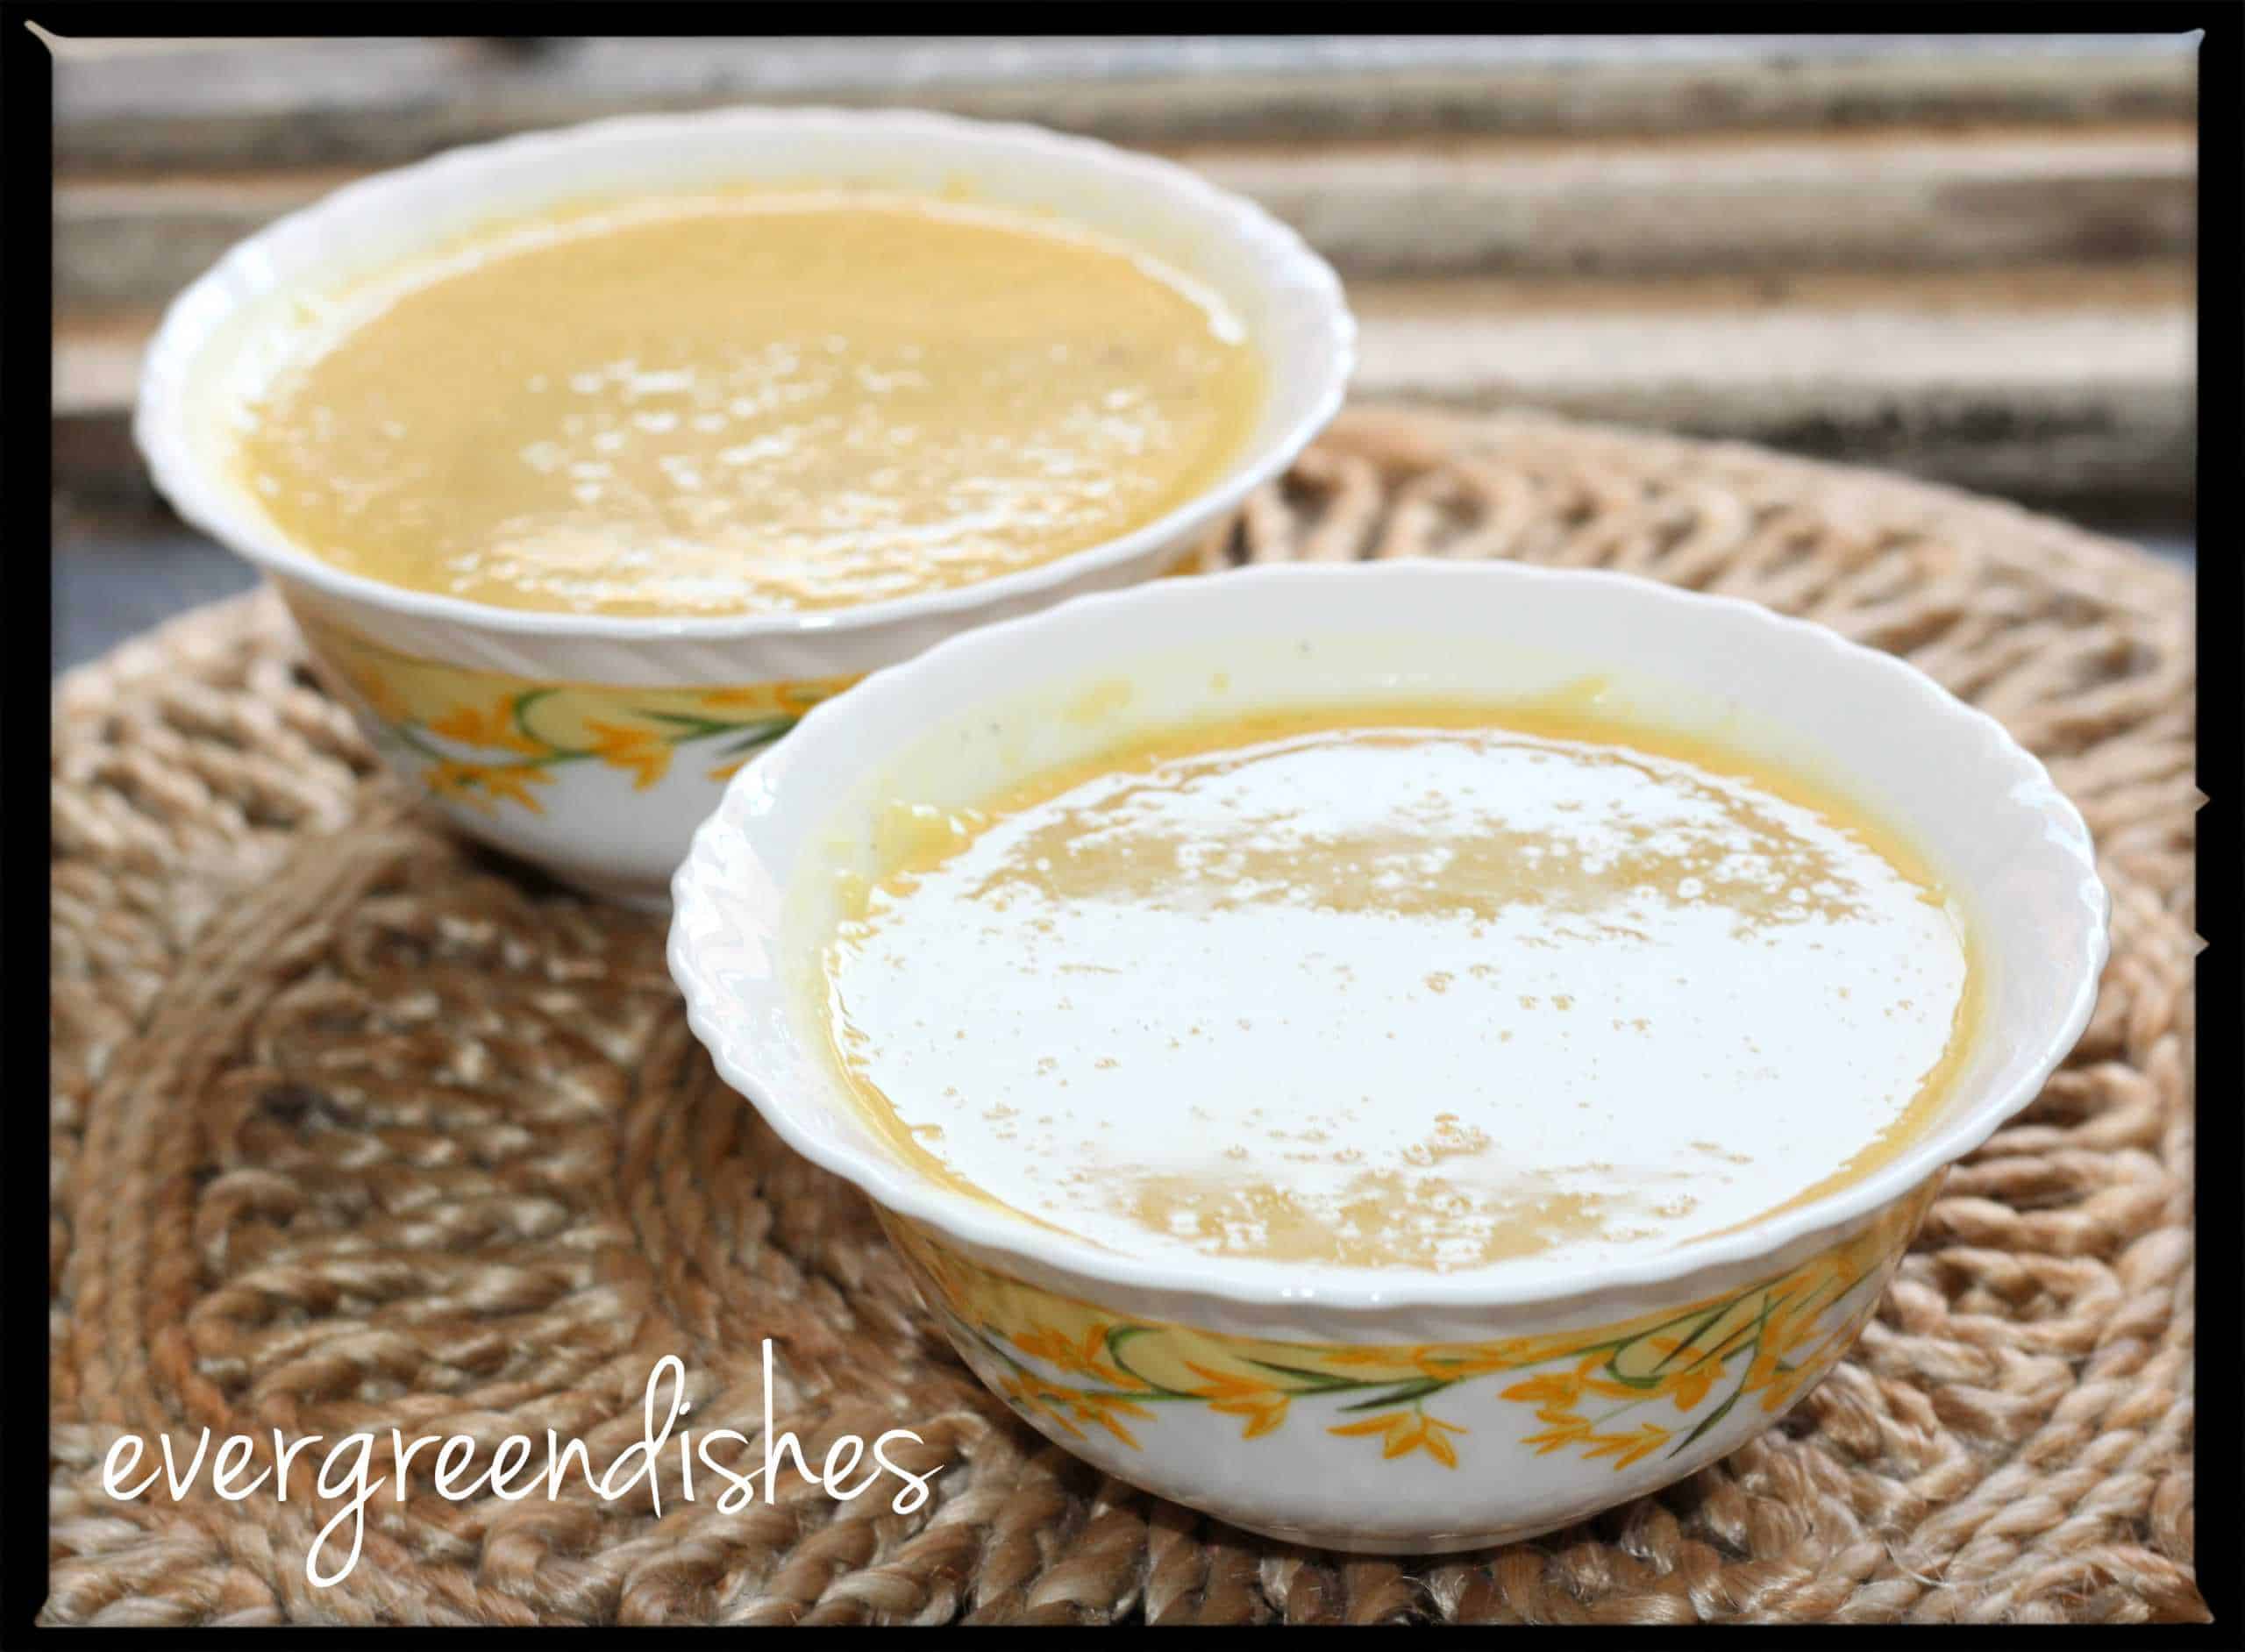
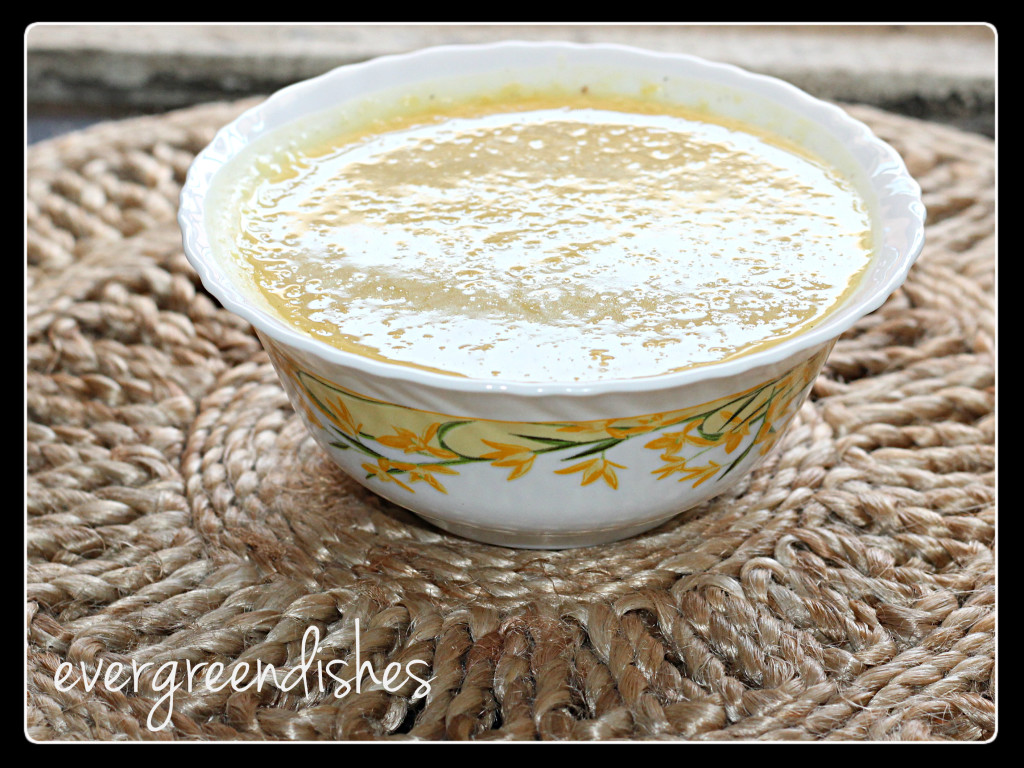
Moongdal payasam is a tasty sweet which has a cooling effect on the body. Thus, with summer at its peak, you can enjoy this delicacy. Moreover, with Ugadi round the corner, it may be in the wish list.
Each state have adapted their own method of cooking. The North Karnataka recipe I had written long time back. You can check it here.Today, I am presenting to you Mangalorean style or Udupi style ( South Canara) style of this payasam.
Coconut milk is used here. I have grinded cashews with a little coconut and mixed it. Thus it is both vegan and gluten free food.
With Ugadi approaching, I am planning to write a few good posts and finally make a collection of recipes too from bloggers for you. Please do keep watching this space.
moongdal payasa
Moongdal payasam, mangalore style
Recipe Type: Sweets
Cuisine: Udupi
Author: Jayashree
Cook time:
Total time:
Serves: 4
A tasty and cool dish to beat the heat
Ingredients
Moongdal 1cup
ghee 2tsp
coconut milk 2 cup
jaggery 1cup
grated coconut 1tbsp
cashew 6
cardamom 4
Instructions
Wash the moongdal and keep it aside. Take a thick bottom pan,add the ghee and roast the moong dal. Add water and cook it. Alternately, you can put it in the pressure cooker at this stage.
But, this does not require much time, so I prefer to cook by the direct method. Once it is cooked, add the coconut milk and stir well. Add the jaggery. Grind the coconut with cashew and cardamom. Add this to it. Boil for a minute. Remove from fire. Moongdal payasam is ready
Notes
You can avoid adding the extra coconut. Cashews can be garnished over also.
Wash the moongdal and keep it aside. Take a thick bottom pan,add the ghee and roast the moong dal. Add water and cook it. Alternately, you can put it in the pressure cooker at this stage.
But, this does not require much time, so I prefer to cook by the direct method. Once it is cooked, add the coconut milk and stir well. Add the jaggery. Grind the coconut with cashew and cardamom. Add this to it. Boil for a minute. Remove from fire. Moongdal payasam is ready.
If you ever make this recipe, take a picture and share it by tagging @foodiejayashree on Instagram or @evergreendishes on Facebook. I will be glad to see and share your creation further.
Check out my e-books on Amazon. Do not miss any post, subscribe to get all updates and an e-book for free !
Dal Fry is a popular accompaniment in our daily menu. The recipe shared makes a good accompaniment with steamed rice as well as chapathi.. It is a no onion garlic dal fry recipe.
A new year and its a new post. Thank you one and all for the support in 2014. I want to share many more recipes here, will soon do it.
Dal fry is one of the essentials in Indian cooking. It makes a complete meal. Tur dal, commonly called as split pigeon pea is the main ingredient in dal. It is also known as arhar dal. It makes a good accompaniment with steamed rice as well as with chapathi. Today, I am sharing a simple dal recipe which is ideal for daily cooking. It is a no onion garlic recipe, ideal for the festive days too. It is vegan too.
Incase, you use ghee, it tastes good but it is not vegan.
How is the dal cooked ?
Proper cooking of the lentil is utmost important. Uncooked lentil does not taste good and may cause indigestion. To cook the dal, take a cup of split pigeon pea, rinse it in water and soak it in four cups of water for half an hour. Put it in the pressure cooker with a quarter teaspoon of turmeric powder. Cook it for three whistles. Allow the pressure to release by itself. Take the dal and mash it well with a ladle or a wired mesh The cooked dal is now ready for further use. You may add a little oil also while cooking.
Can we keep the cooked dal in the refrigerator?
Yes, you can keep it in the refrigerator for four days. Take the required quantity needed for cooking and put the remaining back.
Dal Fry
Today, I present to you dal fry cooked the restaurant style.This simple dish is an all time favourite of everyone. Serve it with plain white rice or chapati and you really relish it.
The ingredients that you need are :
1 cup tur dal or split pigeon cooked
1 tablespoon oil
1/2 teaspoon mustard
1/4 teaspoon asafoetida
1/4 teaspoon turmeric powder
1/2 teaspoon cumin
1 teaspoon grated ginger
4 green chilli cut into pieces
3 tomatoes finely cut
salt to taste
coriander leaves finely cut
1/2 lemon juice
Method :
Take oil in a pan. Add mustard seeds, as it crackles put cumin, asafoetida and turmeric powder. After a few seconds, put the ginger followed by the green chilli.
Now, add the tomatoes and put salt to it. Sprinkle a little water.
Once the tomatoes are tender, mix it thoroughly. Put the cooked dal to it and mix it well.
Adjust the consistency of the dal, it is neither thick or thin.
Allow it to cook for sometime.
Garnish with chopped coriander. Switch off. Add lime juice to it.
Take a tip:
To cook dal, check the post in the beginning.
Do not skip on ginger, it lends a good flavour.
About the event :
Sending this to Foodies _Redoing Old Post 94. It is a fortnightly event started by Renu of Cook With Renu. Since then we have come a long way.
Dal Fry was first published in 2015, edited on 11/2/23 . The post has been modified in all aspects, better pictures, text, video.
Check the video here :
Dal Fry Recipe
Dal Fry is a simple, tasty and easy to make recipe. It is a no onion garlic and ideal for the festive days.
Take oil in a pan. Add mustard seeds, as it crackles put cumin, asafoetida and turmeric powder. After a few seconds, put the ginger followed by the green chilli.
Now, add the tomatoes and put salt to it. Sprinkle a little water.
Once the tomatoes are tender, mix it thoroughly. Put the cooked dal to it and mix it well.
Adjust the consistency of the dal, it is neither thick or thin.
Allow it to cook for sometime.
Garnish with chopped coriander. Switch off. Add lime juice to it.
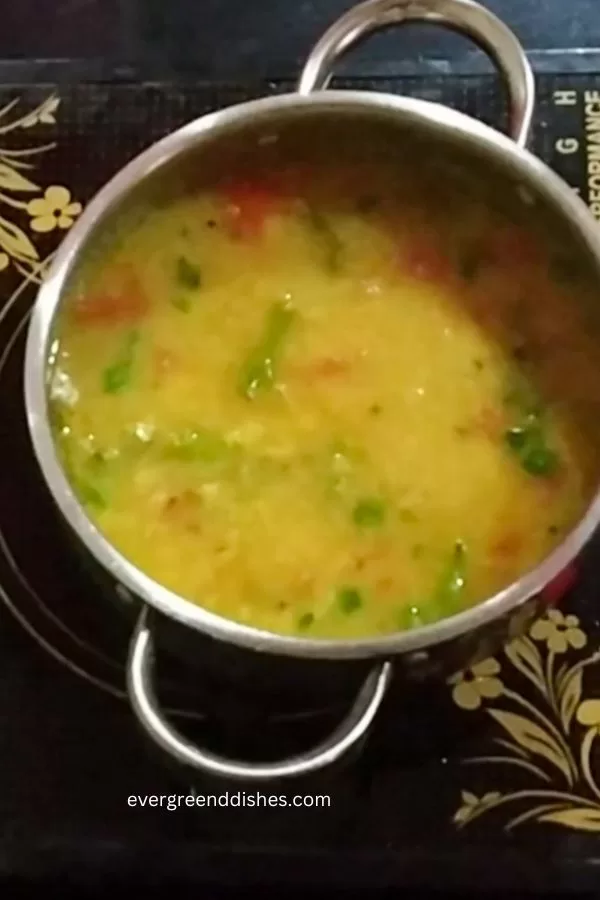
tasty dal fry
f you make Dal Fry recipe, take a picture and share it by tagging @foodiejayashree on Instagram and @evergreendishes on Facebook. Subscribe to get all updates and an e-book for free. Until next time, happy cooking !
Our cooking is influenced from northern states. We adhere their style in daily dishes and thus it seems to have become a part of us. This dish can be served both with rice and chapati .
INGREDIENTS :
tur dal 1 cup
tomatoes 3
red chilli powder 1 1/2 tsp
ghee 1tbsp
salt
cumin 1tsp
mustard 1/2 tsp
asafoetida 1/4 tsp
turmeric powder 1/4 tsp
an all time favourite
METHOD :
Cook the lentil in the pressure cooker. Take a wok and add the ghee. Make the seasoning with cumin,mustard, asafoetida and turmeric powder. Add the tomatoes and salt with some water. allow to cook. Now add the chilli powder and boil for some time. Add the cooked dal to it. Let boil. Serve garnished with coriander .
Evergreendishesdev
Dal, north indian
Dal is one of the essentials of Indian menu. North indian dal is tasty and pairs well with both rice and chapati.
Cook the lentil in the pressure cooker. Take a wok and add the ghee. tomatoes and salt with some water. allow to cook. Now add the chilli powder and boil for
Take a wok and add the ghee. Make the seasoning with cumin,mustard, asafoetida and turmeric powder. Add the tomatoes and salt with some water. allow to cook.
Now add the chilli powder and boil for some time. Add the cooked dal to it. Let boil. Serve garnished with coriander .