Blog

  • Tri-colour Dhokla | Gujarati cuisine

    Tri-colour Dhokla | Gujarati cuisine

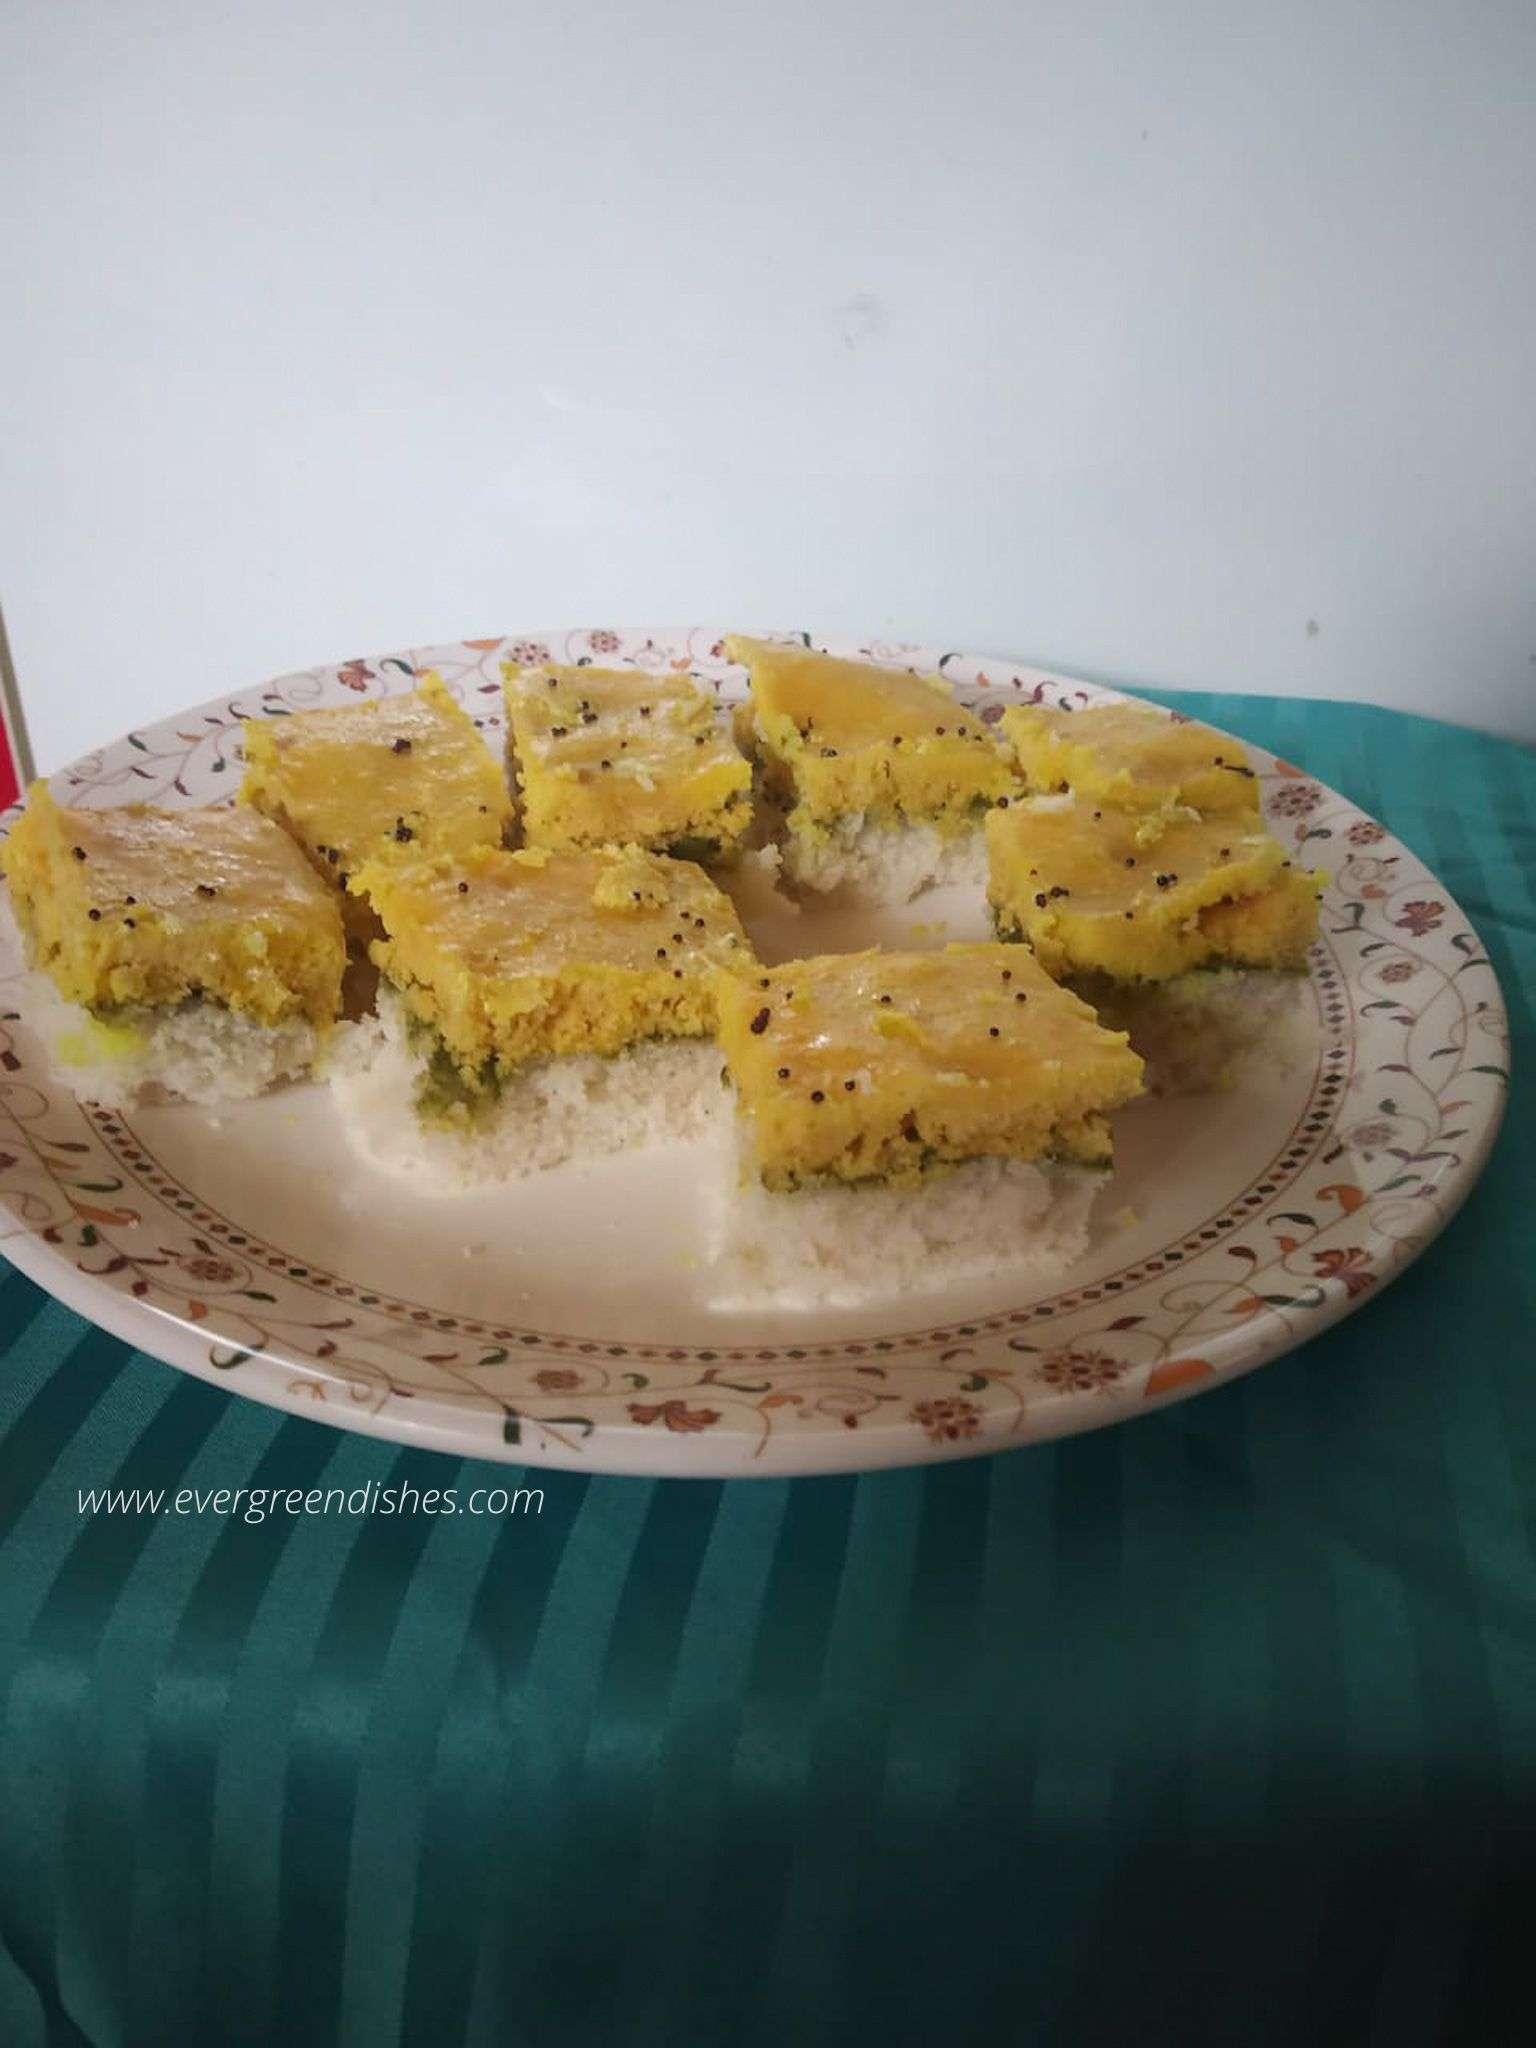
    Tri-colour dhokla is a three layered dhokla. The green layer is sandwiched between the yellow coloured dhokla and white dhokla. The yellow dhokla is khaman dhokla. It makes a good evening snack.

    Dhokla as we all know is a popular savoury snack from Gujarati cuisine. It was initially made with gram flour but soon different kinds were made. Dhokla in its real form is  fermented and later steamed. Times have changed, today, most of the dhokla recipes we make are the instant versions. The most common scenario is we are on work and need to whip some quick dishes, isn’t it ? I have shared many instant dhokla recipes earlier. Check out my corn dhokla, oats dhokla and multi-millet dhokla

    To make tri-colour dhokla, it needs a little planning. It is made by fermenting the two batters. Ideally, it is best to mix at night and prepare in the morning. But, incase, you want to make it in the evening, you need to mix the batter in the morning itself. Here, I have taken one cup of flour, feel free to use the same measurement in grams.

    Let us get to the tri-colour dhokla recipe:

    tri-colour dhokla

    Tri-colour Dhokla

    Ingredients:

    • 1 cup rice flour      ( 1 cup =240ml)
    • 1 cup gram flour
    • 1 cup sour curd
    • 1 tablespoon green chutney
    • 1 teaspoon gram flour
    • 2 tablespoon + 2 teaspoon oil
    • 1 teaspoon soda
    • salt to taste
    • 1/2 teaspoon mustard
    • 1/4 teaspoon asafoetida
    • 1/2 teaspoon cumin
    • a few curry leaves
    • 2 green chilli
    • 1 tablespoon buttermilk
    • coriander for garnishing

    Method:

    1. Take rice flour and gram flour in two seperate bowls.
    2. Mix some curd with gram flour and put it aside.
    3. Use the remaining curd to mix rice flour.
    4. Cover with a lid and keep them in a warm place. Ferment  for at least five hours.
    5. Mix a spoon of besan in the green chutney. This is used for the green layer.
    6. Heat two tablespoon of oil in a pan, add soda to it . Once it cools, mix into both the batter.
    7. Add the required quantity of salt to both the batter.
    8. Put the dhokla steamer to heat.
    9. Grease the tin.
    10. Now, put half the quantity the oil with soda mixture to the white batter. Mix and pour into the tin.
    11. Allow it to steam.
    12. After five minutes, when it is partially done, spread the green chutney over it. Close the lid and steam for two minutes.
    13. Now, pour the remaining oil and soda mixture to the khaman batter. Mix and pour it over the green chutney which you had spread.
    14. Allow it to steam for sometime, a knife pricked should come out clean.
    15. In the meantime, make the seasoning with nustard, cumin, green chilli and cury leaves. Mix some nutermilk in the seasoning.
    16. Cut the dhokla into pieces, pour the seasoning over it.
    17. Tri-colour dhokla is ready to serve.

    Tips :

    • The curd should be sour but not foul smelling. It is best to use a day old curd kept outside.
    • Fermentation is needed for this variety of dhokla. I, mix the dhokla batter at night and keep it aside.
    • Use a little water, if needed, while mixing the dough.
    • To make green chutney, grind coriander, green chilli and salt with a little water. Later, mix gram flour to it.
    • You can add sesame for topping.

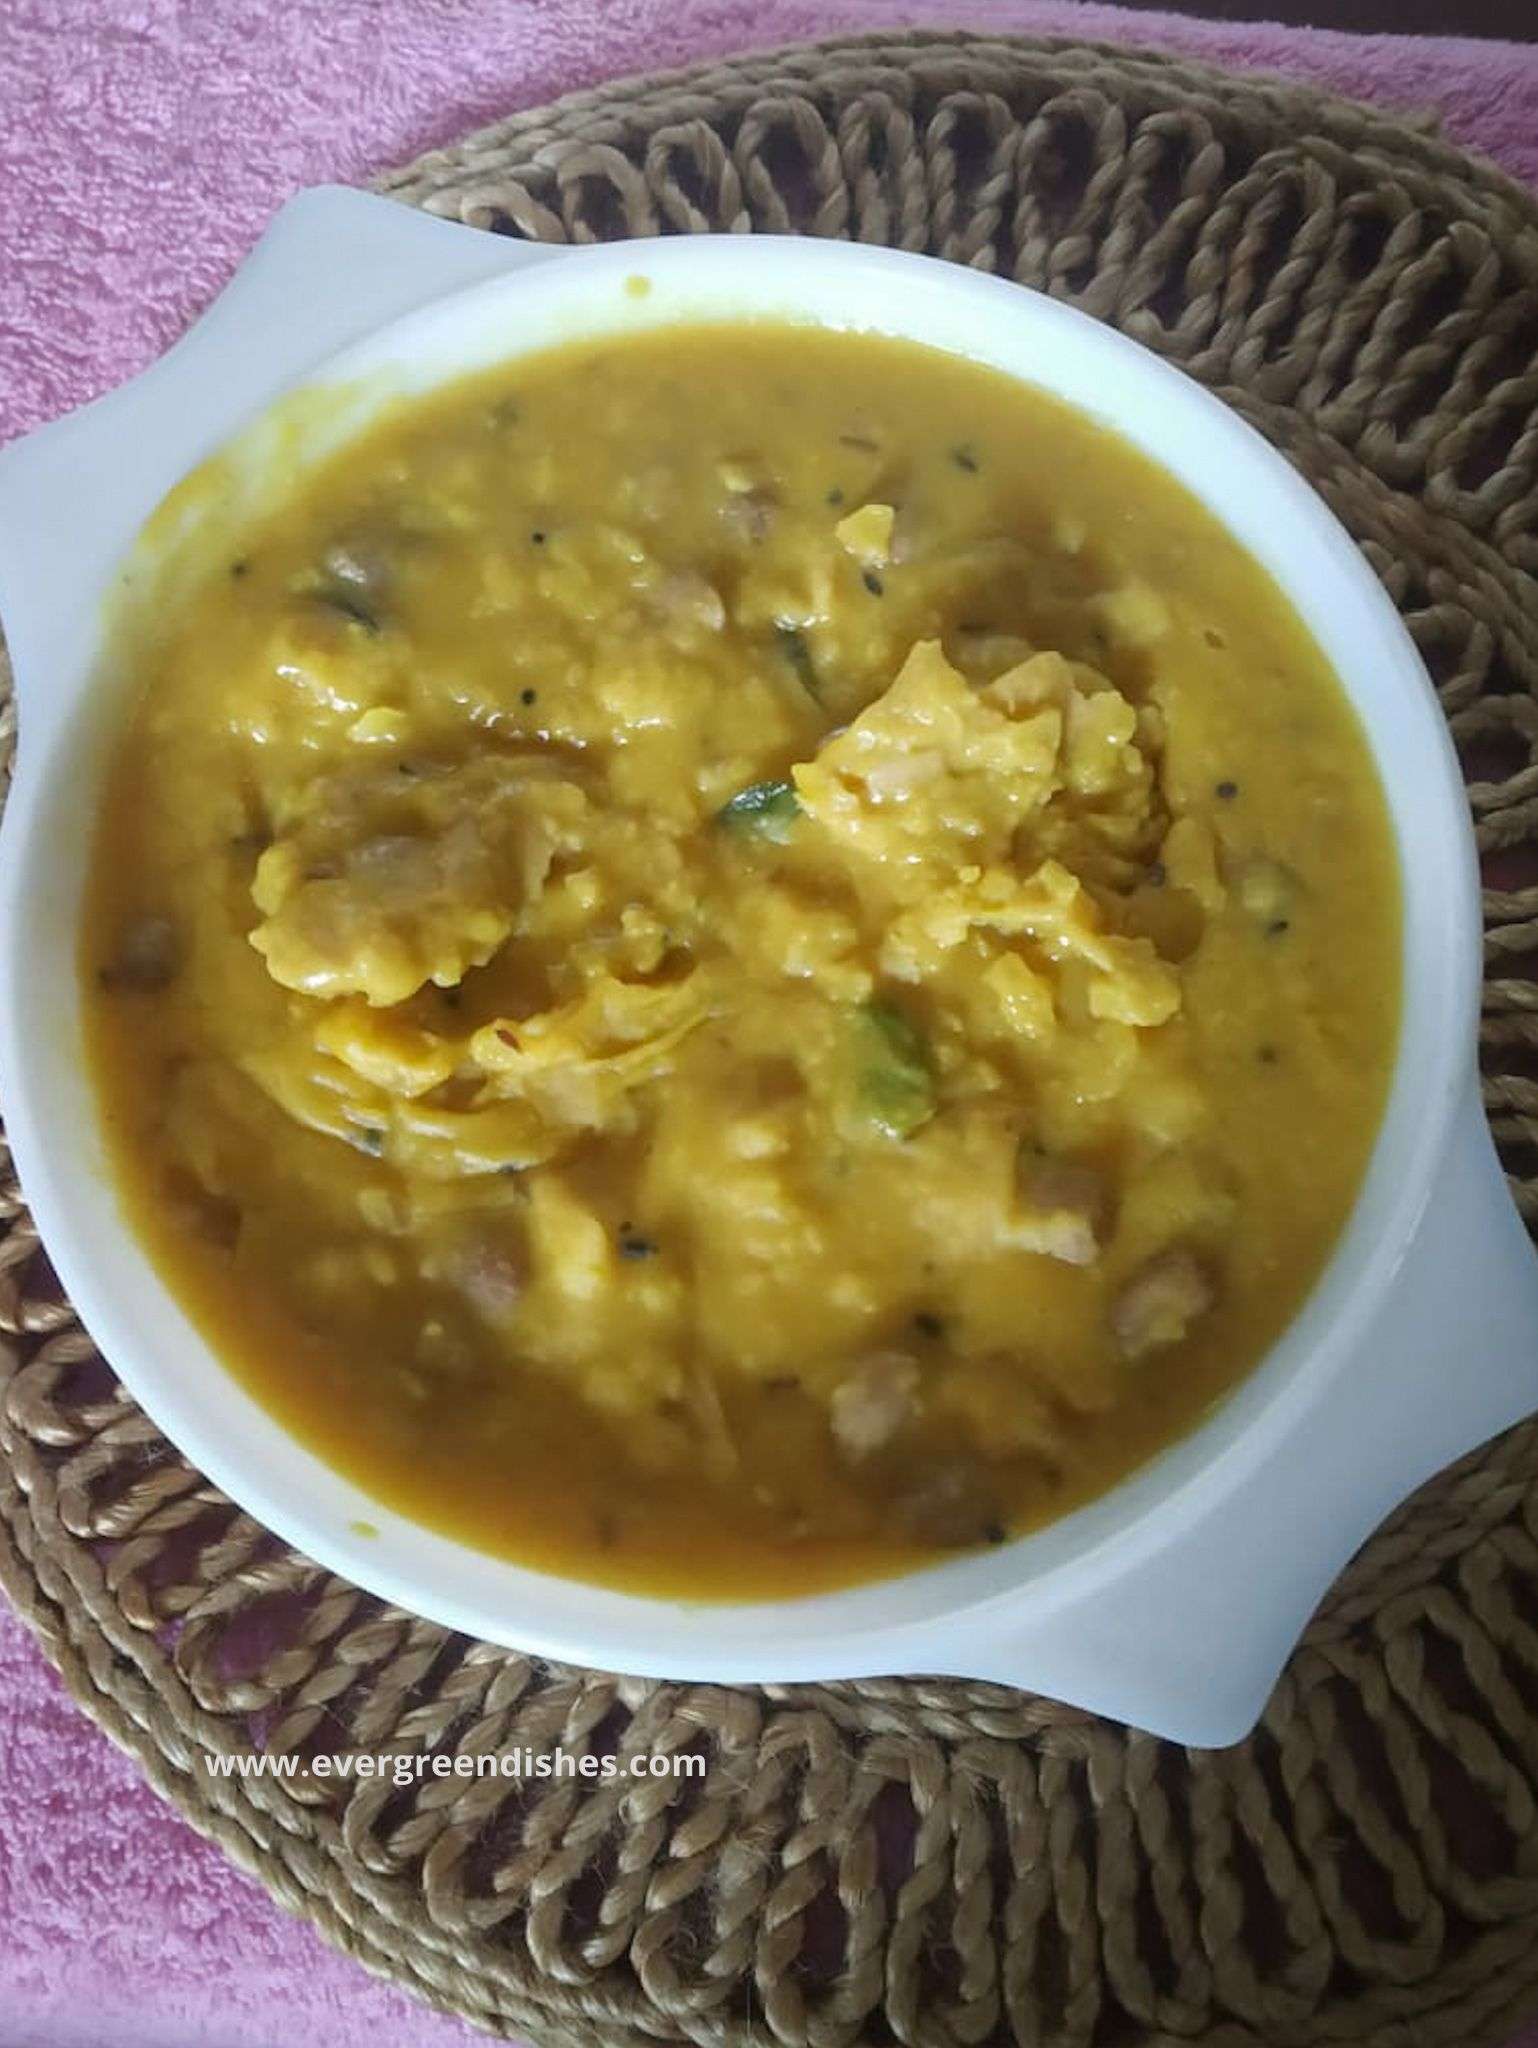
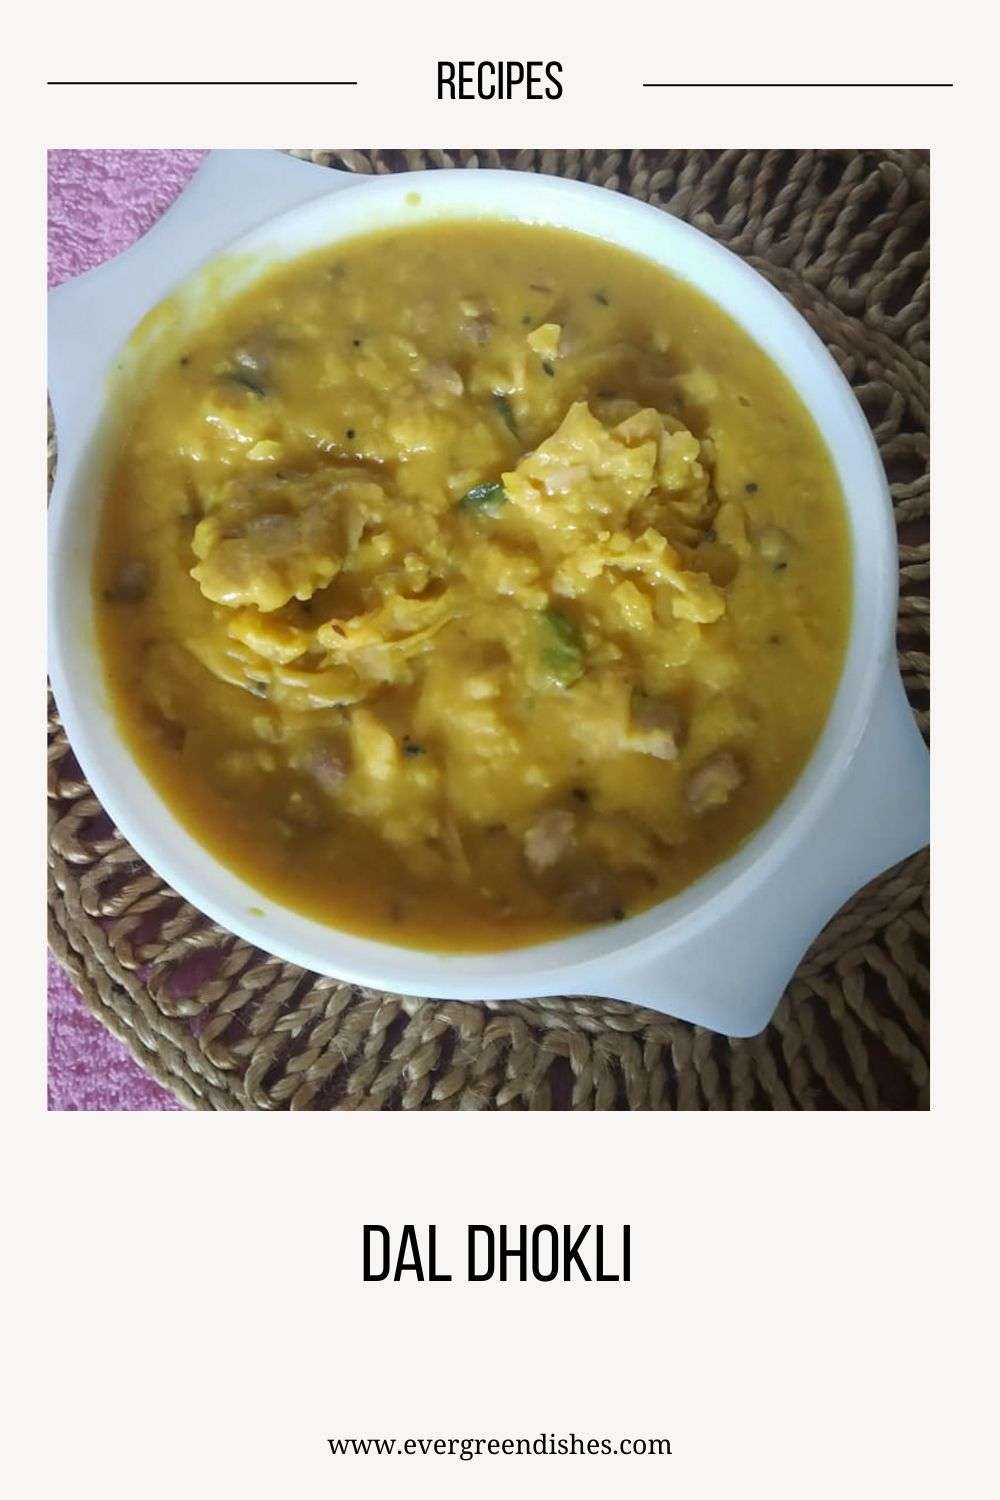
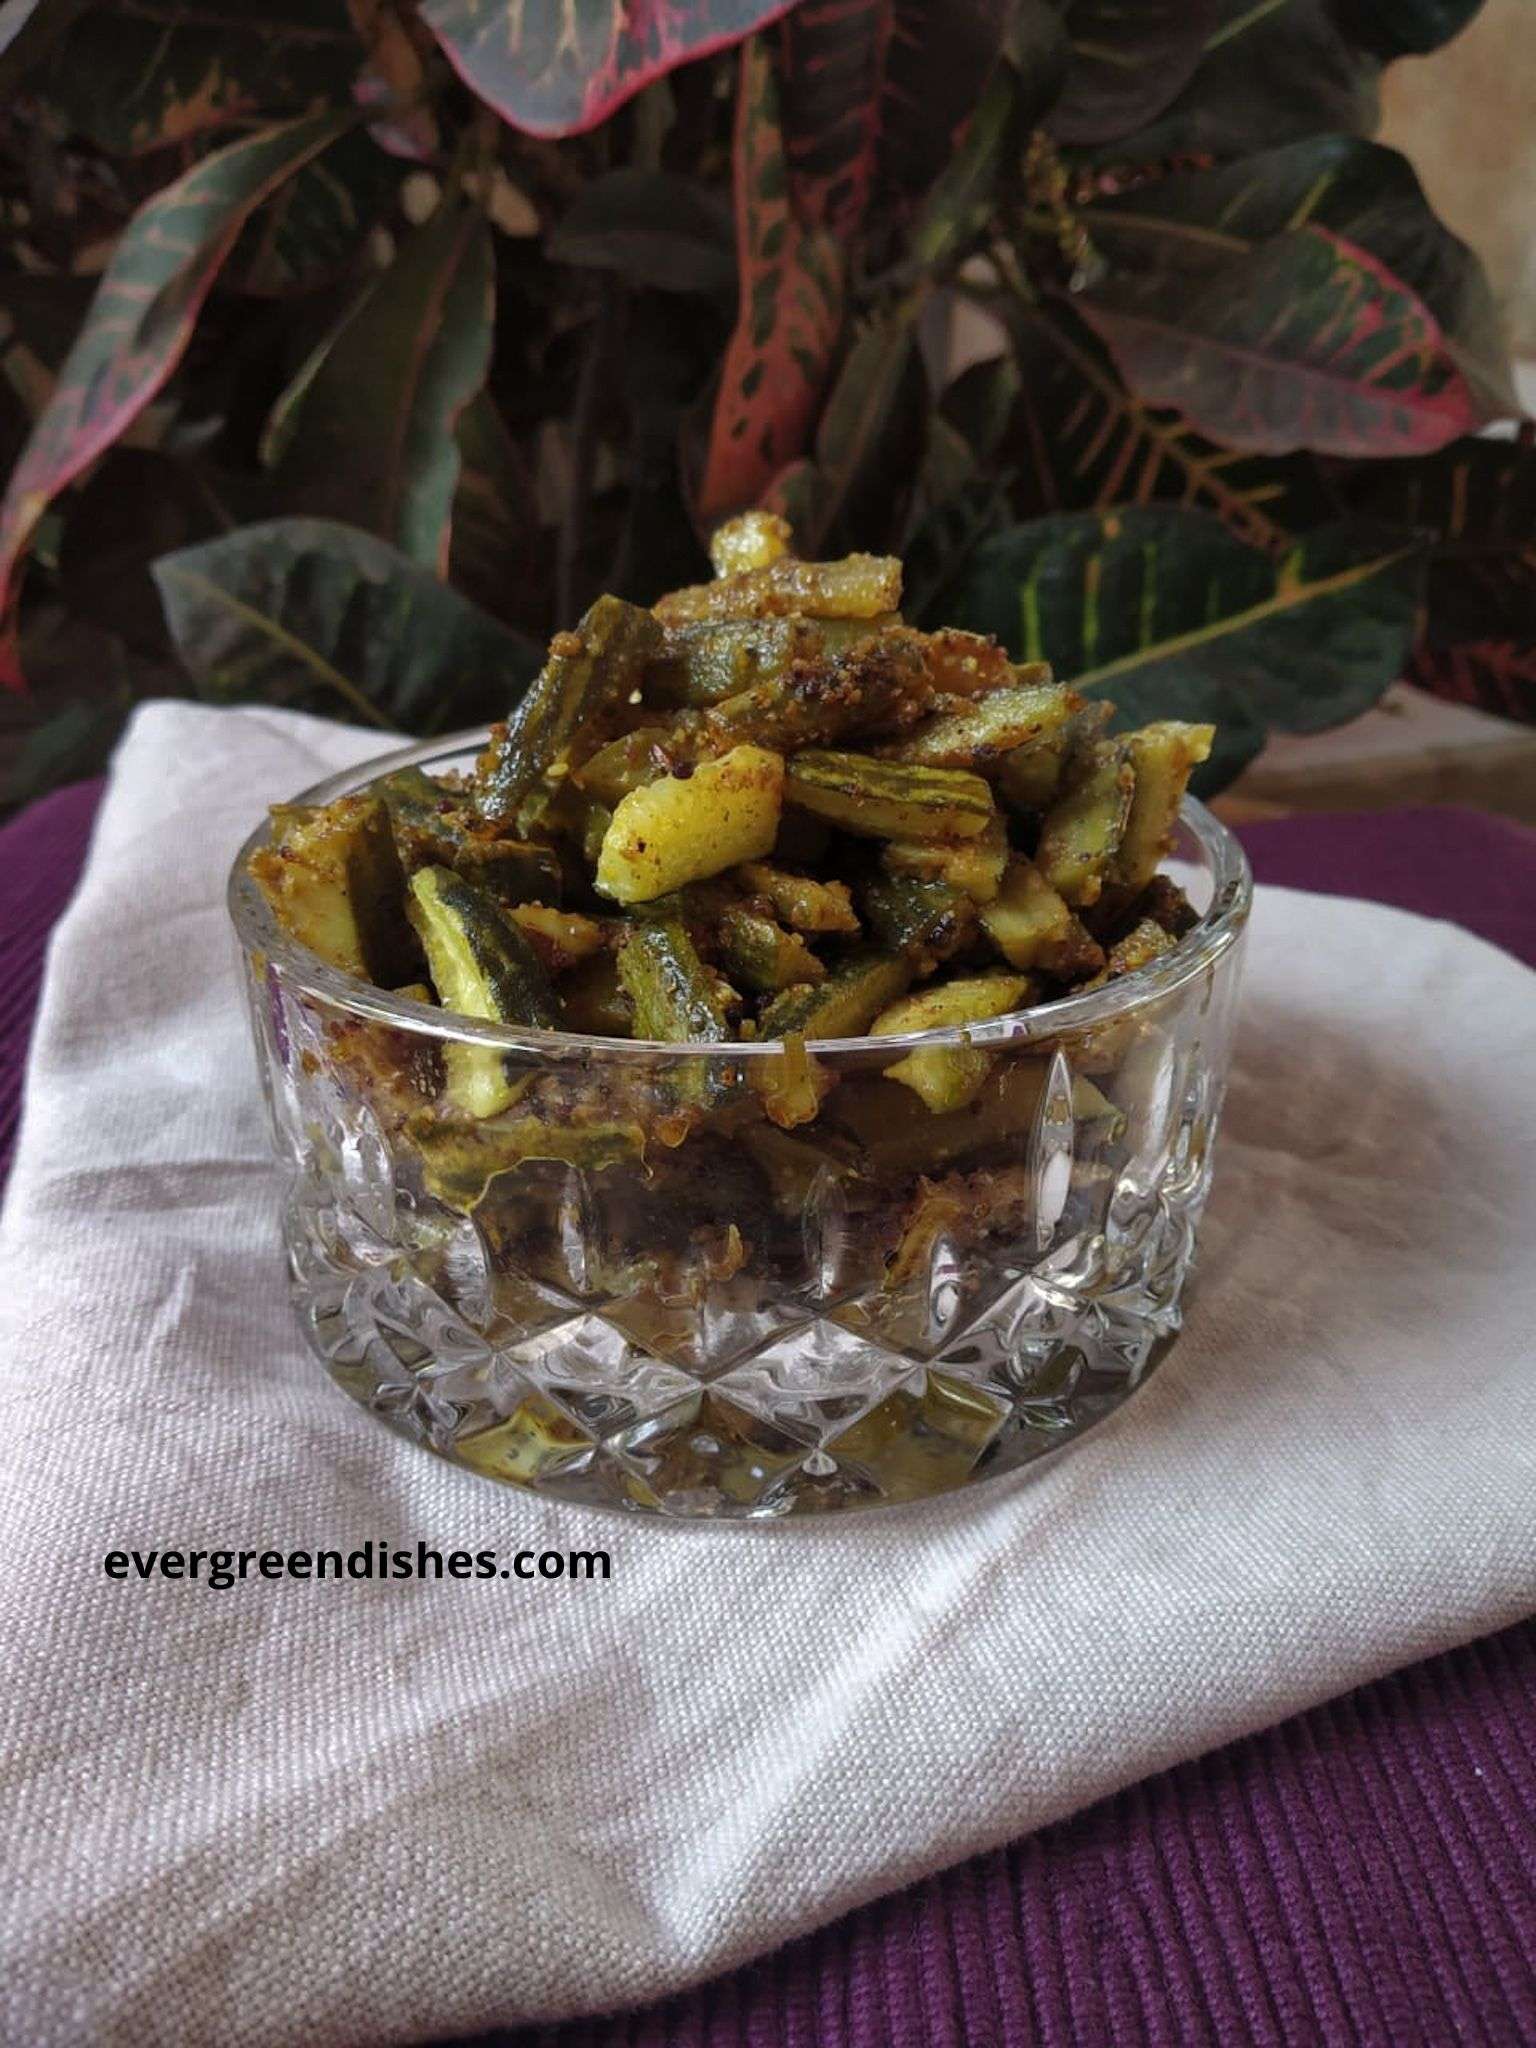
    Are you looking for different kind of Gujarati dishes? Check out  cabbage and methi muthiya, dal dhokli recipe

    tri-colour dhokla
    Evergreendishesdev

    Tri-colour Dhokla

    5 from 1 vote
    Tri-colour dhokla is a fermented, three layered dhokla from Gujarati cuisine.
    Prep Time 15 minutes
    Cook Time 30 minutes
    Resting time 5 hours
    Total Time 5 hours 45 minutes
    Course: evening snacks
    Cuisine: Gujarati

    Ingredients
      

    • 1 cup rice flour 1 cup =240ml
    • 1 cup gram flour
    • 1 cup sour curd
    • 1 tablespoon green chutney
    • 1 teaspoon gram flour
    • 2 tablespoon + 2 teaspoon oil
    • 1 teaspoon soda
    • salt to taste
    • 1/2 teaspoon mustard
    • 1/4 teaspoon asafoetida
    • 1/2 teaspoon cumin
    • a few curry leaves
    • 2 green chilli
    • 1 tablespoon buttermilk
    • coriander

    Equipment

    • 2 bowls
    • 2 ladles
    • dhokla maker
    • tin
    • knife
    • kadai

    Method
     

    1. Take rice flour and gram flour in two seperate bowls.
    2. Mix some curd with gram flour and put it aside.
    3. Use the remaining curd to mix rice flour.
    4. Cover with a lid and keep them in a warm place. Ferment  for at least five hours.
    5. Mix a spoon of besan in the green chutney. This is used for the green layer.
    6. Heat two tablespoon of oil in a pan, add soda to it . Once it cools, mix into both the batter.
    7. Add the required quantity of salt to both the batter.
    8. Put the dhokla steamer to heat.
    9. Grease the tin.
    10. Now, put half the quantity the oil with soda mixture to the white batter. Mix and pour into the tin.
    11. Allow it to steam.
    12. After five minutes, when it is partially done, spread the green chutney over it. Close the lid and steam for two minutes.
    13. Now, pour the remaining oil and soda mixture to the khaman batter. Mix and pour it over the green chutney which you had spread.
    14. Allow it to steam for sometime, a knife pricked should come out clean.
    15. In the meantime, make the seasoning with nustard, cumin, green chilli and cury leaves. Mix some nutermilk in the seasoning.
    16. Cut the dhokla into pieces, pour the seasoning over it.
    17. Tri-colour dhokla is ready to serve.

    Notes

    The curd should be sour but not foul smelling.
    Use a little water, if needed, while mixing the dough.
    To make green chutney, grind coriander, green chilli and salt with a little water. Later, mix gram flour to it.
    You can add sesame for topping.
    Fermentation is needed for this variety of dhokla. I, mix the dhokla batter at night and keep it aside. 

    If you ever make Tri-colour Dhokla recipe, take a picture and tag @foodiejayashree on Instagram or @evergreendishes on Facebook. Subscribe to get all updates in your inbox and an e-book for free!

    Pin it  for later :

    tri-colour dhokla
    tri-colour dhokla


  • Dal Dhokli Recipe | Gujarati cuisine

    Dal Dhokli Recipe | Gujarati cuisine

    Jump to Recipe Print Recipe

    Dal Dhokli is a sweet, spicy, tangy lentil based with wheat flour dumplings from Gujarati cuisine. It is a popular dish and made regularly in most households. It is a comfort food and holds a special place in every Gujarati’s heart. It is ideal to serve for lunch or brunch.


    Being a South Indian, it was not made at home. Chapathi was prepared regularly and dal was quintessential but dal dhokli was hardly known to us. I had heard from friends about it. The past few years has seen a shift and different kind of cuisine are liked at home. it is now made regularly, at least twice in a year.  It makes a tasty food when we are bored of the usual routine cooking. 
    Dal Dhokli is a healthy, filling, no onion garlic, vegan meal which you can make with ingredients easily available at home. A simple, filling, tasty dish which makes a good food by itself. It is filling and the goodness of lentil makes a wholesome diet.

    Coming to the Gujarati cuisine, I have shared couple of recipes here. Dhokla is a family favourite, I keep making a variety of them. Oats Dhokla, Millets Dhokla, Corn Dhokla are some of them. Tri-colour dhokla recipe  will be posted soon, watch out this space. Thepla makes a good breakfast option and make it atleast once in a month. Khakhra is a crispy, savoury snack  ideal to store at home. I have also shared cabbage and methi muthiya recipe earlier. Among the sweets, I have ABC Halwa and Sukhdi


    dal dhokli
    dal dhokli


    Ingredients :


    For the dhokli :


    1/2 cup wheat flour
    2 tsp chickpea flour
    1/4 teaspoon ajwain
    1/4 teaspoon cumin
    1/8 teaspoon asafoetida
    1/8 teaspoon turmeric powder
    1/2 teaspoon chilli powder
    salt
    water


    For the dal:


    1/2 cup tur dal / pigeon pea/ yellow dal 
    1/4 teaspoon turmeric powder
    1.5 cup water
    2 tablespoon groundnut
    2 teaspoon oil
    1/2 teaspoon mustard
    1/2 teaspoon cumin
    2 red chilli
    1 green chilli
    a few curry leaves
    1/2 inch ginger
    1/2 teaspoon sugar
    salt
    water as required

    Method: 

    1. Wash the dal and keep it a pressure pan with three times the water in it. Add a pinch of turmeric powder. In another bowl, put the peanuts and cook them together in a pressure cooker. Let it cook for three whistles. Allow the pressure to release by itself. The dal should be well cooked. Give a stir and keep it aside.
    2. Take a wide bowl, put the ingredients for dhokli except water.Give a mix. Now, add little water at a time and make a stiff dough.Keep it covered for sometime. 
    3. Take oil in a pan, add mustard seeds as it crackles, put cumin. Then add pieces of  red chilli, curry leaves and slit green chilli. Give a mix, put the dal to it. Add salt and sugar. Put the cooked peanuts to it. Adjust the consistency, the dal should be of a thicker consistency. But since, you will be boiling it, you can add some water to it. 
    4. Make three balls of the dough, roll them into chapathi and cut them into rectangular shaped pieces. As you cut it, put a few into the dal which is kept on the other side of the stove. Repeat for the rest of the dough. 
    5. Add the dhoklis with a time interval, lest they may stick together and form a lump. Let it boil for sometime. Keep stirring in between. 
    6. You can garnish with fresh coriander and lime juice. It is best served hot. 
    7. Dal Dhokli is ready to serve. 
    Evergreendishesdev

    Dal Dhokli

    Dal Dhokli is a sweet, spicy, tangy lentil based with wheat flour dumplings in it. It makes a good lunch menu.
    Prep Time 20 minutes
    Cook Time 20 minutes
    Total Time 40 minutes
    Course: brunch, lunch
    Cuisine: Gujarati

    Ingredients
      

    For the dhokli
    • 1/2 cup wheat flour
    • 2 tsp chickpea flour
    • 1/4 teaspoon ajwain
    • 1/4 teaspoon cumin
    • 1/8 teaspoon asafoetida
    • 1/8 teaspoon turmeric powder
    • 1/2 teaspoon chilli powder
    • salt
    • water
    For the dal:
    • 1/2 cup tur dal / pigeon pea/ yellow dal
    • 1/4 teaspoon turmeric powder
    • 1.5 cup water
    • 2 tablespoon groundnut
    • 2 teaspoon oil
    • 1/2 teaspoon mustard
    • 1/2 teaspoon cumin
    • 2 red chilli
    • 1 green chilli
    • a few curry leaves
    • 1/2 inch ginger
    • 1/2 teaspoon sugar
    • salt
    • water as required

    Equipment

    • pan, ladle, rolling pin, bowls, serving spoon

    Method
     

    1. Wash the dal and keep it a pressure pan with three times the water in it. Add a pinch of turmeric powder. In another bowl, put the peanuts and cook them together in a pressure cooker. Let it cook for three whistles. Allow the pressure to release by itself. The dal should be well cooked. Give a stir and keep it aside.
    2. Take a wide bowl, put the ingredients for dhokli except water.Give a mix. Now, add little water at a time and make a stiff dough.Keep it covered for sometime.
    3. Take oil in a pan, add mustard seeds as it crackles, put cumin. Then add pieces of  red chilli, curry leaves and slit green chilli. Give a mix, put the dal to it. Add salt and sugar. Put the cooked peanuts to it. Adjust the consistency, the dal should be of a thicker consistency. But since, you will be boiling it, you can add some water to it.
    4. Make three balls of the dough, roll them into chapathi and cut them into rectangular shaped pieces. As you cut it, put a few into the dal which is kept on the other side of the stove. Repeat for the rest of the dough.
    5. Add the dhoklis with a time interval, lest they may stick together and form a lump. Let it boil for sometime. Keep stirring in between.
    6. You can garnish with fresh coriander and lime juice. It is best served hot.
    7. Dal Dhokli is ready to serve.
    Dal Dhokli

    If you ever make Dal Dhokli recipe, take a picture and tag @foodiejayashree on Instagram or @evergreendishes on Facebook. Subscribe to get all updates in your inbox and an e-book for free!

  • Mango Mousse Recipe | Eggless Desserts

    Mango Mousse Recipe | Eggless Desserts

    Mango Mousse is a delectable, easy to make dessert. It is my go to dessert during summer when we need a quick and easy dessert.

    Mango, mango, I wait for you all year.
    Here, I come with various kinds
    Choose the ones you like and
    treat yourself in many ways

    Well, that’s a kind of feeling I have when the mango season starts. What else can I make with mangoes? 

    For the past two years, mangoes are not much. A few years back, I remember we had a good number of fruits.
    I have shared many mango recipes earlier. They are Mango kesariamba bhat,  Desserts with a international touch are  mango pannacotta, chocolate streaked mango ice cream 
    The ambua, mumbazha pulissery are some of the regional dishes you can prepare. 


    mango mousse


    Why should you make this dessert ?

    • a healthy version
    • needs only three ingredients 
    • easy to make
    • eggless mango mousse for those who prefer it
    • can be made ahead and kept in the refrigerator. 


      Mango Mousse Recipe 

    Ingredients:

    • 2 cups mango puree
    • 1 cup cream 
    • 2 tablespoon honey

      Method:

    • Take the puree and blend it.
    • Add honey to it.
    • Fold the cream into the mango puree.
    • Put it into glass bowls and allow it to set in the refrigerator.
    • Mango mousse is ready to serve.

      Take a tip:
    • Choose good quality mangoes. 
    • Castor sugar may be used instead of honey.
    • Use any whipping cream 

    About the event :
    Sending this to Mango Mania at Shhh Secretly Cooking Challenge. Here, The theme was suggested by Mayuri Patel. Check out her Fajeto recipe, which she has shared for the theme.

    I was partnered with Archana Gunjanikar Potdar,  she wanted to make mango sticky rice and I gave her the ingredients accordingly  coconut milk and jaggery.  Check out the recipe of it. Archana gave me cream and honey, mango mousse recipe is my contribution.

                                shhh cooking secretly


    Evergreendishesdev

    Mango Mousse

    Mango Mousse is a delectable, easy to make dessert.
    Prep Time 15 minutes
    5 hours
    Total Time 5 hours 15 minutes
    Course: Dessert
    Cuisine: international

    Ingredients
      

    • 2 cups mango puree
    • 1 cup cream
    • 2 tablespoon honey

    Equipment

    • bowl, blender, serving bowls

    Method
     

    1. Take the puree and blend it.
    2. Add honey to it.
    3. Fold the cream into the mango puree.
    4. Put it into glass bowls and allow it to set in the refrigerator.
    5. Mango mousse is ready to serve.

    Notes

    • Choose good quality mangoes.
    • Castor sugar may be used instead of honey.
    • Any whipping cream may be used
     

    About the event :
    Sending this to Mango Mania at Shhh Secretly Cooking Challenge. The theme was suggested by Mayuri Patel. Check out her Fajeto recipe, which she has shared for the theme. Here the secret ingrdients are exchanged between the partners and a dish is prepared corresponding to the theme. Later, the prepared dish is shared in the group and other members try to guess the ingredients. 

    I was partnered with Archana Gunjanikar Potdar,  she wanted to make mango sticky rice and I gave her the ingredients accordingly  coconut milk and jaggery.  Archana was kind enough to give me cream and honey, mango mousse recipe is my contribution.

    Pin it for later:

    mango mousse


    If you ever make Mango Mousse recipe,  take a picture and tag @foodiejayashree on Instagram or @evergreendishes on Facebook. Subscribe to get all updates in your inbox and an e-book for free!

  • Southekayi Palya | Cucumber Stir Fry

    Southekayi Palya | Cucumber Stir Fry

    Cucumber Stir Fry is a traditional recipe made using small cucumber. It is ideal to pair with chapathi, jowar roti or even as an accompaniment with steamed rice and rasam.

    The cucumber stir fry is one of the simplest yet tasty recipe which you can make at home. Cucumber is known as southekayi in kannada. It is one vegetable, I use regularly at home. The cucumber we get are small and fresh. We prefer eating raw cucumber as in a salad or a snack. It can also be used in  masala rice or even a simple stir fry. The usual south indian meal in our home consists of a stir fry, dal with green leaf, rasam, chapathi, steamed rice along with pickle and dry chutney powder. Curd is another essential and our meals are incomplete without curd rice. 

    Ways to serve cucumber stir fry:

    It is usually served with chapathi.or jowar roti. You can also make it as an accompaniment with hot steamed rice. It is a part of the festive thali in Karnataka. 

    cucumber stir fry
    cucumber stir fry

    Ingredients:

    • 1 tablespoon oil
    • 1/2 teaspoon mustard
    • 1/4 teaspoon asafoetida
    • 1/4 teaspoon turmeric powder
    • a few curry leaves
    • 1/4 kilogram small variety cucumber
    • salt
    • 2 teaspoon vegetable spice mix
    • 1/2 teaspoon chilli powder

    Method:

    1. Wash and cut the cucumber into one inch pieces. Let them be of the same size.
    2. Take oil in a pan, add mustard seeds, as it splutters, put the turmeric powder and asafoetida. Throw in the cucumber pieces.
    3. I usually close a lid with some water over it, this helps in even cooking. Alternatively, you can sprinkle a little water over the vegetable and close the lid.
    4. Cook them till tender, avoid adding salt in the beginning.
    5. Once the cucumber slices are cooked, put salt, spice mix and a little chilli powder.
    6. Mix it and let it cook for sometime.
    7. Cucumber Stir Fry is ready to serve. 

    Take a tip:

    • The cooking time depends on the quality of cucumber. The old ones lying in the refrigerator usually need some more time to cook. 
    • The spice mix is handy to use.  I always have it in my pantry.
    cucumber stir fry
    Evergreendishesdev

    Cucumber Stir Fry | Southekayi Palya

    Cucumber stir fry is a simple yet tasty side dish from Karnataka. It is ideal to pair with chapathi or jowar roti.
    Prep Time 10 minutes
    Cook Time 15 minutes
    Total Time 25 minutes
    Course: dinner, lunch
    Cuisine: South Indian

    Ingredients
      

    • 1 tablespoon oil
    • 1/2 teaspoon mustard
    • 1/4 teaspoon asafoetida
    • 1/4 teaspoon turmeric powder
    • a few curry leaves
    • 1/4 kilogram small variety cucumber
    • salt
    • 2 teaspoon spice mix
    • 1/2 teaspoon chilli powder

    Equipment

    • 1 pan
    • 1 ladle
    • 2 plate

    Method
     

    1. Wash and cut the cucumber into one inch pieces. Let them be of the same size.
    2. Take oil in a pan, add mustard seeds, as it splutters, put the turmeric powder and asafoetida. Throw in the cucumber pieces.
    3. I usually close a lid with some water over it, this helps in even cooking. Alternatively, you can sprinkle a little water over the vegetable and close the lid.
    4. Cook them till tender, avoid adding salt in the beginning.
    5. Once the cucumber slices are cooked, put salt, spice mix and a little chilli powder.
    6. Mix it and let it cook for sometime.
    7. Cucumber Stir Fry is ready to serve.

    Notes

    • Cut the cucumber pieces proportionately, cooking will be even and faster.
    • Small variety of cucumber is used here.
    • Spice mix recipe is shared earlier, do check it.
    south indian cucumbeer stir fry
  • Chikoo Milkshake | Healthy Sapota Milkshake  Recipe

    Chikoo Milkshake | Healthy Sapota Milkshake Recipe

    Chikoo Milkshake is a tasty and an ideal drink to start the day.  It is filling and a good way to consume a healthy and tasty drink. 

    When the work load is more or the need of proper nutritious food, we resort to smoothies and milkshakes. It should be a norm to take some fruits and vegetables regularly. 

    Milkshakes are of varied kind. They are usually high calorie with ice cream and milk solids in it. But, it can be made healthier. Today, I am sharing the healthier version of sapota milkshake. It is equally tasty and ideal for the calorie conscious folks. It helps to keep hunger at bay, ideal to serve along with breakfast. 


    Chikoo is commonly called as sapota, naseberry or sapodilla. The botanical name of sapota is Manilkara Zapota. It is native to South Mexico. It is grown in large quantities in India, Pakistan, Thailand, Indonesia, Mexico and Bangladesh. It is a sweet, brown hued oval or round shaped.
    Benefits of chikoo :
    1. Chikoo is rich in fibre, aids in proper bowel movement and digestion.
    2. The chemical compounds present in the fruit help to keep congestion and chronic cough at bay.
    3. It is rich in calcium, phosphorous and iron. The nutrients help in strengthening the bones.

    The best way to consume fruits is to eat them whole. When the intake of fruits and vegetables drastically reduces, we think of ways to include them in our diet. Smoothie and milkshake are healthier option, you can limit the sugar content. Readymade juices have a high amount of sugar. 

    sapota milkshake
    chikoo milkshake

    Chikoo MIlkshake Recipe:

    Ingredients:

    • 1 chikoo
    • 1 cup cold milk
    • 1 teaspoon honey 
    • a few ice cubes

    Method:

    1. Take a ripe chikoo, wash and peel the skin. Remove the pulp.
    2. Put it in a blender. Add milk to it. Blend it.
    3. Pour it in a glass. Top it with honey. Put ice cubes and serve.

    Take a tip:

    • Sugar may be added instead of honey.
    • Honey is optional, you can just blend with milk and serve chilled. Take a ripe and sweet fruit. 

    Chikoo Milkshake

    Chikoo Milkshake is a healthy, tasty and filling. It is a good way to kickstart the day with a glass of milkshake.
    Course: Breakfast, evening snacks
    Cuisine: international

    Ingredients
      

    • 1 chikoo
    • 1 cup cold milk
    • 1 teaspoon honey
    • a few ice cubes

    Equipment

    • blender, bowl, knife, glass

    Method
     

    1. Take a ripe chikoo, wash and peel the skin. Remove the pulp.
    2. Put it in a blender. Add milk to it. Blend it.
    3. Pour it in a glass. Top it with honey. Put ice cubes and serve.

    Notes

    Sugar may be added instead of honey.
    Honey is optional, you can just blend with milk and serve. Take a ripe fruit, it is sweeter.

     Other milkshake recipe shared earlier are : Fab Milkshake, Apple Milkshake, Banana Betel Milkshake, Strawberry Banana Milkshake

    chikoo milkshake
    chikoo milkshake

    If you ever make Chikoo Milkshake,  take a picture and tag @foodiejayashree on Instagram or @evergreendishes on Facebook. Subscribe to get all updates in your inbox and an e-book for free!

  • Banana Grape Smoothie

    Banana Grape Smoothie

    Jump to Recipe Print Recipe

    Banana Grape Smoothie is delicious, filling and easy to make. It is one of the healthy breakfast you can treat yourself on a busy morning.

    Smoothie is filling, tasty and healthy, a good breakfast to kickstart the day. Banana Grape Smoothie is a nutrient rich breakfast to kick start the day.

    Do you know the power of eating a healthy breakfast? It keeps you charged to face the challenges of the day with a lot of vigour and vitality. The body is without food for more than ten hours and it is best you feed with a healthy diet. Smoothies are easy to make and filling. They have the added advantage of fruits or vegetables in it which normally many miss taking in small quantities too. Today’s smoothie recipe has :

    • Banana– Banana is available all round the year, it is easy on the pocket and packed with nutrients. It is rich in potassium, magnesium and riboflavin.It improves blood sugar level. It aids in digestion. It may help you feel fuller for a longer time and thus help to reduce weight.
    • Black Grapes – the wonder fruit which is available only for a couple of months.It contains a lot of reseveratrol and antioxidant that is good for the heart. The anti-oxidants also help to keep the heart healthy. The vitaimin K present in it  helps to build strong bones. Another interesting fact is grapes also helps in dealing with memory issues. The polyphenol compounds are associated with benefits of slowing mild memory due to old age.
    • Chia seed – It is one of the highly consumed seed these days. It contains quercetin, an anti-oxidant helps to lower blood pressure and in turn helps to reduce risk of heart diseases. They are rich in fiber.
    • Flaxseed- It is rich in proteins, fiber and omega 3 fatty acids. It is one of the oldest crop known to man. It can be used in various kind of dishes.
    • Yoghurt : I like to add yoghurt in smoothies as it is a good source of protein. It makes the smoothie filling and tasty.

    I like adding smoothie to my diet plan as it is a no cook recipe . It is easy to prepare and makes a quick, healthy breakfast. Moreover, I prefer smoothie to juice or milkshake. The other smoothie you can whip are Apple Banana Smoothie, Watermelon Rind Smoothie, Cantaloupe Carrot Smoothie

    banana grapes smoothie
    banana grapes smoothie

    Let us get to the recipe of Banana Grape Smoothie

    Ingredients:

    • 1 banana
    • 12 black grapes
    • 1/2 teaspoon chia seed
    • 1 teaspoon flax seed
    • 1/2 cup yoghurt
    • 1/2 cup water

    Method:

    1. Crush the chia seed and flax seed in the small jar.
    2. Put the banana, grape and yoghurt in the blender and swirl them together. Put water as per the need.
    3. Top with crushed seed powder.
    4. Chill and serve.

    Take a tip :

    • Use ripe banana to make smoothie.. It is packed with nutrients, sweet in taste and a good way to use it.
    • You may add a few chopped nuts as topping.
    • Sometimes, I add berries to it, it tastes good.
    • If the grapes are sour, add honey to it.
    • Sugar may be used, I do not use it here.

    banana grapes smoothie

    Banana Grape Smoothie

    Banana Grape Smoothie is delicious, healthy and filling. It helps to keep satiated for a longer time.

    Ingredients
      

    • 1 banana
    • 12 black grapes
    • 1/2 teaspoon chia seed
    • 1 teaspoon flax seed
    • 1/2 cup yoghurt
    • 1/2 cup water

    Equipment

    • Blender, small jar, mixer, bowls, glass

    Method
     

    1. Crush the chia seed and flax seed in the small jar.
    2. Put the banana, grape and yoghurt in the blender and swirl them together. Put water as per the need.
    3. Top with crushed seed powder.
    4. Chill and serve.

    Notes

    Use ripe banana to make smoothie.. It is packed with nutrients, sweet in taste and a good way to use it.
    You may add a few chopped nuts as topping.
    Sometimes, I add berries to it, it tastes good.
    If the grapes are sour, add honey to it.
    Sugar may be used, I do not use it here.

    If you ever make Banana Grapes Smoothie, take a picture and tag @foodiejayashree on Instagram or @evergreendishes on Facebook. Subscribe to get all updates in your inbox and an e-book for free!


  • Homemade  Pav Bhaji Masala | Pav Bhaji Masala Recipe

    Homemade Pav Bhaji Masala | Pav Bhaji Masala Recipe

    Jump to Recipe Print Recipe

     Homemade Pav Bhaji Masala is aromatic and gives a good taste to the dish. The fresh flavour of roasted spices is too good and made an enjoyable  dinner for us.

    Spice mix are an essential part of our daily cooking. I  believe a day of  hard work  makes it easier for a couple of months.It gives a good flavour and makes cooking easier. The day starts with a chai masala added to tea. Sometimes, I need the sambar powder while making a quick breakfast.too. I like to sprinkle a wee bit of  garam masala and the dhana jeera powder in my cooking. Some days, I use the traditional powder south indian spice mix in my cooking. It is flavoursome and ideal to make an array of dishes. It is ideal to make a quick lunch with gojju. I even use it as a stuffing in cucumber stir fry and it tastes awesome. Pav Bhaji Masala is ideal to use in a variety of dishes.

    pav bhaji masala
    pav bhaji masala

    What is pav bhaji?

    Pav Bhaji is a popular street for from Mumbai. It is ideal to serve as an evening snack. Roasted bread buns are served with a tasty curry made of fresh peas and other vegetables with a generous topping of butter and finely chopped onions.  It makes a good option for dinner as it is filling.

    What is pav bhaji masala ?


    Pav Bhaji Masala is a spice mix made essentially for this snack. It is easily available in the market by various brands. The homemade spice mix is flavoursome and you are in total control of the kind of spices going into it.

    Can it be stored ?


    Yes, it can be stored. Make sure you keep it in a clean, air-tight container. I have made a small quantity, hence kept it outside. I usually put the spice mix in an air-tight container and put them in the freezer. I use them occasionally and it stays good for a long time. 

    How can it used ?

    Pav Bhaji Masala is ideal to use in stir fry. Sprinkle a little spice mix along with chilli powder and it gives a good flavour. You can use it in tava pulao. I use it in spicy pav buns  too.

    About the event :

    It’s time for Shhh Secretly Cooking Challenge. Here onee of the members suggest a theme. The members are paired, they exchange two secret ingredients and make a dish accordingly. The theme was ” Spice Mix ” suggested by me.   My partner for the month was Kalyani Sri. I told I wanted to make pav bhaji masala and she gave me clove and black cardamom as the secret ingredients. I have given shah jeera and anardana as the secret ingredients  and she has made a flavoursome mumbai sandwich masala


    Homemade Pav Bhaji Masala : 

    Ingredients:

    • 1/4 cup coriander seed
    • 4 black cardamom
    • 6 cloves
    • 10 pepper corn
    • 2 tablespoon cumin
    • 1 tablespoon fennel seed
    • 1 stick cinnamon
    • 5 red chilli
    • 1 tablespoon turmeric powder
    • 1.5 tablespoon amchur powder
    • 1 tablespoon black salt


      Method: 

    1. Take coriander seed, cloves, pepper corn, cumin, fennel and red chilli in a pan. Roast them for three minutes until you get a good aroma. Keep tossing them with a spatula.
    2. Let the ingredients  cool.
    3. Grind to a coarse powder. Add amchur powder, turmeric powder and black salt to it. Grind to a fine powder.
    4. Pav Bhaji Masala is ready to use.
    5. Keep it in a clean air tight container. 
    pav bhaji masala

    Pav Bhaji Masala Recipe

    Pav Bhaji Masala is a flavoursome spice mix from Indian cuisine. It is versatile to use.
    Prep Time 10 minutes
    Cook Time 10 minutes
    Course: condiments
    Cuisine: north indian

    Ingredients
      

    • 1/4 cup coriander seed
    • 4 black cardamom
    • 6 cloves
    • 10 pepper corn
    • 2 tablespoon cumin
    • 1 tablespoon fennel seed
    • 1 stick cinnamon
    • 5 red chilli
    • 1 tablespoon turmeric powder
    • 1.5 tablespoon amchur powder
    • 1 tablespoon black salt

    Equipment

    • pan, spatula, measuring cup, pan

    Method
     

    1. Take coriander seed, cardamom, clove, pepper corn, cumin fennel, cinnamon and red chilli  in a pan. Roast them for three minutes until you get a good aroma. Keep tossing them with a spatula.
    2. Allow them to cool.
    3. Grind them to a powder. Add turmeric powder, amchur powder and black salt to it. Grind altogether again to a fine powder.
    4. Pav Bhaji Masala is ready ro use. Store it in a dry container.

    Pin Pav Bhaji Masala Recipe : 

    pav bhaji masala
    pav bhaji masala

    If you ever make Pav Bhaji Masala  in your kitchen, take a picture and tag @foodiejayashree on Instagram or @evergreendishes on Facebook. Subscribe to get all updates in your inbox and an e-book for free! 

  • Aam ki Launji | Sweet and Sour Mango Pickle

    Aam ki Launji | Sweet and Sour Mango Pickle

    Aam ki Launji is a popular spicy, sweet and sweet pickle from North India. It tastes good with parathas, puri or thepla. 

    Summer brings in beautiful, sweet mangoes, the good fruit which we wait throughout the year. Raw mango is versatile to use. I have shared many mango recipes earlier. It is used to make pickles and juice. Raw mango chutney is tasty and makes a good accompaniment with any meal. The raw mango rice is a festive delicacy in South India. 

    Today, I am sharing another variety of pickle. It is quite popular in North India. The sweet and sour mango pickle makes a tasty accompaniment with paratha, puri or thepla. You can keep it in the refrigerator for a three days.  It makes use of the  basic spices and is ready in a few minutes. 

    Aam ki Launji

    Ingredients:


    1 raw mango
    1 tablespoon oil
    1/8 teaspoon mustard seed
    1/8 teaspoon cumin
    1/8 teaspoon fennel
    1/8 teaspoon kalonji
    1/8 teaspoon fenugreek
    1/8 teaspoon turmeric powder
    a pinch of asafoetida
    salt
    1.5 teaspoon chilli powder
    4 teaspoon sugar
    1/4 teaspoon coriander seed powder
    1/2 cup water

    Method:


    1. Wash, pat dry  and peel the mango. Cut into cubes.
    2. Keep the ingredients of the panch phoran mix ready in a small plate.
    3. Take oil in a pan, add the mentioned spices, turmeric powder and asafoetida. Put the mango pieces , mix it well and allow to cook for sometime. Sprinkle a little water if needed. The mango pieces cook quickly in two or three minutes.
    4. Add chilli powder, salt, sugar and coriander seed powder to it. Put some water in it. Let cook for two minutes. 
    5. Aam ki Launji is ready to serve.

    Take a tip:

    1.  You may need an extra spoon of sugar if the mango is too sour.
    2. Jaggery may be added instead of sugar. 
    3. Increase or decrease  the sugar and the spiciness as per your taste.
    4. The spice mix used here is called as panch phoran. It is an equal mix of cumin, fenugrek, fenneel, kalonji and mustard.


    Evergreendishesdev

    Aam ki Launji

    Aam ki Launji is a hot, sweet and spicy pickle from Rajasthan cuisine. It makes a good accompaniment with parathas, thepla or spicy puris.
    Prep Time 10 minutes
    Cook Time 10 minutes
    Total Time 20 minutes

    Ingredients
      

    • 1 raw mango
    • 1 tablespoon oil
    • 1/8 teaspoon mustard seed
    • 1/8 teaspoon cumin
    • 1/8 teaspoon fennel
    • 1/8 teaspoon kalonji
    • 1/8 teaspoon fenugreek
    • 1/8 teaspoon turmeric powder
    • a pinch of asafoetida
    • salt
    • 1.5 teaspoon chilli powder
    • 4 teaspoon sugar
    • 1/4 teaspoon coriander seed powder
    • 1/2 cup water

    Method
     

    1. Wash, pat dry  and peel the mango. Cut into cubes.
    2. Keep the ingredients of the panch phoran mix ready in a small plate.
    3. Take oil in a pan, add the panch phoran mix, turmeric powder and asafoetida. Put the mango pieces , mix it well and allow to cook for sometime. Sprinkle a little water if needed. The mango pieces cook quickly in two or three minutes.
    4. Add chilli powder, salt, sugar and coriander seed powder to it. Put a little water.Let cook for a minute.
    5. Aam ki Launji is ready to serve.

    Notes

    • You may add an extra spoon of sugar if the mango is sour.
    • Jaggery may be used instead of sugar.
    • Adjust the sweet and spiciness as per your taste.

    If you ever make Aam Ki Launji  in your kitchen, take a picture and tag @foodiejayashree on Instagram or @evergreendishes on Facebook. Subscribe to get all updates in your inbox and an e-book for free! 

    Pin it for later:

    Aam ki Launji
    Aam ki Launji
  • Baking with Whole Wheat – Nutrition in Every Slice

    Baking with Whole Wheat – Nutrition in Every Slice

    Baking with whole wheat -Nutrition in every slice is a healthy and tasty brown bread. It is ideal way to enjoy with tea or as an after school snack.  Know more about whole wheat bread in our guest post series.

    We all have, sometimes in our life, followed crazy diets with no results. Some other times, we just left it to the universe to take care of our diet (hopefully nobody follows this diet). But there are some foods that don’t usually come under the category of healthy, for example, bread. But whole wheat bread is a healthy and adaptable supplement to any diet. Whole wheat flour contains the entire wheat kernel, including the bran and germ. Wheat contains the most nutrients, including fibre, B vitamins, iron, folate, potassium, and magnesium. The wheat kernel is left intact, resulting in a less processed, more nutritious bread.

    baking with whole wheat
    whole wheat bread


    Let’s look at some of the ways in which the whole wheat bread benefits us:

    1.  Lowers chances of developing type 2 diabetes – For those who are at risk of developing type 2 diabetes, new research seems promising. According to a study published in the journal Nutrients in 2018, eating more whole-grain foods is linked to a lower risk of type 2 diabetes.
    2. Helps with weight management – Despite the fact that bread has a reputation for causing weight gain, choosing whole wheat bread may have the opposite impact. According to an analysis of evidence from 38 epidemiological research, consuming whole wheat bread does not induce weight gain and may even help with weight management.
    3.  Aids in healthy digestion – Fibre is essential for digestive health. Consuming a high fibre diet, such as whole-grain foods, allows for the growth of beneficial gut flora. This so-called “pre-biotic” impact has been shown to improve colon health and immune system strength.
    4. Helps heart conditions – For good reason, whole grains have long been recommended for heart health. According to a major 2016 study published in the British Medical Journal, consuming more whole grains is linked to a lower risk of cardiovascular disease and coronary heart disease.
    Whole Wheat Bread
    whole wheat bread


    Now that you know of the ways in which whole wheat bread benefits your health, why not look at some ways in which you can keep having bread in your diet without feeling guilty about it. The best way to do that is to bake your own bread or buy it. But you have to be careful when you choose to buy your whole wheat bread. Different brands have different nutritional values and you have to read those carefully to understand and pick which whole wheat bread is best suited for your needs. For example, iD Wheat Sliced Bread is one brand that you can go for. It’s produced with all-natural ingredients including wheat flour that was carefully obtained and ground for iD. It’s made with whole wheat flour (atta), refined wheat flour (maida), sugar, iodized salt, refined sunflower oil, yeast, gluten, malt flour, natural improver, fermented wheat flour and RO-purified water.


    iD Bread is prepared with traditional methods, beginning with specially milled flour, all-natural fermentation, and traditional baking, with no chemicals or additives. When compared to other identical items on the market, these are the most important distinctions. iD offers the finest bread without the use of any artificial preservatives, flavours, or colors, unlike other options on
    the market today. The team at iD spent two years developing an all-natural bread, and now they’ve cracked the code and are ready to give a healthier and tastier alternative choice to their customers.
    So, if you haven’t yet added whole wheat bread to your diet, all you need to do is connect to the internet and buy your ID Whole Wheat Bread Online or go to your nearest store. 

  • Masoor Dal Dosa | Healthy Breakfast

    Masoor Dal Dosa | Healthy Breakfast

    Jump to Recipe Print Recipe

    Masoor Dal Dosa is crispy and tasty. It is rich in nutrients and makes a good option for breakfast.

    Ask any South Indian and they are never bored of having dosa. Idli may not be liked as much as they prefer dosa anytime. Let it be the regular kind or the rawa dosa, they are satisfied and happy.  The  dosa love is evident. Moreover, dosa variations are so many, you can keep making a different kind over a  month. Do find a new kind of dosa, Masoor Dal Dosa. 

    Masoor Dal Dosa is yet another variation, it is protein rich as the lentil is used in a larger quantity. I liked the dosa shared  in another food group and thought I must share it with my readers.

    masoor dal dosa


    What is Masoor Dal ?  

    Masoor Dal is one of the five legumes used regularly in Indian cooking. It is orange in colour. It is a good source of  nutrition as it is rich in protein, fibre and minerals. It does not need much time to cook and is tasty. 

    What are the  benefits of using masoor dal ?

     A cup of masoor dal has 230 calories, about 17 grams of proteins and 15 grams of dietary fibre. It has many  health benefits: 

    • It helps to keep the heart healthy by lowering cholesterol.
    • It helps to stabilise the blood sugar level.
    • It aids in weight loss. 
    • It boosts the immune system. 


    How is it used in cooking? 

    It can be use in cooking different dishes as soups and dal. It can also be used in making a variety of snacks as fritters, dosa and khichdi. Today, I am sharing a dosa recipe which I have adopted from Shobana Rao, food blogger and friend. 

    What are the other dosa recipe you have shared earlier ?

    The other kind of dosa normally made in my kitchen are jowar dosa, ragi dosa, masala dosa, quinoa dosa, watermelon rind dosa


    Masoor Dal Dosa  Recipe: 

    Ingredients:

    • 2 cup Masoor dal
    • 1 cup raw rice
    • 1 teaspoon methi seed
    • salt to taste
    • oil for roasting

      Method:

    • Wash and soak masoor dal for 2-3 hours.
    • Wash and soak raw rice and methi seeds for 2-3 hours.
    • Grind masoor dal to a smooth paste and remove it in a wide bowl.
    • Grind raw rice and methi seeds to a smooth paste. Use water as required, the consistency should be of a dosa batter.
    • Mix both of them together, keep it in a warm place and allow it to ferment for six to eight hours. I usually keep it overnight.
    • Next day, add salt to the batter.
    • Take the required quantity of batter, adjust the consistency.
    • Heat a skillet, take a spoonful of batter and spread it like a dosa. Sprinkle oil around it.
    • Once it is golden in colour, remove from the skillet and serve with coconut chutney.
    • Repeat for the rest of the batter.

    Take a tip:

    • A few red chilly may be added while grinding the batter. 

    About the event :

         Sending this to “Flatbreads Theme” at Shhh Secretly Cooking Challenge. Every month, one of the blogger suggests a theme, we are paired as partners and the secret ingredients are exchanged between the two ladies. They prepare a dish using the secret ingredients and later share it in the FB group, other members try to guess those ingredients. It is interesting to see some ingredients cannot be guessed by the members.  During the month of March, Anu Kollon suggested the theme. I liked her Uluva Kanji, a traditional Kerala dish  made with methi seeds and raw rice, I have bookmarked it to make it soon. 

    I was paired with Priya Iyer. Priya gave me oil and salt which was versatile to prepare any kind of recipe  I needed to do. I gave wheat flour and chilli, she made the delicious Gujarati Methi Bhakris

                                            shhh cooking secretly


    Masoor Dal Dosa 

    Masoor Dal Dosa is crispy and tasty. It is a good way to include the healthy legumes in breakfast.

    Ingredients
      

    • 2 cup Masoor dal
    • 1 cup raw rice
    • 1 teaspoon methi seed
    • salt to taste
    • oil for roasting

    Equipment

    • 1 big bowl
    • 1 ladle
    • 1 dosa skillet
    • 1 dosa spatula
    • 1 small bowl
    • 1 small spoon
    • 1 round plate

    Method
     

    1. Wash and soak masoor dal for 2-3 hours.
    2. Wash and soak raw rice and methi seeds for 2-3 hours.
    3. Grind masoor dal to a smooth paste and remove it in a large, wide bowl.
    4. Grind raw rice and methi seeds to a smooth paste. Use water as required, the consistency should be of a dosa batter.
    5. Mix both of them together, keep it in a warm place and allow it to ferment for six to eight hours. I usually keep it overnight.
    6. Next day, add salt to the batter.
    7. Take the required quantity of batter, adjust the consistency.
    8. Heat a skillet, take a spoonful of batter and spread it like a dosa. Sprinkle oil around it.
    9. Once it is golden in colour, remove from the skillet and serve with coconut chutney.
    10. Repeat for the rest of the batter.

    Notes

    • A few red chilly may be added while grinding the batter.
    • Dosa can be made either crisp or like the regular ones.
    • Ghee or a mix of oil and ghee can be used for roasting.
    Masoor dal dosa is crispy and tasty. It is a healthy twist to the usual one. Masoor dal is a good source of nutrient and this recipe is an ideal way to include it in your diet. Give a try to Masoor Dal Dosa.      #breakfastrecipes #healthy #southindian
    masoor dal dosa

    If you ever make Masoor Dal Dosa in your kitchen, take a picture and tag @foodiejayashree on Instagram or @evergreendishes on Facebook. Subscribe to get all updates in your inbox and an e-book for free!