Blog

  • Amaranth leaves Stir Fry | Rajgiri Soppu Palya

    Amaranth leaves Stir Fry | Rajgiri Soppu Palya

    Jump to Recipe Print Recipe

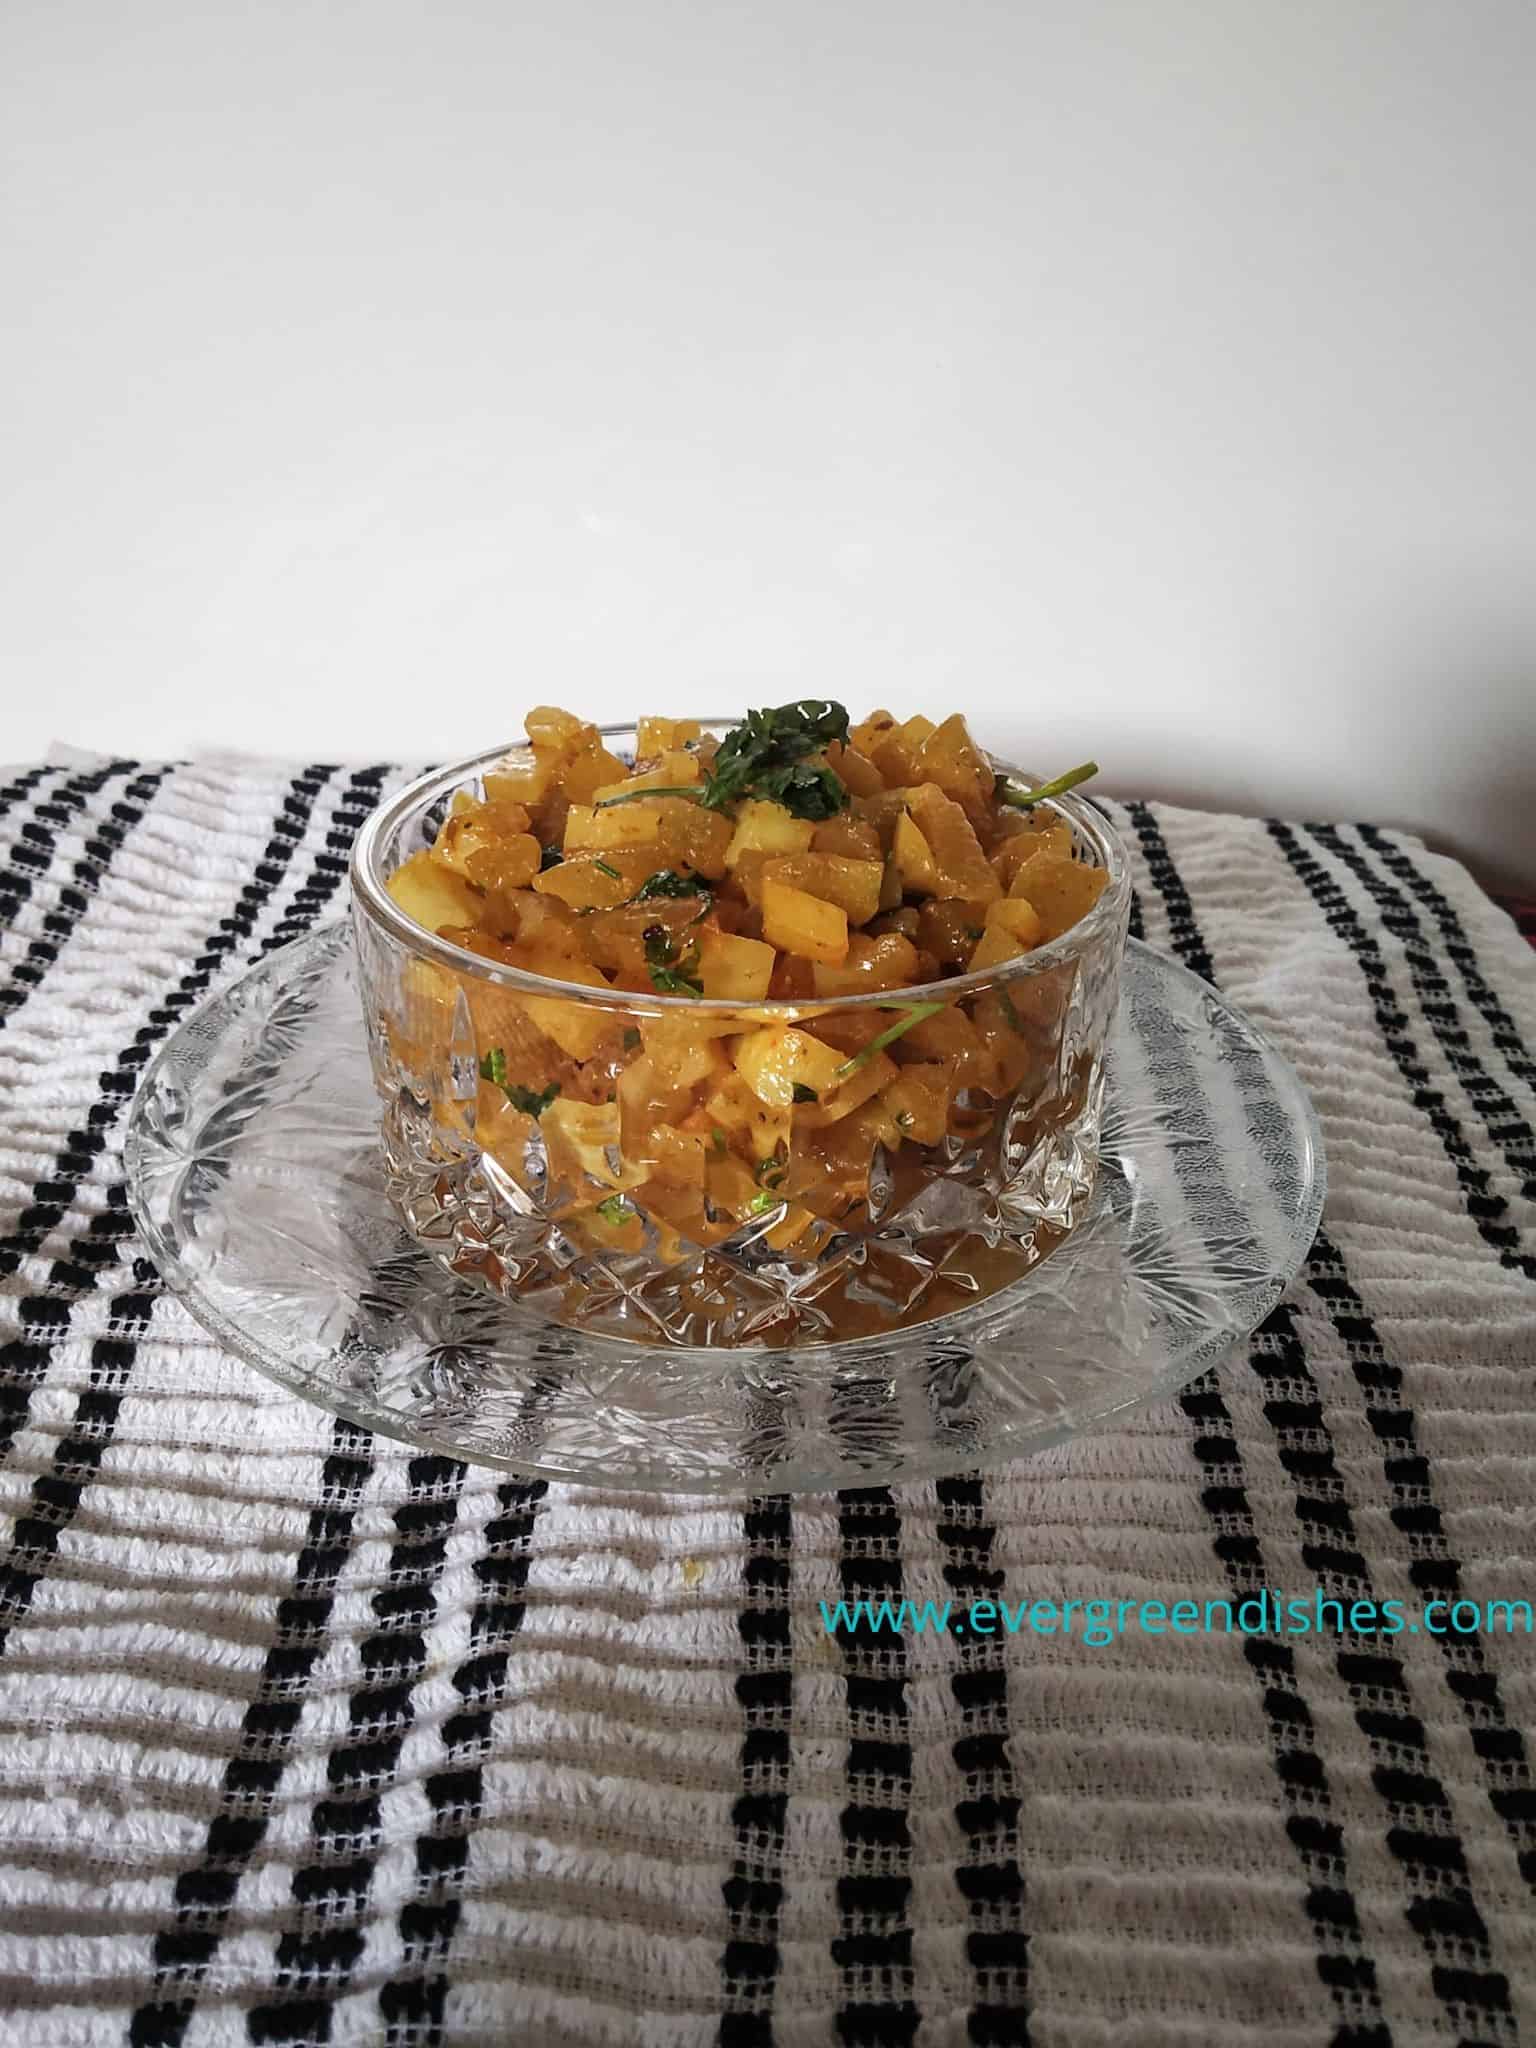
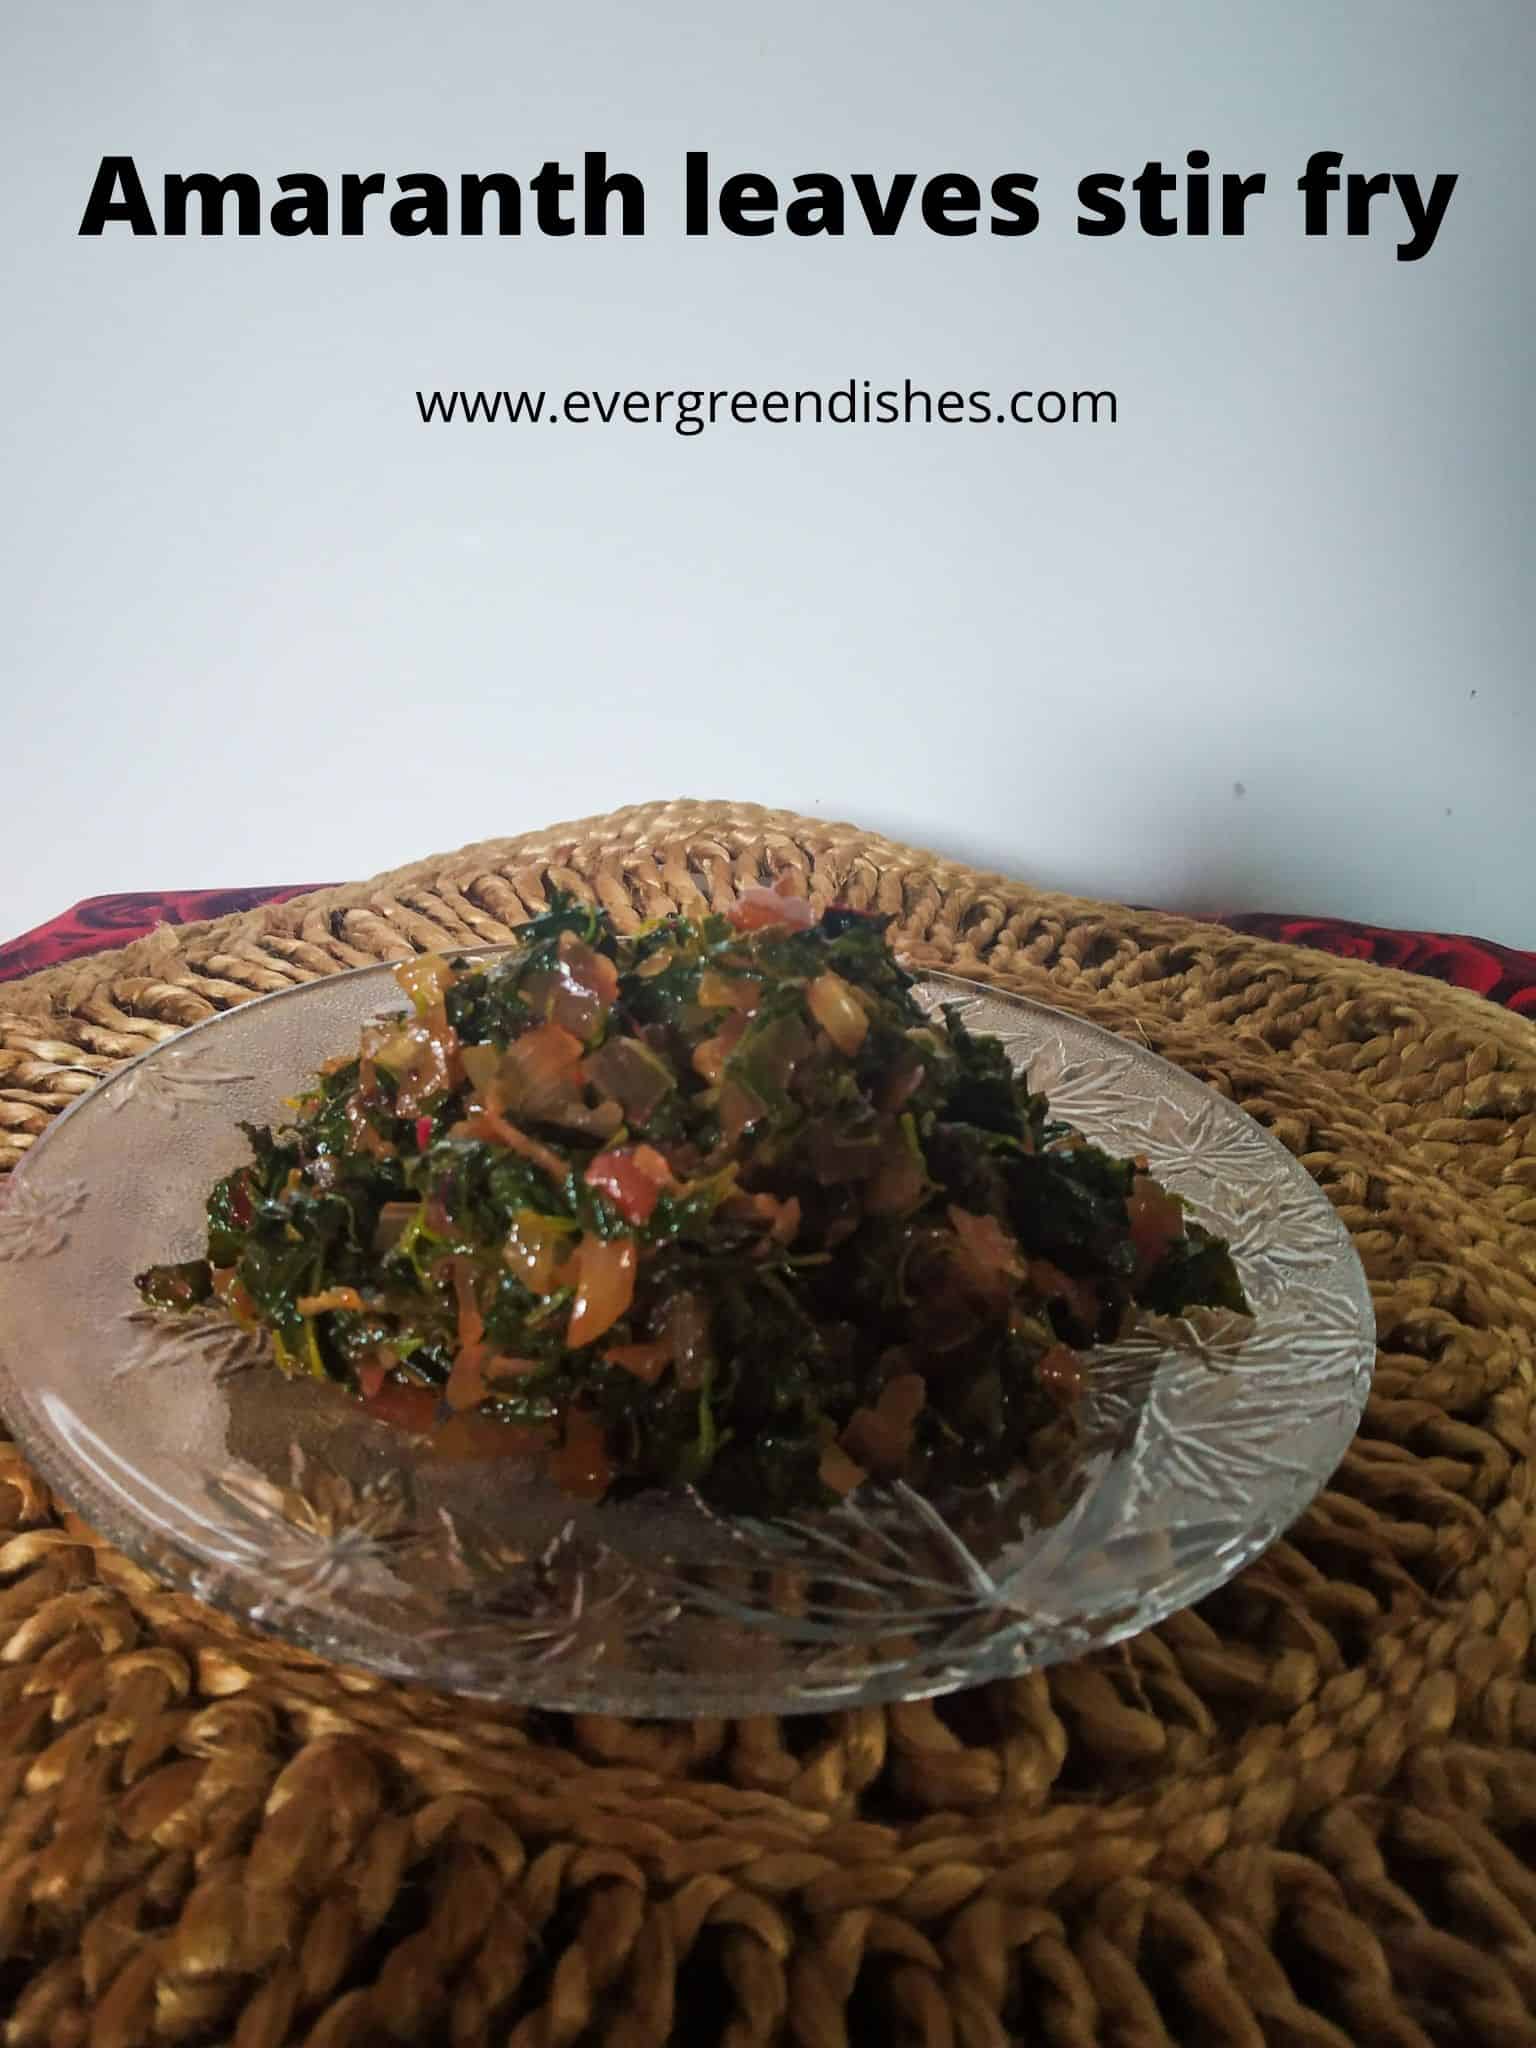
    Amaranth leaves stir fry is a simple, tasty and healthy side dish from Karnataka. It is ideal to serve with chapathi or jowar roti. 

    Amaranth leaves are not so popular as spinach. It is regularly used in daily cooking by one sect of people here. While the other section have a dislike and few have never used it. 

    In Kannada, it is called as Dantina Palya or Harive Soppu . It is commonly known as Chaulai or Rajgira. The leaves are green or red  with a moderate stem depending on the region they are grown. One needs to include more of it as it is a good source of Vitamin A, C and K.  It is also rich in fiber, iron, magnesium and. phosphorous. It is often given to lactating mothers. It is versatile to use, one can use it in stir fry, dal and stew. Cook it with tur dal and it turns out a good accompaniment with steamed rice. Use a good quantity of fresh leaves to make a delectable chutney. In North India, it is made as a saag. 

    Today, I am sharing a healthy stir fry using amaranth leaves. I have hardly shared any stir fry with greens here. You can use either the red or the green coloured leaves for this stir fry. You may add a few cloves of garlic if you like along with onion. Fresh coconut can also be added to it. Amaranth leaves stir fry, spicy chutney, a mixed dal  and chapathi make a good meal. 

    Amaranth leaves stir fry
    Amaranth leaves stir fry

    What goes in the stir fry ?

    Amaranth leaves :Separate the amaranth  leaves from the stalk. You may use the stalk if it is tender. It will eventually get cooked. You can use either the red amaranth or the regular one. The green leaf vegetable reduces considerably on cooking. 

    Onion : Cut them into medium size pieces. 

    Oil : You can use any oil ideal for cooking. 

    Mustard seed : Any south indian cooking starts with a dash of mustard seeds. The spluttering also indicates the temperature of the oil is right for cooking.

    Asafoetida : Just a small pinch of asafoetida, lends a good aroma to the dish.

    Turmeric powder : It has anti-bacterial properties. 

    Chilli powder: The quantity of chilli powder depends on how much spicy it is.

    Fresh Coconut : South Indian cooking is incomplete without the addition of fresh grated coconut. It is optional, serve it just like that. I have it sans coconut.

    How to wash green leafy vegetables? 

    The question often arises if we should wash and then cut the leafy vegetables or the other way round. Very often, it is suggested to first wash them thoroughly  and then cut the leaves as the nutrients are lost in the process. However, most of us tend to cut the green leaf and then wash it.


    Amaranth leaves stir fry
    Evergreendishesdev

    Amaranth leaves Stir Fry | Rajgiri Soppu Palya

    Amaranth leaves stir fry is a simple, tasty and healthy sidde dish. It is ideal to pair with jowar roti or chapathi.
    Prep Time 10 minutes
    Cook Time 10 minutes
    Total Time 20 minutes
    Course: dinner, lunch ideas
    Cuisine: Indian, karnataka

    Ingredients
      

    • 1 tablespoon oil
    • 1/2 teaspoon mustard seed
    • 1/4 teaspoon turmeric powder
    • a pinch of asafoetida
    • 1 big onion
    • 2 bunch rajgiri soppu / amaranth leaves
    • salt to taste

    Method
     

    1. Separate the leaves from the stalk. Cut them and wash a couple of times in water to remove the grime.
    2. Cut the onion.
    3. Take oil in a pan, add mustard seeds. As it splutters, sprinkle a little asafoetida and turmeric powder. Tip in the onions. Saute for sometime.
    4. In the meantime, remove the amaranth leaves and put them in a colander.
    5. Once the onion is pink in colour, put the amaranth leaves and salt. Mix and let cook for two minutes.
    6. Once the water has evaporated, add chilli powder
    7. Fresh grated coconut may be added. Amaranth leaves stir fry is ready to serve.

    Notes

    1. Two cloves of garlic may be added along with onion.
    2. It can be garnished with fresh grated coconut.

    Pin it for later: 

    Amaranth leaves stir fry is a simple, tasty and healthy side dish from Karnataka. It pairs well with  chapathi or jowar roti. Give a try to this version of amaranth leaves stir fry. Check out the post to know the other names for this green leaf.  #healthycooking #sidedish
    Amaranth leaves stir fry

    If you ever make this recipe,  do take a picture and tag @foodiejayashree on Instagram or @evergreendishes on Facebook or Twitter. I will be glad to see your creation and share it further.   

    Subscribe to get all updates and an e-book for free. Check out my e-books on Amazon.  Happy Cooking !

  • Watermelon Rind and Potato stir fry

    Watermelon Rind and Potato stir fry

    Watermelon rind and Potato Stir Fry is a simple yet delicious side dish. It is a good way to use the rind which is usually discarded. It pairs well with chapathi or phulka. One can also serve it with rice and sambar. 

    I have earlier shared the benefits of watermelon rind. In my eagerness to use the rind, I made this stir fry and it was liked at home. I have mixed it with potato pieces. Cut the rind and potato in similar fashion. Here, I peeled the skin of potato, usually I avoid doing it. But, I felt the need here. You may use only watermelon rind and cook it.

    The other ways in which you can use the rind are Dosa, Salad and Smoothie. If you have not tried these recipes, do try them. I urge it to try these recipes as the summer is setting soon and most of us bring watermelon. Instead of discarding the rind, you can make use of it. The amount of waste we discard can be put to a better use.


    watermelon rind and potato stir fry
    watermelon rind and potato stir fry

    Let’s get to the recipe of Watermelon Rind and Potato Stir Fry

    Ingredients: 

    • 2 teaspoon oil
    • 1/2 teaspoon cumin
    • a pinch of asafoetida
    • 2 green chilli
    • 1 cup potato pieces
    • 1 cup watermelon rind pieces
    • salt to taste
    • 1/2 teaspoon turmeric powder
    • 1/2 teaspoon coriander seed powder
    • 1/2 teaspoon chilly powder
    • 1/4 teaspoon garam masala powder
    • coriander for garnishing

      Method:

      1. Cut the watermelon rind into small cubes.
      2. Peel the potato, cut it similarly and put it in a bowl of water.
      3. Take oil in a pan, add cumin seeds. As it splutters, tip in green chilly. Put the potato pieces and give a stir. After a minute, put the rind pieces to it. Put salt, sprinkle some water and allow to cook.
      4. Once they are tender, add turmeric powder, chilli powder, coriander seed powder and garam masala to it. Cook for two minutes, let the flavours seep in.
      5. Garnish with coriander leaves.
      6. Serve with phulka.

    Take a tip: 

    • Cut them in similar size and shape.
    • You may use only watermelon rind pieces.
    watermelon rind and potato stir fry
    Evergreendishesdev

    Watermelon Rind and Potato Stir Fry

    Watermelon rind and potato stir fry is a simple, tasty side dish. This is a good way to use the rind which is usually discarded.
    Prep Time 10 minutes
    Cook Time 10 minutes
    Total Time 20 minutes
    Course: dinner, lunch ideas
    Cuisine: Indian

    Ingredients
      

    • 2 teaspoon oil
    • 1/2 teaspoon cumin
    • a pinch of asafoetida
    • 2 green chilli
    • 1 cup potato pieces
    • 1 cup watermelon rind pieces
    • salt to taste
    • 1/2 teaspoon turmeric powder
    • 1/2 teaspoon coriander seed powder
    • 1/2 teaspoon chilly powder
    • 1/4 teaspoon garam masala powder
    • coriander for garnishing

    Method
     

    1. Cut the watermelon rind into small cubes.
    2. Peel the potato, cut it similarly and put it in a bowl of water.
    3. Take oil in a pan, add cumin seeds. As it splutters, tip in green chilly. Put the potato pieces and give a stir. After a minute, put the rind pieces to it. Put salt, sprinkle some water and allow to cook.
    4. Once they are tender, add turmeric powder, chilli powder, coriander seed powder and garam masala to it. Cook for two minutes, let the flavours seep in.
    5. Garnish with coriander leaves.
    6. Serve with phulka.

    Notes

    Cut them in similar size and shape.
    You may use only watermelon rind pieces.

    Pin Watermelon rind stir fry to your collection:

    Watermelon rind and potato stir fry is a tasty side dish. It is a good way to use the rind in our daily cooking.
    watermelon rind and potato stir fry


    This is the last post of the year. Thank you for being a part of my journey. Hope to have your continued support in the future too ! Subscribe to get all updates in your inbox and an e-book for free!


  • Vegetable Makhanwala | Veg Makhanwala recipe

    Vegetable Makhanwala | Veg Makhanwala recipe

    Jump to Recipe Print Recipe

    Vegetable Makhanwala is a delicious side dish from North Indian cuisine. It is a  medley of vegetables cooked in butter with a few spices. It makes a good accompaniment with chapathi or phulka. Ideally, it should be served with nan or roti. 

    This dish is ideal for a family get-together or parties. You can make use of many kind of vegetables. I have used beans, carrot, capsicum, potato and green pea. You can add cauliflower and paneer pieces too. The vegetables can either be boiled or sauteed in a little oil. I have done the later mehod. The dish is made in several steps as cutting the vegetables, saute the vegetables, sauting the vegetables for the paste, making of paste and finally the gravy. 

    Let us get to the recipe of Vegetable Makhanwala

    Ingredients: 

    • 15 beans
    • 1 carrot
    • 1 capsicum
    • 1 potato
    • 1/4 cup peas
    • 2 teaspoon oil
    • 2 teaspoon butter
    • 2 clove
    • 1 teaspoon cumin
    • 1/4 teaspoon turmeric powder
    • 1/2 teaspoon garam masala
    • 1/2 teaspoon chilli powder
    • salt to taste
    • 1/2 teaspoon kasuri methi
    • 1 tablespoon fresh cream
    • 1 teaspoon coriander for garnishing

    For the makhanwala masala :

    • 2 onion
    • 3 large tomato
    • 5 cloves garlic
    • 1 inch ginger
    • 10 cashew nuts
    • 1 teaspoon oil

    Method:

    1. Cut the beans, carrot, and capsicum into thin long strips of half an inch.
    2. Cut the onion and tomatoes, keep them aside.
    3. To make the masala, take oil in a pan, add ginger, garlic and onions. Saute the onions for sometime, let them  be translucent. Put the tomatoes to it. Throw in the cashew pieces to it. Let it cook for sometime. The tomatoes need to be mushy. Once it is done, let cool for sometime. Later, grind to a paste.
    4. To saute the vegetables, take two teaspoon of oil in another pan. Add beans to it. Saute it, after a few seconds, put the carrot pieces. After sometime, put potatoes and peas. Lastly, put the capsicums. Toss them in between. The vegetables must be cooked al dente.
    5. Once the vegetables are cooked, put them in a bowl. In the same pan, add butter. Put cumin, as it sizzles, add the tomato paste to it. Let it cook for sometime. Now, add turmeric powder, chilli powder and garam masala to it. Let cook for sometime. Put salt to it
    6. Now, add the cooked vegetables along with salt. Let it simmer for sometime.
    7. Put kasuri methi to it. Add fresh cream to it. 
    8. Finally, garnish with some coriander leaves. 
    9. Serve with rotis or nan. 
    vegetable makhanwala
    vegetable makhanwala
    vegetable makhanwala
    Evergreendishesdev

    Vegetablee Makhanwala

    5 from 2 votes
    Vegetable Makhanwala is a medley of vegetables cooked together in flavoursome spices.
    Course: Main Course
    Cuisine: north indian

    Ingredients
      

    • 15 beans
    • 1 carrot
    • 1 capsicum
    • 1 potato
    • 1/4 cup peas
    • 2 teaspoon oil
    • 2 teaspoon butter
    • 2 clove
    • 1 teaspoon cumin
    • 1/4 teaspoon turmeric powder
    • 1/2 teaspoon garam masala
    • 1/2 teaspoon chilli powder
    • salt to taste
    • 1/2 teaspoon kasuri methi
    • 1 tablespoon fresh cream
    • 1 teaspoon coriander for garnishing
    • For the masala :
    • 2 onion
    • 3 large tomato
    • 5 cloves garlic
    • 1 inch ginger
    • 10 cashew nuts
    • 1 teaspoon oil

    Method
     

    1. Cut the beans, carrot, and capsicum into thin long strips of half an inch.
    2. Cut the onion and tomatoes, keep them aside.
    3. To make the masala, take oil in a pan, add ginger, garlic and onions. Saute the onions for sometime, let them  be translucent. Put the tomatoes to it. Throw in the cashew pieces to it. Let it cook for sometime. The tomatoes need to be mushy. Once it is done, let cool for sometime. Later, grind to a paste.
    4. To saute the vegetables, take two teaspoon of oil in another pan. Add beans to it. Saute it, after a few seconds, put the carrot pieces. After sometime, put potatoes and peas. Lastly, put the capsicums. Toss them in between. The vegetables must be cooked al dente.
    5. Once the vegetables are cooked, put them in a bowl. In the same pan, add butter. Put cumin, as it sizzles, add the tomato paste to it. Let it cook for sometime. Now, add turmeric powder, chilli powder and garam masala to it. Let cook for sometime. Put salt to it
    6. Now, add the cooked vegetables along with salt. Let it simmer for sometime.
    7. Put kasuri methi to it. Mix fresh cream into the curry.
    8. Finally, garnish with some coriander leaves.
    9. Serve with tandoori roti, nan or chapathi.

    Pin Veg Makhanwala to your board:

    Vegetable Makhanwala is a delicious side dish from North Indian cuisine. Different kind of vegetables are cookeed in a varied spices to make it a tasty side dish.
    Vegetable Makhanwala

    If you ever make this Vegetable Makhanwala recipe,  do take a picture and tag @foodiejayashree on Instagram or @evergreendishes on Facebook or Twitter. I will be glad to see your creation and share it further. Let’s be connected, do follow on social media platforms. Until next time, let’s stay connected.  Subscribe to get all updates and an e-book for free. Check out my e-books on Amazon.  Happy Cooking !

  • Homemade Granola on Stovetop

    Homemade Granola on Stovetop

    Jump to Recipe Print Recipe

    Granola on stovetop is an easy to make recipe with ingredients easily available at home. It is vegan, gluten-free, soy free snack you can enjoy anytime,  Eat it with milk or yoghurt topped with fruits. 

    Granola can be customised as per one’s  need, use different variety of nuts and dates. I have used almonds, raisins and melon seeds. If you want to make it nut free avoid nuts and substitute with any other ingredient as choco chips, coconut pieces or seeds.  Different sweeteners  may be used as  maple or brown sugar. 

    This homemade granola can be had as it is or with milk or yoghurt and fruit pieces too. It is healthy and filling. Moreover, you are in control of the ingredients that you use.

    This recipe is ideal for those who wish to make on stovetop instead of the oven. You may like to check a few other healthy recipes as muesli bar, oats ladoo, dry fruit ladoo


    homemade granola on stovetop
    homemade granola on stovetop

    Ingredients:

    • 2.5 cup oats ( I prefer using the quick oats)
    • 1/4 cup almonds
    • 1/2 cup melon seeds
    • 4 teaspoon honey
    • 2 teaspoon coconut oil
    • 1/4 cup raisins


    Method: 

    • Cut the almond into slivers.
    • Take a pan, add all the ingredients and roast on a low flame for five minutes.
    • Add the raisins, continue to toss for sometime.
    • Keep tossing in between as it gets burnt easily.
    • Once it is crisp, remove from flame. Keep it aside.
    • Store in an air-tight container.

    Take a tip:

    • I prefer using quick oats.
    • Pecans, walnuts, cashew may be used.
    • You can add dried berries also.
    • Maple syrup or brown sugar may be used. 
    • Keep roasting on a low flame. If you do not toss in between, it will get burnt easily. 
    homemade granola on stovetop
    Evergreendishesdev

    Homemade Granola on Stovetop

    Granola makes a good and easy to serve breakfast or snack option. It can be served with milk or as a topping with fruits or desserts.
    Prep Time 10 minutes
    Cook Time 10 minutes
    Total Time 20 minutes
    Course: Breakfast
    Cuisine: international

    Ingredients
      

    • 2.5 cup oats
    • 1/4 cup almonds
    • 1/2 cup melon seeds
    • 4 teaspoon honey
    • 2 teaspoon coconut oil
    • 1/4 cup raisins

    Method
     

    1. Cut the almond into slivers.
    2. Take a pan, add all the ingredients and roast on a low flame for five minutes.
    3. Add the raisins, continue to toss for sometime.
    4. Keep tossing in between as it gets burnt easily.
    5. Once it is crisp, remove from flame. Keep it aside.
    6. Store in an air-tight container.

    Notes

    • I prefer using quick oats.
    • Pecans, walnuts, cashew may be used.
    • You can add dried berries also.
    • Maple syrup or brown sugar may be used. 
    • Keep roasting on a low flame. If you do not toss in between, it will get burnt easily. 
    Homemade Granola is tasty and healthy.It is easy to make and has no added sugar in it. Give a ty to this version of granola made on stove top.
    homemade granola on stovetop


    If you ever make these  Homemade Granola on Stovetop,  do take a picture and tag @foodiejayashree on Instagram or @evergreendishes on Facebook or Twitter. I will be glad to see your creation and share it further. Let’s be connected, do follow on social media platforms. Until next time, let’s stay connected.  Subscribe to get all updates and an e-book for free. Check out my e-books on Amazon.  Happy Cooking !

  • Homemade Chocolates | how to make chocolates at home

    Homemade Chocolates | how to make chocolates at home

    Jump to RecipePrint Recipe

    Homemade Chocolates are tasty and loved by all. They are the best gifts you can give to someone you care about.

    Chocolates, the very name creates a feeling of joy. It is loved by people of all ages. No matter, how old you are, there is something about them, you feel happy and loved.They make ideal gifts for the season. 

    Chocolate making seems to be an artisans job. But with so much advances in cooking, making chocolates is a breeze. I love making chocolates and hope to share a couple more recipes here. 

    With Christmas and New Year approaching, most people are busy in baking cakes and cookies. I have shared some lovely cookies earlier, do take a look, they are ideal to give as a gift too. Almond Cookies are delicious, melt-in-the mouth cookies. Chocolate and Vanilla Floral Cookies are dainty looking cookies. Mexican Wedding Cookies are short bread  cookies from Spain, give a try if you haven’t. 

    How to make chocolates at home:

    Homemade chocolates are made in two ways. One is using the cocoa powder and the other with compounded chocolate.  Today, I am sharing a recipe using cocoa powder. A few things we need to keep in mind while making chocolates. I have read recipes using butter but its best to use cocoa butter or coconut oil. Secondly, we should always follow the double boiler method here.  In this method, water is boiled in a pan on a low flame. A larger bowl is kept over it and the chocolate is made in it. Remember, water may seep into a small container. Lastly, chocolate moulds are essential to give shape. 

    Let’s get making chocolates :

    Homemade Chocolates / How to make chocolates at home

    Ingredients:

    1/2 cup cocoa powder
    1/4 cup milk powder
    3/4 cup powder sugar
    1/2 cup cup coconut oil/ cocoa butter 
    2 tbsp nuts

    Method: 


    Take cocoa powder, castor sugar and milk powder in a bowl. Sieve them together.
    The chocolate is made using double boiler method. Take a small pan, fill a quarter of it with water. Keep a larger bowl over it, this is double boiler method. If you keep a smaller bowl, there is a chance of water getting into this one. Keep it on a low flame. Put coconut oil into it. Let it heat for sometime.
    Keep the chocolate moulds ready.
    Cut the almond into slivers.
    Now, put the sieved mixture into and mix it thoroughly. Let it cook for two minutes.
    Remove and put it in the mould. Initially, put a small quantity into it. Now, add the powdered nuts and top it with chocolate mixture. Once you have put it, tap it slowly. Put it in the refrigerator for 2 hours.
    Once, they are set, you can easily remove them from the mould.
    Homemade chocolates are ready to eat.

    Homemade Chocolates
    Homemade Chocolates
    homemade chocolates
    Evergreendishesdev

    Homemade Chocolates

    Homemade chocolates are tasty and easy to make.
    Course: festive treats, kids favourite
    Cuisine: international

    Ingredients
      

    • 1/2 cup cocoa powder
    • 1/4 cup milk powder
    • 3/4 cup powder sugar
    • 1/2 cup cup coconut oil
    • 2 tbsp nuts

    Method
     

    1. Take cocoa powder, castor sugar and milk powder in a bowl. Sieve them together.
    2. The chocolate is made using double boiler method. Take a small pan, fill a quarter of it with water. Keep a larger bowl over it, this is double boiler method. If you keep a smaller bowl, there is a chance of water getting into this one. Keep it on a low flame. Put coconut oil into it. Let it heat for sometime.
    3. Keep the chocolate moulds ready.
    4. Cut the almond into slivers.
    5. Now, put the sieved mixture into and mix it thoroughly. Let it cook for two minutes.
    6. Remove and put it in the mould. Initially, put a small quantity into it. Now, add the powdered nuts and top it with chocolate mixture. Once you have put it, tap it slowly. Put it in the refrigerator for 2 hours.
    7. Once, they are set, you can easily remove them from the mould.
    8. Homemade chocolates are ready to eat.
    homemade chocolates
    homemade chocolates

    Pin it for later: 

    Homemade Chocolates are delicious and easy to make. They make a good gift option for the holiday season. Customise and make them easily at home.
    Homemade Chocolates

    If you ever make these  Homemade Chocolates,  do take a picture and tag @foodiejayashree on Instagram or @evergreendishes on Facebook or Twitter. I will be glad to see your creation and share it further. Let’s be connected, do follow on social media platforms. Until next time, let’s stay connected.  Subscribe to get all updates and an e-book for free. Check out my e-books on Amazon.  Happy Cooking !

  • Ratlami Sev / Masala Sev Recipe

    Ratlami Sev / Masala Sev Recipe

    Jump to Recipe Print Recipe

    Ratlami Sev / Masala Sev  is a popular variety of sev. It is tasty and makes a good snack with tea. It is usually available in super markets. The addition of spice mix makes it spicy and unique in taste. 

    Ratlami Sev is a spicy sev served as a snack with tea. The use of varied  spices makes it spicy and flavoursome. It is a good change from the usual one we make. Ratlam is a small town in Madhya Pradesh. It was a princely town town four hundred years back. Raja Ratan Singh  of Jodhpur created it in 1652. Shah Jahan had given large lands for the service they had rendered. While on a visit, the Mioghuls, wanted sevaiyan. Since there was no wheat available, gram flour was used along with spices and the sev came into existence. Since then, it is known as Ratlami Sev. It is different from the usual variety. It has a blend of unique spices which gives a good flavour to it. Moreover, the size of the sev is totally different from the regular ones. 

    What is Sev?

    Sev is a popular savoury snack from Indian sub-continent. It is deep-fried , crispy  snack made from gram flour. 

    Different kind of sev:

    1. Nylon Sev – The fine, thin variety of sev used as topping in chaats. It is made with minimum spices. It is the most popular sev used.
    2. Regular Sev – These are slightly thicker and can be used as a snack. I have shared the Ompudi and Palak Sev earlier. It is moderately spicy. 
    3. Ratlami Sev- This is spicier and thicker than the other usual  ones. 

    The other kind of savoury snacks you might like are Instant Chaklis, Kodbole, Butter Murukku, Ribbon Pakoda, Nippattu

    Ratlami Sev
    Ratlami Sev

    Ratlami Sev Recipe 

    Ingredients: 

    • 2. 5 cup besan / gram flour
    • 2 tablespoon rice flour
    • 2 tablespoon oil
    • 1 teaspoon lemon juice
    • 1/4 tsp turmeric powder
    • 1 teaspoon kashmiri chilli powder
    • pinch of asafoetida 
    • 1/4 teaspoon baking soda
    • salt to taste
    • 1/2 cup water for mixing

    For the spice mix:

    • 3/4 teaspoon clove
    • 1/2 teaspoon fennel
    • 1/4 teaspoon ajwain
    • 1 teaspoon cumin
    • 1 teaspoon pepper 
    • 2 pods cardamom
    • small piece of cinnamon

    Method :

    1. Dry roast cloves. cardamom, fennel, ajwain, cumin, cinnamon  and pepper for two minutes. Grind to a powder.
    2. Take gram flour in a wide. Put  rice flour to it. Add  salt, asafoetida, turmeric powder, chilli powder. Give a mix.
    3. Add oil and mix it thoroughly.
    4. Put the spice mix and baking soda. Mix, add a little water and make a stiff dough of it. 
    5. Take the mould and use the disc with thick sev pattern. 
    6. Grease the mould with a little oil, take a ball  and squeeze into it. 
    7. Heat oil in a pan, press it directly into the oil. Take care, slowly put it into a coil shape.
    8. Deep fry, slowly turn to the other side and once it is golden in colour remove it on a tissue paper,
    9. Repeat for the rest of the dough.
    10. Store in an air-tight container. 

    Take a tip:

    • Once you add the ingredients, give a good mix, before mixing with water. 
    • Addition of rice flour is optional but it makes them crispy.
    • Once they are cool, store in an air-tight container. 
    Ratlami Sev
    Evergreendishesdev

    Ratlami Sev

    Ratlami Sev is a spicy savoury snack from Indian cuisine.
    Prep Time 10 minutes
    Cook Time 20 minutes
    Total Time 30 minutes
    Course: dry snack
    Cuisine: Indian

    Ingredients
      

    • 2.5 cup besan / gram flour
    • 2 tablespoon rice flour
    • 2 tablespoon oil
    • 1 teaspoon lemon juice
    • 1/4 tsp turmeric powder
    • 1 teaspoon kashmiri chilli powder
    • pinch of asafoetida
    • 1/4 teaspoon baking soda
    • salt to taste
    • 1/2 cup water for mixing
    • For the spice mix:
    • 3/4 teaspoon clove
    • 1/2 teaspoon fennel
    • 1/4 teaspoon ajwain
    • 1 teaspoon cumin
    • 1 teaspoon pepper
    • 2 pod cardamom
    • small piece cinnamon

    Method
     

    1. Dry roast cloves. cardamom, fennel, ajwain, cumin, cinnamon  and pepper for two minutes. Grind to a powder.
    2. Take gram flour in a wide. Put  rice flour to it. Add  salt, asafoetida, turmeric powder, chilli powder. Give a mix.
    3. Add oil and mix it thoroughly.
    4. Put the spice mix and baking soda. Mix, add a little water and make a stiff dough of it.
    5. Take the mould and use the disc with thick sev pattern.
    6. Grease the mould with a little oil, take a ball  and squeeze into it.
    7. Heat oil in a pan, press it directly into the oil. Take care, slowly put it into a coil shape.
    8. Deep fry, slowly turn to the other side and once it is golden in colour remove it on a tissue paper,
    9. Repeat for the rest of the dough.
    10. Store in an air-tight container.
    11. Take a tip:
    12. Once you add the ingredients, give a good mix, before mixing with water.
    13. Addition of rice flour is optional but it makes them crispy.
    14. Once they are cool, store in an air-tight container.

    Notes

    Addition of rice flour is optional but it makes them crispy.
    Reduce clove, pepper and chilli powder to reduce spiciness.

    Pin Ratlami Sev to your board:

    Ratlami Sev is a spicy savoury snack from Indian snack. It makes a good snack option to store at home.
    Ratlami Sev

    If you ever make this  Ratlami Sev recipe,  do take a picture and tag @foodiejayashree on Instagram or @evergreendishes on Facebook or Twitter. I will be glad to see your creation and share it further. Let’s be connected, do follow on social media platforms. Until next time, let’s stay connected.  Subscribe to get all updates and an e-book for free. Check out my e-books on Amazon.  Happy Cooking !


  • Dates Payasam | Dates Kheer recipe

    Dates Payasam | Dates Kheer recipe

    Jump to Recipe

    Dates Payasam / Dates Kheer is a rich and delicious sweet dish ideal for any celebration. It is one of the classic  sweets of South India with numerous health benefits. Khajoor Payasa is a sugar free, rich, creamy dessert ideal for any occasion.

    Kheer is one of the essential sweets during any festivities. The traditional sweet dishes are made quite often, give a try to Dates Kheer  recipe during this Diwali. The festival of lights brings new hopes of peace and prosperity. The festival is celebrated for four days from Nov 3. The first day is Dhanteras followed by Naraka Chaturdasi. We rise early in the morning and the house is decorated with diyas and mango leaves. Beautiful rangolis and bursting of crackers is another attraction during this time. The third day is Laxmi Puja and the last day is Bali Padya. Diwali is a festival which everyone look forward too. Savouries and snacks are prepared and exchanged with friends and relatives.

    I have earlier shared many sweet recipes, do check it out for the festive season. 

    Benefits of Dates:

    Dates are packed with nutrients. They contain several vitamins and minerals as calcium, magnesium, selenium, folate, and  Vitamin K. It helps  in controlling blood sugar. It also aids in preventing chronic illnesses as Alzeihmers, heart disease, cancer and diabetics. It also helps in improving bone health. It is a good substitute for sugar. But one should be aware that it is high in calories. It should be consumed in moderation.

    Other recipes with Dates:

    Dates Burfi is loved by one and all, give a try to it. Milkshakes are consumed regularly at home. Iusually soak  dates for some time and use them in banana milkshake. Dates chutney is quintessential for chaats and I have it regularly in my refrigerator. 

    Dates Payasam

    Dates Payasam / Dates Kheer recipe

    Ingredients: 

    15 dates
    15 almonds
    3/4 litre milk
    1/4 cup jaggery
    1/2 teaspoon cardamom powder
    1 teaspoon ghee
    8 cashew pieces


    Method:


    Soak the dates and almonds in a glass of milk for half an hour. If the seeds are present, remove them before soaking.
    Make a paste and keep it aside.
    Boil the remaining milk. Add the paste to it. Give a stir. Let it boil for a while. Turn off the flame. Put shredded jaggery to it. Add cardamom powder to it.
    Finally, roast the cashew pieces and garnish it.
    Serve chilled.

    Take a tip:

    Vegans may use almond milk.  In that case, avoid soaking almonds  as it may get nauseating. Dry roast or microwave the cashew pieces and garnish it.

    About the event:

    It’s Diwali time and we are celebrating the same at Shhh Secretly  Cooking Group too. The theme was decided by the wonderful admins  Mayuri Patel and Renu Agarwal Dongre. Renu Agarwal has many wonderful recipes on her blog  Cook with Renu and I would love to make her Moong Dal Halwa.  For the Diwali theme she has made this fuss free  Milk Powder Chocolate Ladoo. Mayuri Patel is my partner too for this  month. She blogs and Mayuirisjikoni. I love her bakes and I had tried her Bao bun earlier. 

    For the challenge, Mayuri and me both wanted to make a sweet dish and we shared the ingredients accordingly.I had given her sugar and cardamom powder as the secret ingredients. She has prepared delicious Kalakand with cottage cheese, it’s on my to do list now. I was given jaggery and ghee and I made this dates kheer which was on my list to post since a long time. 

    shhh cooking secretly

    dates payasam

    Dates Payasam / Dates Kheer Recipe

    Dates Payasam or Dates Kheer is a delicious, rich dessert ideal to serve for any occasion.
    Prep Time 10 minutes
    Cook Time 10 minutes
    Soaking time 30 minutes
    Total Time 50 minutes
    Servings: 4 people
    Course: indian sweets, sweets
    Cuisine: karnataka, South Indian

    Ingredients
      

    • 15 dates
    • 15 almonds
    • 3/4 litre milk
    • 1/4 cup jaggery
    • 1/2 teaspoon cardamom powder
    • 1 teaspoon ghee
    • 8 cashew pieces

    Method
     

    1. Soak the dates and almonds in a glass of milk for half an hour. If the seeds are present, discard them before soaking.
    2. Make a paste.
    3. Boil the remaining milk. Add the paste to it. Give a stir. Let it boil for a while. Turn off the flame. Put shredded jaggery to it. Add cardamom powder to it.
    4. Finally, roast the cashew pieces and garnish it.
    5. Serve chilled.

    Notes

    Vegans may use almond milk. In that case, avoid using additional almonds. Dry roast or microwave the cashew pieces. 
    Dates Payasam / Dates Kheer is a rich, delicious dessert ideal to serve for any occassion.
    Dates Payasam / Dates Kheer

    If you ever make this  Dates Payasam,  do take a picture and tag @foodiejayashree on Instagram or @evergreendishes on Facebook or Twitter. I will be glad to see your creation and share it further. Let’s be connected, do follow on social media platforms. Until next time, let’s stay connected.  Subscribe to get all updates and an e-book for free. Check out my e-books on Amazon.  Happy Cooking !

  • Aloo Mangodi Ki Sabzi | Potato and Dried  lentil nuggets stir fry

    Aloo Mangodi Ki Sabzi | Potato and Dried lentil nuggets stir fry

    Jump to Recipe Print Recipe

    Aloo Mangodi ki Sabzi is a popular Rajasthani dish. It is ideal to pair with steamed rice or chapati. It is a semi-dry side dish made using dried nuggets and potato. 

    What is Mangodi ?


    Mangodi is a dried lentil nugget used in dry lands of Rajasthan. It is usually made of moong or urad dal. The people of Rajasthan make these and store them at home. They use them regularly in cooking sabzis and other dishes. They make a good replacement when vegetables are not easily available during summer.

    The lentil is soaked for a couple of hours, it is then made into a paste, seasoned with some spices and it is spread on a sheet in the sun for a couple of days. They are stored and used as and when required.

    The first time I had mangodi ki sabzi was  at a Rajasthani city like entertainment place made here. Later, it was during my Jaipur trip I found it commonly in the thali meals.  A few months back, while shopping online, I found these ready made mangodis  and bought a packet of them to try at home.

    How to use Mangodi ?

    Mangodi can be used in stir fry, curries and pulaos. It is ideal to use in curries along with other vegetables. Here, mangodi is fried in oil to a golden colour. Later, it is cooked along with the potato pieces. They may be crushed and added. As the one I have are small in size, I just added them.

    Alu Mangodi Ki
    Alu Mangodu ki sabzi

    What goes in the Aloo Mangodi Sabzi ?

    • Potato : It is one of the the essentials in making the sabzi.
    • Mangodi : Mangodi is available in the super market. It is ideal to store a packet ot it as it is useful when we do not have any vegetables
    • Onion
    • Oil : Any neutral oil is ideal.
    • Ginger garlic paste : It can be made in a small quantity using the small jar.
    • Cumin 
    • Chilli powder: If the chilli powder is too spicy, be mindful while using it.
    • Coriander powder: You can use a good quality one from the market. Store it in a tight container.
    • Salt 

    Can I make mangodi at home?

    Yes, you can make it during the summer time. It is a regular affair in Rajasthan to make it during summer.  Moong dal is soaked overnight. It is then made into a paste with very little water. To the batter, salt is added and well beaten for sometime. It is then put as small droplets on a tray and dried in the sun for two or three days. It is then stored and used as required.


    Print Recipe

    Aloo Mangodi ki Sabji

    Aloo Mangodi ki sabzi is a popular side dish from Rajasthani cuisine.
    Prep Time 15 minutes
    Cook Time 15 minutes
    Total Time 30 minutes
    Course: Breakfast, dinner, lunch
    Cuisine: Indian, rajasthani,

    Ingredients
      

    • 4 potatoes
    • 2 onions
    • 1/2 cup mangodi
    • 2 tablespoon oil
    • 1/2 teaspoon cumin
    • 1/2 teaspoon ginger garlic paste
    • 1 teaspoon chilli powder
    • 1.5 teaspoon coriander powder
    • salt to taste

    Method
     

    1. Wash, peel the skin and cut the potato into cubes.
    2. Cut onions and keep them aside.
    3. Make a paste of ginger and garlic.
    4. Take oil in a pan, add mangodi and shallow fry them Once they are golden in colour, remove and put them aside.
    5. Now, add cumin, as it splutters put onion to it. Saute for a few seconds. Put the ginger garlic paste to it and continue to saute for sometime.
    6. Add potato pieces and fried mangodi pieces to it. Let cook for sometime. You may add salt at this stage.
    7. Once the potato pieces are cooked, add chillo powder and coriander powder to it.
    8. Finally, garnish with coriander leaves .
    9. Aloo Mangodi Sabji is ready to serve.

    Pin it for later:

    Aloo Mangodi ki Sabzi is a popular side dish from Rajasthani cuisine. It is a semi-dry preparation ideal to pair with chapathi.
    Aloo Mangodi ki Sabzi


    If you ever make this Aloo Mangodi ki Sabzi,  do take a picture and tag @foodiejayashree on Instagram or @evergreendishes on Facebook or Twitter. I will be glad to see your creation and share it further. Let’s be connected, do follow on social media platforms. Until next time, let’s stay connected.  Subscribe to get all updates and an e-book for free. Check out my e-books on Amazon.  Happy Cooking !

  • Mughlai Vegetable Pulao

    Mughlai Vegetable Pulao

    Print RecipeJump to Recipe

    Mughlai VegPulao is a rich, mildly aromatic  and delicious rice dish from Indian sub-continent. It is rich with the addition of nuts and fruit pieces. It makes a good meal for the weekend. 

    Rice dish in any form is always welcome at home.  It serves dual purpose, it is loved by my children and  cooking is made easier for the day. It is ideal for brunch, weekend lunch or dinner. Mughlai Pulav as the name indicates is rich and tasty. It paies well with any curd based salad and a appetiser. 

    Earlier, I have shared some recipes which I often make at home. They are  pudina pulao, spring onion and corn pulao, corn and peas pulao, jeera rice, tri-colour pulav

    To make mughlai veg pulao, initially cook  the rice separately with a bay leaf, a teaspoon of ghee and a pinch of salt. Cut the vegetables into thin strips. Grind coconut along with coriander seed, poppy seed, garlic and ginger to a paste. Here, I have used a mixture of oil and ghee to cook it., it gives a good taste to the dish. One can fry the nuts ahead and keep them aside at this stage. The detailed recipe is given below.

    mughlai vegetable pulao
    mughlai vegetable pulao

    Mughlai Pulao Recipe 

    Ingredients: 

    • 1 cup basmati rice
    • 1 bay leaf
    • 1 teaspoon ghee
    • 1/4 cup beans (cut in one inch long pieces)
    • 1/4 cup carrot  (cut similarly, used in lesser quantity )
    • peas
    • 1/4 cup beetroot ( cut similarly, used in lesser quantity)
    • fruit pieces ( I have used apple and pomegranate)
    • 2 tablespoon oil
    • 1 tablespoon ghee
    • 2 cloves
    • 1 inch stick cinnamon
    • 2 cardamom
    • 1 tablespoon fresh coconut
    • 1.5 teaspoon poppy seed
    • 5 cloves garlic
    • 5 green chilli
    • 1/2 inch ginger
    • 1.5 tablespoon coriander seed
    • salt

    Method : 

    1. Cook the rice with bay leaf and a teaspoon of ghee. We need separate grains of rice, add water accordingly.
    2. In a thick bottom pam, add ghee and oil. Put cardamom, cloves and cinnamon to it. After a few seconds, add beans to it. Put carrot and beetroot pieces after two minutes. Let them cook. Put peas to it. 
    3. Grind together coconut, poppy seed, green chilli, ginger and coriander seed with a little water. 
    4. Put the paste in it and saute it for sometime. Let the raw smell diminish. 
    5. Now, add  the cooked rice and salt to it. Mix it gently.
    6. Fry cashew and raisins in ghee.
    7. Garnish with fruits and dry fruits. Serve Mughlai vegetable pulao with a raita of your choice. 

    Take a tip:

    • You may  add grapes and pineapple pieces to it.
    • Let the pressure release by itself. It is good to spread on a wide plate. 
    • Vegetables are of your choice. You may add potatoes and omit beetroot if you wish.
    • Avoid using garlic to make it a no onion garlic recipe. 

    About the event : 

    Sending this to “Exotic Pulao and Biryanis ” at Shhh Secretly Cooking group. The theme was suggested by Swaty Malik. She has a wide range of dishes on her blog. I have bookmarked her healthy moong dal idlis to try. Here, we are paired together and partners exchange two ingredients as secret ones to cook a dish. Later, other members try to guess the given ingredients. I was paired with Renu. She gave me green chilly and poppy seed and I have prepared  this Mughlai Vegetable Pulao. I gave cinnamon and bada elaichi ( big cardamom) as the secret ingredients and she has prepared a delicious One Pot Vegetable Mangodi Tahiri.  I would love to make  her no bake coffee energy balls soon. 

    shhh cooking secretly

    mughlai vegetable pulao
    Evergreendishesdev

    Mughlai Vegetable Pulao

    Mughlai vegetable pulao is a delicious rice dish prepared with coconut and other spices, cooked with assorted vegetables and garnished with fruits and nuts
    Prep Time 15 minutes
    Cook Time 30 minutes
    Total Time 45 minutes
    Servings: 4
    Course: lunch ideas, Main Course
    Cuisine: Indian

    Ingredients
      

    • 1 cup basmati rice
    • 1 bay leaf
    • 1 teaspoon ghee
    • 1/4 cup beans cut in one inch long pieces
    • 1/4 cup carrot cut similarly, used in lesser quantity
    • peas
    • 1/4 cup beetroot cut similarly, used in lesser quantity
    • fruit pieces I have used apple and pomegranate
    • 2 tablespoon oil
    • 1 tablespoon ghee
    • 2 cloves
    • 1 inch stick cinnamon
    • 2 cardamom
    • 1 tablespoon fresh coconut
    • 1.5 teaspoon poppy seed
    • 5 cloves garlic
    • 5 green chilli
    • 1/2 inch ginger
    • 1.5 tablespoon coriander seed
    • salt

    Method
     

    1. Cook the rice with bay leaf and a teaspoon of ghee. We need separate grains of rice, add water accordingly.
    2. In a thick bottom pam, add ghee and oil. Put cardamom, cloves and cinnamon to it. After a few seconds, add beans to it. Put carrot and beetroot pieces after two minutes. Let them cook. Put peas to it.
    3. Grind together coconut, poppy seed, green chilli, ginger and coriander seed with a little water.
    4. Put the paste in it and saute it for sometime. Let the raw smell diminish.
    5. Now, add  the cooked rice and salt to it. Mix it gently.
    6. Fry cashew and raisins in ghee.
    7. Garnish with fruits and dry fruits. Serve Mughlai vegetable pulao with a raita of your choice.

    Notes

    You may  add grapes and pineapple pieces to it.
    Let the pressure release by itself. It is good to spread on a wide plate. 
    Vegetables are of your choice. You may add potatoes and omit beetroot if you wish.
    Avoid using garlic to make it a no onion garlic recipe. 

    If you ever make this Mughlai Vegetable Pulao,  do take a picture and tag @foodiejayashree on Instagram or @evergreendishes on Facebook or Twitter. I will be glad to see your creation and share it further. Let’s be connected, do follow on social media platforms. Until next time, let’s stay connected.  Subscribe to get all updates and an e-book for free. Check out my e-books on Amazon.  Happy Cooking !

    Mughlai Vegetable Pulao is a delicious rice preparation with coconut, spices, nuts and assorted vegetables. It is ideal to serve during get-togethers.
    Mughlai Vegetable Pulao
  • Gasgase Payasa | Poppy seeds Kheer

    Gasgase Payasa | Poppy seeds Kheer

    Jump to Recipe Print Recipe

    Gasgase payasa is a rich, creamy, delicious dessert. It is one of the Indian sweet dishes  lost back with time.

    Gasgase is the Indian name for poppy seed. It is also known as khus-khus. in Hindi, kasa kasa in Tamil, and posto in Bengali. Gasgase payasa is an all time favourite sweet dish of many Kannadigas and this is a traditional Karnataka recipe.

    The tiny white seeds are a good source of calcium, manganese, copper, zinc, and potassium. It is a rich source of dietary fiber and thus aids in digestion. It fights insomnia. The poppy plant is a source of opium, thus extensive use of these seeds induces sleep. The anti-oxidants help to maintain good eyesight. It is a good cure for the thyroid.

    Khus khus is widely used in Indian cooking. It is used in small quantity to enhance the taste of the dish.

    Khus-khus payasam is a good sweet dish from South India. It is ideal to prepare for any festivities. It is vegan and gluten-free
    Make sure the poppy seed is thoroughly cleaned. Fresh coconut along with nuts and khus-khus gives a good taste. It is then ground and sweetened with jaggery.

    Navratri festival is celebrated with pomp and show throughout India. It is a ten day festival when elaborate poojas are performed and deities are spectacularly decorated. The tenth day is celebrated as Dasara. If you are looking for other kind of kheer recipes, check out dalia payasam, sabudana kheer, komala payasam, sweet potato kheercustard apple kheer, chaler payesh, makhana kheer,

    gasgase payasa | poppy seed kheer
    gasgase payasa | poppy seed kheer

    Gasgase Payasa recipe | Khus khus payasa

    Ingredients:

    • 1/3 cup gasgase / poppy seed
    • 10 cashew nut
    • 2/3 cup fresh coconut
    • 1 cup jaggery
    • 2 cup water
    • 1/4 teaspoon cardamom powder

    Method:

    1. Dry roast gasgase for two minutes until it pops. Put it aside for sometime.
    2. Once it cools, grind it in the small jar. Now, add grated coconut and cashew to it with a little water. Make a paste of it.
    3. Put jagger in a pan along with water. Once it melts, strain the liquid to remove impurities.
    4. Put the jaggery syrup back on the stove, once it is warm, put the paste to it and simmer for five minutes.
    5. Finally, add cardamom powder.
    6. Gasgase payasa is ready to serve.

    Take a tip:

    • You may top with nuts roasted in ghee.
    • It tastes good when chilled too.

    gasgase payasa | poppy seed kheer
    Evergreendishesdev

    Gasgase Payasa | Khus khus payasa

    Gasgase Payase is a delicious, creamy sweet treat from Karnataka cuisine. It is one of the recipes lost back with time.
    Prep Time 10 minutes
    Cook Time 20 minutes
    Total Time 30 minutes
    Servings: 4 people
    Course: sweets, traditional recipes
    Cuisine: karnataka

    Ingredients
      

    • 1/3 cup gasgase / poppy seed
    • 10 cashew nut
    • 2/3 cup fresh coconut
    • 1 cup jaggery
    • 2 cup water
    • 1/4 teaspoon cardamom powder

    Method
     

    1. Dry roast gasgase for two minutes until it pops. Put it aside.
    2. Once it cools, grind it in the small jar. Then, add coconut and cashew to it and make a paste with little water.
    3. Put jagger in a pan along with water. Once it melts, strain the liquid to remove impurities.
    4. Put the jaggery syrup back on the stove, once it is warm, put the paste to it and simmer for five minutes.
    5. Finally, add cardamom powder.
    6. Gasgase payasa is ready to serve.

    Notes

    • Gasgase payasa  can be served warm or cold. It tastes good when chilled.
    • It can be kept for a day in the refrigerator. 
    • You may garnish with nuts roasted in ghee. 

    If you ever make this gasgase payasa,  do take a picture and tag @foodiejayashree on Instagram or @evergreendishes on Facebook or Twitter. I will be glad to see your creation and share it further. Let’s be connected, do follow on social media platforms. Until next time, let’s stay connected.  Subscribe to get all updates and an e-book for free. Check out my e-books on Amazon.  Happy Cooking!


    Pin it for later :

    Gasgase Payasa | Poppy seeds kheer is a rich, creamy dessert. It is one of the traditional recipes from Karnataka cuisine. Give a try to this.
    Gasgase payasa | Poppy seeds kheer