Blog

  • Bengali Mixed Vegetable Dry Sabzi

    Bengali Mixed Vegetable Dry Sabzi

    Jump to Recipe Print Recipe

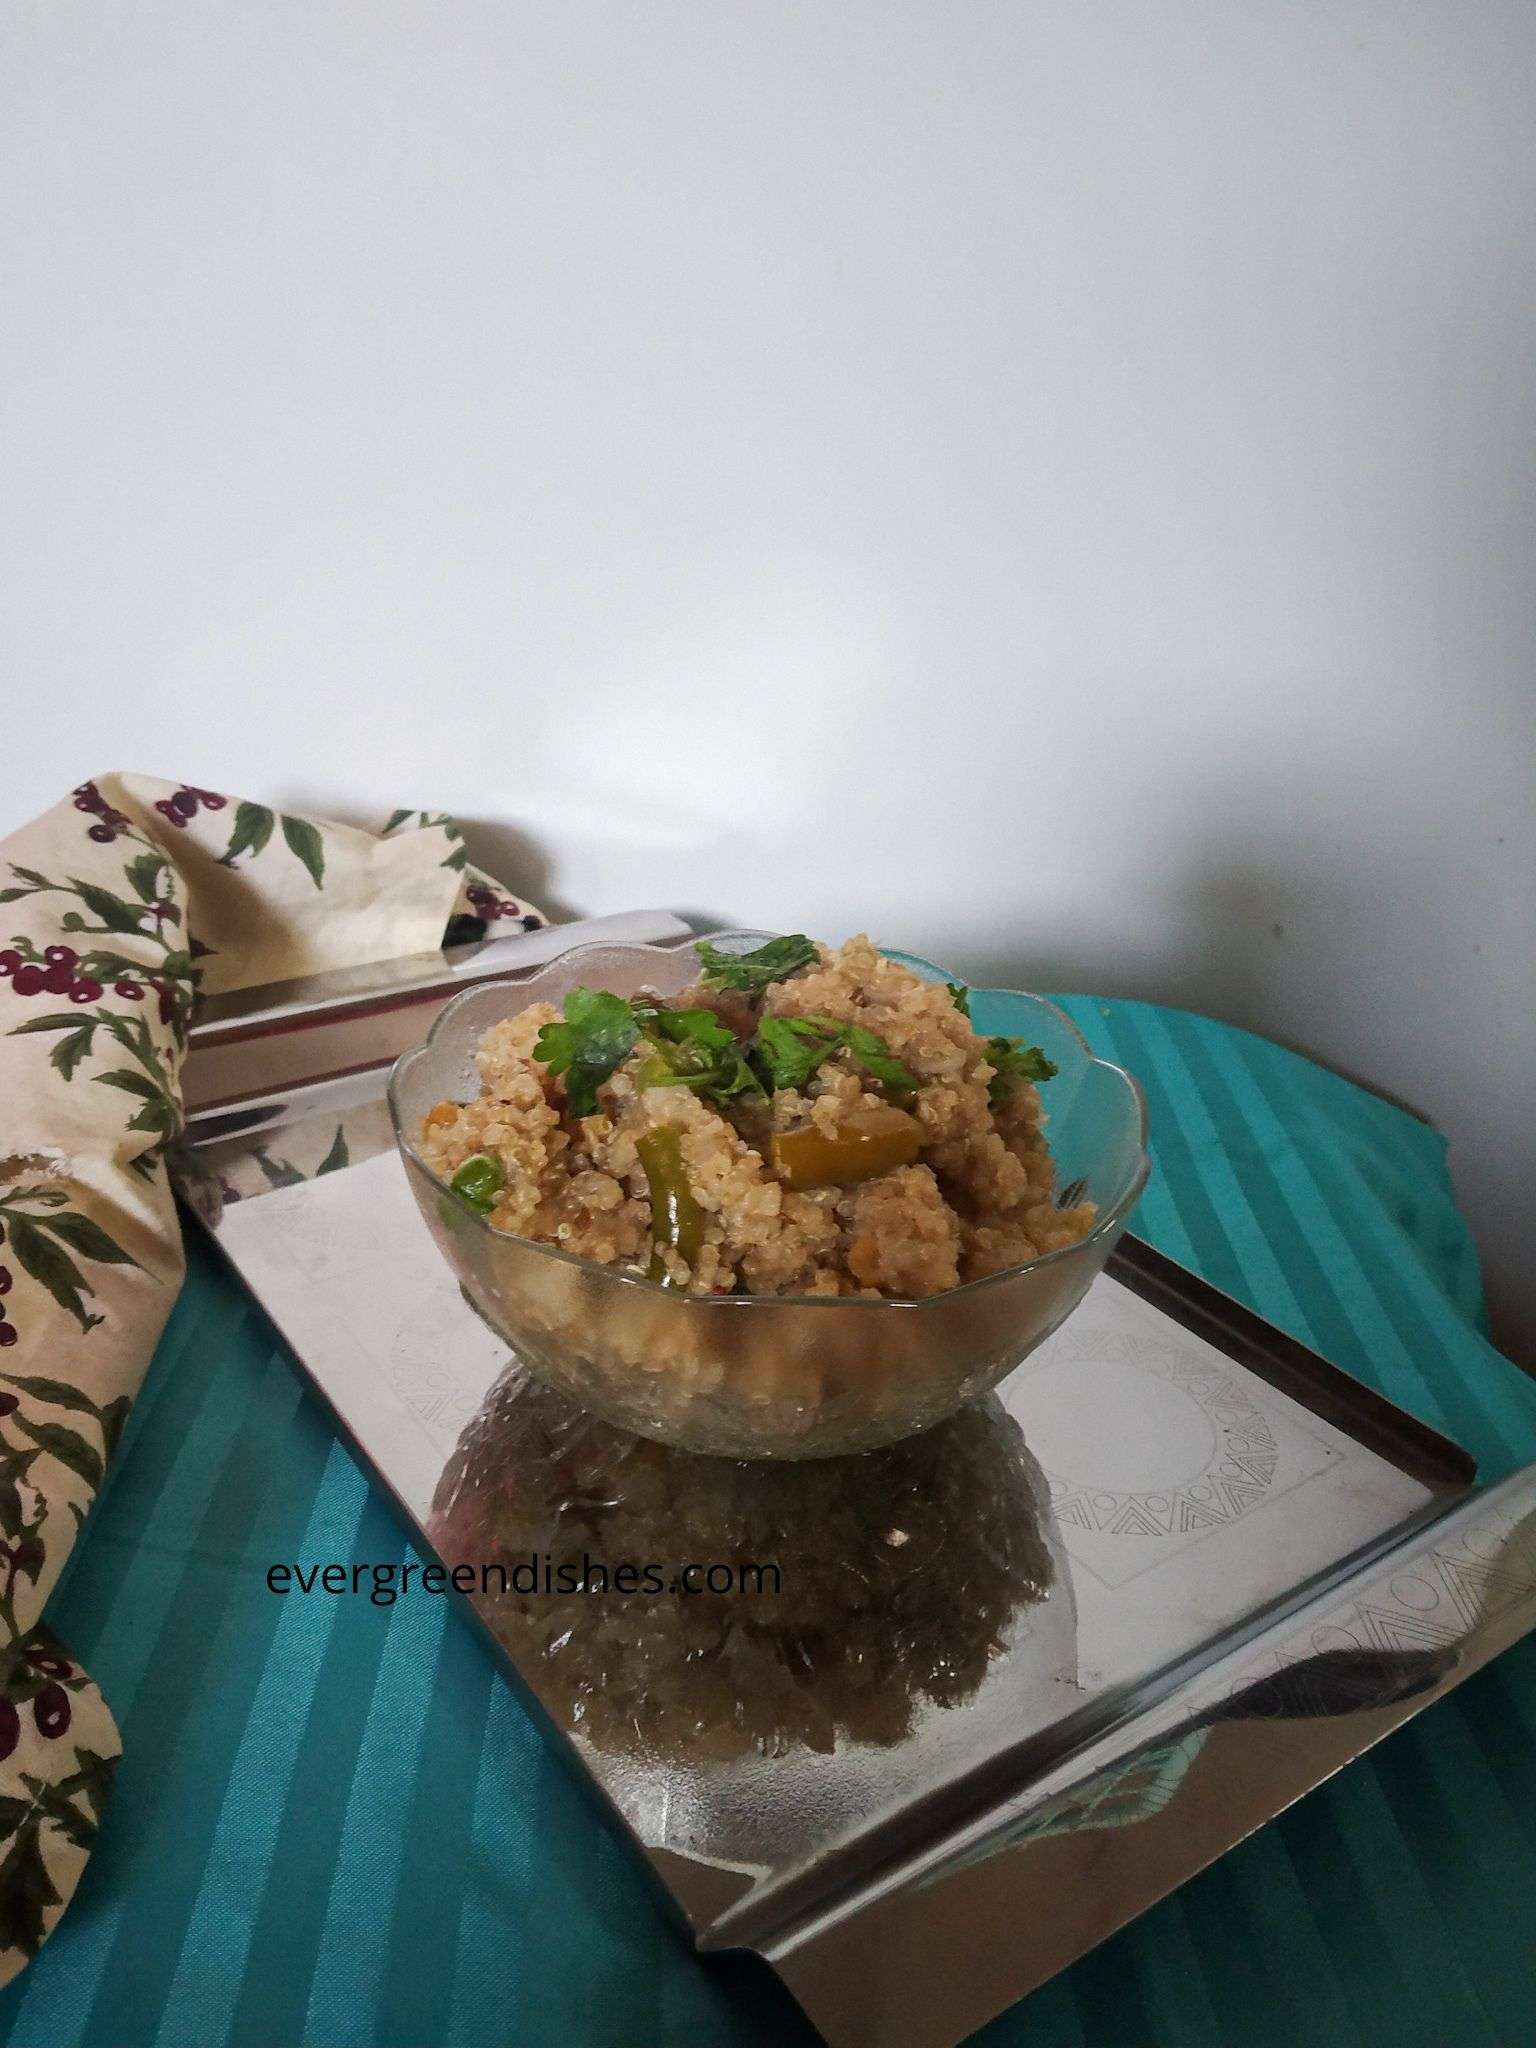
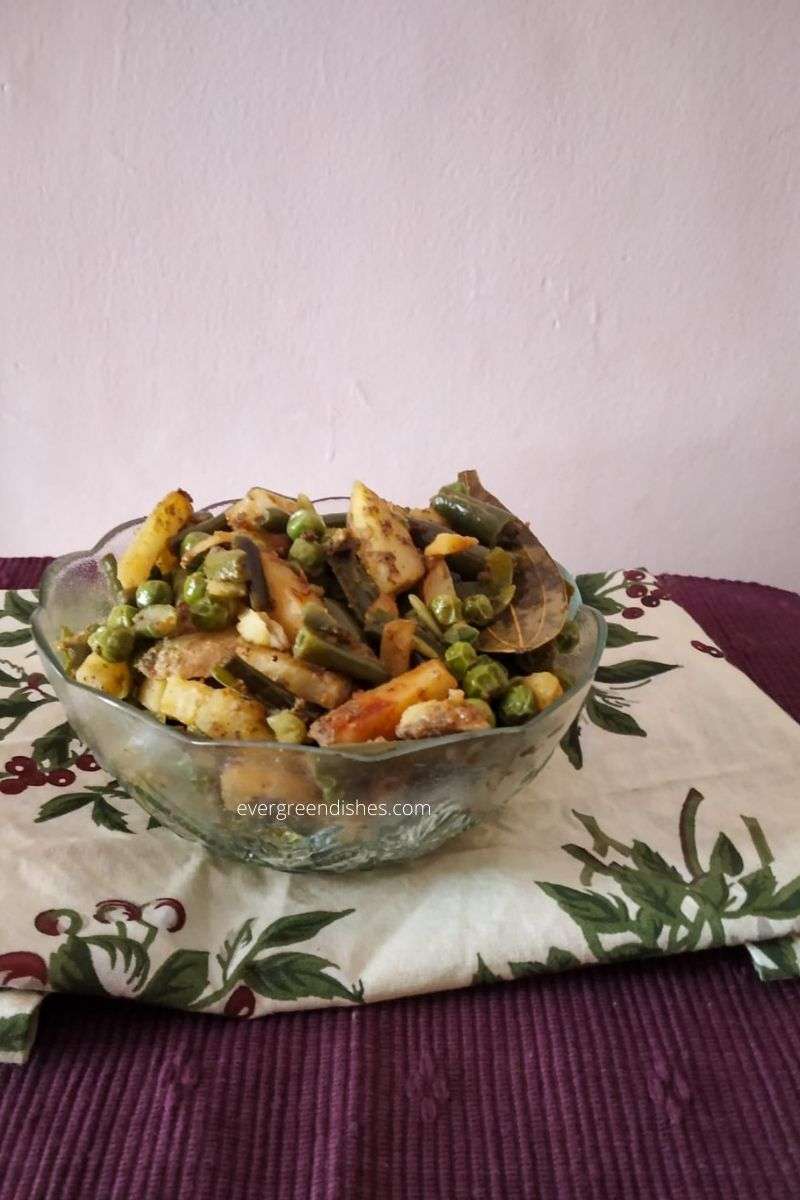
    Bengali Mixed Vegetable Sabzi is flavoursome, tasty, aromatic and easy to prepare. It pairs well with chapathi or phulka.

    It’s been a regular feature these days, I end up making this sabzi but not able to post it here. It is flavoursome and the aroma of the spices is enchantingly good. Panchphoran is used in Bengali cuisine. It makes use of five spices. The good thing about this stir fry is any kind of vegetable can be used. You can use cauliflower, pumpkin, brinjal or cabbage too. Make sure you use the right combination of vegetables. 

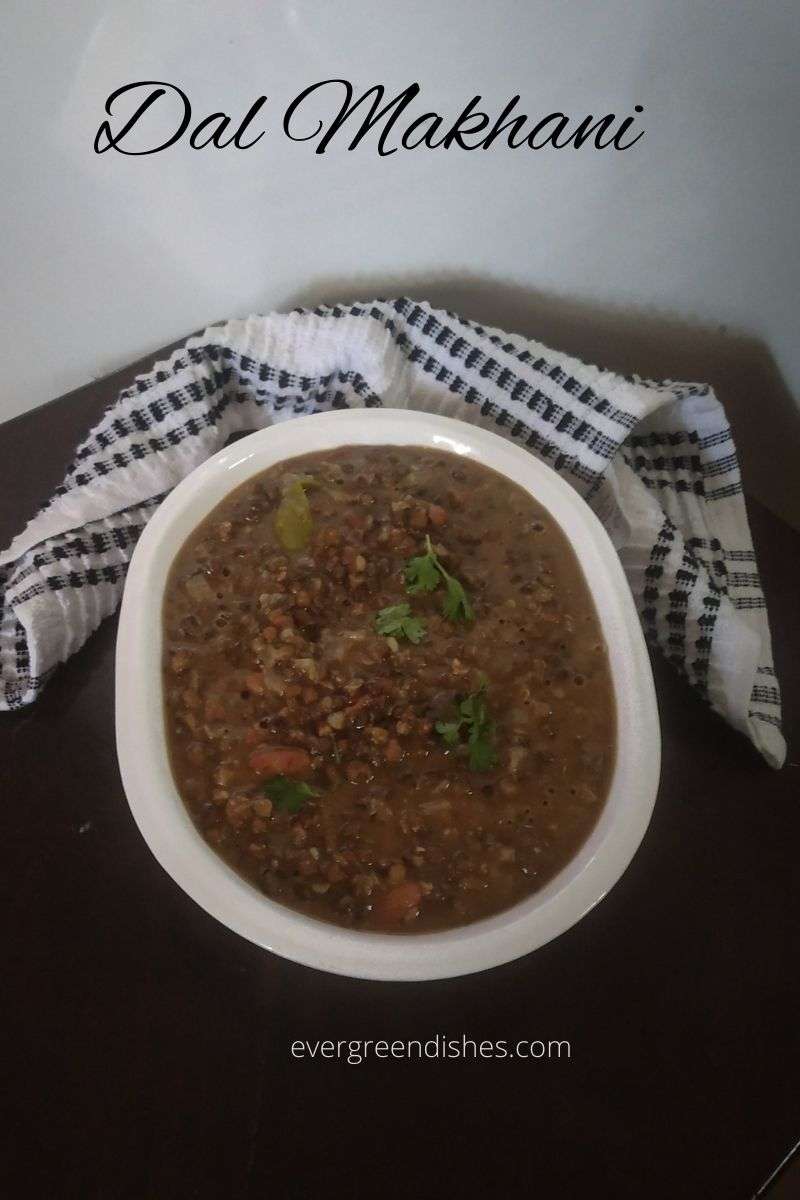
    The other sabzi or stir-fry I commonly make at home are Dal Makhani, Alu Palak Dry Sabzi, Corn Palak, Palak Kofta Curry to name a few. 

    What is Panch Phoran? 

    Panch Phoran / Panch Putana  is a blend of five seeds originating from South-east Asia. It is used in dal, sabzi, chutney and many other dishes. It is one of the essentials in Bengali cuisine. It is also used in cuisine of Bangladesh, Nepal and other North Eastern states of India.  Cumin, Fennel, Mustard, Fenugreek and Nigella are used in equal quantities here. Every region has their own variation of the spice mix. This spice mix is usually used as whole spice mix either by roasting or just mixing them together. 

    What is Nigella seed? 

    Nigella seed or Kalonji is commonly  known as black cumin. The scientific name of it is Nigella sativa. It has many medicinal properties. The tincture prepared from it is used in indigestion, diarrohea, amenorrhea and treatment of worms.

    It is worth mentioning here that nigella is neither onion seed nor fennel seed. 

    Why should you make this stir fry?

    • easy to prepare
    • it is aromatic, fennel gives a good aroma to it.
    • flavoursome 
    • a good way to sneak in different vegetables
    • it is also a good way to use the leftover vegetables
    • vegan
    Bengali Mixed Vegetable

    Here is the Bengali Mixed Vegetable Recipe:

    • 2 tablespoon oil
    • 1-2 bay leaf
    • 4 green chilli
    • 1/4 teaspoon turmeric powder
    • asafoetida
    • panchphoran mix ( ingredients given below)
    • 2 cup beans
    • 1 capsicum
    • 2 potato
    • 1 cup green pea
    • salt
    • 1/2 teaspoon chilli powder


    For the panch phoran mix:

    1/2 teaspoon mustard
    1/2 teaspoon fenugreek
    1/2 teaspoon nigella
    1/2 teaspoon fennel
    1/2 teaspoon cumin

    Method:

    To make the panch phoran mix:
    Dry roast the ingredients for two minutes. Once it cools, grind it.

    To make the sabzi;
    Cut the vegetable into one inch long thin pieces. If the peas are frozen, put them in water.
    Take oil in a pan, add bay leaf, break the chilli into two and throw it. Add asafoetida and turmeric powder. Now, put the panch phoran mix into it.
    Add the vegetables depending on their cooking timee. First, put the beans, a little later put the potato pieces, capsicum and lastly the green peas. Gently stir and allow to cook for sometime. Sprinkle salt. You can cover it with a plate with some water on it. This facilitates even cooking.
    When it is done, sprinkle a little chilli powder and remove from flame.


    Take a tip:

    • Other vegetables as cauliflower, brinjal and pumpkin may be used.


      A few other recipes shared earlier from Bengali cuisine are Chaler Payesh, Aloo Chat 


    Evergreendishesdev

    Bengali Mixed Vegetable

    Mixed Vegetable is a medley of vegetables cooked together in a spice mix. It is flavoursome and makes a good side dish.
    Prep Time 10 minutes
    Cook Time 15 minutes
    Total Time 25 minutes
    Servings: 6 people
    Course: dry sabzi, lunch ideas
    Cuisine: Bengali

    Ingredients
      

    • 2 teaspoon oil
    • 1-2 bay leaf
    • 4 green chilli
    • 1/4 teaspoon turmeric powder
    • asafoetida
    • panchphoran mix ingredients given below
    • 2 cup beans
    • 1 capsicum
    • 2 potato
    • 1 cup green pea
    • salt
    • 1/2 teaspoon chilli powder
    For the panch phoran mix:
    • 1/2 teaspoon mustard
    • 1/2 teaspoon fenugreek
    • 1/2 teaspoon nigella
    • 1/2 teaspoon fennel
    • 1/2 teaspoon cumin

    Equipment

    • 1 pan
    • 1 ladle
    • 5 bowls
    • 1 lid cover

    Method
     

    To make the panch phoran mix:
    1. Dry roast the ingredients for two minutes. Once it cools, grind it.
    To make the sabzi;
    1. Cut the vegetable into one inch long thin pieces. If the peas are frozen, put them in water.
    2. Take oil in a pan, add bay leaf, break the chilli into two and throw it. Add asafoetida and turmeric powder. Now, put the panch phoran mix into it.
    3. Add the vegetables depending on their cooking timee. First, put the beans, a little later put the potato pieces, capsicum and lastly the green peas. Gently stir and allow to cook for sometime. Sprinkle salt. You can cover it with a plate with some water on it. This facilitates even cooking.
    4. When it is done, sprinkle a little chilli powder and remove from flame.

    Notes

    Other vegetables as brinjal, pumpkin, cauliflower and cabbage may be used.


    Bengali Mixed Vegetable

    If you ever make Bengali Mixed Vegetable recipe, take a picture and tag @foodiejayashree on Instagram or @evergreendishes on Facebook. Subscribe to get all updates in your inbox and an e-book for free! 

  • Mixed Fruit Jam Recipe  | How to make mixed fruit jam

    Mixed Fruit Jam Recipe | How to make mixed fruit jam

    mixed fruit jam | no preservatives | spreads | jam | 

    Jump to Recipe

    Mixed Fruit Jam is a delicious sweet spread made with fruits. The homemade jam is free from any preservatives.

    One of the fondest memories of childhood is Kissan Mixed Fruit Jam. It would always be in the kitchen shelves. Jams are of different kind. You can make it with a single fruit, dual or a mixed variety. Jam of apple, mango or strawberry taste good  themselves The orange is usually used to make a marmalade. Strawberry Jam  and Mixed fruit jam are the ideal choice for many. 

    Pectin is usually added in jams as a preservative. Commercial pectin is extracted from apple cores and contains acid to ensure proper jelling. It reduces the cooking time also.   But homemade jams do not use pectin but pectin rich fruits. Fruits such as apples, oranges, grapes, pomegranate are rich in pectin. Sugar is an essential ingredient in making jam. It not only add sweetness but also gives a shelf life to it. 

    Why should you make this jam:

    • It has no added pectin in it.  
    • Different kind of fruits can be used.
    • It is tasty.
    • It is versatile to use.
    • Easily use it as a spread for lunch box.

    How to store jam:

    • Put it in a clean and dry jar. If it is a glass jar, sterlize it. 
    • Since it is homemade, keep it in the refrigerator. 
    • Use a clean spoon.
    • Close the lid tightly after using it.


    Mixed Fruit Jam


    I have used a wide variety of fruits. Sapota, Banana, Grapes of both kind, Apple, Strawberry and orange. The result was a delicious spread, it is more of a good sweet to enjoy anytime.

    MIXED FRUIT JAM RECIPE : 

    Ingredients:

    • 2 big banana
    • 2 small banana
    • 6 sapota
    • 15 green grapes
    • 15 black grapes
    • 1 apple
    • 6 strawberries
    • 1 orange
    • 2 cups sugar
    • a pinch of salt
    • 1/2 lemon juice


      Method:


    1. Peel and cut all the fruits. Make a puree with a blender or in a mixer.
    2. Put the puree in a pan, add sugar to it.
    3. Put it on medium flame to cook.
    4. Put two small plates or bowls  in the freezer. You will need it later
    5. Keep stirring in between.
    6. After cooking for twenty to thirty minutes, it becomes thicker. Take the plate from the freezer.  Put a drop on it, if it does not spread, it is done. 
    7. Add salt and lime juice to it. Keep it aside. Once it is cool, put it in a sterlized jar.


    Take a tip: 

    • Use good quality fruits. If you use damaged fruits, the jam may deteriorate quiclky.
    • Citrus fruits, blackberries, apples have higher pectin level.
    • Addition of lime juice helps to set the jam.
    • You may vary the fruits and berries used.
    • It is better if you close a lid while cooking. But, remember to keep stirring in between. 
    • Addition of salt is optional but recommended.
    • Use clean utensils in cooking and storing.
    Print Recipe
    Evergreendishesdev

    Mixed Fruit Jam

    Mixed Fruit Jam is a delicious spread with varied fruits.
    Prep Time 15 minutes
    Cook Time 30 minutes
    Resting time 15 minutes
    Total Time 1 hour
    Course: Breakfast
    Cuisine: international

    Ingredients
      

    • 2 big banana
    • 2 small banana
    • 6 sapota
    • 15 green grapes
    • 15 black grapes
    • 6 strawberries
    • 1 orange
    • 2 cups sugar
    • a pinch of salt
    • 1/2 lemon juice

    Equipment

    • 1 pan
    • 1 ladle
    • 2 small plates or bowl

    Method
     

    1. Peel and cut all the fruits. Make a puree with a blender or in a mixer.
    2. Put the puree in a pan, add sugar to it.
    3. Put it on medium flame to cook.
    4. Put two small plates or bowls  in the freezer. You will need it later
    5. Keep stirring in between.
    6. After cooking for twenty to thirty minutes, it becomes thicker. Take the plate from the freezer.  Put a drop on it, if it does not spread, it is done.
    7. Add salt and lime juice to it. Keep it aside. Once it is cool, put it in a sterlized jar.

    Notes

    You may vary the fruits and berries used.
    It is better if you close a lid as it splashes around while cooking. But, remember to keep stirring in between. 
    Addition of salt is optional. 

    Pin it for later :

    Mixed Fruit Jam is a delicious spread made withh varied fruits.
    Mixed Fruit Jam


    If you ever make Mixed Fruit Jam  recipe, take a picture and tag @foodiejayashree on Instagram or @evergreendishes on Facebook. Subscribe to get all updates in your inbox and an e-book for free! 


  • Kothu Parotta with leftover chapathi

    Kothu Parotta with leftover chapathi

    Jump to Recipe

    kothu parotha | street food | breakfast | snack | 

     Kothu Parotta is tasty and filling. It is a popular street food from Tamil Nadu.Here, is an easy recipe to make Kothu Parotta or Kothu Chapathi

    What is Kothu Parotta? 

    Kothu Parotta is a popular street food from Tamilnadu. It translates to shredded paratha. Parotta is a layered flatbread from Indian sub-continent. It’s popularity has spread to many othher countries too. Kothu Parotta is minced paratha with a medley of vegetables or meat along with  salna. Thus, it is a filling meal.

    Is Kothu Parotta healthy ?

     Kothu Parotta is made using parathas. which are usually made using all -purpose flour and laden with ghee. It is again cooked with oil along with other vegetables and salna. So, it is not ideal for the weight watchers.

    What is the easy version of Kothu Parotta?

    The easy version of Kothu Parotta makes use of left over chapatis. It is a good way to use the leftover chapatis. Moreover, wheat flour is used here. Lesser quantity of oil is used as no salna is added here. 

    Have you shared any recipes with leftover food? 

    No, I haven’t shared much here. But recently I shared a Bread Gulab Jamun which makes use of leftover bread slices. I remember sharing a pakoda recipe with leftover rice. They are tasty and make good accompaniments.


    Today, I am sharing an easy recipe of Kothu Parotta. You may call it as Kothu Chapathi. Chapatis are regularly made at home. Even after all members eat, we are usually leftover with a few chapatis. A few ways to use the remaining chapatis is to distribute among workers. In the bygone years, I remember my mother used to make chapati ladoos. The next best thing is to convert them into khakras.  A  couple of times, I have created  interesting  recipes, several times, it was elegantly  transferred to a chapathi pizza and noodles too. Lastly, it is the kothu paratha which we enjoy, rather I should say it as Kothu Chapathi. It is ideal to serve as breakfast, lunch or an evening snack. 

    Kothu Parotta
    Kothu Parotta

    What goes in the Kothu Paratha ?

    • Leftover chapathis : It is the star ingredient here. You may use leftover paratha which is commonly used.
    • Ingredients of seasoning : oil, mustard, cumin, turmeric, asafoetida, 
    • Saunf: lends a good taste
    • Ginger garlic paste : It is used here
    • Onion: chop it finely
    • tomato : cut into small bits
    • garam masala: for that special taste
    • chilli powder: for the hot taste
    • coriander: fresh one for garnishing

    Making of kothu paratha :

    As usual, get the things ready by cutting the onion and tomato, making a paste of ginger and garlic and last but not the least, cutting the chapathi into pieces. You may use other vegetables as beans, carrot, capsicum. In a pan, make the seasoning, as the mustard seeds crackle, add cumin, saunf, turmeric powder, asafoetida, ginger garlic paste and saute for sometime. Put the onion and cook for sometime. Let the raw smell vanish, add the tomato pieces along with a little salt.Let cook, then add the garam masala, chilli powder and a little water. Let cook. Put the chpathi pieces and letcook for a minute. Finally, garnish with coriander leaves.

    You can use the ready malabar partaha to make this dish. Adjust the spice level as per your liking. Be careful with the addition of salt. Serve it hot with a onion raita.


    Print Recipe
    Evergreendishesdev

    Kothu Paratha

    5 from 3 votes
    Kothu Paratha is an easy to make dish with left over chapatis. It is tasty and filling.
    Course: Breakfast, lunch
    Cuisine: Indian

    Ingredients
      

    • 1 tablespoon oil
    • 1/4 teaspoon mustard
    • 1/2 teaspoon cumin
    • 1/2 teaspoon saunf
    • 1/4 teaspoon turmeric powder
    • 1/4 teaspoon asafoetida
    • 1 onion
    • 2 to mato
    • salt to taste
    • 1/4 cup water
    • 1/2 teaspoon garam masala
    • 1/2 teaspoon chilly powder
    • 4 leftover chapati broken into pieces
    • coriander for garnishing

    Equipment

    • 1 pan
    • 1 ladle
    • kitchen scissor

    Method
     

    1. Chop the onion and tomato finely.
    2. Cut the chapati into small pieces.
    3. Take oil in a pan, add mustard seeds, as it splutters put cumin and saunf. Addditionally, throw in asafoetidda and turmeric powder.
    4. Now, put the onion and saute it for sometime.
    5. Once it is translucent, put the tomato pieces with a little salt. Give a stir. Once it is slightly cooked, put some water to it. Allow to cook
    6. Now, add garam masala, chilly powder and turmeric powder to it, mix them thoroughly.
    7. Put the chapathi pieeces to it and let cook for a minute or two.
    8. Garniish with coriiander leavves.
    9. Kothu Paratha is ready to serve.

    If you ever make this recipe, take a picture and tag @foodiejayashree on Instagram or @evergreendishes on Facebook. Subscribe to get all updates in your inbox and an e-book for free! 

    About the event : 

    An old post updated, sending it Foodies_RedoingOldPosts_177 It is a fortnightly event, where we work on an old post by changing the picture or adding more content.


  • Dal Makhani / Easy Dal Makhani Recipe

    Dal Makhani / Easy Dal Makhani Recipe

    Jump to Recipe Print Recipe

    Dal Makhani is a rich creamy, delectable side dish from North Indian cuisine. It makes a good accompaniment to all kinds of flat breads, rice dishes and steamed rice. Dal is the Hindi word for lentil while Makhani translates to butter. It is a whole black lentil cooked in butter. 

    The first time I had it was decades back and since then it has been a family favourite. I learnt this recipe from a good Punjabi friend who is no more. She was kind enough to share this recipe with me. Dal Makhani is synonymous to the traditional Maa ki dal. Whole black dal  is cooked on a low flame for long hours with spices. 

    Here is an easy restaurant style dal makhni recipe. It is rich, creamy and tastes delicious. It can be paired with any kind of flatbread like roti, nan, paratha,  roomali roti or phulka.


    A few pointers while cooking dal makhni at home.  It needs time and patience, the lentil needs to be soaked for at least six hours. Once they are soaked,  put them in a colander, after sometime, clean it thoroughly, discard the hard ones. The hard pulses never cook and do not taste good. Later, it is cooked in a pressure cooker for six whistles  along with kidney beans and a few other ingredients. Once the pressure releases, the makhan comes into action. After sauting the onion and tomato in butter, lentils are again cooked in a pressure cooker. This is the usual procedure  I have been following to get a creamy dal makhani. 

    Dal Makhani
    Dal Makhani

    Dal Makhani Recipe

    Ingredients :

    250 grams black urad dal
    50 grams rajma
    1 inch ginger
    2 green chillies
    3 cups water
    2 tablespoon butter
    1/2 teaspoon cumin
    1 onion
    2 tomato
    salt to taste
    1/2 teaspoon chilli powder
    coriander for garnshing


    Method:

    1. Wash black urad dal a couple of times and soak in water overnight.
    2. Soak kidney bean  in another bowl .
    3. The next day, put the soaked urad dal in a colander for sometime.
    4. Now, clean the lentil. Some of them are hard as pellets and will never cook. They need to be discarded.
    5. In a bowl, add the cleaned lentils and kidney beans with three cups of water. Cut the green chilli into two pieces and throw it. Put the grated ginger and a little turmeric powder to it. Pressure cook for five or six whistles.
    6. In another pressure pan, add butter. Add cumin, as it splutters, put onion pieces. Saute it for sometime, until light pink in colour. Put tomato  in it. Saute it. Once it is mushy, add the cooked lentil and bean mixture to it. Put salt. Allow it to simmer for sometime. Put chilli powder and pepper powder. Check the consistency, add water accordingly. The consistency, will be thicker on cooling, you need a medium, flowing consistency. Pressure cook for one whistle.
    7. Once the pressure release, check the taste and adjust accordingly. Garnish with fresh coriander. 

    Take a tip:

    1. I have not added garlic, if you wish, put it and saute with onions.
    2. You can make tomato puree and use it.  
    3. The measurement given here may be more for some of you. Reduce the quantity of lentil and kidney beans used. Use the other ingredients as per your need.
    4. You may add some cream in the end.


    Evergreendishesdev

    Dal Makhni

    Dal Makhni is a delicious side dish from North India. Black urad dal and kidney bean are cooked together to form a creamy and tasty accompaniment. It is ideal to pair with roti, nan or steamed rice.

    Ingredients
      

    • 250 grams black urad dal
    • 50 grams rajma
    • 1 inch ginger
    • 2 green chillies
    • 3 cups water
    • 2 tablespoon butter
    • 1/2 teaspoon cumin
    • 1 onion
    • 2 to mato
    • salt to taste
    • 1/2 teaspoon chilli powder
    • coriander for garnshing

    Method
     

    1. Wash black urad dal a couple of times and soak in water overnight.
    2. Soak kidney bean  in another bowl .
    3. The next day, put the soaked urad dal in a colander for sometime.
    4. Now, clean the lentil. Some of them are hard as pellets and will never cook. They need to be discarded.
    5. In a bowl, add the cleaned lentils and kidney beans with three cups of water. Cut the green chilli into two pieces and throw it. Put the grated ginger and a little turmeric powder to it. Pressure cook for five or six whistles.
    6. In another pressure pan, add butter. Add cumin, as it splutters, put onion pieces. Saute it for sometime, until light pink in colour. Put tomato  in it. Saute it. Once it is mushy, add the cooked lentil and bean mixture to it. Put salt. Allow it to simmer for sometime. Put chilli powder and pepper powder. Check the consistency, add water accordingly. The consistency, will be thicker on cooling, you need a medium, flowing consistency. Pressure cook for one whistle.
    7. Once the pressure release, check the taste and adjust accordingly. Garnish with fresh coriander.

    About the event:

    Sending this post at Shhh Cooking Secretly Challenge  for the  theme “Restaurant style food at home”. The theme was suggested by Aruna Sahas Chandra. I like the variety of different dishes she puts on her blog. Recently, she posted Paneer Do Pyaza, would like to recreate the same as my children love paneer dishes. 

    Here, it  is a monthly event, partners are paired and secret ingredients are exchanged between them.  The dish is prepared and shared in the Facebook group. Guessing the ingredients is a fun activity. My partner for the event was talented blogger Anu Kollon. The two ingredients given to me where cumin and onion. I made Dal Makhni which I intended to post since a long time. I had given ginger and tomato, she has made delicious, Paneer Butter Masala

    shhh cooking secretly

    A few  North Indian dishes shared earlier are :

    Pin Dal Makhani to Indian Food Board: 

    Dal Makhani is a creamy and tasty side dish from North Indian cuisine.
    Dal Makhani

    If you ever make this Dal Makhani recipe, do take a picture and tag me @foodiejayashree on Instagram, I will be glad to see your creation.Follow evergreendishes on FacebookTwitterPinterest and Instagram, let’s be connected. Subscribe to get all updates and a book of handy hints for free! Check out my e-books

  • Mumbai Sandwich | Bombay Sandwich Recipe

    Mumbai Sandwich | Bombay Sandwich Recipe

    Jump to RecipePrint Recipe

    Mumbai Sandwich or Bombay Sandwich is a popular Indian snack. A simple white bread is made into a spicy and tasty snack with green chutney, potato and other vegetables pieces as filling. It is ideal to pack in the lunch box.

    Mumbai is famous for its street food. Mumbai Sandwich is one such kind of snack which sells like hot cakes. People grab a sandwich and eat on the go or for a mid-day break. 

    Children need a variety of snacks especially in the evenings when they are back home.  Assembling the  sandwich takes a few minutes if you have green chutney and boiled potato. You can either grill it or serve it just like that. Here is a post which I had written couple of years back, do check it. It consists of no cook sandwich ideas.

    The good thing about serving bread is we can choose the variety we need. One can opt for multi-grain or any of their choice. Eating fried snacks is considerably reduced as this is filling. Moreover, it is easy to serve for mothers too. 

    Green chutney can be made in numerous ways. Here I suggest you to add some fried gram along with coriander and mint leaves. It gives a good taste and consistency. This is just one kind but you are free to spread any kind of green chutney.


    Mumbai Sandwich

    Mumbai Sandwich Recipe: 

    Ingredients:

    • 8 slices of bread
    • 2 tablespoon green chutney
    • 1 onion
    • 1 boiled potato
    • 1 tomato
    • 1 cucumber
    • 1 capsicum
    • pepper powder
    • chaat masala

      Method:

    1. Boil the potato. Peel and cut into cubes.
    2. Cut the cucumber and tomato into circles
    3. Make thin slices of onion and capsicum.
    4. Take two slices of bread, smear green chutney over them.
    5. Put a few slices of vegetable.
    6. Sprinkle a little pepper powder and chaat masala.
    7. Put the other slice and put in the toaster.
    8. Alternatively, you can toast it on the skillet with a little ghee until golden in colour.

    Take a tip:

    1. Cut into half and  serve it plain without grilling, But I prefer to grill it. 
    2. Keep the green chutney of thick consistency. If you make it thin, the sandwich will become soggy. 
    3. Boiled beetroot pieces can be used. 
    Mumbai Sandwich

    Mumbai Sandwich

    5 from 7 votes
    Mumbai Sandwich is a tasty street food from Mumbai. It is ideal to serve for breakfast or as an evening snack. One can pack it in the lunch box too.
    Prep Time 15 minutes
    Cook Time 15 minutes
    Total Time 28 minutes
    Course: Breakfast, evening snacks
    Cuisine: Maharashtrian

    Ingredients
      

    • 8 slices of bread
    • green chutney
    • 1 onion
    • 1 boiled potato
    • 1 to mato
    • 1 cucumber
    • 1 capsicum
    • pepper powder
    • chaat masala

    Method
     

    1. Boil the potato. Peel and cut into cubes.
    2. Cut the cucumber and tomato into circles
    3. Make thin slices of onion and capsicum.
    4. Take two slices of bread, smear green chutney over them.
    5. Put a few slices of vegetable.
    6. Sprinkle a little pepper powder and chaat masala.
    7. Put the other slice and put in the toaster.
    8. Alternatively, you can toast it on the skillet with a little ghee until golden in colour.

    Notes

    Cut into half and  serve it plain, But I prefer to grill it. 
    Boiled beetroot pieces can be used. 

    If you ever make this recipe, do take a picture and tag me @foodiejayashree on Instagram, I will be glad to see your creation.Follow evergreendishes on FacebookTwitterPinterest and Instagram, let’s be connected.Subscribe to get all updates and a book of handy hints for free!Check out my e-books

    Pin it for later: 

    Mumbai Sandwich is a savoury snack from the streets of Mumbai. It is tasty and filling. It is ideal to pack in the lunch box.
    Mumbai Sandwich


  • Quinoa Dosa | Healthy Quinoa Dosa Recipe

    Quinoa Dosa | Healthy Quinoa Dosa Recipe

    Quinoa Dosa is a healthy twist to the usual dosa we normally prepare. It is crispy and tasty, ideal to serve for breakfast.

    If you are looking for different breakfast recipes, here is another kind of dosa. It has no rice in it, ideal for those who are opting for a healthy diet. It needs no fermentation and can be served with a chutney. Earlier, I had shared quinoa upma, if you have not tried it yet, check out the recipe. 

    The other breakfast recipes you can make are ragi dosa, ragi idli, jowar dosa

    Quinoa Dosa
    Quinoa Dosa

    With the increasing awareness to be fit and healthy, every little change goes a long way. Initially, there is resistance but if one considers to adopt, it has something good in the longer period of time. Quinoa is rich in fibre, it helps in maintaining gut health and obesity. It is ideal for those following gluten-free diet. It consists all nine essential amino acids, hence it is a complete protein food. It also has zinc, magnesium and folate.

    A few facts about Quinoa :

    • It is a pseudo cereal.
    • It is an excellent source of proteins. 
    • 100 grams of quinoa provides 14 grams of protein and 7 grams of fibre.
    • It is known since five thousand years, but  its use  has increased rampantly in the past ten years. 

    Why should you make Quinoa  dosa?

    • easy to prepare with a little planning  as no fermentation is needed.
    • If you add ginger and green chilly, it is spicy and can be eaten with a podi.
    • You can make soft dosas too
    • It is rich in nutrients as it has the goodness of lentils and quinoa in it. 
    • It is a no rice dosa, ideal for those who avoid eating rice.

      Quinoa Dosa Recipe:

      Ingredients :

    • 1 cup quinoa
    • 1/2 cup urad dal
    • 1/2 cup moong dal
    • 1/2 teaspoon fenugreek 
    • salt to taste
    • water for grinding
    • oil for roasting

      Method:

    1. Wash quinoa a couple of times in running water. The water should be clean and clear. Soak it in water.
    2. Wash urad dal and moong dal separately, put them together in the same bowl along with a few methi seeds. Soak for five to six hours.
    3. Grind them together to a smooth paste. Keep it aside for two hours.
    4. Add salt to the batter. Adjust the consistency, if it is very thick.
    5. Heat a skillet, take a ladle full of batter and pour it. Quickly, spread it into a thin crepe. Put a little oil over it. Let it cook for a minute.
    6. Once it is done, remove and serve with chutney and potato sabzi.

    Take a tip:

    • You may add ginger and green chilli to the batter.
    • A little cumin and coriander can be made into a paste and mixed in the batter. 
    • Dosa can be made instantly but keeping it aside for an hour gives a good taste to it. 


    quinoa dosa

    Quinoa Dosa

    5 from 8 votes
    Quinoa dosa is crispy, tasty and healthy. It is ideal for those who want to avoid rice or gluten in their diet.
    Course: Breakfast
    Cuisine: Indian

    Ingredients
      

    • 1 cup quinoa
    • 1/2 cup urad dal
    • 1/2 cup moong dal
    • 1/2 teaspoon fenugreek
    • salt to taste
    • water for grinding
    • oil for roasting

    Method
     

    1. ash quinoa twice or thrice in running water. The water should be clean and clear. Soak it in water.
    2. Wash urad dal and moong dal separately, put them together in the same bowl along with a few methi seeds. Soak for five to six hours.
    3. Grind them together to a smooth paste. Keep it aside for two hours.
    4. Add salt to the batter. Adjust the consistency, if it is very thick.
    5. Heat a skillet, take a ladle full of batter and pour it. Quickly, spread it into a thin crepe. Put a little oil over it. Let it cook for a minute.
    6. Once it is done, remove and serve with chutney and potato sabzi.

    Notes

    You may add ginger and green chilli to the batter.
    A little cumin and coriander can be made into a paste and mixed in the batter. 

    Pin Quinoa Dosa for later:

    Quinoa dosa is a tasty, crispy dosa ideal to serve for breakfast. It  needs no fermentation.
    Quinoa dosa

    If you ever make this recipe, do take a picture and tag me @foodiejayashree on Instagram, I will be glad to see your creation.

    Follow evergreendishes on FacebookTwitterPinterest and Instagram, let’s be connected.

    Subscribe to get all updates and a book of handy hints for free!

    Check out my e-books

  • No Bake Strawberry Cheese Cake

    No Bake Strawberry Cheese Cake

    No Bake Strawberry Cheese Cake is an easy to make dessert with fresh strawberries. It is a no bake recipe and can be made ahead and kept. It is tasty and ideal for a weekend dinner. 

    February is the month of love and joy. With Valentine’s Day round the corner, which dessert are you making? May this season bring joy and happiness to all. Cook a good meal at home for the two of you and enjoy the day.  

    I love strawberries and make the best use when they are available. The No bake strawberry cheese cake is a delight to serve. Make it for the V-Day or any time when you wish.  Check out the other strawberry recipes shared earlier.  Strawberry Mojito, Strawberry Chia SouffleStrawberry Ice Cream are ideal for celebrations. Strawberry Jam tastes good with bread or chapathi. Strawberry Lassi and Strawberry Yoghurt are good to have during summer. 

    The making of strawberry cheese cake is easy but requires a little planning. Make sure you have read the recipe rightly instead of messing with the ingredients. Moreover, a lot of time is spent in the process. Cream cheese is easily available in big cities but people in small town do not have access to many things. Secondly, Agar agar needs to be cooked on a slow flame for a few minutes. It will not dissolve by itself. Thirdly, It is best to use fresh strawberries but you can use frozen ones too. 

    No Bake Strawberry Cheese Cake
    no bake strawberry cheese cake


    No Bake Strawberry Cheese Cake 

    Ingredients:

    • 15 digestive biscuits (I used marie biscuits)
    • 3 tbsp butter
    • 12 strawberries
    • 3 tablespoon sugar
    • 1 teaspoon cornstarch
    • 1teaspoon lemon juice
    • 1 cup hung curd (1 cup= 240 ml)
    • 1 cup cottage cheese
    • 1 tablespoon agar agar
    • 1/4 cup water

    Method: 


    1. Grind the biscuits. Melt the butter and mix it in it. Take a glass bowl and line it evenly with the biscuit mixture. Put it in the freezer to set.
    2. Wash and make a puree of the strawberries. Boil it i with sugar, cornstarch and lemon juice and make a lump free mixture. The cottage cheese should be soft. Put it in warm water and keep it aside for sometime.
    3. Cut the  agar agar into small pieces. Put it in water and heat it on a low flame, keep stirring. The strands melt and form a homogenous mixture.  Keep it aside.
    4.  Now, blend the sugar, hung curd, cottage cheese along with the strawberry mixture and agar agar. 
    5. Take the lined bowl out  from the freezer and spread  this mixture over it.
    6. Allow it to set for two hours in the refrigerator.
    7. Decorate with a few strawberries, cut and serve the delicious No Bake Strawberry Cheese Cake.


    Take a tip:

    • Frozen strawberries may be used.
    • You can use mango and apple also instead of strawberries.
    • You may use ready cream cheese. 
    • Adjust sugar accordingly, it depends on the sweetness of the fruit.
    • Any digestive biscuits can be used for the base. 

    No Bake Strawberry Cheesecake

    No Bake Strawberry Cheese Cake is a tasty, make ahead dessert.
    Prep Time 20 minutes
    Cook Time 15 minutes
    Refrigeration and Freezing 4 hours
    Total Time 4 hours 35 minutes
    Course: Dessert
    Cuisine: international

    Ingredients
      

    • 15 digestive biscuits used marie biscuits
    • 3 tbsp butter
    • 12 strawberries
    • 3 tablespoon sugar
    • 1 teaspoon cornstarch
    • 1 teaspoon lemon juice
    • 1 cup hung curd 1 cup= 240 ml
    • 1 cup cottage cheese
    • 1 tablespoon agar agar
    • 1/4 cup water
    • 3 strawberries for garnishing

    Method
     

    1. Grind the biscuits. Melt the butter and mix it in it. Take a glass bowl and line it evenly with the biscuit mixture. Put it in the freezer to set.
    2. Wash and make a puree of the strawberries. Boil it i with sugar, cornstarch and lemon juice and make a lump free mixture. Let the mixture reduce to half the quantity.
    3. Cut the agar agar into small pieces. Put it in water and heat it on a low flame, keep stirring. The strands melt and form a  mixture.  Keep it aside.
    4. The cottage cheese should be soft. Put it in warm water and keep it aside for sometime.
    5. 5.Now, blend the sugar, hung curd, cottage cheese together along with the strawberry mixture and agar agar.
    6. Take the lined bowl out  from the freezer and spread  the mixture over it.
    7. Allow it to set for two hours in the refrigerator.
    8. Decorate with a few strawberries, cut and serve the delicious No Bake Strawberry Cheese Cake.

    Notes

    • You can use mango and apple also instead of strawberries.
    • You may use ready cream cheese. 
    • Adjust sugar accordingly, it depends on the sweetness of the fruit.
    • Any digestive biscuits can be used for the base. 

    Pin No Bake Strawberry Cheese Cake to a dessert board: 

    no bake strawberry cheese cake
    no bake strawberry cheese cake

    If you ever make this recipe, take a picture and tag @foodiejayashree on Instagram or @evergreendishes on Facebook. Subscribe to get all updates and an e-book for free!


  • Quinoa Upma | How to make quinoa upma

    Quinoa Upma | How to make quinoa upma

    Jump to Recipe Print Recipe

    Quinoa Upma is a healthy, hearty breakfast ready in thirty minutes. It is ideal for people of all ages. 

    Quinoa is a little grain packed with nutrients. It is one of the food we regularly consume these days. Initially, we did not like it much,  but now, we do enjoy. The numerous benefits and the rich source of proteins makes it an ideal diet for all vegetarians. It is vegan, gluten-free and good alternative for health conscious people. 

    Quinoa Upma
    quinoa upma

    What is quinoa? 

    Quinoa (pronounced as Kinwa or kinuwa) is a flowering plant of Amaranth family. It is technically a seed but classified as a grain. It is a pseudo cereal grown since 5000 years. It is a good source of nutrition for people following animal diet. It is also used as a substitute to rice by many people. 

    What does quinoa contain? 

    Quinoa is a rich source of protein.  It also contains manganese, iron, folate, magnesium along with anti-oxidants. It is also a good source of fiber. 1 cup of cooked quinoa provides 222 calories and  contains 8 grams of protein,  39 grams of carbohydrates, 5 grams of fiber and 6 grams of fat. (Source: Everyday Health) It helps to keep hunger at bay for a long time. 

    How is quinoa cooked ?

    Quinoa should be washed a couple of time  to remove saponin. It is a bitter coating which gives a good covering for the grain. Put the rinsed quinoa and water in the ratio of 1:2 and simmer it for ten to fifteen minutes. It should be well cooked, cover it with a lid while cooking. 

    How is it used ?

    It is versatile to use. It can be used in salads or as a filling  with a few other vegetables. One can also use it to make dosa and idli.  The versatility makes it even more interesting for us to use it.  Watch out this space for more quinoa recipes.

    Quinoa Upma
    quinoa upma

    What recipe are you sharing today and the event related ? 

    Archana, from The Mad Scientist Kitchen has given the theme as Seeds to Cook  in the Shhh Cooking Secretly Challenge. Archana has many recipes on her blog. She has made a winter treat with edible gum. It is the right season to have  Kachaya Dinka Chi Pud. Here we are paired and secret ingredients are shared to guess later by other members in the group.  I decided to make Quinoa Upma. My partner for this month was Poonam Bachchav and she gave me bengal gram and lemon as the secret ingredients accordingly. Poonam wanted to make a mouth freshener and I have given black salt and sesame seed as the secret ingredients. I would love to make this this Flaxseed Mukhwas soon. 


    shhh cooking secretly


    Quinoa Upma Recipe 

    Ingredients:

    • 2 teaspoon oil
    • 1/2 teaspoon mustard seed
    • a pinch of asafoetida
    • 3 green chilli
    • 1 onion
    • 1/4 cup green pea
    • 1 cup quinoa
    • salt to taste
    • sugar
    • 1/2 lemon
    • coriander for garnishing

      Method:
      1. Wash the quinoa by rinsing a couple of times to remove saponins. Keep it aside.
      2. Take oil in a pan, add mustard seed, as they splutter put asafoetida and green chilli. After a minute, put onion to it. Saute it
      3. Add green peas to it. Let them cook for sometime.
      4. Put the rinsed quinoa to it. Add two cups of water to it with salt and a dash of sugar.
      5. Let it cook for sometime. After sometime, cover with a lid and let it cook evenly.Finally, when the water is absorbed and it is well cooked, add lemon juice and garnish with fresh coriander leaves. Serve hot.

    Take a tip:

    • You can use other vegetables as beans and carrot. Chop them finely and put them in the seasoning.
    • Tomatoes too can be added. I have kept it simple with onion and green peas.
    • Alternatively, you can skip onion if you wish.
    • Instead of green chilli, you can add a little sambar and chilli powder. It also tastes good. 
    • To make it gluten-free, avoid asafoetida or using gluten -free asafoetida.
    Quinoa Upma
    quinoa upma
    Quinoa Upma

    Quinoa Upma

    5 from 12 votes
    Quinoa Upma is a healthy, easy to make and tasty breakfast. It is ready in thirty minutes.

    Ingredients
      

    • 2 teaspoon oil
    • 1/2 teaspoon mustard seed
    • a pinch of asafoetida
    • 3 green chilli
    • 1 onion
    • 1/4 cup green pea
    • 1 cup quinoa
    • salt to taste
    • sugar
    • 1/2 lemon
    • coriander for garnishing

    Equipment

    • bowl, pan, ladle

    Method
     

    1. Wash the quinoa by rinsing a couple of times to remove saponins. Keep it aside.
    2. Take oil in a pan, add mustard seed, as they splutter put asafoetida and green chilli. After a minute, put onion to it. Saute it
    3. Add green peas to it. Let them cook for sometime.
    4. Put the rinsed quinoa to it. Add two cups of water to it with salt and a dash of sugar.
    5. Let it cook for sometime. After sometime, cover with a lid and let it cook evenly.
    6. Finally, when the water is absorbed and it is well cooked, add lemon juice and garnish with fresh coriander leaves. Serve hot.

    Notes

    • You can use other vegetables as beans and carrot. Chop them finely and put them in the seasoning.
    • Tomatoes too can be added. I have kept it simple with onion and green peas.
    • Alternatively, you can skip onion if you wish.
    • Instead of green chilli, you can add a little sambar and chilli powder. It also tastes good. 
    • To make it gluten-free, avoid asafoetida or using gluten -free asafoetida.
     
    Quinoa Upma is a healthy, tasty and easy to make breakfast. It is ready in thirty minutes.
    Quinoa Upma

    If you ever make Quinoa Upma recipe, do take a picture and share by tagging @foodiejayashree on Instagram or @evergreendishes on Facebook. Subscribe to get all updates and an e-book for free ! 

  • Bread Gulab Jamun Recipe | Dry Jamun Recipe

    Bread Gulab Jamun Recipe | Dry Jamun Recipe

    Bread Gulab Jamun is a delicious, easy to make sweet recipe. Here white bread slices  are used to make these jamuns.


    What is Gulab Jamun?


    Gulab Jamun is a traditional mix of solid-based sweets from the Indian sub-continent. It is popular in many countries of Asia. Jamun is actually the name of a fruit. These deep fried balls are similar to black plum, hence the name. They are dunked in a rose water scented sugar syrup.


    Why should you give a try to this recipe:

    • It is easy to prepare.
    • The ingredients are easily available at home.
    • It makes a quick dessert for the sweet tooth.
    • Good way to make use of the leftover bread.
    • It is a good left over make over recipe you can share with other friends. 


    Can it be served as the regular gulab jamun with syrup?

    Yes, you can serve it the regular way. In that case, increase the quantity of syrup you are making. The quantity given here will be a little less to serve with syrup.

    Is it a substitute for the original recipe? 

    No, it is not a substitute. It is pseudo recipe which you can easily recreate and enjoy. Moreover, variety of food gives a good taste to life , isn’t it?

    Can it be served for parties? 

    Yes, you can make it ahead and serve. If you are hosting an International party, do check the article on how to host a good dinner.

    What are the other International recipes you have? 

    I have shared Veg manchurian, Vegetable Manchow soup, and Spanish rice to name a few. 


    bread gulab jamun
    bread gulab jamun 

    Recipe of Bread Gulab Jamun

    Ingredients:

    For the balls:

    • 3 cup bread crumbs
    • 1 tablespoon milk powder
    • 1/2 cup milk

    For the  sugar syrup:

    • 1/3 cup sugar
    • 1/3 cup water
    • a few strands of saffron
    • 1/4 teaspoon cardamom powder

    For frying:

    • ghee

    For decorating :

    • 1/3 cup desiccated coconut
    • a few cashew pieces

    Method:

    1. To make bread crumbs, take a few slices of bread and grind them in the mixer. I have used five slices of bread.
    2. Put the bread crumbs in a bowl.
    3. Add milk powder to it. Mix them slowly to a dough using milk.
    4. Keep it covered for ten minutes.
    5. In the meantime, make the sugar syrup. Take sugar and water in a pan. Boil it for two minutes with a few saffron strands. Put cardamom powder, set it aside.
    6. To make the jamuns, make small balls of the dough.
    7. Heat ghee in a pan, slowly, put a few balls and deep fry. Once they are golden in colour, put them aside,  Later, put them in the sugar syrup.
    8. Fry the remaining balls and soak them in the syrup.
    9. Soak for four to five hours.
    10. Mix desiccated coconut and cashew pieces in palate. Roll the soaked jamuns in the mixture and serve. 
    11. Bread Gulab Jamun is ready to serve. 

    Take a tip:

    • Use white bread to make these gulab jamun. Wheat or multi grain bread will not give a good texture. 
    • The sugar syrup is just right to soak them. If you need to serve with sugar syrup, use half cup of sugar and water. 
    • This is a pseudo recipe of the traditional gulab jamun. The texture is not as soft as milk based jamun. 
    • It is ideal for a sudden sweet craving. 


    bread gulab jamun
    Evergreendishesdev

    Bread Gulab Jamun

    Bread Gulab Jamun is a tasty, easy to make dessert for sudden sweet cravings.
    Prep Time 10 minutes
    Cook Time 10 minutes
    Soaking time 4 hours
    Total Time 4 hours 20 minutes
    Course: sweets
    Cuisine: Indian

    Ingredients
      

    For the balls:
    • 3 cup bread crumbs
    • 1 tablespoon milk powder
    • 1/2 cup milk
    For the  sugar syrup:
    • 1/3 cup sugar
    • 1/3 cup water
    • a few strands of saffron
    • 1/4 teaspoon cardamom powder
    For frying:
    • ghee
    For decorating :
    • 1/3 cup desiccated coconut
    • a few cashew pieces

    Method
     

    1. To make bread crumbs, take a few slices of bread and grind them in the mixer. I have used five slices of bread.
    2. Put the bread crumbs in a bowl.
    3. Add milk powder to it. Mix them slowly to a dough using milk.
    4. Keep it covered for ten minutes.
    5. In the meantime, make the sugar syrup. Take sugar and water in a pan. Boil it for two minutes with a few saffron strands. Put cardamom powder, set it aside.
    6. To make the jamuns, make small balls of the dough.
    7. Heat ghee in a pan, slowly, put a few balls and deep fry. Once they are golden in colour, put them aside,  Later, put them in the sugar syrup.
    8. Fry the remaining balls and soak them in the syrup.
    9. Soak for four to five hours.
    10. Mix desiccated coconut and cashew pieces in palate. Roll the soaked jamuns in the mixture and serve.
    11. Bread Gulab Jamun is ready to serve.

    Notes

    • Use white bread to make these gulab jamun. Wheat or multi grain bread will not give a good texture. 
    • The sugar syrup is just right to soak them. If you need to serve with sugar syrup, use half cup of sugar and water. 
    • This is a pseudo recipe of the traditional gulab jamun. The texture is not as soft as milk based jamun. 
    • It is ideal for a sudden sweet craving. 
     

    Pin Bread Gulab Jamun to your board:

    Bread Gulab Jamun is a tasty, easy to make sweet recipe. It is a good way to use the left over bread pieces.
    Bread Gulab Jamun

    If you ever make this Bread Gulab Jamun, do take a picture and tag @evergreendishes on Facebook or  @foodiejayashrree on Instagram. Subscribe to get an e-book and all updates in your inbox.


  • Brinjal Stir Fry | Badanekayi Palya

    Brinjal Stir Fry | Badanekayi Palya

    Brinjal Stir Fry / Badanekayi palya  is a simple, vegan stir fry with a spice mix from Karnataka. The roasted spice mix lends a good taste to it. It is ideal to serve with chapati or jowar roti.

    Fresh vegetables are available in winter and brinjal is one of them. In Kannada it is called as badanekayi, baingan in Hindi and Gujarati, Kathirikai in Tamil, Vankaya in Telugu and Begun in Bengali. It is more popular as egg plant in England and aubergine in Germany and  France.

    Not everyone likes the taste of brinjal. But most people, who tend to like it are greats fans of this vegetable. It is versatile to use and stir fry and raita are quite common dishes. Sometimes, it is also added in Sambar. Vangi Bhat is a popular rice dish from Maharashtra.

    Sadly, I have not shared any recipe using brinjal. So, today I thought of posting this stir fry recipe which we regularly prepare at home.  Makar Sankranti is round the corner. The day prior is celebrated as Bhogi. It is a harvest festival and all fresh grown grains and vegetables are used. Sajje rotti and brinjal stir fry are usually prepared in most households of Karnataka.  The other dishes on the platter  are Khara pongal and gojju.

    Brinjal comes in different varieties. The medium sized purple and light green coloured brinjals  are the ones I regularly use. Here, I have used the green variety, they are tender and cook very well. The spice mix is usually available at home. You can make a small quantity and use it for the stir fry.

    Brinjal strir fry / Badane kayi palya
    Brinjal Stir fry / badane kayoi palya is a simple and tasty side dish from Karnataka. It makes a good accompaniment with any meal.

    Let’s get to the recipe of Brinjal Stir Fry | Badanekayi Palya

    Ingredients:

    • 2 tablespoon oil
    • 1/2 teaspoon mustard
    • 1/4 teaspoon asafoetida
    • 1/4 teaspoon turmeric powder
    • 1/2 kilogram brinjal
    • salt
    • a little water
    • 3 teaspoon vegetable spice mix
    • 1/2 teaspoon chilli powder (optional)

    Method:

    1. Cut the brinjal into small pieces. Put them in water to avoid discolouration.
    2. Take oil in a pan, add mustard seeds. As it crackles, tip in turmeric powder an asafoetida. Discard the water and put the brinjal pieces to it.
    3. Put salt and sprinkle some water to it. Close a lid and allow it to cook. Give a stir in between.
    4. Once the brinjal is cooked, give a stir and mash it lightly with the ladle.
    5. Put the spice powder to it. Depending on the taste, use chilli powder.
    6. Let cook for a minute.
    7. Remove and serve with hot chapati or phulka. Brinjal Stir Fry is also used with hot steamed rice.

    Take a tip:

    • The spice mix stays good for two months. Store it in an air-tight container.
    • You can use the spice mix in other dishes as well.

    Brinjal strir fry / Badane kayi palya
    Evergreendishesdev

    Brinjal Stir Fry / Badane kayi palya

    5 from 11 votes
    Brinjal stir fry / Badane kayi palya is a simple, tasty side dish. It is ideal to serve with any meal.
    Prep Time 10 minutes
    Cook Time 15 minutes
    Total Time 25 minutes
    Course: dinner, lunch
    Cuisine: karnataka

    Ingredients
      

    • 2 tablespoon oil
    • 1/2 teaspoon mustard
    • 1/4 teaspoon asafoetida
    • 1/4 teaspoon turmeric powder
    • 1/2 kilogram brinjal
    • salt
    • a little water
    • 3 teaspoon vegetable spice mix
    • 1/2 teaspoon chilli powder optional

    Method
     

    1. Cut the brinjal into small pieces. Put them in water to avoid discolouration.
    2. Take oil in a pan, add mustard seeds. As it crackles, tip in turmeric powder an asafoetida. Discard the water and put the brinjal pieces to it.
    3. Put salt and sprinkle some water to it. Close a lid and allow it to cook. Give a stir in between.
    4. Once the brinjal is cooked, give a stir and mash it lightly with the ladle.
    5. Put the spice powder to it. Depending on the taste, use chilli powder.
    6. Let cook for a minute.
    7. Remove and serve with hot chapati or phulka. Brinjal Stir Fry is also used with hot steamed rice.

    Notes

    Cut the vegtable into small pieces.
    Allow to cook with a lid closed over it.
    Spice mix can be freshly made. Check the recipe.

    Pin it for later :

    Brinjal Stir fry is a tasty side dish from Karnataka. It is usually made along with sajje roti.
    Brinjal Stir Fry / Badane kayi palya


    If you ever make this recipe,  do take a picture and tag @foodiejayashree on Instagram or @evergreendishes on Facebook or Twitter. I will be glad to see your creation and share it further.   

    Subscribe to get all updates and an e-book for free. Check out my e-books on Amazon.  Happy Cooking !